Room phones are perfect for shared spaces such as reception desks or conference rooms.
Dialpad supports several different Polycom and SoundStation room phones, whether you purchased them from us or not. Make sure your device is on our Supported Room Phones list.
Who can use this
To set up and manage a room phone, you must be a Dialpad Admin.
Let's take a look at managing a room phone in Dialpad.
Note
Room phones introduce a recurring cost. In addition to purchasing the hardware, you'll also pay a monthly fee for a room phone license. If you'd like to purchase room phone licenses first, head to the Billing section of your Dialpad Admin Portal.
Add a room phone
You can add room phones with these phone model series.
Yealink T series
Note
Before proceeding with these steps, your Yealink phone must be on the list of Supported Desk Phones and use at least the listed firmware version.
To add a Yealink room phone, go to your Dialpad Admin Settings.
Navigate to Office > Desk Phones
Select Room Phones
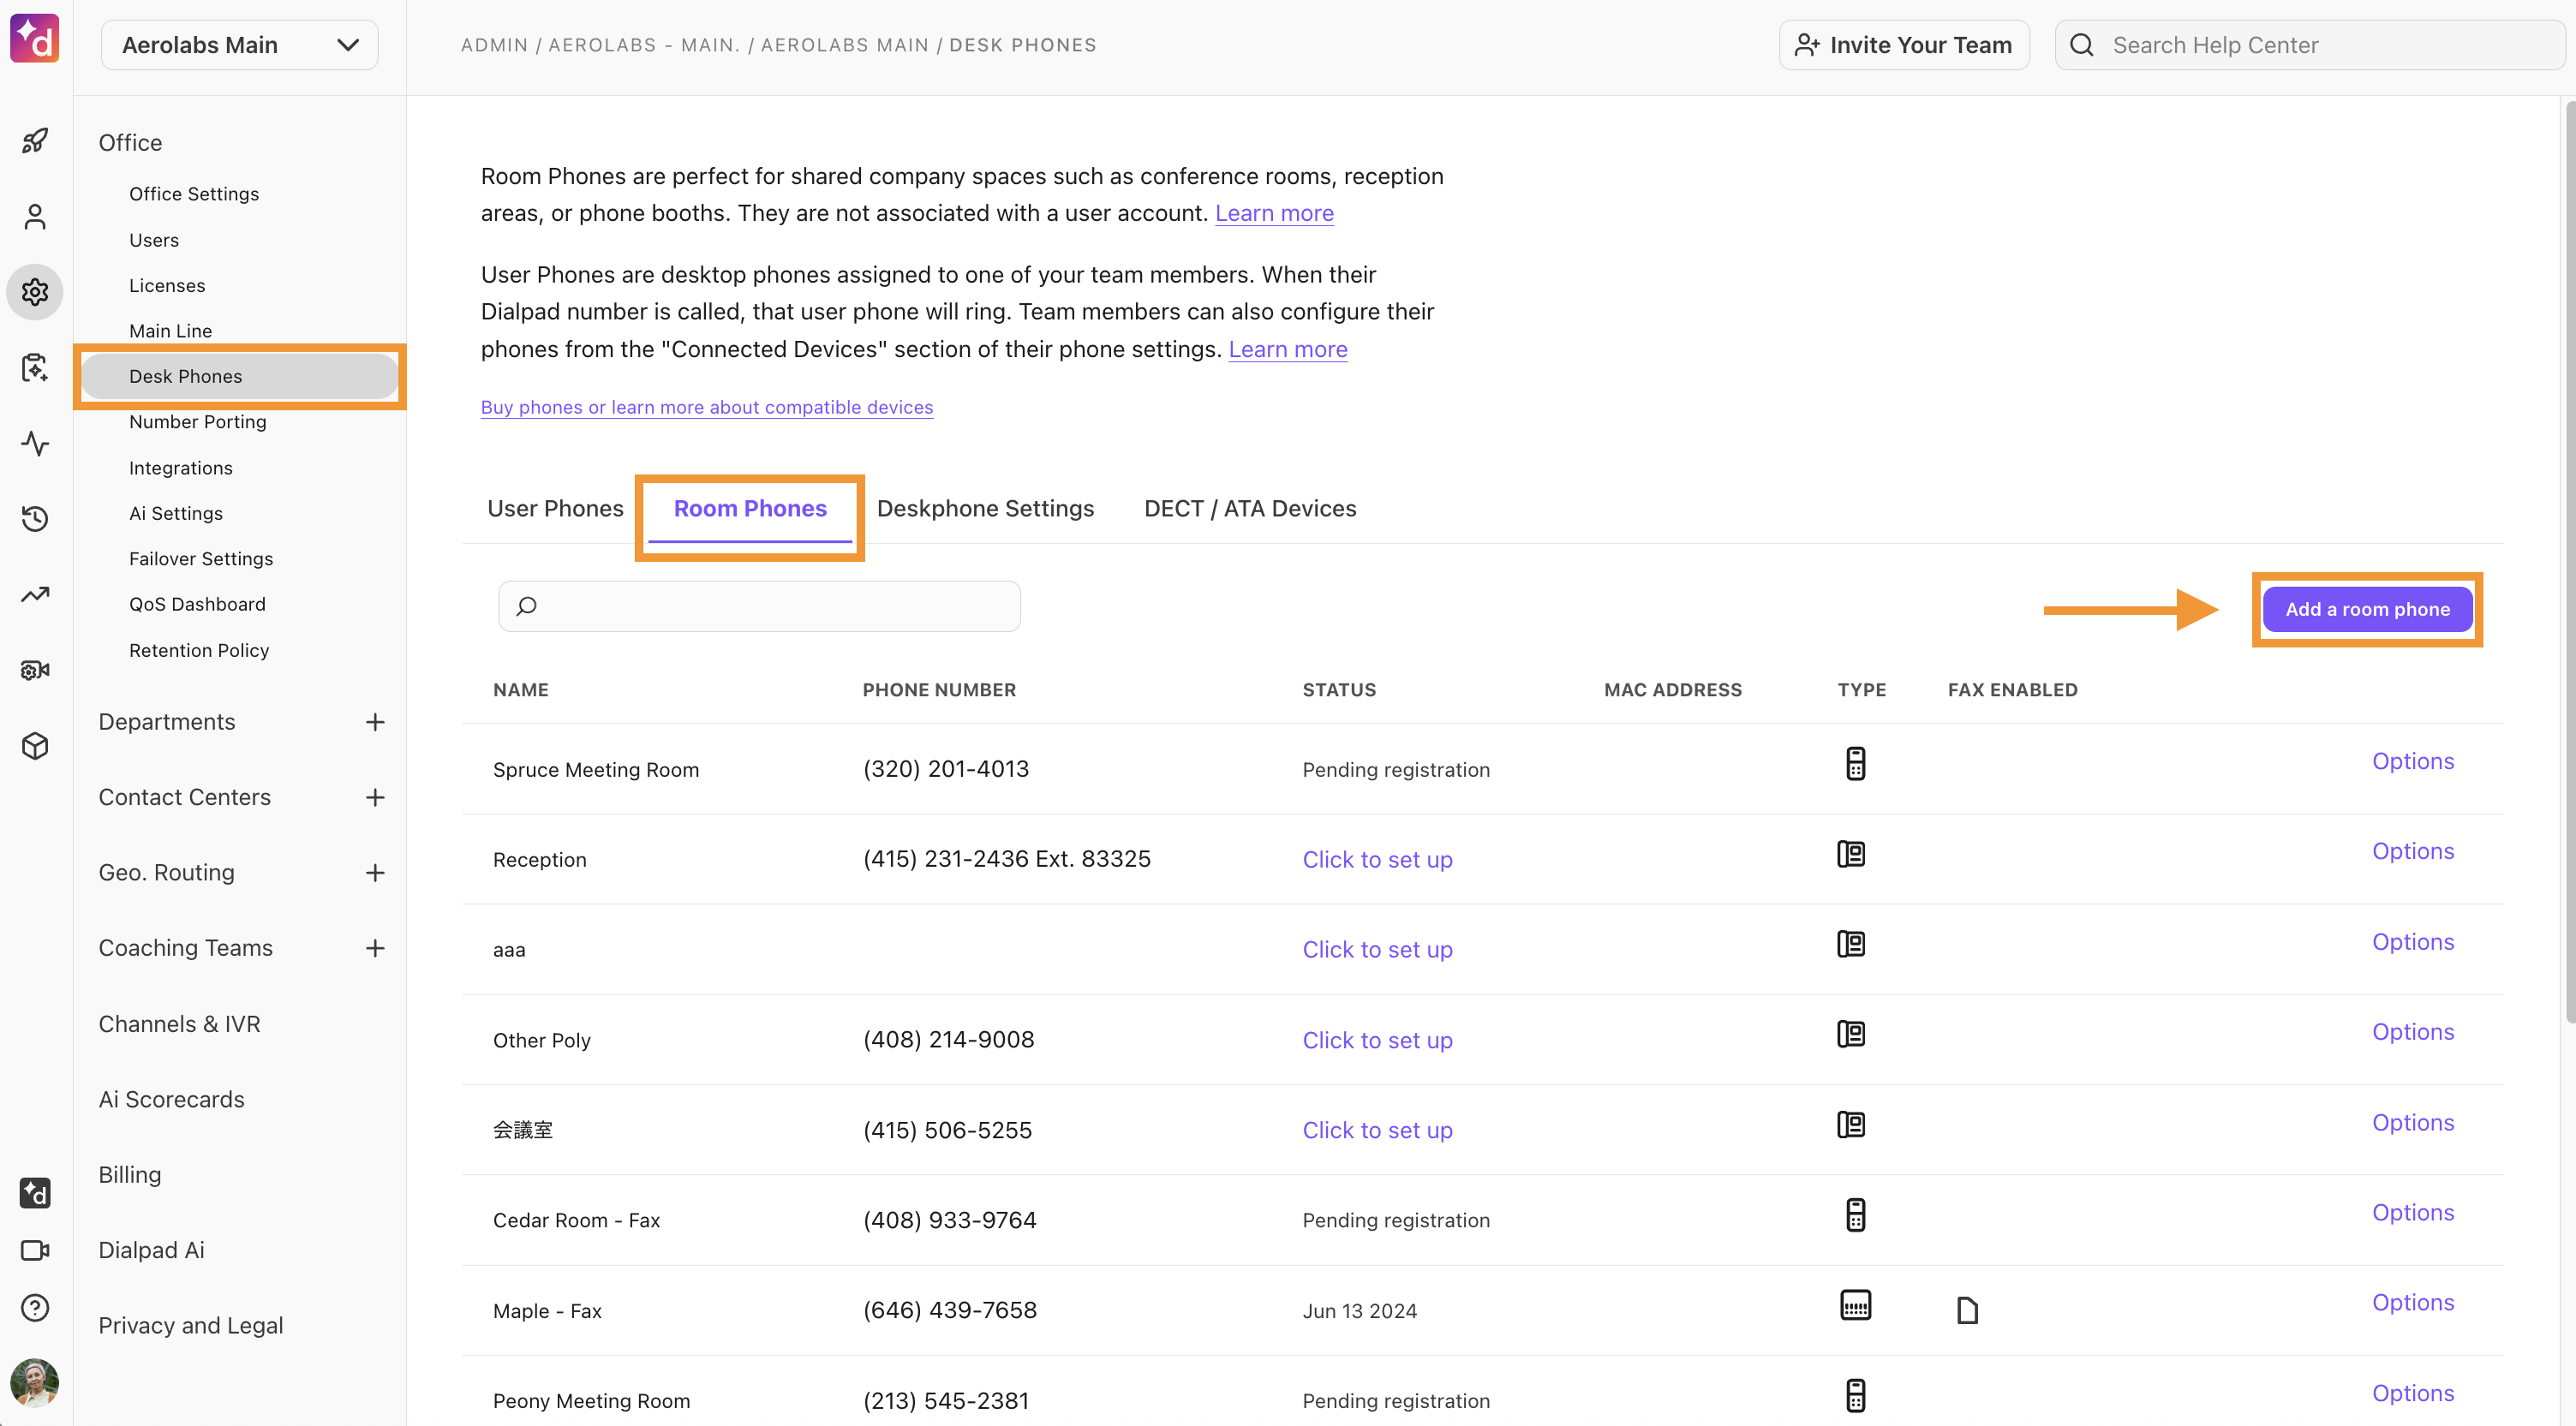
Select Add a room phone
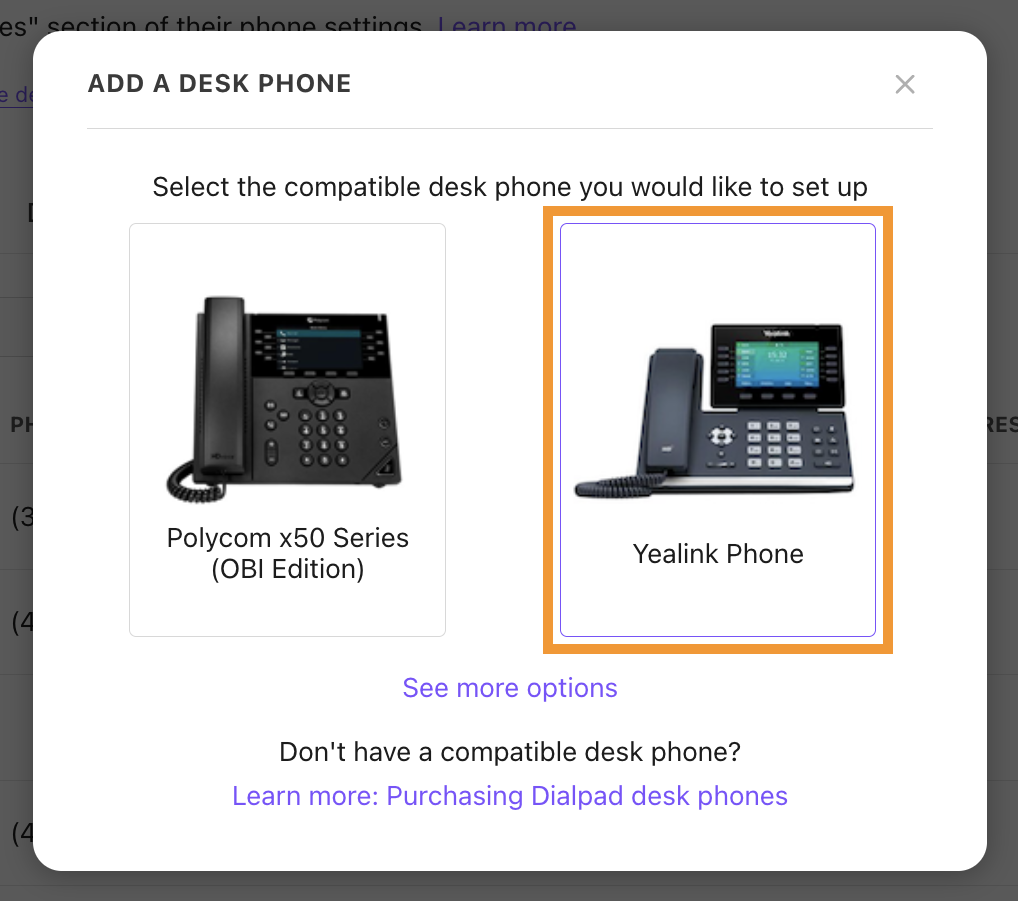
Select Yealink phone
Name the desk phone, then assign it to a user
Select Next
Once initialization is complete, select one of the following options:
The device screen displays “Dialpad Activate”
The device screen does NOT display “Dialpad Activate”
Follow the prompts to activate
The device screen says "Dialpad Activate"
If the device screen says “Dialpad Activate”:
Enter the code prompted on your screen
A voice message will confirm that the code has been sent to the server
Hang up the phone, and the device will reset
Select Done
The device screen does NOT display "Dialpad Activate"
If the device screen doesn’t say “Dialpad Activate”:
Head to this Help Center article to learn how to set up Dialpad on your device using the phone's web interface
After adding the Dialpad provisioning server via the phone's web interface, your device will display Dialpad Activate
Once it does, you can then select Next on the pop-up to activate it
Polycom x50 Series (OBi Edition)
To add a Polycom x50 Series (OBi Edition) Room Phone, head to your Dialpad Admin Settings.
Navigate to Office > Desk Phones
Select Room Phones
Select Add a room phone
.png)
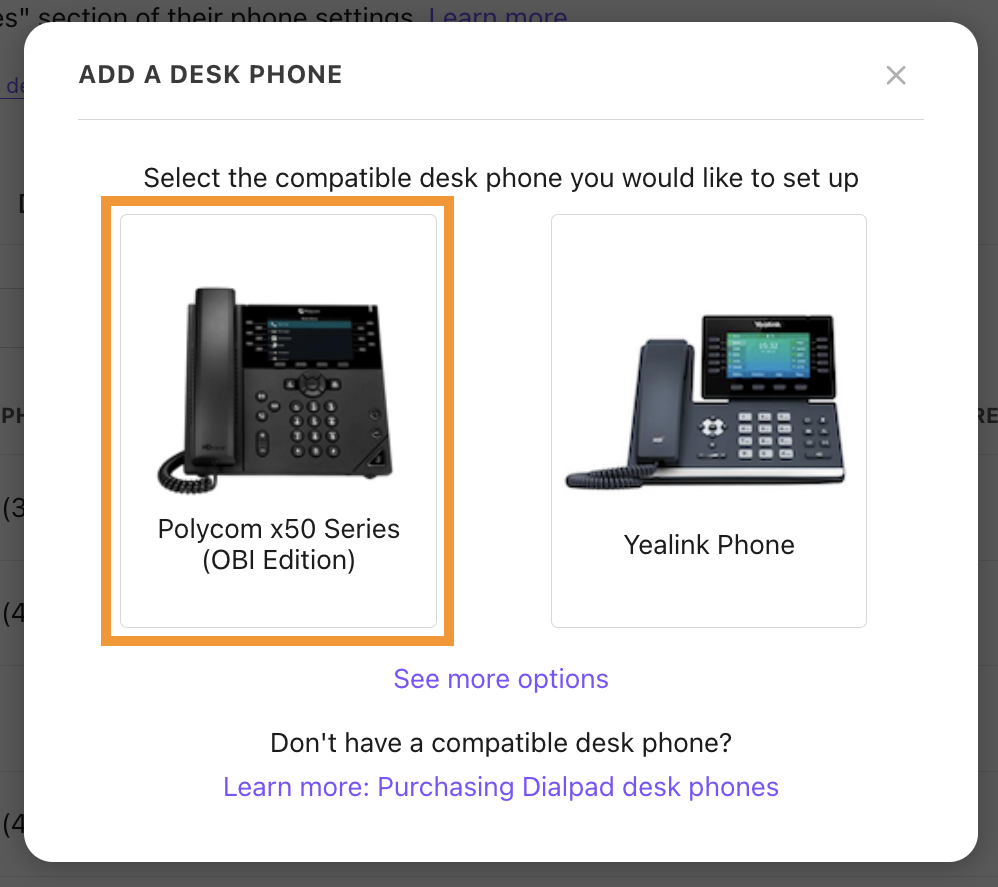
Select Polycom x50 Series (OBi Edition)
Name the phone, click Next
Choose the number type (local number, toll-free number, or ported number)
Note
If you want to choose a different number, select Change.
Make sure your phone is powered on and connected to the internet.
Select one of the following options
The device screens display “Dialpad Activate”.
The device screens do NOT display “Dialpad Activate”.
Follow the prompts to activate
The device screen says "Dialpad Activate"
If the device screen says “Dialpad Activate”:
Enter the code prompted on your screen
A voice message will confirm that the code has been sent to the server
Hang up the phone, and the device will reset
Select Done
The device screen does NOT display "Dialpad Activate"
If the device screen doesn’t say “Dialpad Activate”:
Head to this Help Center article to learn how to set up Dialpad on your device using the phone's web interface
After adding the Dialpad provisioning server via the phone's web interface, your device will display Dialpad Activate
Once it does, you can then select Next on the pop-up to activate it
Polycom VVX UCS series
To add a Polycom VVX room phone, head to your Dialpad Admin Settings.
Navigate to Office > Desk Phones
Select Room Phones
Select Add a room phone
.png)
Select See more options
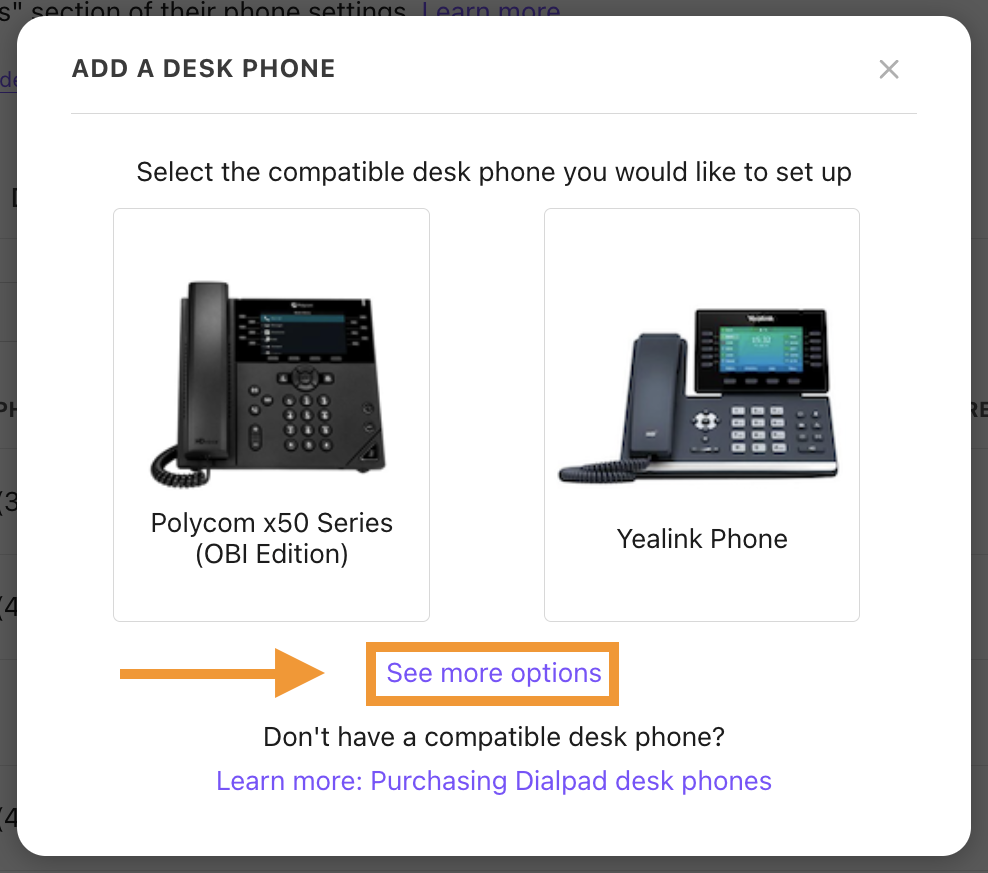
Select Other Polycom Phones
Name the phone, click Next
Choose the number type (local number, toll-free number, or ported number)
If you want to choose a different number, select Change.
Make sure your phone is powered on and connected to the internet
Select one of the following options
The device screens display Dialpad Activate
The device screens do NOT display Dialpad Activate
Follow the prompts to activate
The device screen says "Dialpad Activate"
If the device screen says “Dialpad Activate”:
Enter the code prompted on your screen
A voice message will confirm that the code has been sent to the server
Hang up the phone, and the device will reset
Select Done
The device screen does NOT display "Dialpad Activate"
If the device screen doesn’t say “Dialpad Activate”:
Head to this Help Center article to learn how to set up Dialpad on your device using the phone's web interface
After adding the Dialpad provisioning server via the phone's web interface, your device will display Dialpad Activate
Once it does, you can then select Next on the pop-up to activate it
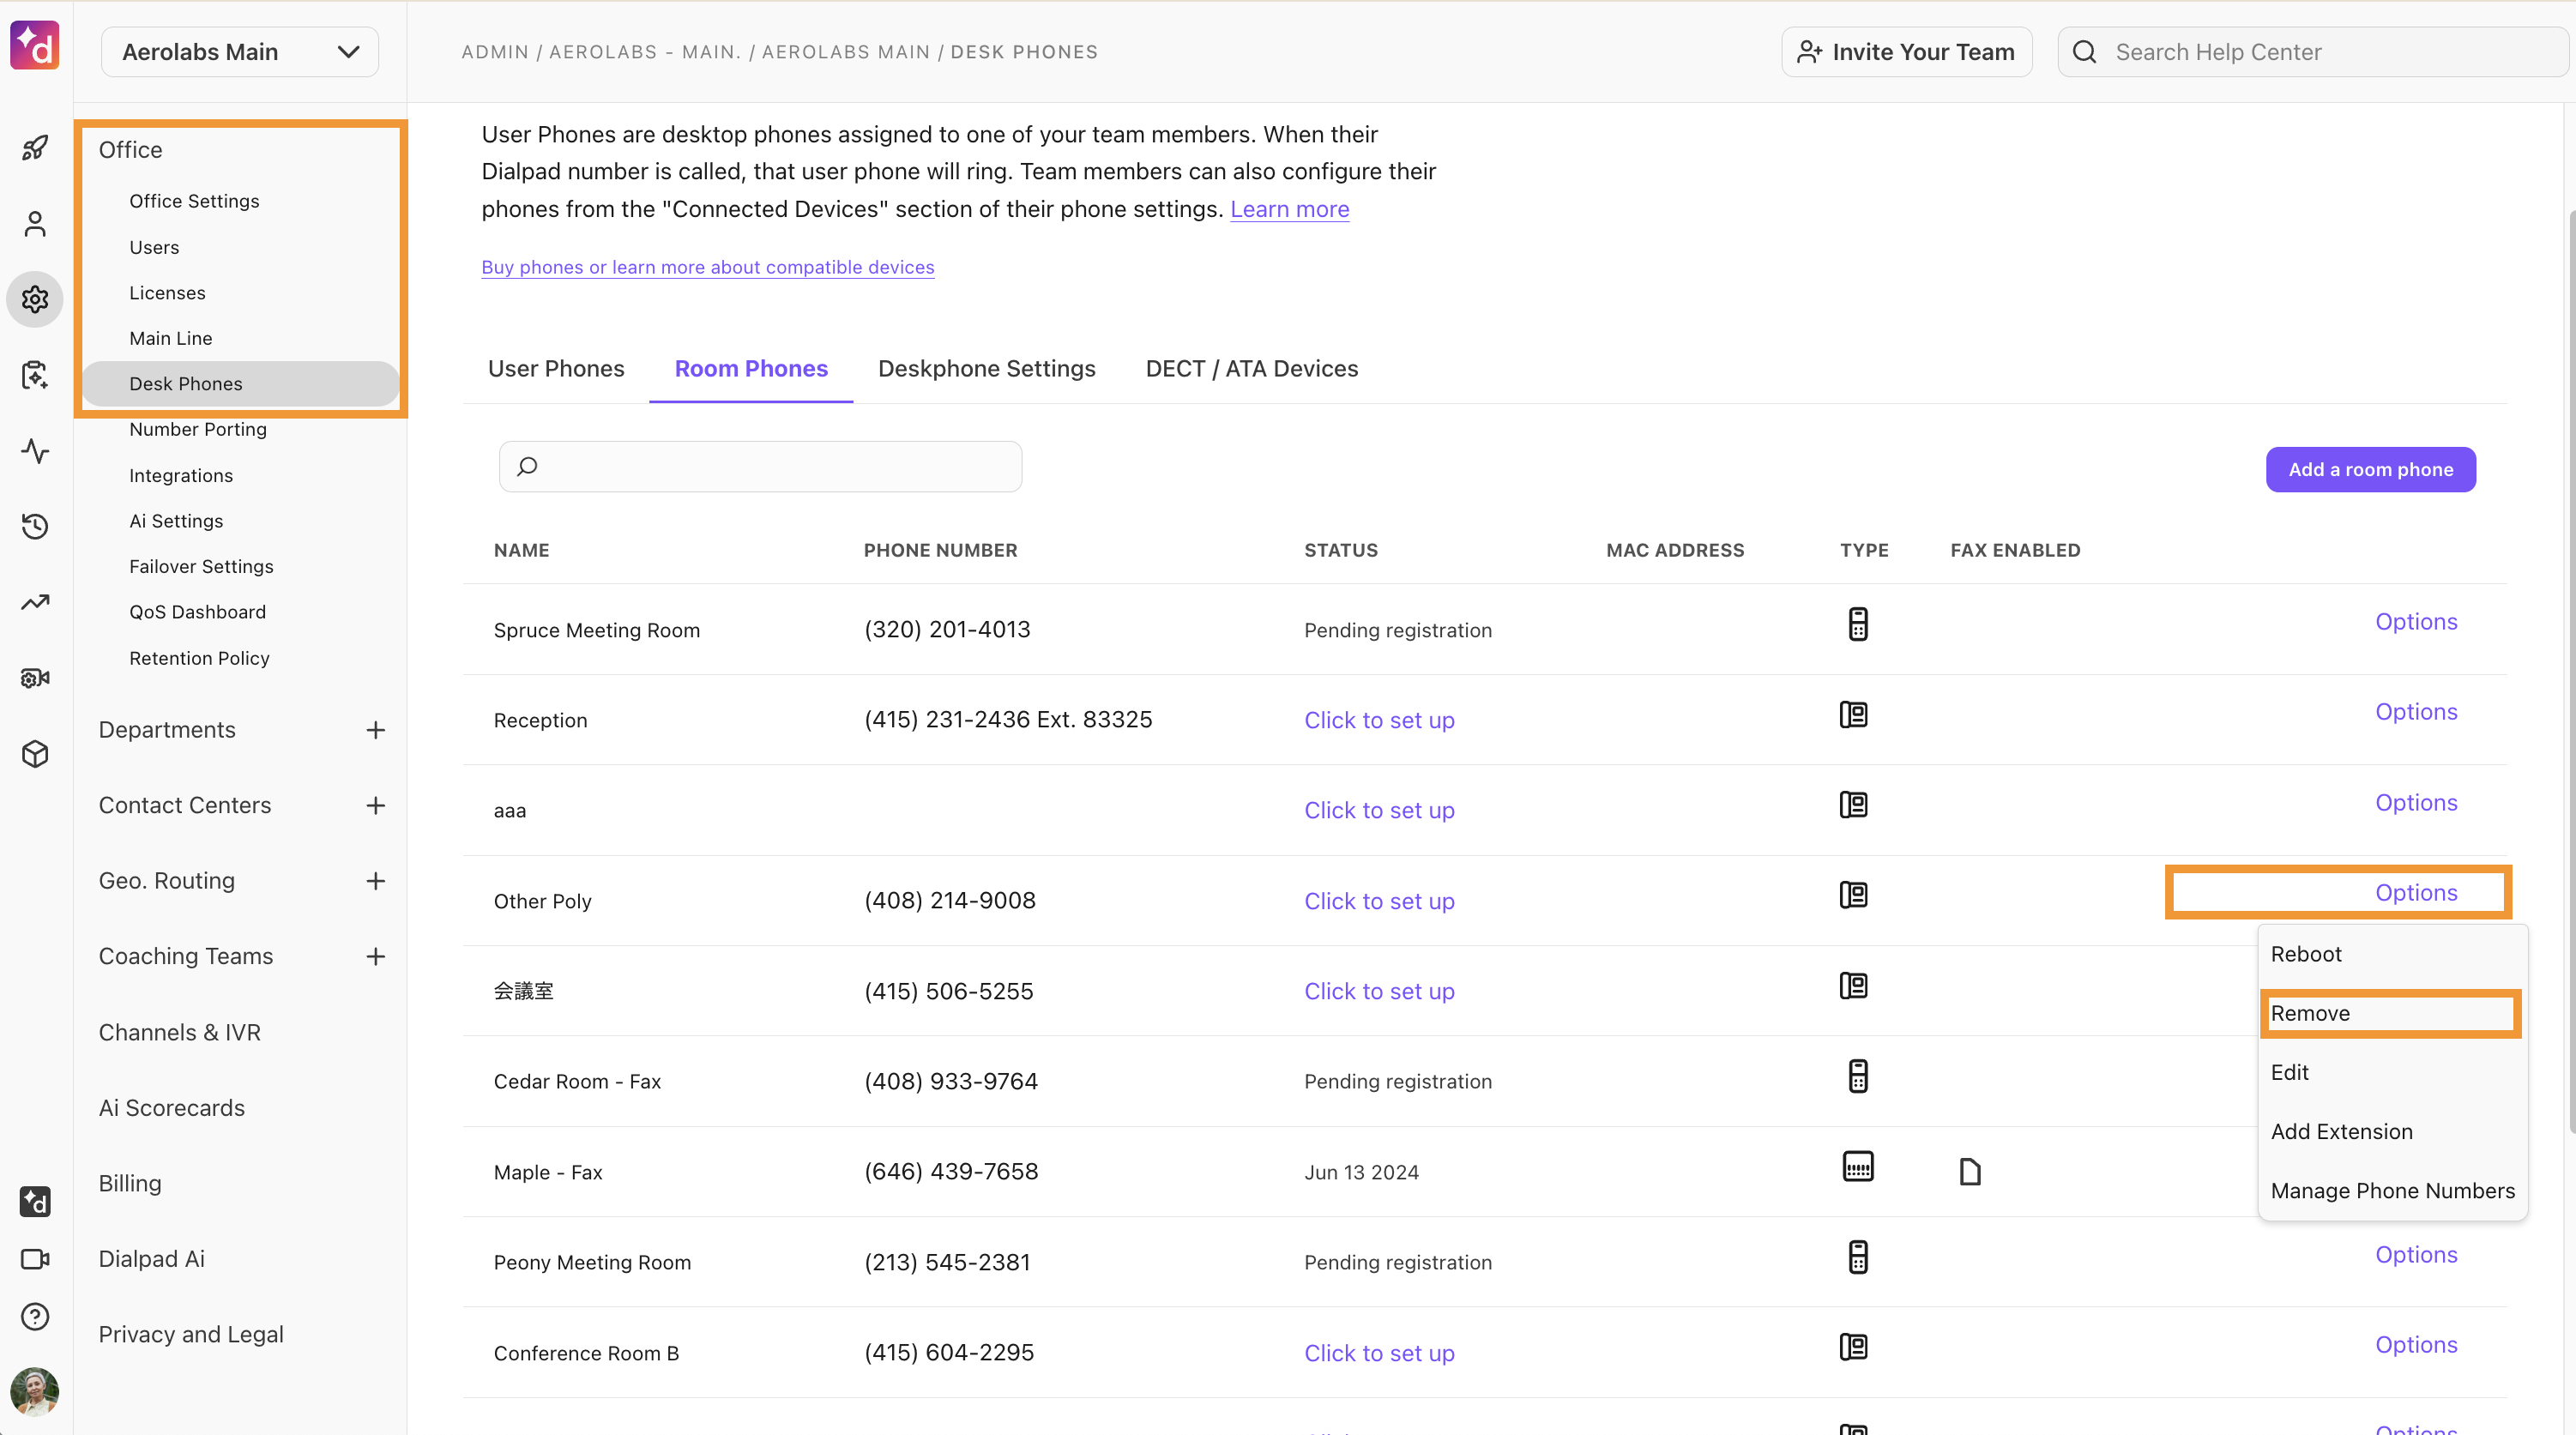
Remove a room phone
To remove a room phone, head to your Dialpad Admin Settings.
Navigate to Office > Desk Phones
Select Room Phones
Besides the phone you want to remove, select Options > Remove
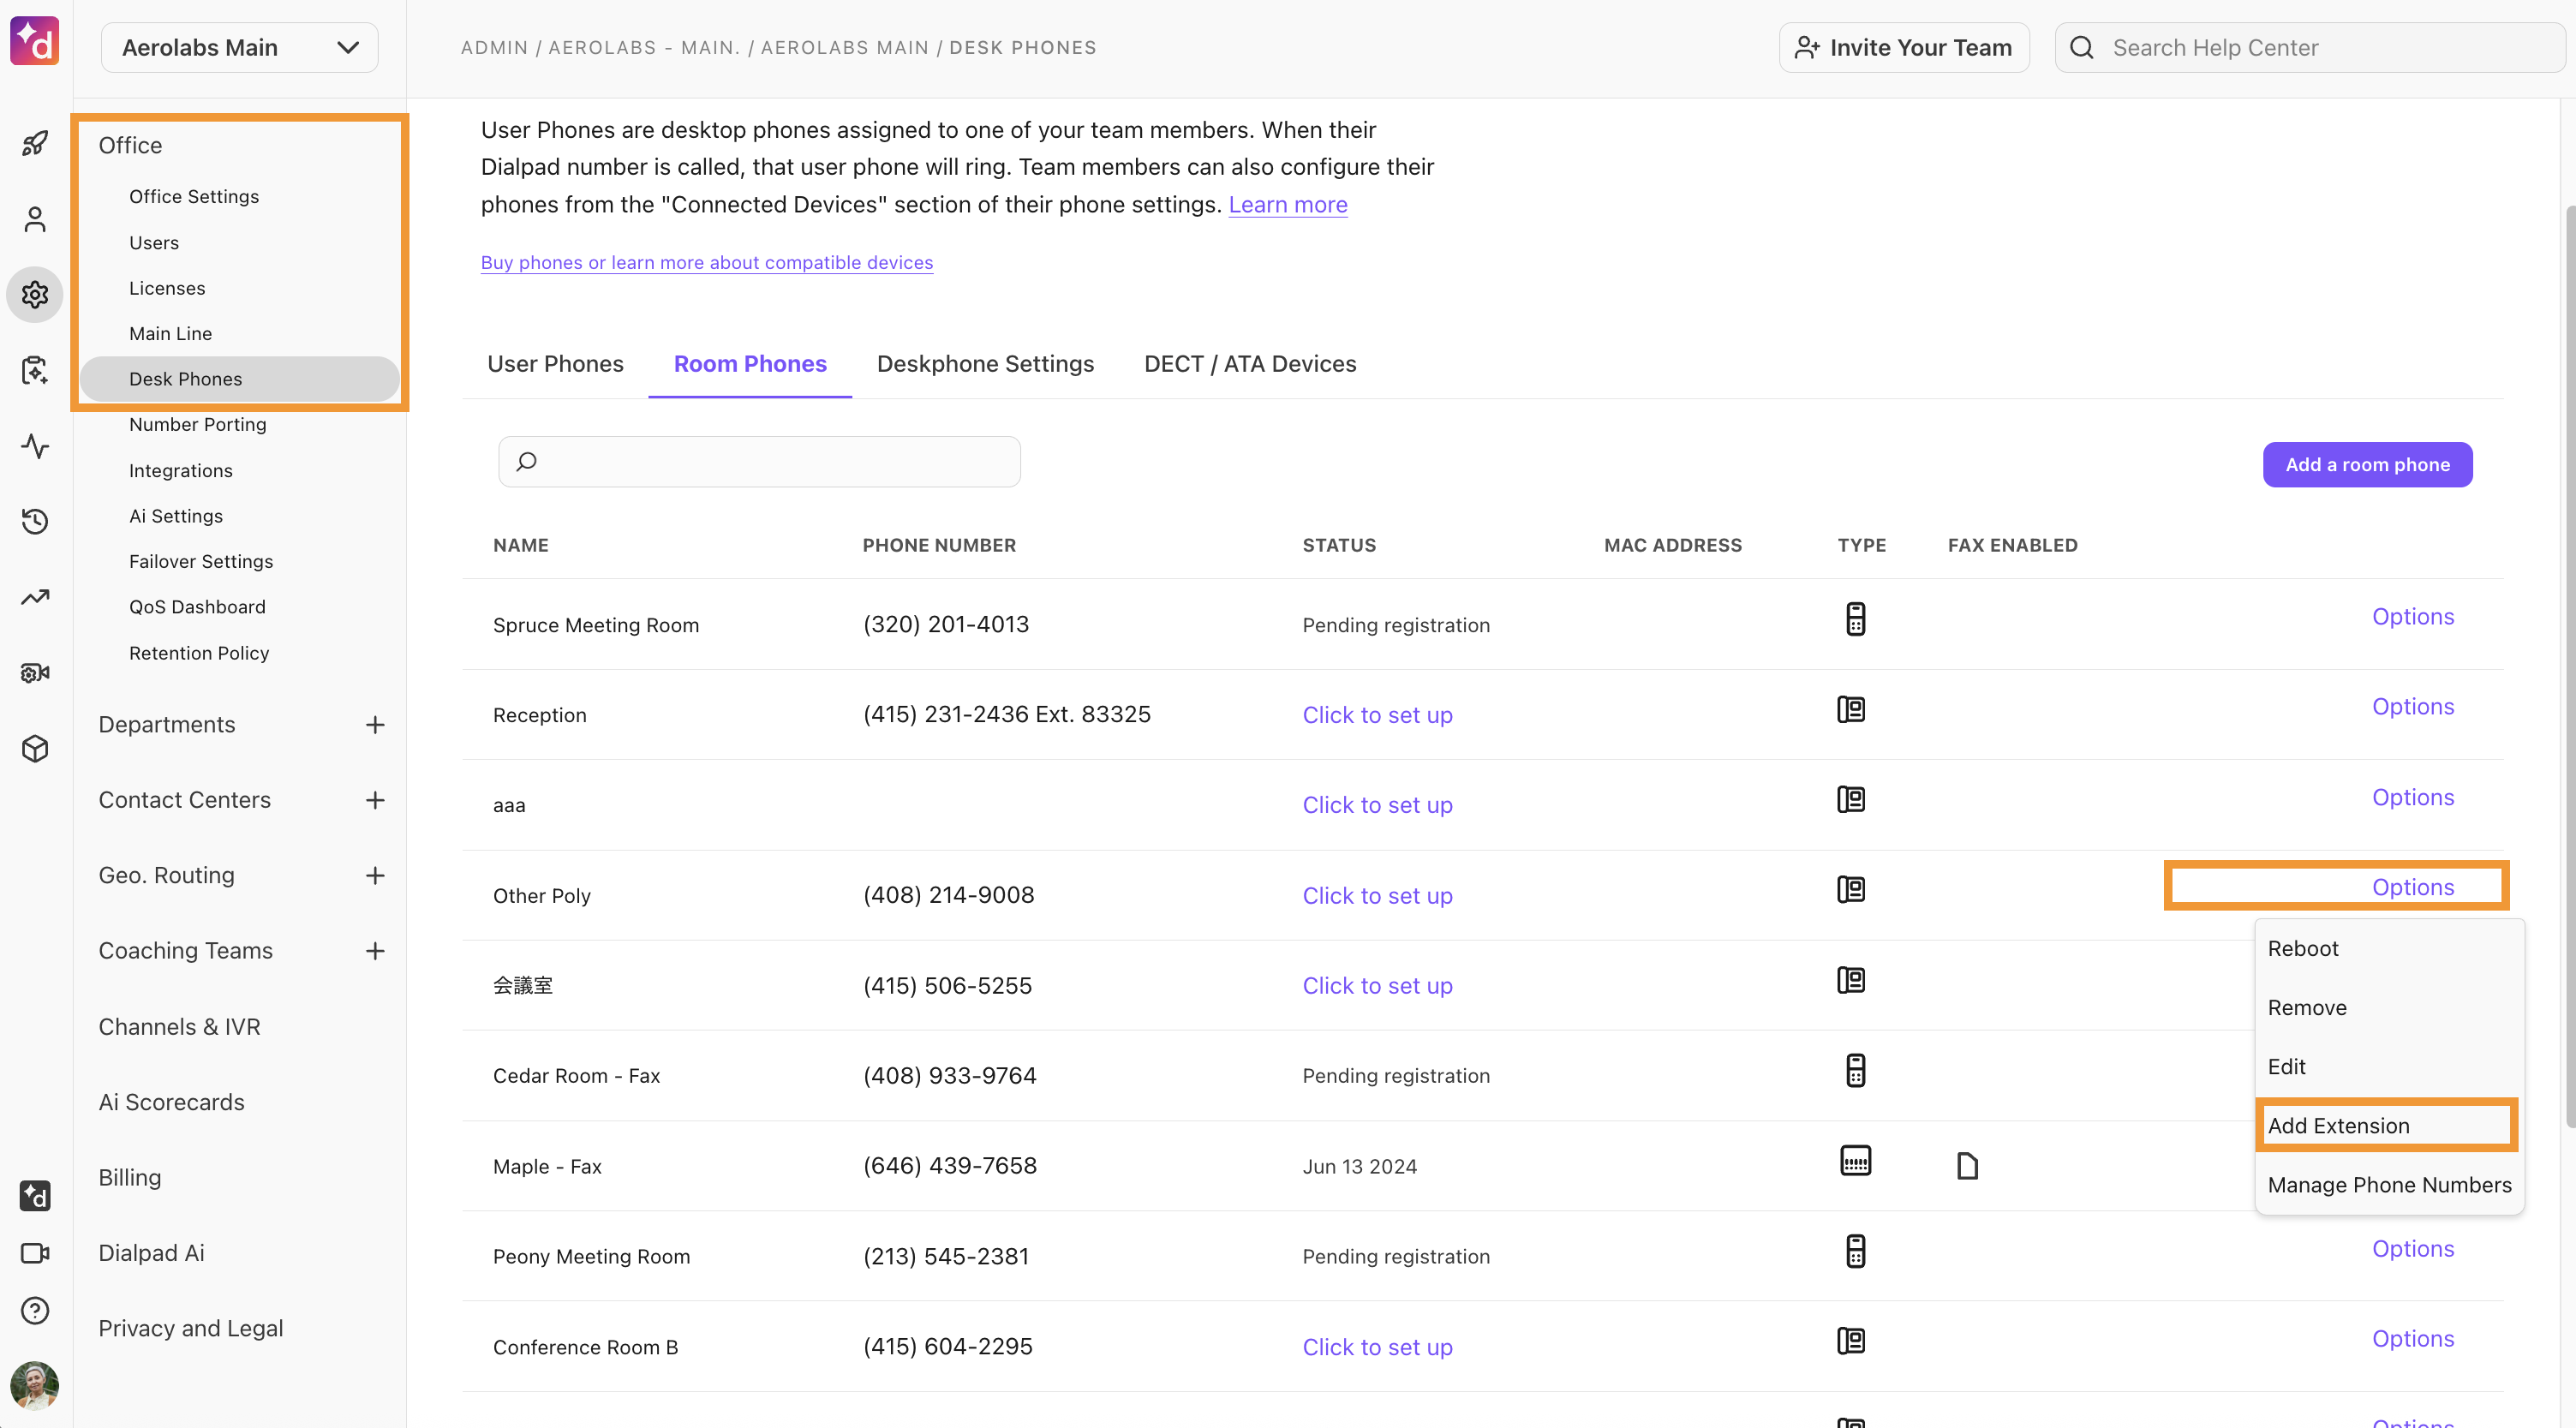
Add room phone extension
To add a room phone extension, head to your Dialpad Admin Settings.
Navigate to Office > Desk Phones
Select Room Phones
Besides the phone you want to update, select Options > Add Extension
Enter the desired extension number
Note
Extensions can be 3, 4, 5, or 6 digits long. 5 digits is the default — contact Customer Care if you'd like to use a 3, 4 or 6-digit extension.
Select Save
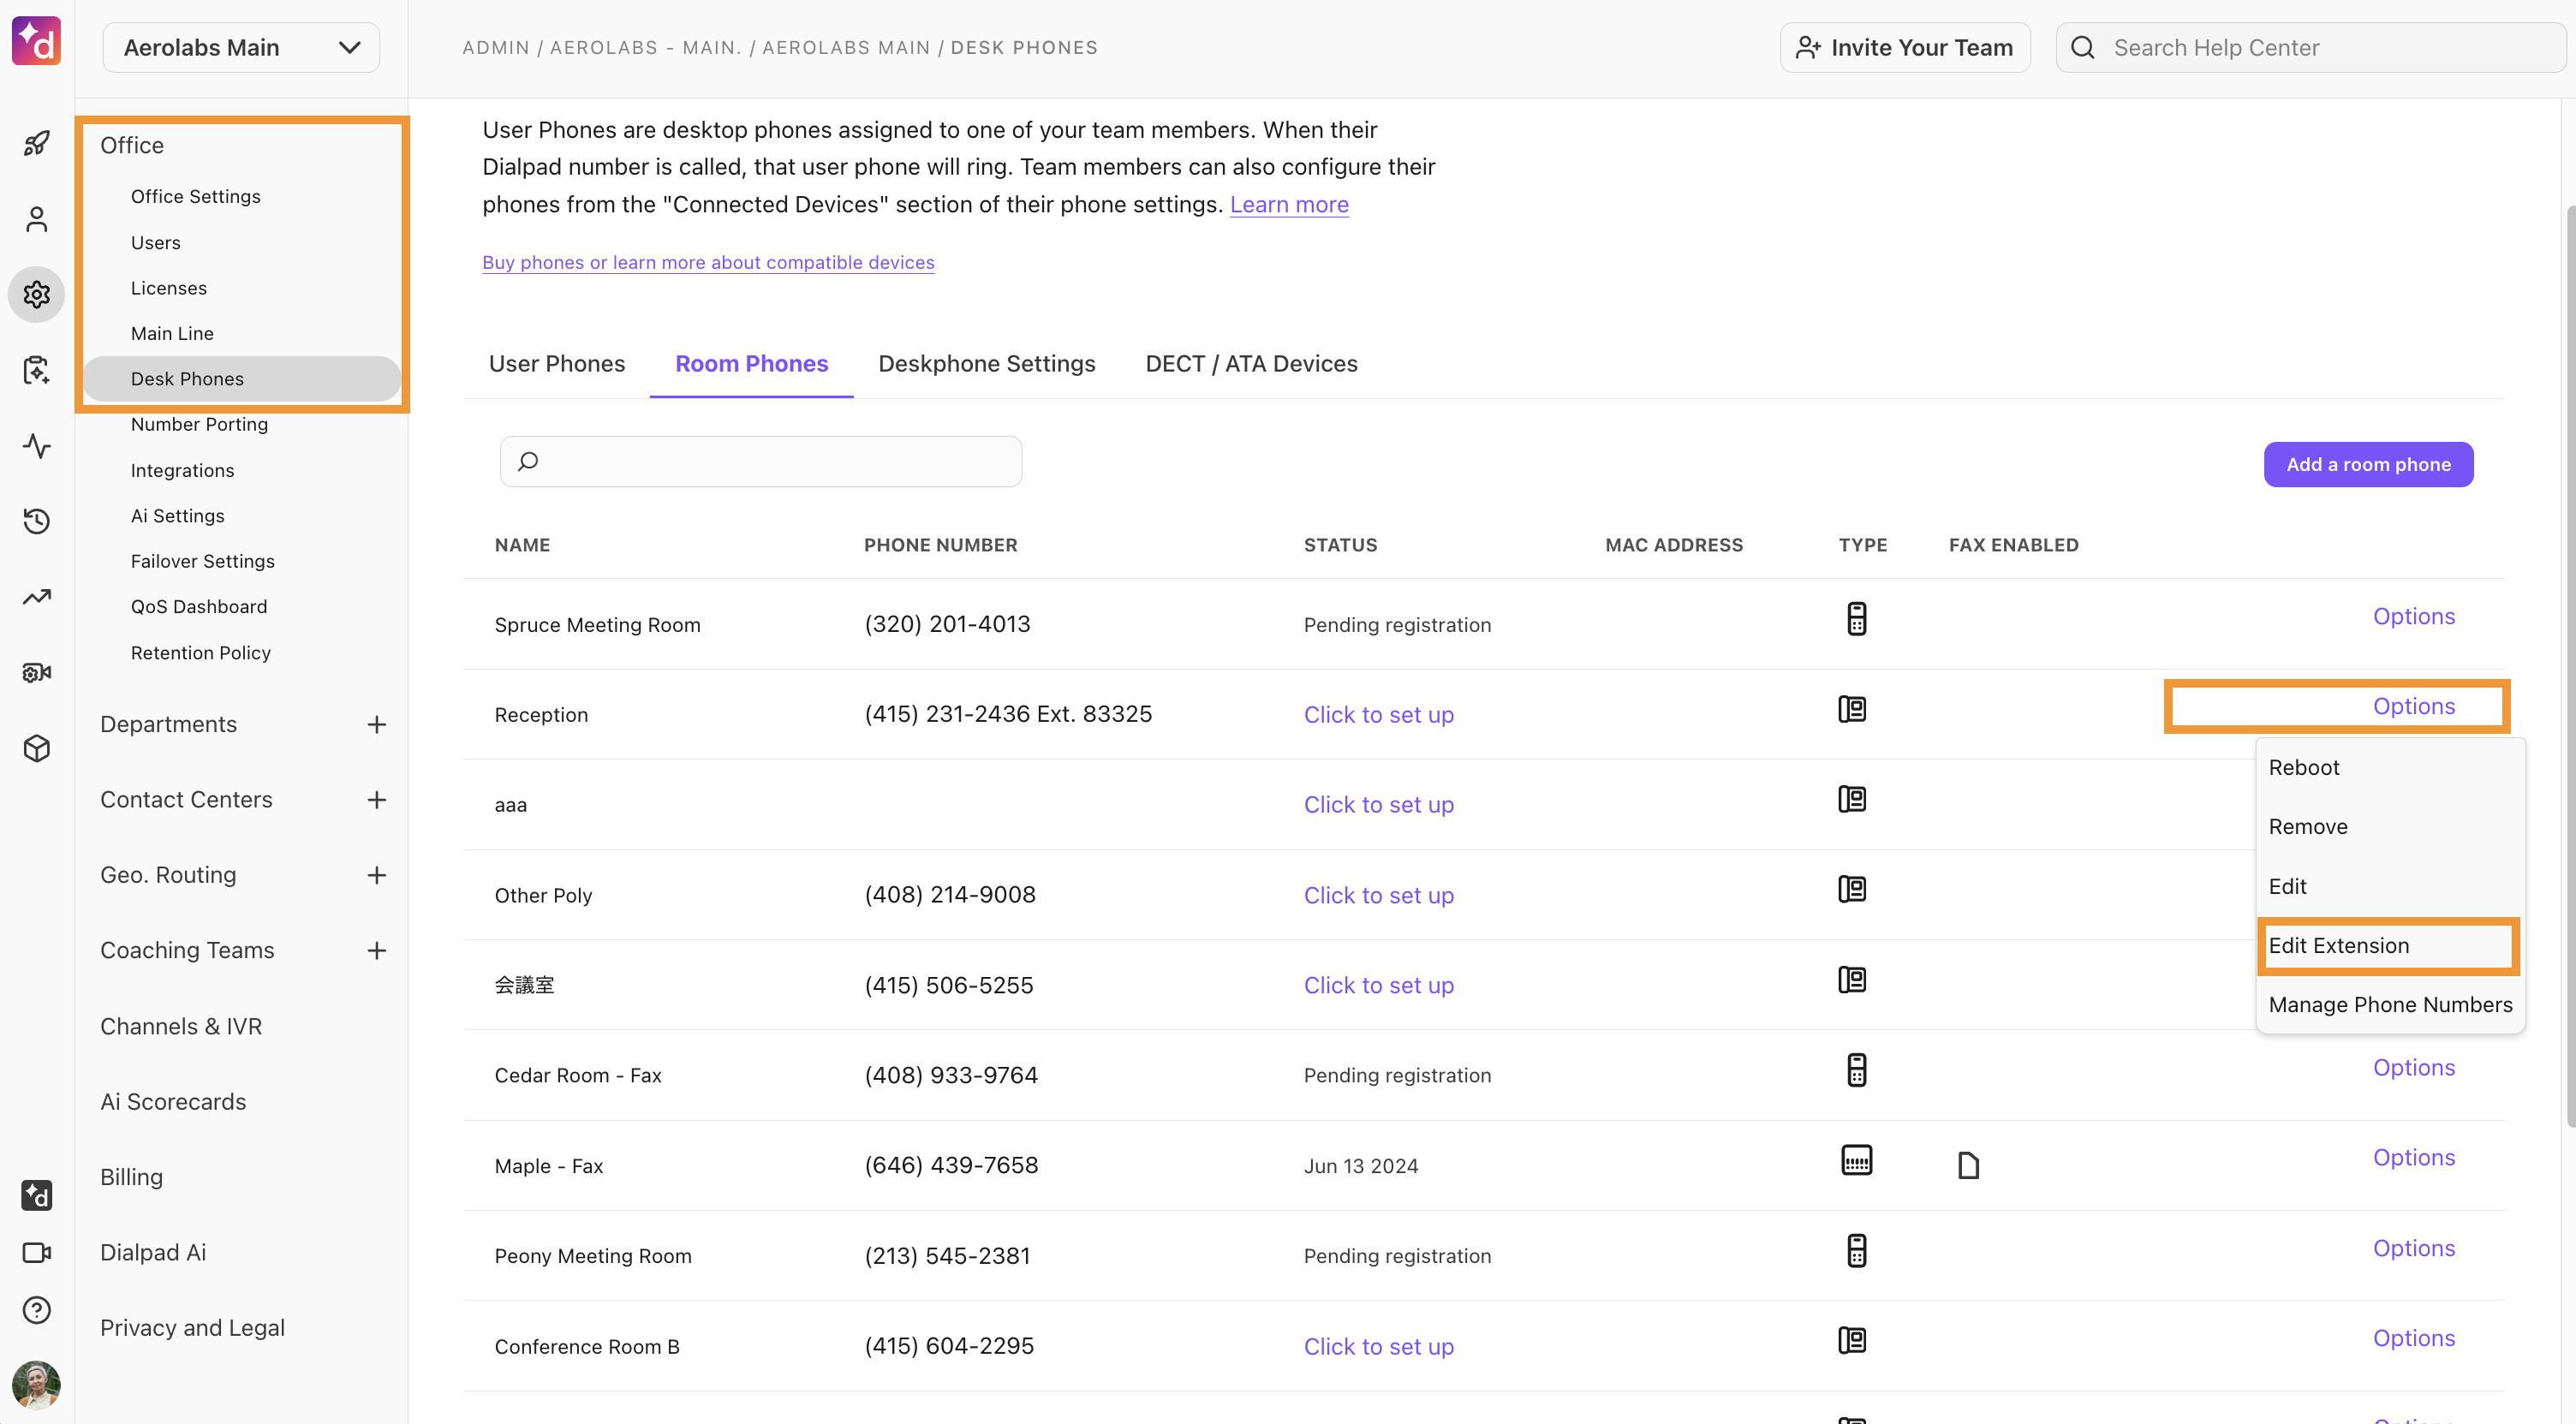
Edit or remove a room phone extension
To edit or remove a room phone extension, head to your Dialpad Admin Settings.
Navigate to Office > Desk Phones
Select Room Phones
Besides the phone you want to update, select Options > Edit Extension
Enter the new 5-number extension or select Remove Extension
Select Save
Edit room phone settings
To edit your room phone's settings, head to your Dialpad Admin Settings.
Navigate to Office > Desk Phones
Select Room Phones
Besides the phone you want to update, select Options > Edit
.png)
You can edit the following details:
Name
Ring duration and forwarding
Registering Emergency Services Location (e911)
Outbound ID
Outbound calling and international calling
Hold music
Call queuing
Make your changes, then select Done
Enable T.30 Fax
Note
Faxing via a room phone is only possible with OBi 300 devices.
Faxing over a VoIP service does have a few limitations that impact all VoIP providers (including Dialpad). As a result, if your business is heavily dependent on frequently faxing large, multi-page documents, we recommend that you maintain an analog line and a traditional fax machine.
While VoIP faxing standards are considered reliable, they can be interpreted differently by different providers, and that means an end-to-end connection cannot be guaranteed.
To enable OBi 300 faxing, head to your Dialpad Admin Settings.
Navigate to Office > Desk Phones
Select Room Phones
Beside your OBI 300 phone, select Options
Select Add T30 Fax
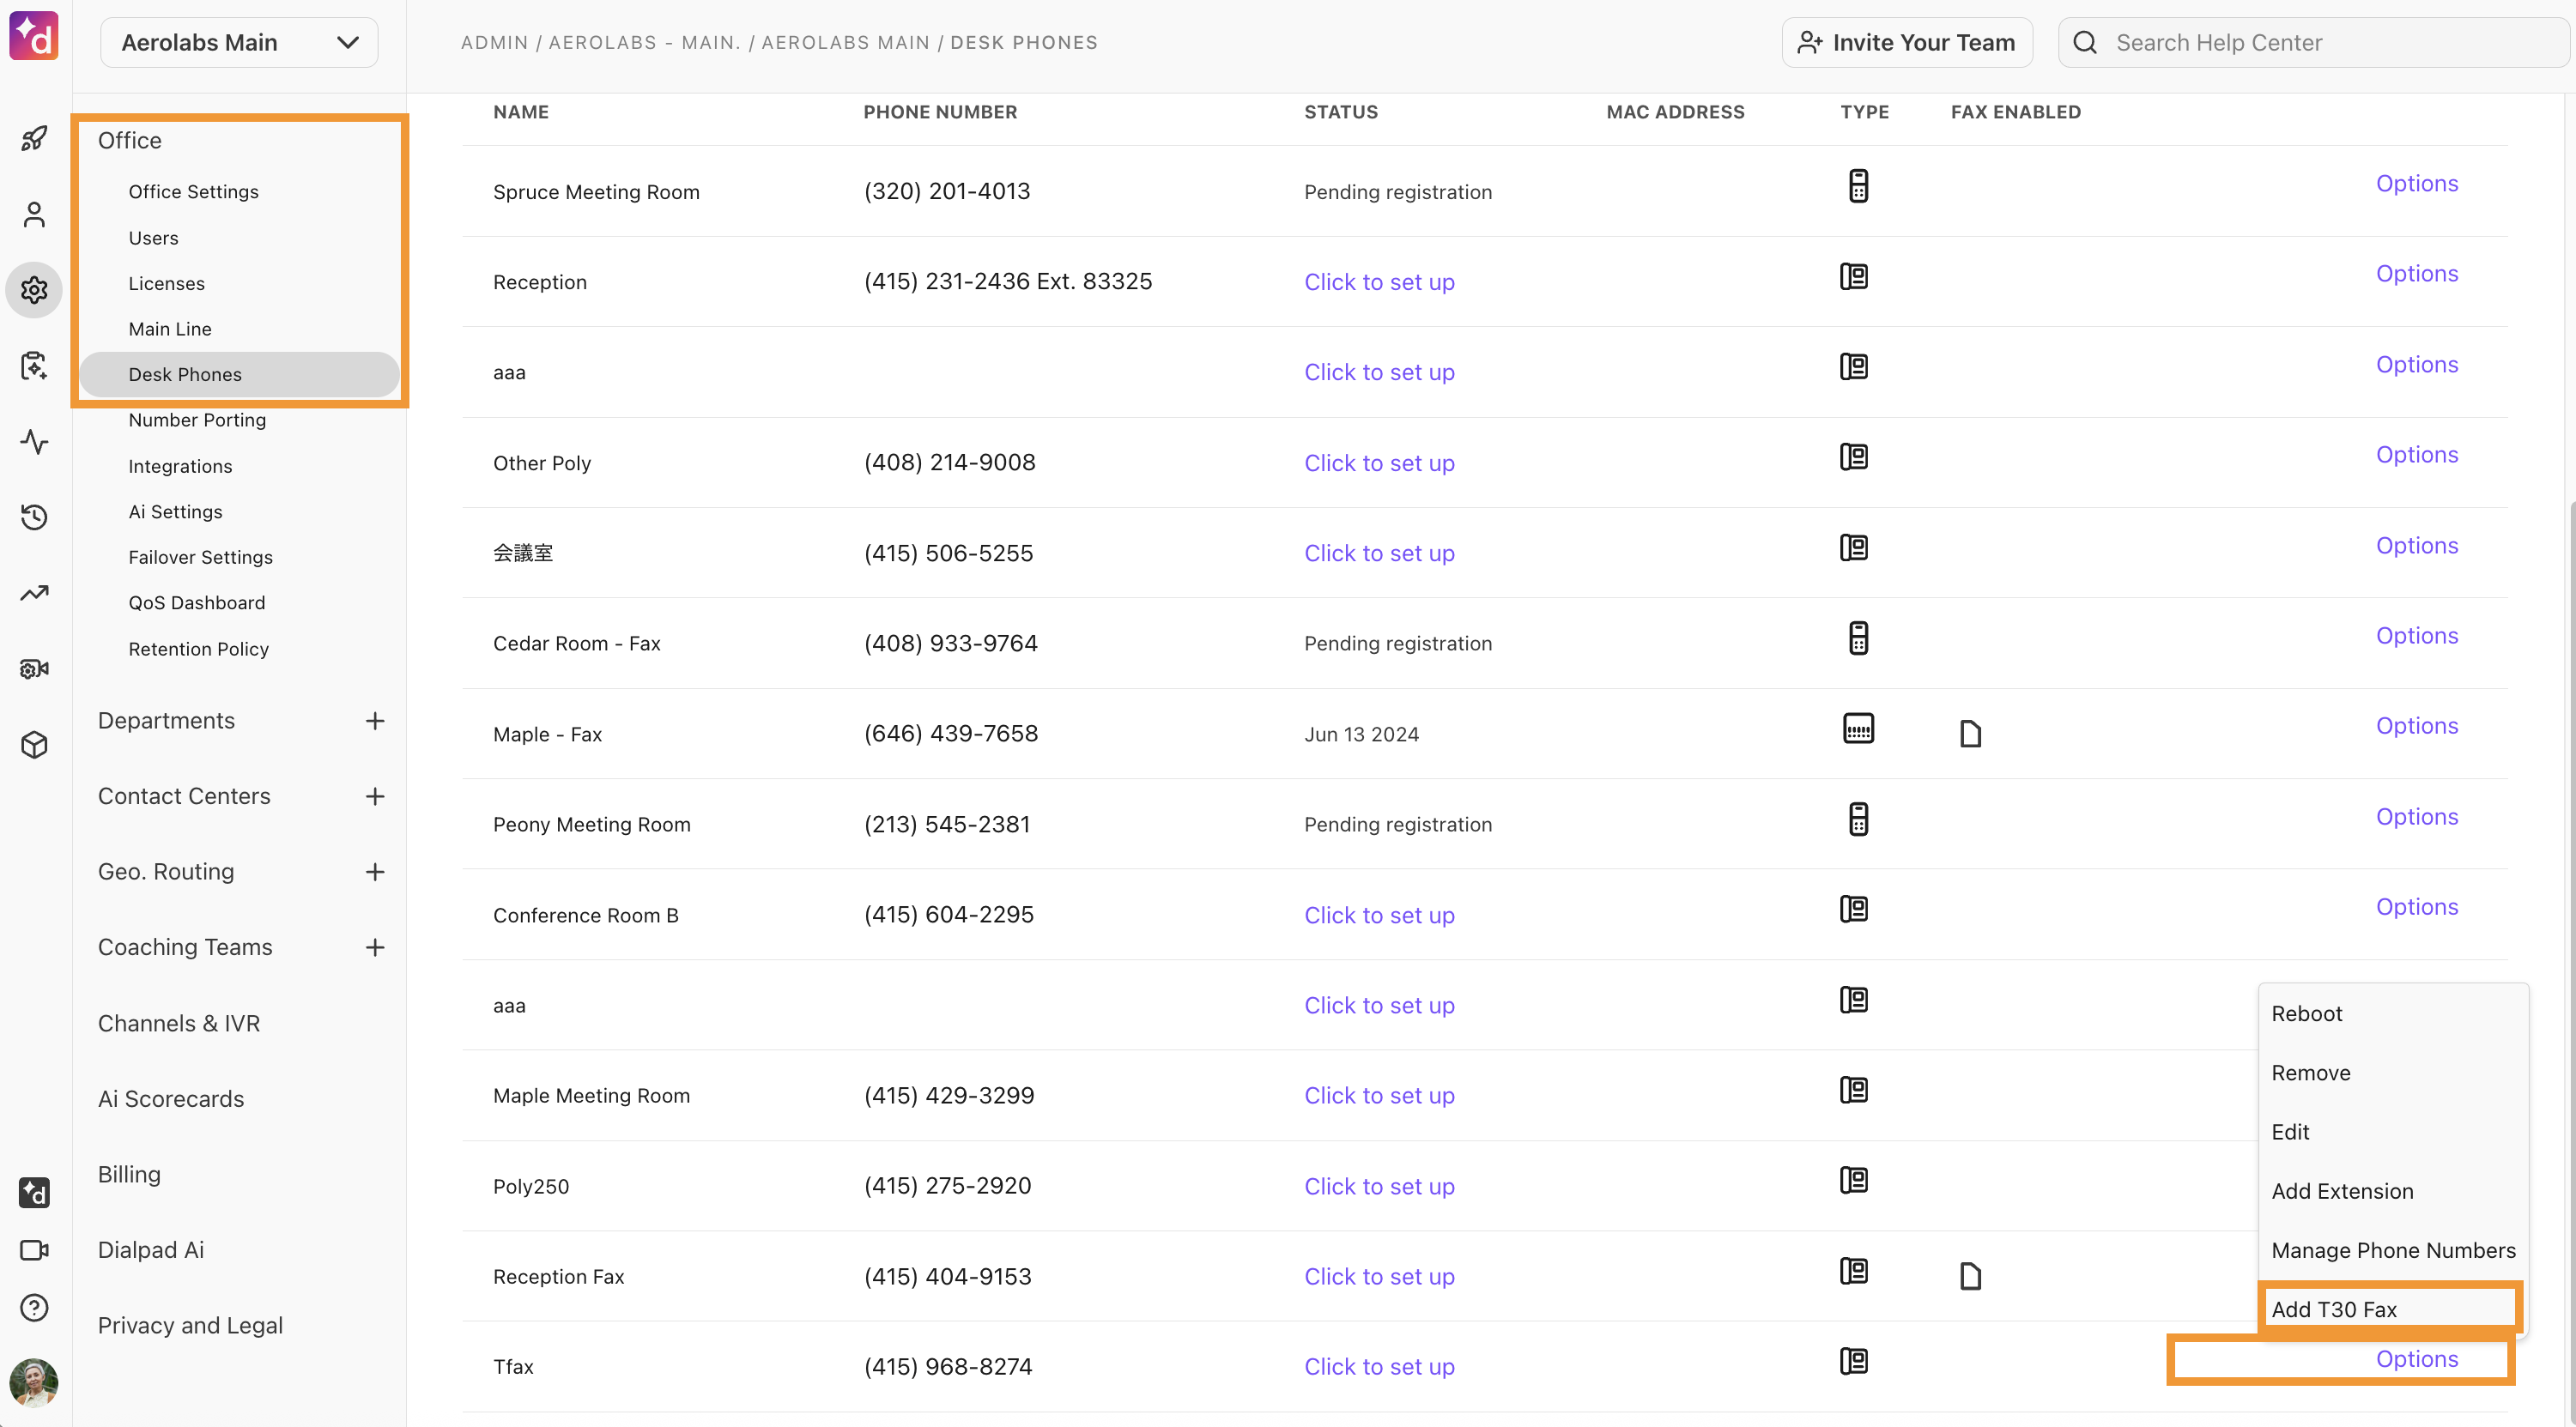
Select Okay
Once faxing is enabled, you'll see a fax icon in the Fax enabled column.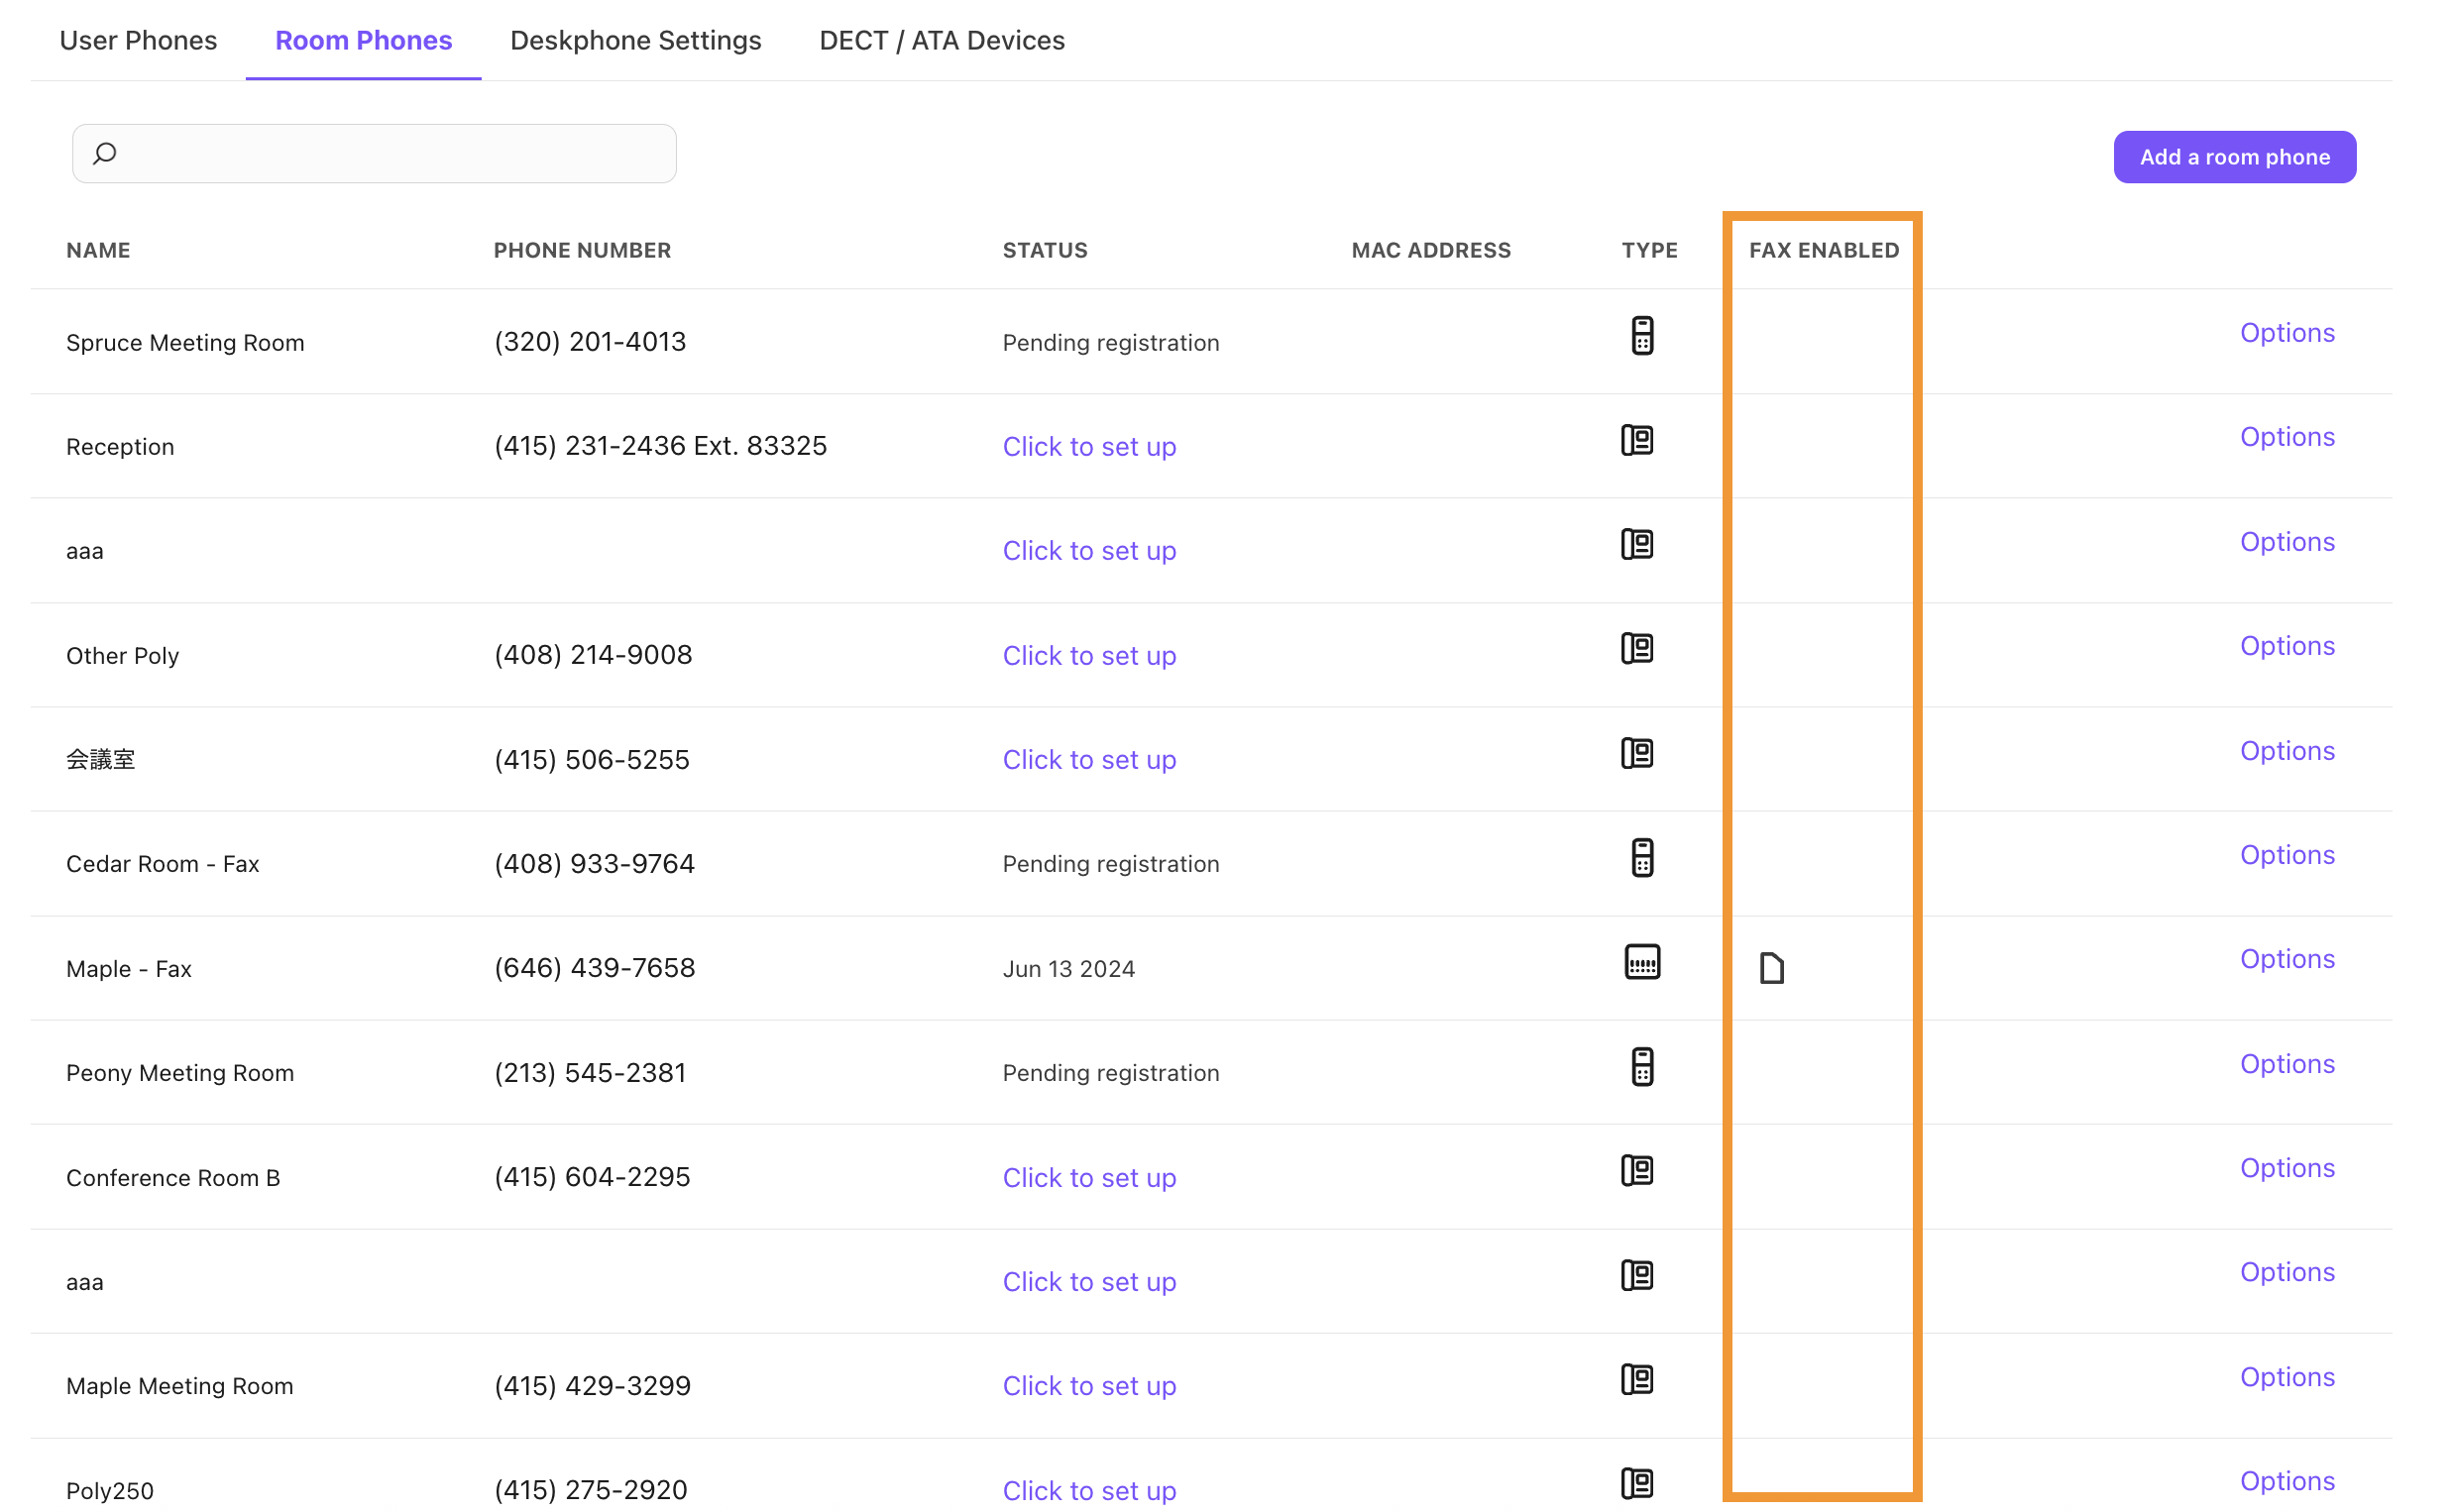
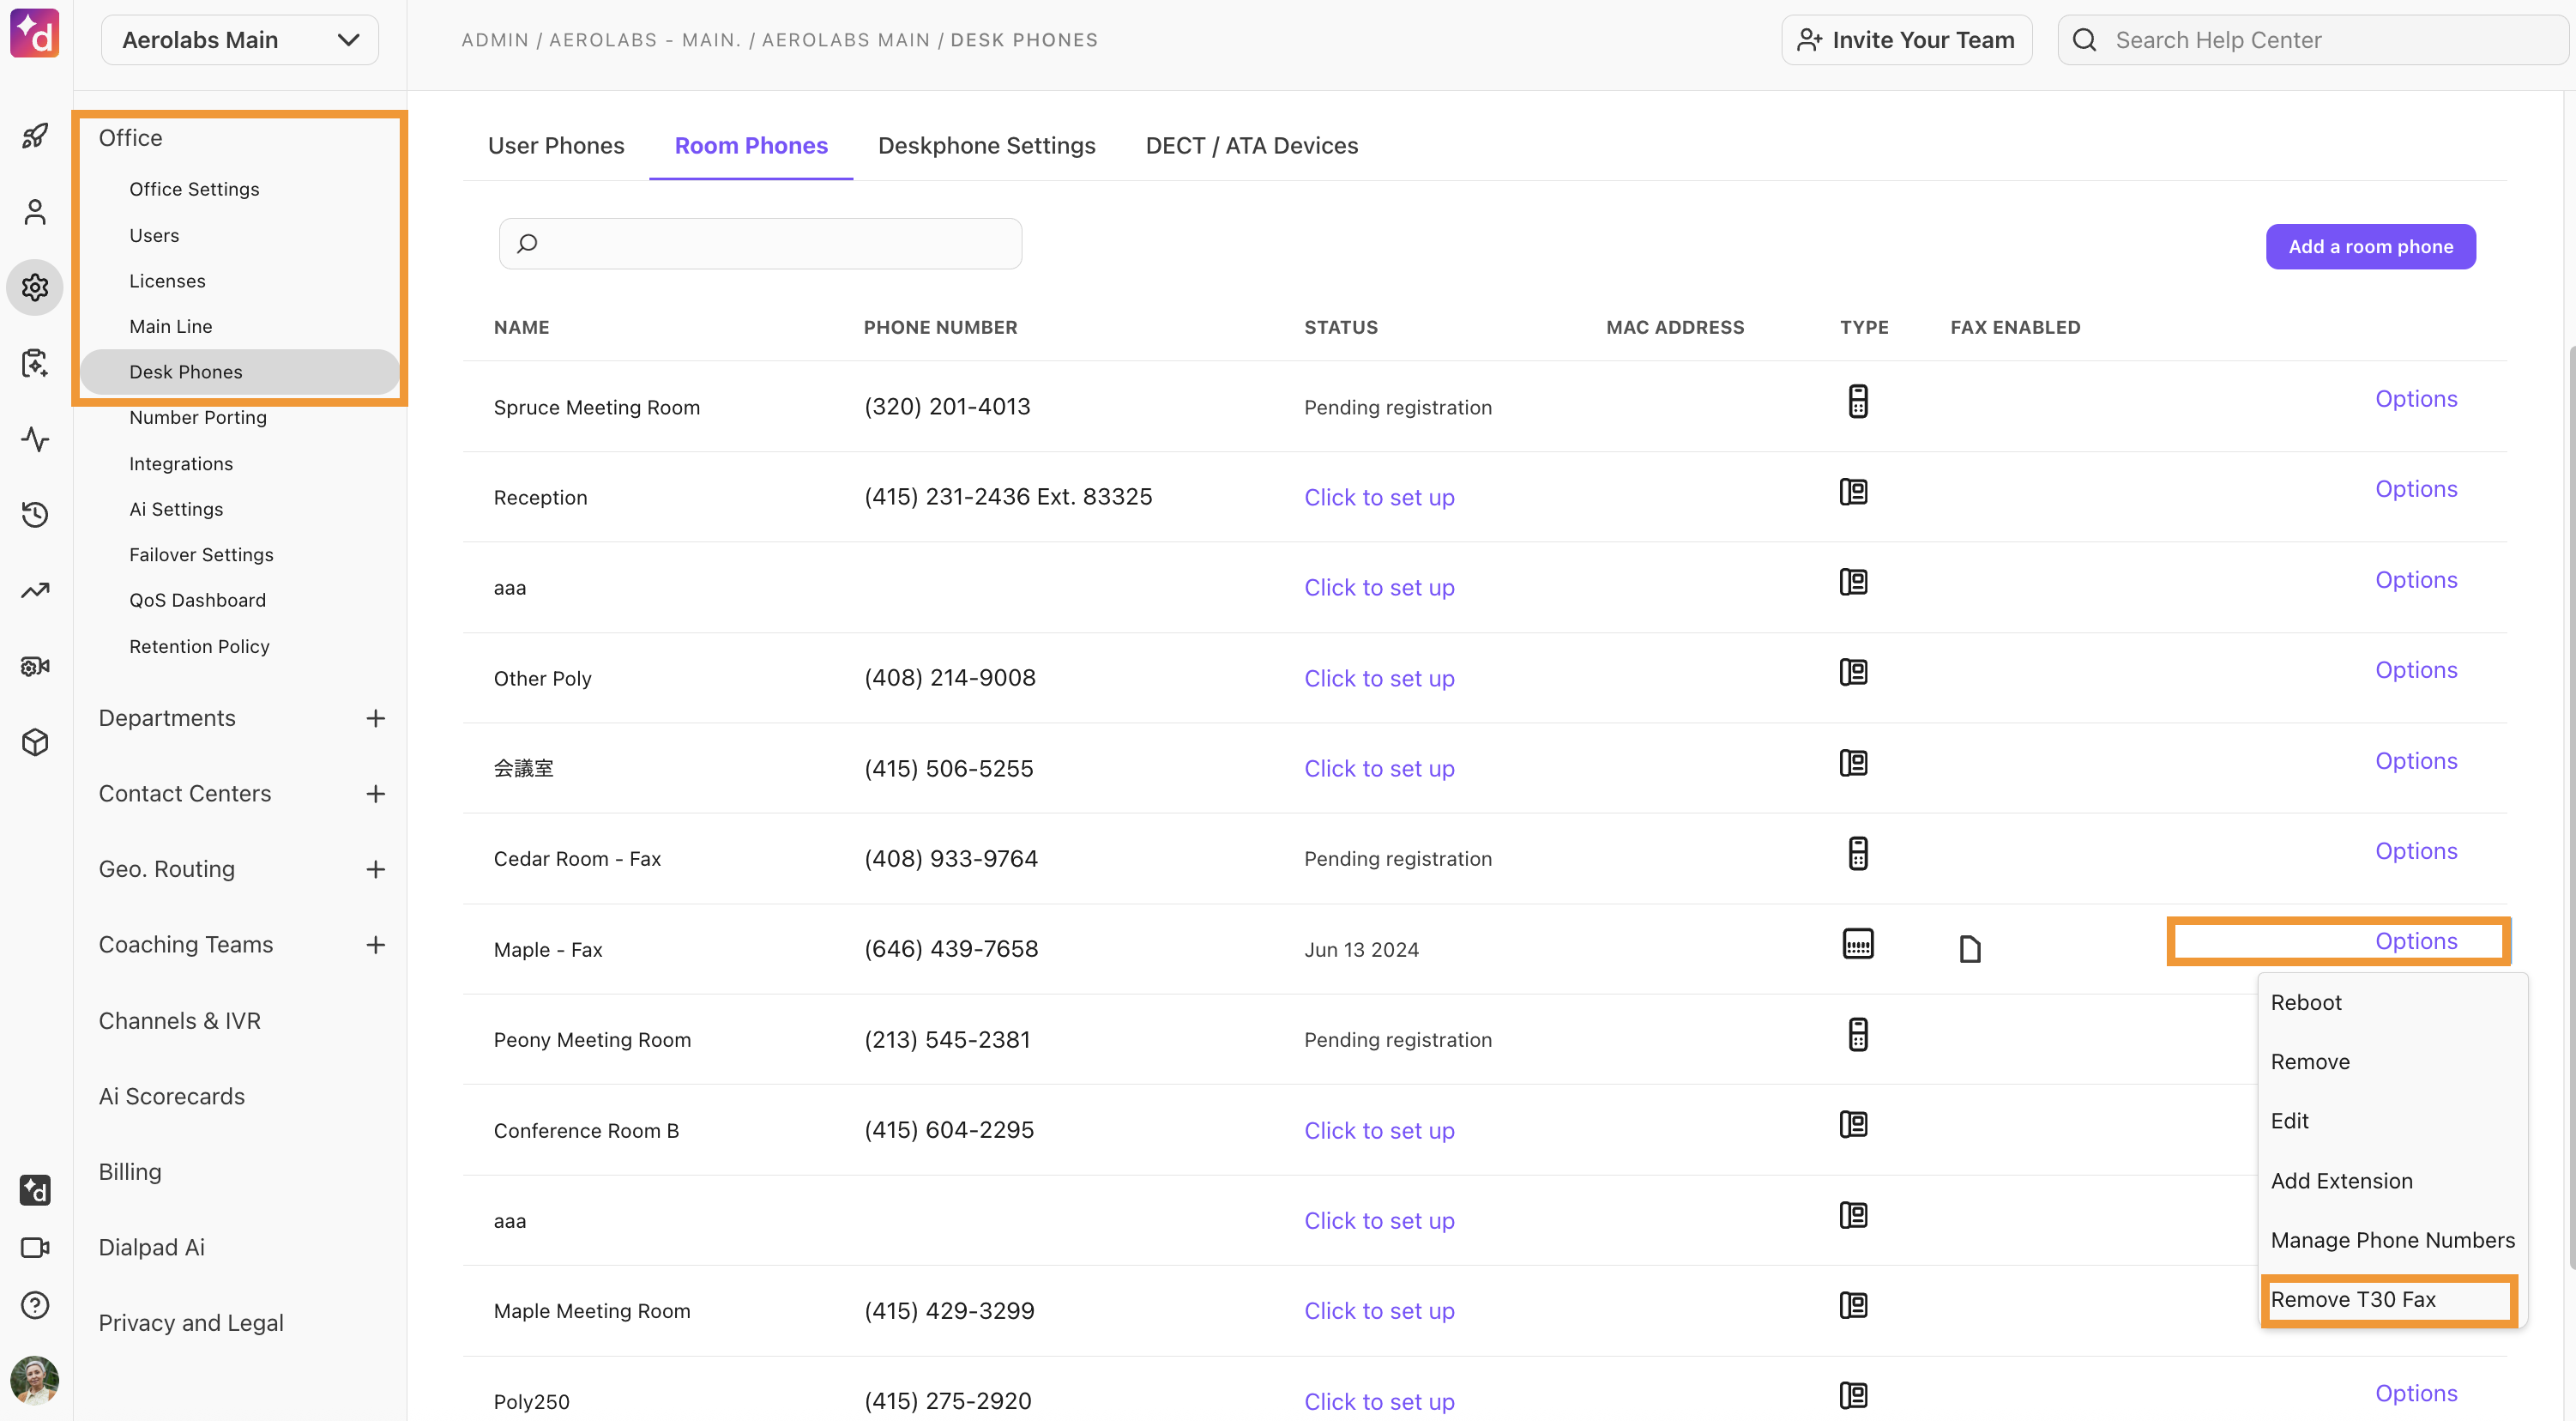
Disable faxing
To disable faxing, go to your Dialpad Admin Settings.
Navigate to Office > Desk Phones
Select Room Phones
Beside your fax-enabled OBI 300 phone, select Options
Select Remove T30 Fax
Frequently asked questions (FAQs)
How can I view call activity on my room phones?
When exporting your analytics data, select your Office as the Users & Targets filter. Select the timeframe, then select Export Statistics.
When you open the exported file, sort the data based on name or target_type to view calls handled with a room phone.
What if I'm switching providers?
If you are looking to remove a device from Dialpad for use with another provider, please contact Customer Care so the Telephony team can update the device registration with the manufacturer.