Access your Dialpad profile easily through the web portal or the app, and update your personal settings with just a few clicks.
Quickly access a specific section in your Dialpad profile's personal settings using a bookmark — Dialpad AI, Call Handling & Voice, Devices, Executive Assistant, For Your Safety, Scheduled Reports, and Dialpad Meetings — you'll notice that each directs to a unique URL.
Let's dive into the details.
Access your profile
You can access your profile in two ways:
By selecting Your Settings on Dialpad.com

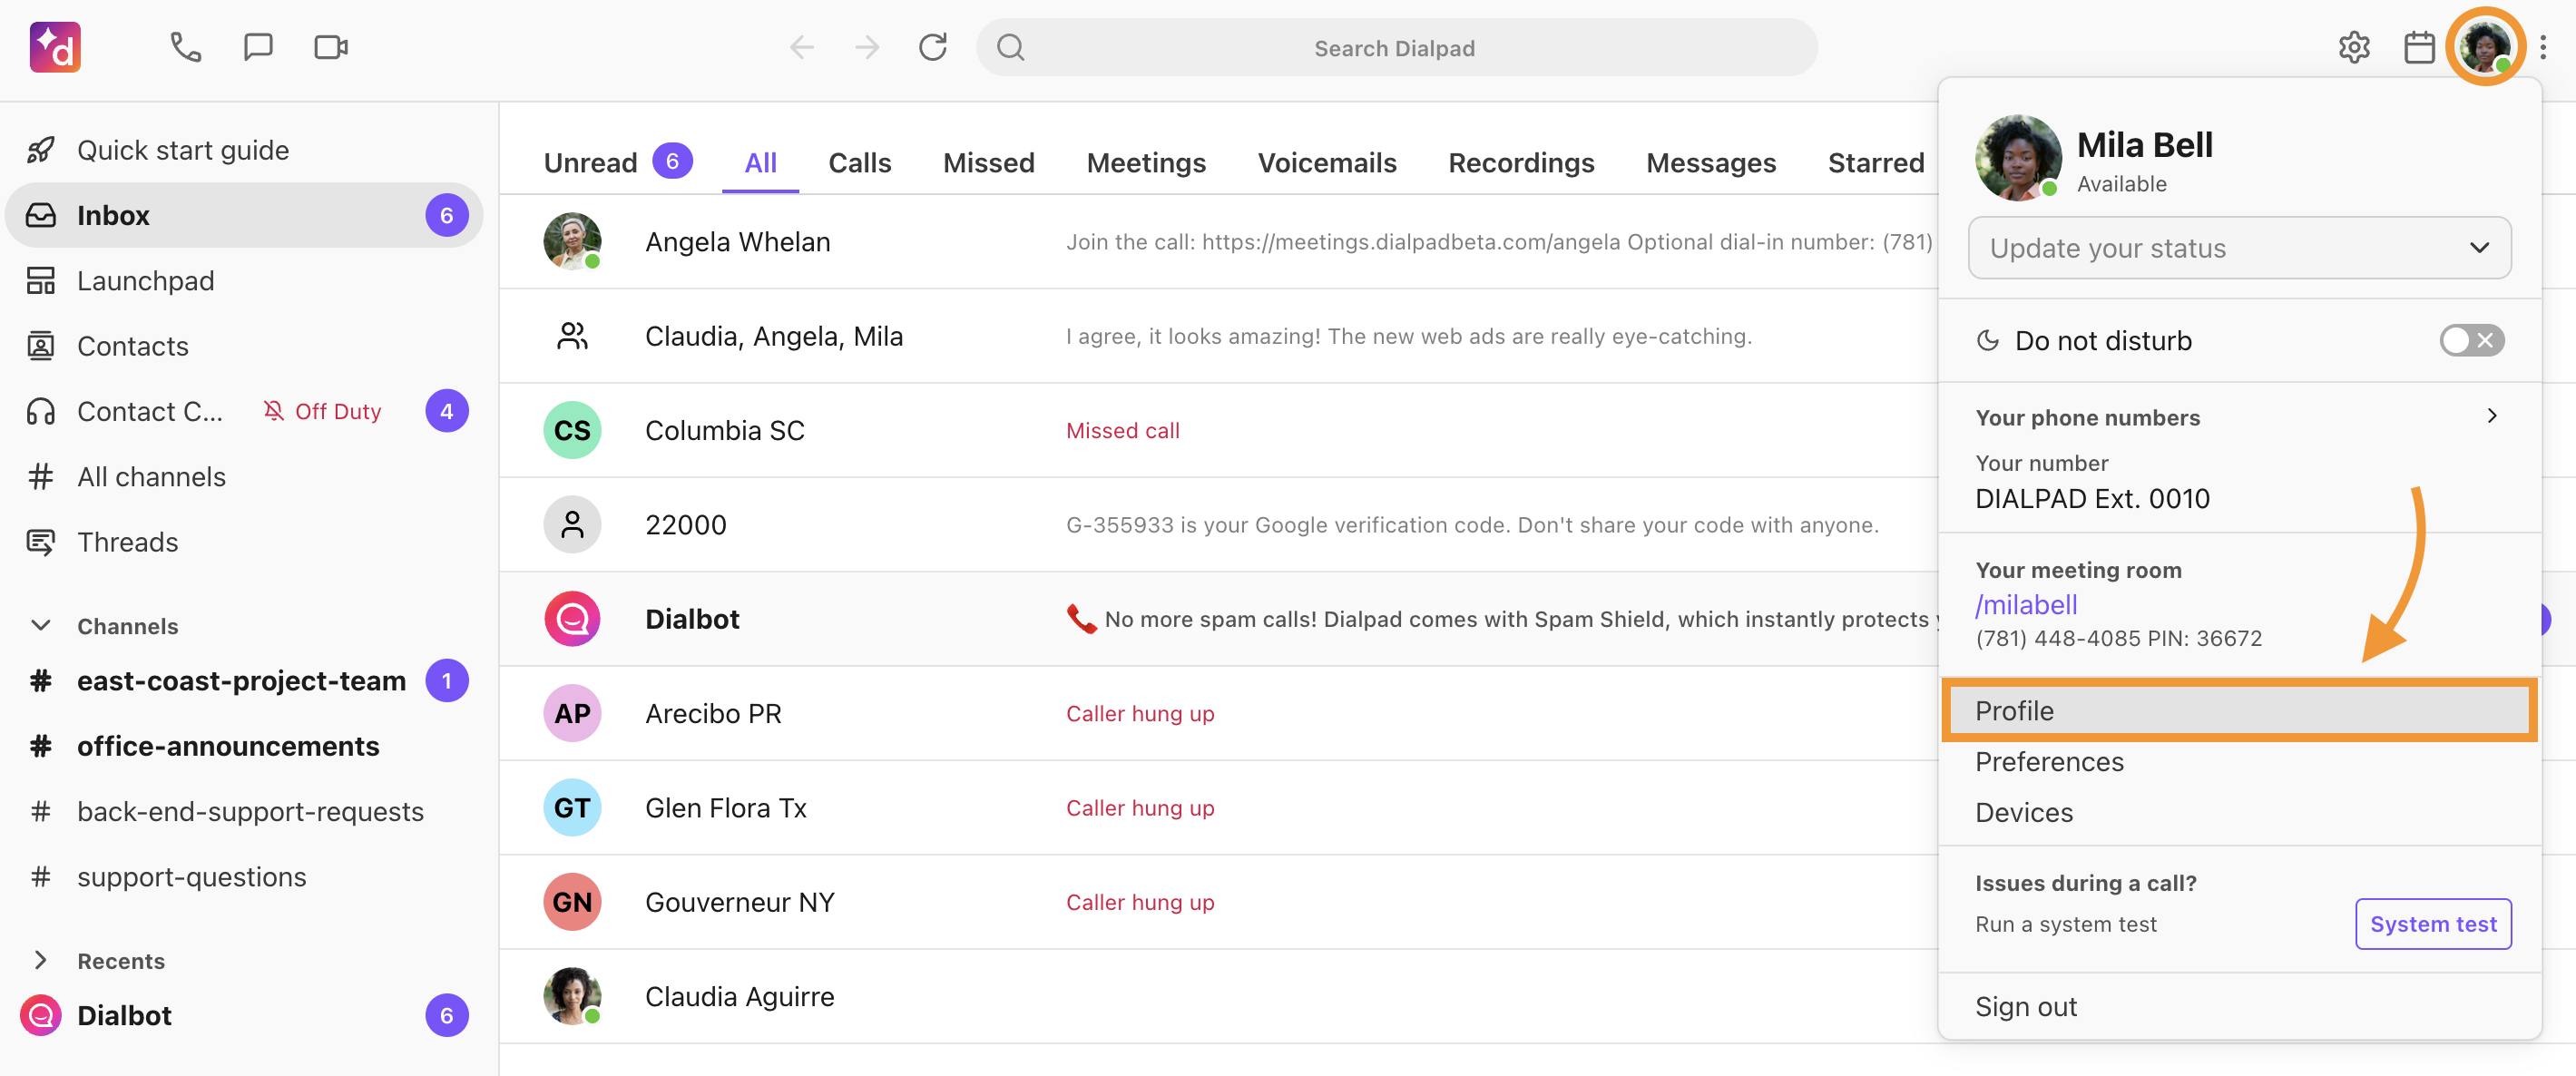
By selecting Profile from the in-app personal menu
If you're a Google or Microsoft Office 365 user with a profile picture, it will automatically display in Dialpad along with your name, job title, and Dialpad-associated email address.
Your profile includes public information like your name, photo, job title, and pronouns.
Tip
Select Edit Personal Information to edit any details manually.
Read this Help Center article for more information on changing your profile.
Dialpad numbers
Every Dialpad Connect user is assigned a direct Dialpad number under Your Dialpad Numbers. If your Admin has added a fax line or a Dialpad Meetings account, you'll see those numbers, too.
Why do I have two numbers?
When you sign up for a Dialpad account, we automatically give you a free local Main Line number which cannot be removed. This number is considered your Company's phone number that your callers can call to reach out to any operator assigned to your mainline.
The second number you receive is your direct Dialpad number, which callers would use to reach out to you directly.
Don't like the numbers you were assigned? No problem!—in fact, you'll have the option after you finish the sign-up flow to port in an existing local or toll-free number.
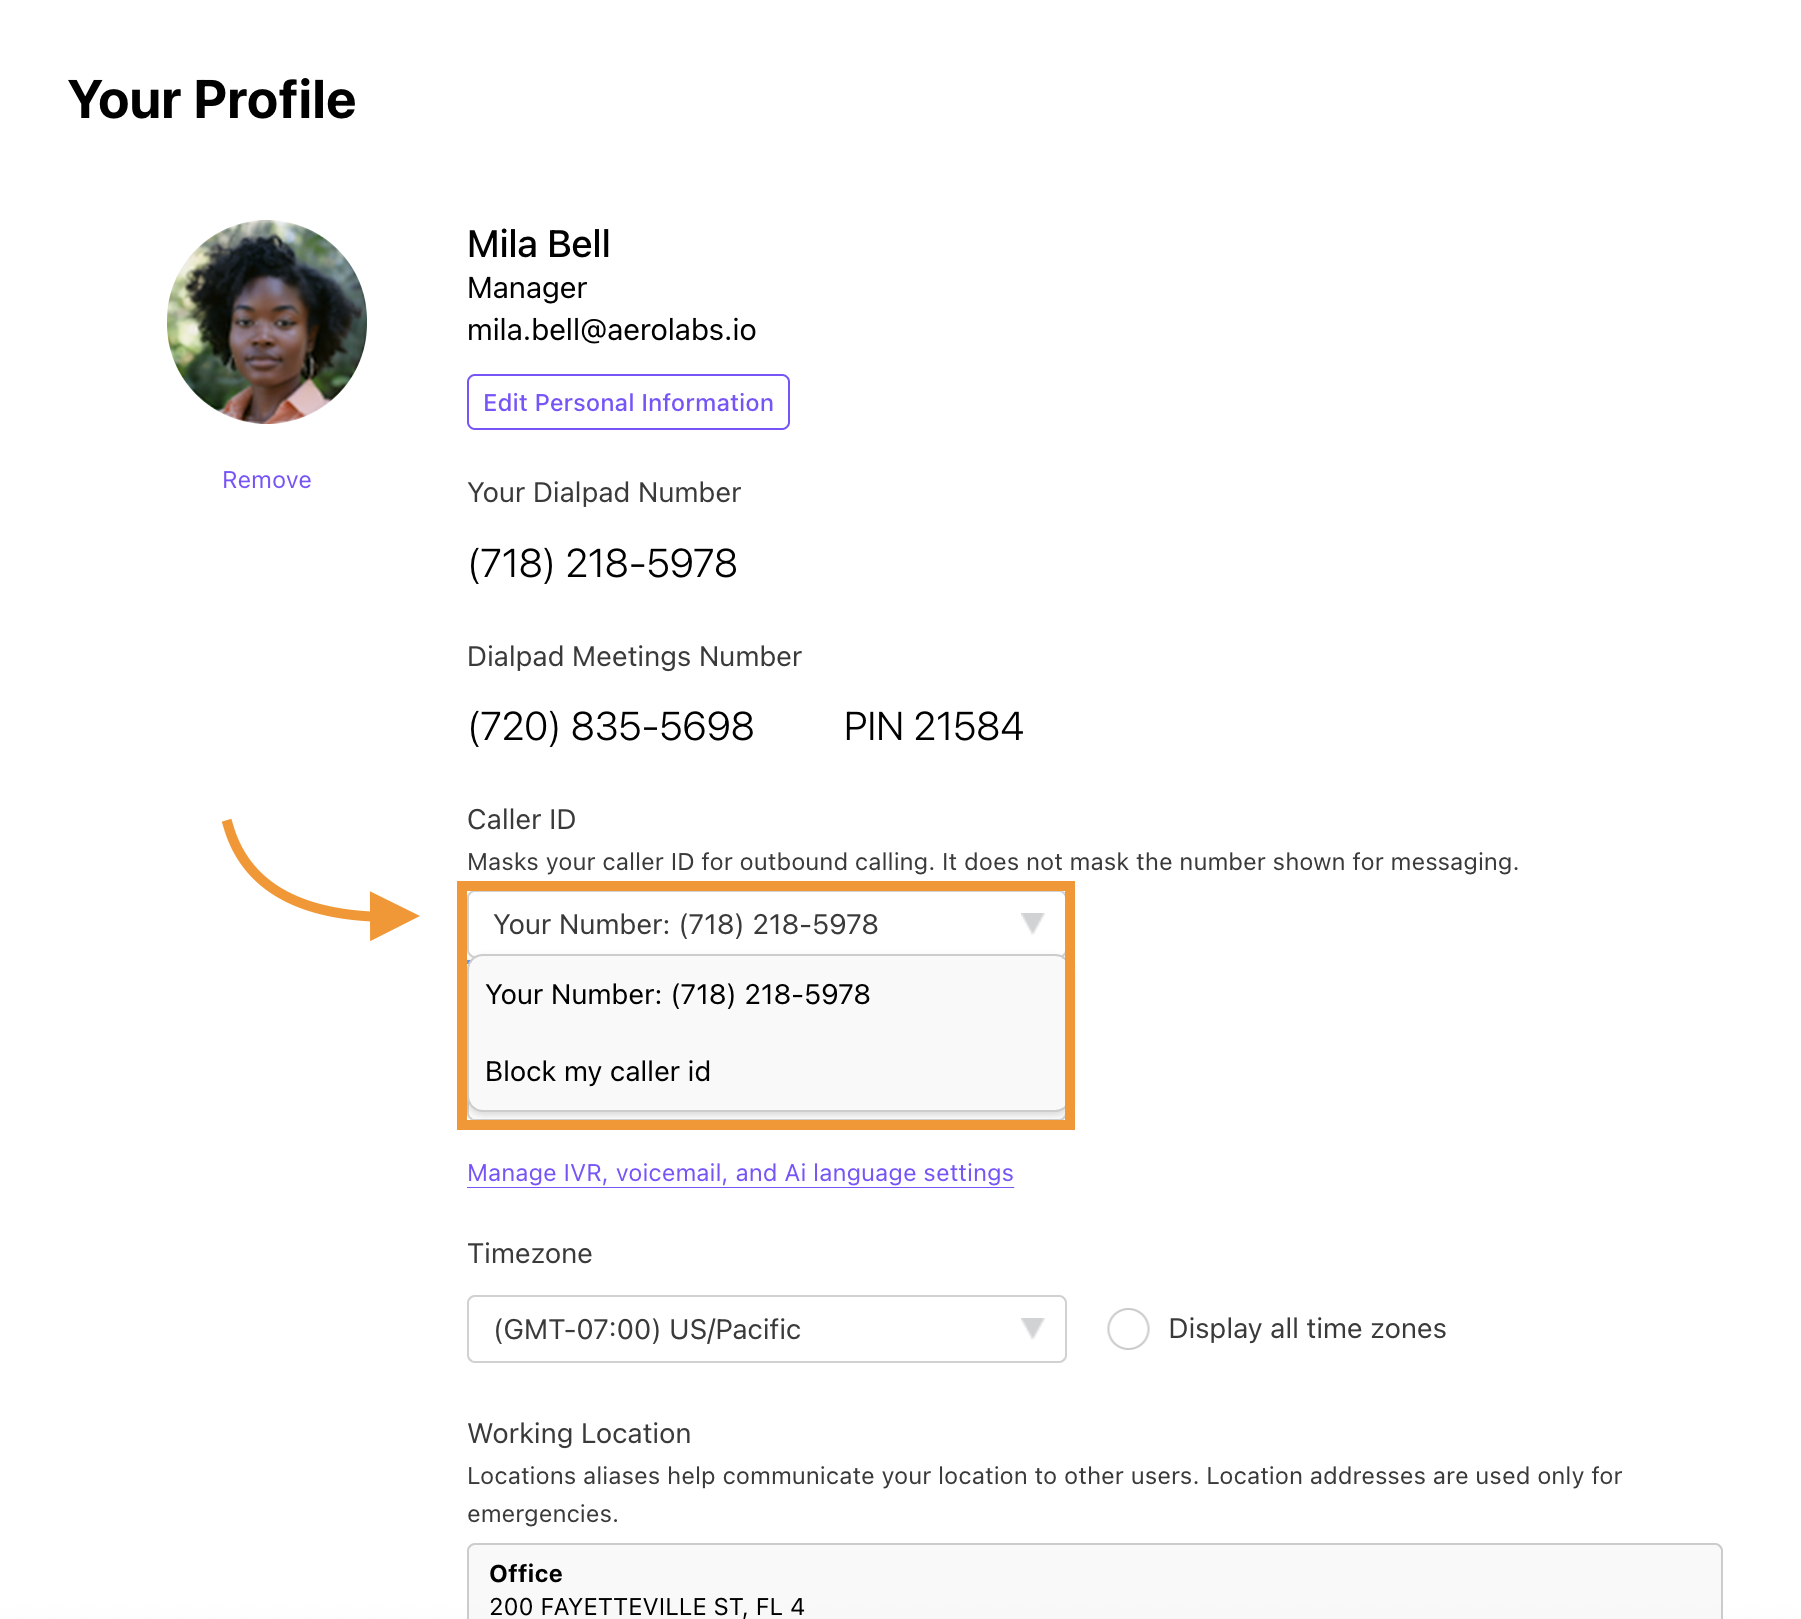
Caller ID
In the Caller ID section, you'll see which number will appear when you place an outbound call.
It is set to your direct number by default, but you may see other options if you're assigned as an operator or agent, or if your admin chose to enable office-wide caller ID settings.
Language
The Language section lets you change the language of your Dialpad App experience.
Office settings set a user's default language, but it can also be changed for their individual Dialpad account.
To change the language, simply select a different option from the drop-down menu. Dialpad will update automatically.
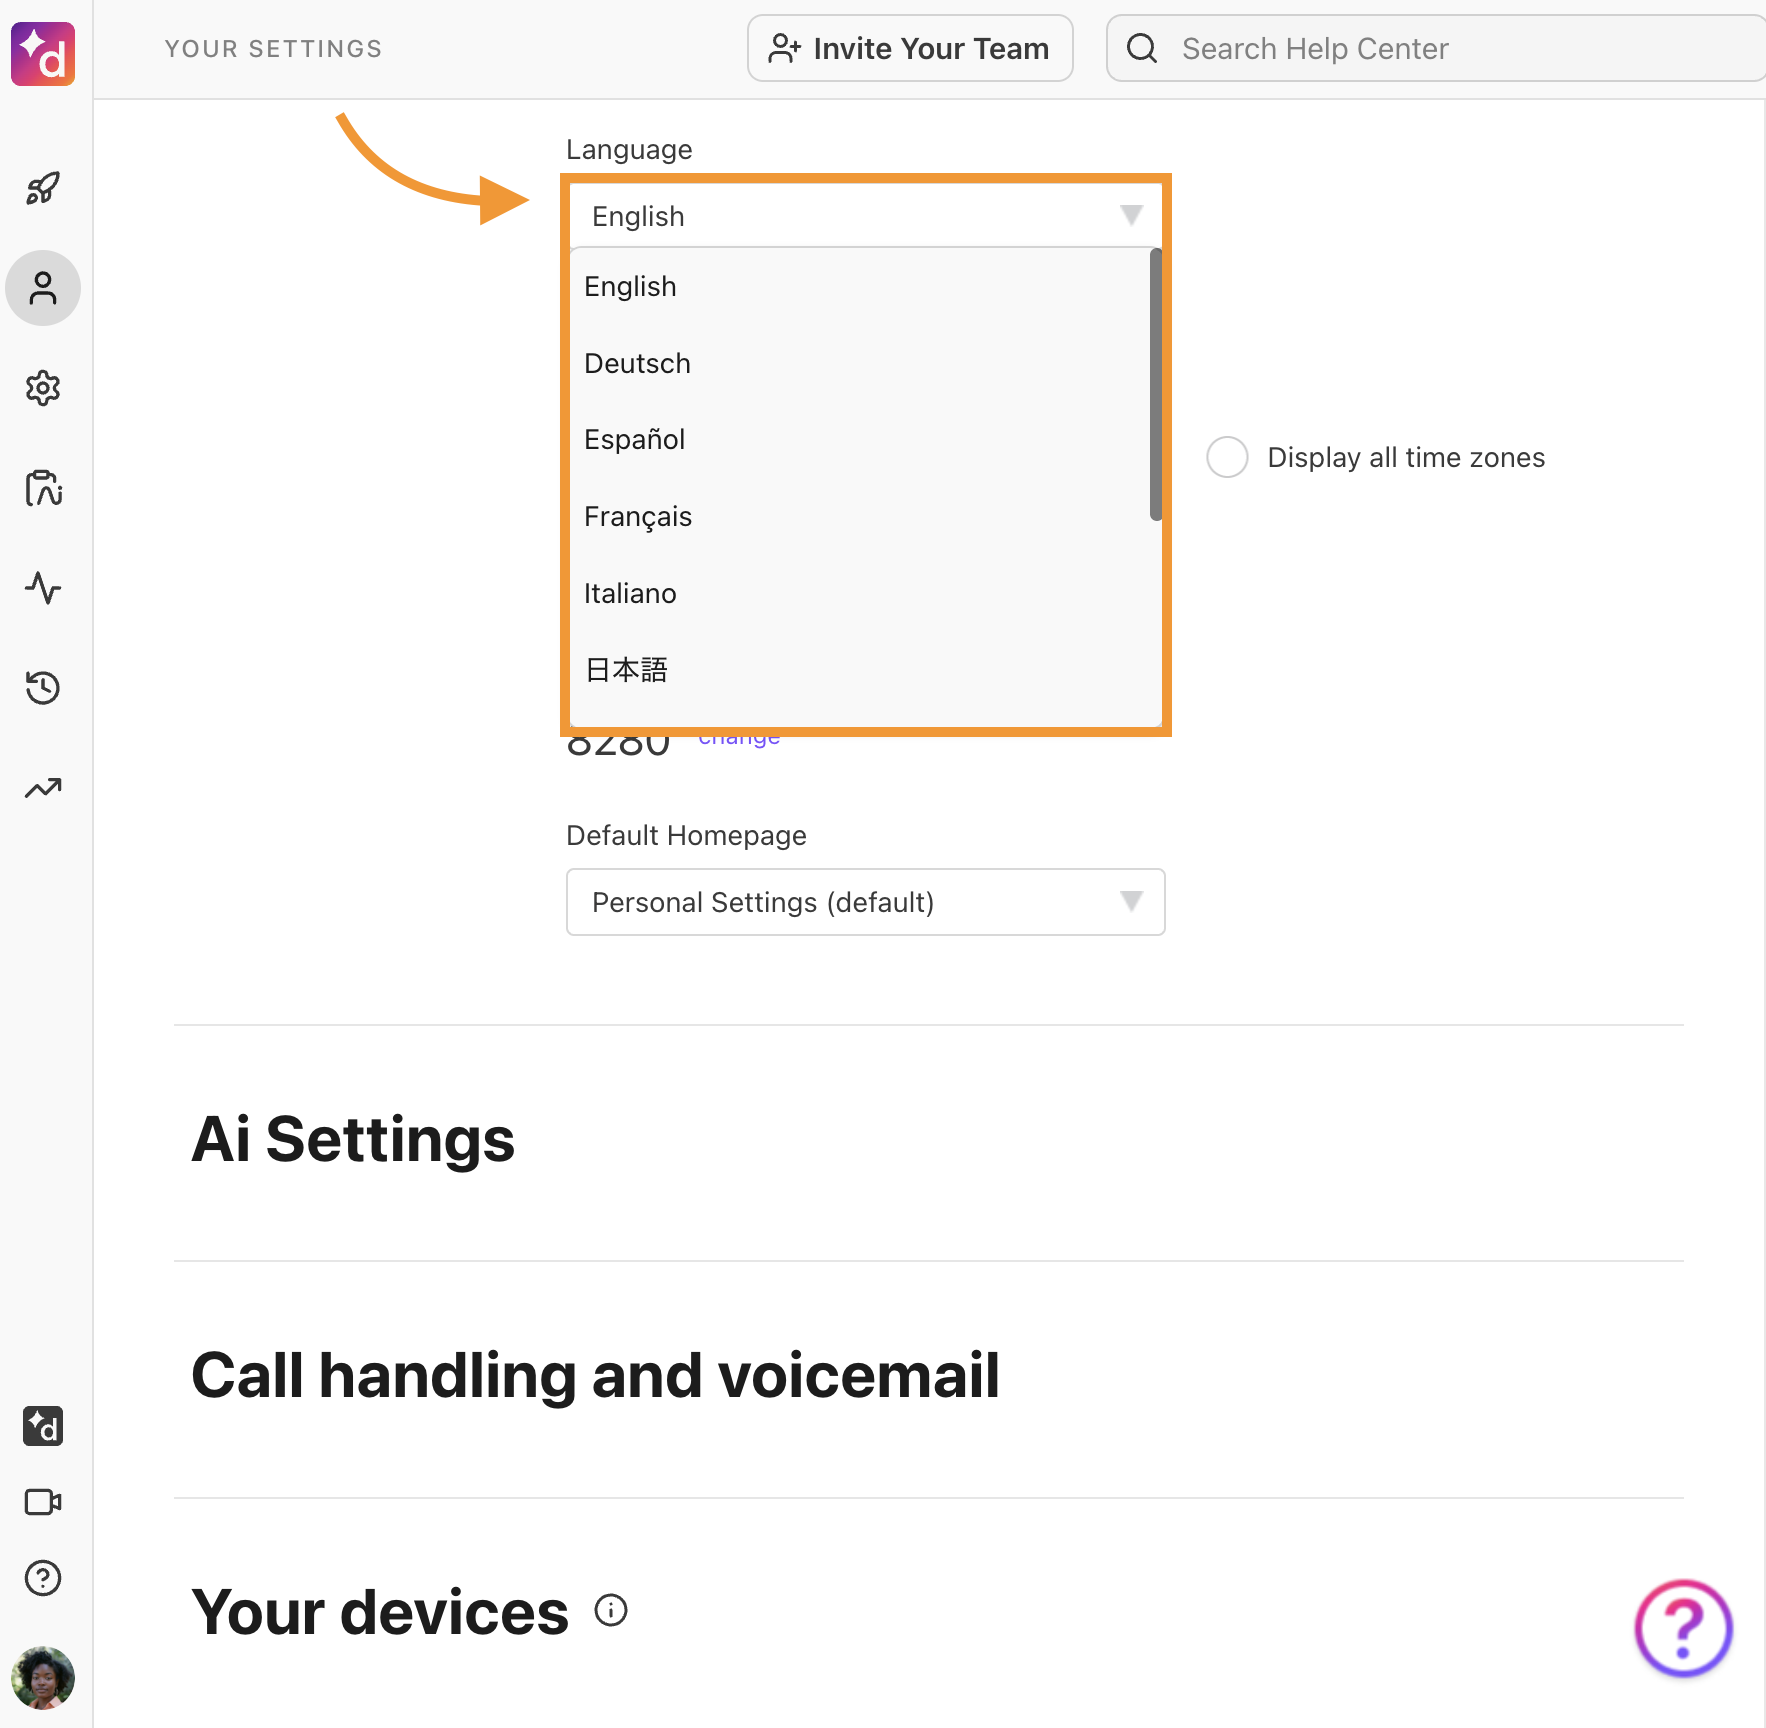
Dialpad supports the following languages:
English
German (Deutsch)
Spanish (Español)
French (Francais)
Italian (Italiano)
Japanese
Dutch
Portuguese
Russian
Chinese
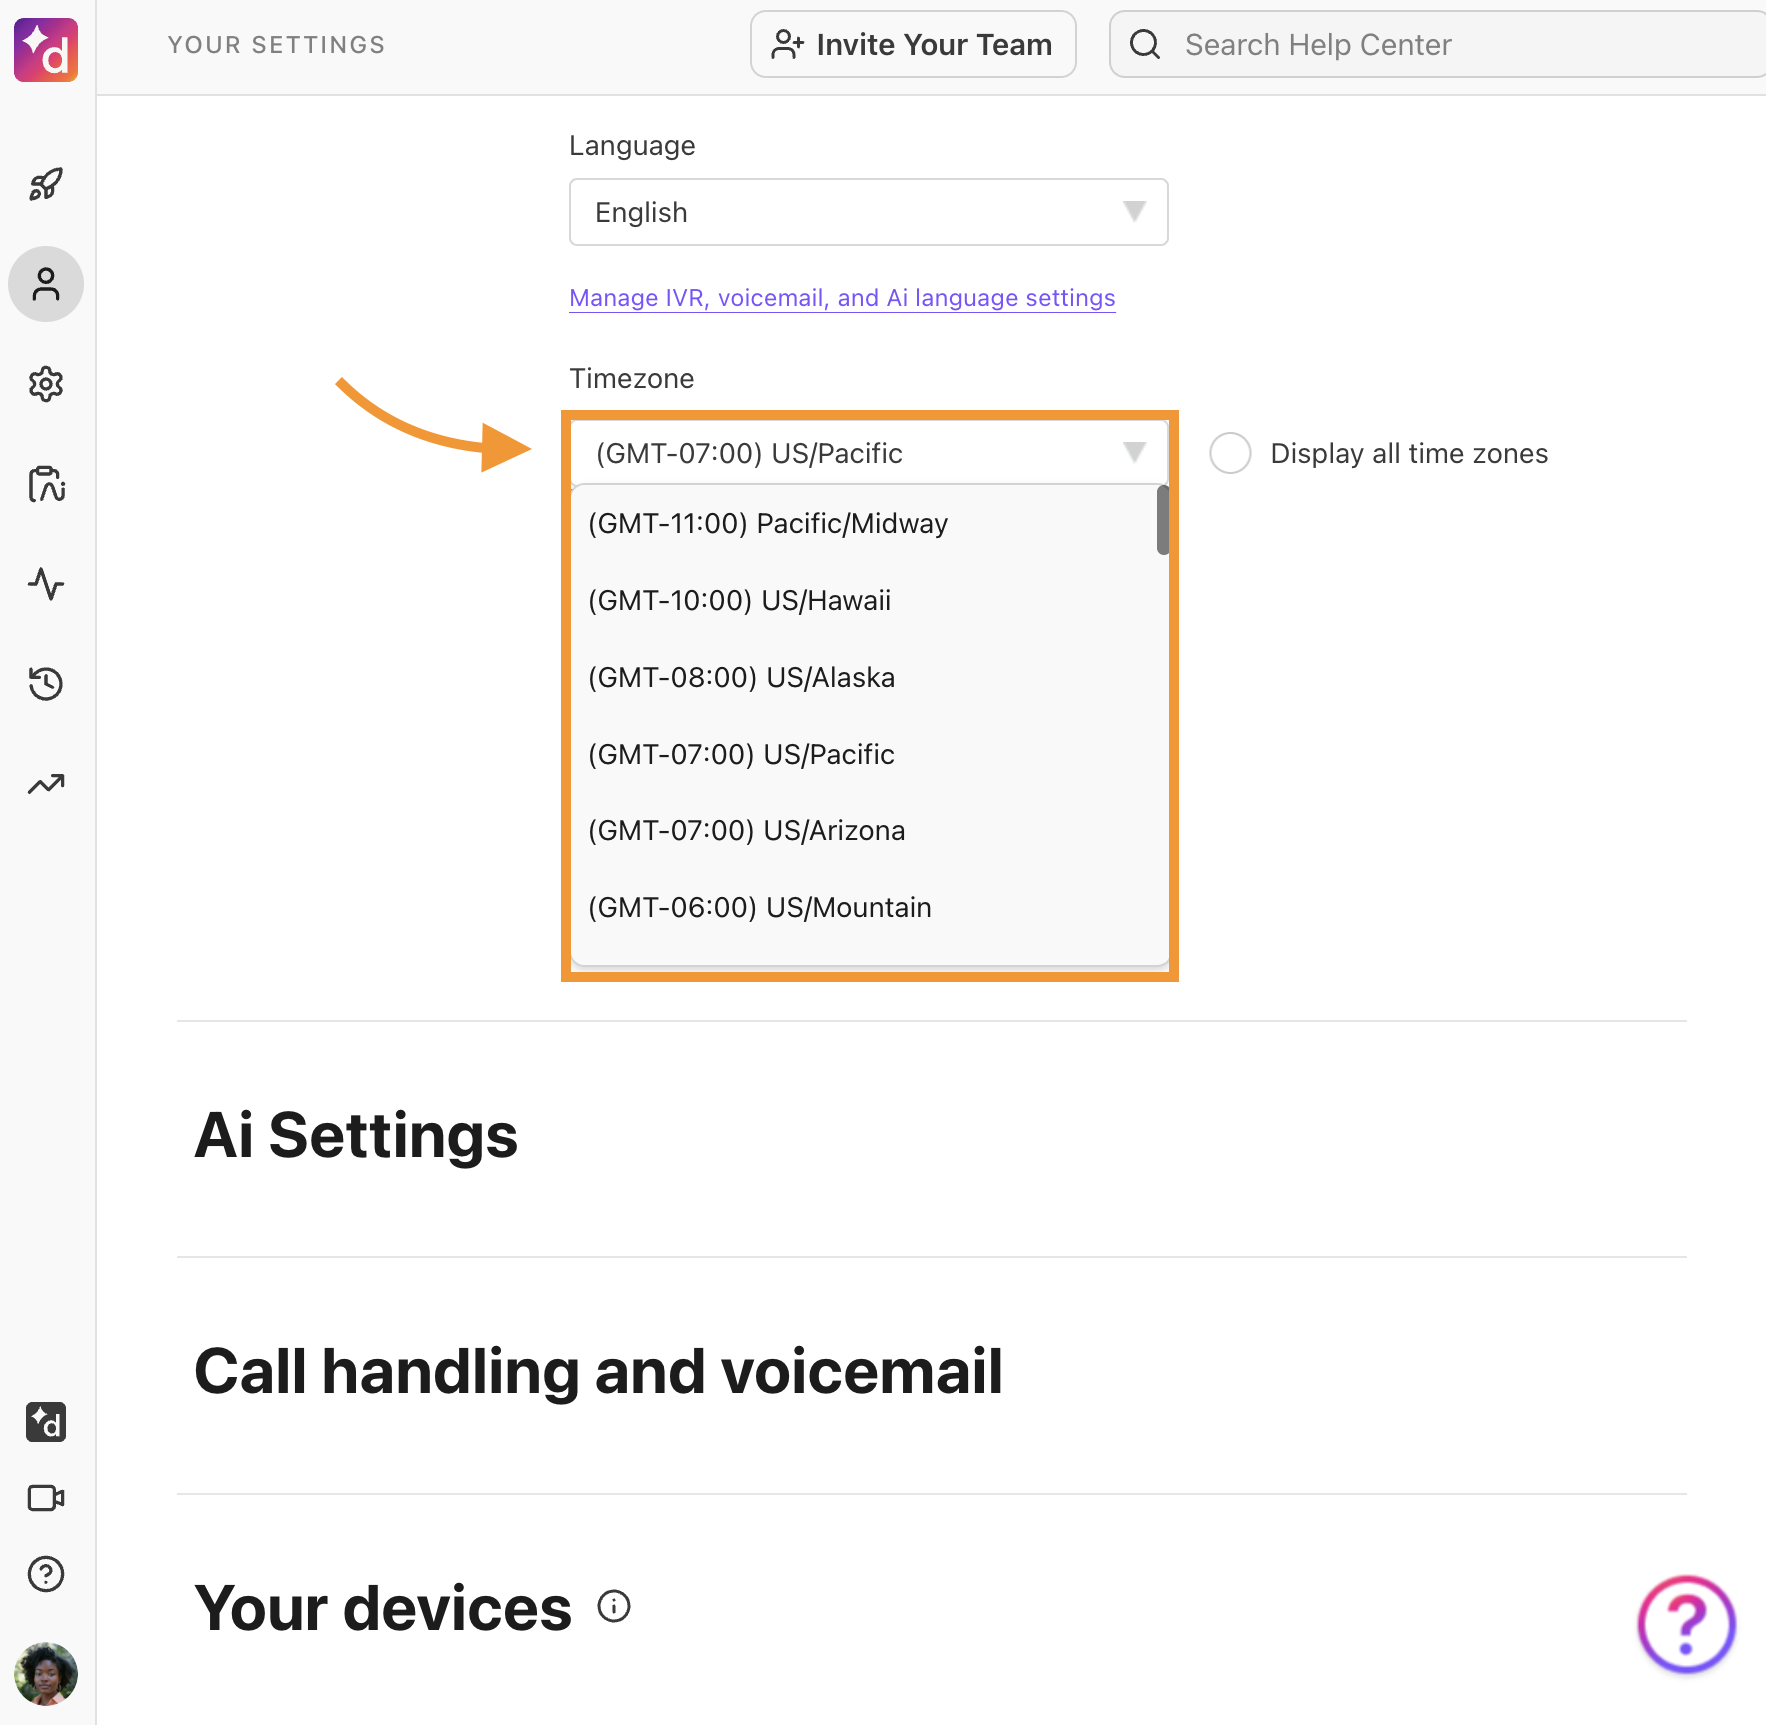
Timezone
Your Dialpad timezone is set to Pacific Standard Time (PST) by default, so don't forget to change it if you’re located in a different region.
To change the timezone, simply select a different option from the drop-down menu. Dialpad will update automatically.
Tip
If you don't see your timezone listed, check Display all timezones to see more options.
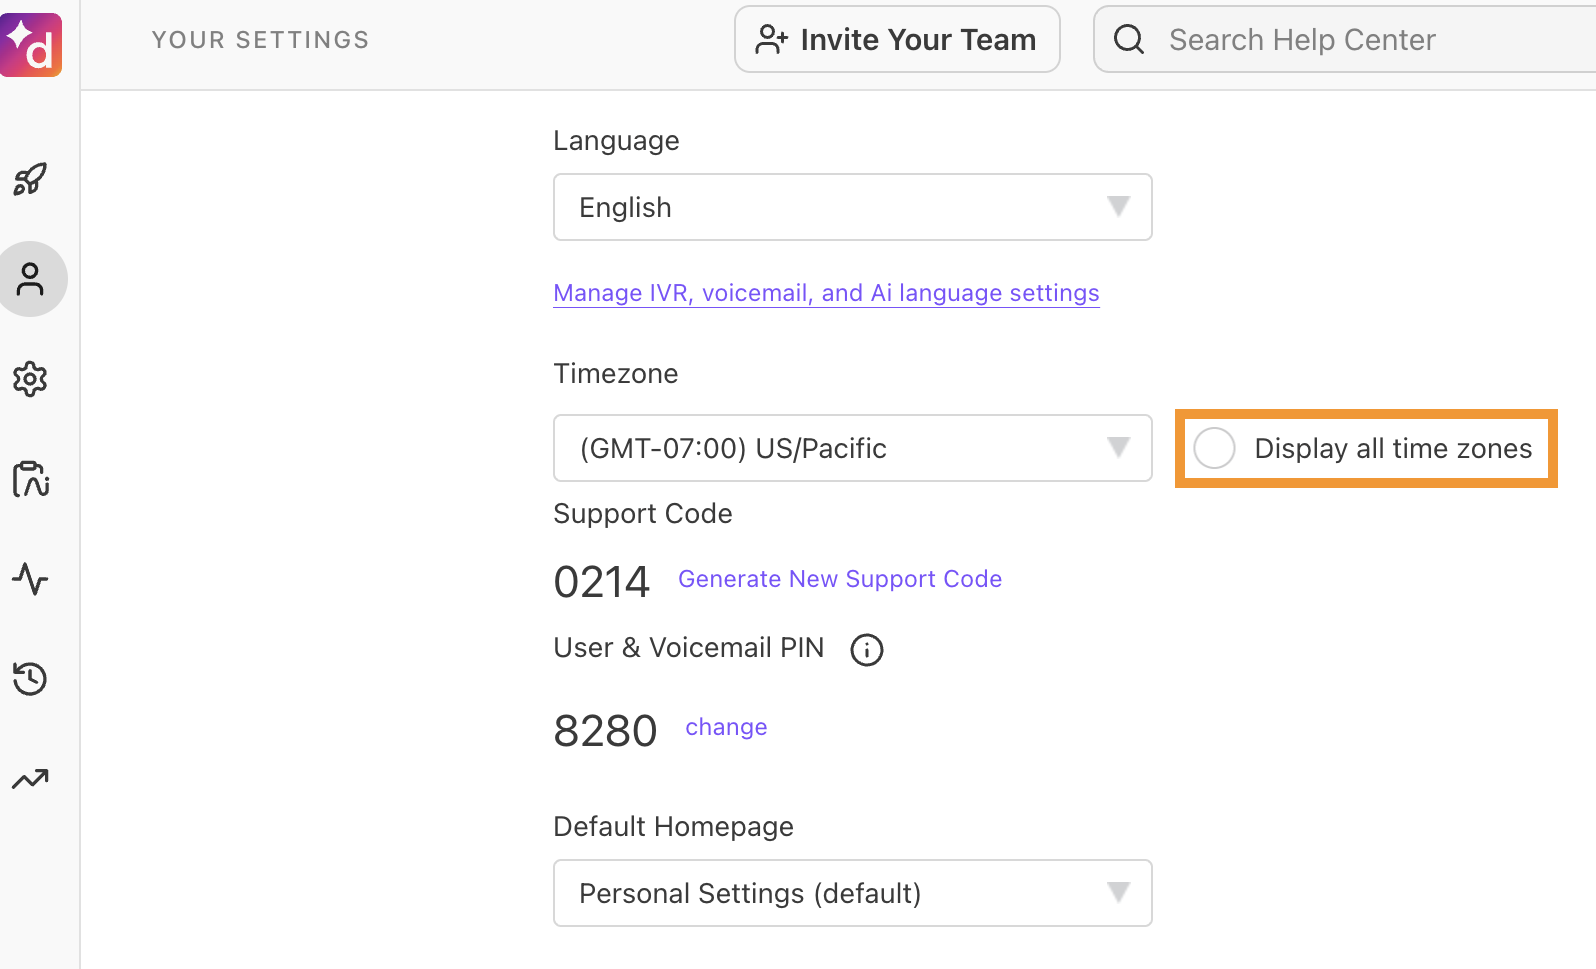
Your timezone appears in the Local time section of your Contact information.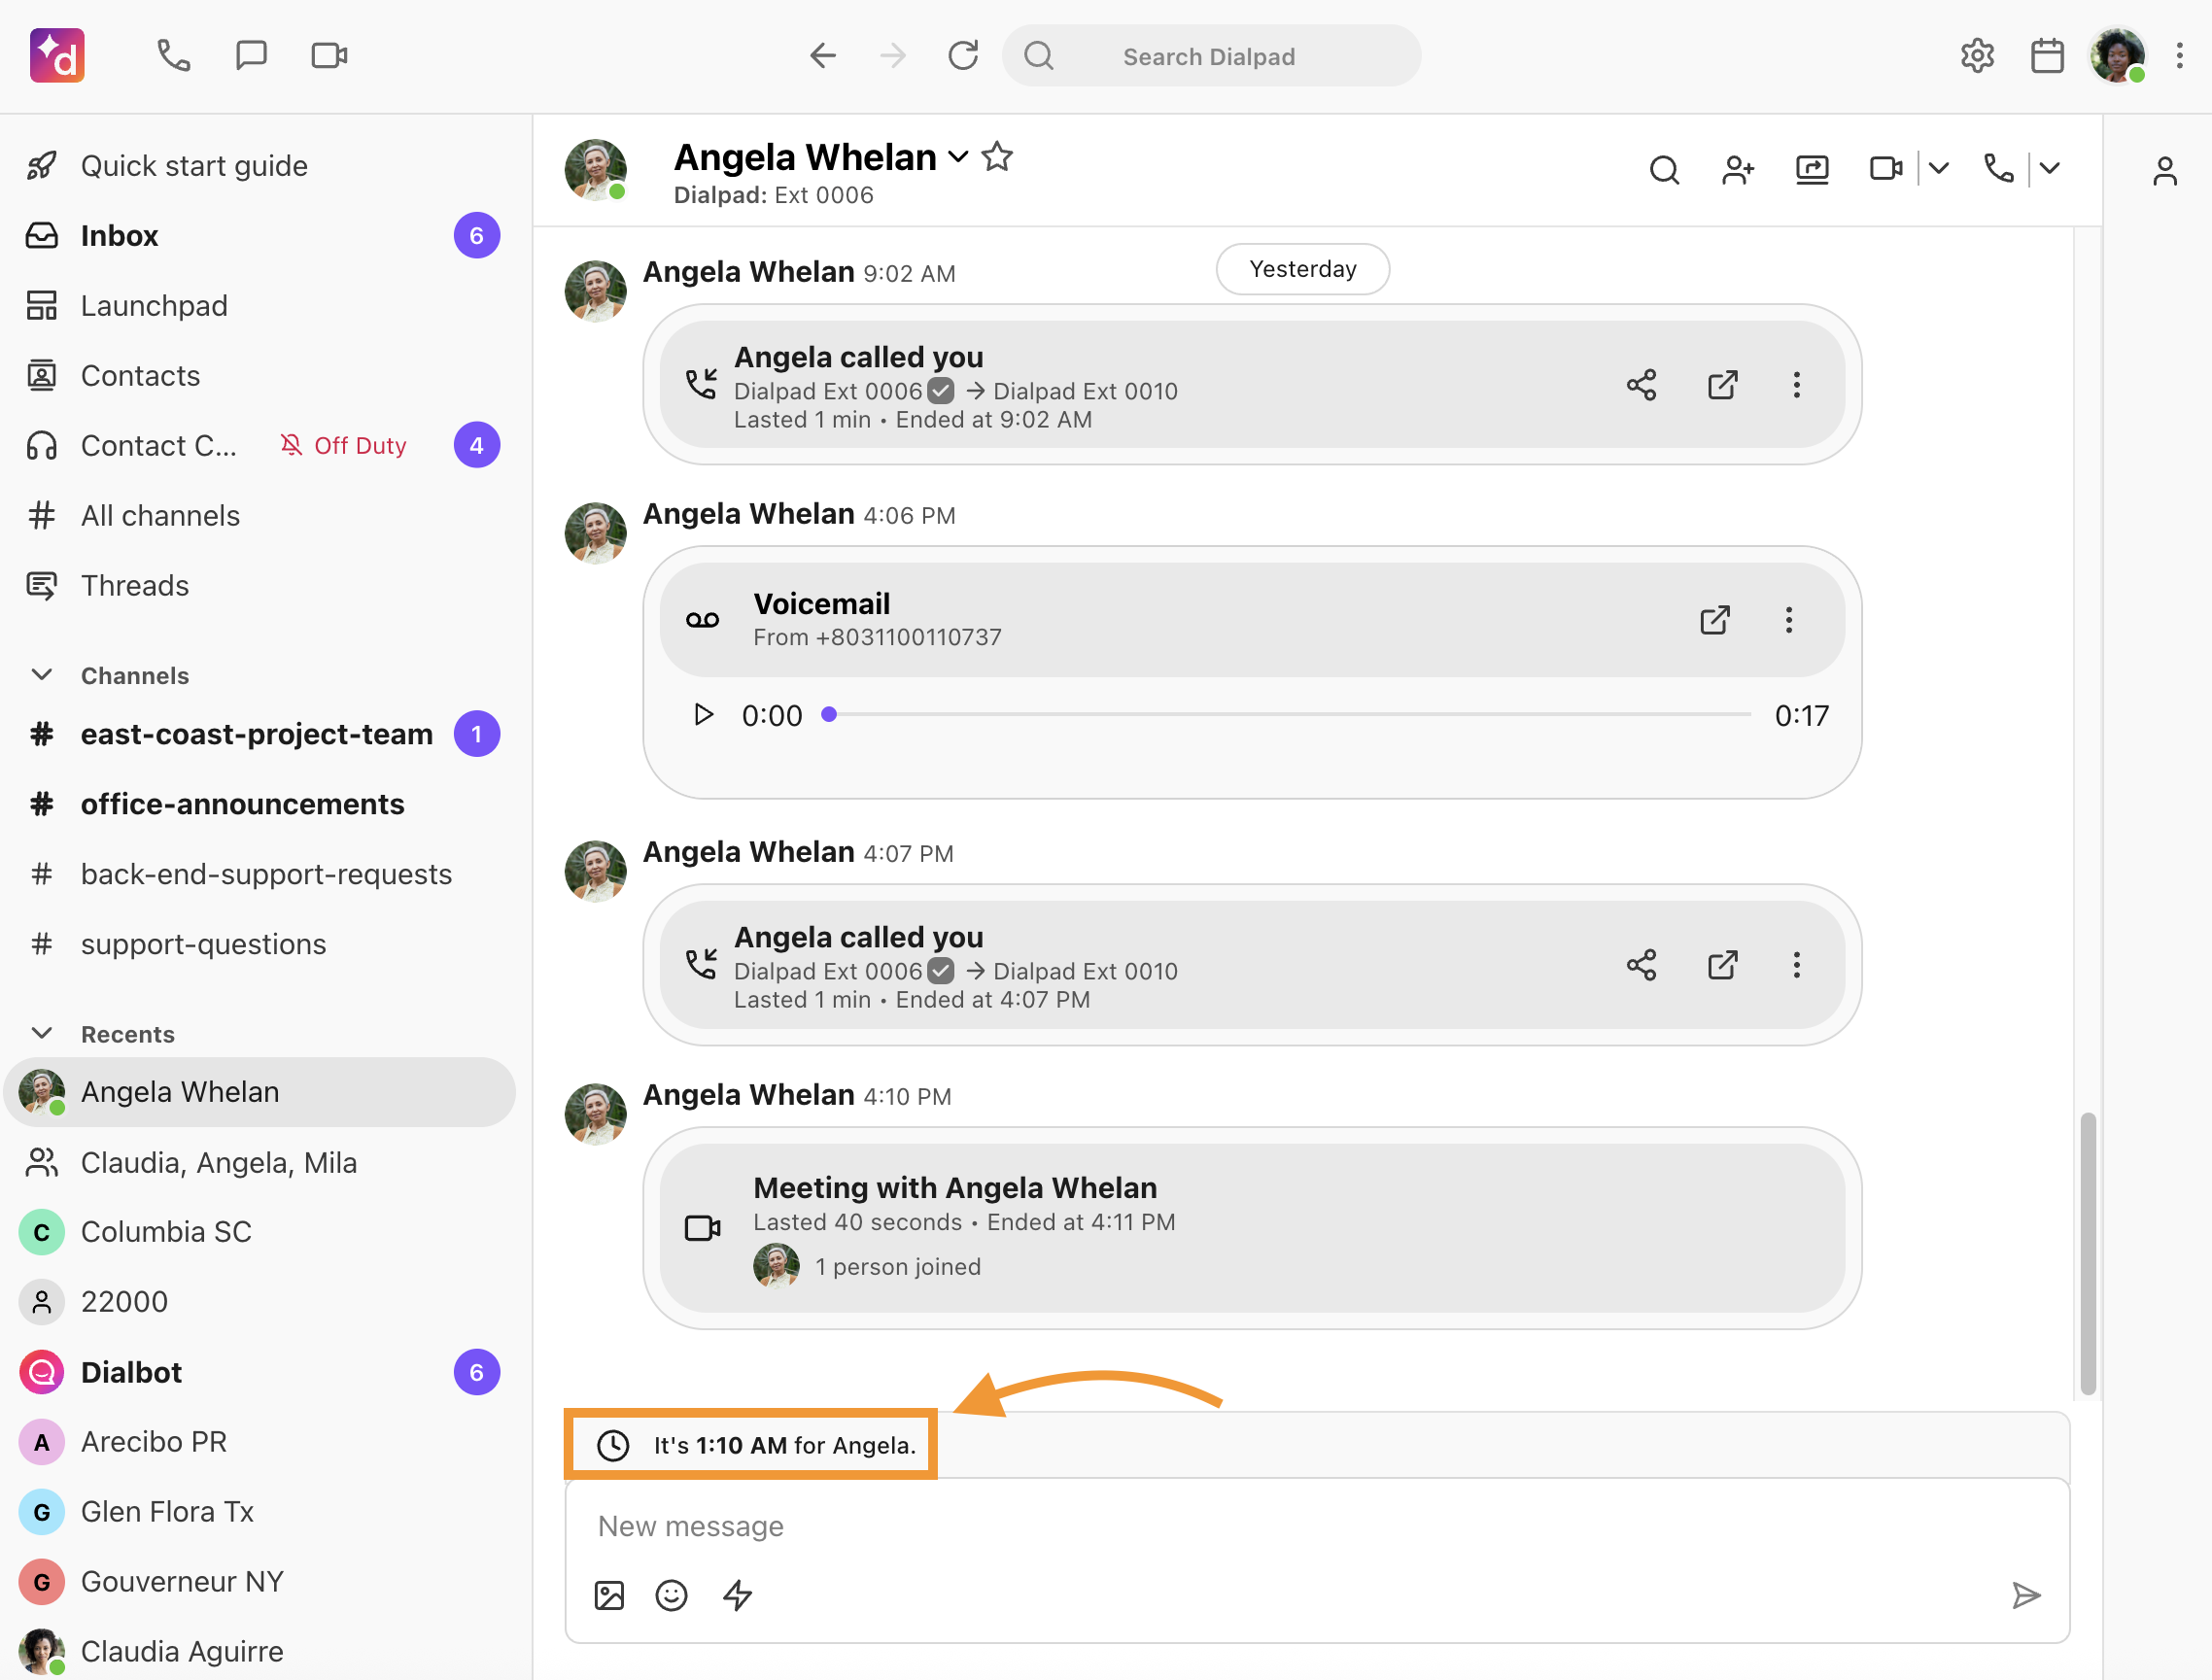
If you haven’t set your Personal Working Hours, and it's between 7 PM and 8 AM, when a teammate writes you a Dialpad message, they’ll see a notification letting them know what time it is for you.
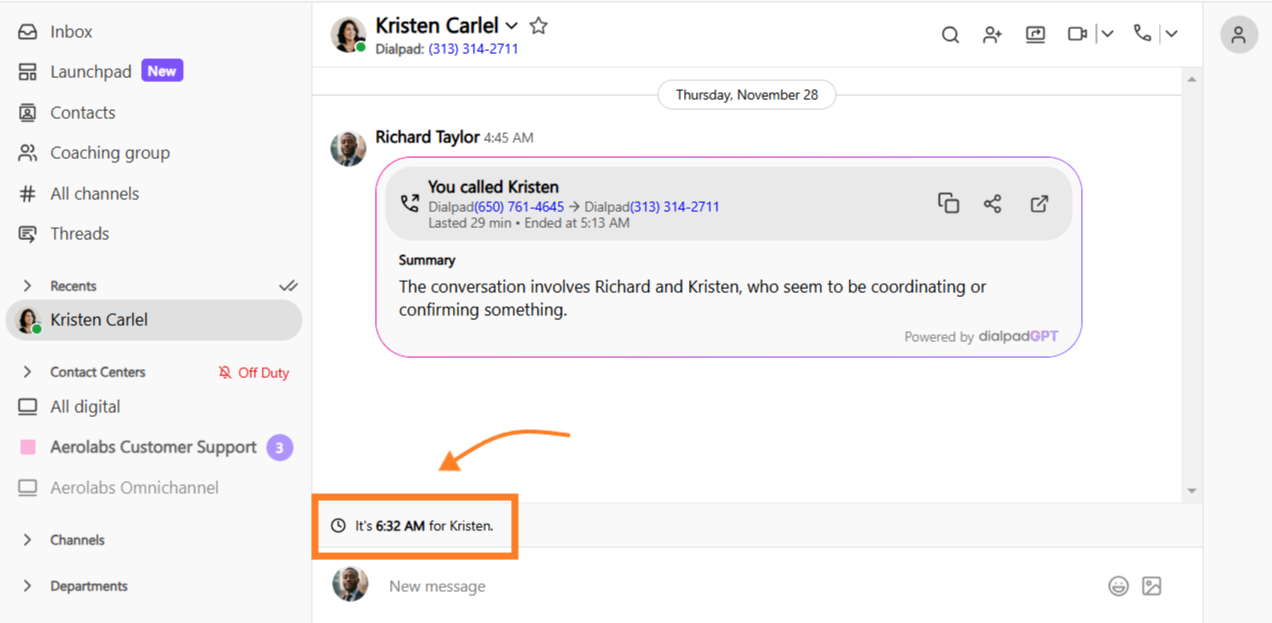
Note
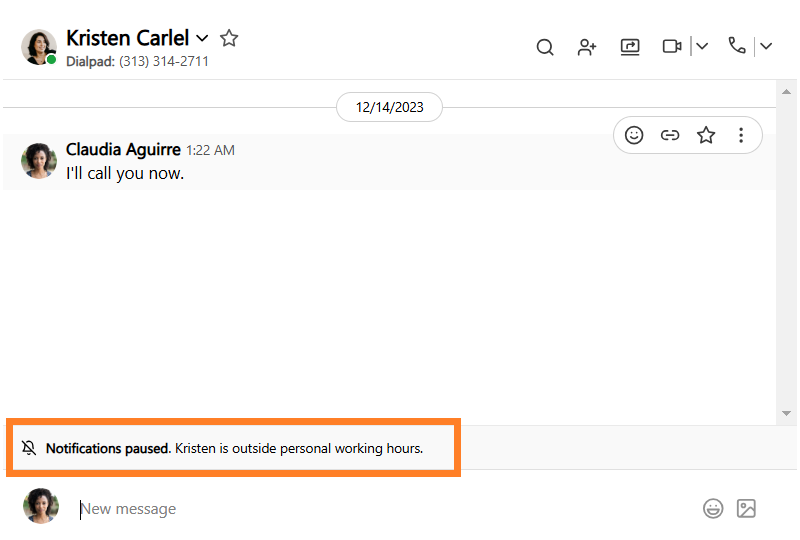
If the recipient has set their Personal Working Hours, you’ll see a notification letting you know that it is outside of their working hours and that their notifications are paused.
User & voicemail PIN
Dialpad provides an auto-generated PIN that users can change. This PIN is required for actions like checking voicemails, recording a voicemail greeting, and toggling Do Not Disturb mode.
To change your PIN, select change, then enter your new PIN and select Save.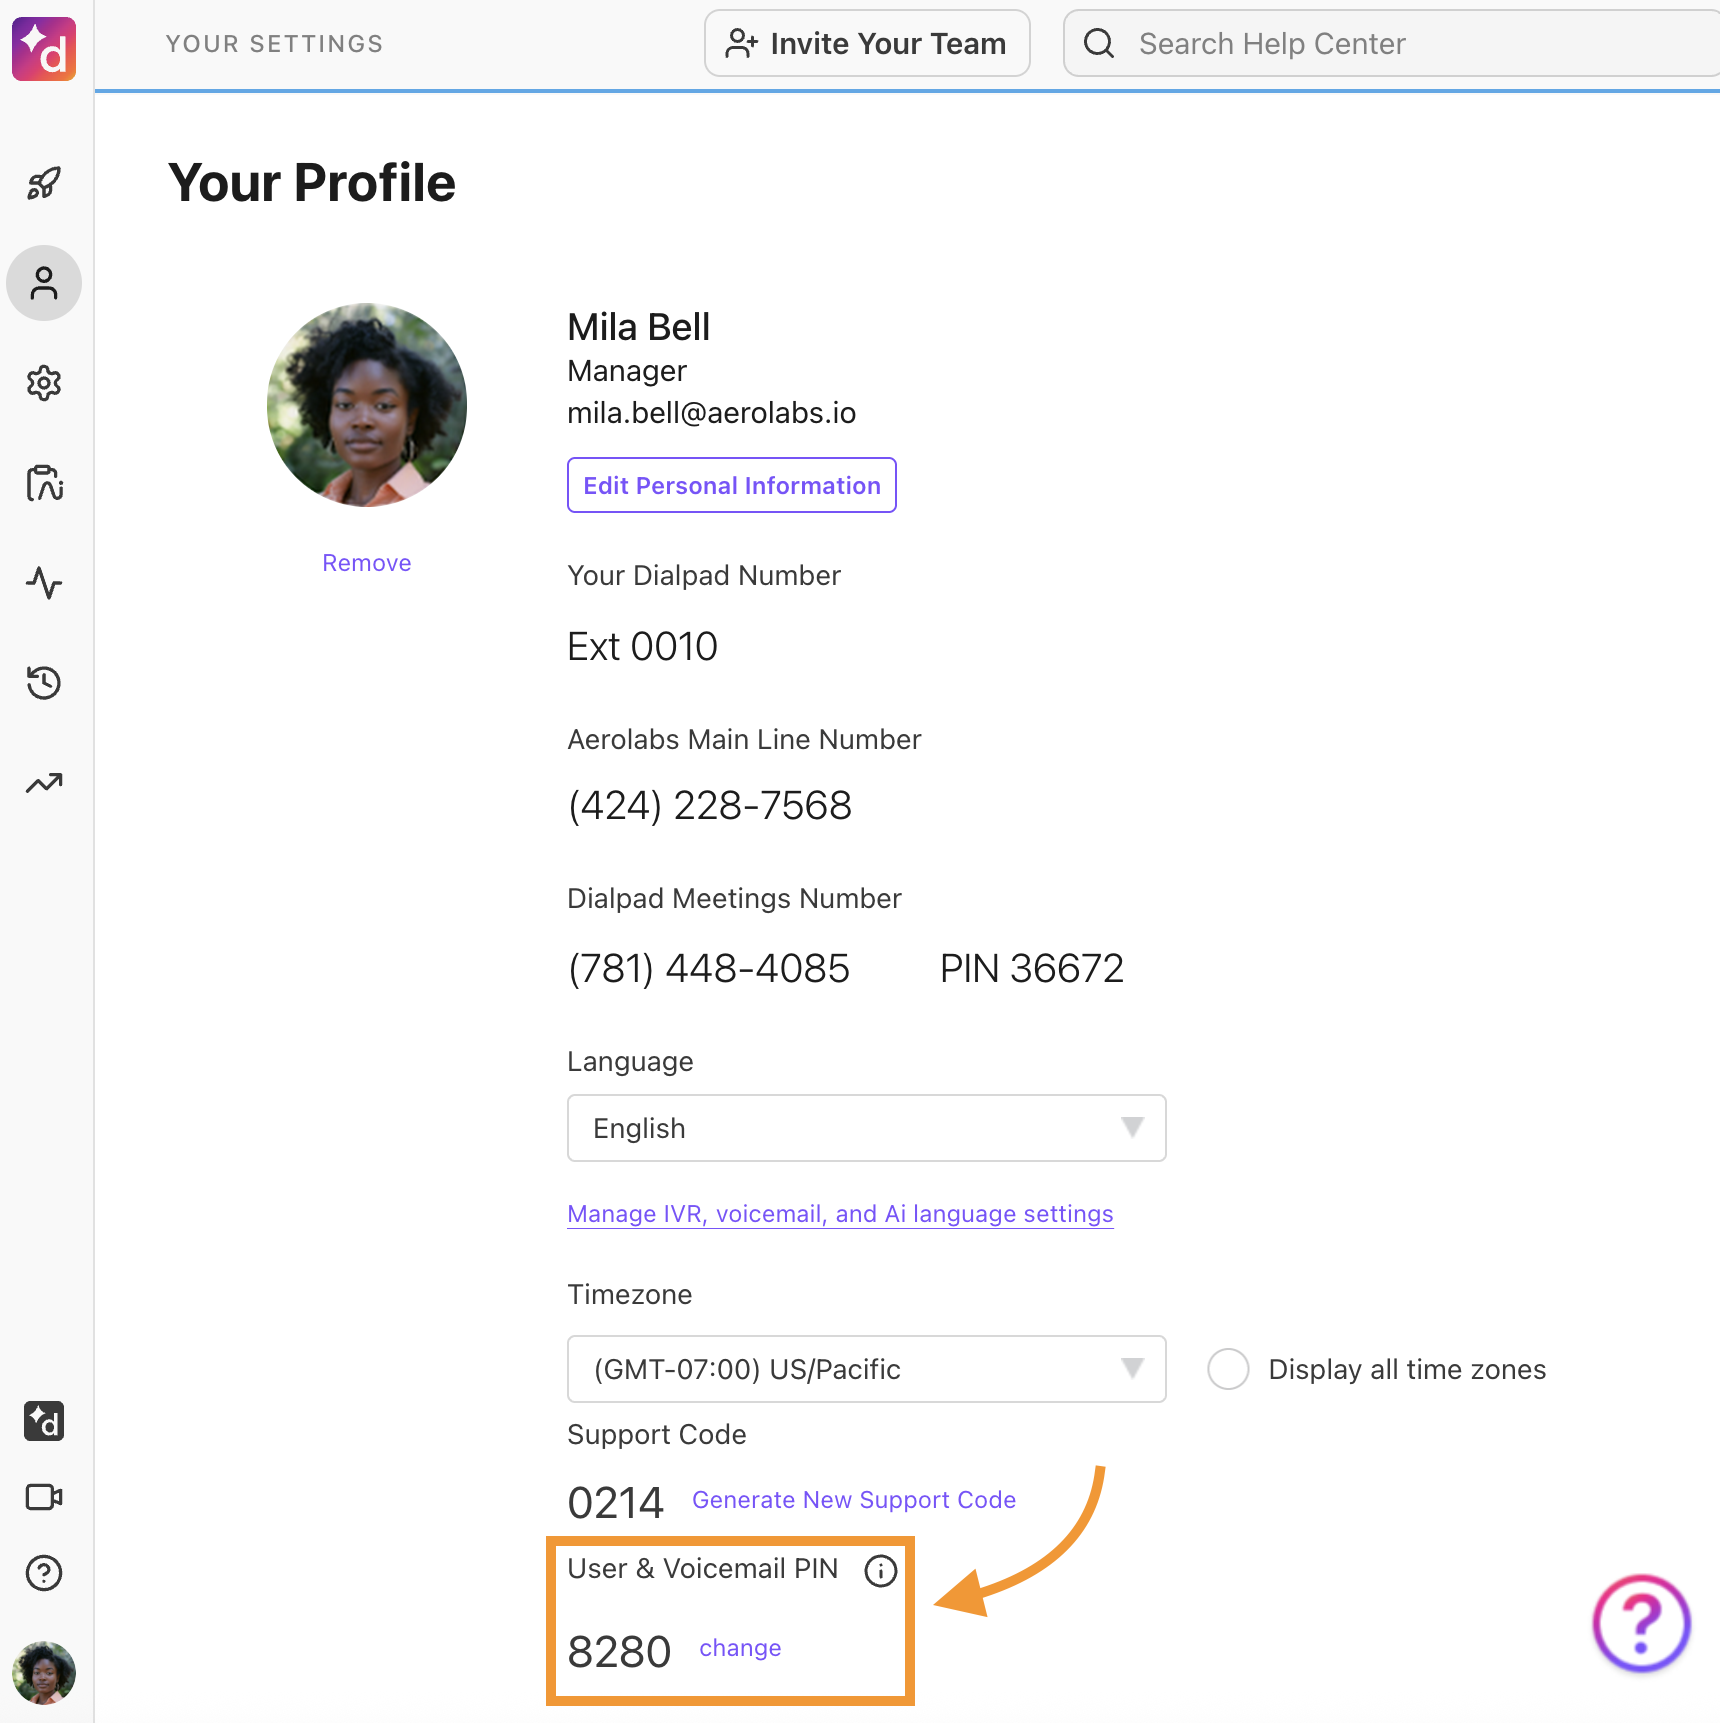
Voicemail drop
When enabled, Voicemail Drop plays a pre-recorded message to leave a voicemail on an outbound call.
Who can use Voicemail Drop
Voicemail drop is provided for Dialpad Sell users on an Advanced or Premium plan.
It's also offered as a paid add-on for Contact Center users, and Essential Dialpad Sell users.
To turn on Voicemail Drop, check the box beside Enable Voicemail Drop. 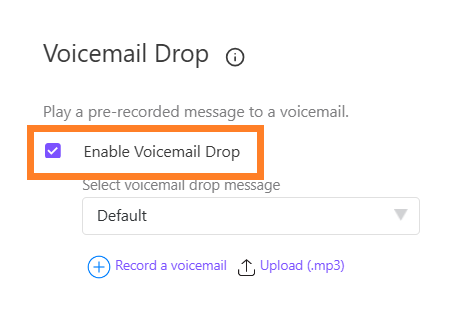
Dialpad lets you choose between the default greeting or a custom greeting set by you. If you choose a custom greeting, you can upload an MP3 file or record audio from within Dialpad.
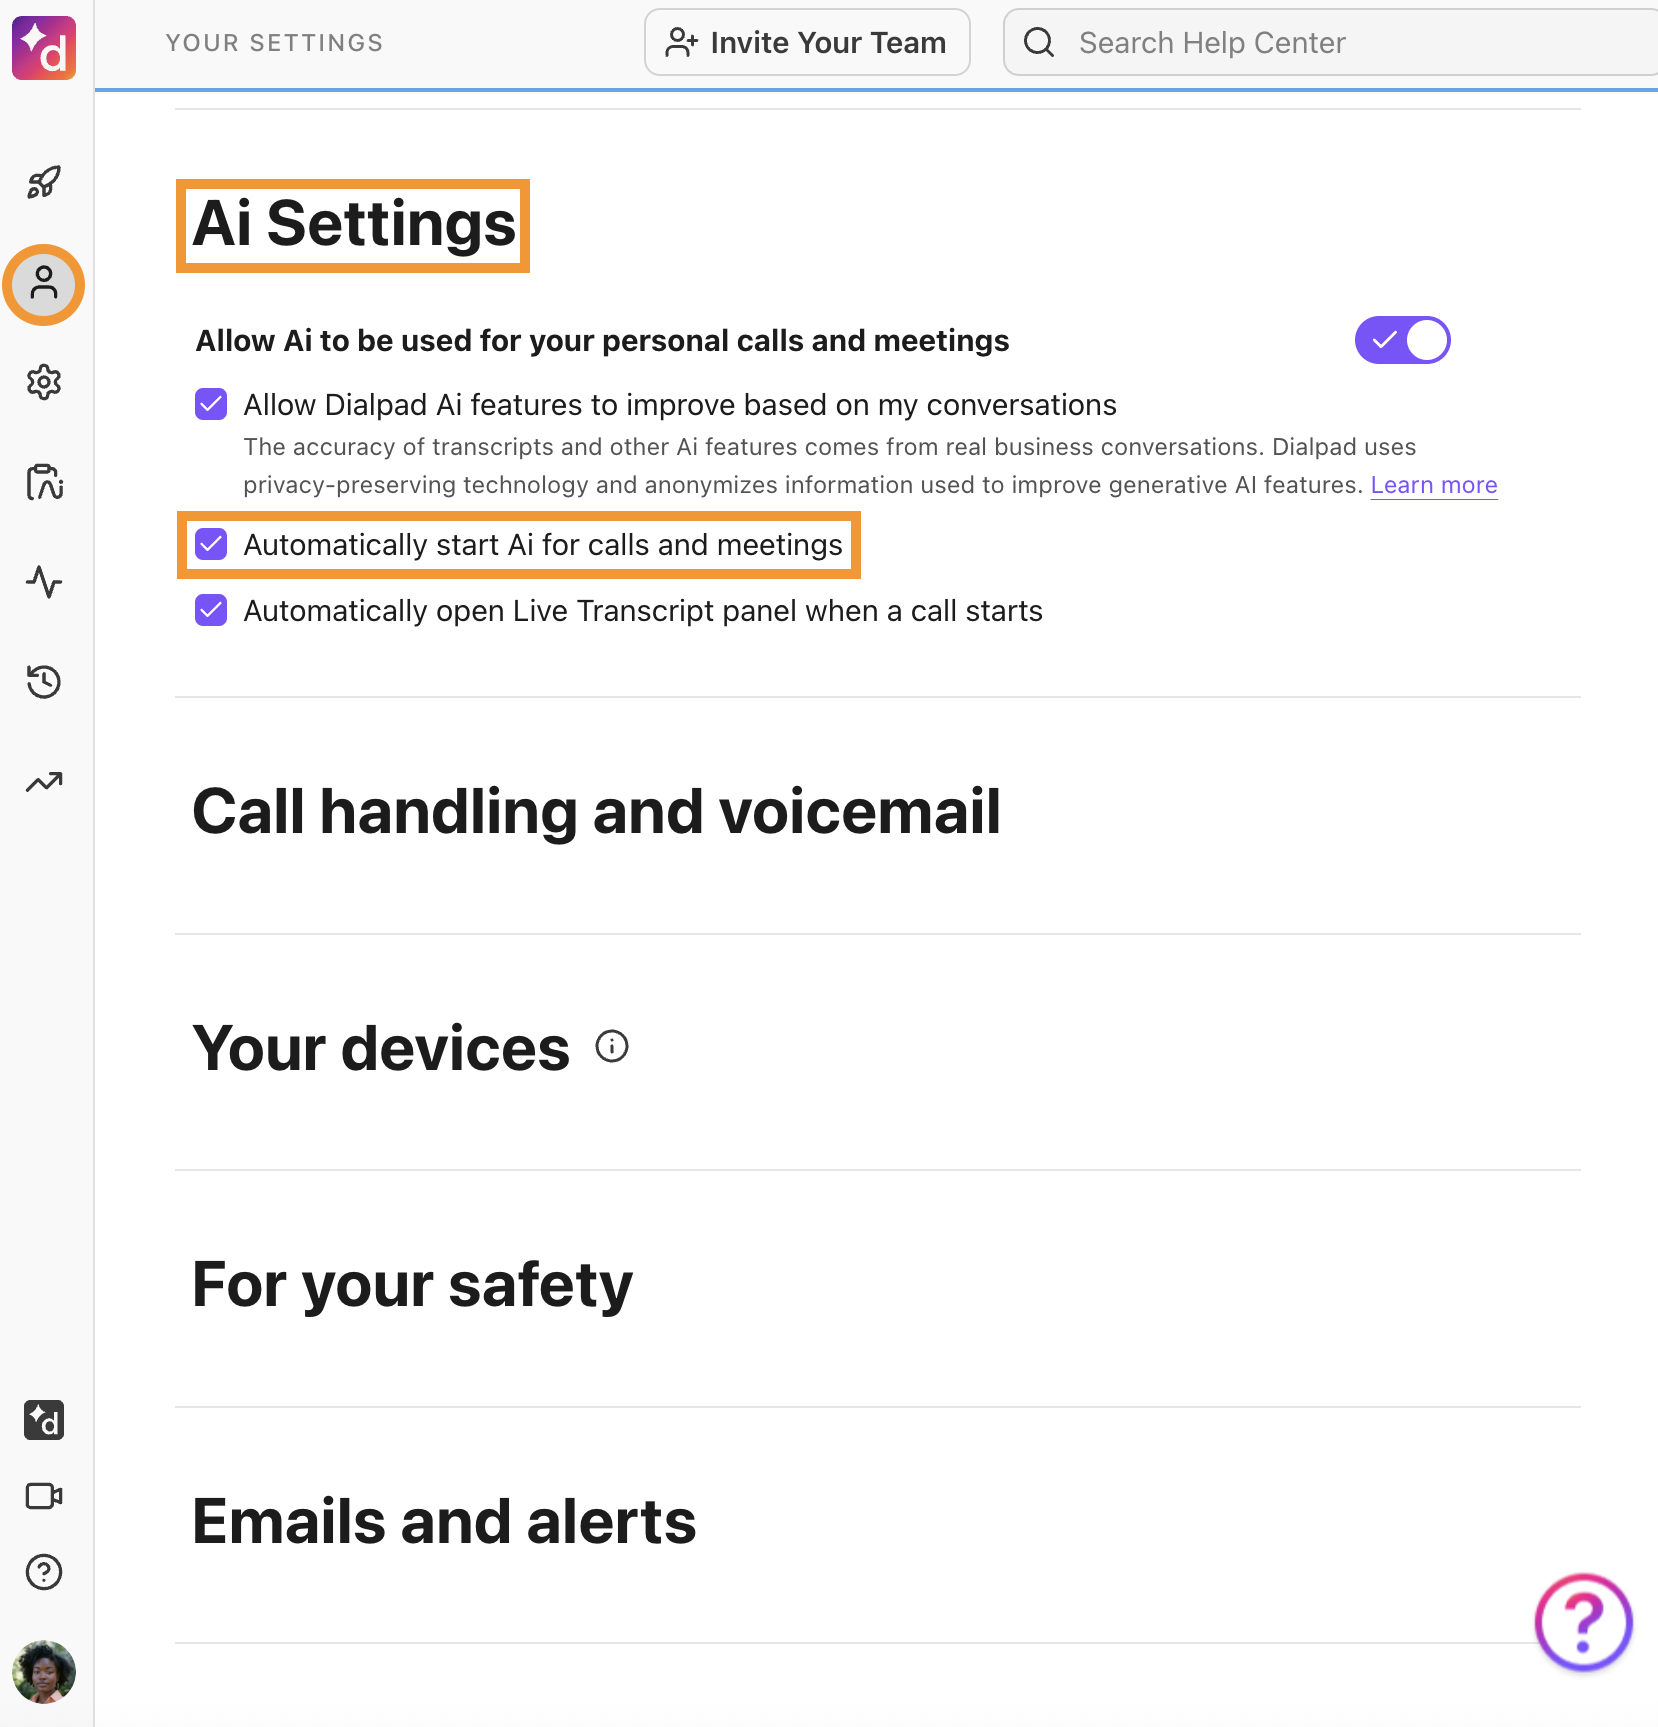
Dialpad AI
Dialpad AI can transcribe your calls and meetings in real time, track keywords that come up in conversations, detect customer sentiment, and more!
To turn on AI, navigate to Dialpad AI, then check the box beside Automatically start AI for calls and meetings.
Note
Check here to see which language options are available in your country.
Call handling & voicemail
In the Call Handling & Voicemail section, adjust your voicemail settings, manage spam prevention, and enable remote screen control.
You can also choose to open a conversation automatically during a call, and turn automatic call recording on or off (if allowed by your Office Administrator).
Select Show advanced options to see more customizable settings. 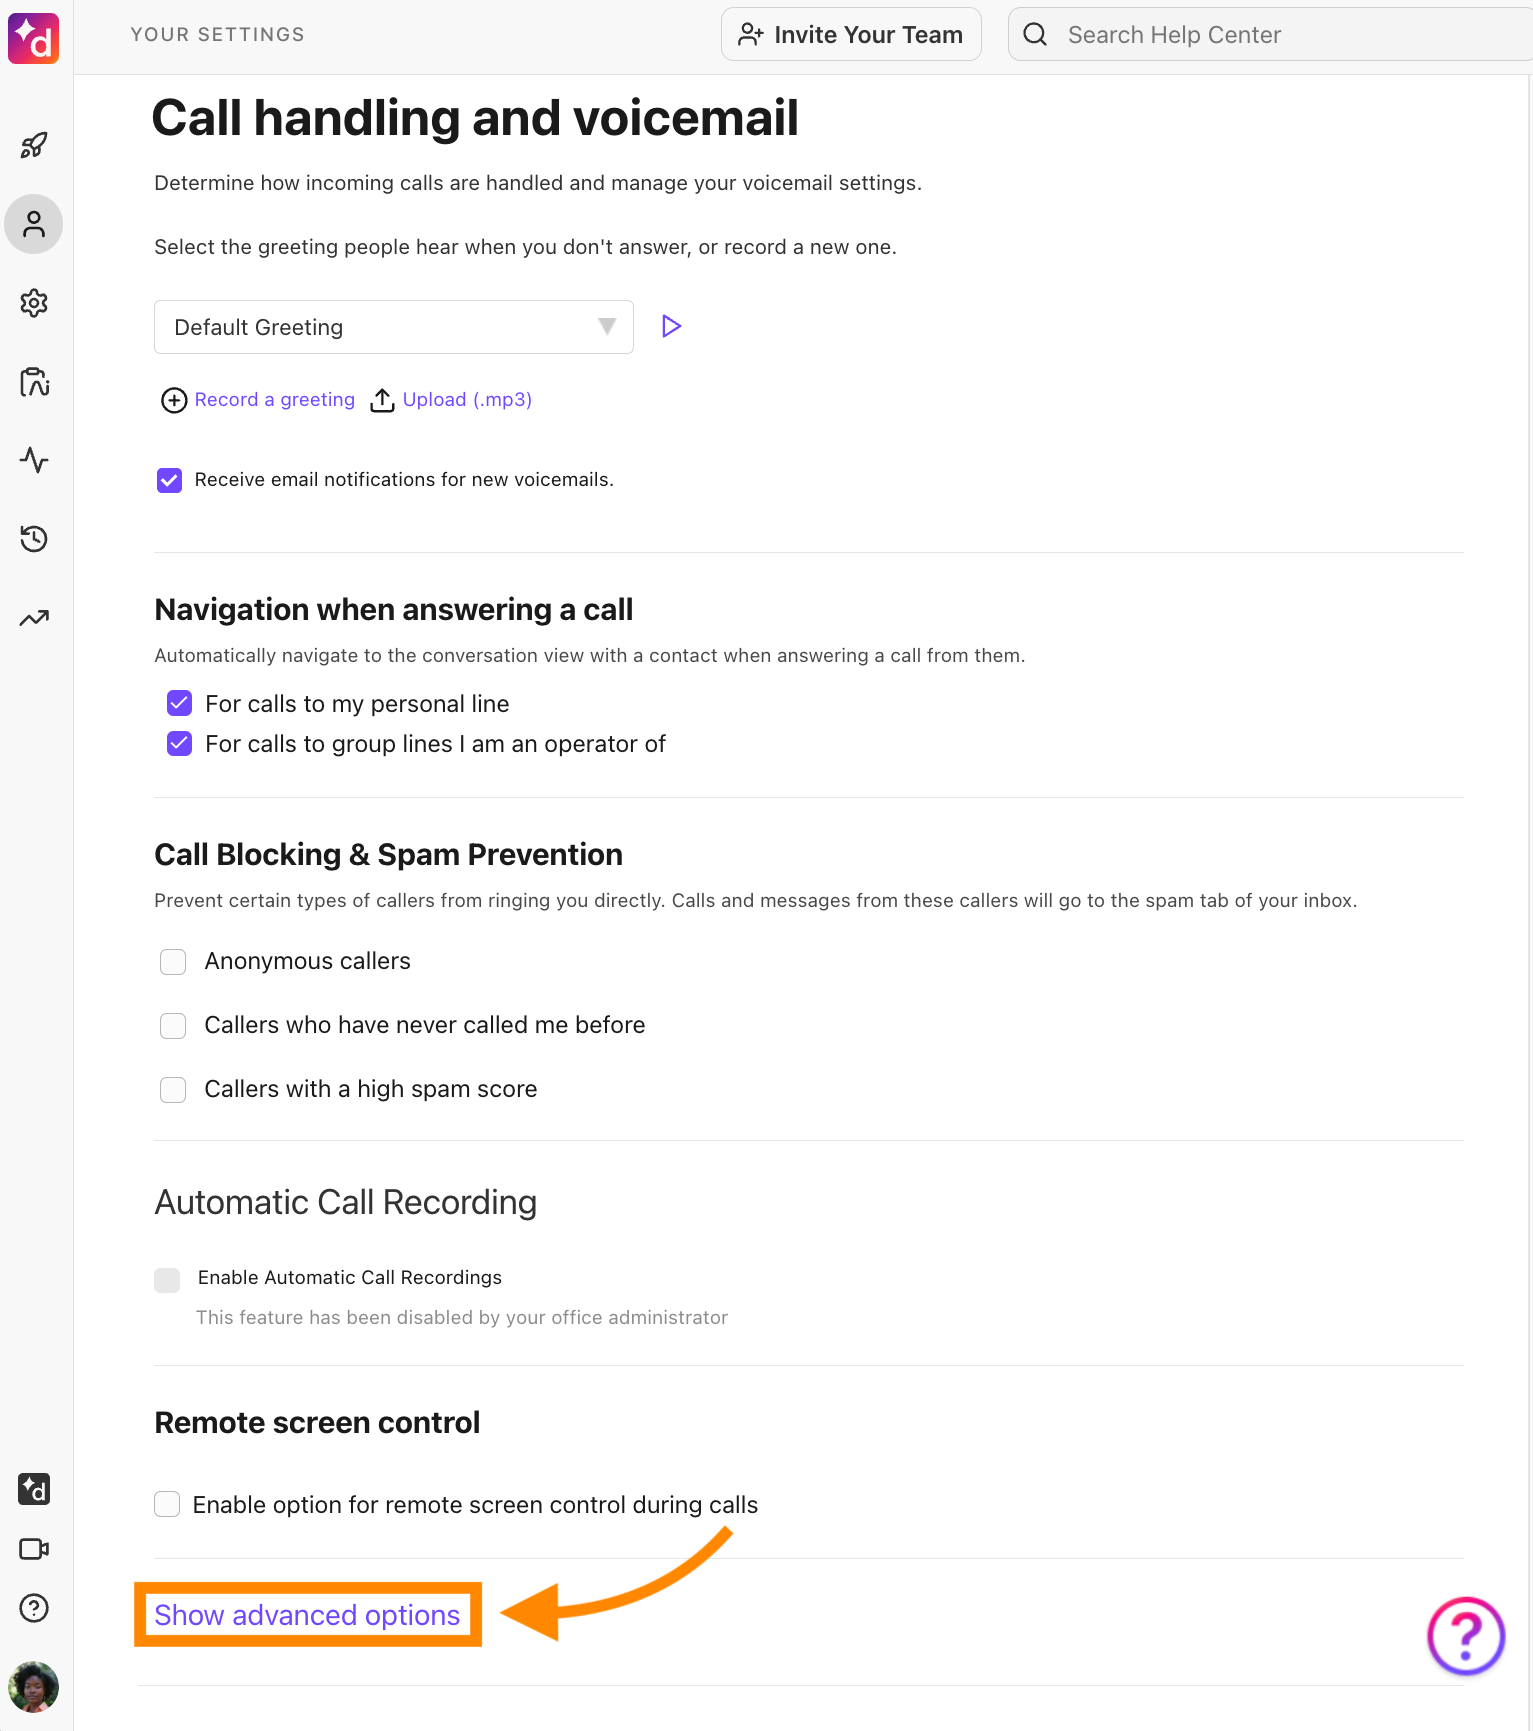
Note
Remote Access Control is currently part of our Early Adopter Program.
Reach out to your Company Admin to get it enabled.
Coaching team greeting
Allow trainees to use their own personalized call recording greeting for Coaching Team calls. They can record a greeting or upload a custom audio file.
.png)
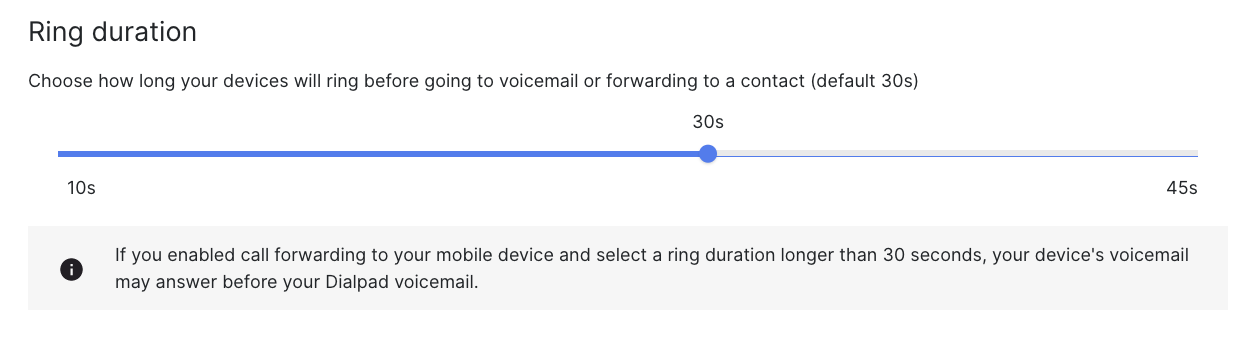
Ring duration
Set a Ring duration to determine how long your devices will ring.
To set the ring duration, adjust the slider to choose the desired length (in seconds) for how long the call should ring.
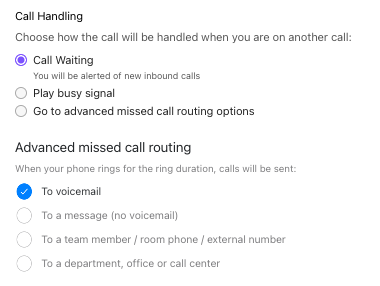
Call handling
The Call Handling section lets you determine how a call is handled when you’re on another call.
You can choose the following options:
Call Waiting: The caller will wait until you’re free and you’ll receive an on-screen alert.
Play Busy Signal: The callers will wait until you’re free. You won't receive an alert and the caller will hear a busy signal.
Go to Advanced Routing Options: The caller will be sent directly to voicemail, a message, another team member or room phone, a Department, or an automated response menu.
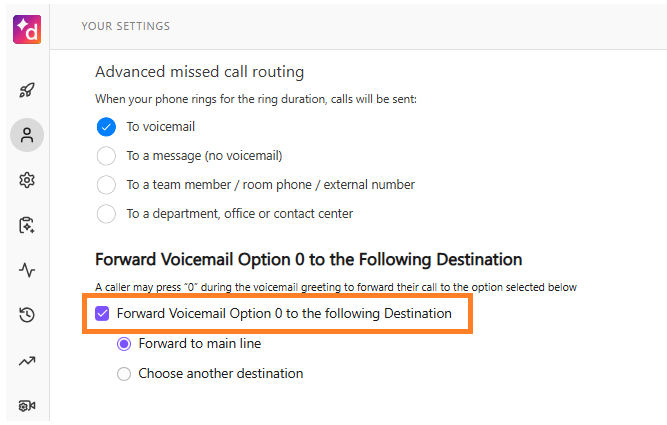
Press 0 to skip voicemail option
Give callers the option to press 0 during your voicemail greeting and route them to another number, like your mainline or another shared line.
To turn on the skip voicemail option, select Call handling and voicemail.
Navigate to Forward Voicemail Option 0 to the Following Destination
Check the box beside Forward Voicemail Option 0 to the following Destination
Forward to main line
Choose another destination
Note
You can only select groups that you have visibility into or access to. To use a shared line as an option, you must be assigned as an operator on that shared line.
Additional call handling & voicemail advanced options
The advanced options section lets you adjust the following settings:
Call queuing (Enterprise only)
When call queuing is enabled, any subsequent callers (after the first) will be placed in the queue, and users will not receive notifications for these additional callers.
Your devices
In the Your devices section, you'll see a list of connected devices and additional information such as forwarding number (if applicable), the date it was last connected, and if the device is set to ring.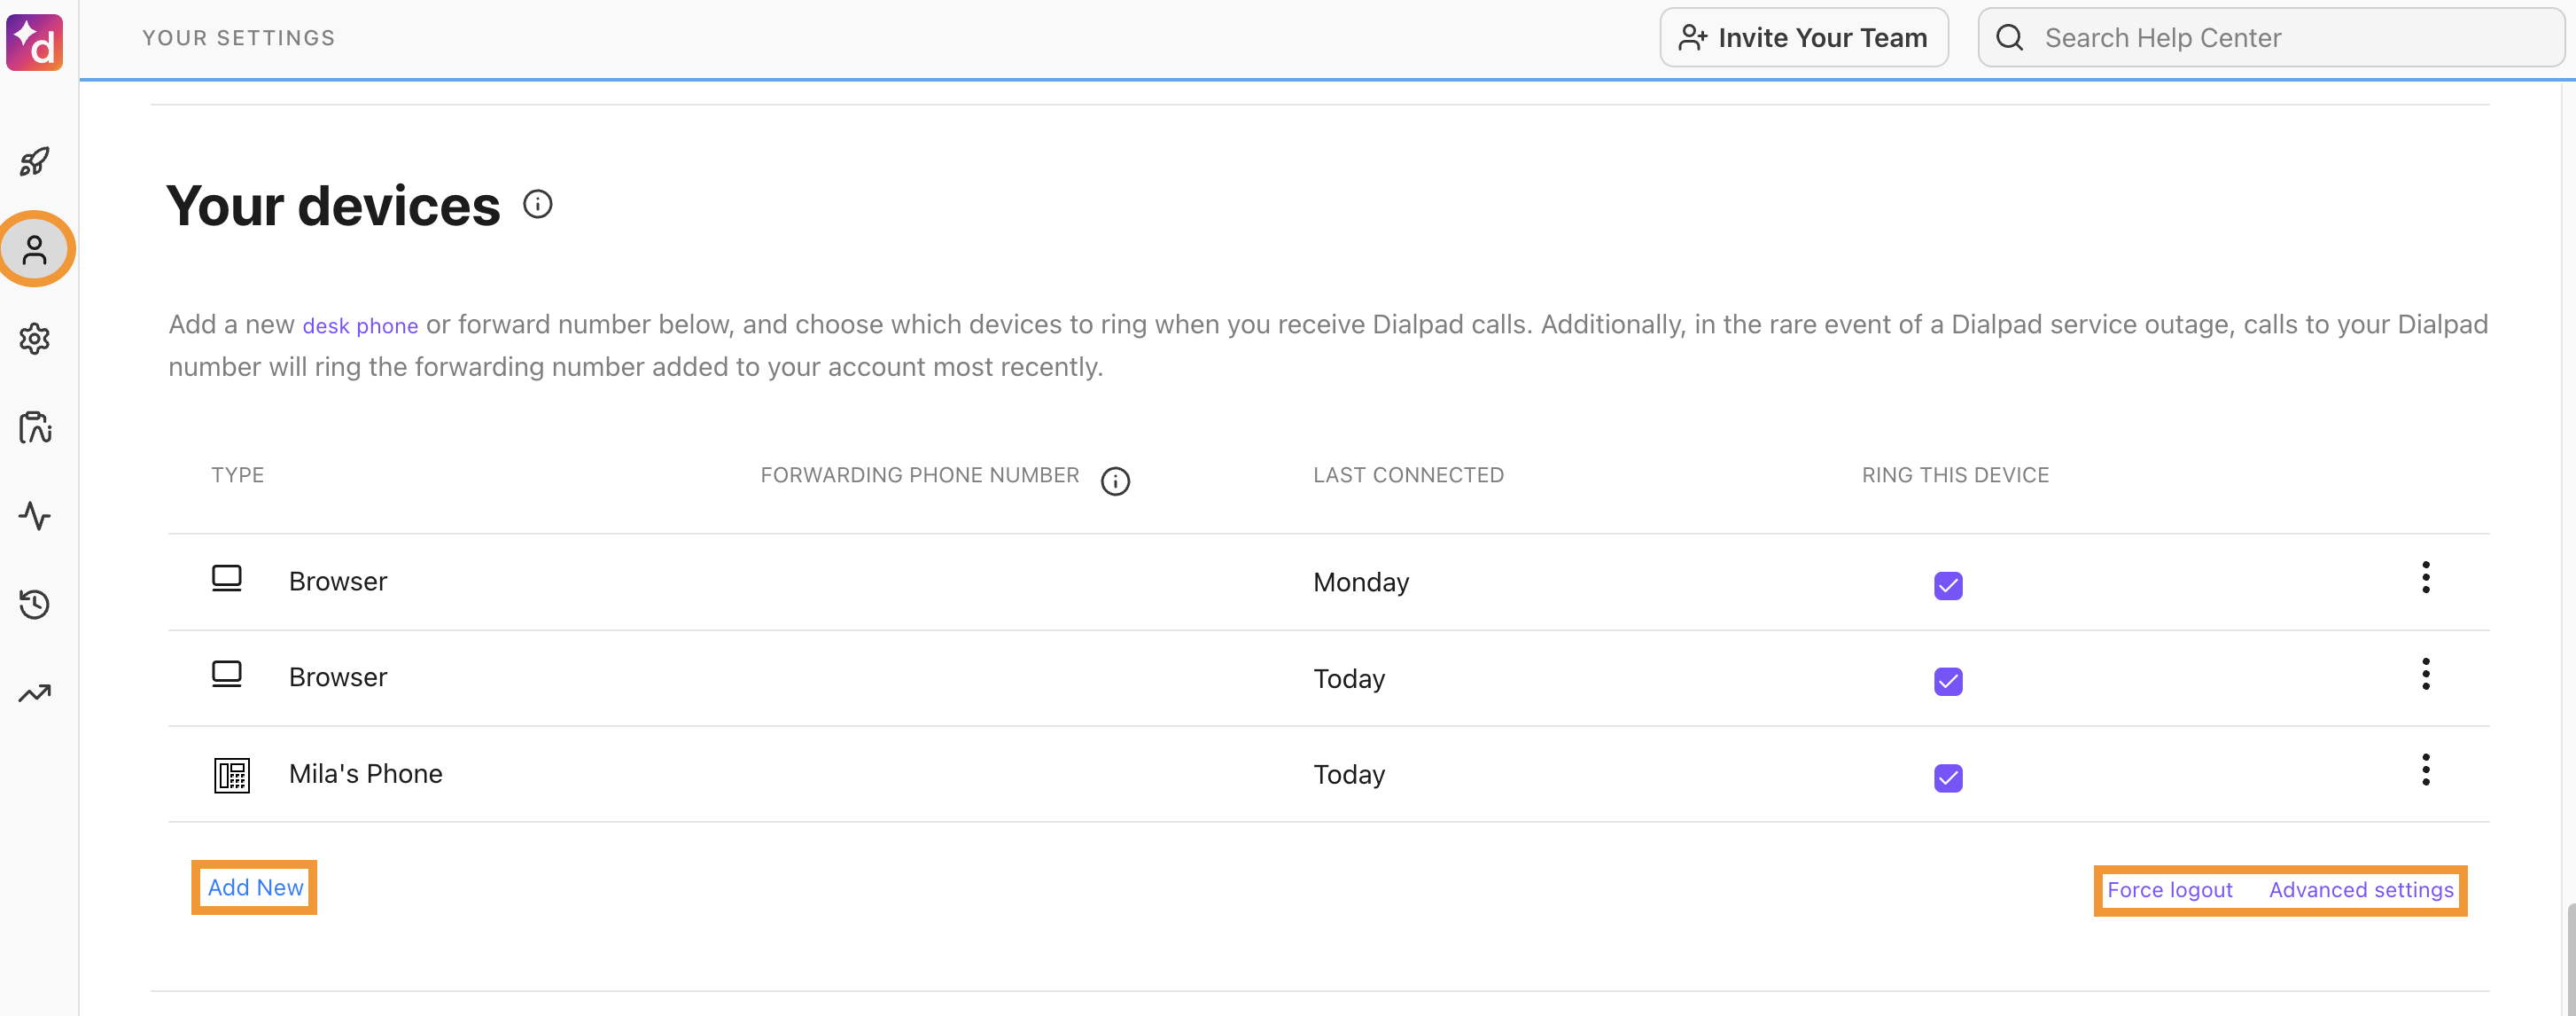
Select Add New to add a desk phone or forwarding number.
Select Force logout to remotely log out of your devices.
Select Advanced Settings to choose the caller ID you want to see when receiving an inbound call to a forwarding number, e.g. Dialpad calls forwarded to your mobile phone.
Note
If your admin has already added and set up a desk phone to your account, it will appear here.
Executive Assistant
The Executive Assistant section displays your Executive Assistant (EA) pairings.
Admins typically create EA pairings, but users can also request to be paired as either an Executive or an Assistant.
To request a pairing, select + Add a new Assistant and follow the prompts.
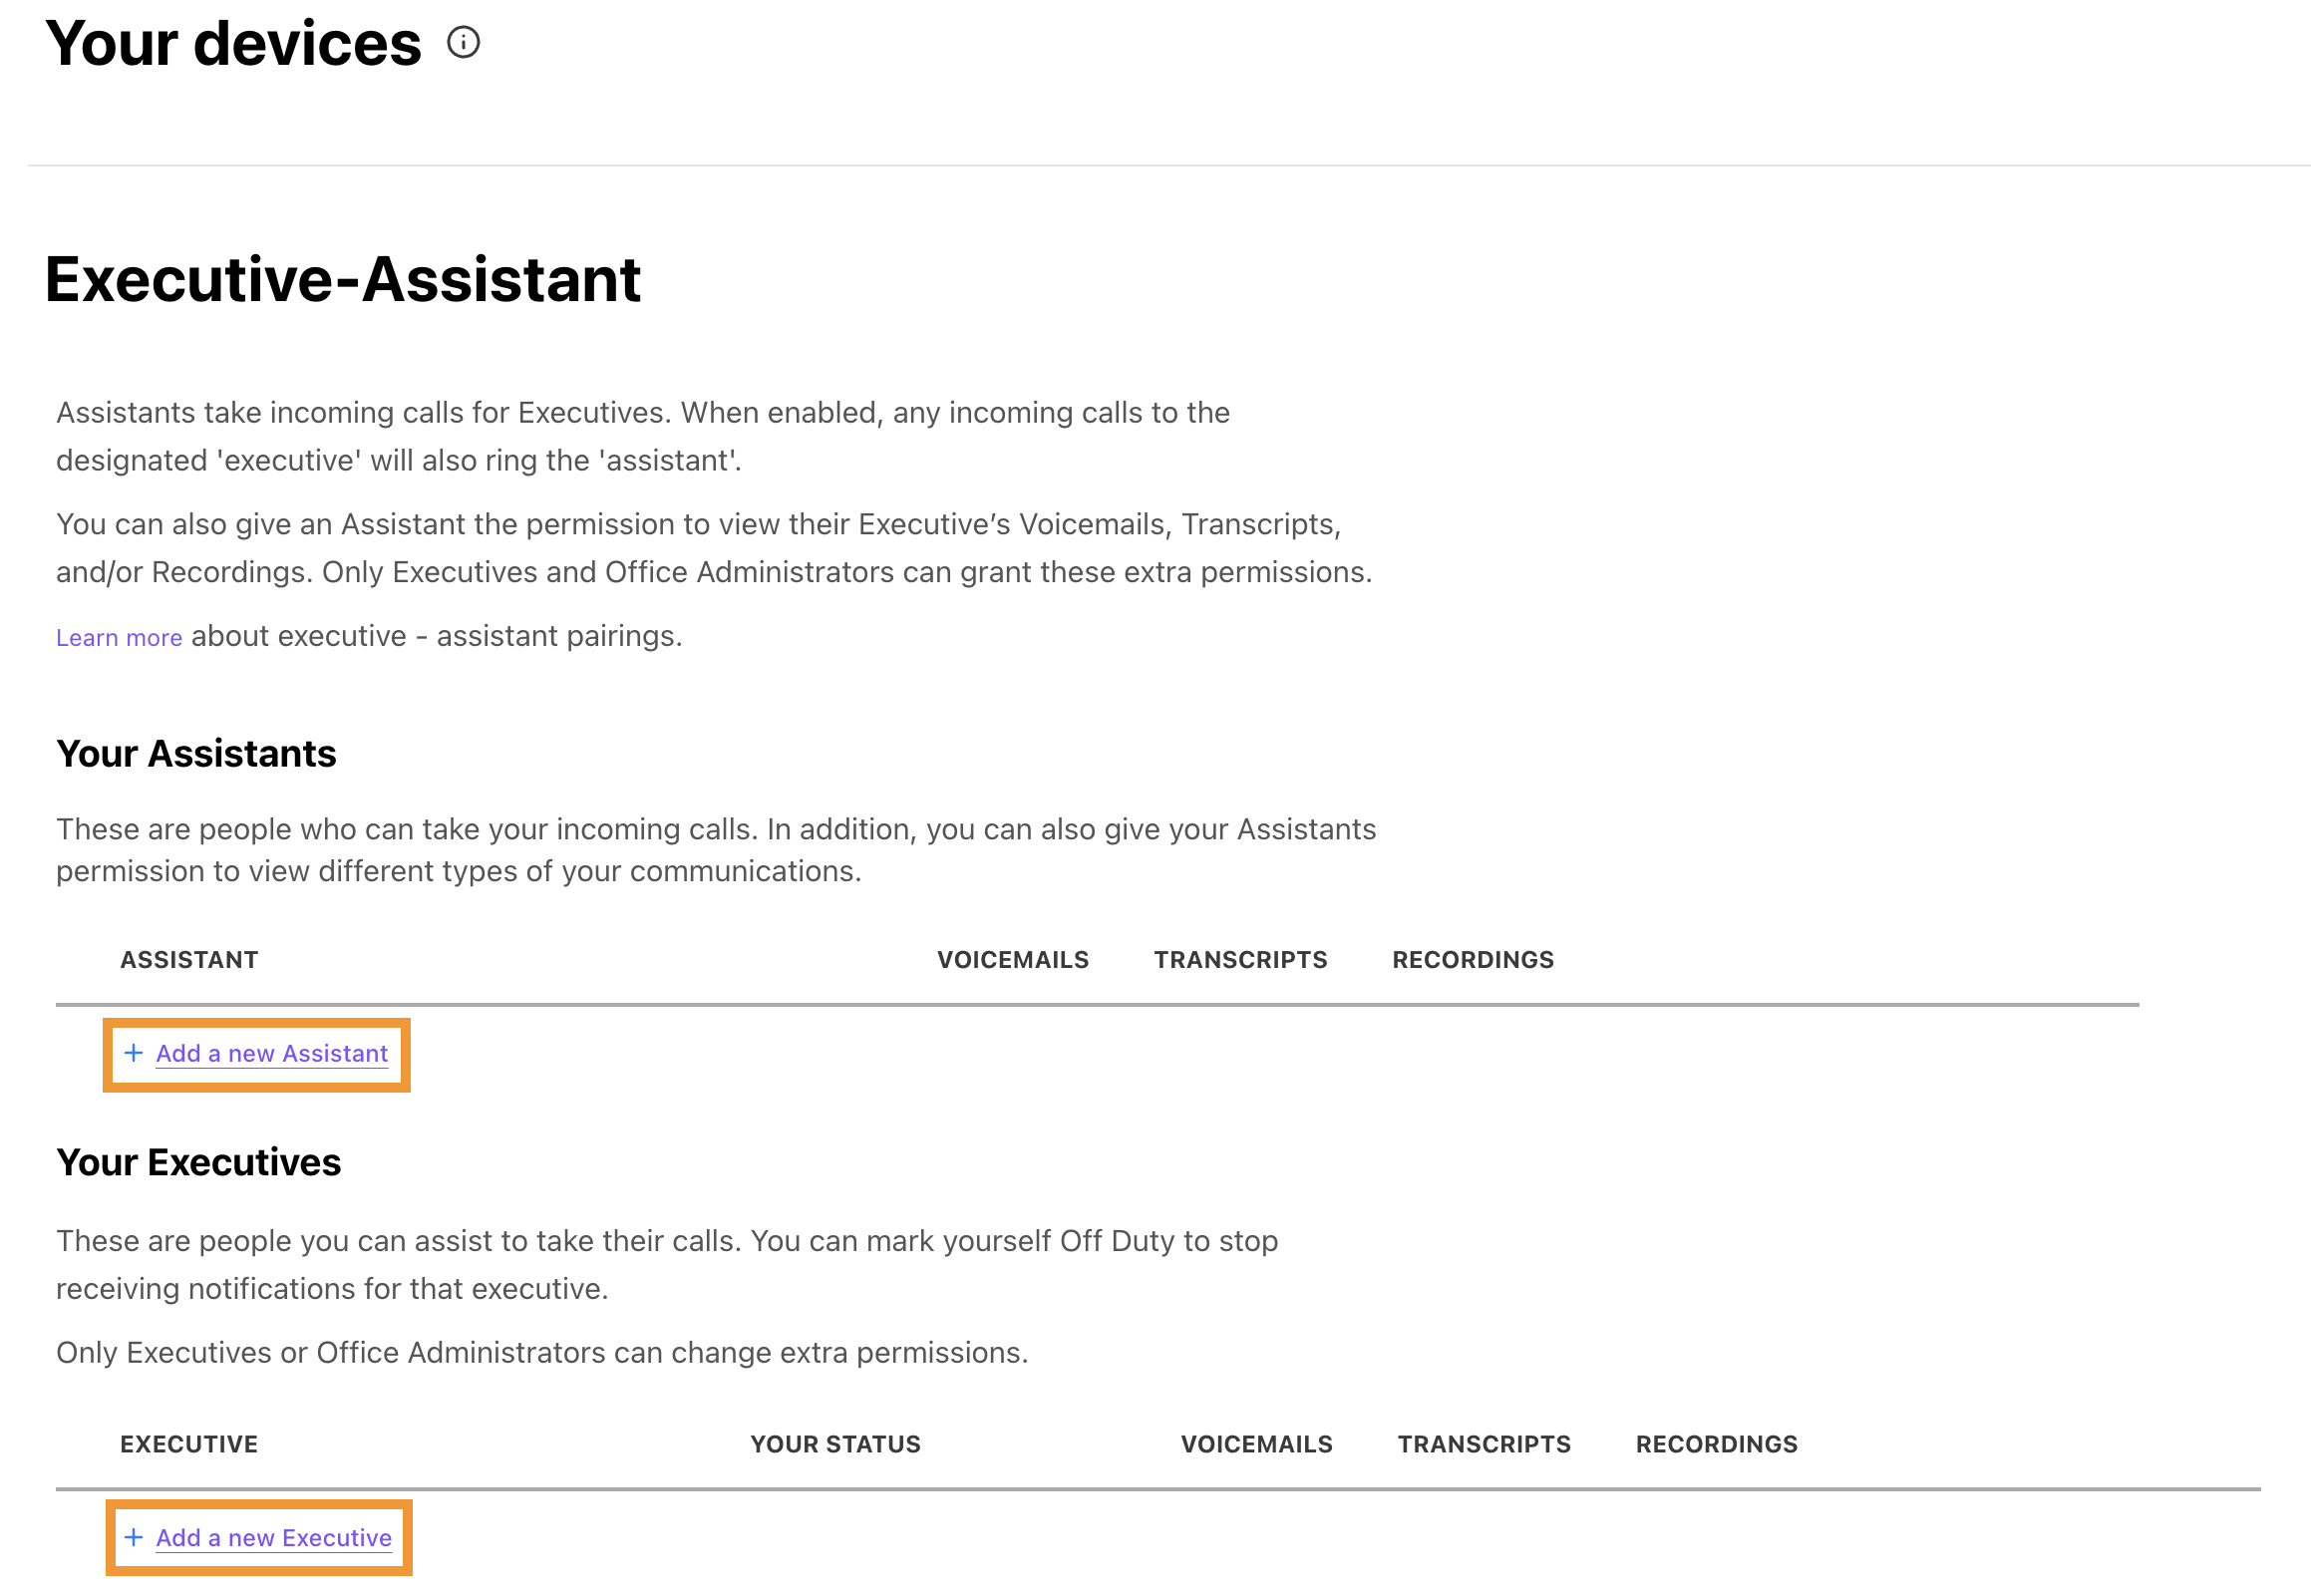
In either case, both parties will have to confirm from an emailed notification before the changes take place.
Working location
Use a personal working location to override your office's default E911 address so that First Responders can find you if you dial 911 and you’re not at the office.
To add a working location, select Add location and follow the prompts. 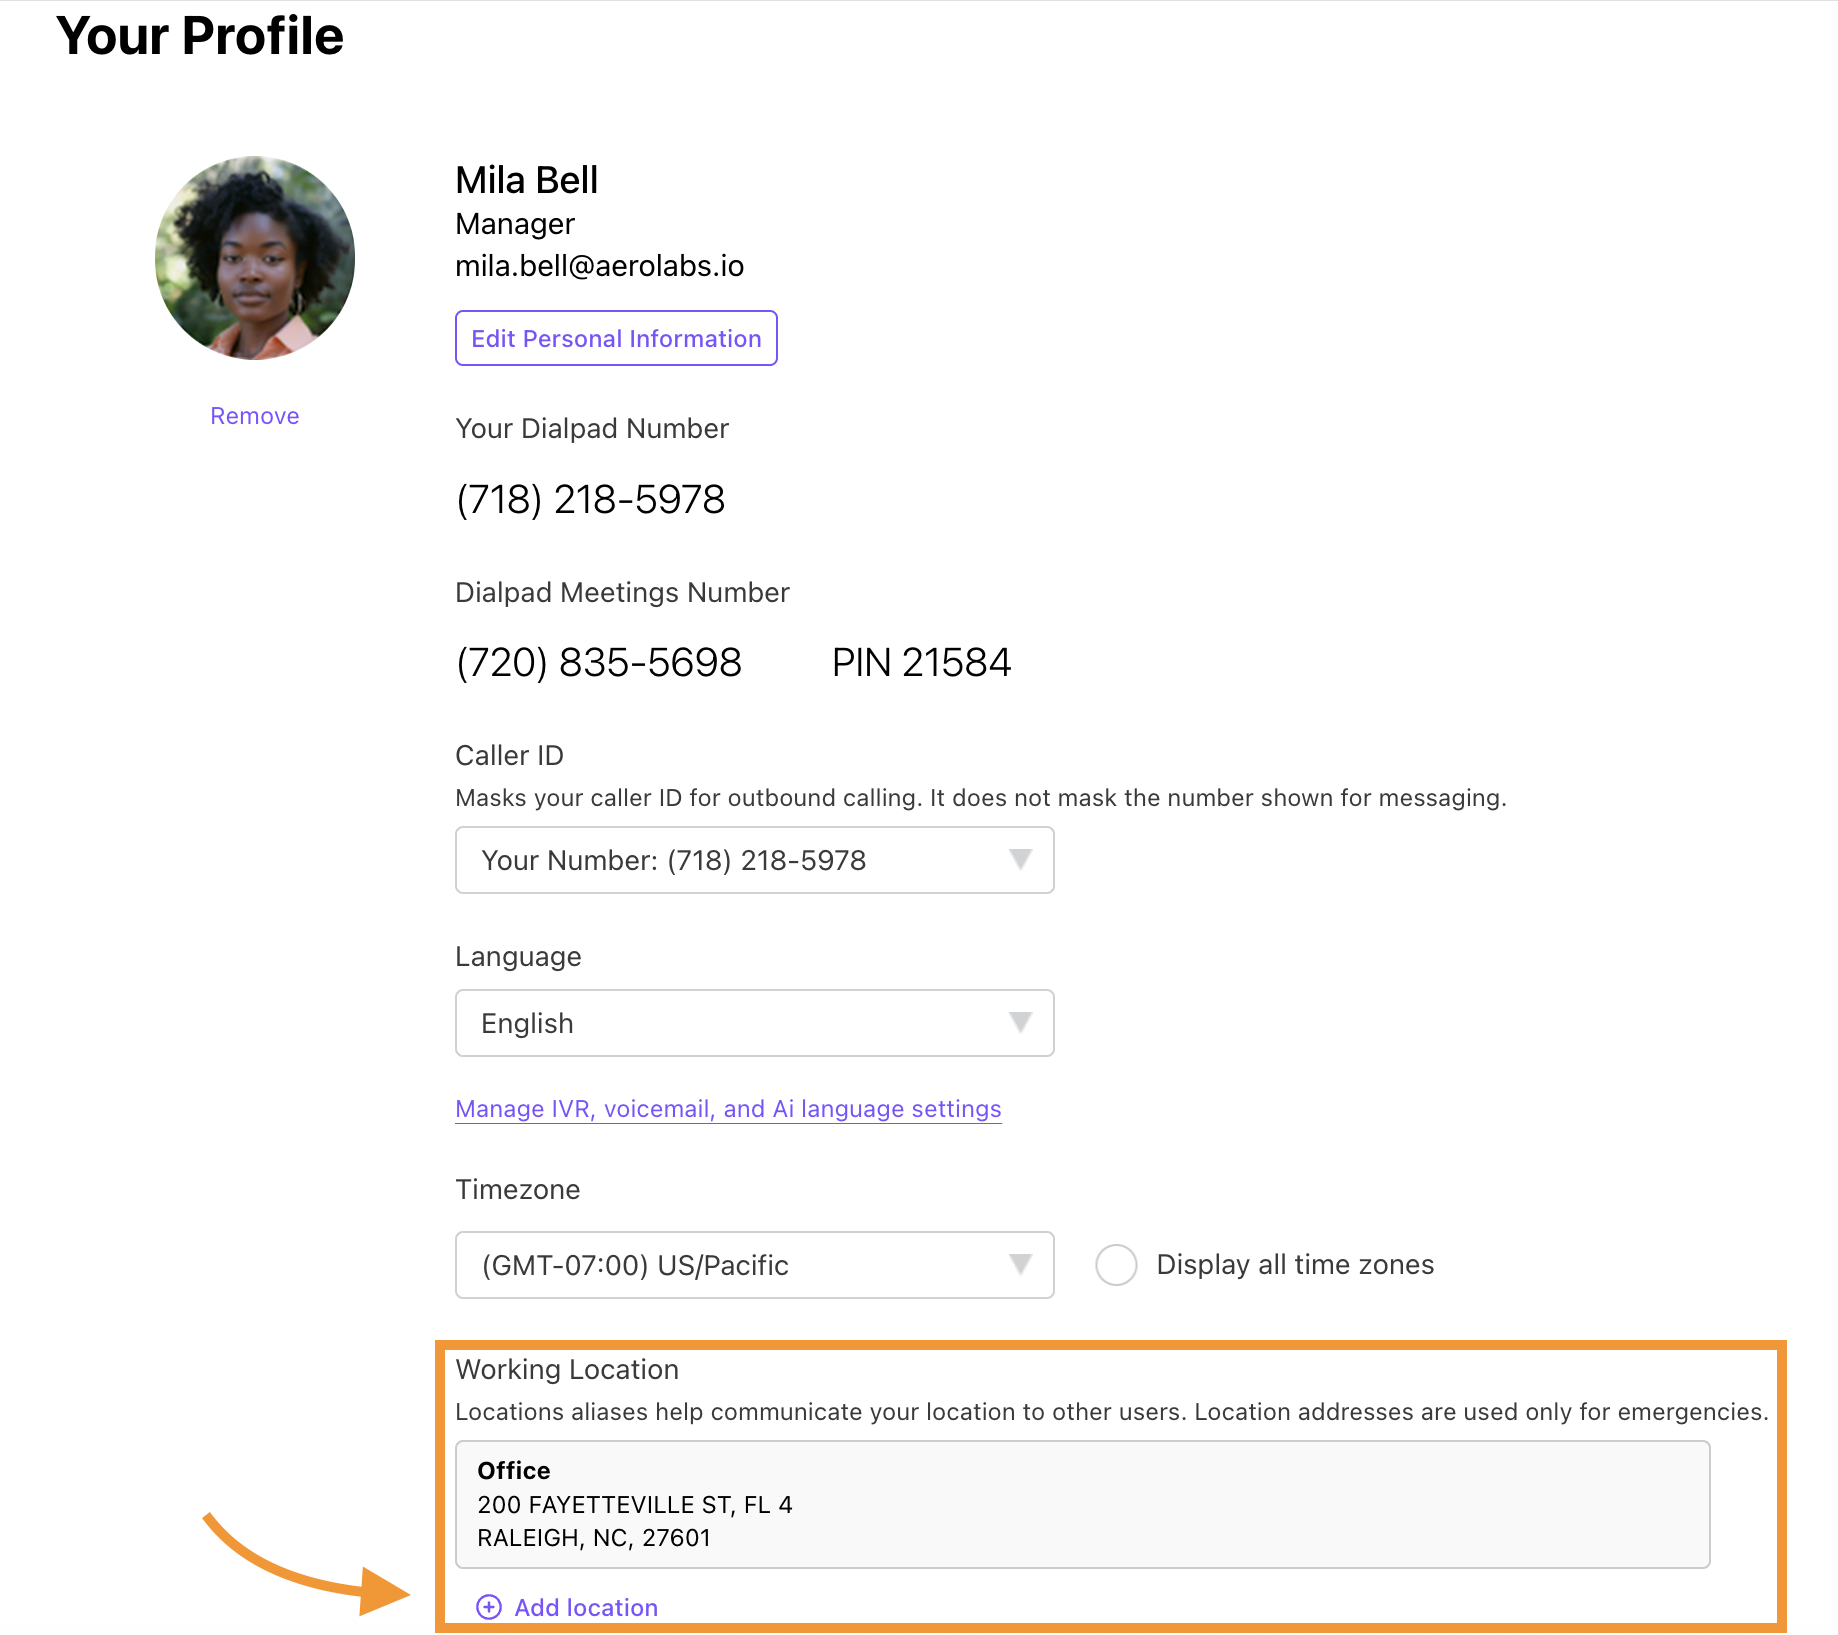
Dialpad lets you save up to 10 locations, so you don’t need to add a new address every time you visit a different office.
Emails and alerts
In the Email and Alerts section, you can review and edit your scheduled reports and change your office notification settings.
To enable notifications for specific Contact Centers, select the desired Contact Center from the drop-down menu and check the boxes beside the topics you'd like to be notified for.
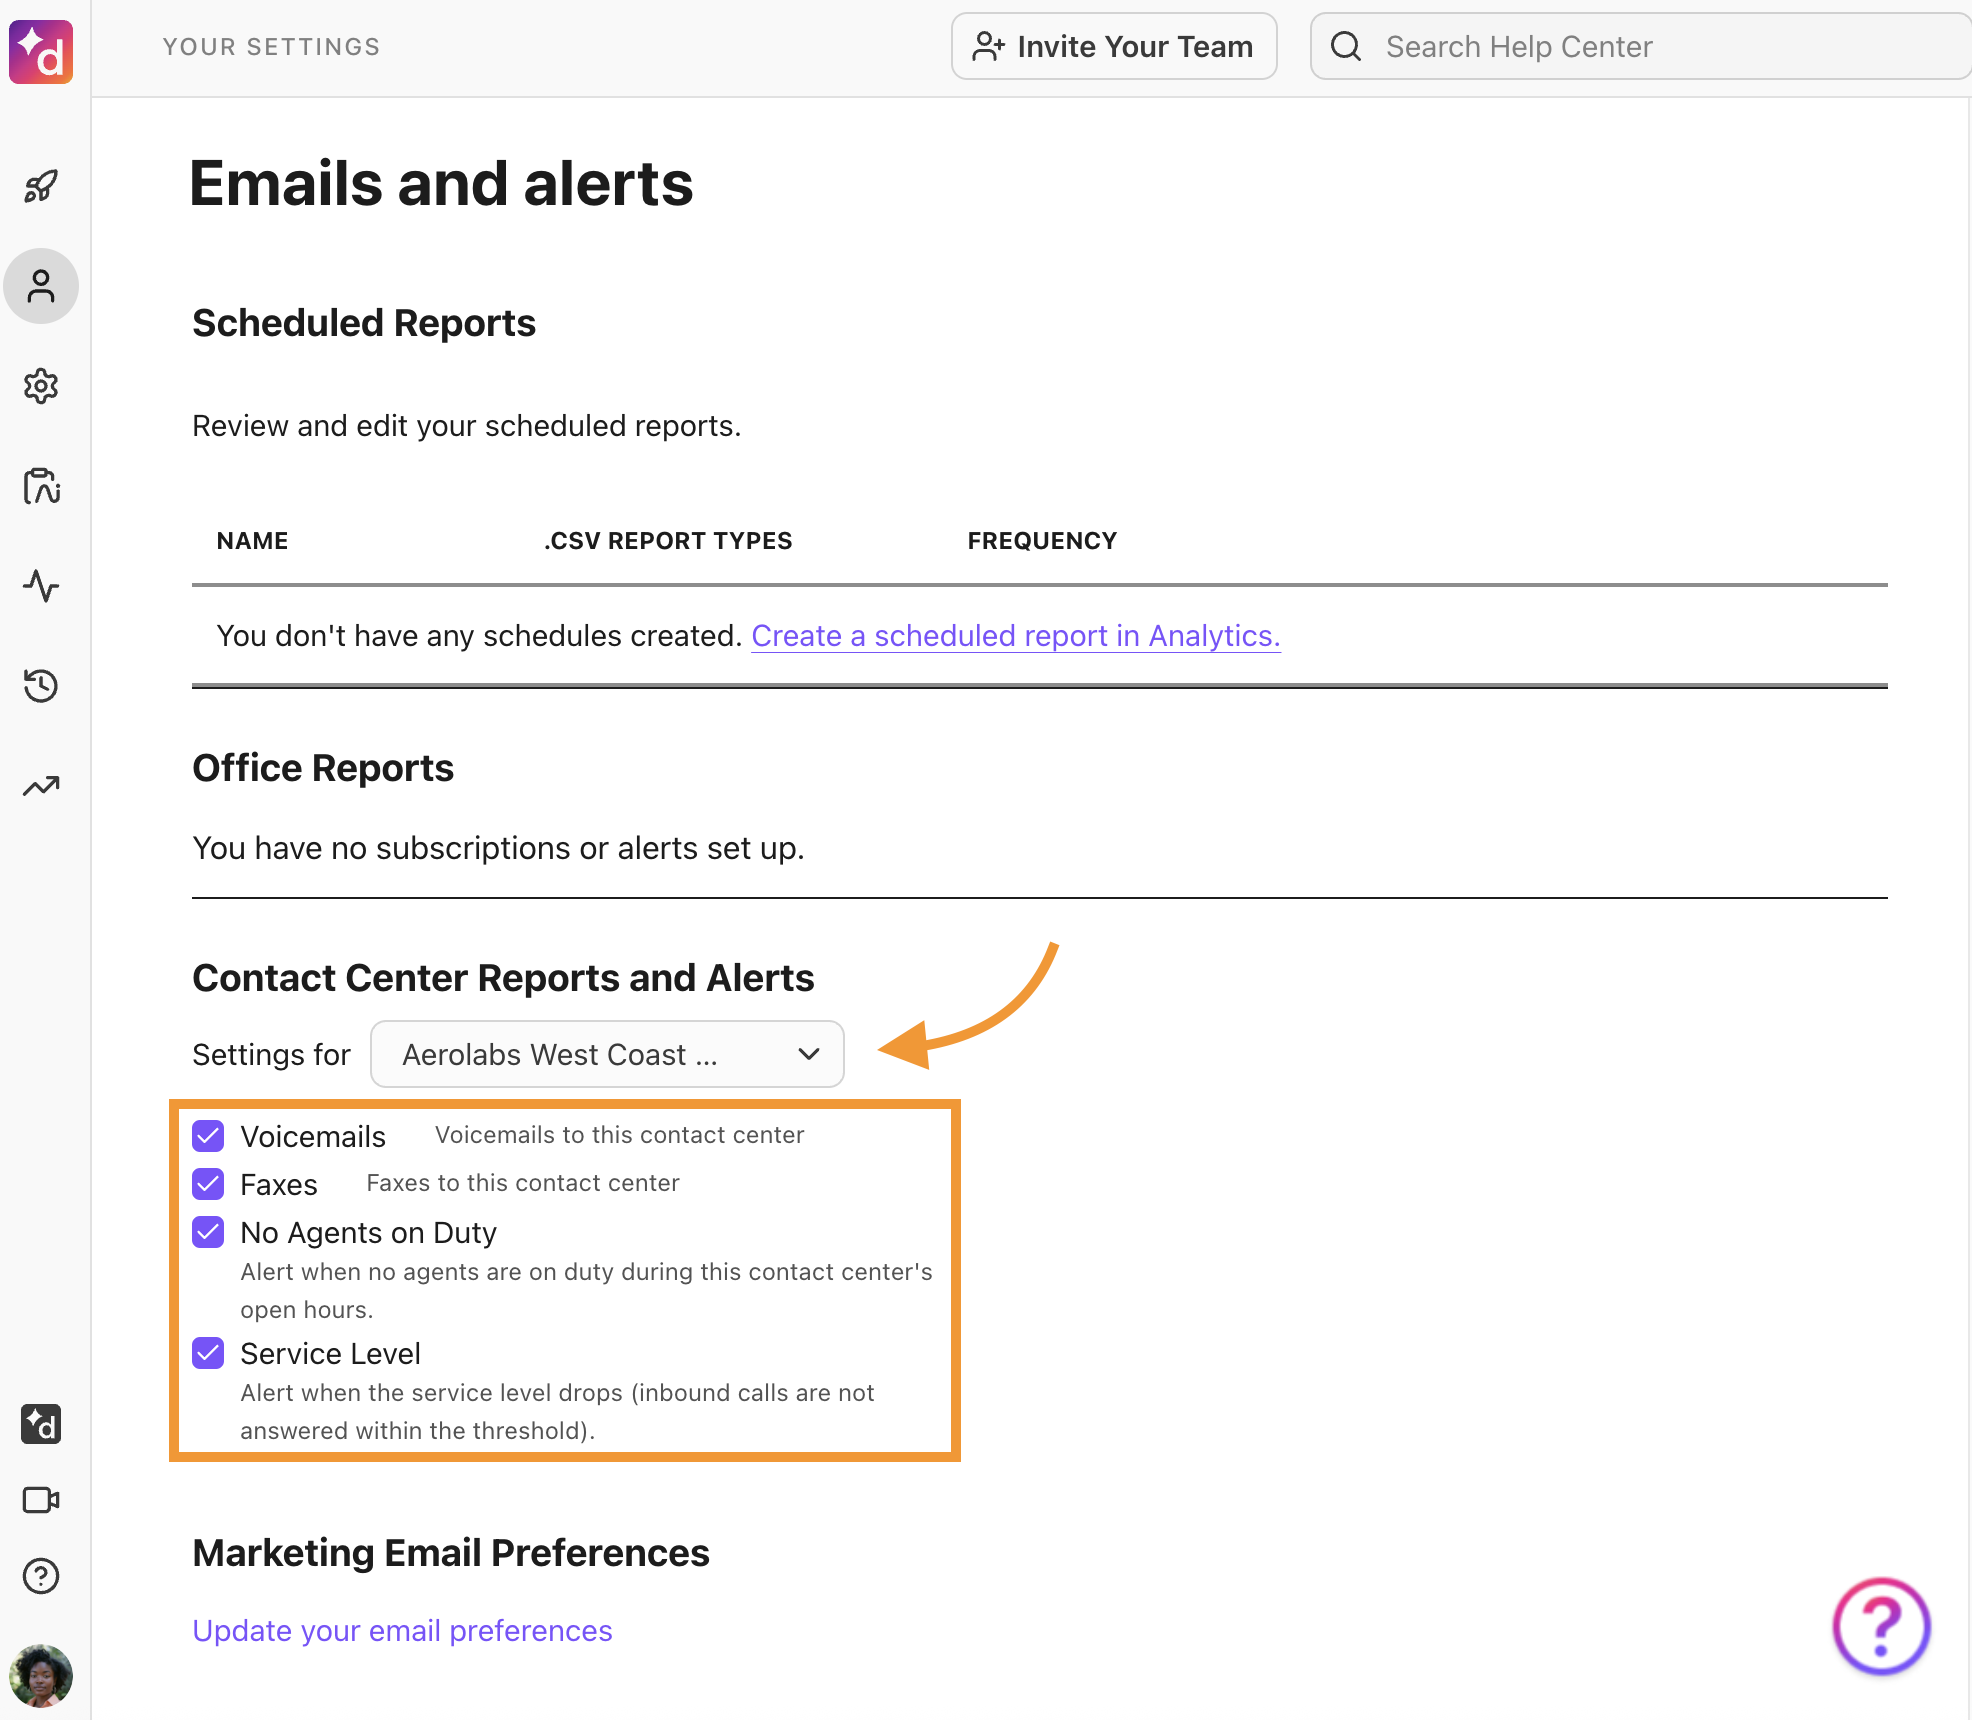
If you're the admin or operator for a Contact Center, you can also manage your notifications for that Contact Center here.
My Dialpad Meetings settings
If your Dialpad Meetings account is linked to your Dialpad account, you can adjust your personal Dialpad Meetings settings from your profile. 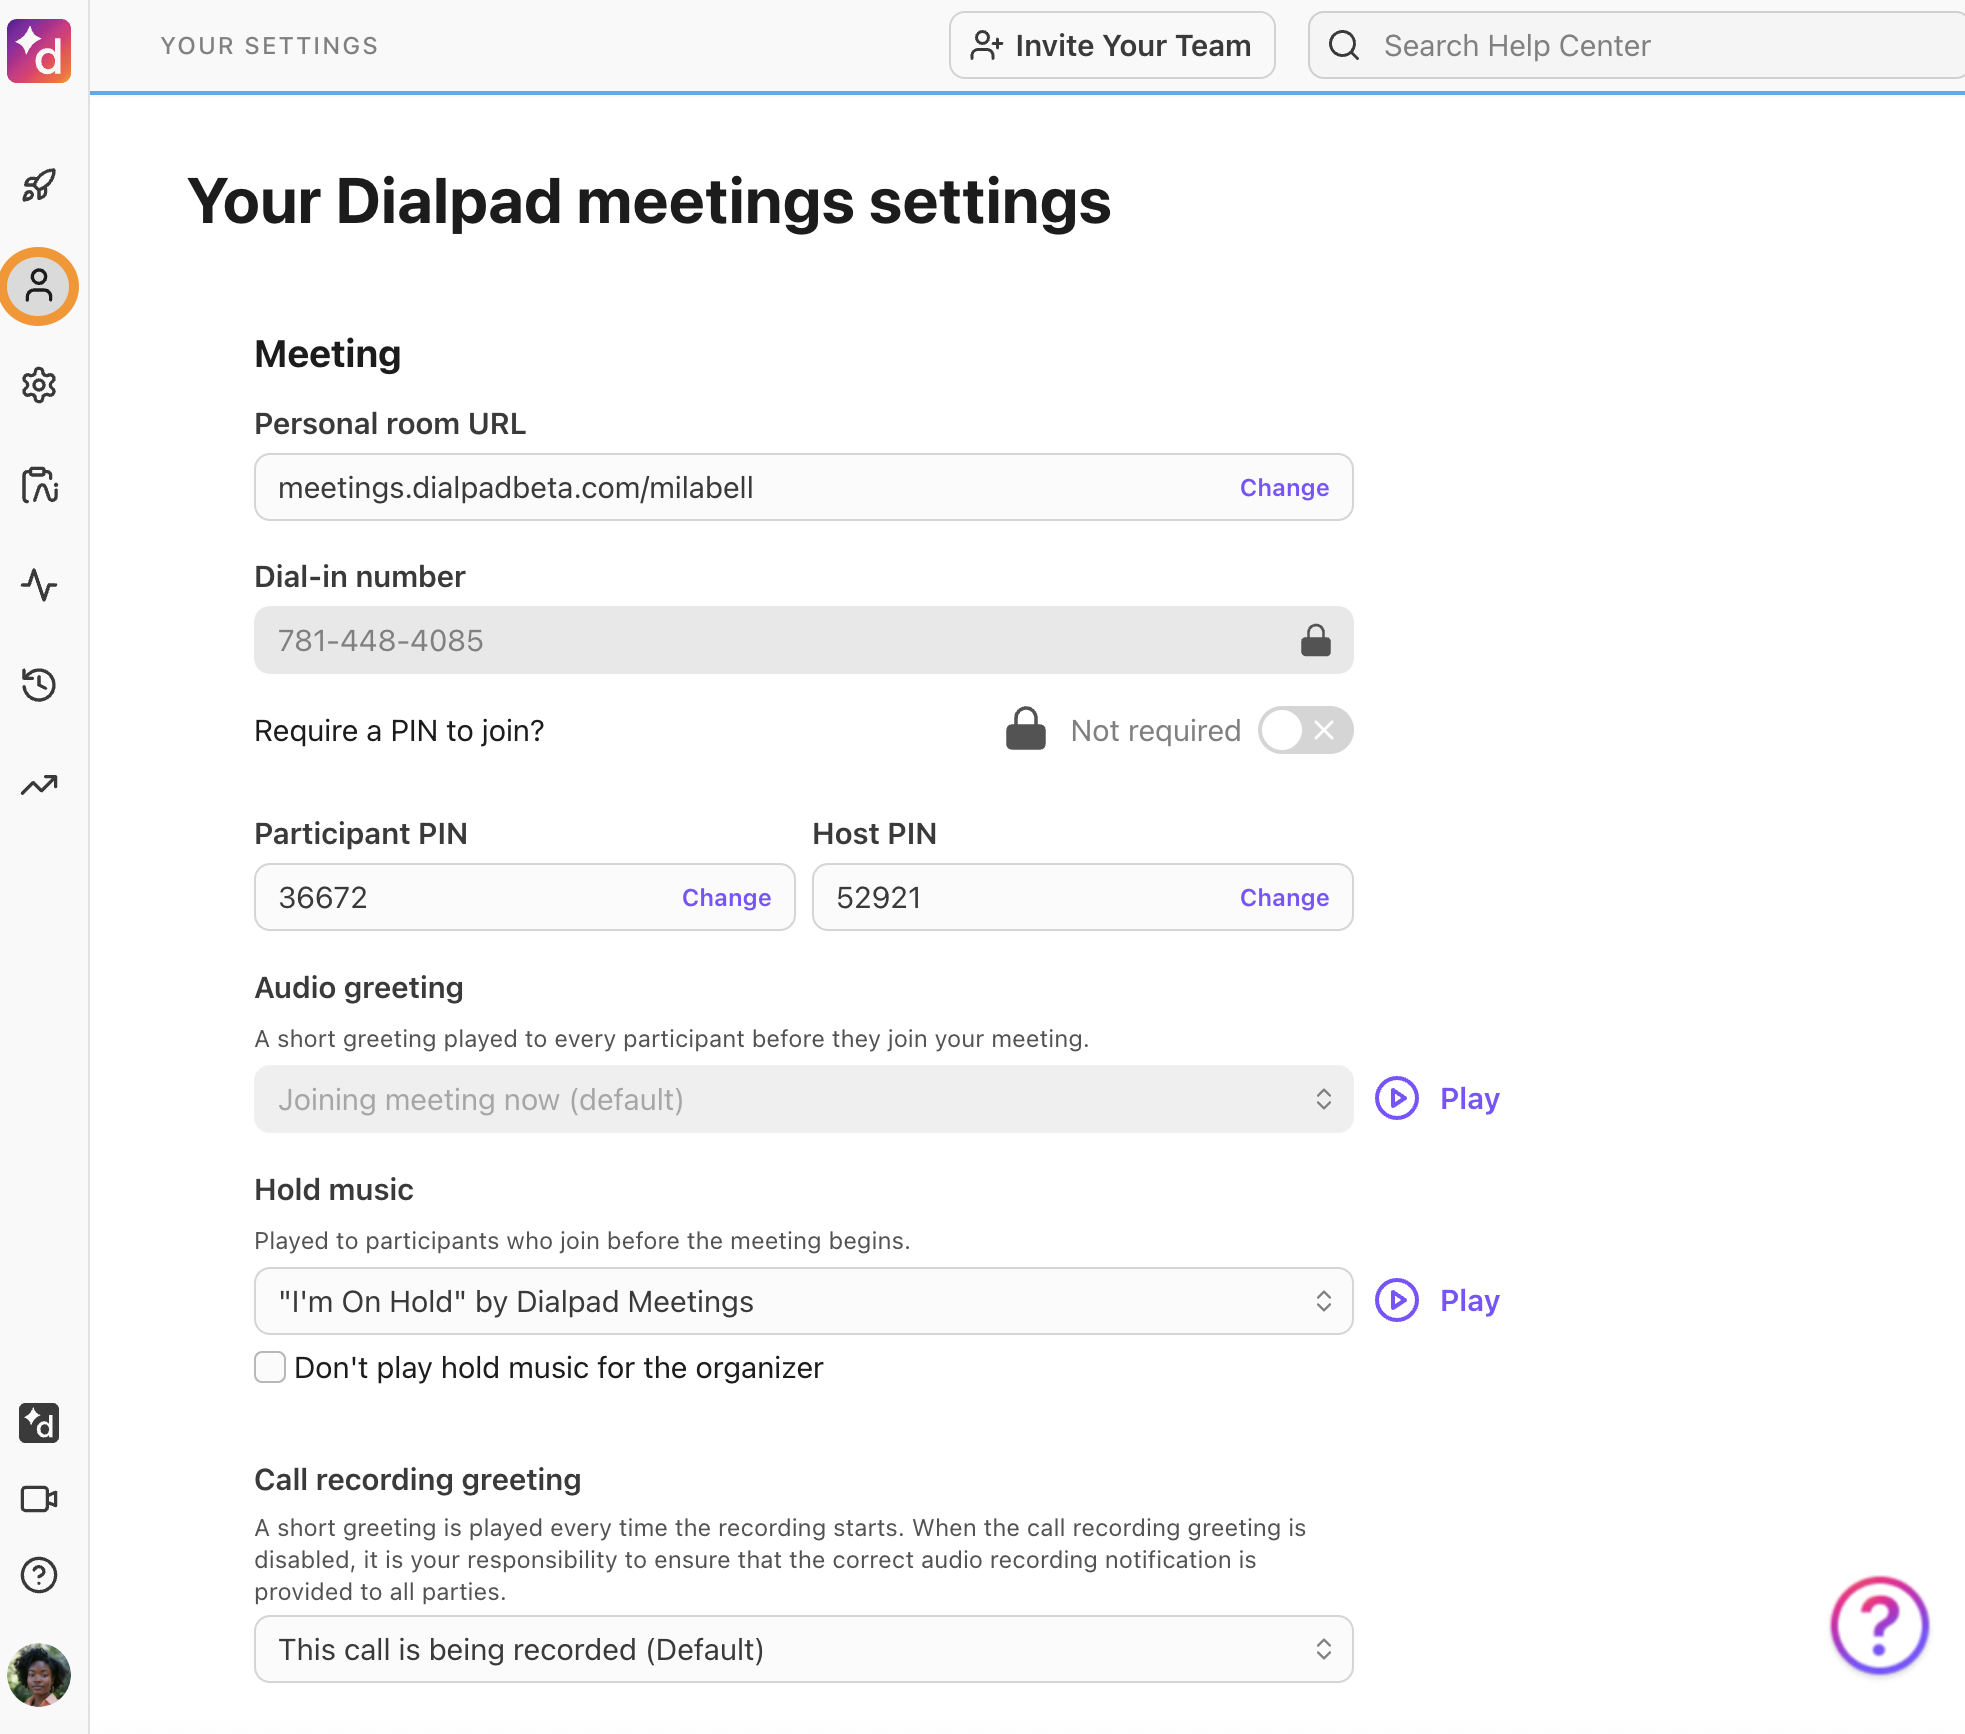
Dialpad Meetings Admins can also select Dialpad Meetings Team Settings from the left-side tabs to adjust team-wide settings.