In addition to our mobile, browser, and desktop apps, you can also use Dialpad on a supported desk phone. We offer a range of options from trusted manufacturers like Poly and Yealink. Easily add one—or many—directly from your Dialpad account.
Let's take a look at ordering and managing a desk phone in Dialpad.
Who can use this
Desk phones can be used on all Dialpad plans.
To set up and manage a desk phone for another user, you must be a Dialpad Admin.
Manage a user desk phone
User phones are desk phones assigned to a team member. When their Dialpad number is called, that user's phone will ring.
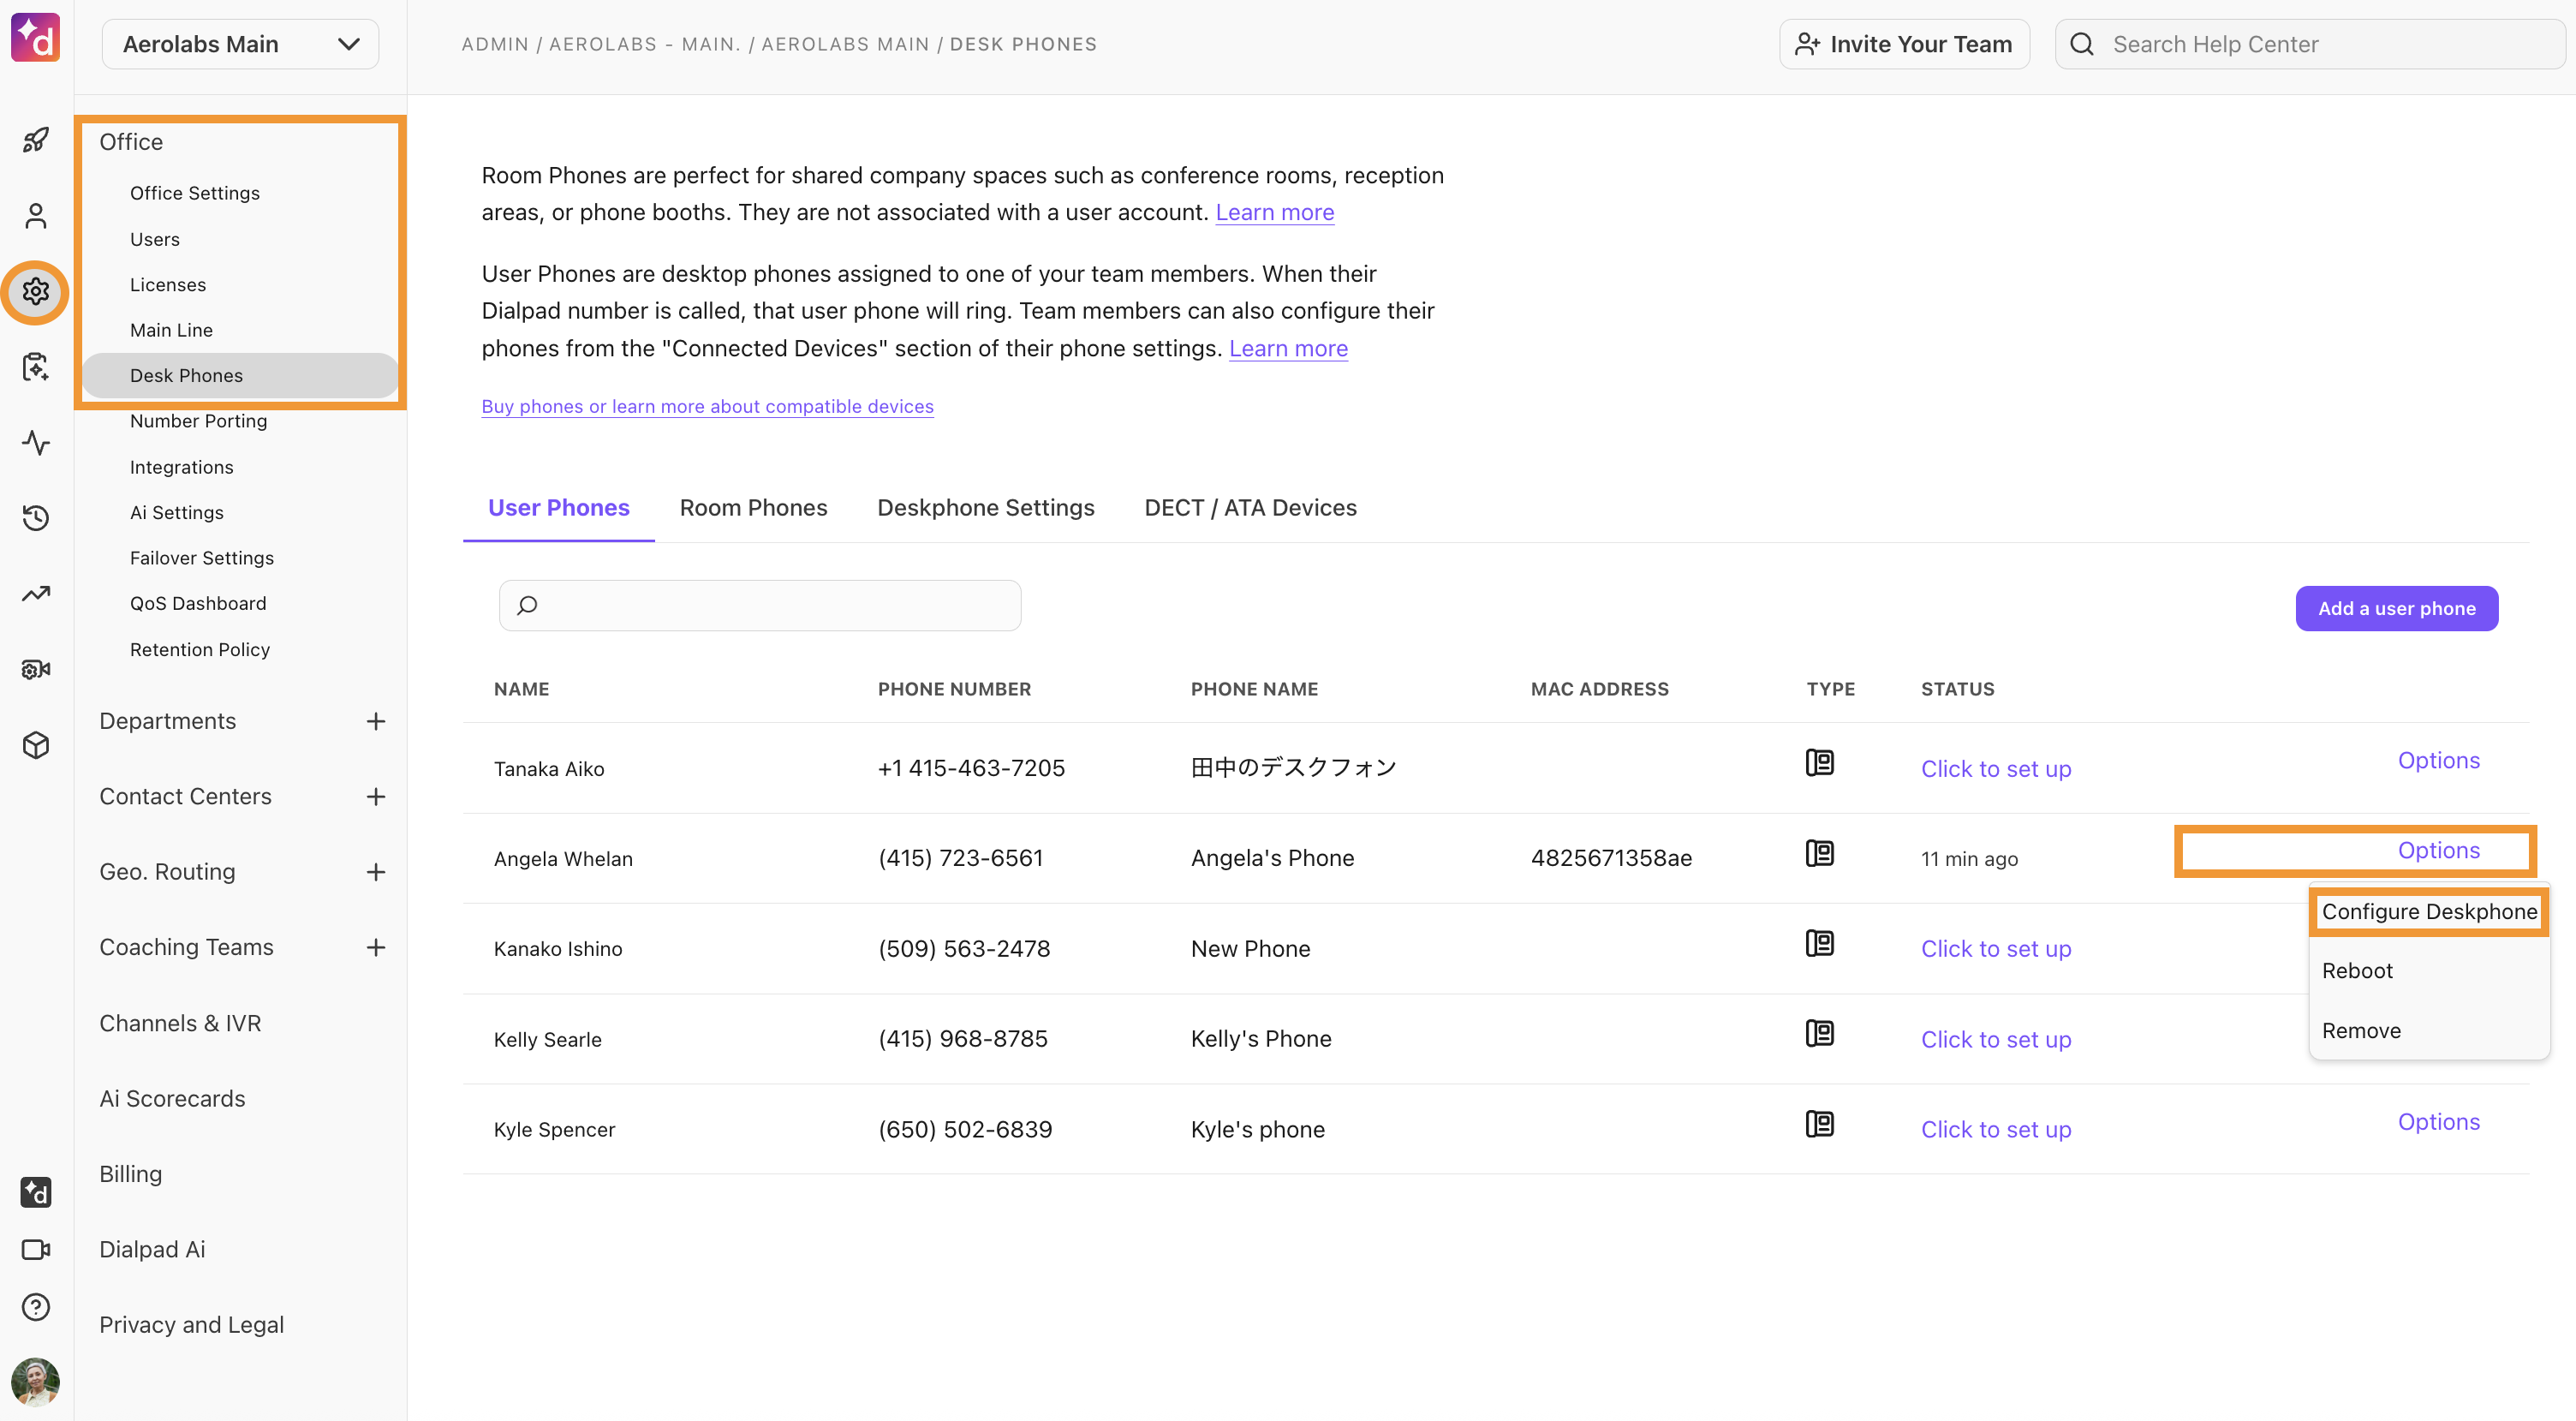
Dialpad Admins can manage user desk phones right from their Dialpad Admin Settings.
Navigate to Office > Desk Phones
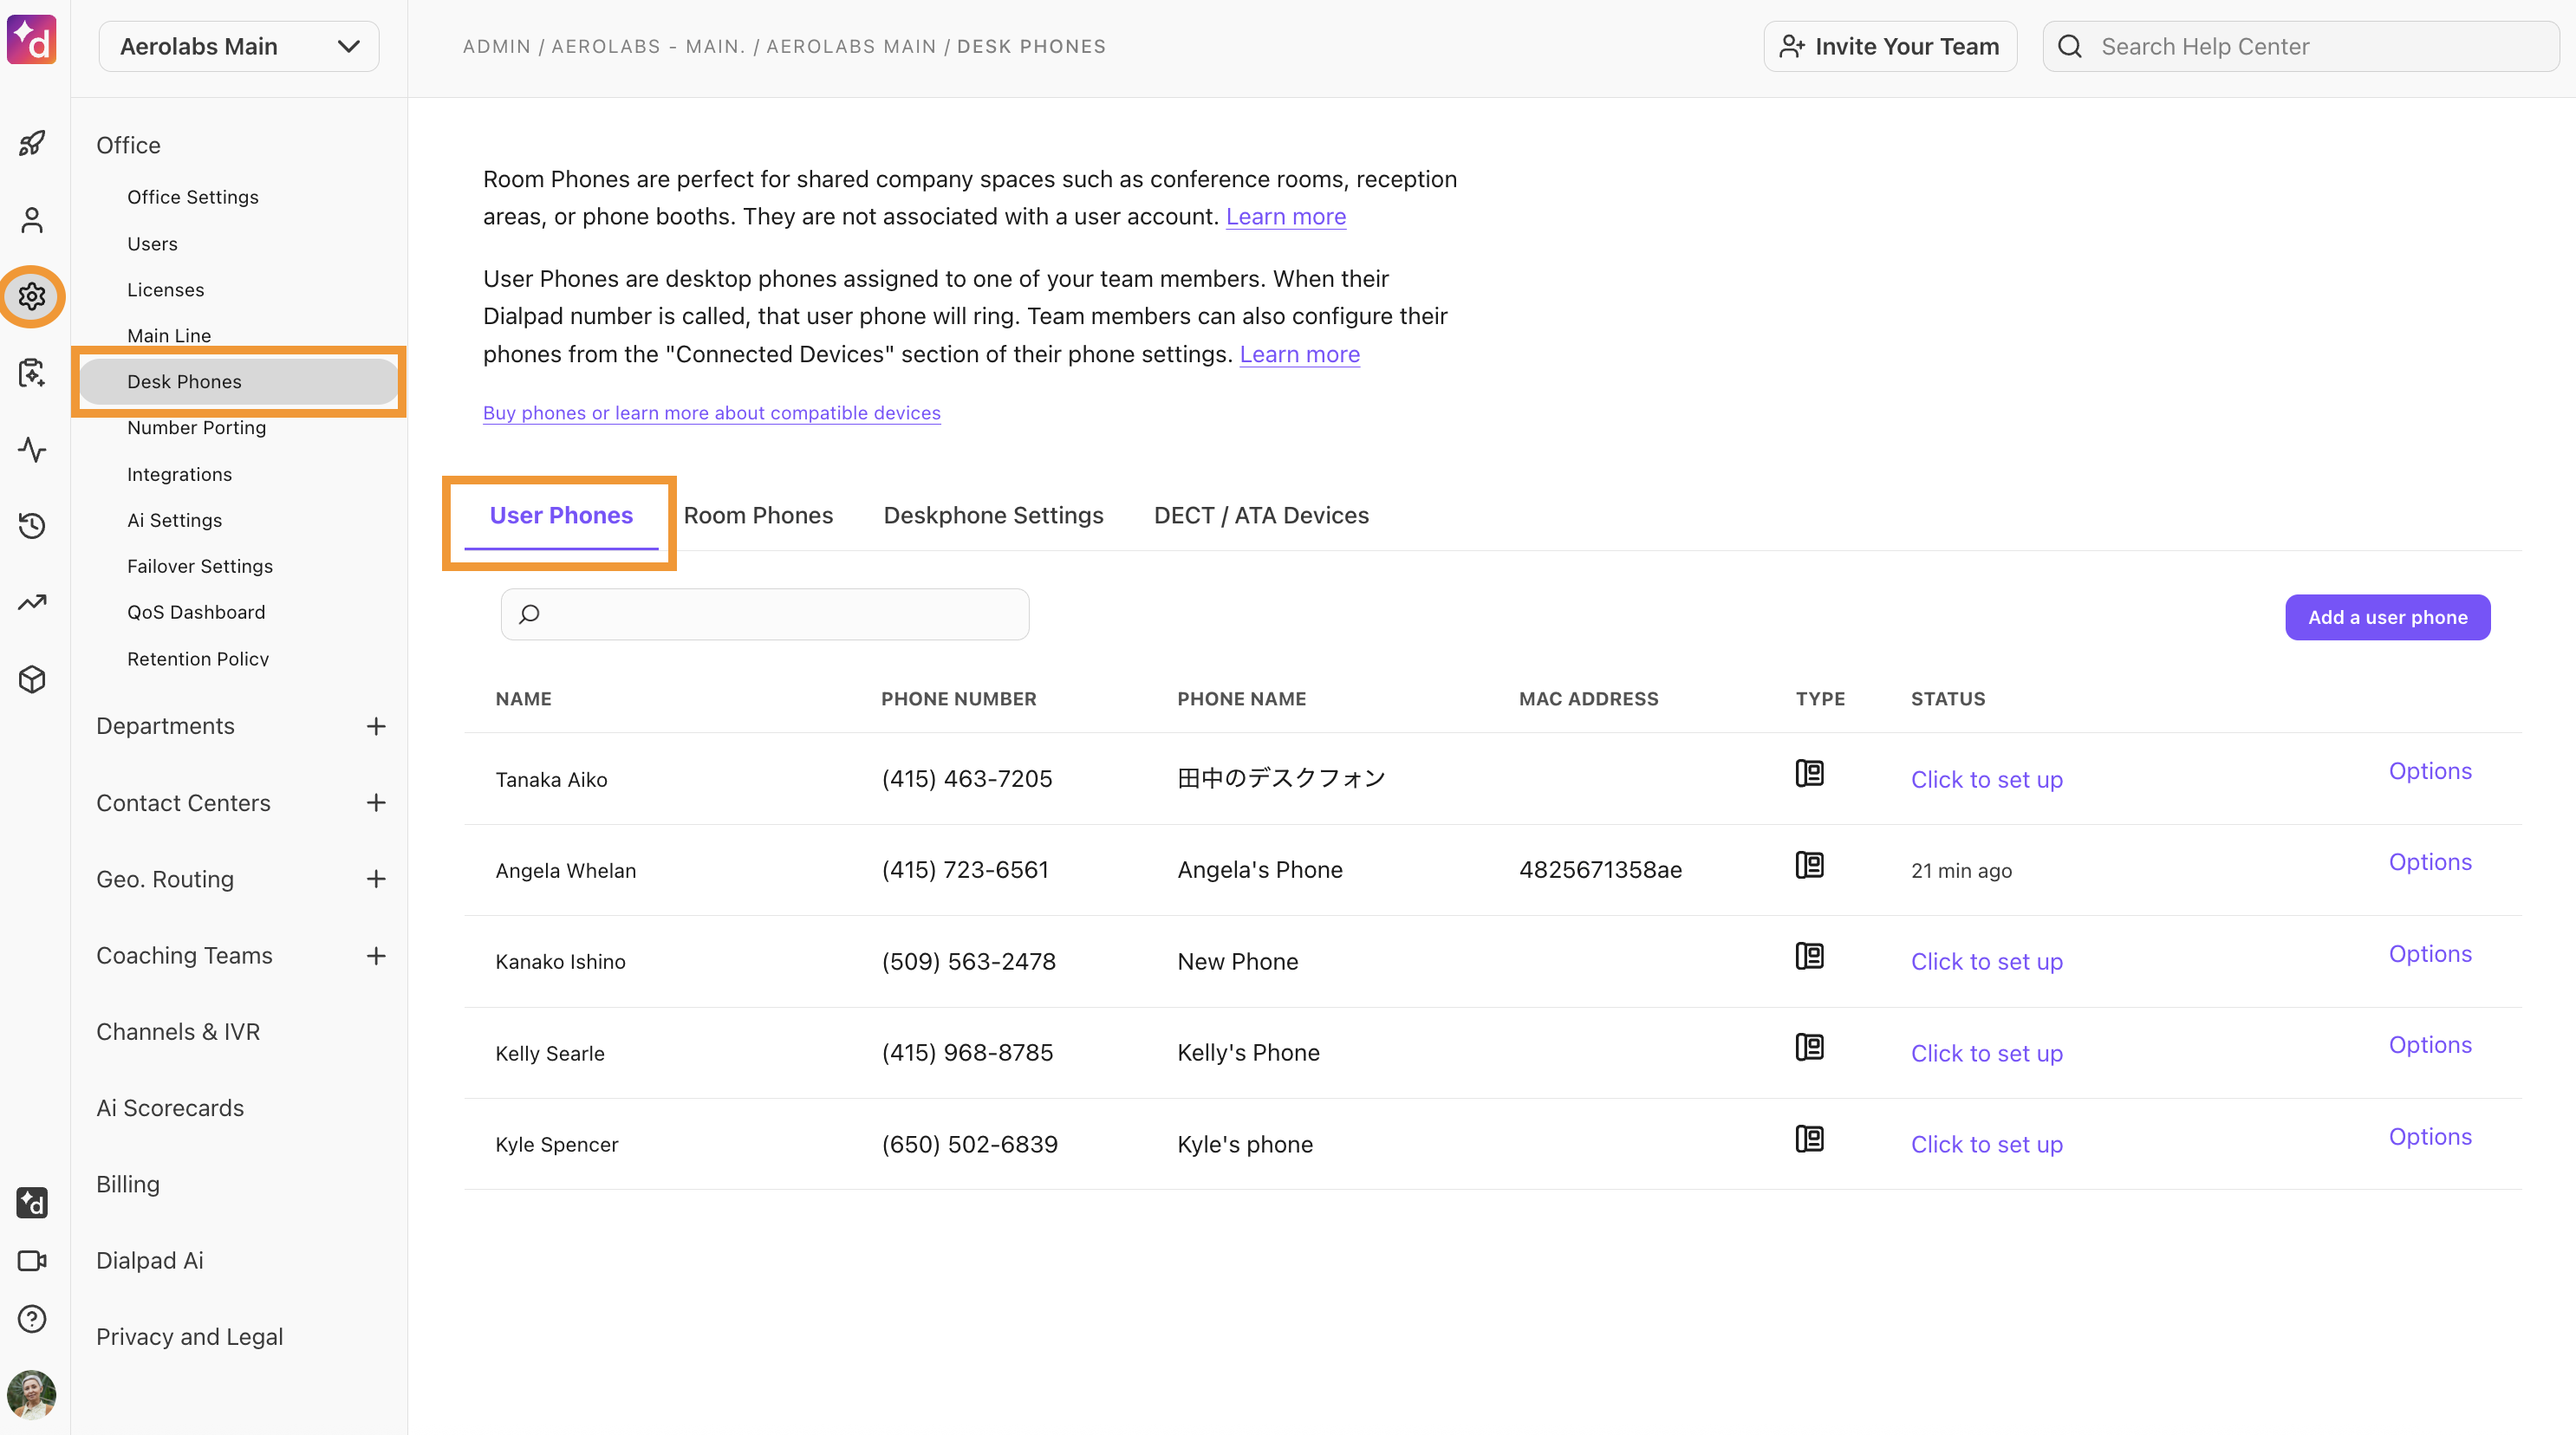
Select User Phones
From the Desk Phone Settings section, admins can:Add a user phone
Reboot an existing user phone
Remove an existing user phone
Enable corporate speed dial
Note
Team members can also configure their phones from the Connected Devices section of their phone settings.
Allow team members to provision desk phones
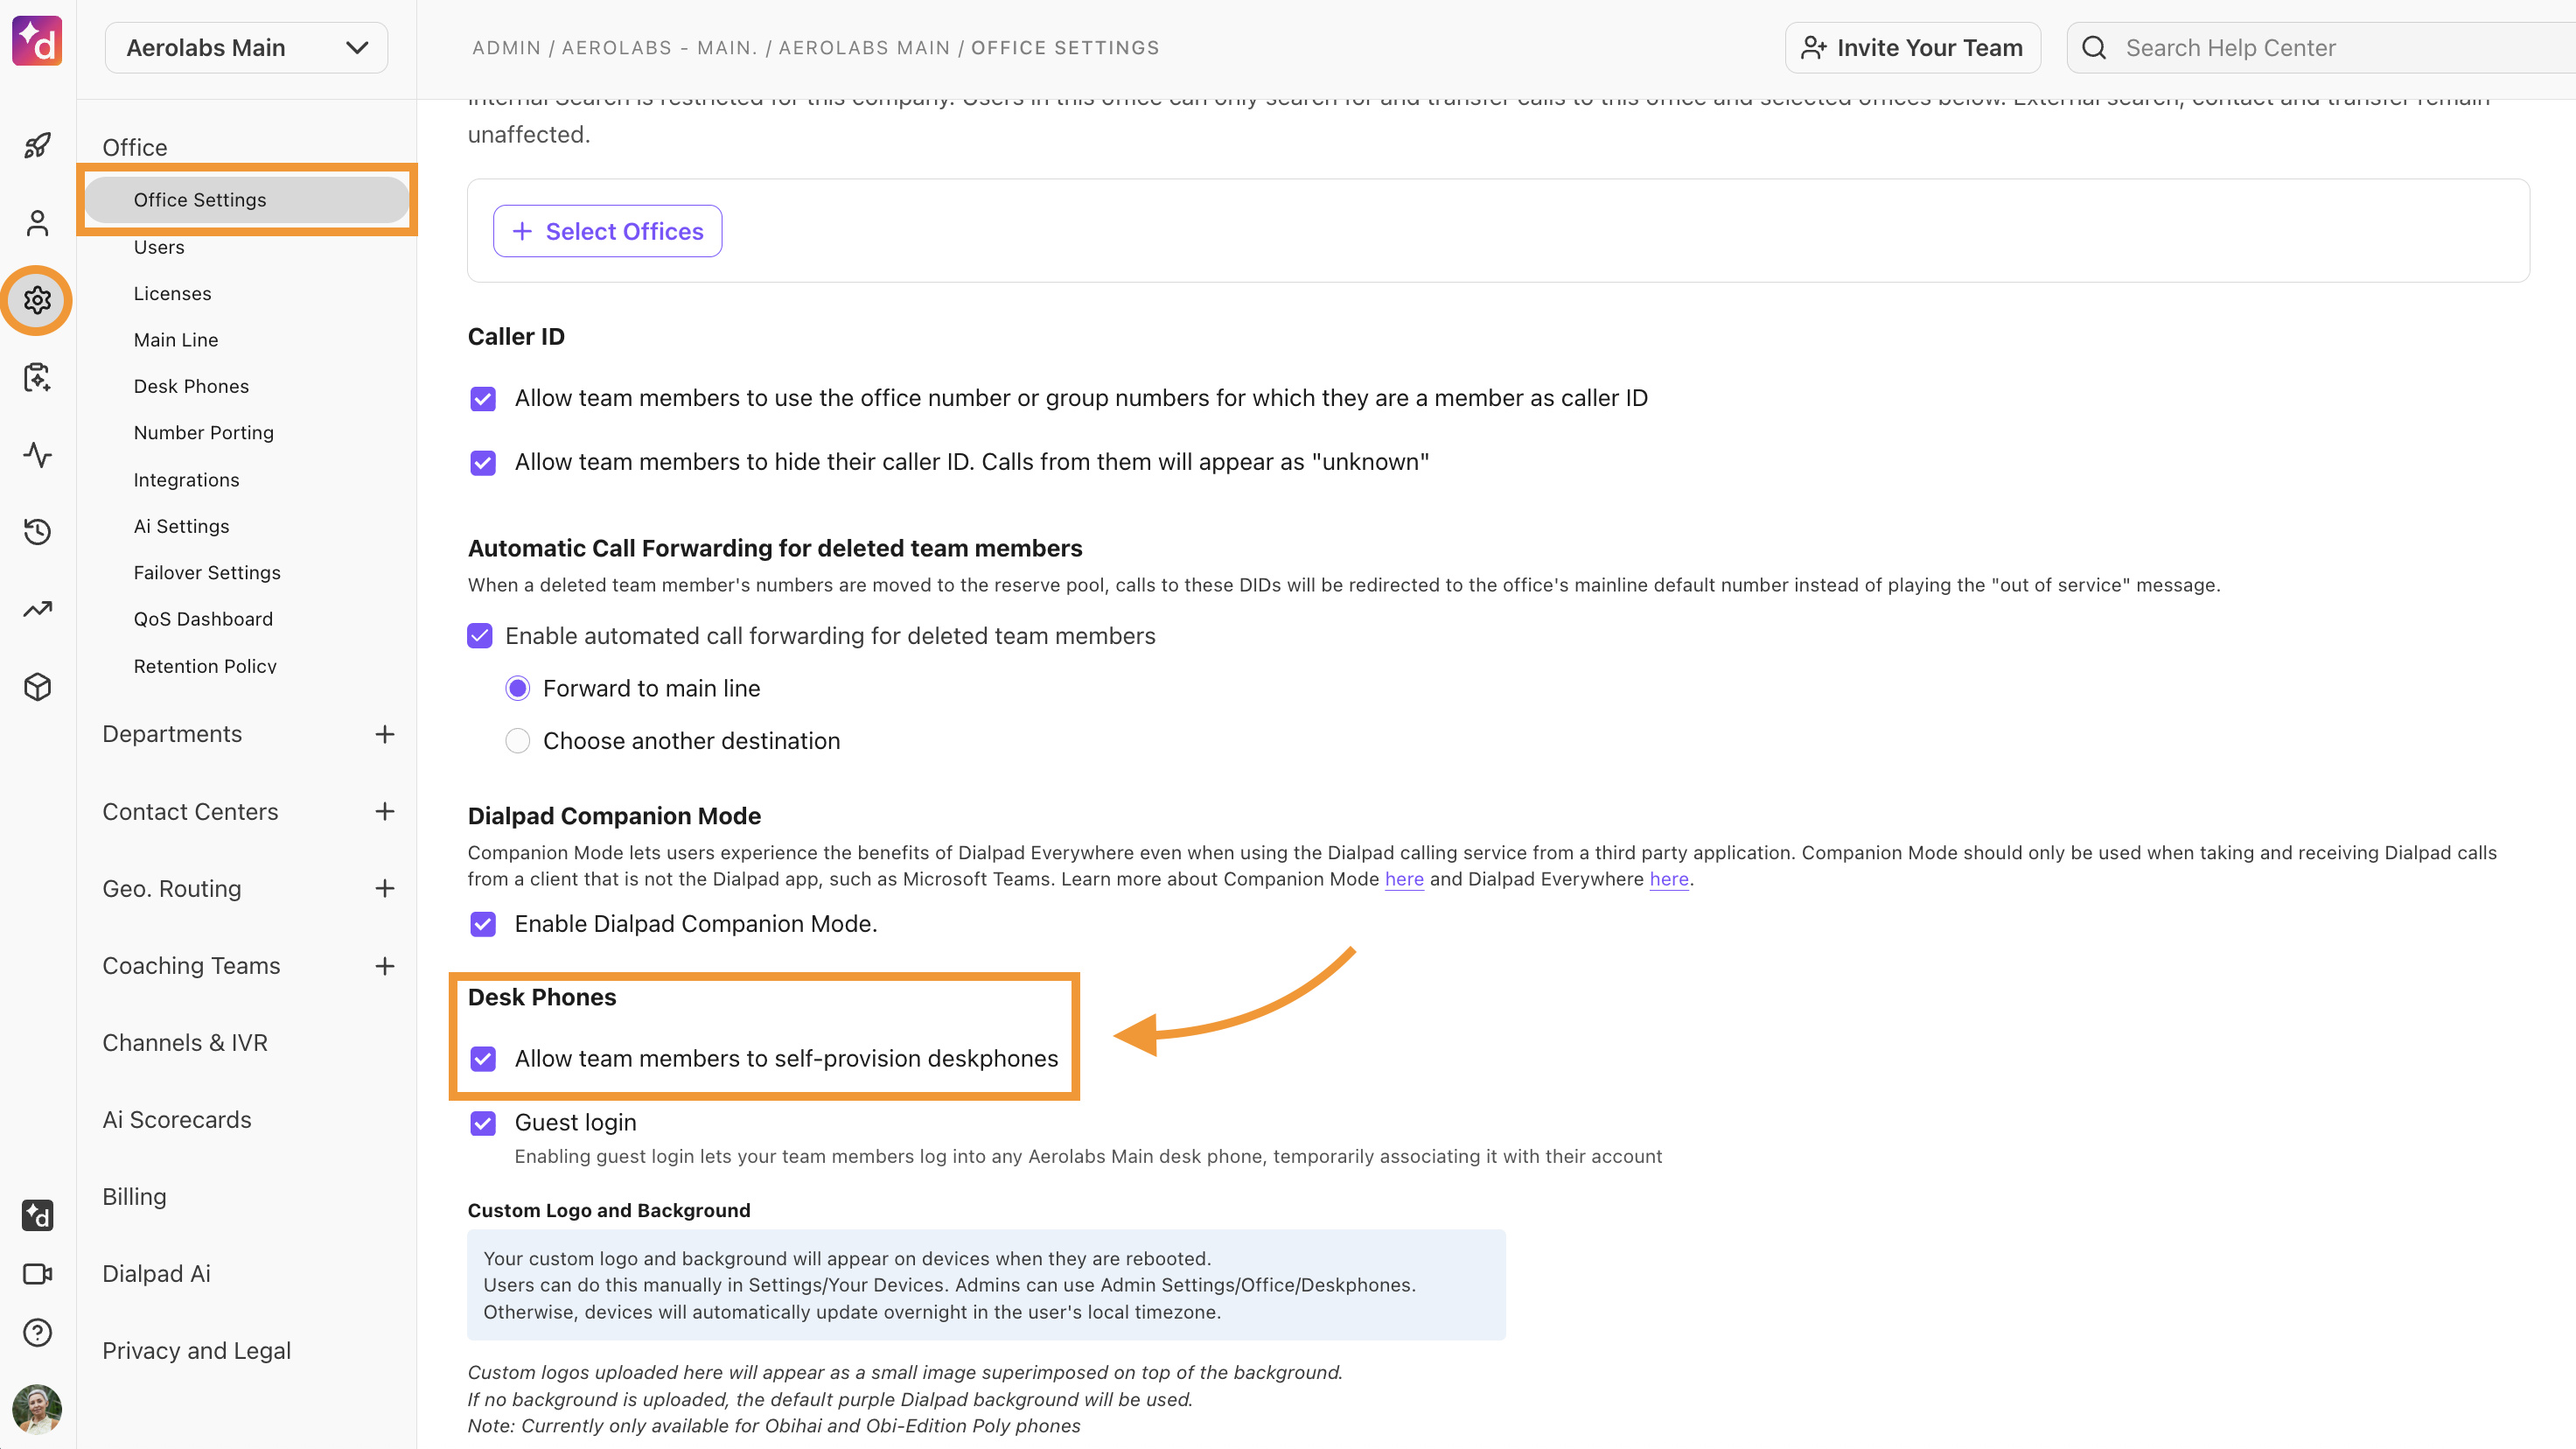
Admins normally set up their users' desk phones, but they can also allow team members to do it themselves.
To let users set up their own desk phones, go to your Dialpad Admin Settings.
Navigate to Office > Office Settings
Navigate to Desk Phones
Check the box beside Allow Team members to self-provision deskphones
Note
Team members can provision their desk phones by going to Your Settings and selecting Your Devices.
Deskphone admin password
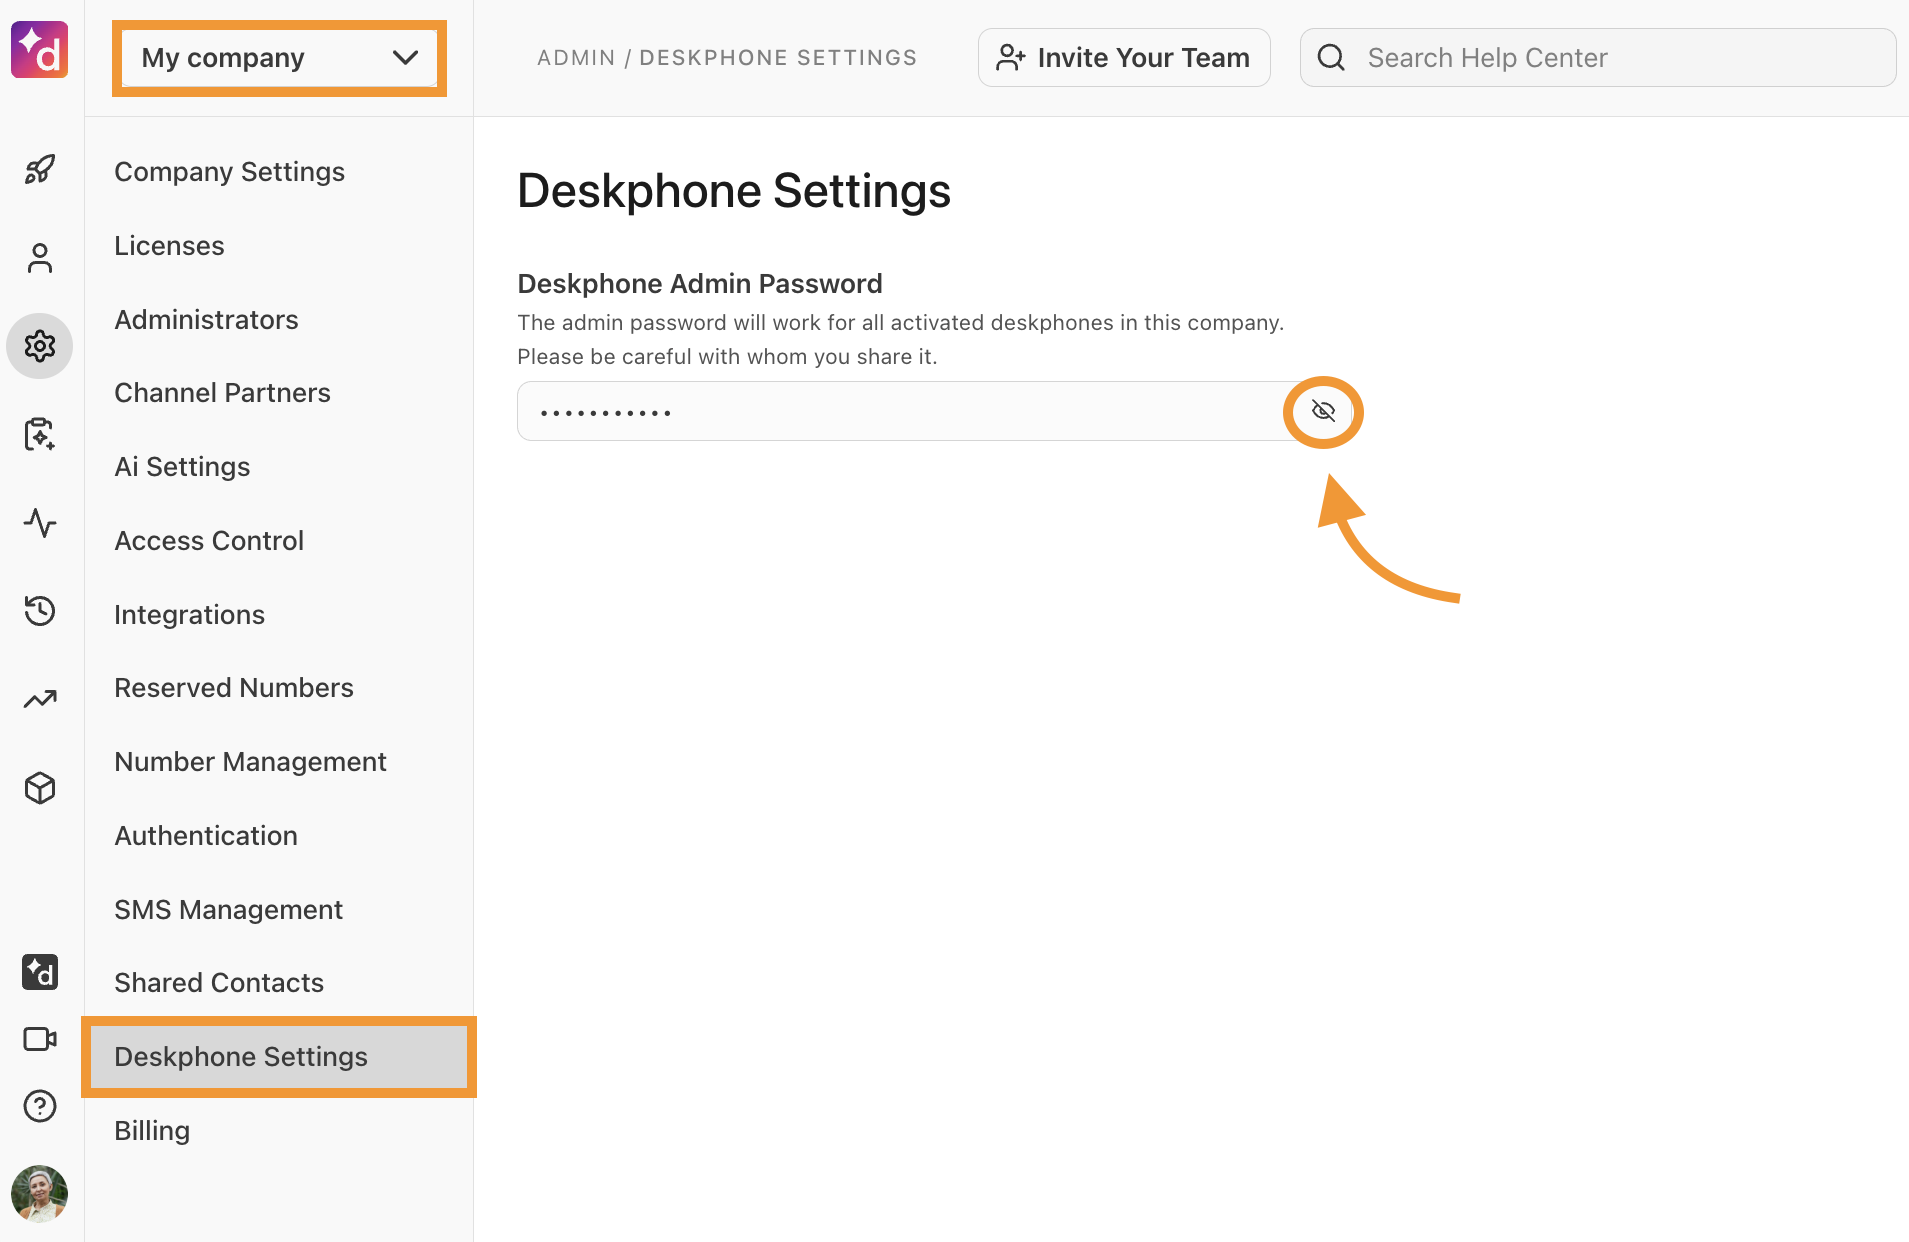
Company admins can access their organization’s desk phone password in Company Settings. This admin password applies to all desk phones activated with Dialpad.
To access the Deskphone Admin Password, go to your Dialpad Admin Settings.
Select My Company > Deskphone Settings
Navigate to Deskphone Admin Password
Select the eye icon to see the password
Note
For unassigned Dialpad provisioned devices, use the default deskphone password: 3425723, which spells "Dialpad" on a phone keypad.
Add a user desk phone
Admins can add user desk phones from their Dialpad Admin Settings.
Navigate to Office Settings > Desk Phones
In the User Phones tab, select Add a user phone
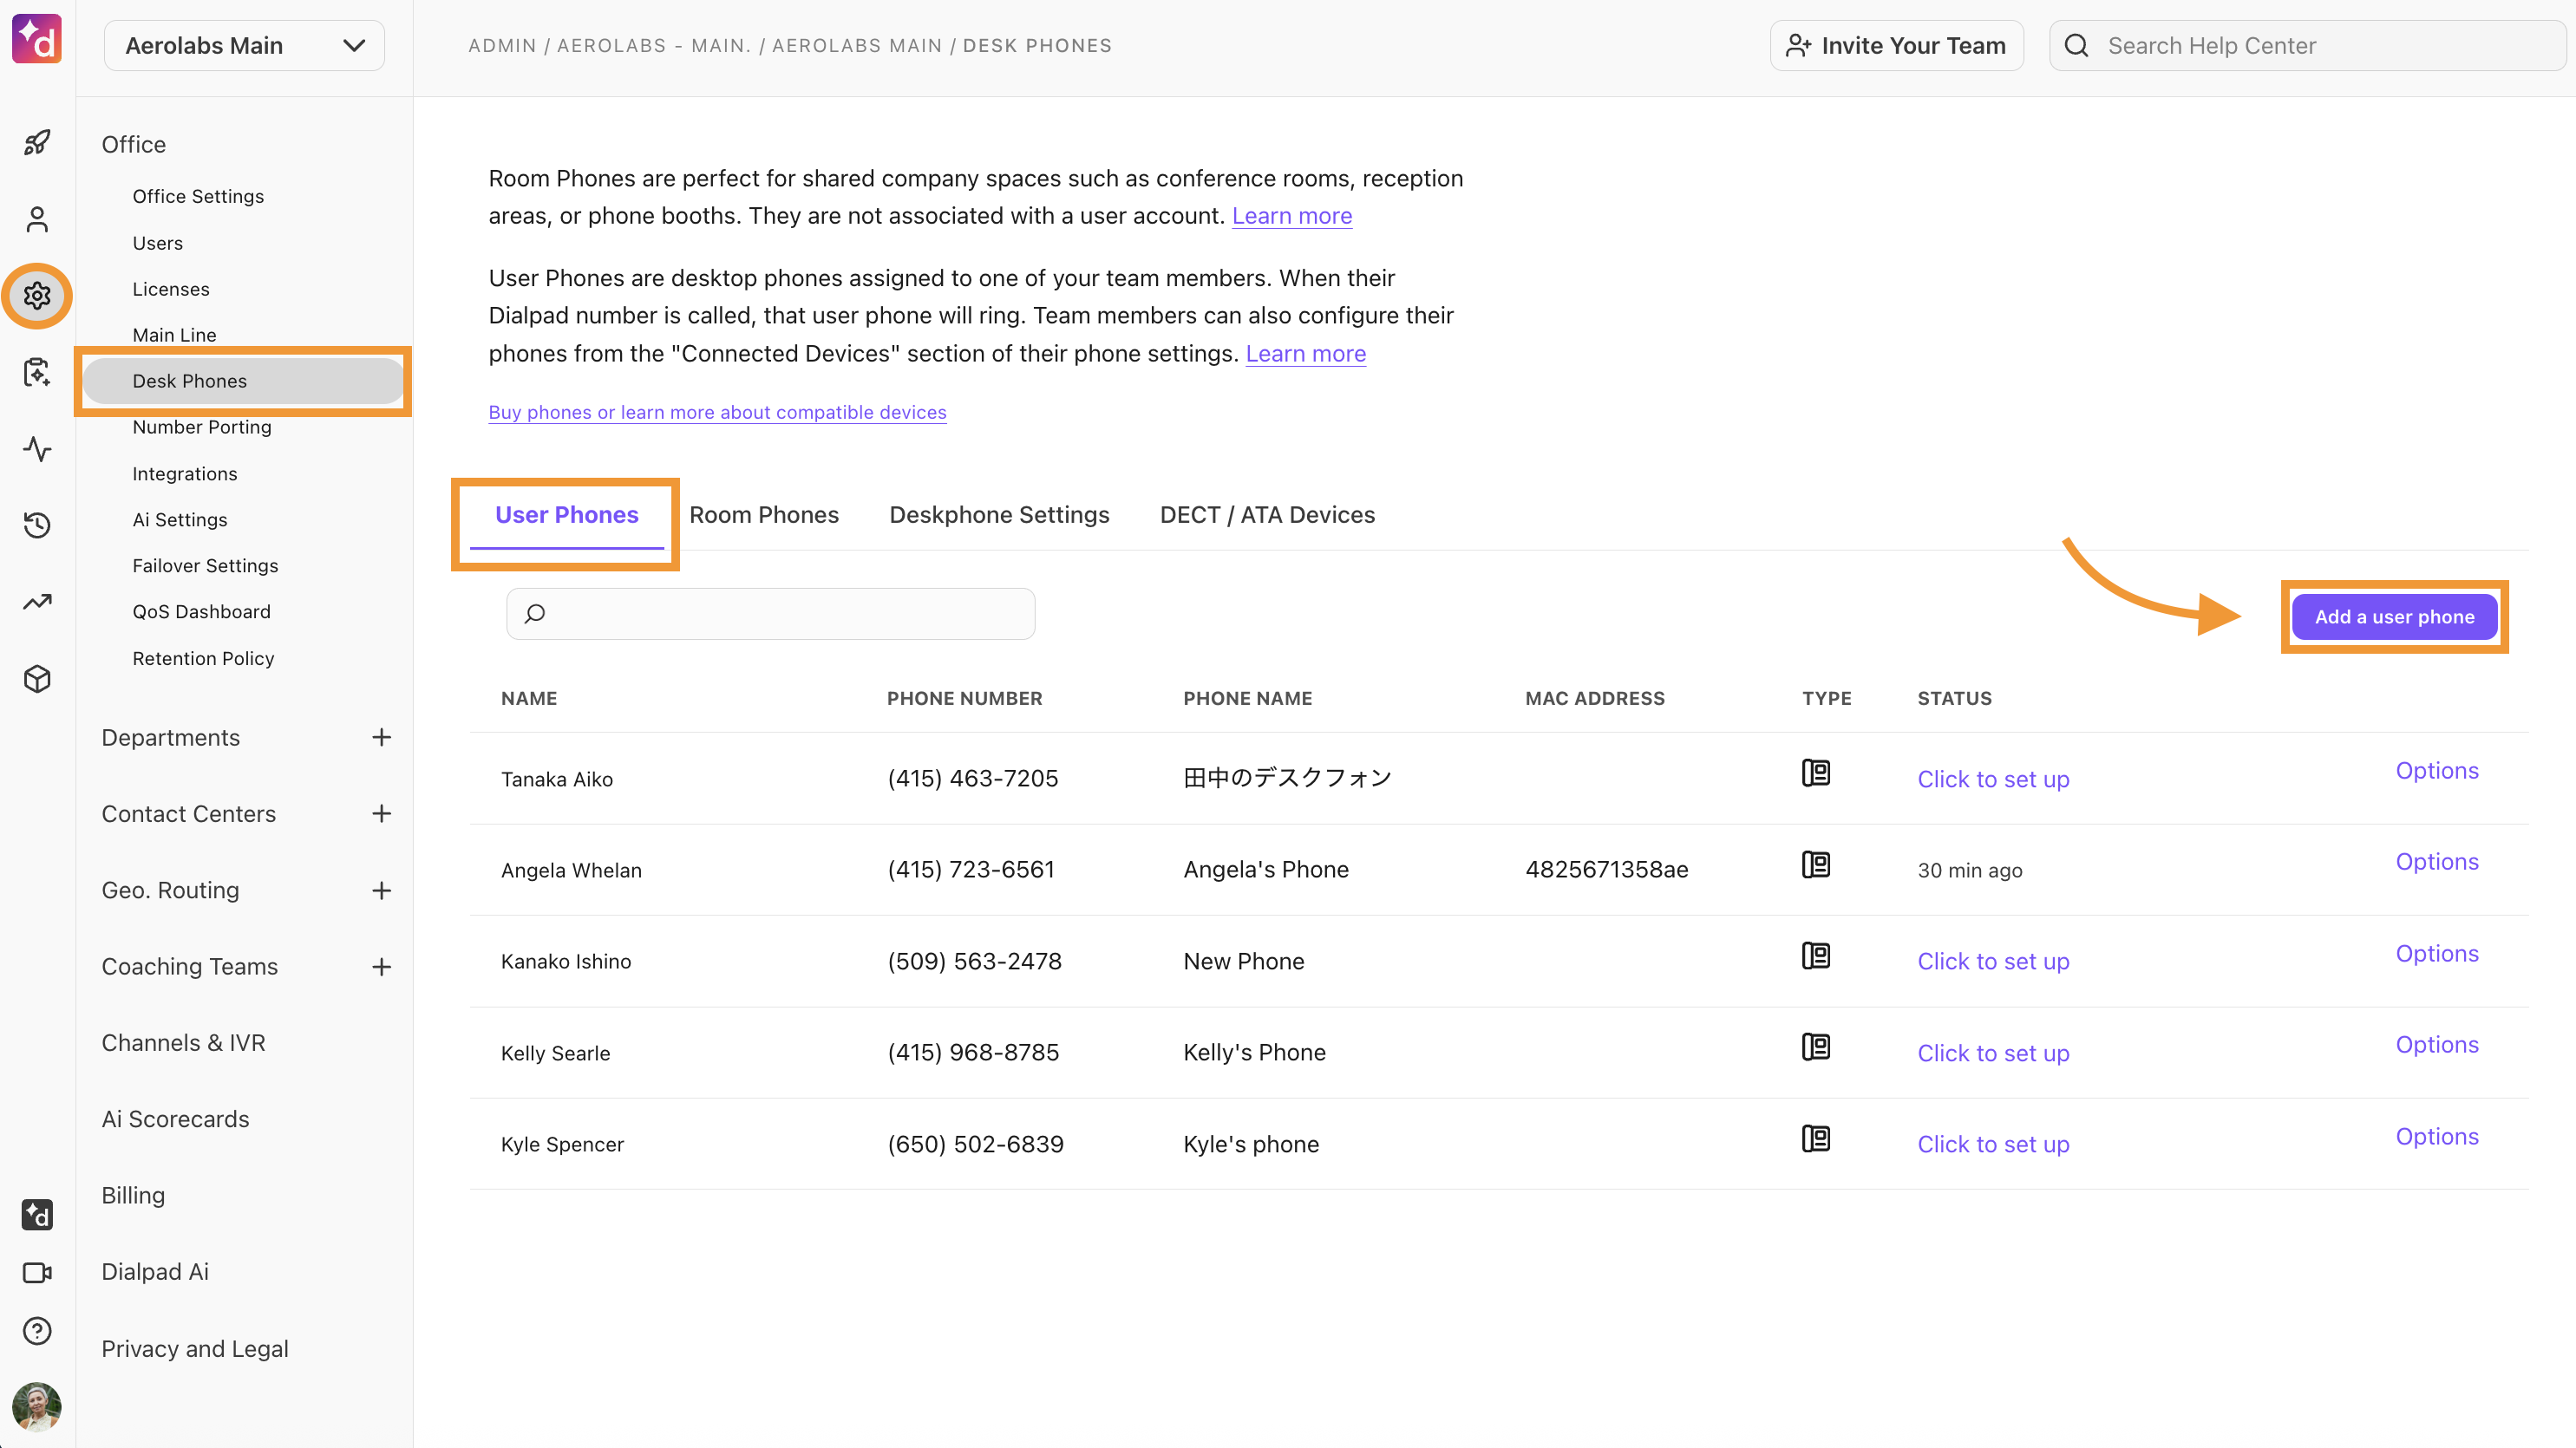
Select the desired model
Follow the prompts to configure your new desk phone
Let's go over the steps to add each supported desk phone.
Note
Your desk phone must be connected to the internet before getting started.
Polycom x50 series (OBi Edition)
To add your Polycom x50 series phone, go to your Dialpad Admin Settings.
Navigate to Office > Desk Phones
In the User Phones tab, select Add a User Phone
.png)
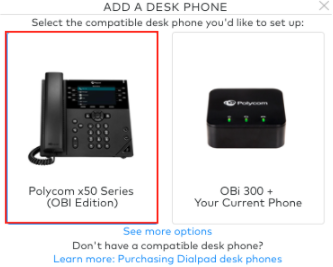
Select Polycom x50 Series (OBi Edition)
Name the desk phone and assign a user, then select Next
Select The device screen does display "Dialpad Activate" and select Next
Dial the activation code, then hang up and select Done
Once the activation code has been entered, you'll hear a message confirming the phone is ready and connected to the account.
Poly Edge E series
To add your Polycom Edge E phone, go to your Dialpad Admin Settings.
Navigate to Office > Desk Phones
In the User Phones tab, select Add a user phone
.png)
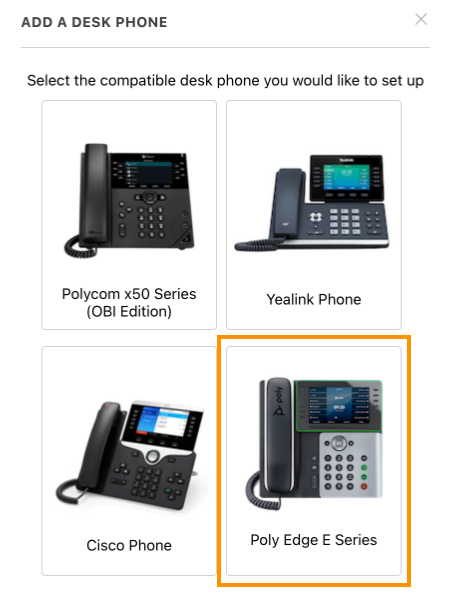
Select See more options
Select Poly Edge E Series
Name the desk phone and assign a user, then select Next
Select The device screen does display “Dialpad Activate” and select Next
Save the 4-digit activation code
Pick up the receiver and, when prompted, enter the 4-digit activation code
Note
The phone will automatically dial out.
Polycom VVX UCS series
There are two different methods to add your Polycom VVX:
If you purchased it from Dialpad
If you purchased it from a third party (not recommended)
Let's take a look at the two processes below.
Purchased from Dialpad
If you purchased your desk phone from Dialpad, go to your Dialpad Admin Settings.
Navigate to Office > Desk Phones
In the User Phones tab, select Add a user phone
Select See more options > Other Polycom Phones
Name the desk phone and assign it to a user, then select Next
Select The device screen displays "Dialpad Activate" > Next
Pick up the desk phone, dial the activation code, and hang up
Purchased from third party
If you purchased your desk phone from a third party, first go to your Dialpad Admin Settings.
Navigate to Office > Desk Phones
In the User Phones tab, select Add a user phone
Select See more options > Other Polycom phones
Name the desk phone and assign it to a user, then select Next
Select The device screen does NOT display "Dialpad Activate" > Next
You'll see a set-up menu, guiding you through the steps on your Polycom device.
Then, proceed in factory resetting the device.
Log into the Polycom Web Browser at: https://IP_Address_of_your_Polycom
Select Utilities
Select Phone Backup and Restore
Select Expand Global Settings
Select Restore
Next, it's time to provision the server.
Navigate to Menu > Status > Network
Copy the IP address from your Polycom device in a new web browser tab
Note
Add https:// before the IP address.
Enter the Admin Password displayed in Dialpad
Navigate to Settings > Provisioning Server
Change the Server Type to HTTPS and enter the server address provided in Dialpad
Remove Server User and Server Password information
Change Boot Server to Static
Select Save
Yealink T series
Note
Your Yealink phone must be on the list of Supported Desk Phones. Your device may update its firmware during activation to ensure compatibility with Dialpad.
To add your new Yealink desk phone, go to your Dialpad Admin Settings.
Navigate to Office > Desk Phones
In the User Phones tab, select Add a user phone
.png)
Select Yealink Phone
Name the desk phone and assign it to a user, then select Next
Once initialization is complete, select one of the following options:
The device screen displays "Dialpad Activate"
The device screen does NOT display "Dialpad Activate"
If the device screen says "Dialpad Activate"
Enter the code prompted on your screen
Note
A voice message will confirm that the code has been sent to the server.
Hang up the phone and Select Done
Note
The device will reset.
If the device screen does NOT display "Dialpad Activate"
Head to this Help Center article to learn how to set up Dialpad on your device using the phone's web interface
After adding the Dialpad provisioning server via the phone's web interface, your device will display “Dialpad Activate”
Select Next on the pop-up to activate it
Add SIP credentials to a device
To add SIP credentials to a device, head to your Dialpad Admin Settings.
Go to Office > Desk Phones
Select the User Phones or Room Phones tab and select Add a user phone or Add a room phone
From the list of devices, select SIP Phone
Enter the SIP phone details:
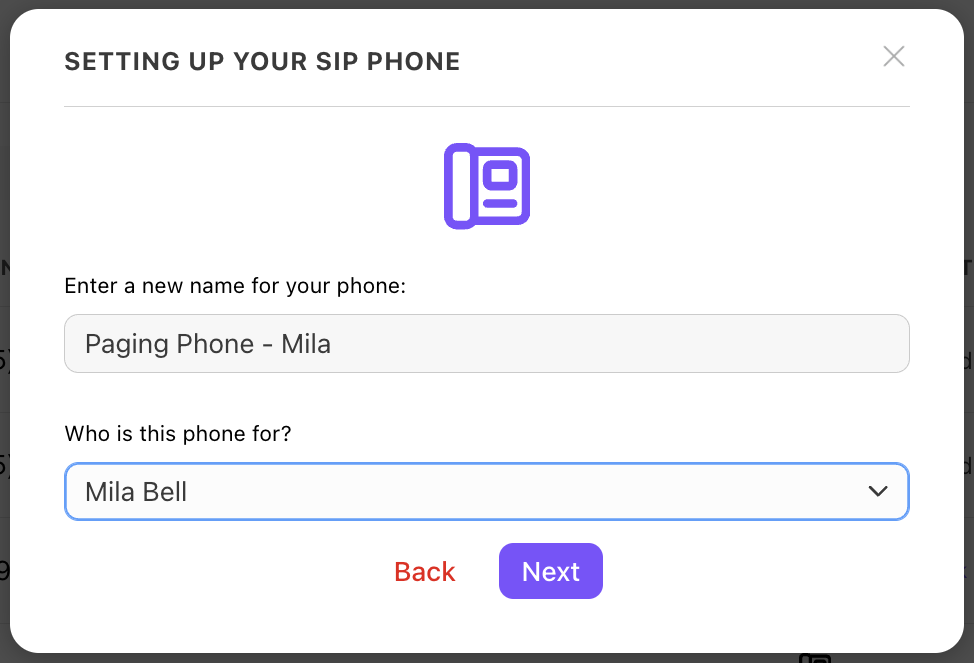
For user phones, enter a name and choose who the phone is for
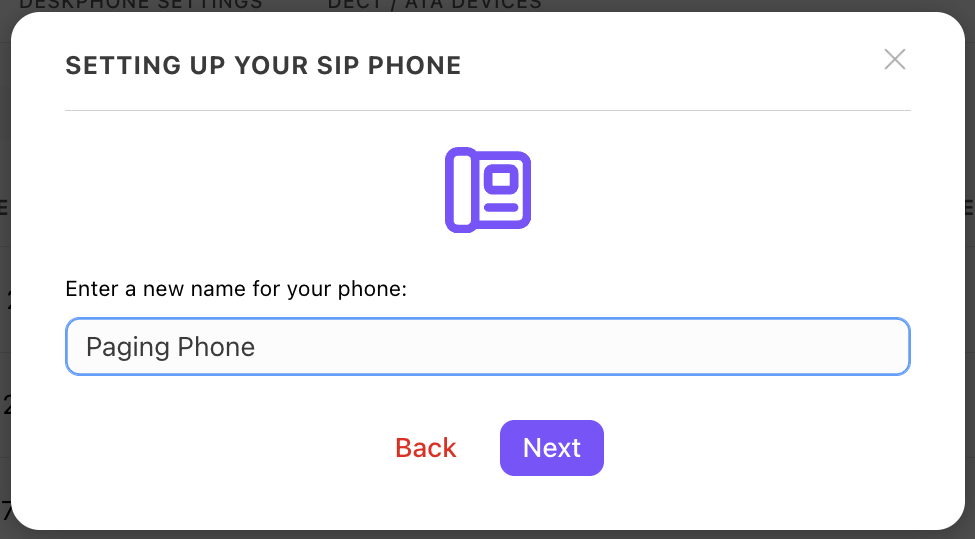
For room phones, enter a name
Note
For room phones, you’ll also need to choose your Number type.
Select Next
Dialpad generates the SIP credentials for the phone.
Note
This includes the voice gateway Domain and the Port for voice traffic.
Select Done
Read this Help Center article to learn more about SIP devices.
Remove a desk phone
To remove a user desk phone, head to your Dialpad Admin Settings.
Navigate to Office > Desk Phones
In the User Phones tab, go to the device you want to remove
Select Options > Remove
.png)
Confirm the changes
Configure line keys from Dialpad Admin Portal
Configure Line Keys gives you a visual tool to associate line keys on your supported desk phone with other calling feature functionality (such as speed dials and shared line appearances)
To configure your line keys, head to your Dialpad Admin Settings.
Navigate toOffice Settings > Desk Phones and find the desk phone you want to configure
Select Options > Configure Deskphone
Assign your lines as needed (speed dial, executive line, etc.)
Corporate speed dial
Enabling corporate speed dial places a Speed Dial on the last line of your Office's desk phones.
To configure your corporate speed dial, head to your Dialpad Admin Portal.
Navigate to Office > Desk Phones
Under the Desktop Settings tab, enter the Speed-dial name and the desired phone number
Select Save Speed Dial
.png)
Changes will be reflected on these desk phones overnight or within 1-2 minutes of a manual reboot.
Once corporate speed dial has been enabled, easily change the speed dial number by selecting Clear Speed Dial.
Custom speed dial
You can create custom speed dial numbers for line keys on a user desk phone.
To create a custom speed dial on a user phone, go to your Dialpad Admin Settings.
Navigate to Office > Desk Phones
Locate the phone you want to add a custom speed dial to, select Options > Configure Deskphone
In an empty line key row, select Speed dial/BLF from the Function drop-down menu
Select Create Custom Speed Dial
Enter this information for the custom speed dial
Label
Number (phone number)
Select Save, then select Update Device
Frequently asked questions
Why is there a pause before my phone call goes through?
When you make a call with your desk phone using VoIP, there’s usually a 4-second delay after you dial a number. Since VoIP calls go over the internet, the process is more complex than with regular phone lines, which causes this delay.
Can I change the time format on my desk phone?
Yes, to switch your device's time format from 24-hour to 12-hour, contact our Customer Care team.
If I save a number to a custom speed dial, will it show up in Dialpad’s shared contacts?
No. Custom speed dial numbers are stored locally on the desk phone only. They are not synced or added to Dialpad’s shared contacts.
Want to learn more?
Check out Dialpad University's free courses covering our products and services, as well as insightful tips and best practices.