Create a Department after setting up your Main Line in Dialpad.
Departments route callers to a specific group or team, such as sales and customer support.
Create a Department
To create a department, go to your Dialpad Admin Settings.
Navigate to Departments
Select Add a Department (that's the + icon)
Name the Department, then add a description
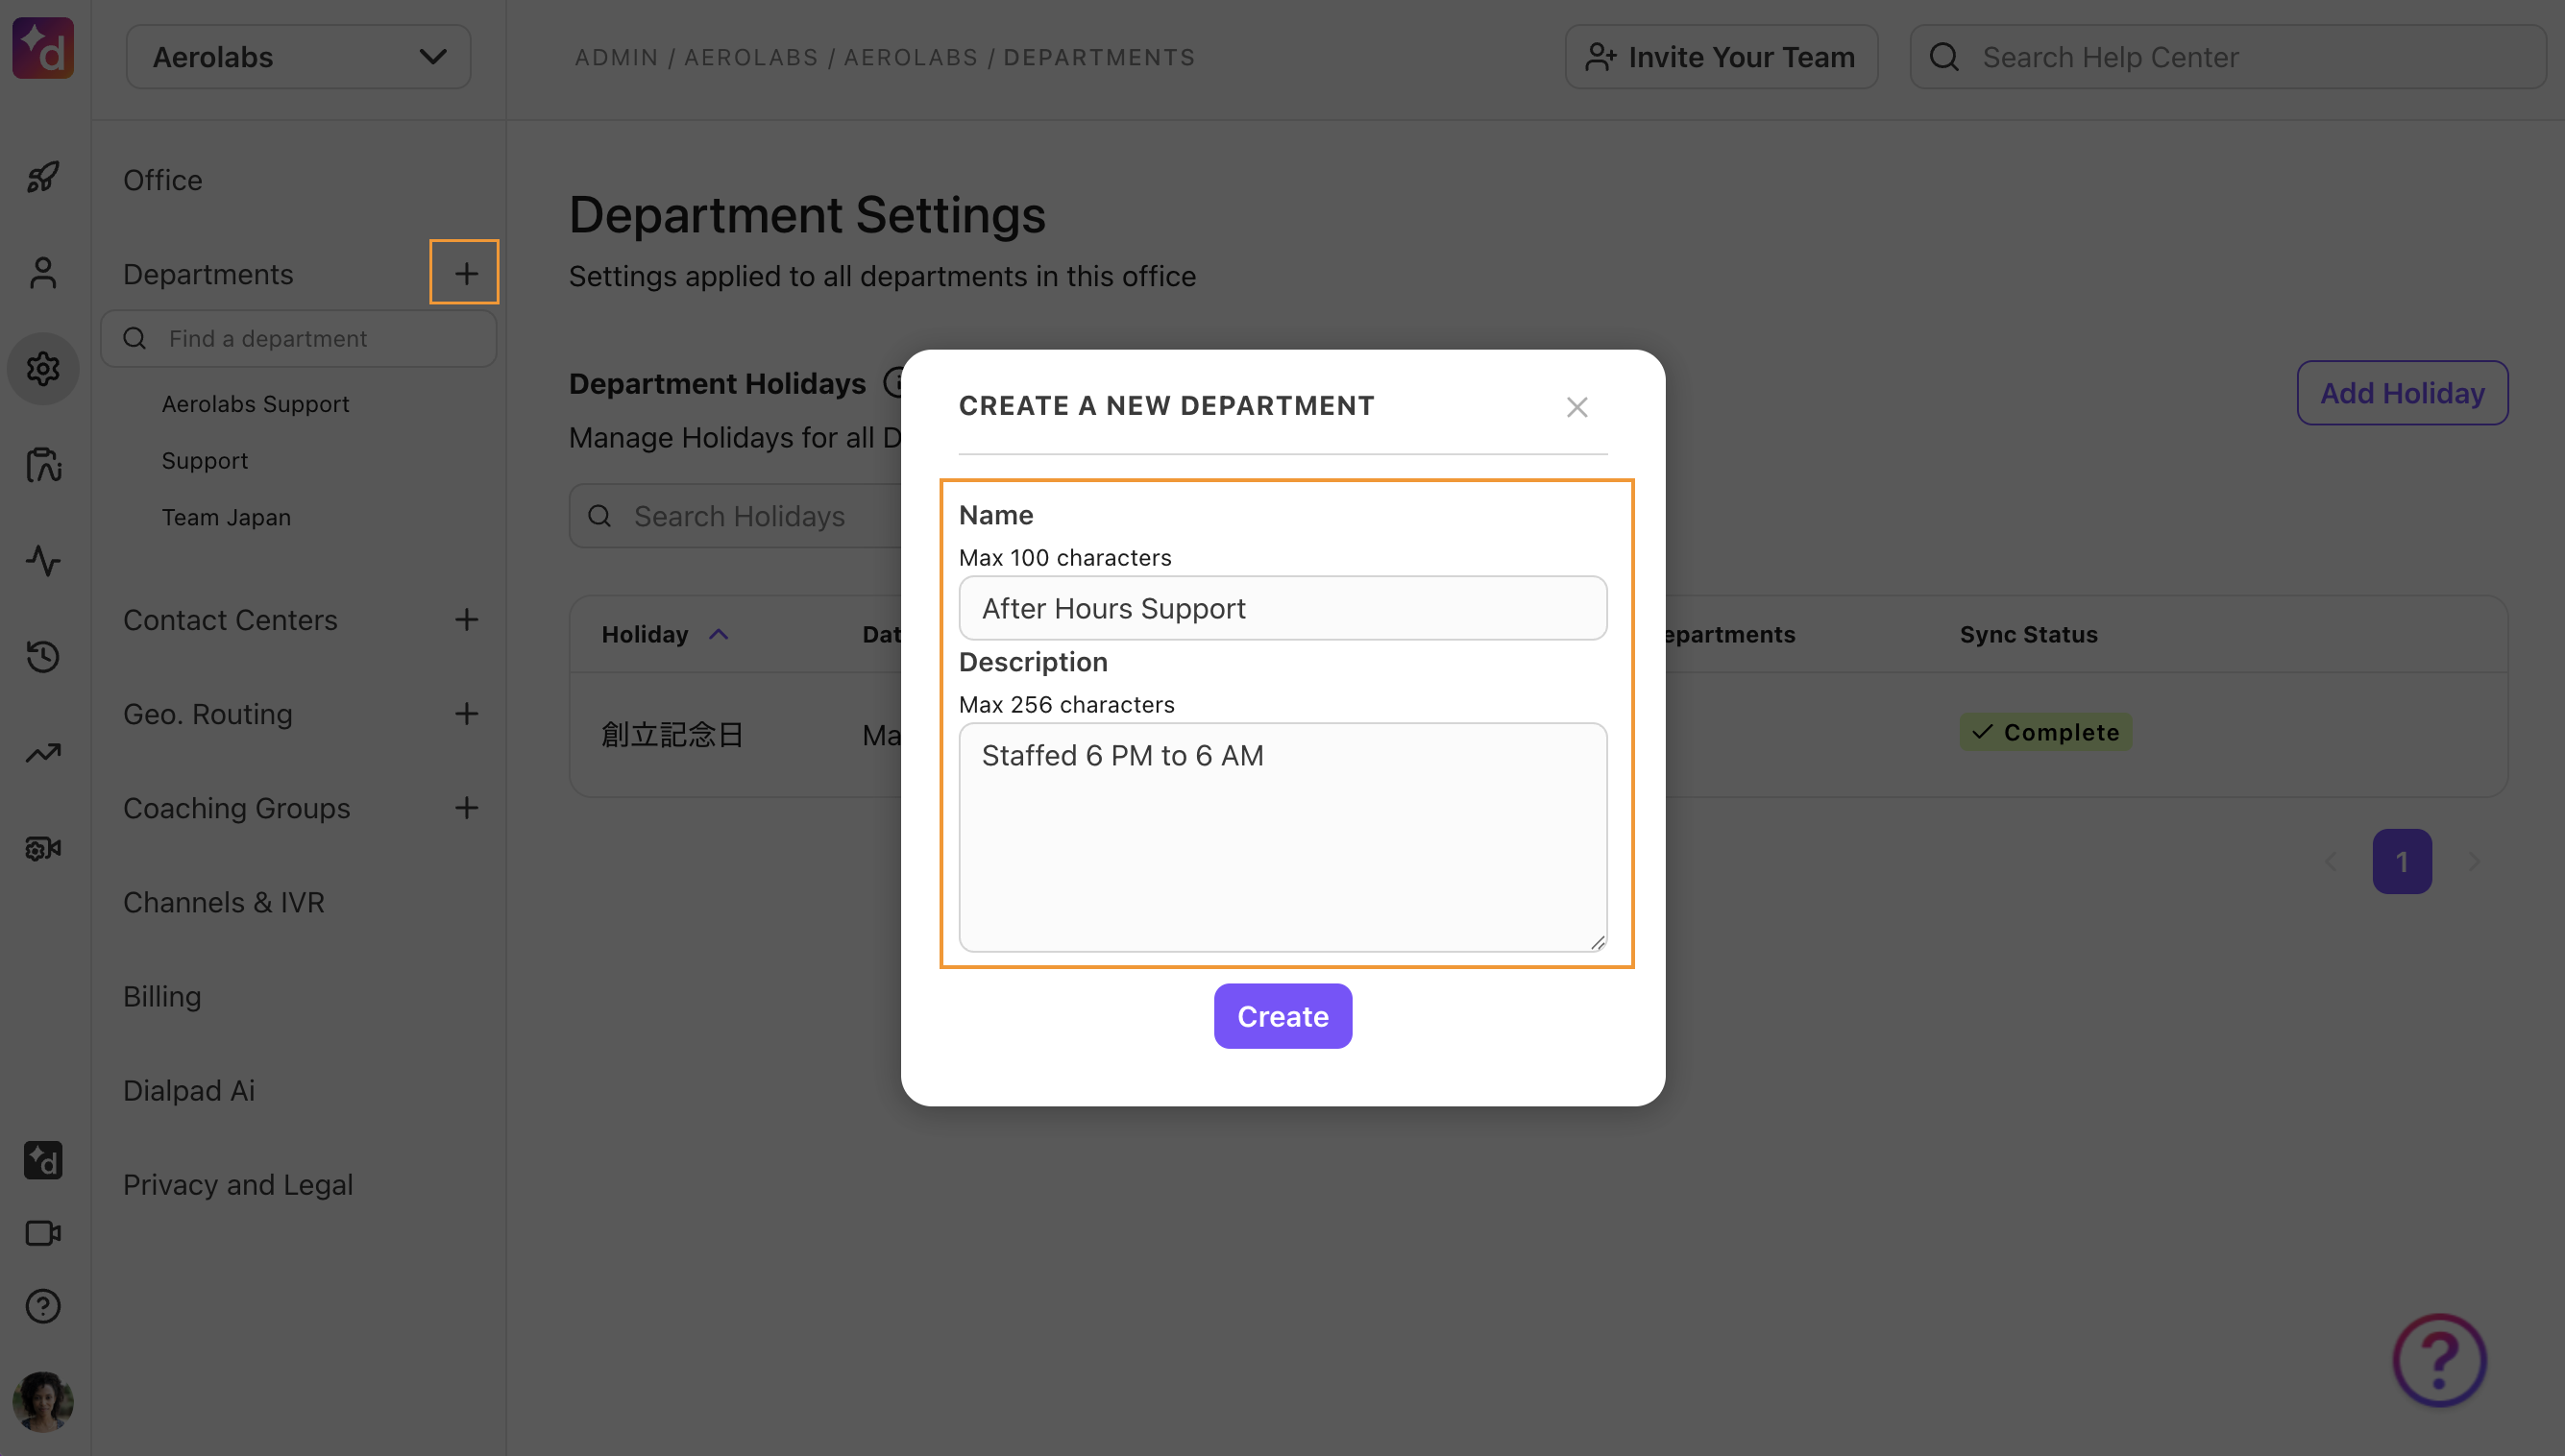
Select Create
Dialpad will then take you to the homepage for your newly created Department. 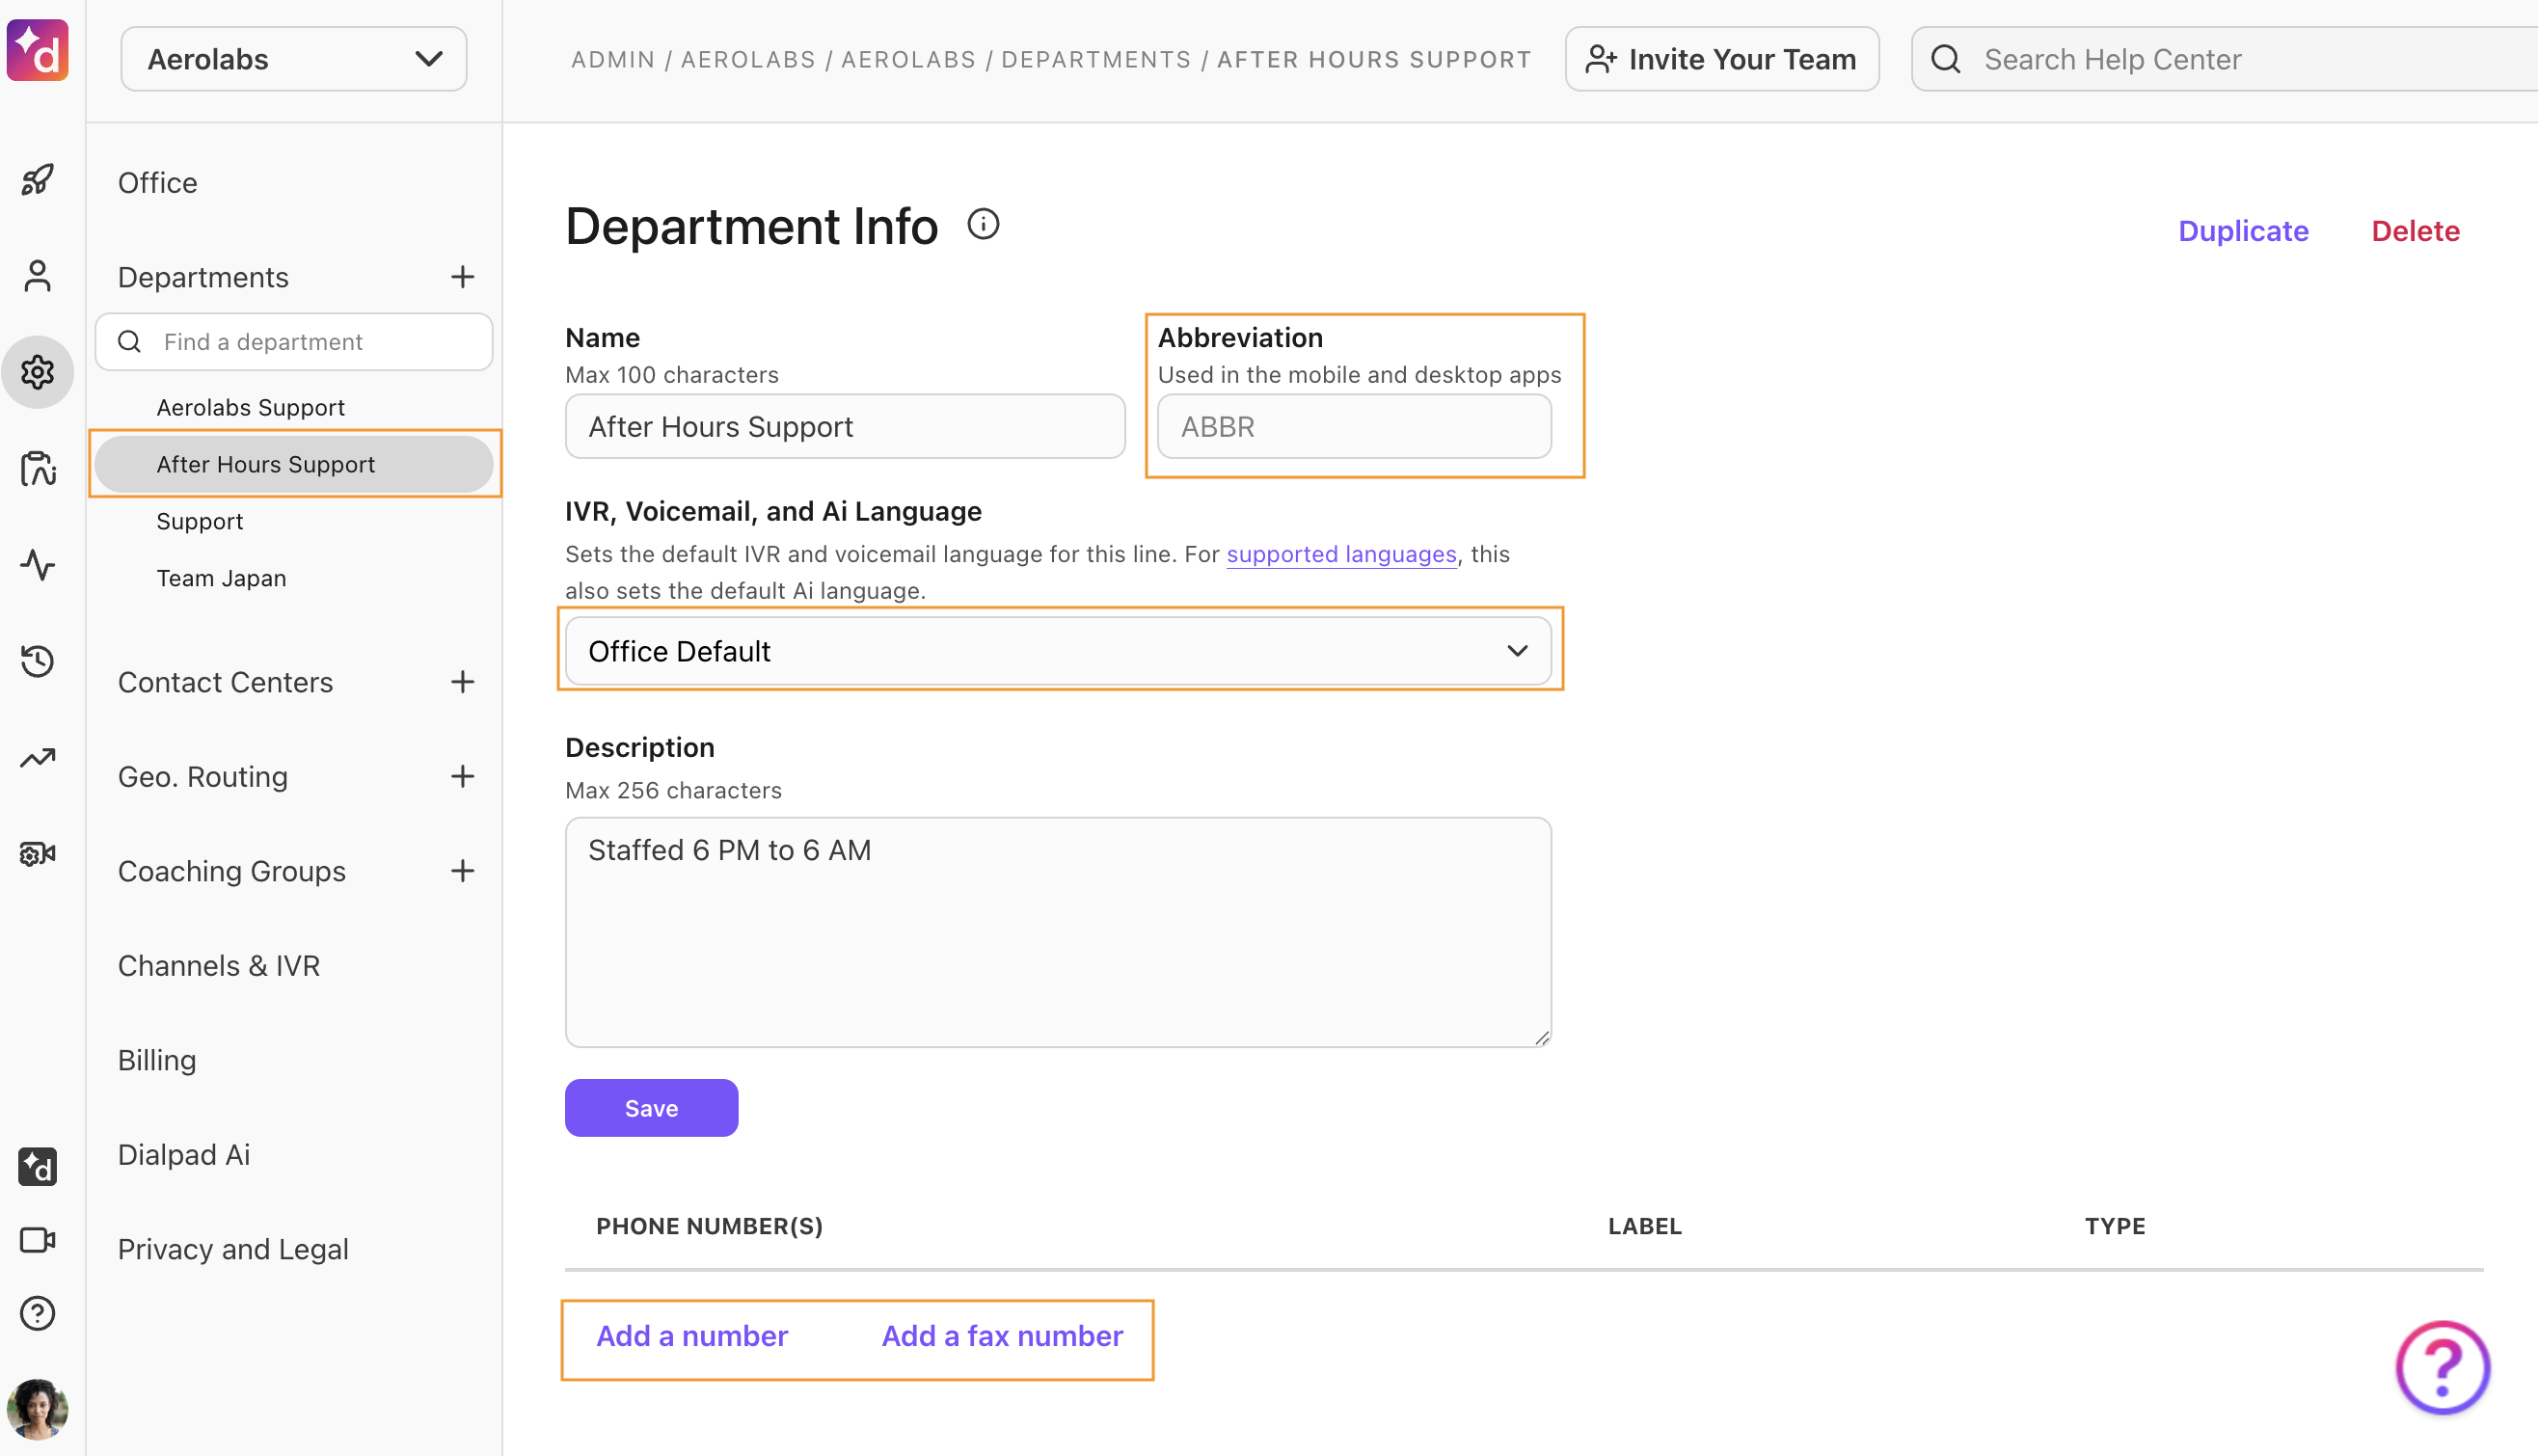
Here, you can add an abbreviation, local, toll-free, and fax numbers, and select your IVR and voicemail language settings.
Note
Departments can have up to 30 numbers.
Duplicate a Department
As your team scales, easily duplicate existing Departments to speed up the creation process and ensure parity between departments.
Duplication allows your customizations (think routing settings or custom moments) to be carried over to the new Department without manually updating it at the time of creation.
To duplicate a Department, head to your Admin Settings from Dialpad.com
Select Departments
Choose the desired Department
Select Duplicate
.png)
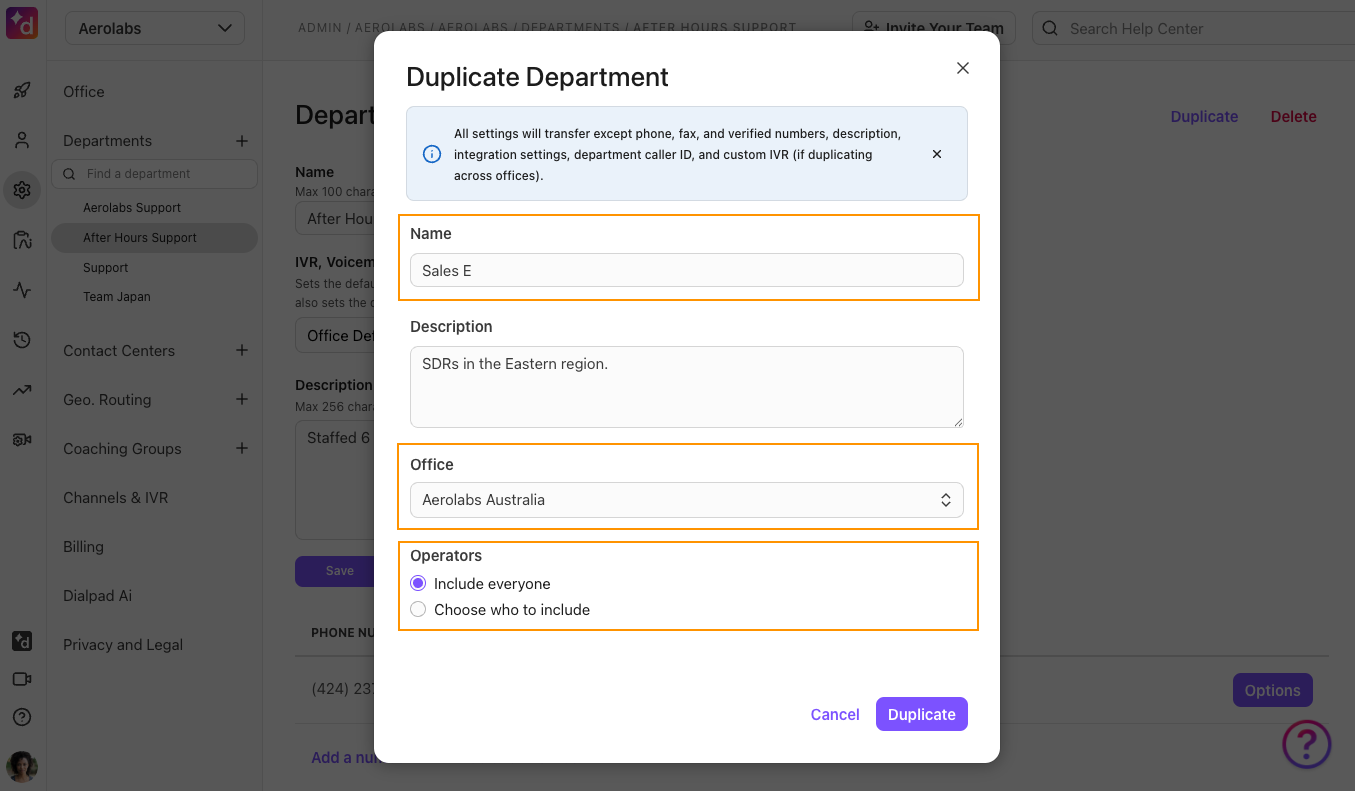
Name the new Department
Write a Department description (optional)
Choose which office the Department will be located in
Duplications can be done throughout different offices
Select which operators you’d like to include
Choose to keep the same operators as the existing Department
Choose new operators
Select Duplicate
Your new Department will be created, and you’ll be taken to its settings page.
Office parameters
When duplicating a Department within the same office, the following settings will not be duplicated:
Phone numbers
Fax Numbers
Verified Numbers
Integration Settings
When duplicating a Department to another office, the following settings will not be duplicated:
Phone numbers
Fax Numbers
Verified Numbers
Integration Settings
Department caller ID
Custom IVRs
Timezone
Routing options
Call recording greetings
Holiday settings
Call blocking & spam prevention
Retention policy
Ring type of Operators