Contact Center agents are front-line employees who interact with your customers through various communication channels like phone, email, or chat.
Assigning agents to the right contact centers ensures calls and messages are routed effectively and that contact centers are properly staffed, improving team efficiency and customer satisfaction.
Once you've created a Contact Center, assign agents to it.
Who can use this
Contact Center agents are available to Dialpad Support users.
If you're on an Dialpad Sell plan with the Contact Center Add-on, you can also assign agents to your Contact Center.
Assign an agent
To assign an agent to your Contact Center:
Navigate to Dialpad Admin Settings > Contact Centers
Select the desired Contact Center and go to the Agents & Admins section
Enter the name or email address of the agent in the search bar
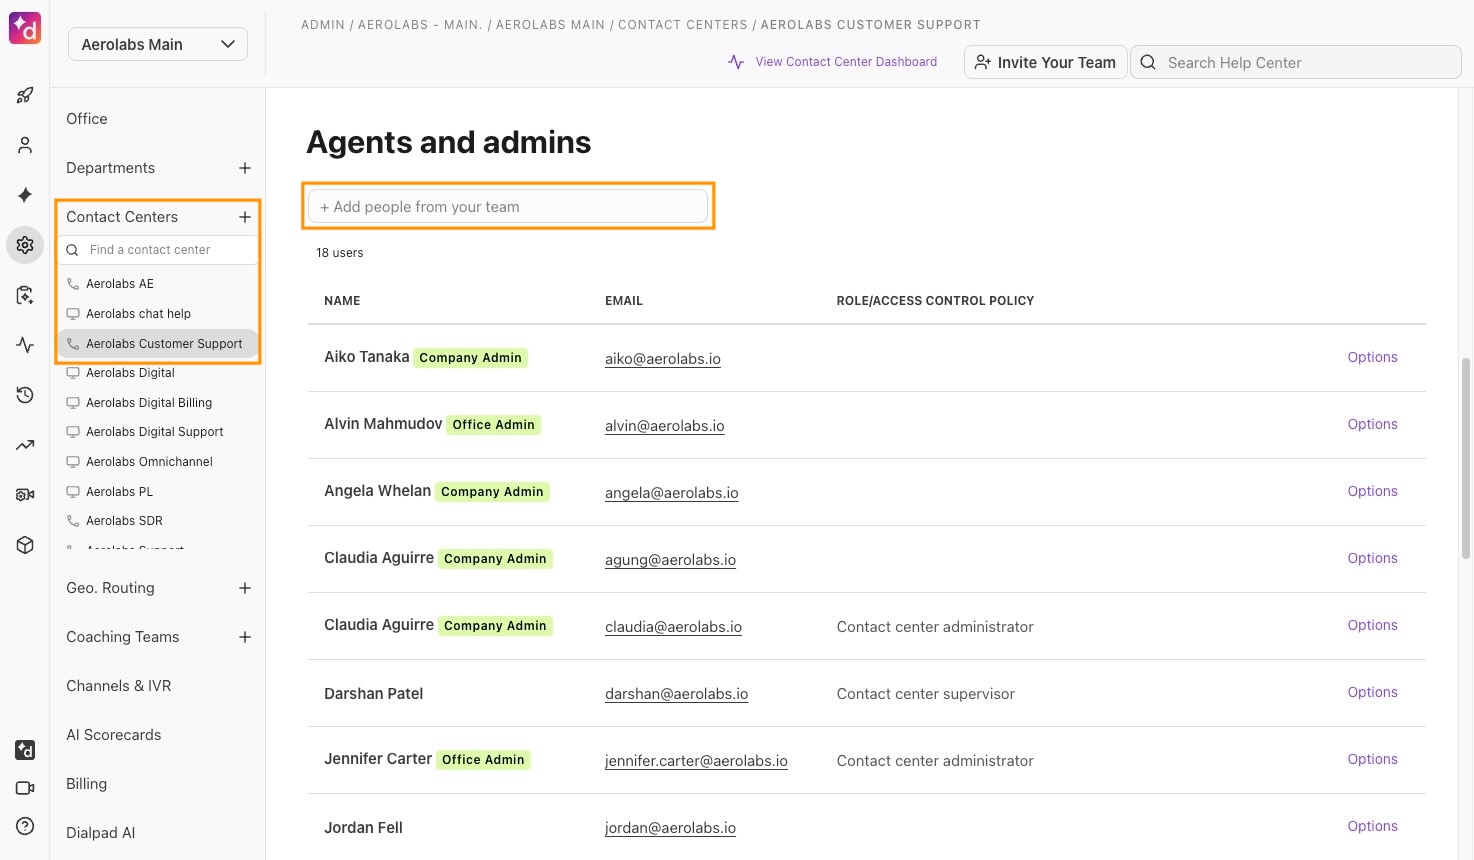
Select the agent from the results window. The agent is added to the list for the Contact Center.
Note
An agent can be assigned to a maximum of 100 Contact Centers.
Assign Contact Center Admin or Supervisor permission
Initially, users appear as an agent, but you can make them an admin or supervisor. Roles for admins and supervisors are defined like this:
Supervisor | Have all the access as an agent or rep with the ability to utilize coaching metrics like Listen In, Barge In, and Take Over, as well as access the dashboard and set alerts |
Admin | Can do everything that a Contact Center Supervisor can do, as well as edit Contact Center settings. |
To give an agent Contact Center Admin or Supervisor permissions:
Navigate to Dialpad Admin Settings > Contact Centers
Choose the desired Contact Center and go to the Agents and Admins section
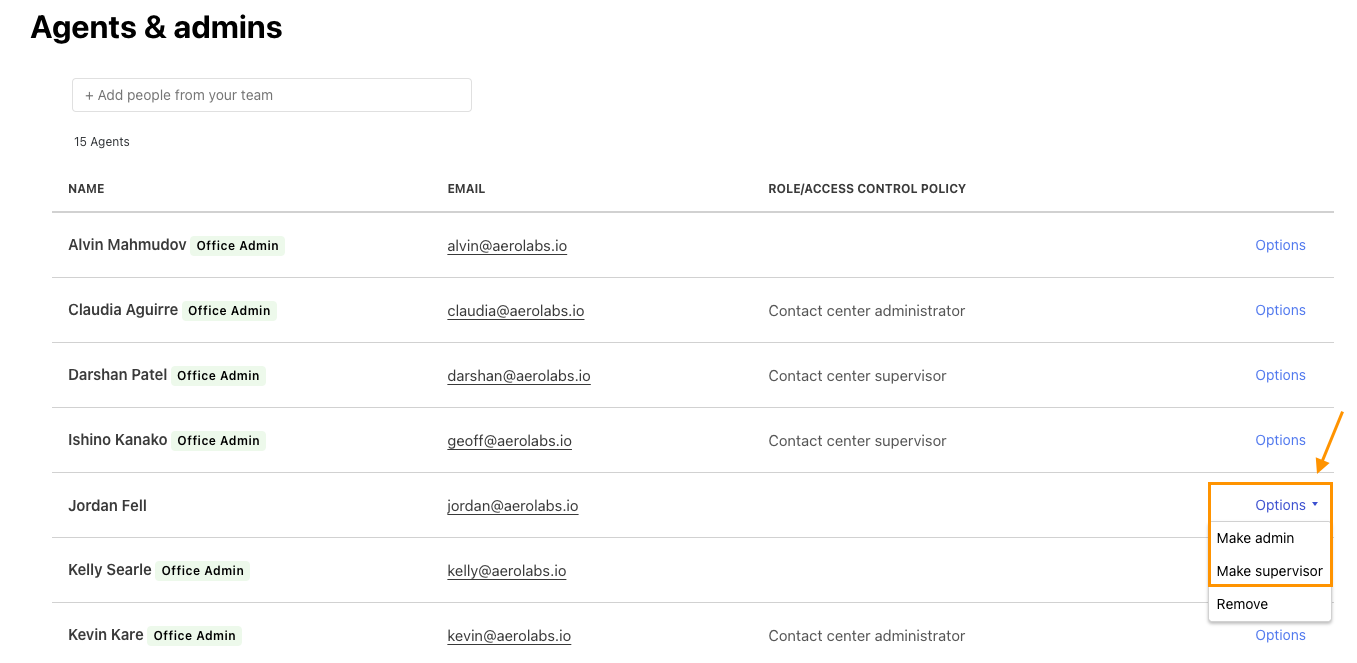
Find agent you whose settings you want to change and select Options
From the drop-down list, select Make Admin or Make Supervisor
After updating the permissions for the agent, select your routing type, such as skills-based routing, to prioritize which agents receive calls based on their rank and proficiency for a specific type of call.
Bulk manage roles and skills
Easily manage an agent’s admin or supervisor access and skills across the contact centers they belong to.
To bulk edit an agent’s role and skill, go to Dialpad Admin Settings.
Navigate to Office > Select Users
Select Options > Groups
Select Manage contact centers
Choose the contact centers you’d like to manage > Select Role and skill
Set the agent’s role and skill > Select Apply and Done
Note
Regional and Office admins can only manage contact centers they’re part of.
Upgrading users from Dialpad Connect to Dialpad Support
When you change a Dialpad Connect user to a Contact Center user, you must upgrade the user to a Dialpad Support or Dialpad Sell license.
If you don’t have a free license, you’ll be prompted to purchase a new license and will not be able to move the user until a license is available.
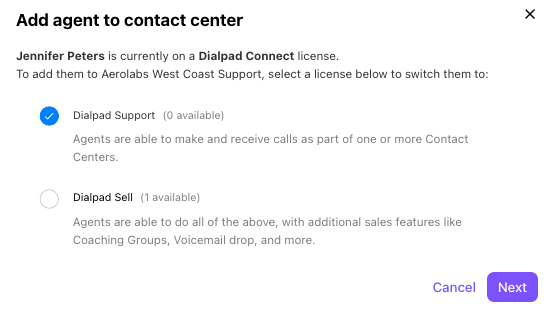
When you upgrade a user to a Dialpad Support license, you can let them keep their existing numbers or remove them — if you keep the existing number, you’ll be billed for an additional number on that user’s line.
Upgrades are instantaneous, so you don’t have to worry about downtime.
Note
Without a direct number, the user can only place outbound calls from the Contact Center.
Assign an agent to multiple Contact Centers
To assign an agent to multiple Contact Centers:
Navigate to Dialpad Admin Settings > Office and select Users
Go to the desired user and select Options
.jpeg)
Select Groups > Manage contact centers
Select Add Contact Centers > Choose the contact centers you want the agent to be added to
Select Add > Done to save
To remove an agent from multiple contact centers, repeat steps 1-4 shown above, and then deselect the Contact Centers you want the agent removed from.
Note
Agents can be assigned to contact centers across multiple Offices.
Ring connected devices
Agents should ensure calls ring connected devices — calls can ring from Dialpad on desktops, laptops, mobile devices, desk phones, room phones, and forwarding numbers.
To determine which devices will ring:
Navigate to Your Settings > Your Devices
For each device type, enable the Ring This Device option
.png)