In-app audio settings let you decide the microphone and speaker/headset Dialpad uses.
Built-in options are often included with laptops or desktops, but Dialpad also supports external microphones and speakers/headsets. So you're able to choose what works best for you. It takes only a few clicks, and then Dialpad knows your preferences for all calls and messages.
Let's take a look at audio settings in Dialpad's desktop app.
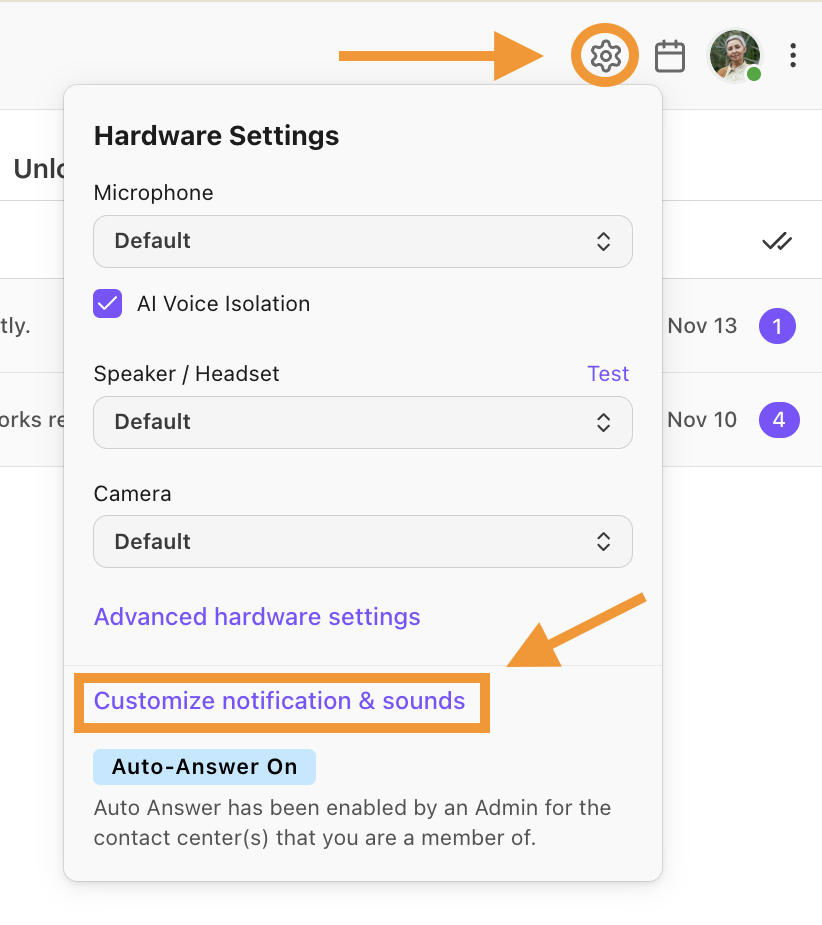
Hardware settings
To access your Hardware Settings from the Dialpad app, select the Gear icon.
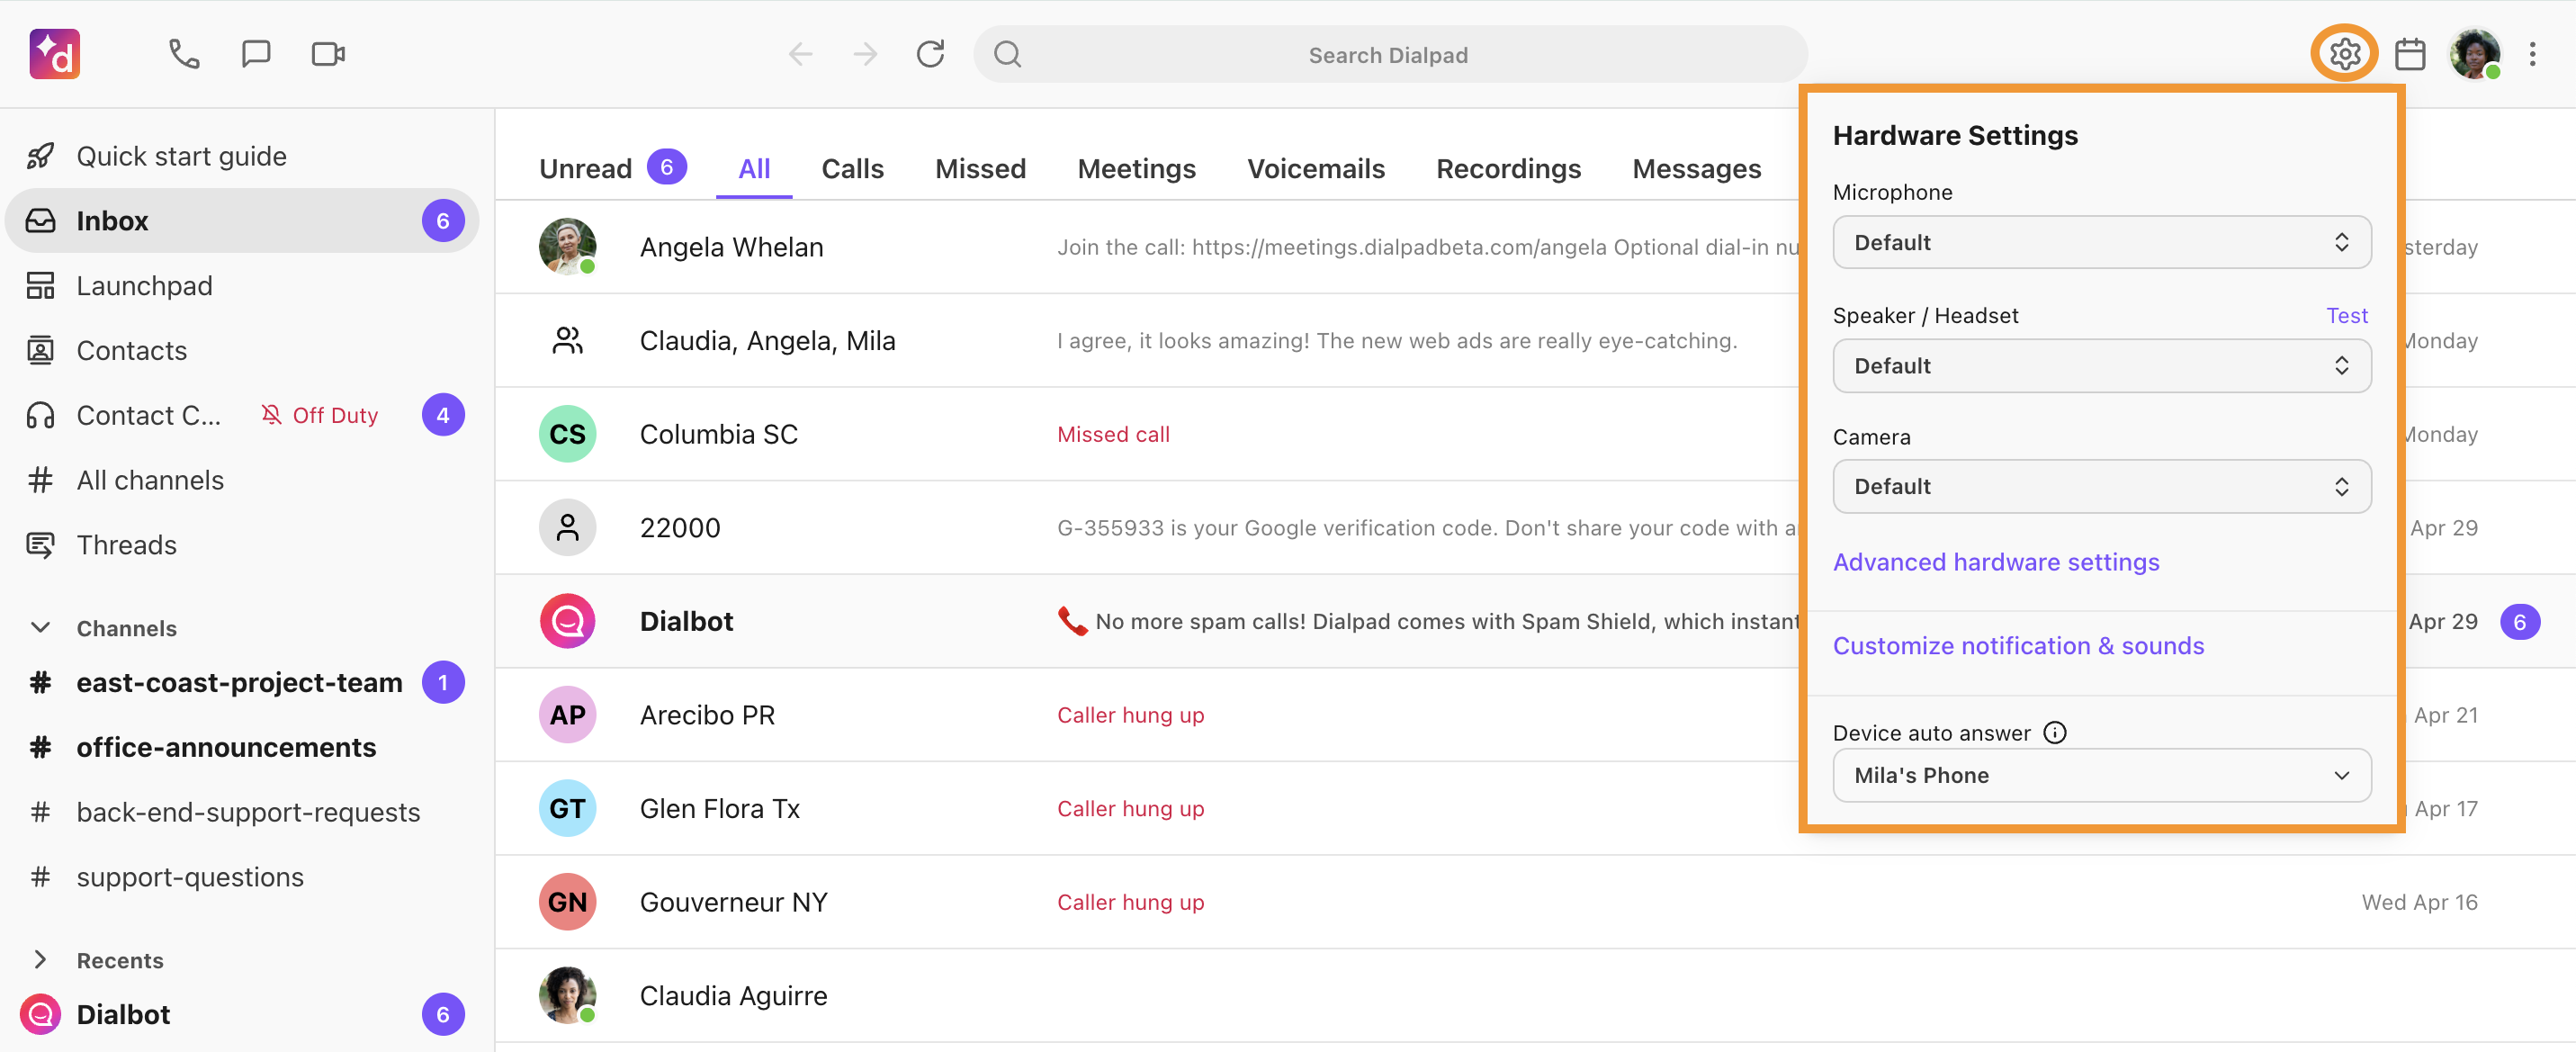
This pop-up menu provides quick access to your microphone, speaker/headset, camera configuration and desk phone settings.
You can also access your Hardware Settings from your app settings.
Select your avatar
Select Preferences
Select Hardware Settings

Here you'll find the same list of microphone, speaker/headset, camera options and deskphone.
Make any adjustments necessary, then continue using Dialpad.
Volume control
Customize your notification and microphone volume, or choose to use Dialpad’s Auto Volume feature to maintain a consistent volume throughout your devices.
Volume control settings can be accessed from your Hardware Settings menu, as detailed in the section above, or from the Preferences section of your in-app setting.
![]()
To adjust the volume, slide the toggle to the right or left, then select Test to listen to the volume.
You can also choose Auto Volume to have Dialpad automatically maintain a consistent volume.
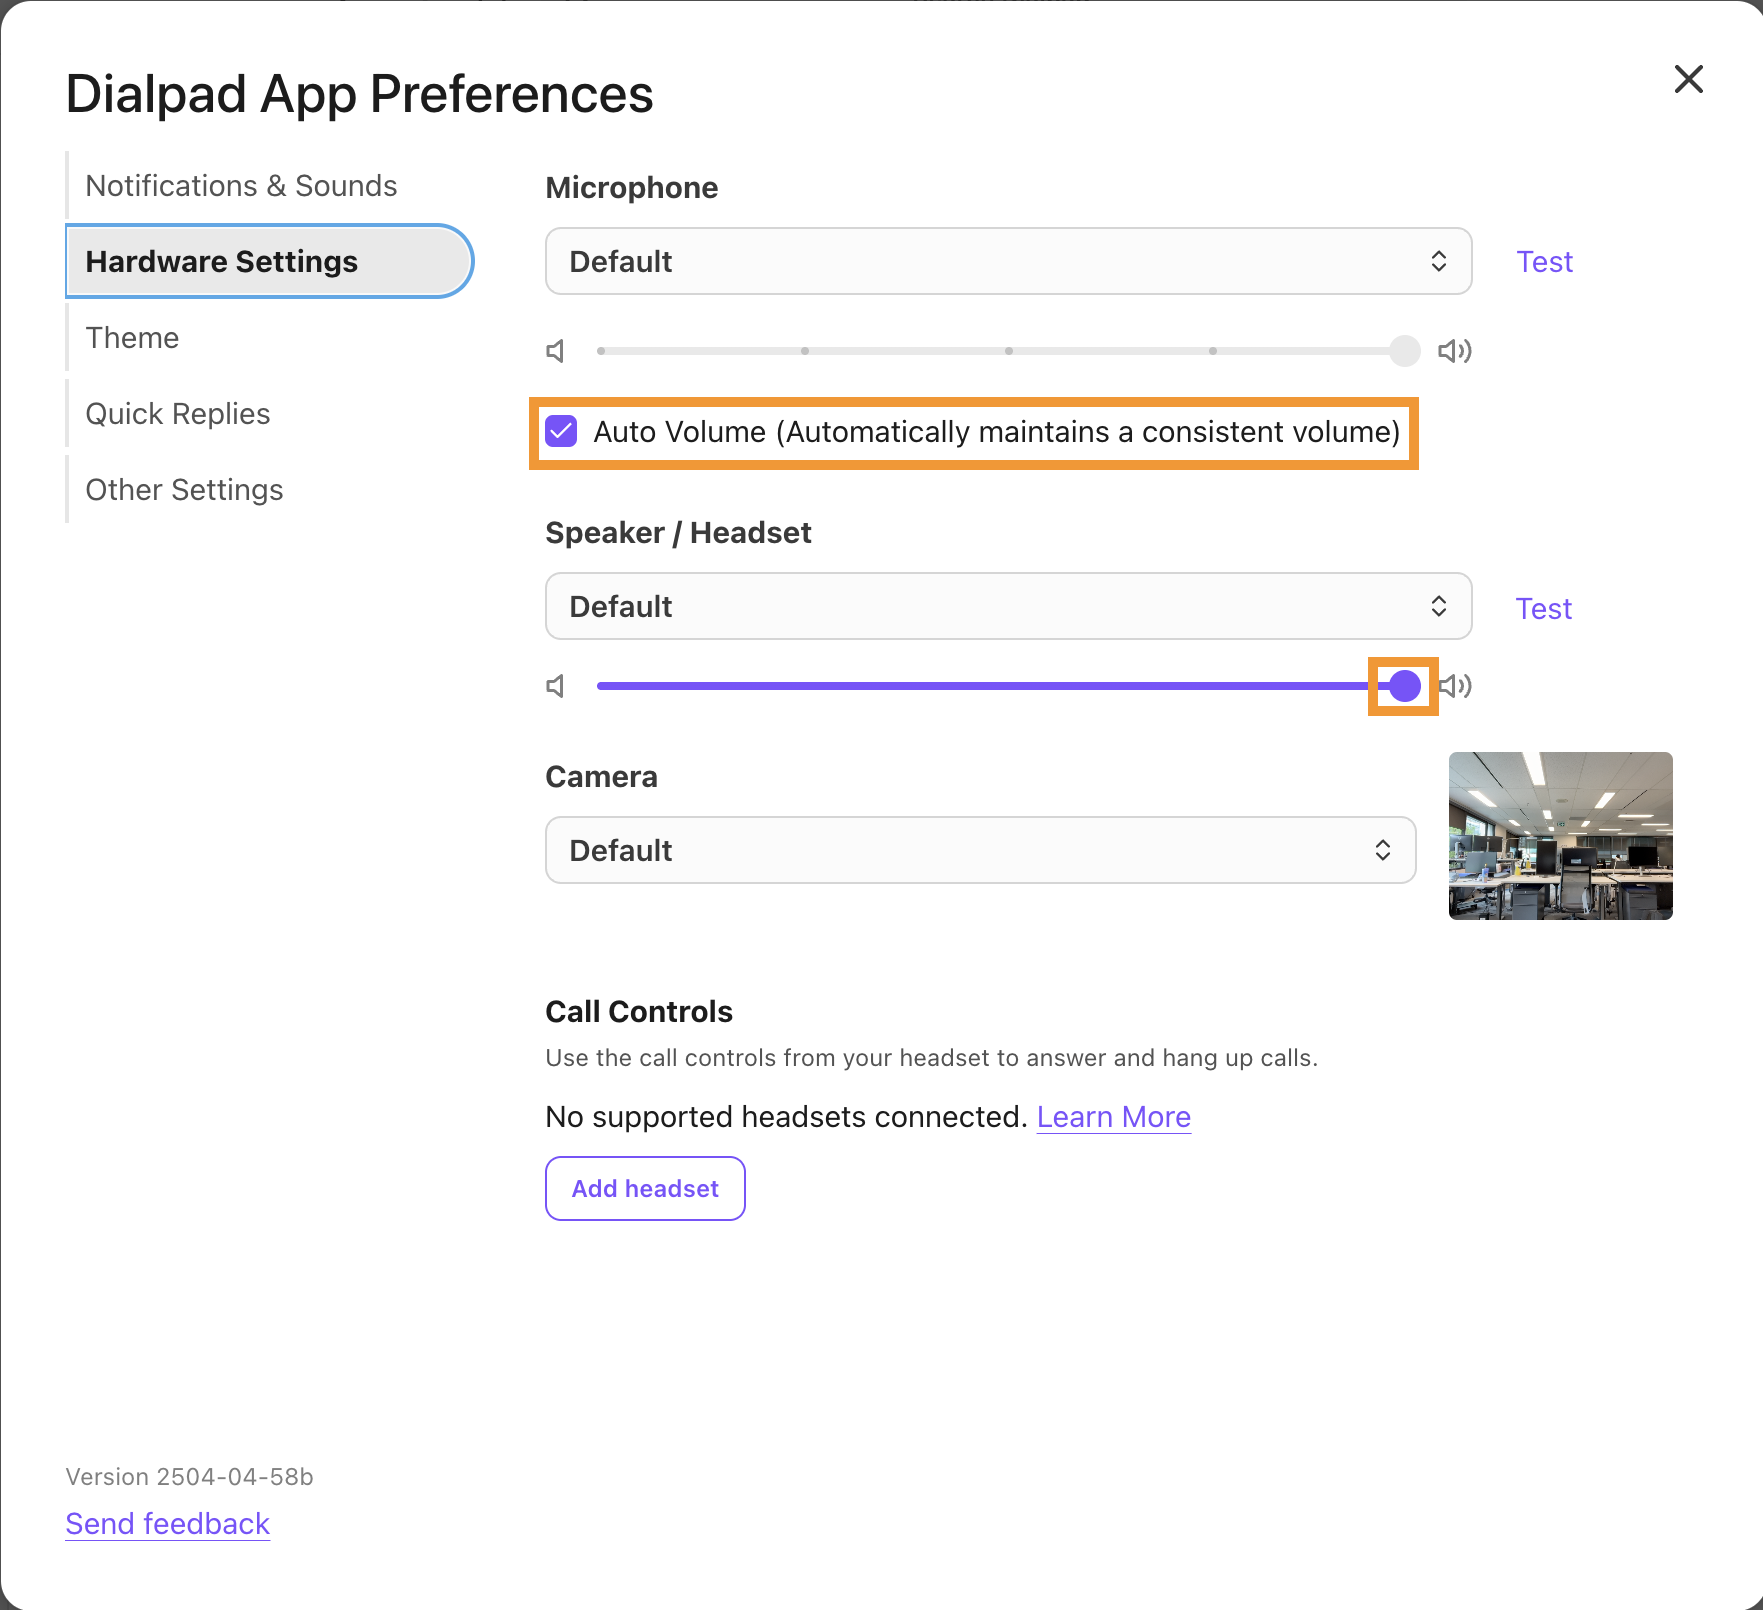
That’s it, your preferences are instantly saved!
Use a headset
If you'd rather use a headset for in-app audio, make sure that you've got the following set up:
USB wired headset or USB dongle-based wireless headset
Headset is selected in your computer's sound settings
Headset is selected as default microphone in your Chrome browser (Chrome app users)
Docking station is plugged directly into your laptop
Connecting a new USB headset will prompt an overlay, asking whether you'd like to continue to use that specific microphone.

If the app detects a change to your speaker as well, Dialpad will display an alert; this typically occurs when docking with an external monitor that has built-in speakers.
Please refer to our Help Center article for more details.
Note
Dialpad offers built-in noise cancelation and encryption. Using virtual devices can interfere with Dialpad’s existing noise-cancellation features and may reduce call quality.
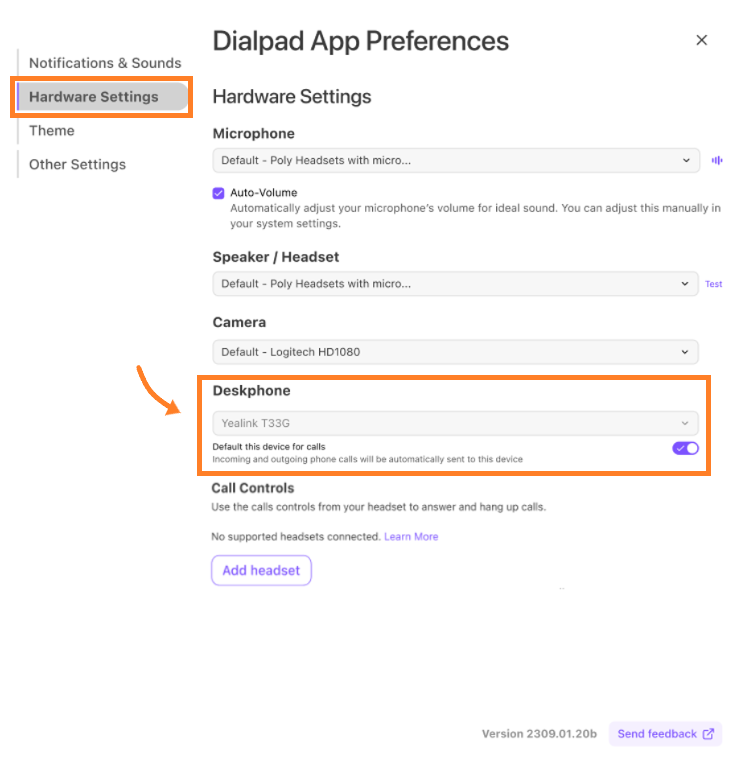
Desk phone
After dialing a number using the Dialpad app, you can seamlessly continue the call on your connected desk phone.
To set your desk phone as a default device for outbound calls, head to Hardware Settings and navigate to Deskphone.
Select your desk phone from the drop-down menu
Enable Default this device for calls
Note
Not all external desk phones support remote call initiation. This functionality is only applicable to outbound calls.
App notification settings
Manage your app notifications for calls, messages, and meetings. You can also choose whether to receive notifications for messages or voicemails from Departments and Contact Centers.
To access your App Notification Settings,
Select the Settings icon
Select Customize notifications & sounds
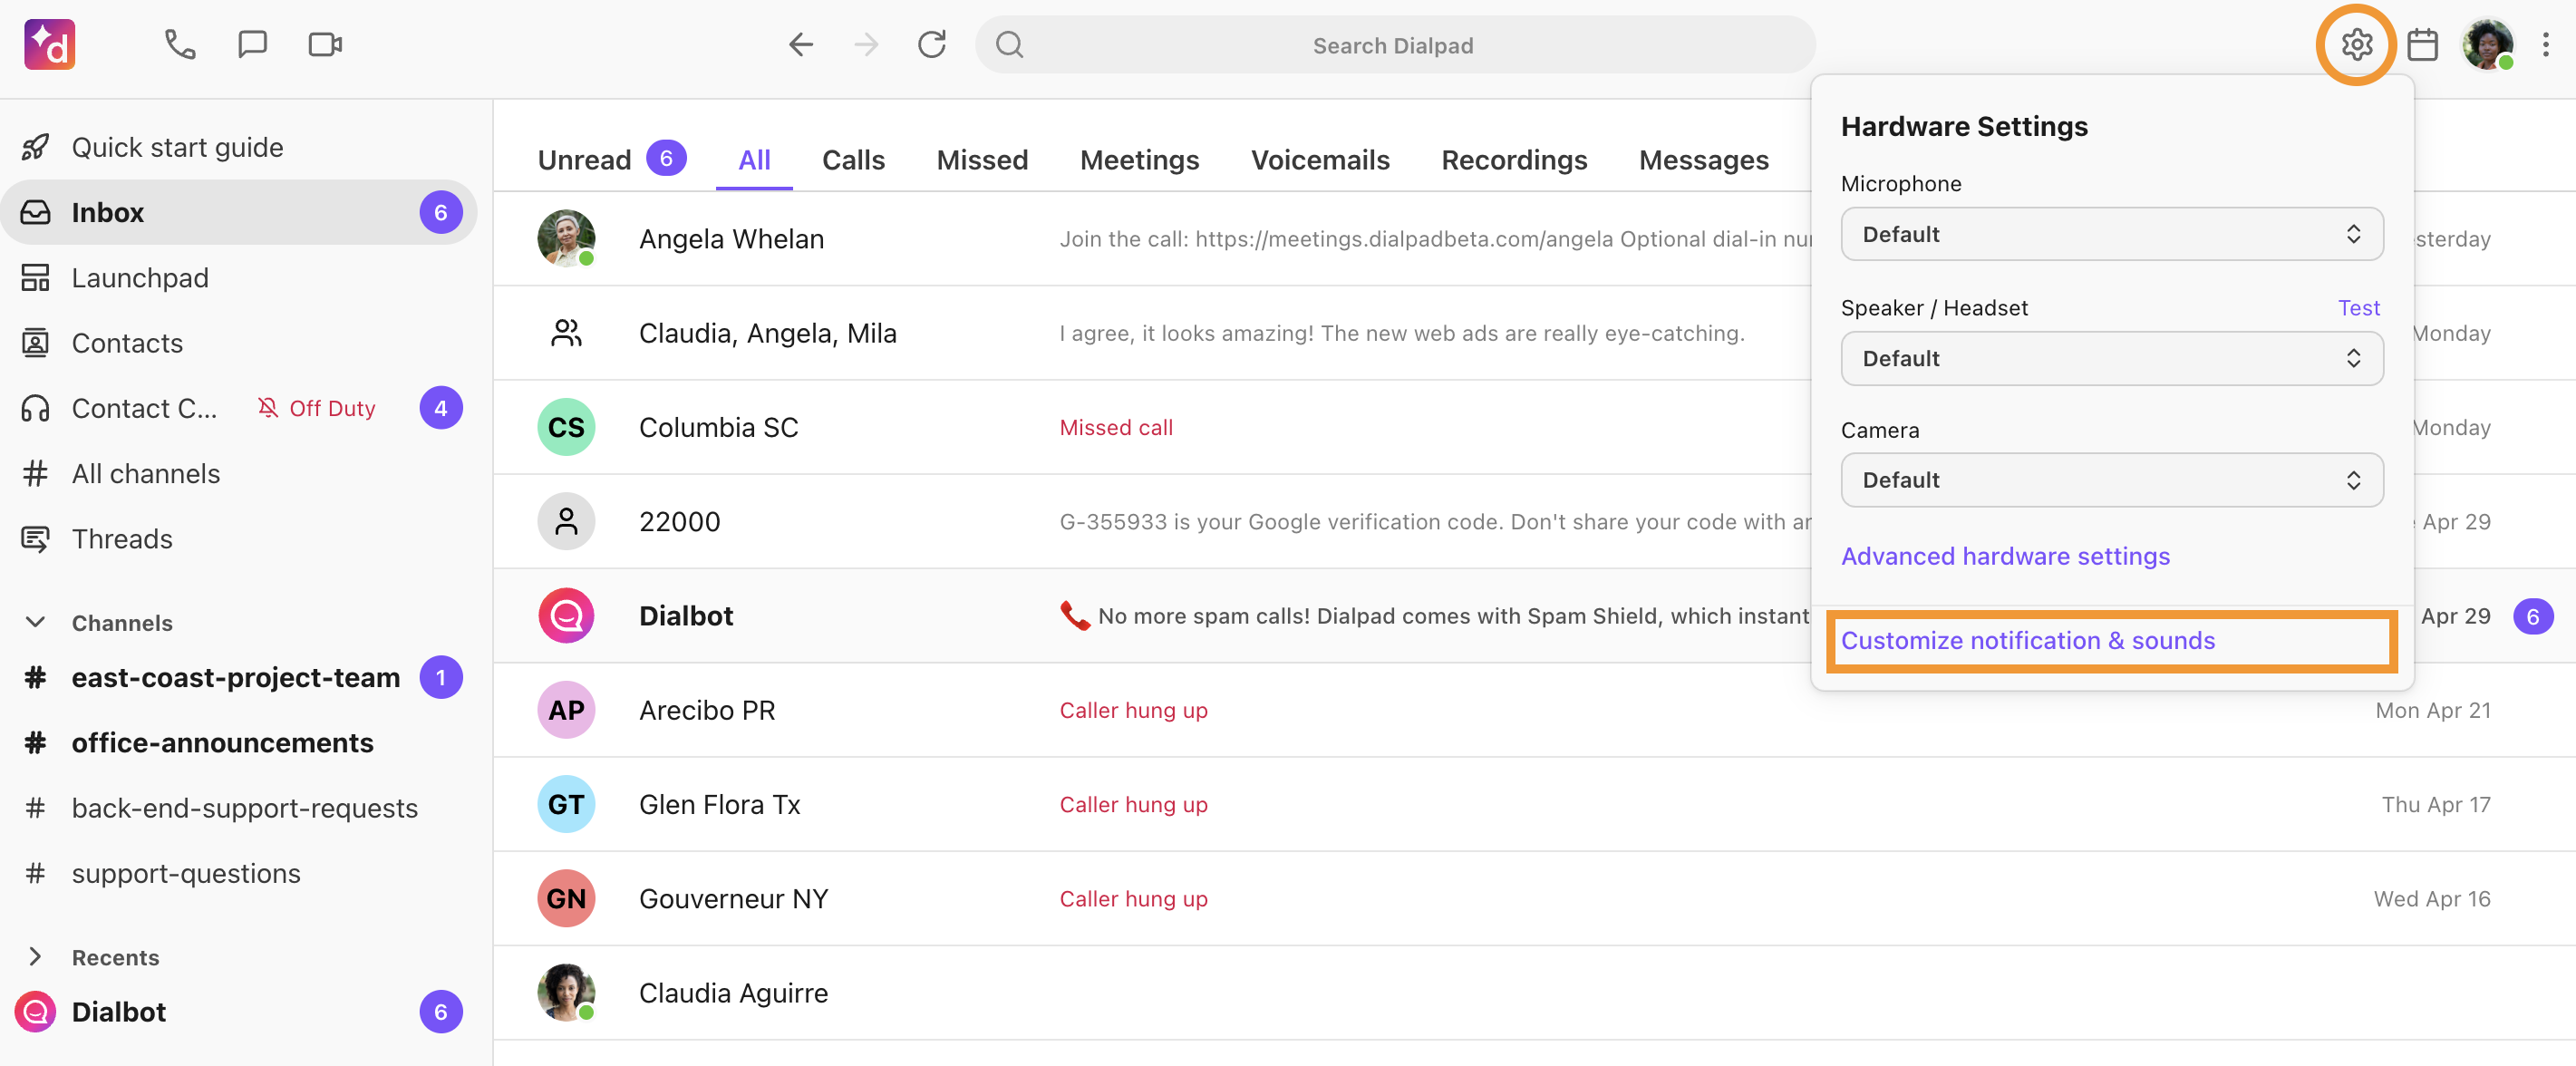
Navigate to Notifications & Sounds in the left panel of the pop-up window and choose your notification preferences.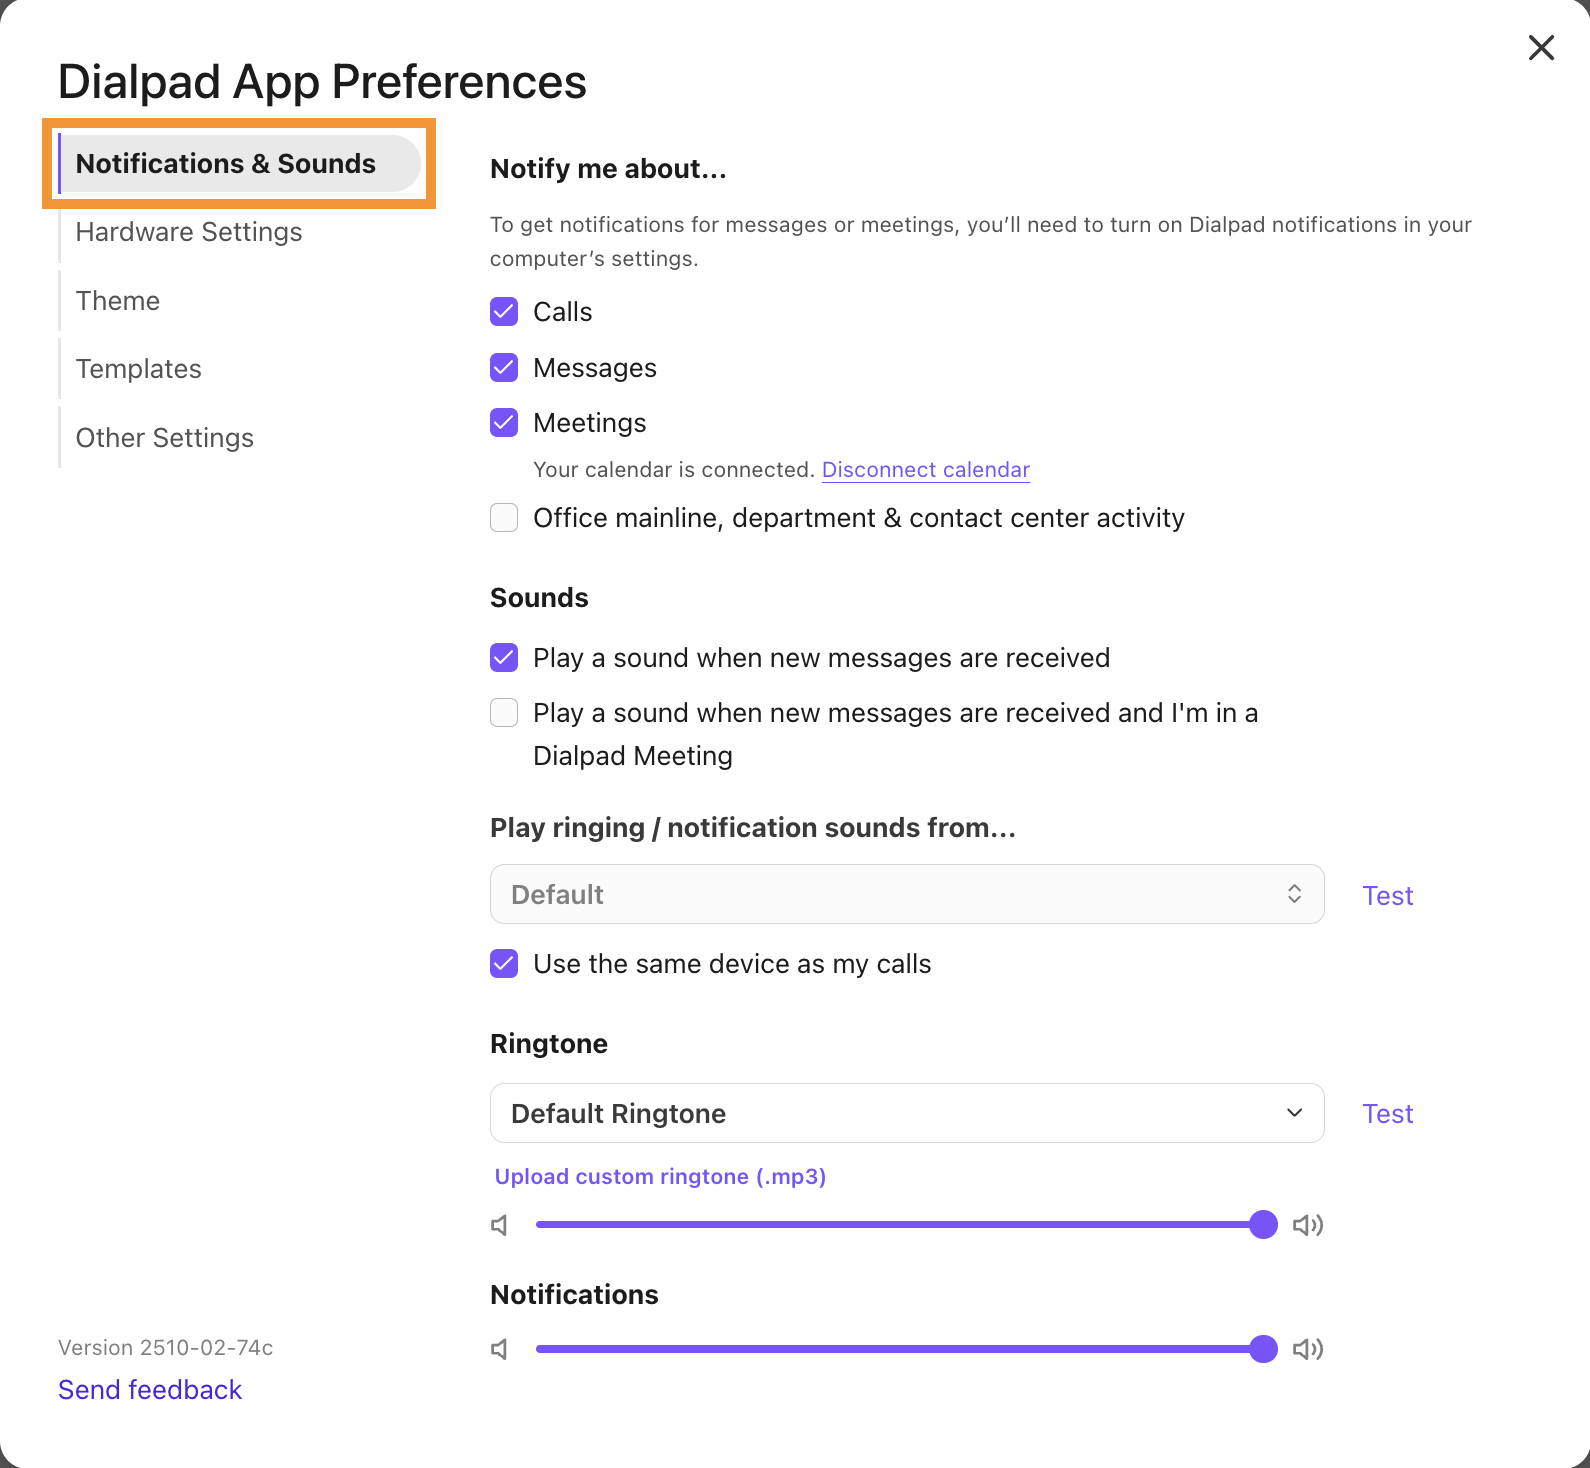
You can choose where ringing and notification sounds play from, and choose the ringtone that Dialpad plays each time you receive a call. You can also test the audio to ensure it's working properly.
You can also use the volume sliders to adjust the ringtone, ringtone volume, and notification volume.
Granular notifications for shared lines
Early Adopter Program
This feature is part of the Dialpad Early Adopter Program.
Granular notifications allow you to choose, per shared line, whether to receive Messages and Voicemail alerts for your Office mainline, Departments, and Contact Centers.
Note
To display granular notifications for both your desktop app and mobile app, you will need to set them up separately in the corresponding settings for each app.
To choose which shared lines you receive notifications from, go to your Dialpad App.
Select your avatar, and select Preferences
.png)
Tip
Alternatively, you can select the Gear icon and then select Customize notifications & sounds.
Select Notifications & Sounds
Select the Office mainline, department & contact center activity option
Select the shared lines you want to receive messages and/or voicemails
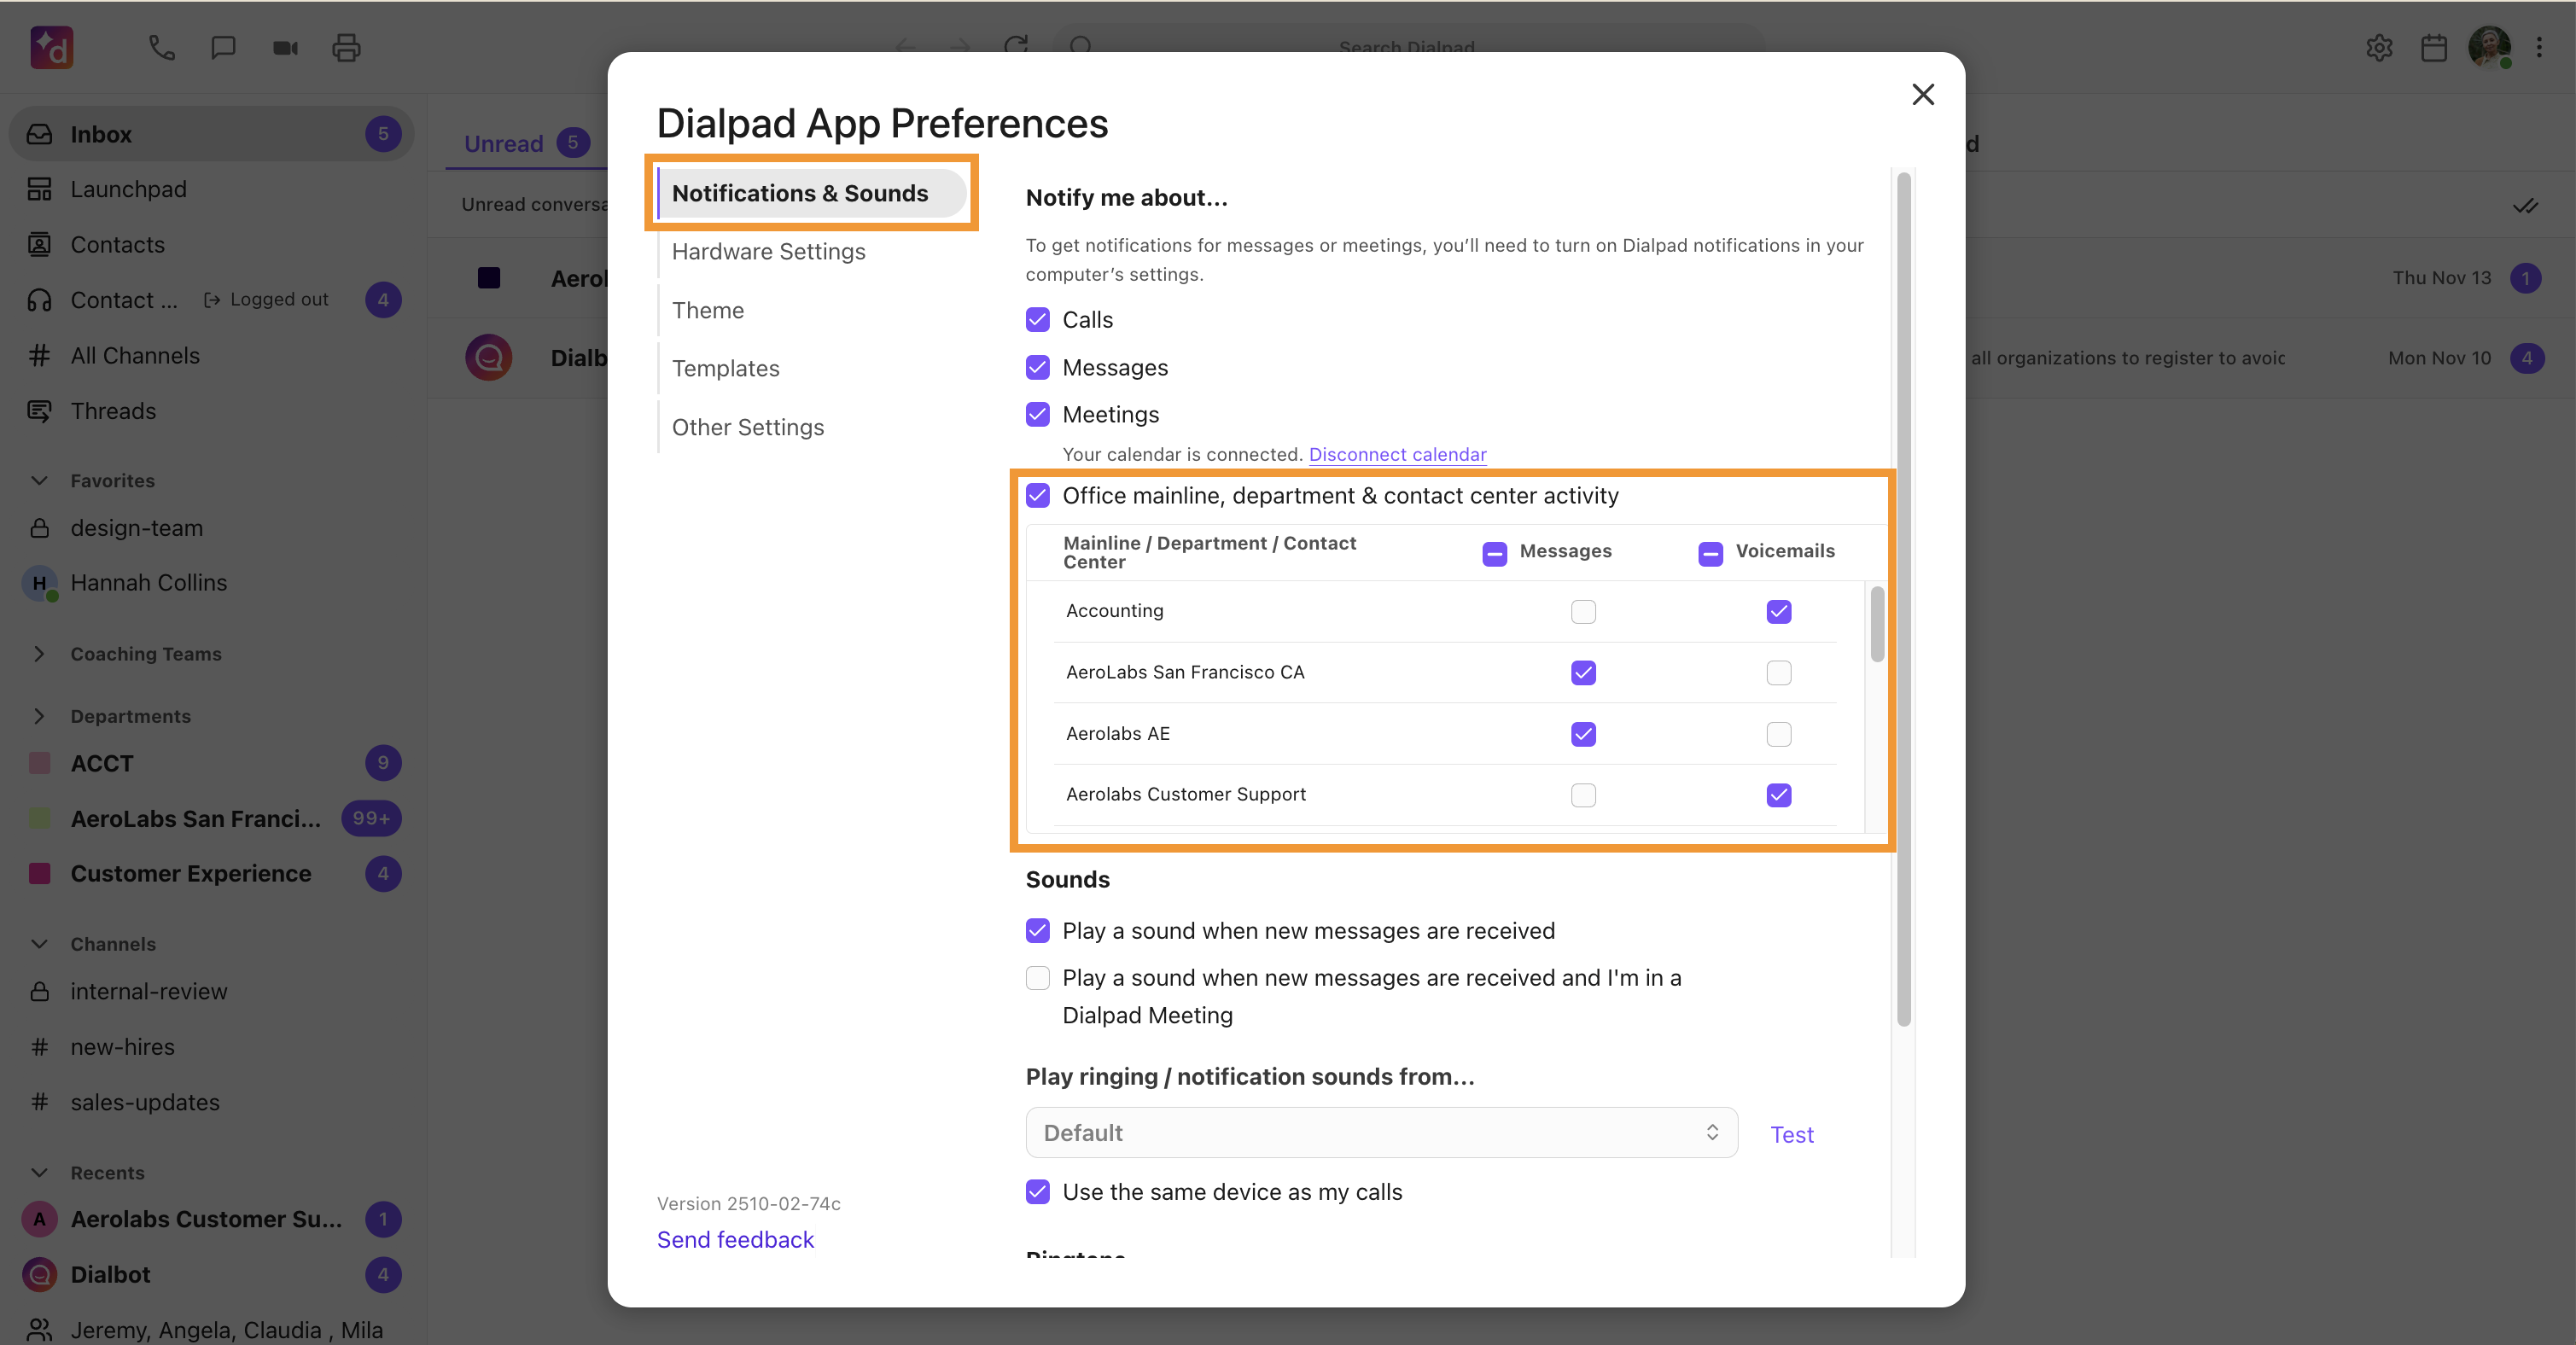
Note
Granular notification settings for shared lines are set per user and follow Do Not Disturb and Business Hours settings.
Run a system test
To run a system test, open your in-app settings menu by clicking on your avatar. Then, select System test.
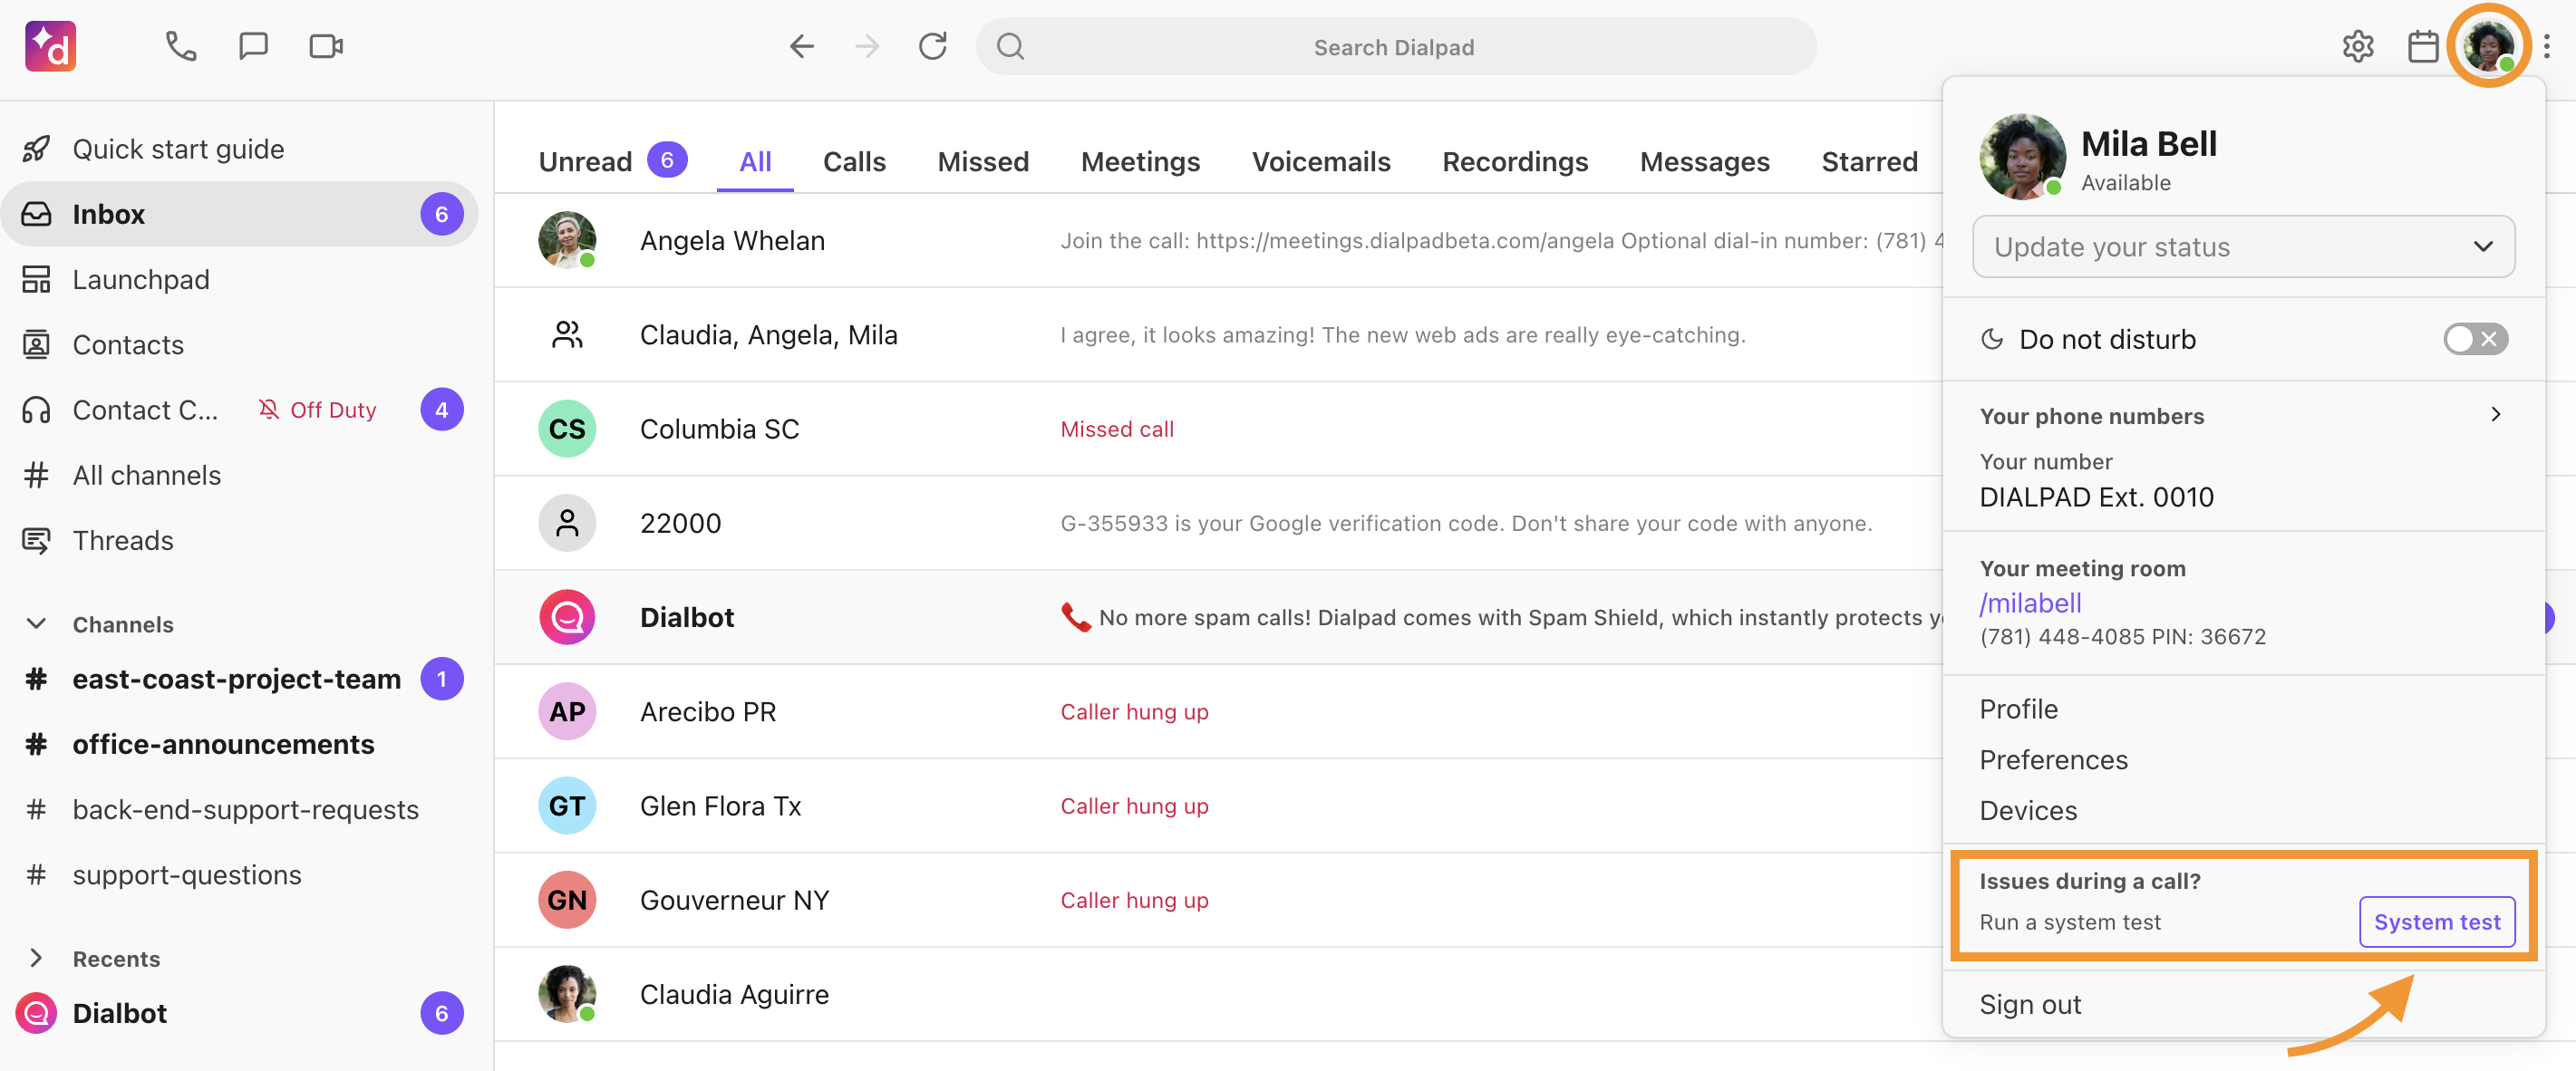
If there are any issues along the way, the system test will offer deeper insights and troubleshooting assistance