Dialpad WFM’s time reporting tools let your agents log their own working hours — whether they’re clocking in and out of scheduled shifts or reporting unplanned overtime.
As a manager, you have control over which agents are required to do this and the extent of their reporting capabilities. All time reports are automatically tracked and can be easily downloaded as a timesheet from Reports.
Let’s dive into the details.
Who can use this
Dialpad WFM is currently in an Dialpad WFM is available to all Dialpad users.
Contact your Customer Success Manager to discuss adding Dialpad WFM to your plan. Early Adopter Program; please contact your Customer Success Manager if you want to join.
Configure clocking in and out
When enabled, agents must clock in and out of each scheduled shift.
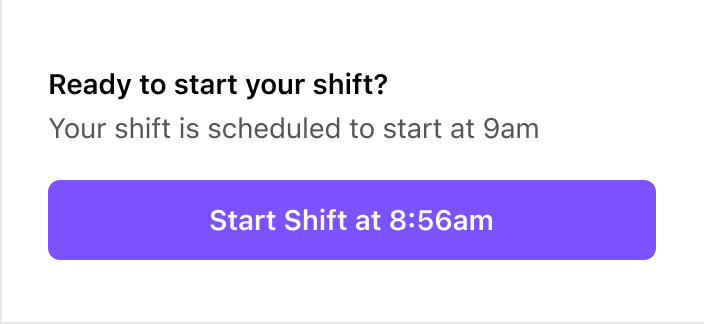
Clock-in/out actions record a timestamp in the timesheet.
Dialpad WFM offers the following additional settings that can be enabled to provide additional options for agents:
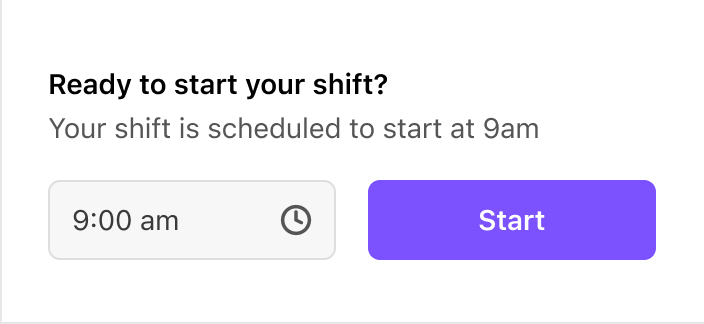
Allow agents to enter custom times: When enabled, agents can enter an alternative start or end time for their shift.
This setting is helpful if agents often forget to clock in or out and you want them to be able to self-correct.
Allow overtime any time: When enabled, agents will be able to clock in to work when they are not scheduled to do so.
This setting is helpful if you allow agents to pick up extra hours when needed, e.g. to clear through an email backlog in the evenings.
To enable these settings:
Go to Reports
Select Timesheets
Select Manage Time Reporting
Select the checkbox next to the setting you want to enable
This will be enabled for all agents in the account who have clocking in and out enabled.
Select Save
Enable clocking in and out
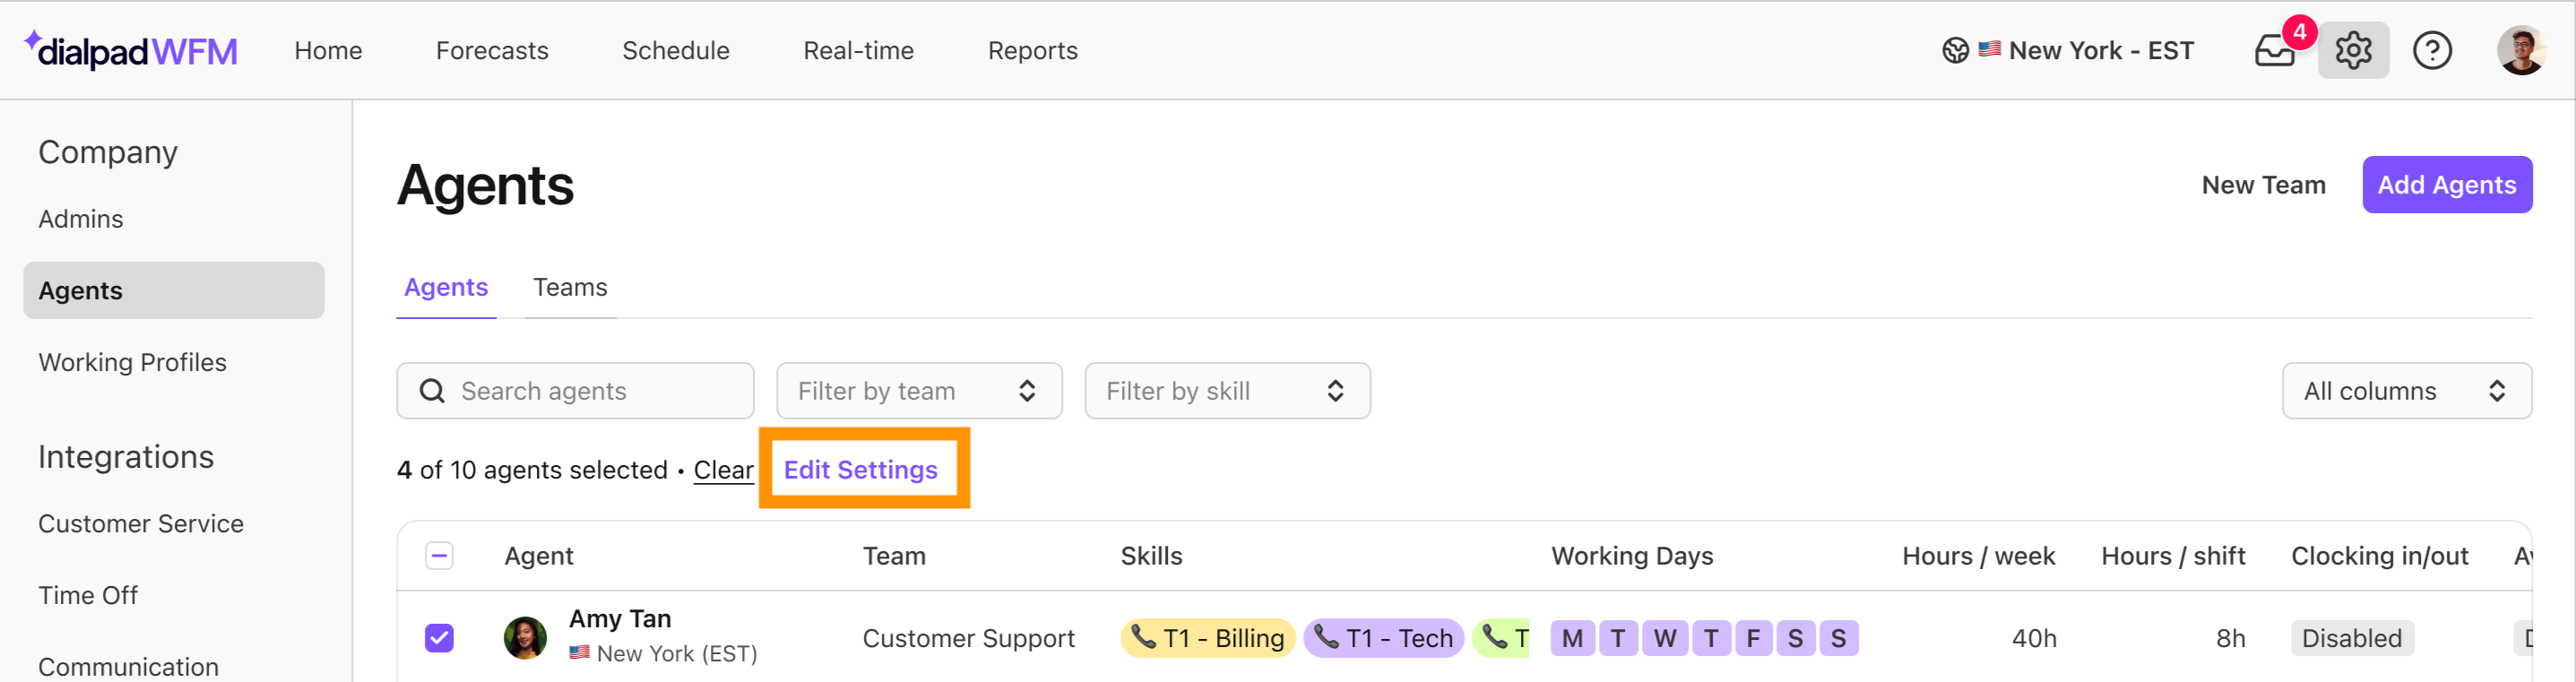
By default, time reporting is disabled and needs to be enabled per agent.
To enable clocking in and out for multiple agents:
Go to Settings
Select Agents
Select the checkbox next to each agent’s name, or to select all agents, select the checkbox in the column header
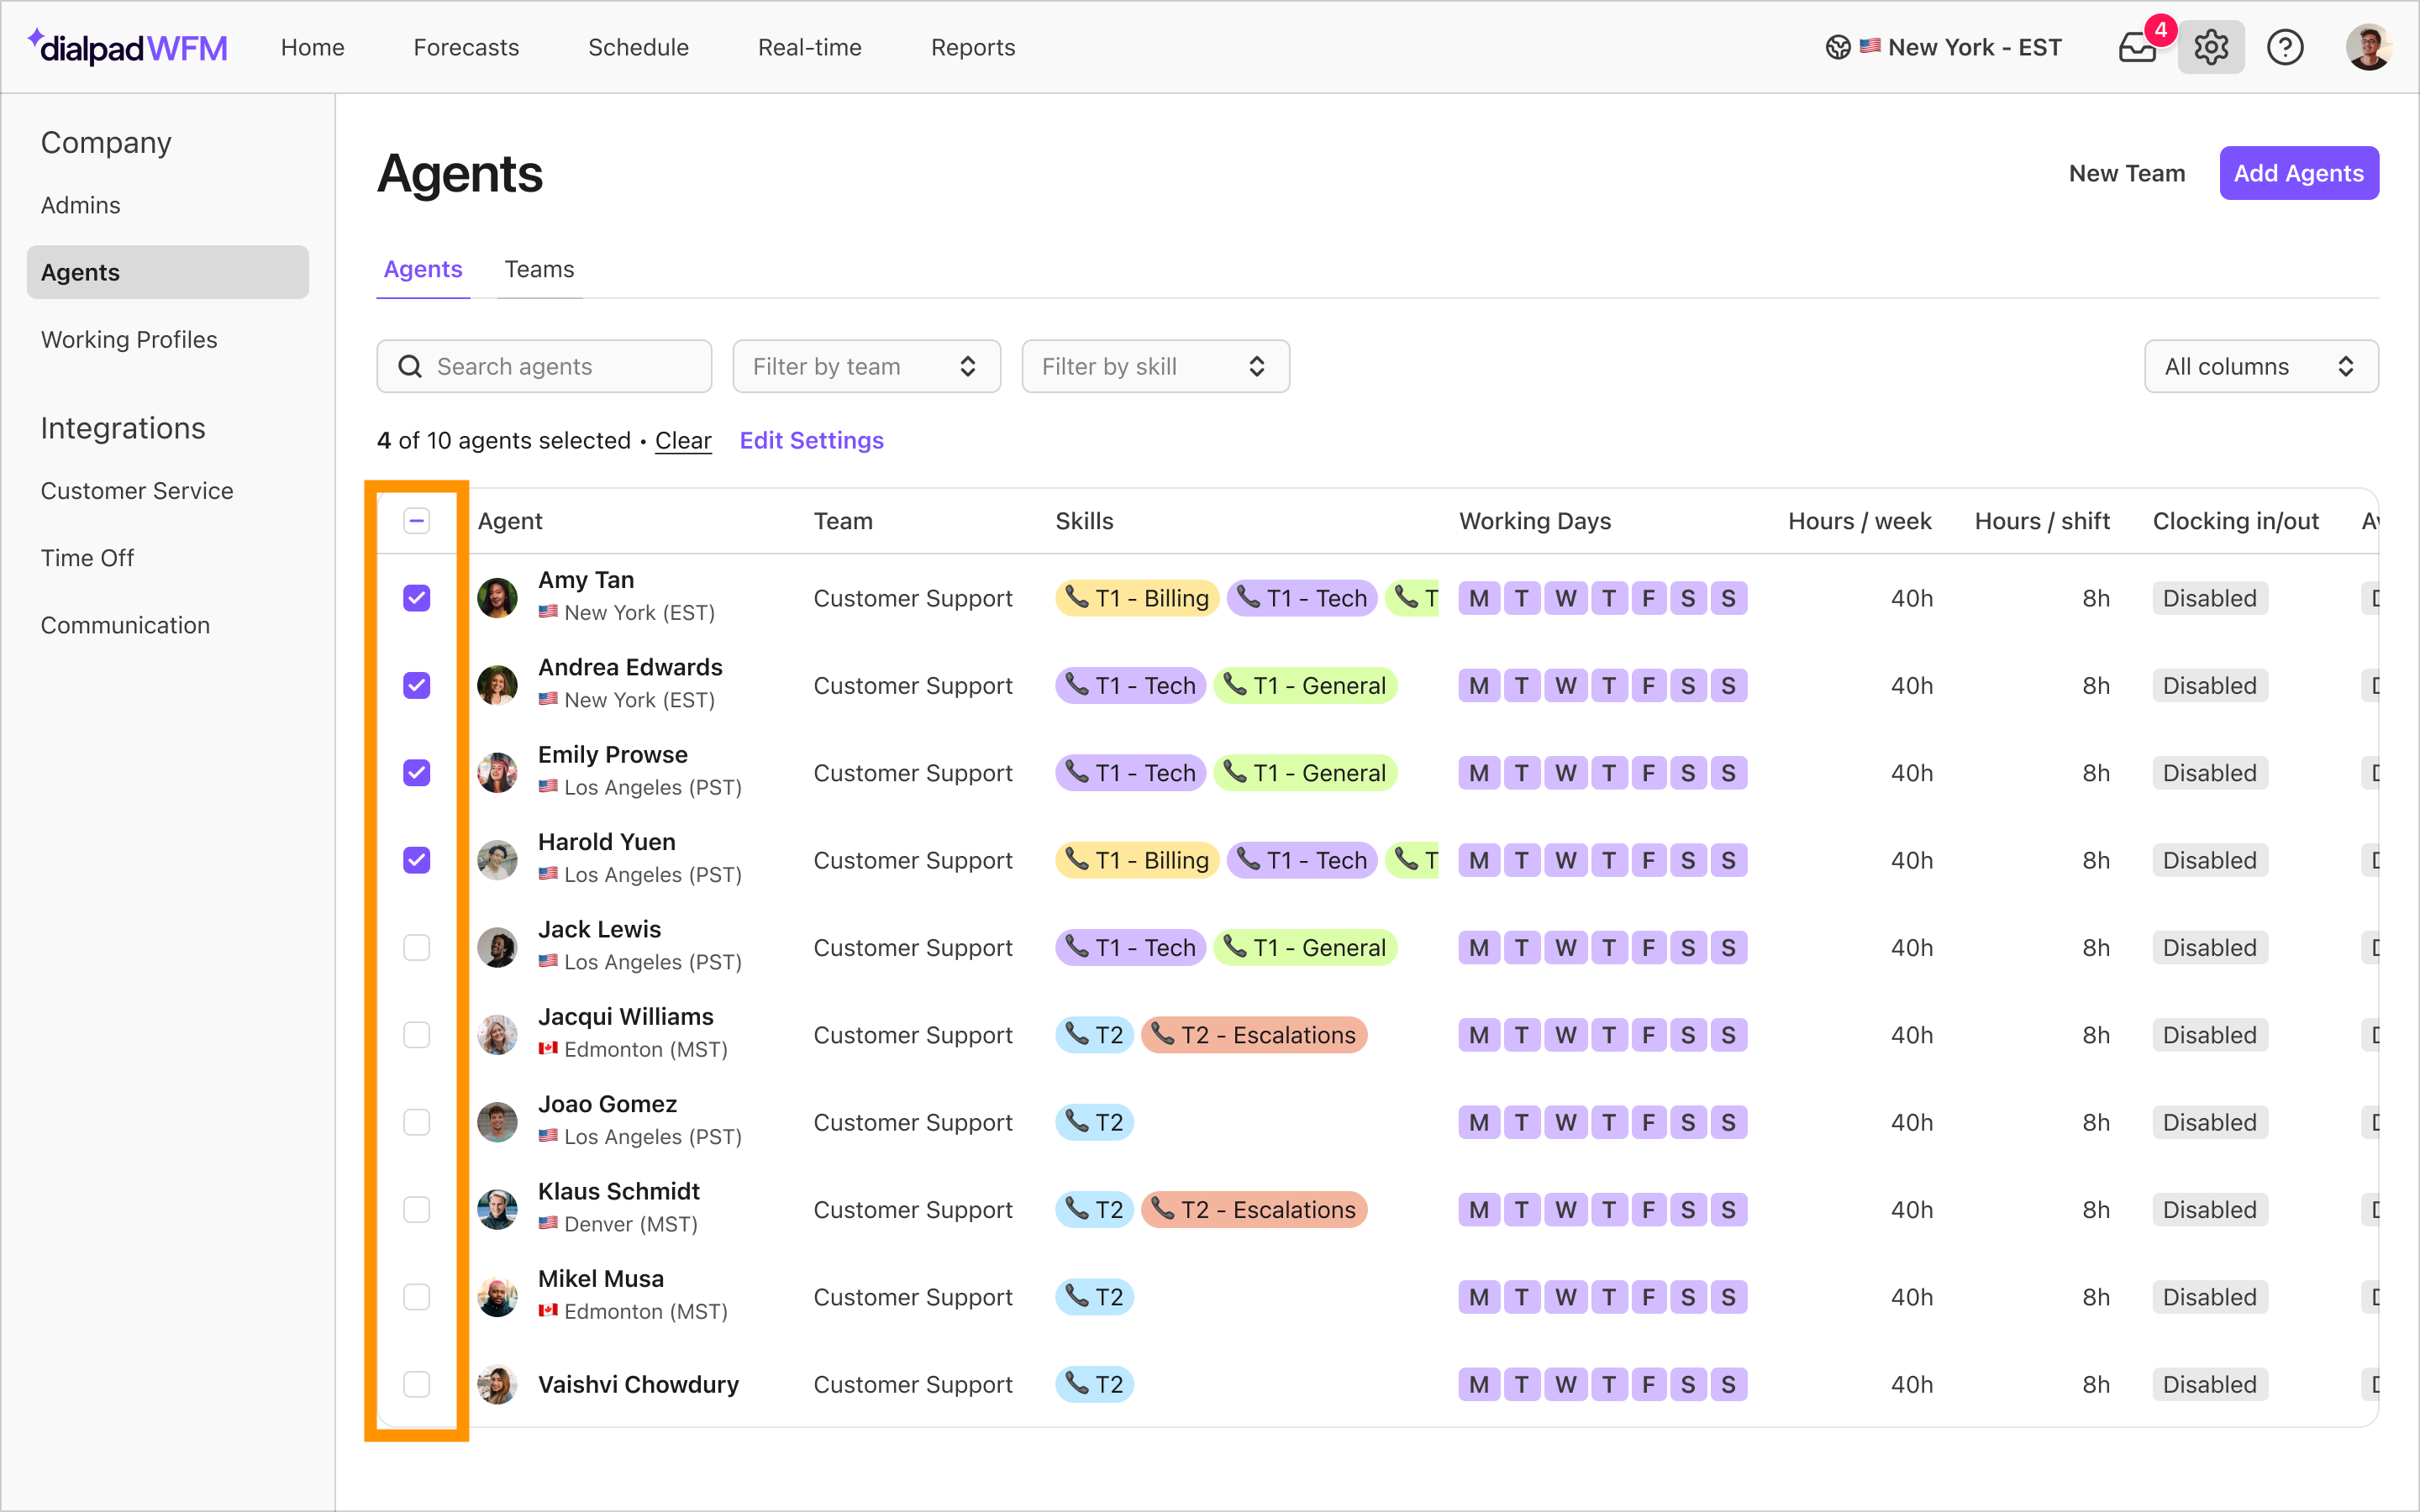
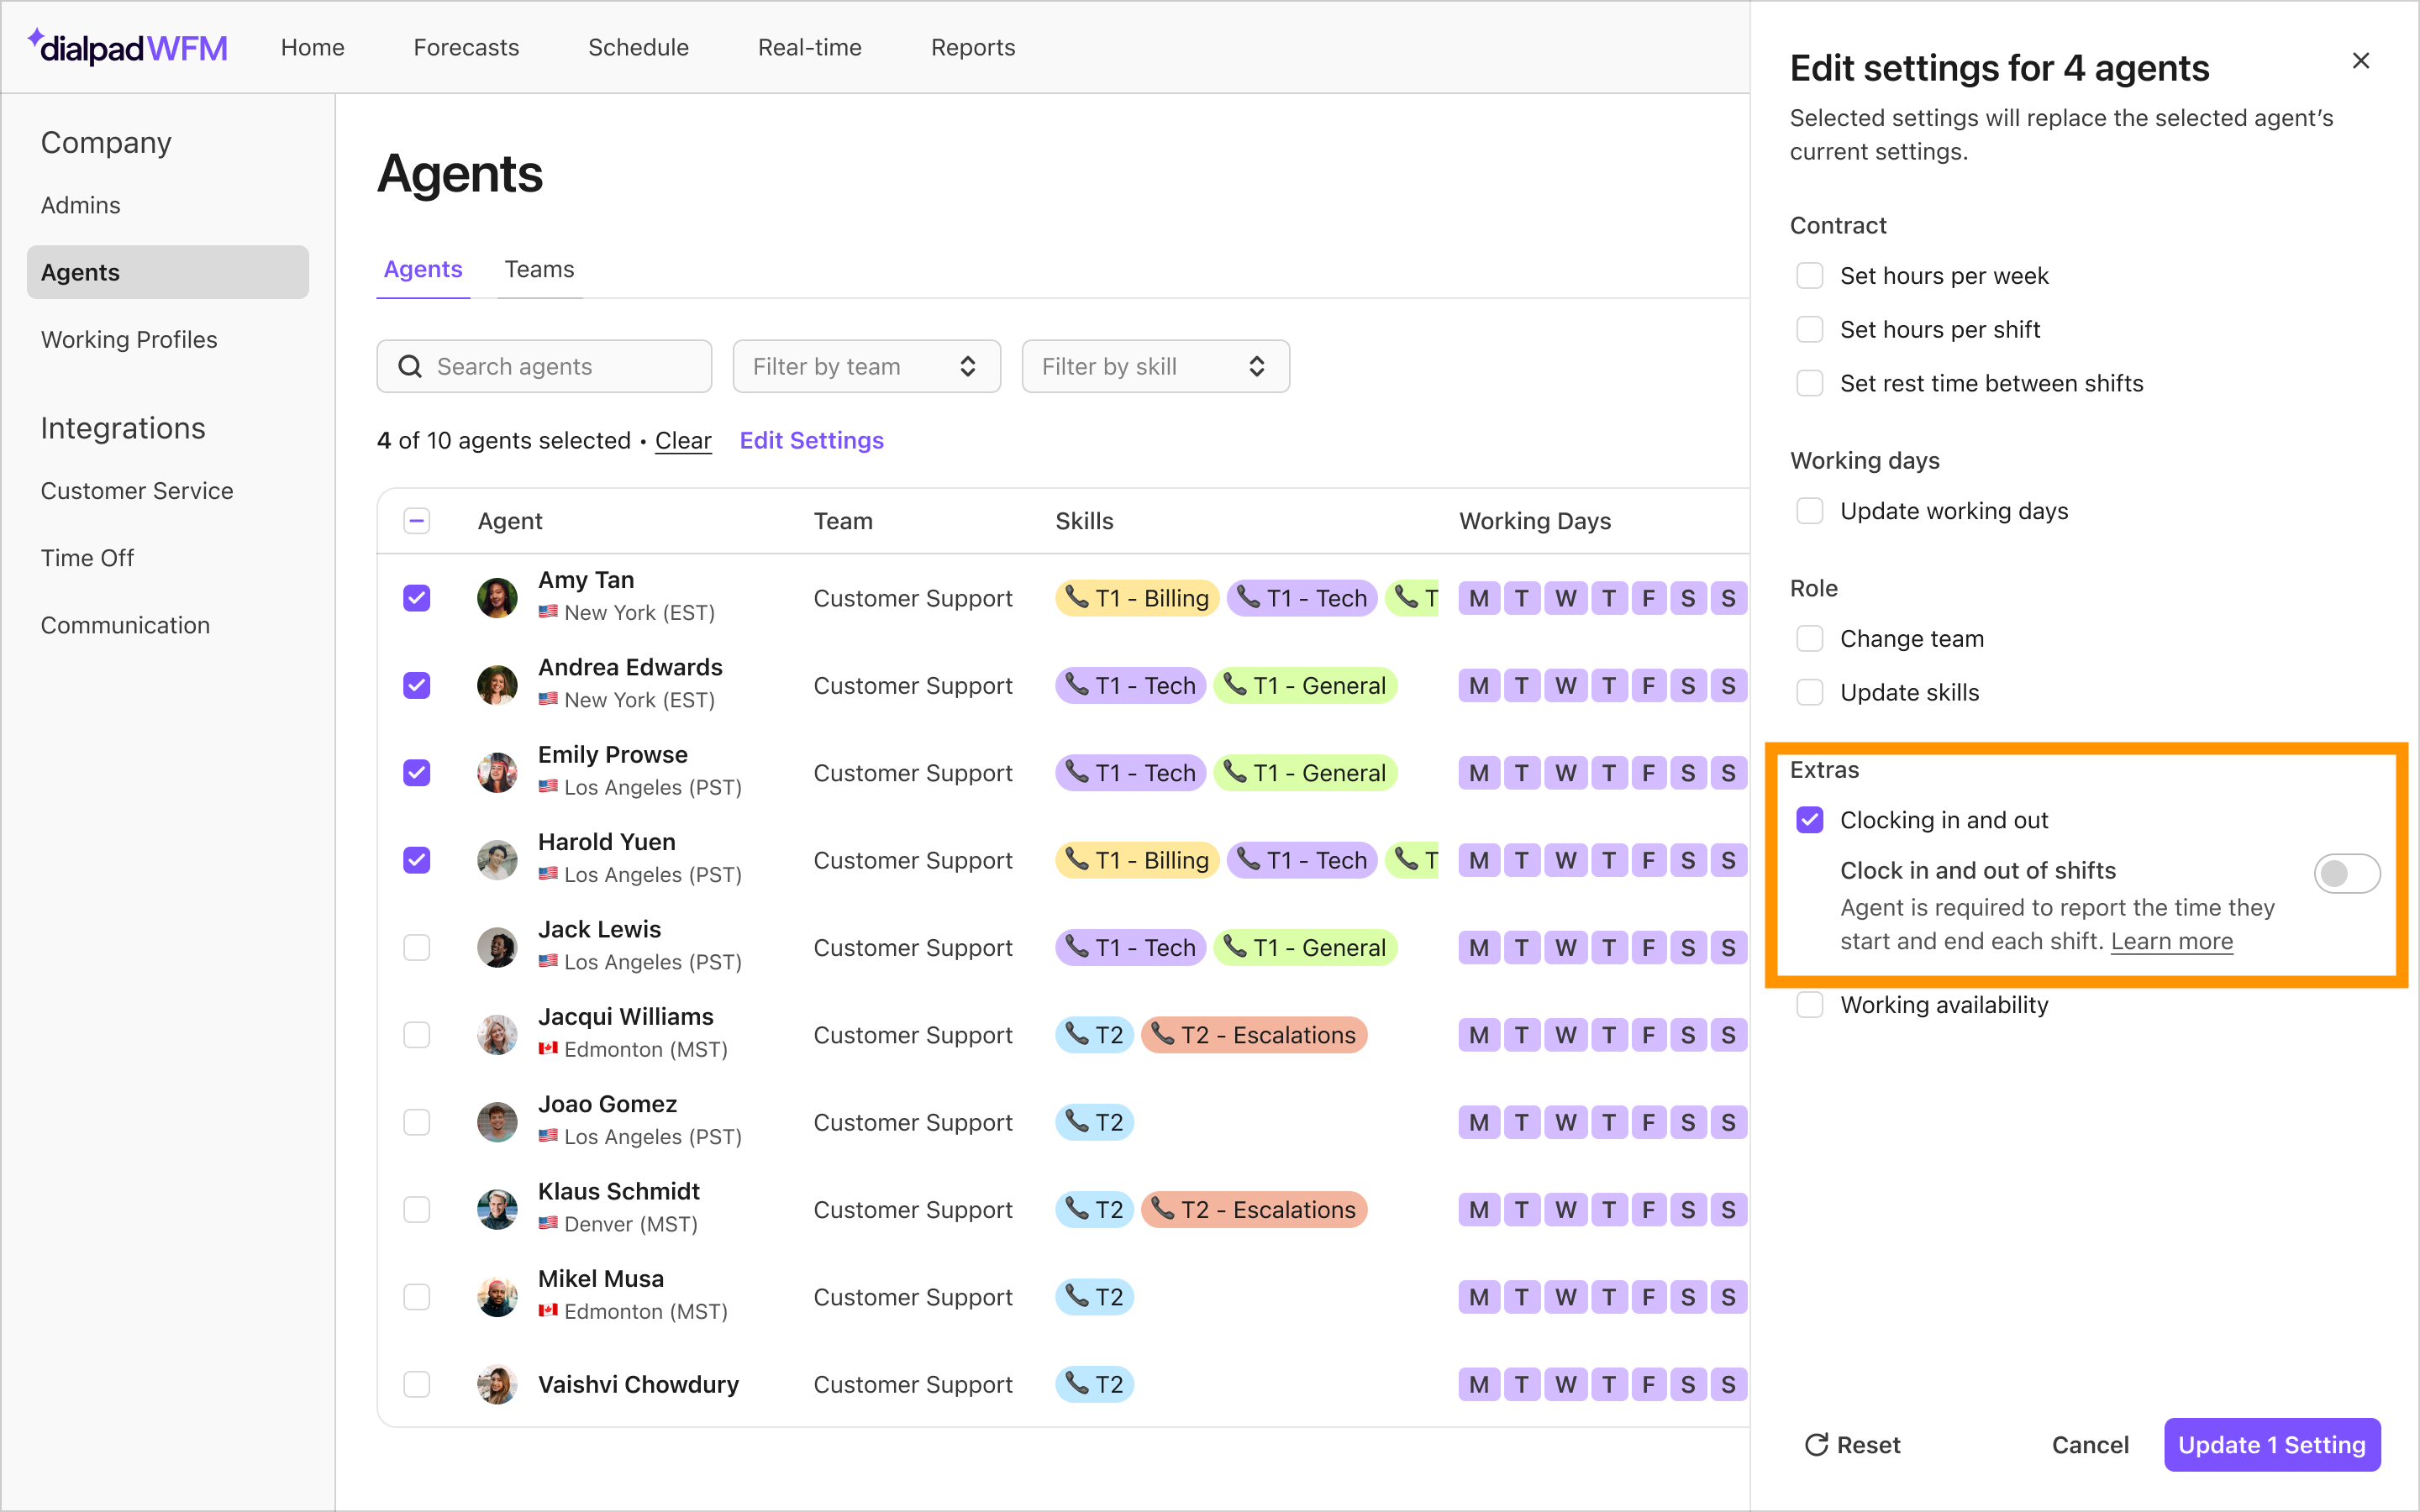
Select Edit Settings
In the side drawer, select the checkbox next to Clocking in and out
.png)
Toggle the switch to on
Select Update Settings
Clocking in and out will now be enabled for all the selected agents. Agents may need to refresh their tab or log in and out again to update their accounts.
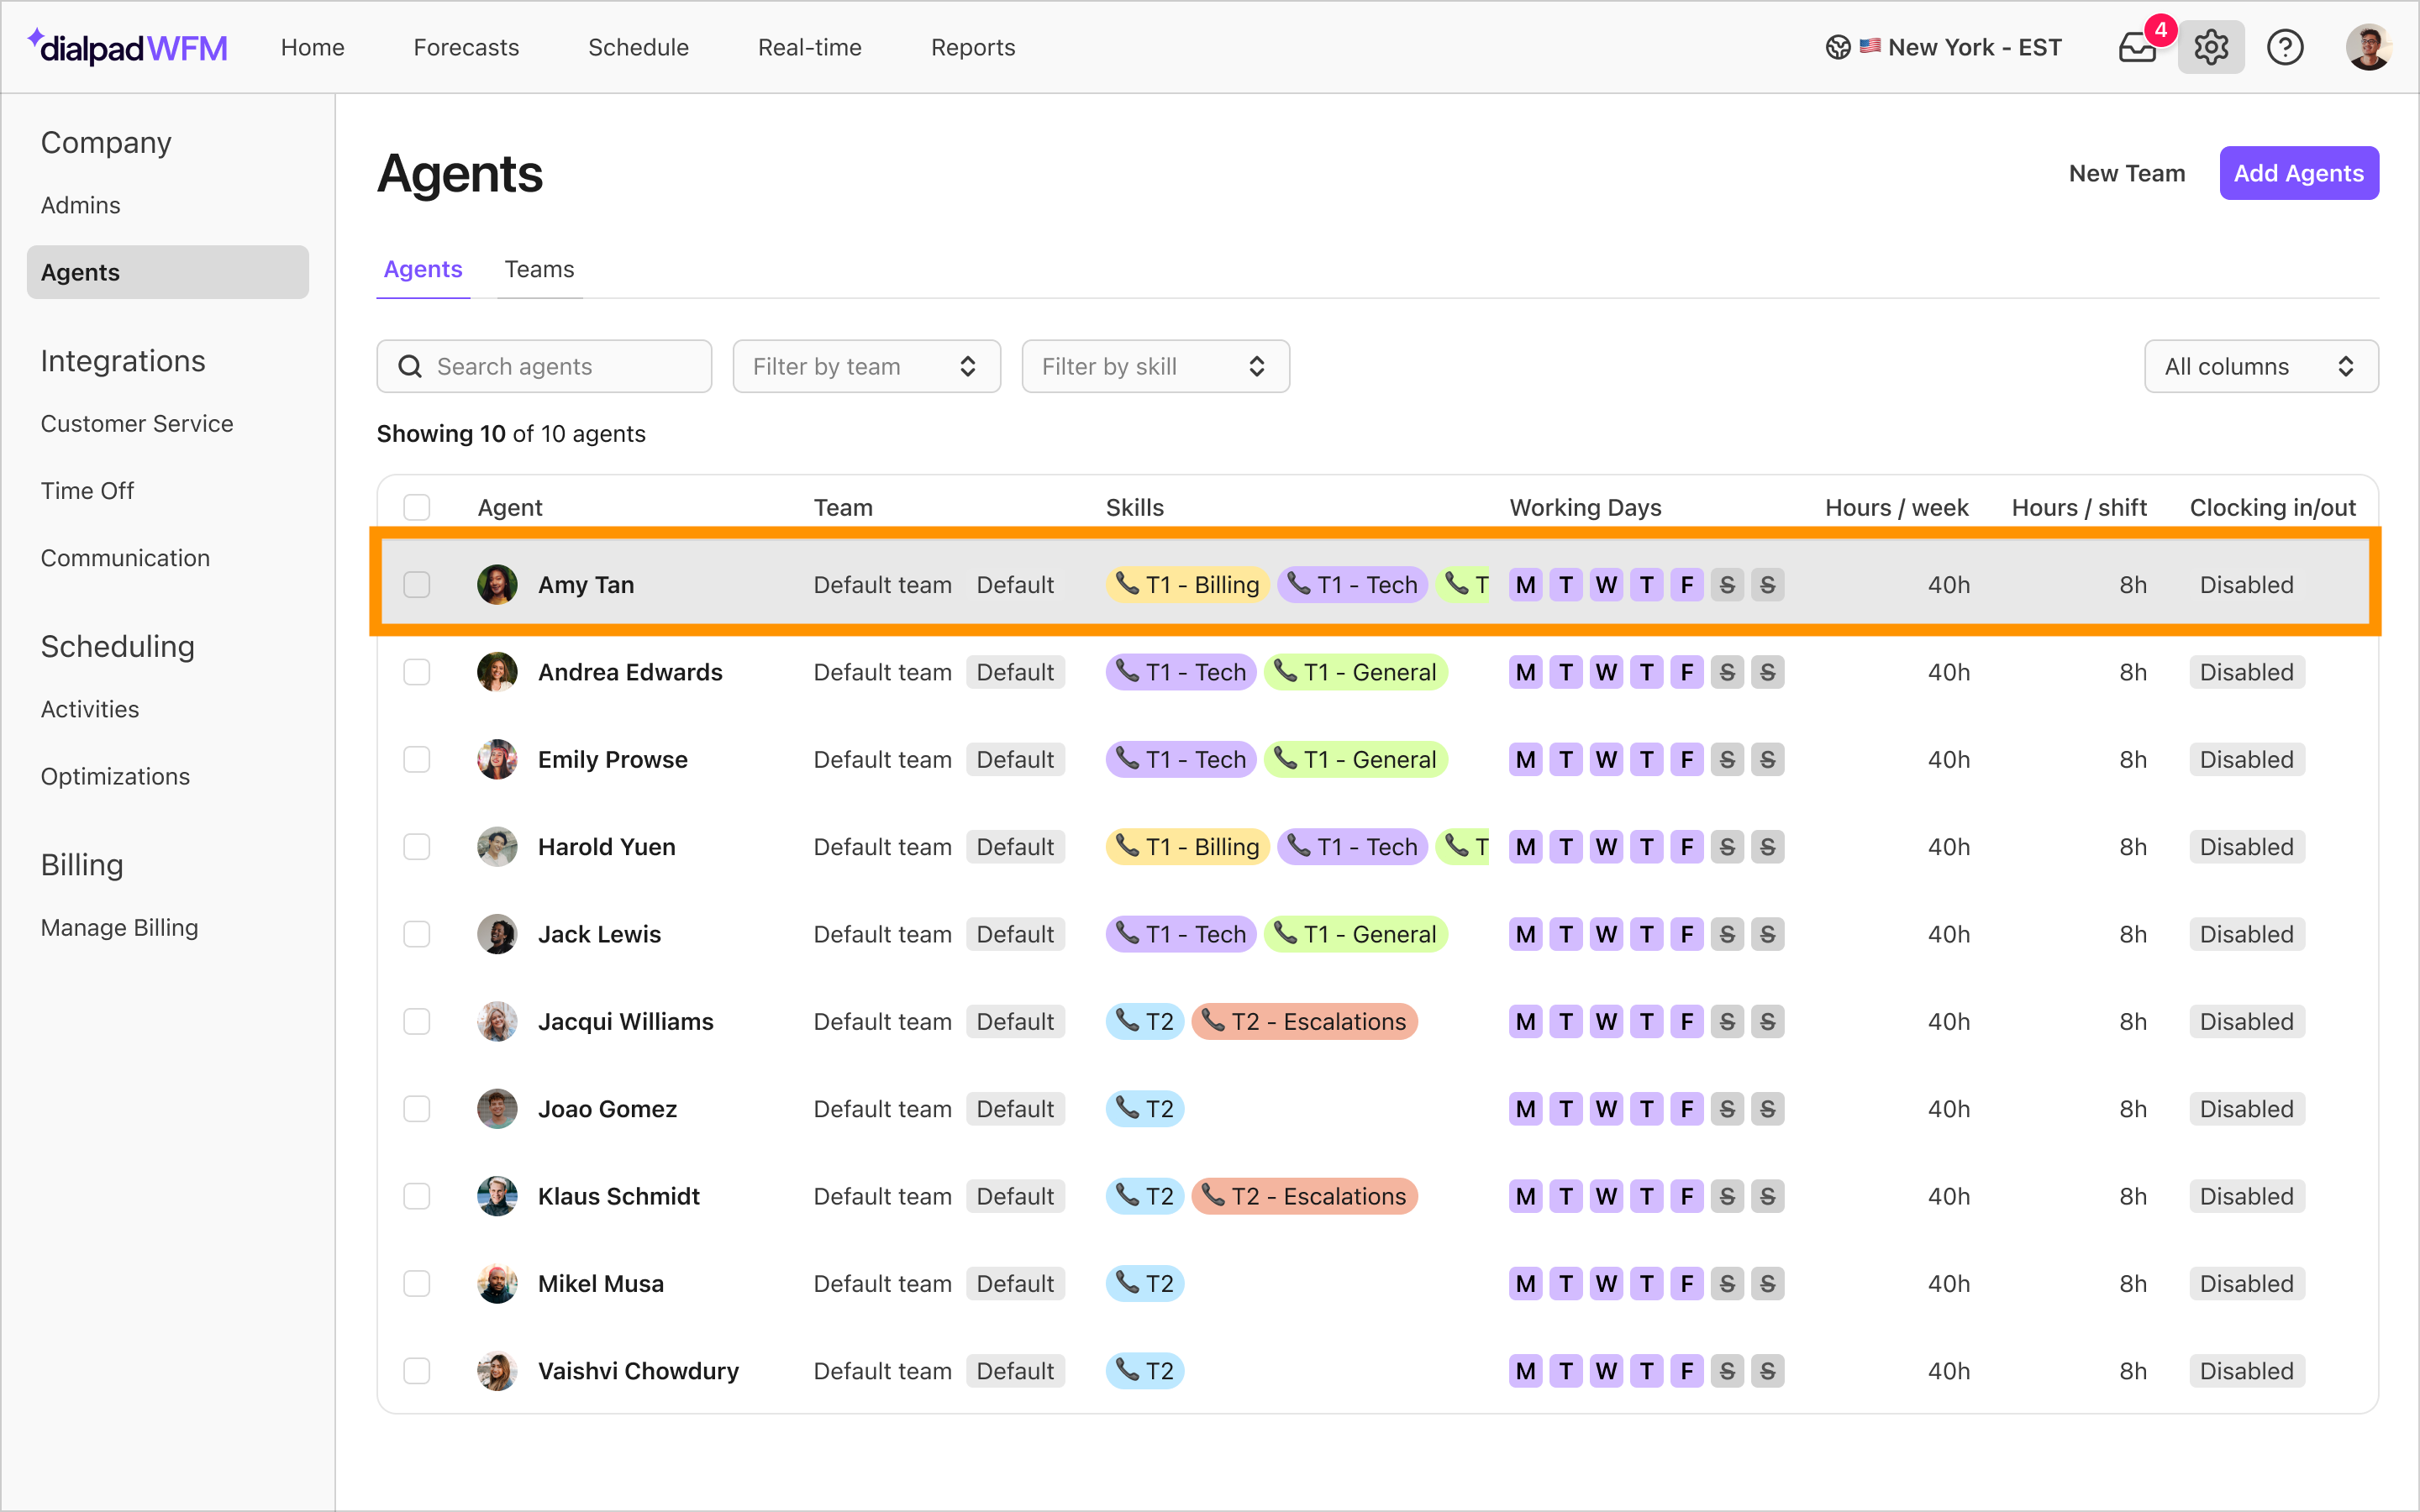
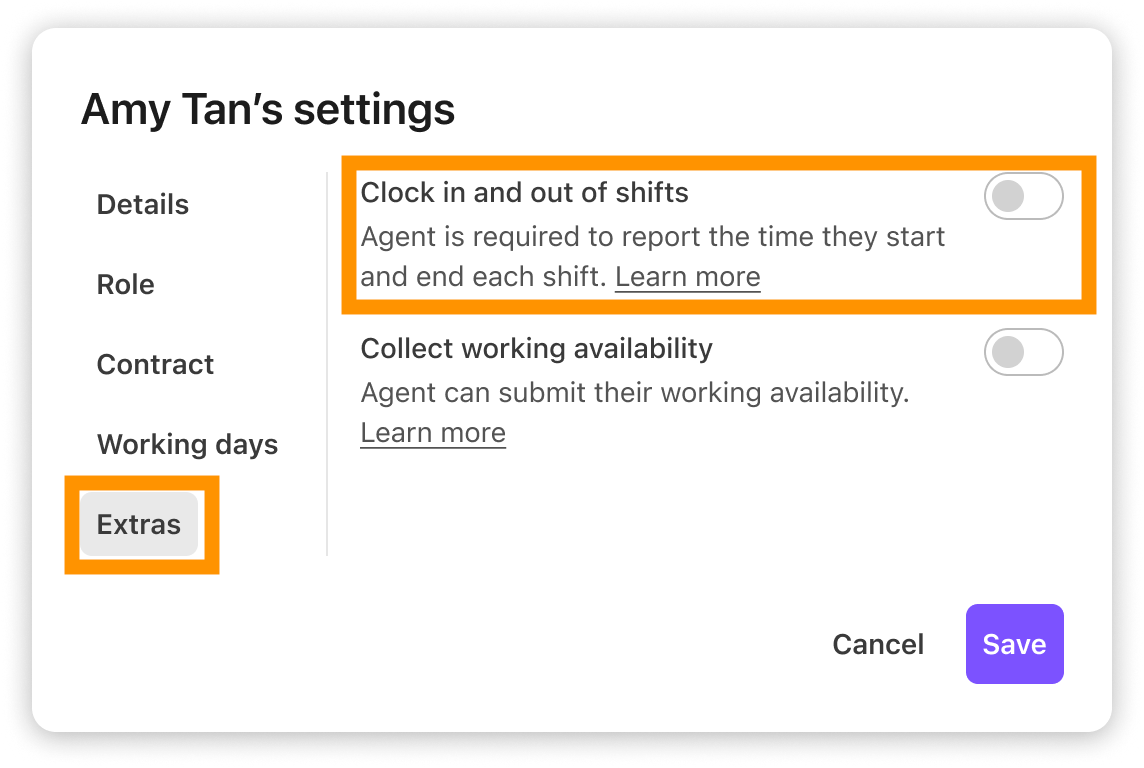
To enable clocking in and out for individual agents:
Go to Settings
Select Agents
Select anywhere on the agent row
Select the Extras tab
Toggle the switch next to Clocking in and out to on
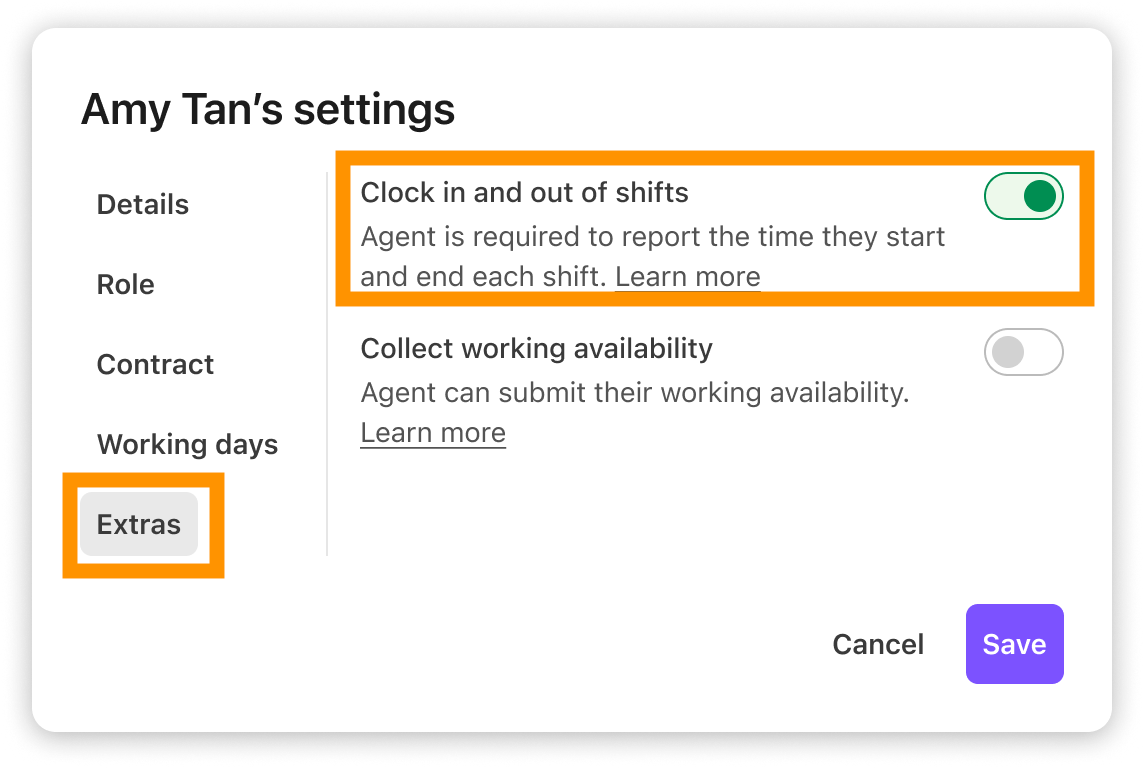
Select Save
Clocking in and out will now be enabled for all the selected agent. The agent may need to refresh their tab, or login and out again to update their account.
Disable clocking in and out
You can disable clocking in and out in the same way that you enabled it.
To disable clocking in and out for multiple agents:
Go to Settings
Select Agents
Select the checkbox next to each agent’s name, or to select all agents, select the checkbox in the column header
Select Edit Settings
In the side drawer, select the checkbox next to Clocking in and out
Toggle the switch to off
Select Update Settings
Clocking in and out will now be disabled for all the selected agents. Agents may need to refresh their tab, or login and out again to update their account.
To disable clocking in and out for individual agents:
Go to Settings
Select Agents
Select anywhere on the agent row
Select the Extras tab
Toggle the switch next to Clocking in and out to off
Select Save
Clocking in and out will now be disabled for all the selected agent. The agent may need to refresh their tab, or log in and out again to update their account.
Frequently asked questions
How do I view when agents’ clocked in and out?
You can view and edit agent’s time reports and download detailed timesheets from the Timesheets report
Agent’s clock-in time is displayed in the real-time dashboard, giving you visibility over who’s on time or tardy
You can access timesheet and schedule data via the API
Why can’t an agent see the clock in button?
If an agent cannot see the clock in or out button:
Check that they have clocking in and out enabled: Go to the agents page and check the Clocking in/out column. If the feature is enabled, it will display an Enabled badge. If it says disabled, then the feature needs to be enabled - refer to the steps above for guidance.
If you have just enabled the feature for the agent, ask them to log in and out again to update their account.
Check that the agent has selected today’s shift: Agents can only clock in to a shift scheduled for the current day.