We know how much you love options, and Dialpad is happy to provide support for AudioCodes MediaPack ATA devices. These devices allow you to connect multiple handsets or ports and can even be used for faxing.
Let's dive into the details.
Who can use this
AudioCodes MediaPack ATA devices can be used on any Dialpad plan.
Dialpad supports MP-112, MP-114, MP-118 and, MP-124 devices.
Set up process
Setting up your new AudioCodes MediaPack ATA device with Dialpad is a 3-step process.
Provision the ATA device to Dialpad
Add the ATA device to the Dialpad Admin Portal
Activate (assign) the port for a Dialpad user or room
Provision AudioCodes MediaPack ATA device
To provision an AudioCodes MediaPack ATA device to Dialpad:
Note the device's IP address
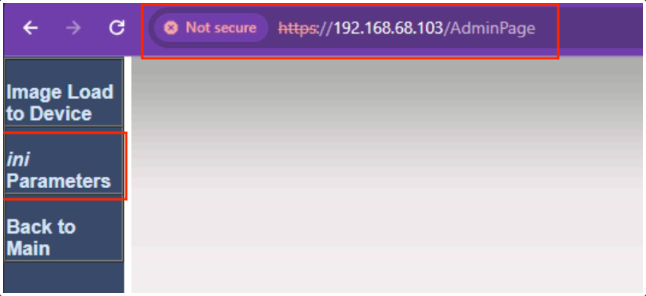
In a web browser, navigate to https://<device_ip>/AdminPage
Enter the IP address instead of <device_ip>
This URL is case-sensitive
Select ini Parameters
In the Parameter Name box, enter IniFileURL
This will be automatically capitalized.
in the Value box, enter https://prov.dialpad.com/<MAC>-config.ini
Leave <MAC> as is.
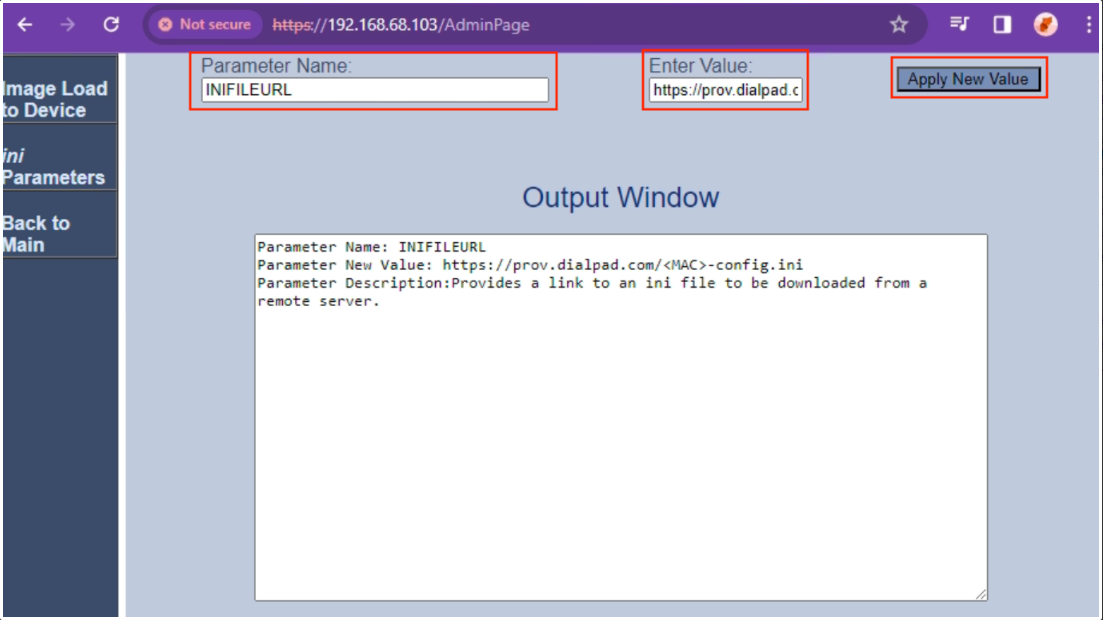
Select Apply Value
In the Parameter Name box, enter AUPDResetURLOnWebConfig
This will be automatically capitalized.
in the Value box, enter 1
The device will contact Dialpad's provisioning service, and then reboot.
Next, you'll need to reset the device.
From the AudioCodes web settings:
Select Maintenance
Expand the Maintenance menu
Select Maintenance Actions
Select Reset

Note
For the new updates to take effect on the MediaPack, you need to manually pull the new configuration from the provisioning server.
To do this, please repeat steps 1 to 6 from the previous section Provision AudioCodes MediaPack ATA device.
Add the ATA to the Dialpad Admin Portal
Now that your ATA device has been provisioned to Dialpad, it's time to add it to the Dialpad Amin Portal.
To add the device, head to your Admin Settings from Dialpad.com
Navigate to Office
Select Office Settings
Select Desk Phones
Select the DECT/ATA Devices tab
Select Add a new DECT/ATA
.png)
Select the Device Type
Enter the display name and the device's MAC address
Select Add new device
.png "name-dect-ata-device(2).png")
That's it! The device will reboot and you'll see it listed in the DECT/ADA Devices tab.
Assign the port
Now that the device is provisioned and set up for Dialpad, it's time to assign the port to a user or room.
Assign a port to a user
To assign a port to a user, head to the DECT/ATA tab from your Dialpad Admin Portal.
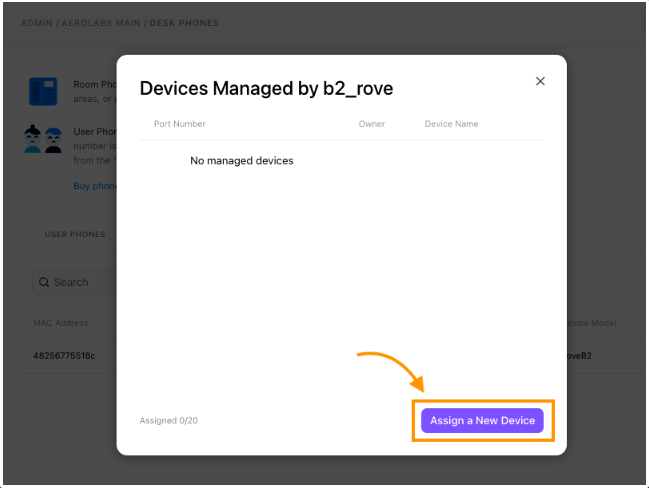
Select Options
Select Show managed devices
.png)
Select Assign a new device

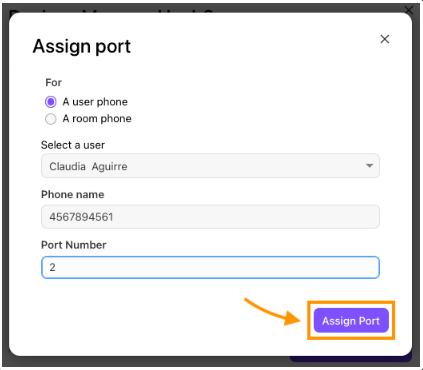
Select User
Choose the owner, add the display name and port
The port number must match the index number on the handset.
Select Assign port
Once the port has been assigned, the base station will reboot.
Assign a port to a room
To assign a port to a room, head to the DECT/ATA tab from your Dialpad Admin Portal.
Select Options
Select Show managed devices
.png)
Select Assign a new device
Select Room phone
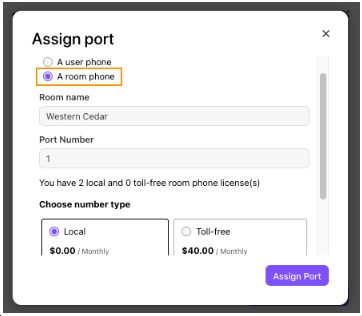
Enter the room name and port number
The port number must match the index number on the handset.
Choose the number type
Local
Toll-free
Select Assign port
After assigning the port, the base station will reboot.
Note
ATA devices set as room devices can be configured for faxing.
Head to this Help Center article to learn how.
Unassign a port
To unassign a port, head to your Dialpad Admin Portal.
Navigate to Office
Select Desk Phones
Select DECT/ATA Devices
Select Options beside the device
Select Show Managed Devices
.png)
Select Options
Select Unassign
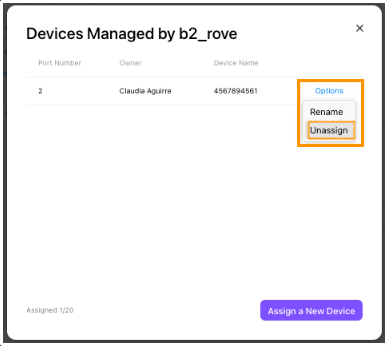
The device will reboot to apply the update.
Rename an ATA device
To rename an ATA device, head to your Dialpad Admin Portal.
Navigate to Office
Select Desk Phones
Select DECT/ATA Devices
Select Options beside the device you want to rename
Select Rename
.png)
Enter the new display name
Select Rename
(1).png)
Rename a managed ATA device
To rename a managed ATA device, head to your Dialpad Admin Portal.
Navigate to Office
Select Desk Phones
Select DECT/ATA Devices
Select Options beside the device
Select Show Managed Devices
.png)
Select Options beside the device
Select Rename

Enter the new display name
Select Rename
Frequently asked question
Why is there a pause before my ATA phone call goes through?
When you make a call with your ATA device using VoIP, there’s usually a 4-second delay after you dial a number. Since VoIP calls go over the internet, the process is more complex than with regular phone lines, and takes more time.