ATA devices that have been allocated as room devices can be configured for faxing.
Lets dive into the details.
Who can use this
Office and Company Admins can configure ATA devices for faxing.
Enable faxing on ATA ports
To configure an ATA device for faxing, head to your Admin Settings from Dialpad.com
Navigate to Office > Desk Phones
Select DECT/ATA Devices
Select Options beside the ATA device
Select Show Managed Devices
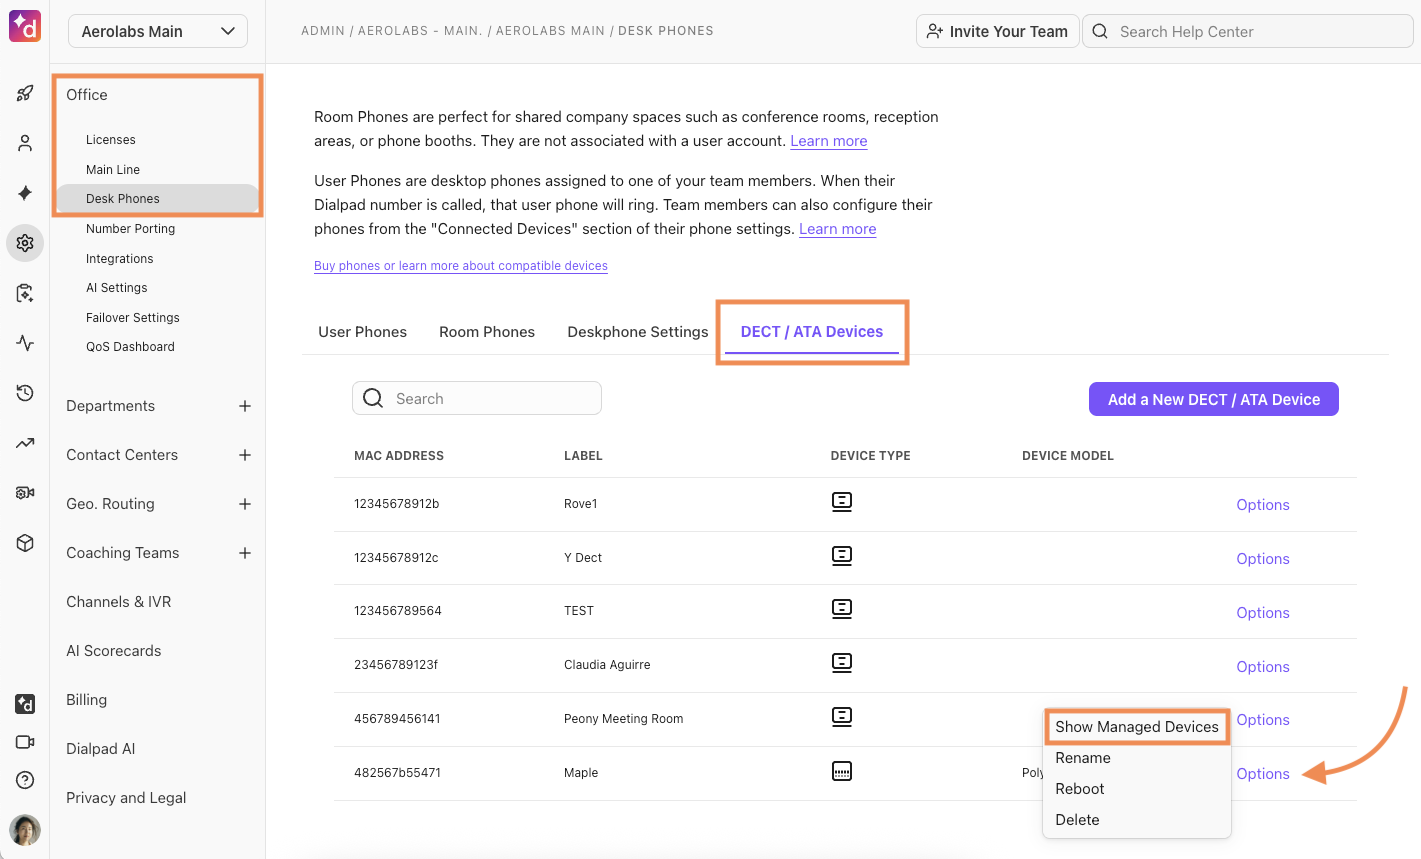
Select Options > Enable Fax
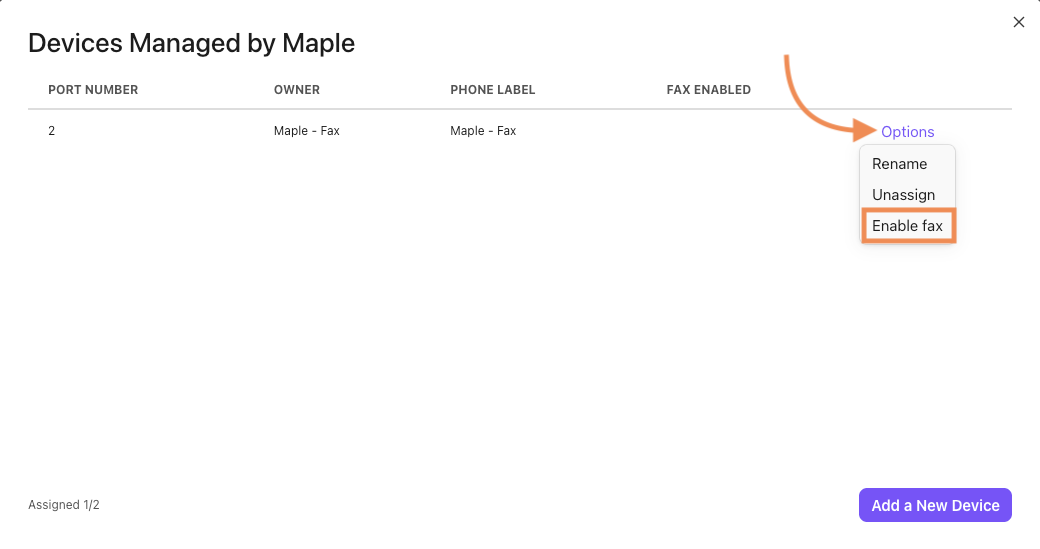
That’s it! You’ll now see the Fax icon beside the room device.

Disable faxing on ATA ports
Decided you don’t need the ATA device to fax? No problem.
To remove faxing functionality from an ATA device for faxing, head to your Admin Settings from Dialpad.com
Navigate to Office > Desk Phones
Select DECT/ATA Devices
Select Options beside the ATA device
Select Show Managed Devices
Select Options > Disable Fax
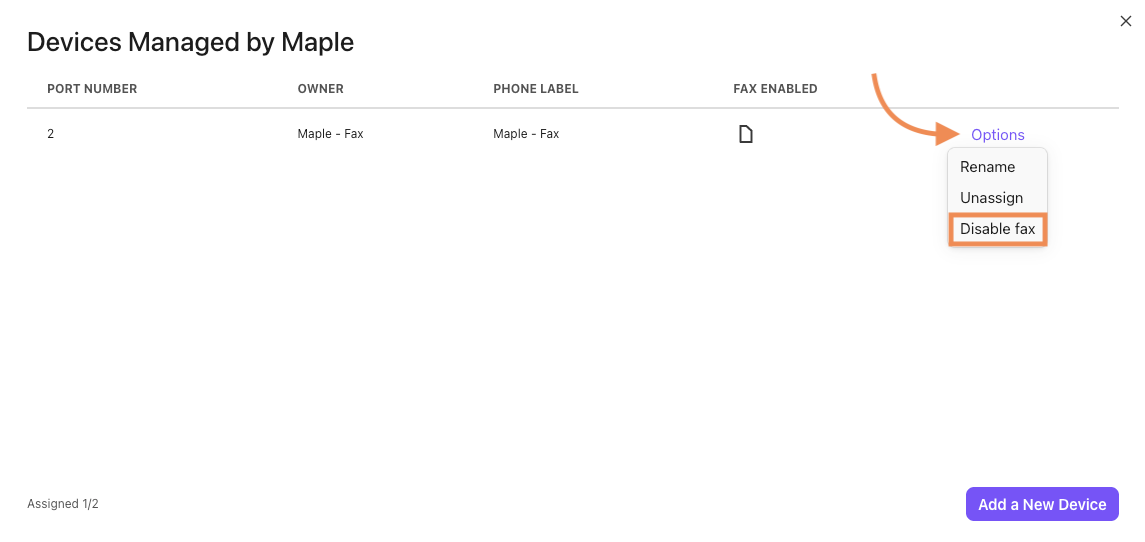
You’ll notice that the Fax icon has disappeared from the device. This means the port is now allocated to voice service.
More information
If you would like more information on how to use your ATA device, please be sure to review this Help Center article.