We know how much you love options, and Dialpad is proud to support Grandstream desk phones.
Let’s go over how to provision Grandstream desk phones.
Note
Your Grandstream desk phone must be on the list of Supported Desk Phones.
Access deskphone admin password
Company admins can access their organization’s deskphone password directly from the Company Settings. This admin password applies to all deskphones activated with Dialpad.
To access the deskphone admin password, navigate to Dialpad Admin Portal.
Select My Company
Select Deskphone Settings
.png)
Navigate to Deskphone Admin Password
Select the eye icon to see the password
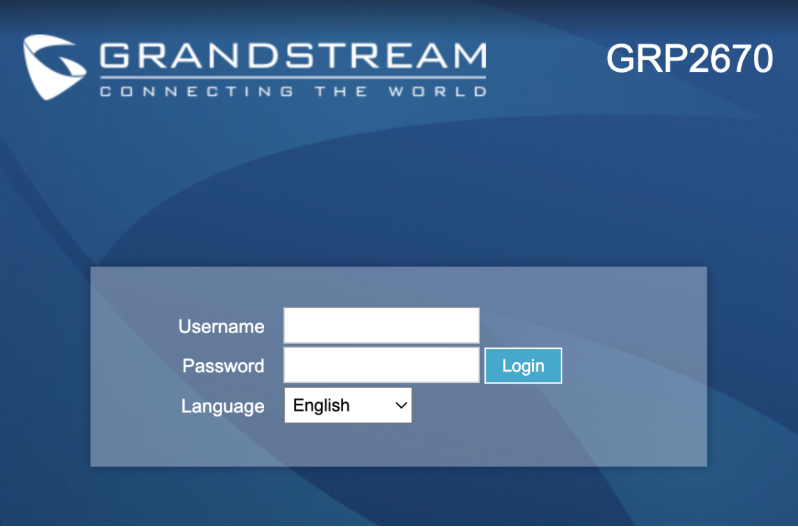
Then, log in to the deskphone's web interface using "admin" as your username and your assigned deskphone admin password.
Note
For unassigned Dialpad provisioned devices use the default deskphone password: 3425723, which spells "Dialpad" on a phone keypad.
The deskphone admin password cannot be changed.
Set up process
Setting up your Grandstream desk phone to Dialpad is a 4 step process.
Factory reset the desk phone
If your phone is brand new, you won’t need to do a factory reset.
Access the desk phone’s web interface
Provision the desk phone to Dialpad
Assign the desk phone to a user or room phone
Factory reset
First, we need to make sure that any previous configuration has been removed and will not interfere with your Dialpad service.
To reset your Grandstream desk phone:
Select Menu on the desk phone
Select System, then Enter
Select Operations
Select Factory Reset
Select Yes to confirm
After confirming the factory reset, the phone will reboot.
Access the web interface
Now that your device has been reset, you’ll need to access the web interface of your desk phone.
Connect the desk phone to the network
Note the desk phone’s IP address
Go to Menu
Select Status
Select Network Status
Note the IPv4
Log in to the device web interface
Enter the IP address (https://<device.ip>) in the browser address bar
Enter the deskphone admin credentials

Select Login
Note
After successfully logging in, you’ll be asked to set a new password for your web interface credentials.
Provision the desk phone for Dialpad
Note
The password required to access the web user interface (UI) of a Grandstream High-Density ATA (GXW42xx series) varies depending on the device's status:
Brand New / Unactivated Devices
Use the factory default password or the password set manually by the user.
Activated Devices
The password is assigned during provisioning. Go to your Admin Settings and select My Company > Deskphone Settings.
Next up, you’ll need to provision the desk phone for Dialpad.
Navigate to Network Settings
Select Ethernet Settings
.png)
Navigate to DNS Server
On DNS Server 1, enter 8.8.8.8.
On DNS Server 2, enter 8.8.4.4.
Navigate to Maintenance
Select Upgrade and Provisioning
Navigate to Configure via Network
.png)
Set Config Upgrade via as HTTPS
Set Config Server Path to prov.dialpad.com
Select Save and Apply
Wait 15-20 seconds; the phone will show Dialpad Activate if the provisioning is successful.
Note
The web interface differs for every model, but it has the same main menu and sub-menus.
Add a user desk phone
Admins can add a user desk phone from their Dialpad Admin Portal.
Navigate to Office
Select Desk Phones
Select the User Phones tab
Select Add a user phone
.png)
Select the phone model
Follow the prompts to configure your phone
Note the activation code
To activate your device, press the speaker button or pick up the handset. The phone will automatically call the activation number. Enter the activation code when prompted.
Tips
Your desk phone must be connected to the internet before getting started.
If you don’t see the Grandstream option, please reach out to our Customer Care Team.
Add a desk phone as a room phone
Admins can add room phones from the Dialpad Admin Portal.
Navigate to Office
Select Desk Phones
Select Room Phones tab

Select Add a room phone
You'll need a Room Phone License to provision this device as a room phone.
Select the model
Follow the prompts to configure your phone
Note the activation code
Once the phone has been added, you’ll need to activate it.
To activate your device, press the speaker button or pick up the handset. The phone will automatically call the activation number. Enter the activation code when prompted.