Digital Contact Center Admins and Supervisors can monitor Omnichannel interactions in real-time, manage agents' DND status, whisper to agents, take over conversations, and more.
Let's take a look at the details.
Who can use this
Digital Contact Center supervisor features are available to Dialpad Support and Dialpad Sell customers with a Digital Contact Center.
Contact Center inbox
To access your Digital Contact Center's inbox from the Dialpad app:
Navigate to Contact Centers and select the arrow next to your status
Tip
If you have any pending messages in your contact centers, select the notification bubble to open the list of your contact centers.
Select Contact Centers and select the Contact Center from the drop-down
Select the Monitor digital tab
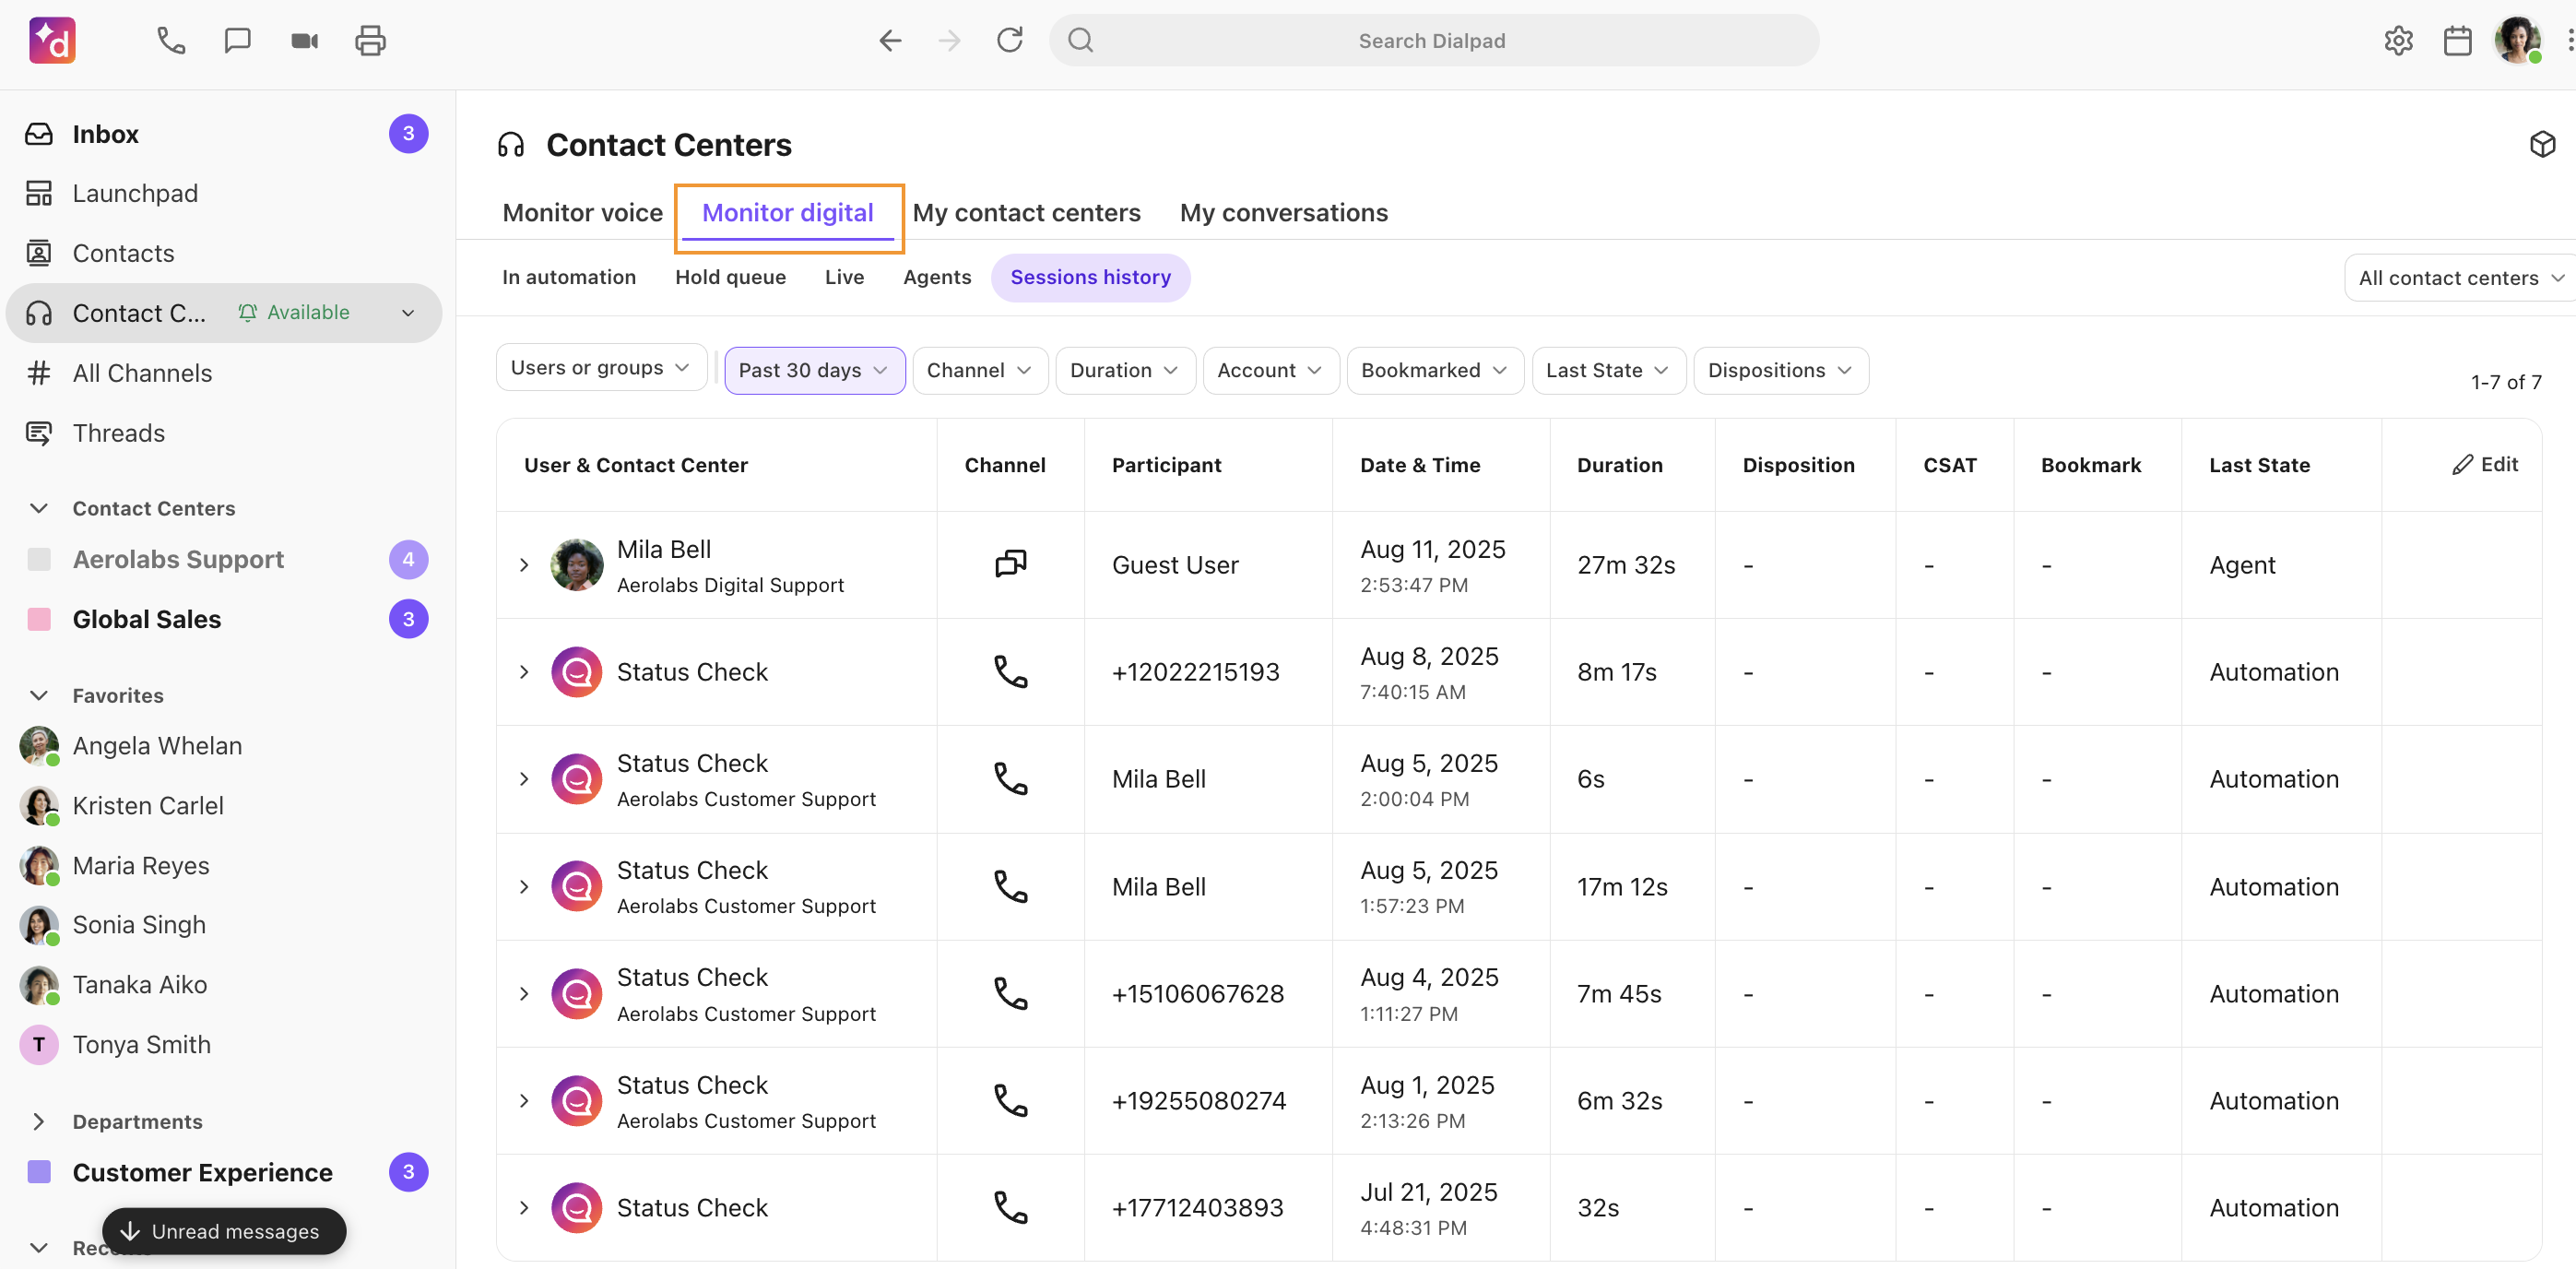
Your Inbox is divided into 5 sections:
In automation | Live view of conversations being handled by a configured automation. |
Hold queue | Live view of callers waiting to connect to an agent. |
Live | Overview of live conversations, highlighting the agent, channel type, guest name, and time started. |
Agents | Displays Agents within the Contact Center, their status, time in that status, and an easy toggle button to switch agents on or off of DND. |
Sessions history | Displays information from all sessions with multiple Contact Centers' agents. Supervisors can filter this view to hide or display specific data. |
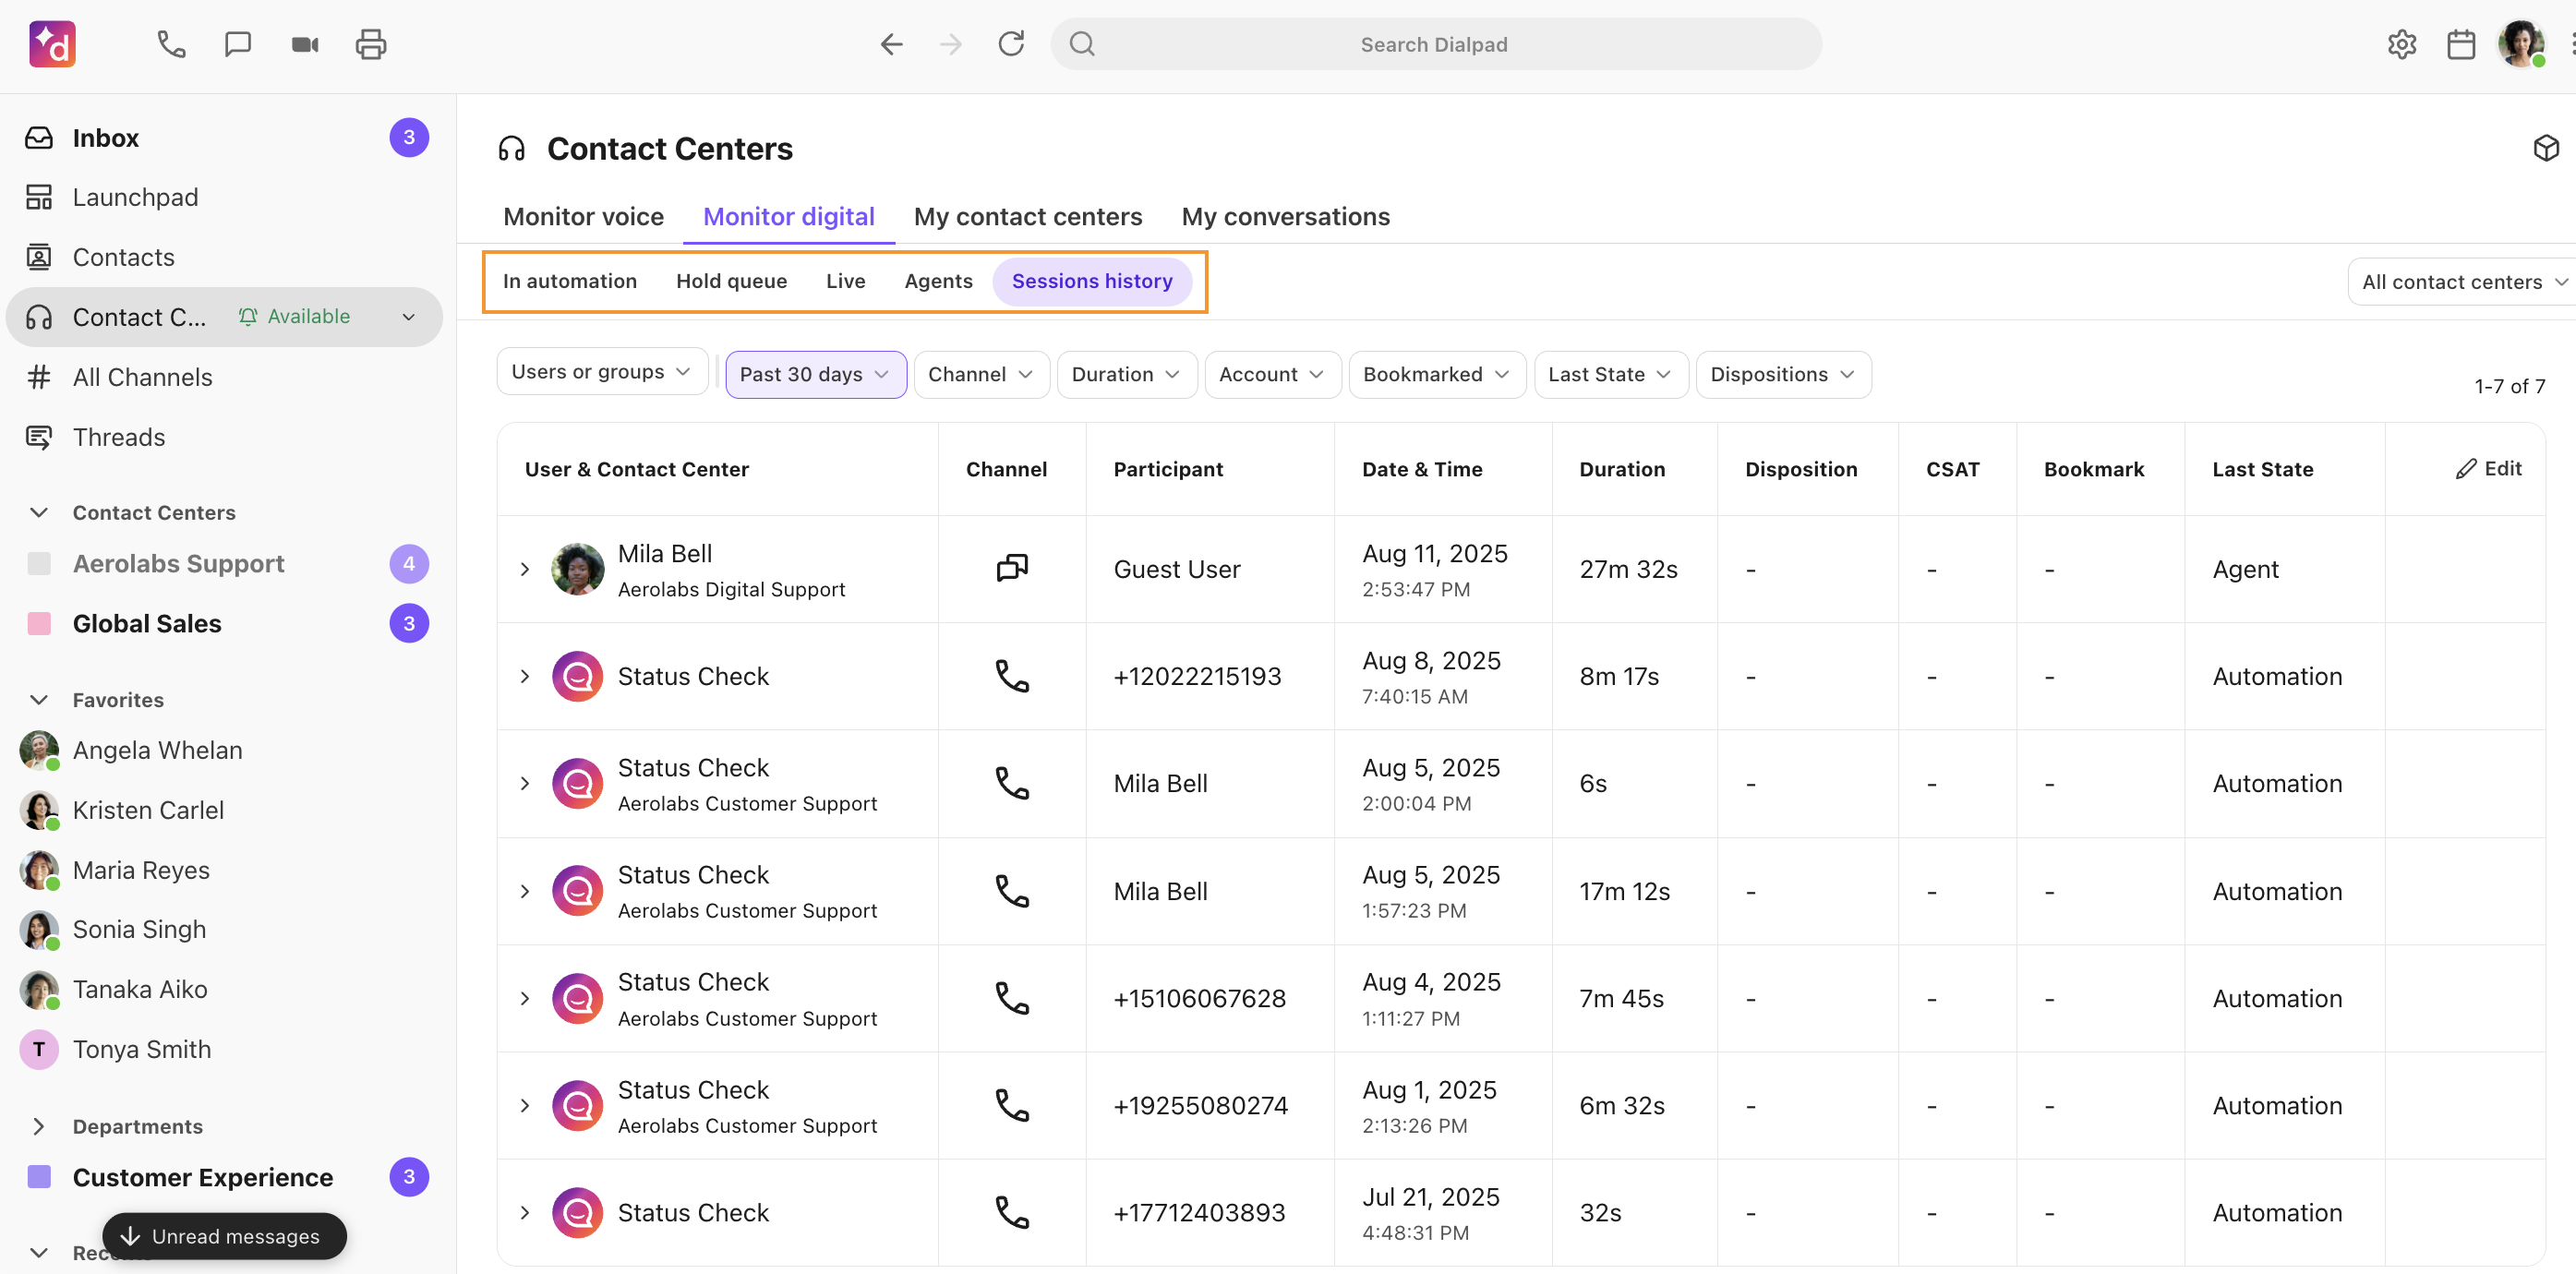
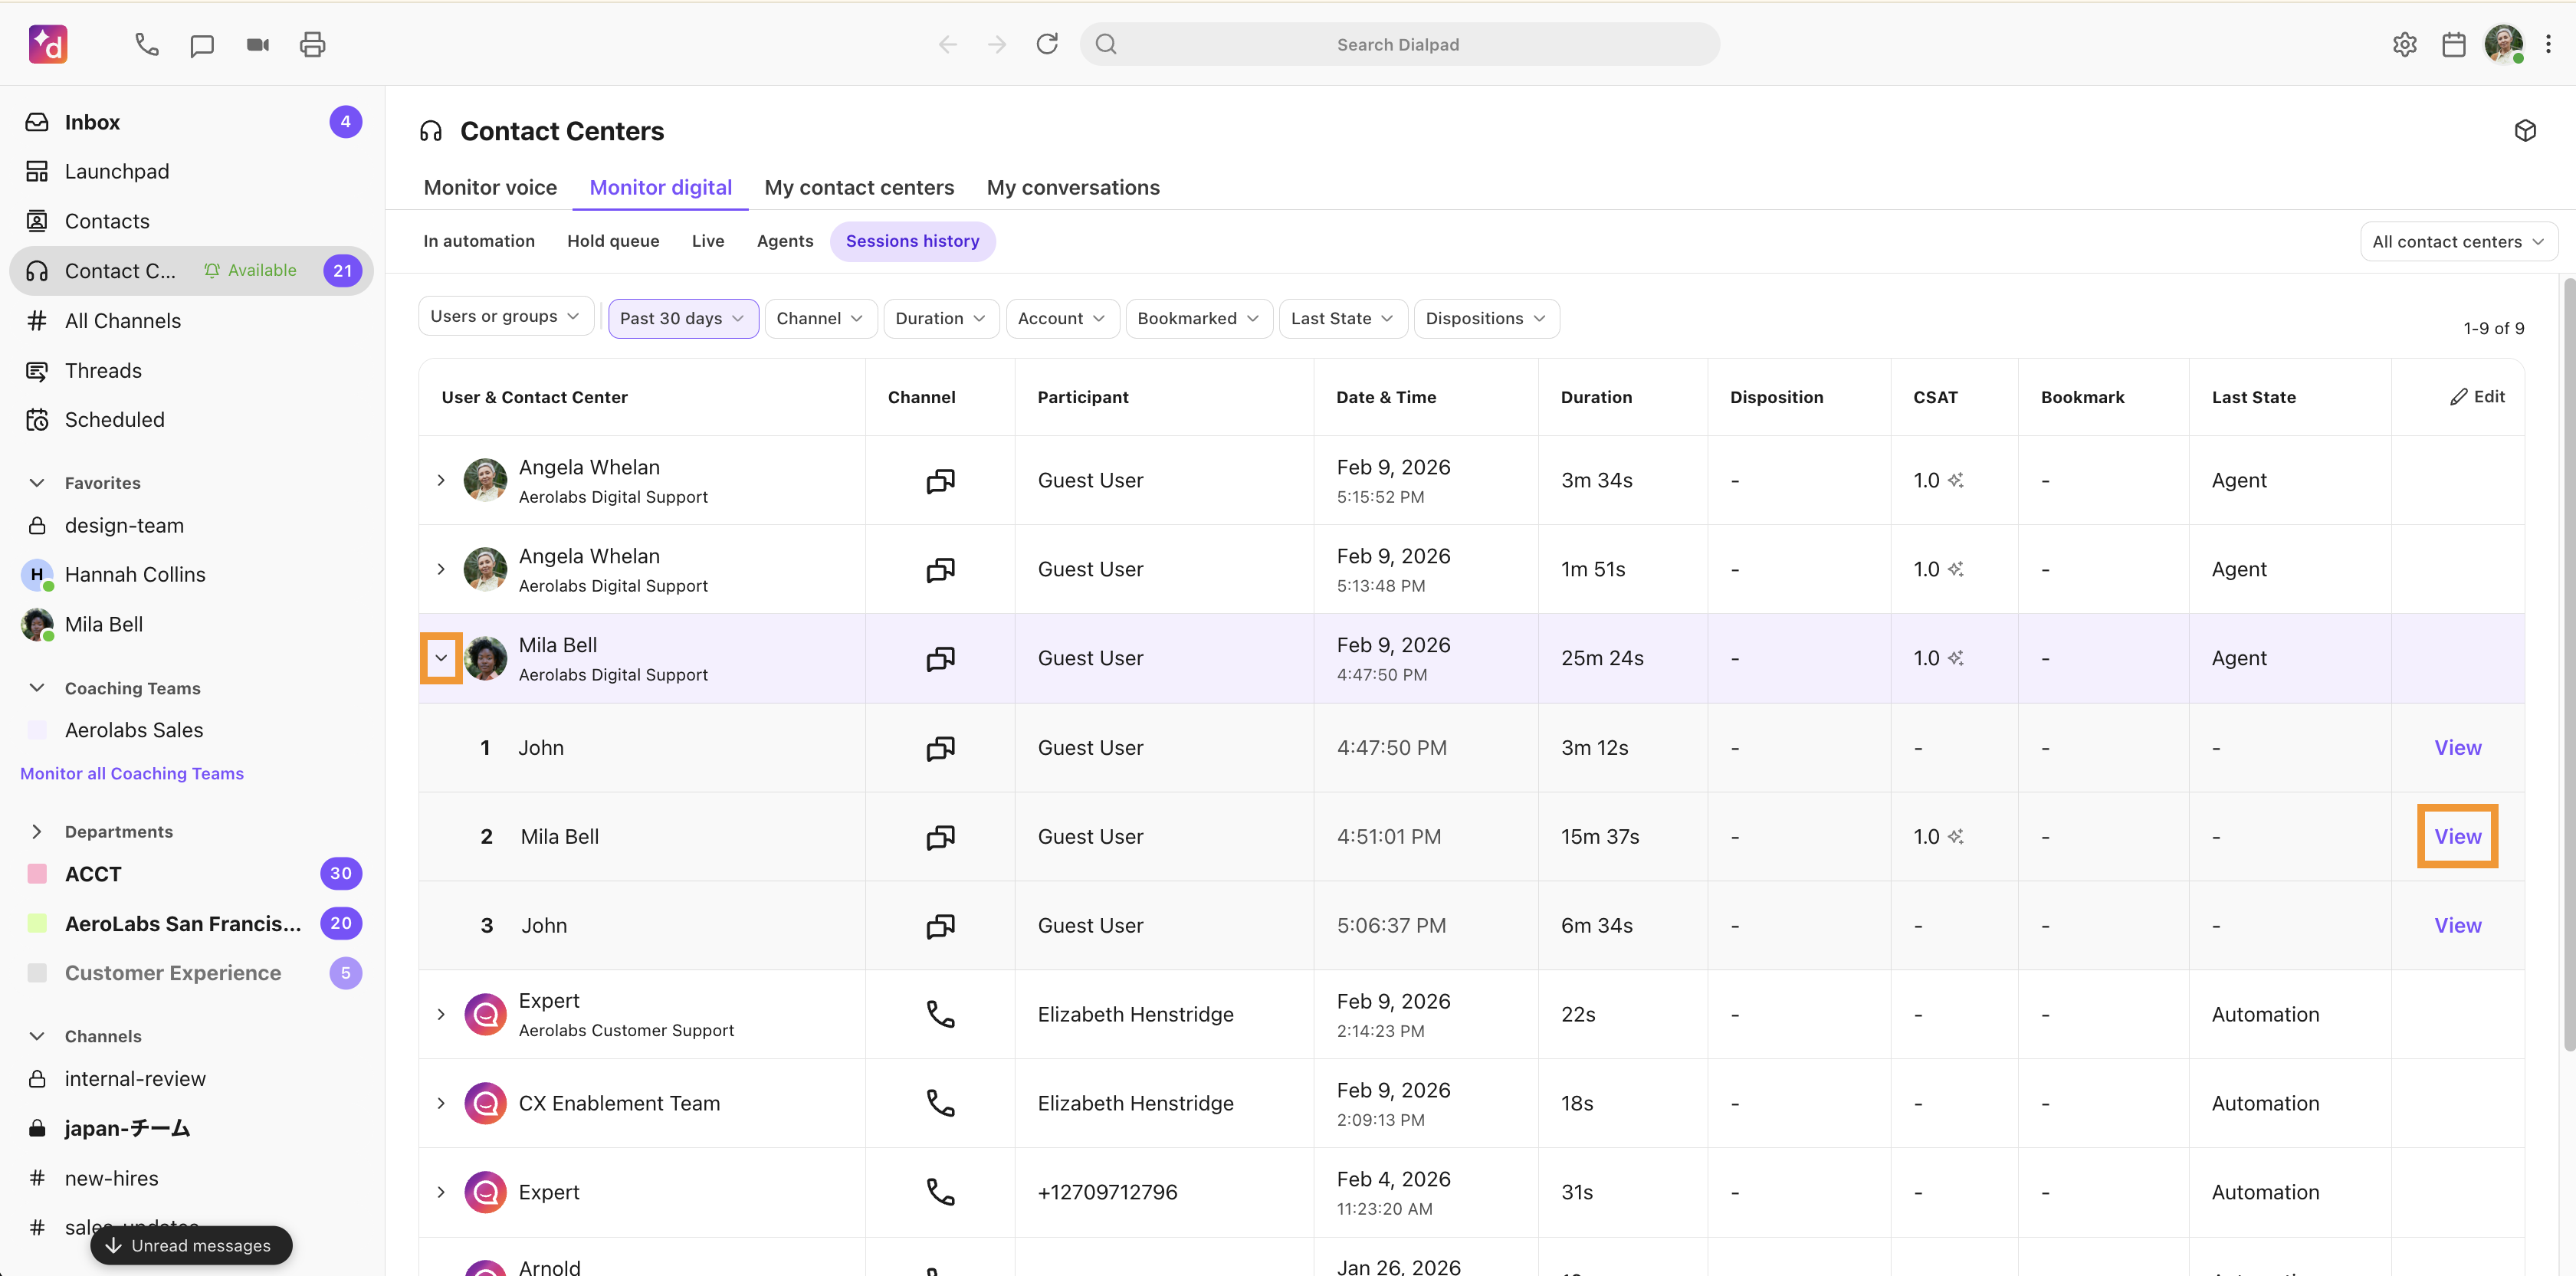
Sessions history
The Sessions History section of the Supervisor inbox provides key information from multiple Contact Centers and agents.
Here, you'll see details on past interactions and their CSAT score (AI or customer-provided).
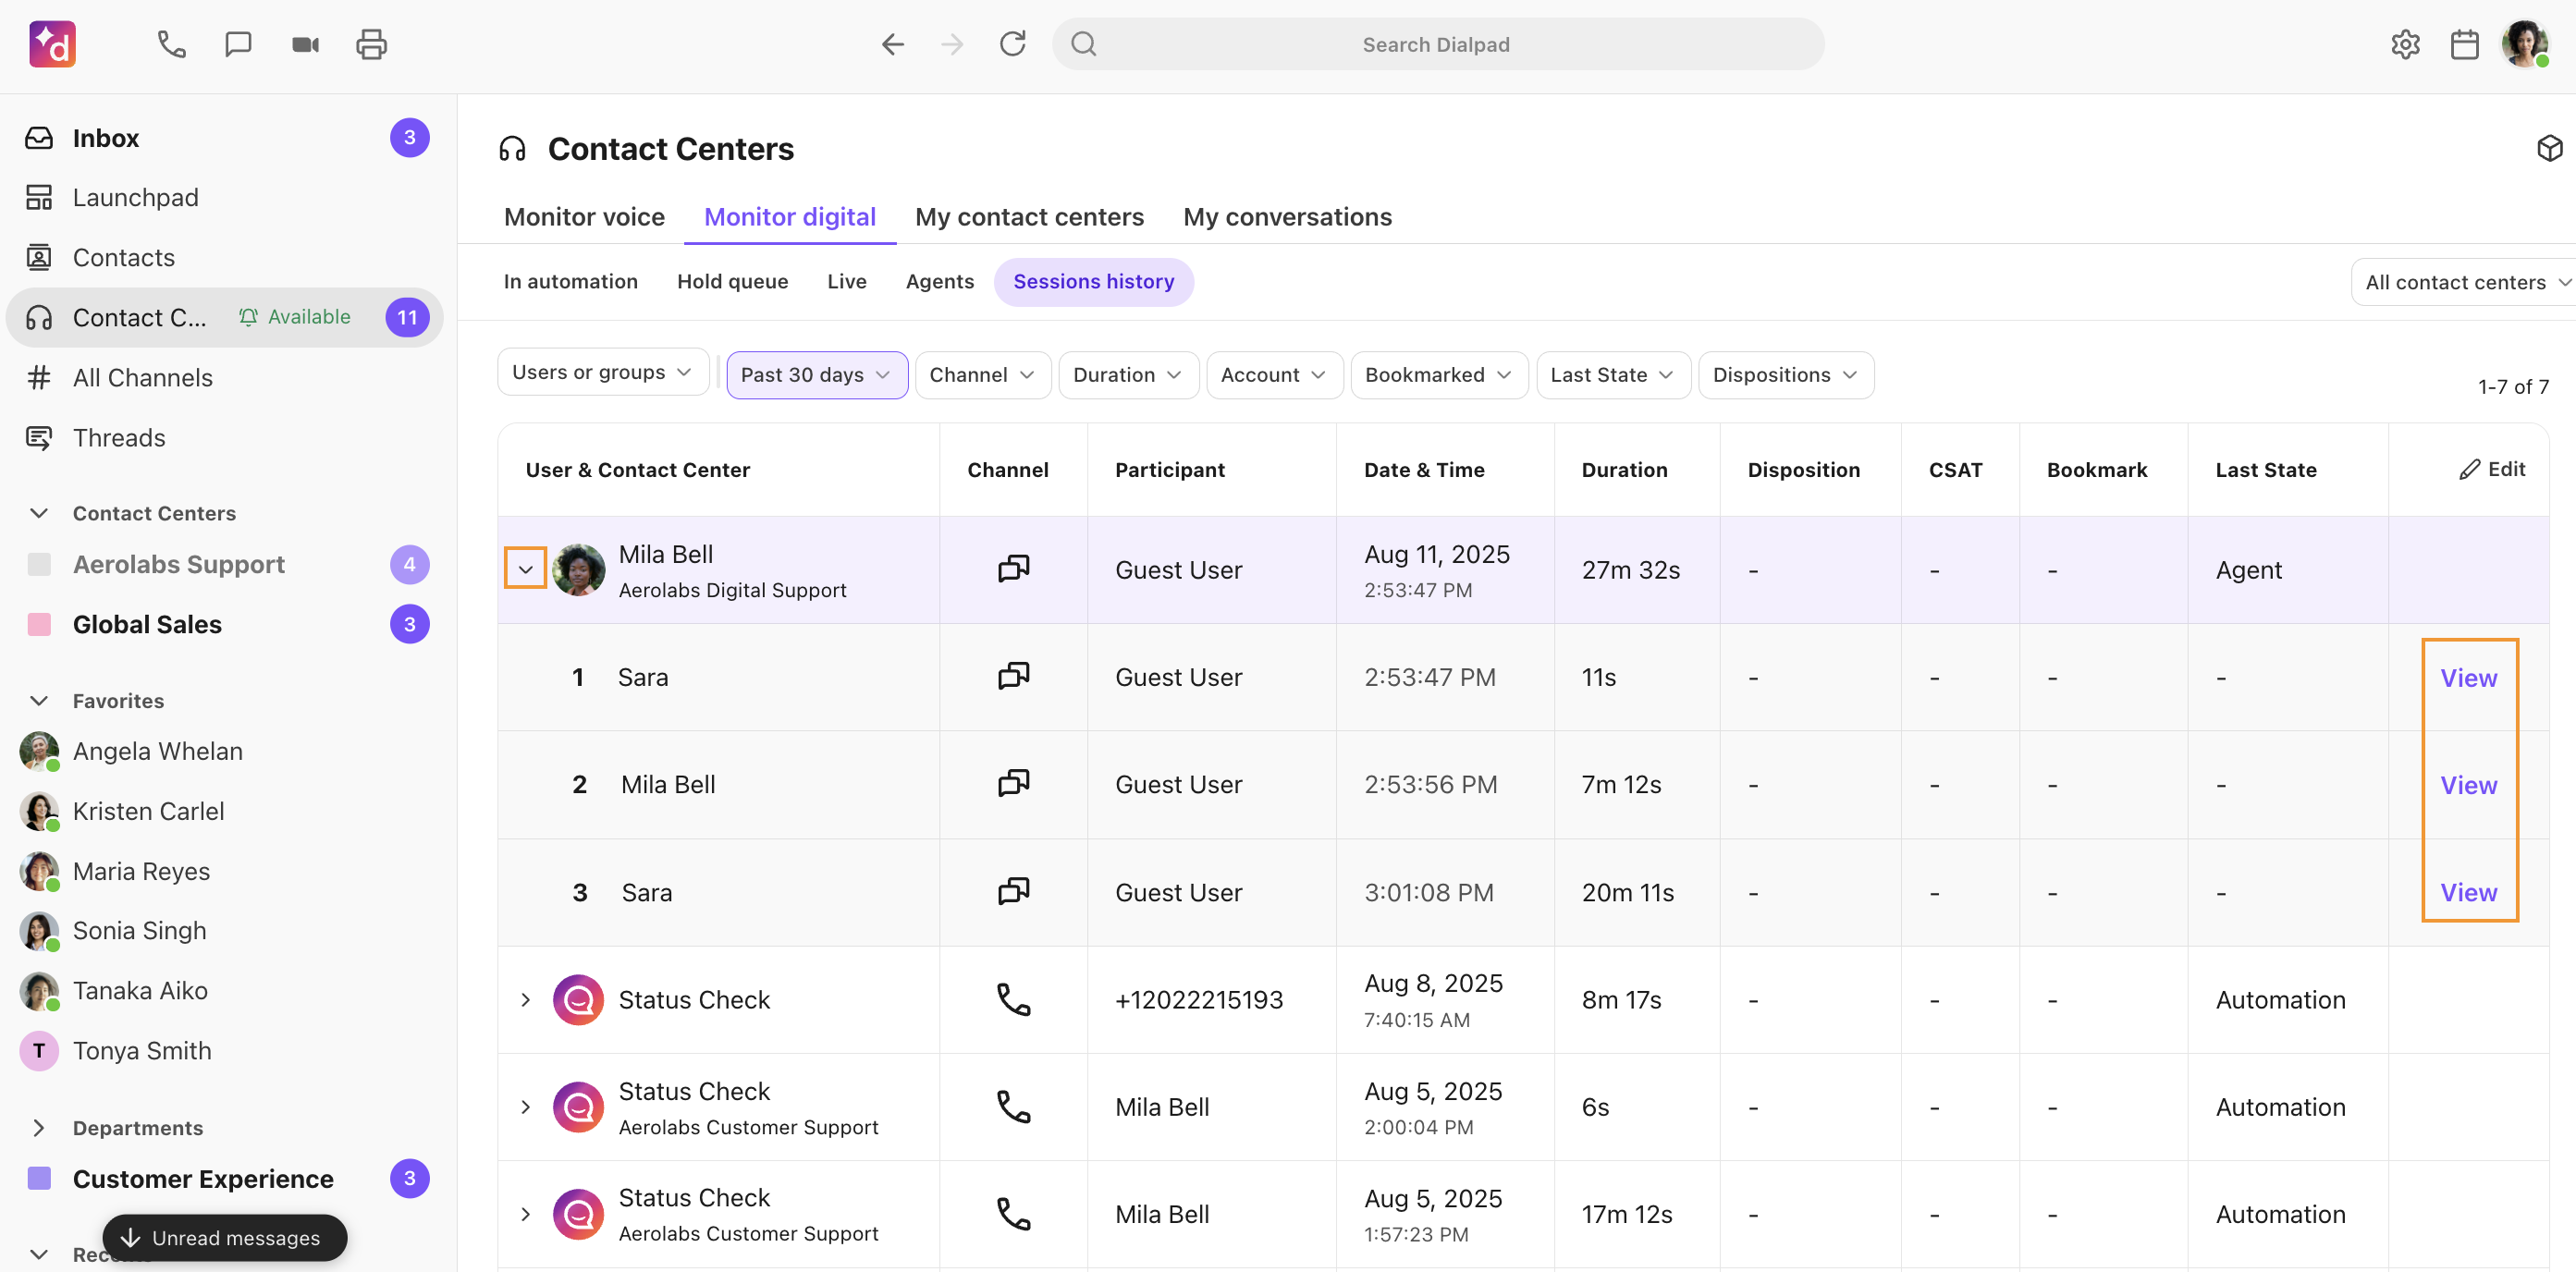
Expand the interaction and select View to open up the conversation's Conversation History.
Use the filters to choose specific agents and contact centers during a specific period and get granular using the Edit feature to update the columns.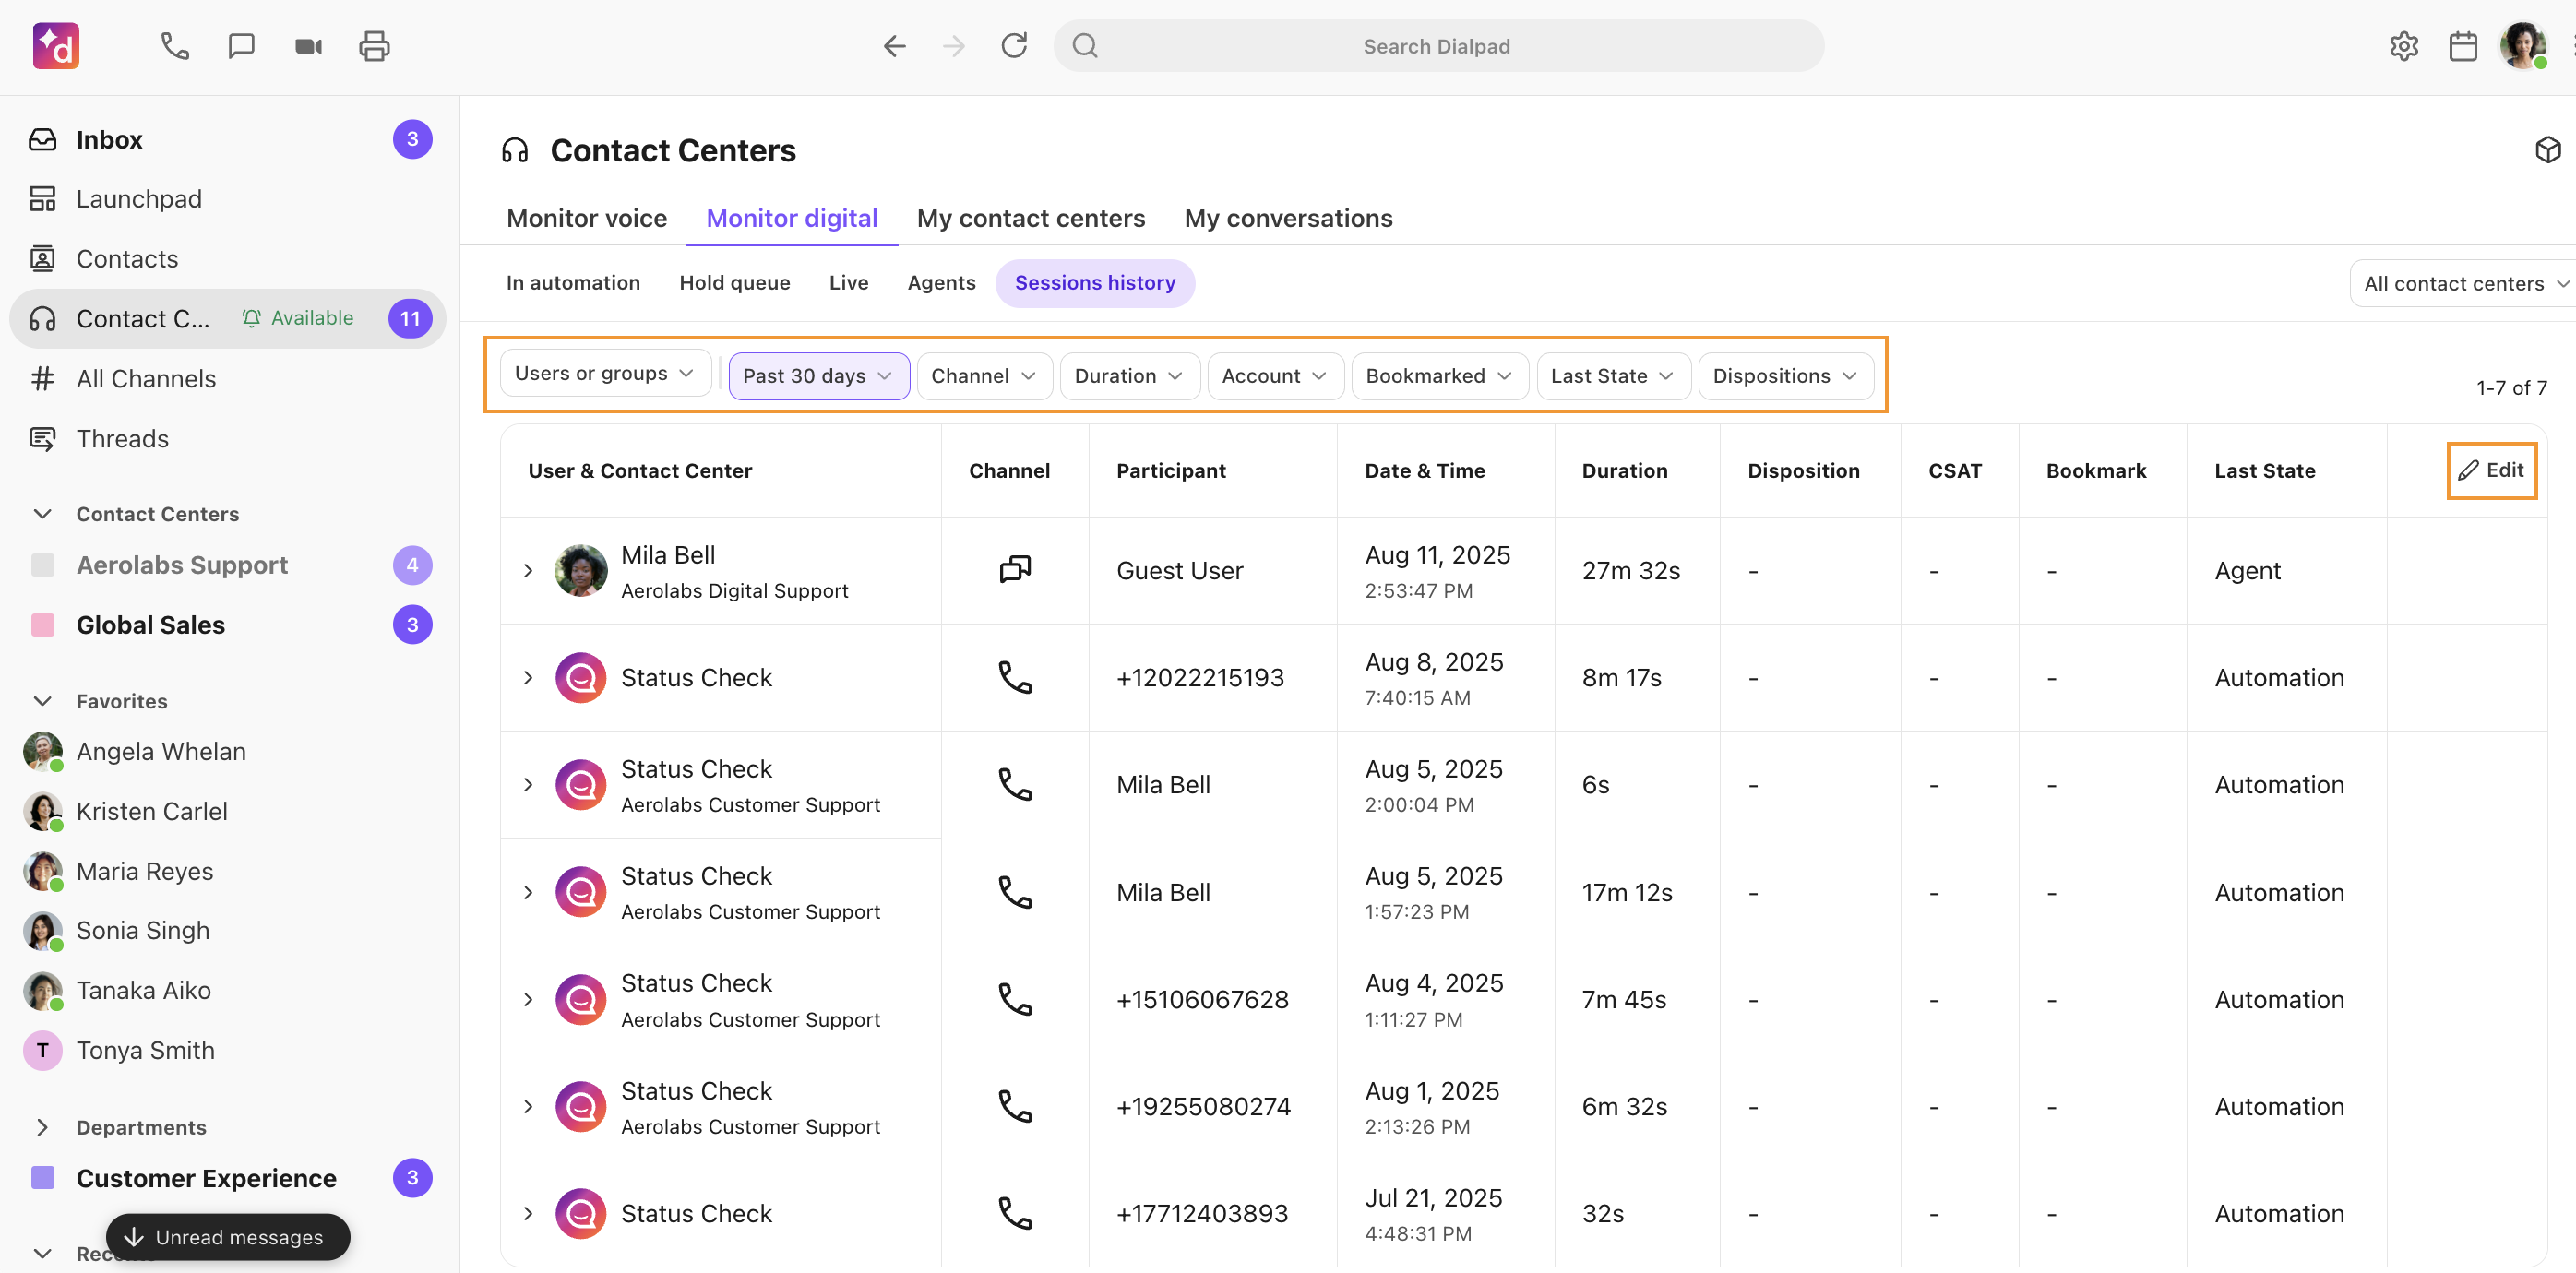
The Sessions History tab offers the following filters:
Users or groups | Filters for a specific agent or user group. |
Date | Filter by specific dates. |
Channel type | Filter by channel. |
Duration | Filter by the length (duration) of the interaction. |
Account | Filter by the account type. |
Bookmarked | Filters for conversations that have or have not been bookmarked. |
Last State | Filters by the last state of the conversation.
|
Columns can be configured to show:
User and Contact Center | The name of the agent and the Contact Center associated with the session. |
Channel | The type of digital engagement channel. |
Participant | The customer’s name or phone number. |
Date & Time | The date and time the interaction began. |
Duration | The length of the interaction. |
CSAT | The CSAT score from the customer. |
Bookmark | If the conversation was bookmarked. |
Last state | The conversation’s last state. |
Select the arrow beside a conversation to view all the legs of the interaction.
.png)
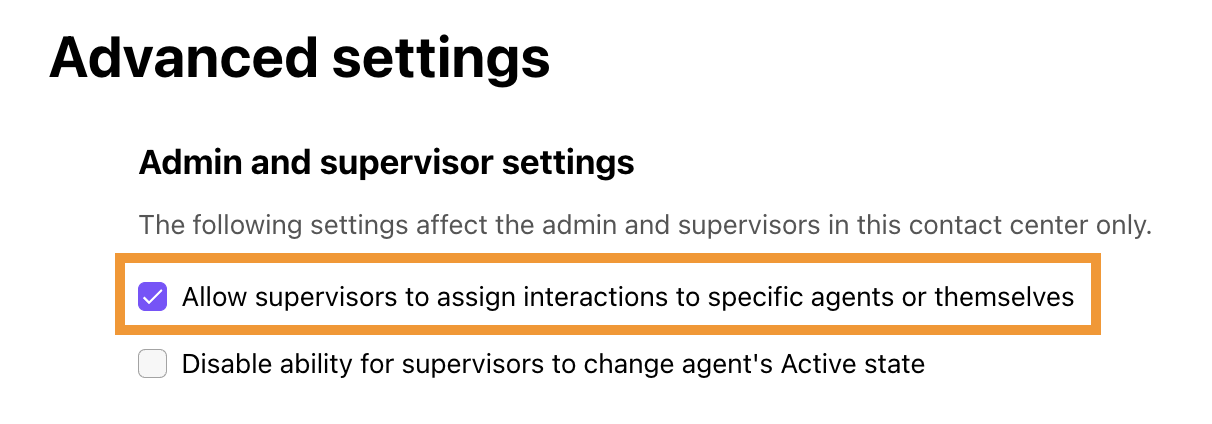
Enable digital interaction assignment
Admins and Supervisors can assign digital sessions from the Hold queue to themselves or other available agents.
To enable assigning interactions, go to your Dialpad Admin Settings.
Select Contact Center and select your desired Digital Contact Center
Go to Advanced Settings > Admin and supervisor settings
Select Allow supervisors to assign calls to specific agents or themselves
Assign a digital interaction
As a Digital Contact Center Admin or Supervisor, you can assign interactions from the Hold queue to yourself or other agents on your team.
To assign a digital interaction, head to your Dialpad app and navigate to your Contact Center Hold queue.
Select the interaction you want to assign and select Assign
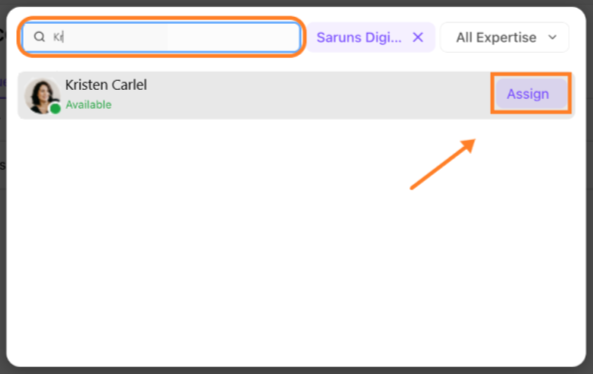
Select an available agent
Search for a specific agent
Select from the agents on duty
Select Assign
Tip
You can assign a digital interaction to agents who are on DND or in a customized Off-Duty State.
Note
Agents set to Off Duty won’t receive interactions through standard routing. However, they can still be assigned conversations if someone manually transfers or cherry-picks a conversation to them.
This allows for flexibility in cases where a specific agent or supervisor may need to be looped in, even if they aren’t actively on duty. To prevent confusion, we recommend coaching your team to check an agent’s availability before transferring a conversation. If an agent appears as unavailable, it’s best to select someone who is currently active.
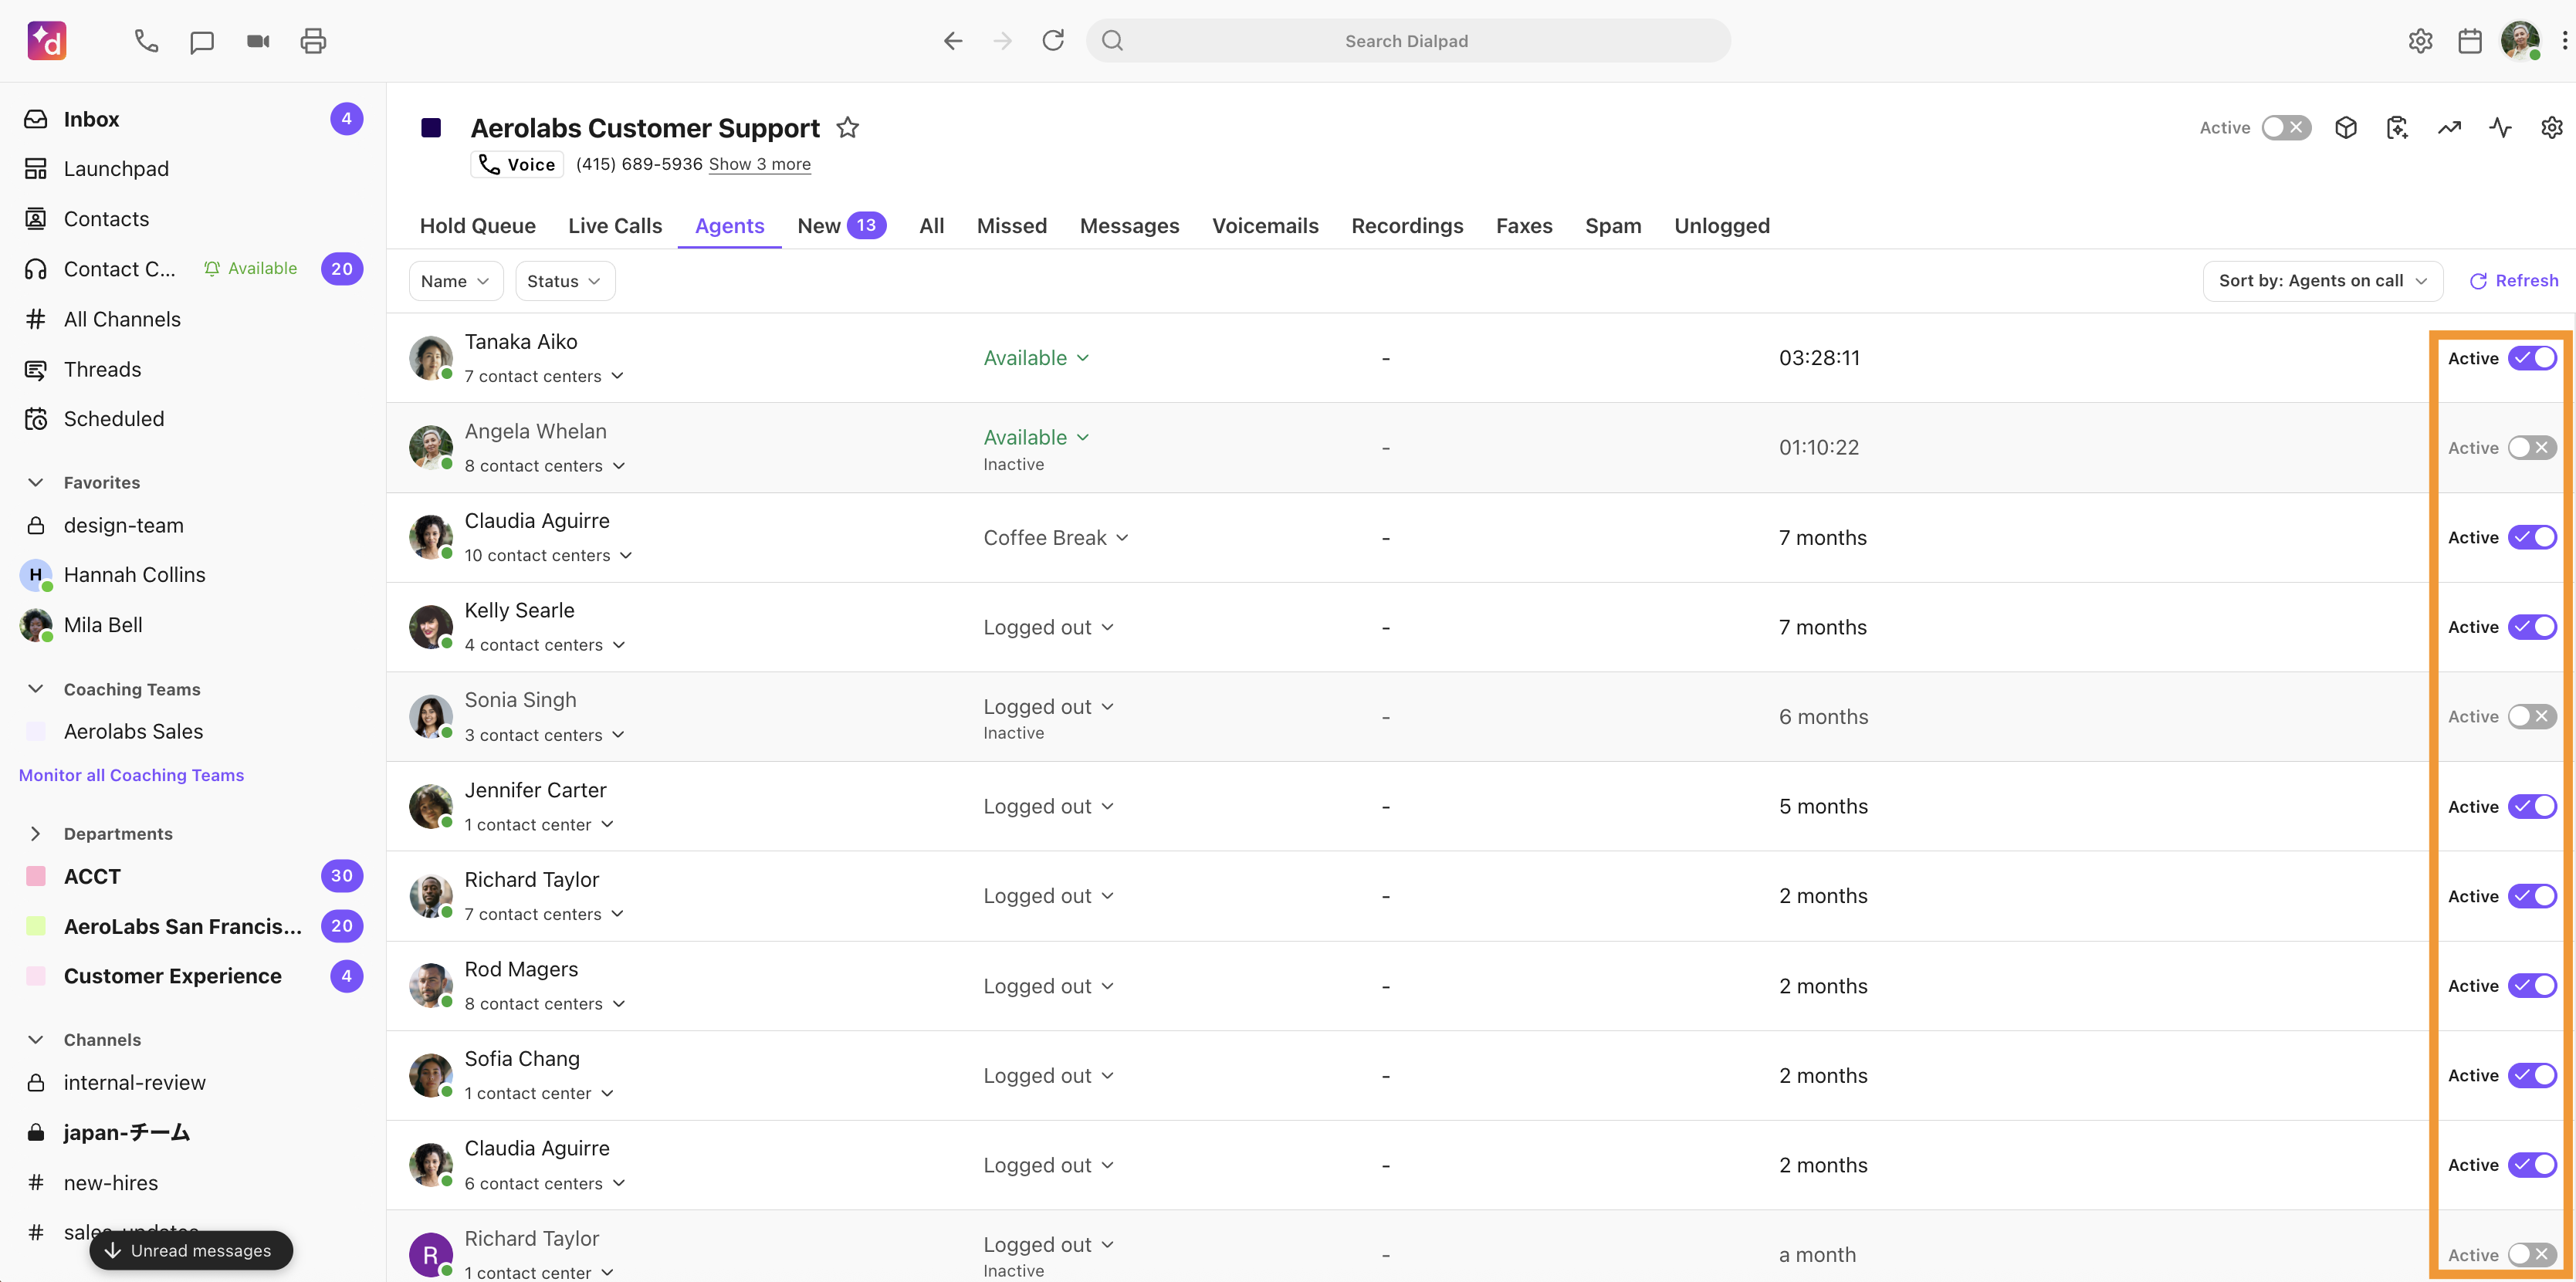
Monitor agent availability
Digital Contact Center Admins or Supervisors can monitor agent availability from the contact center’s Agents tab.
Here, you'll see a list of agents, their availability status, and how long they've been in that status.
Sort your agents by name, status, and more, by selecting the arrow beside the Sort By menu.
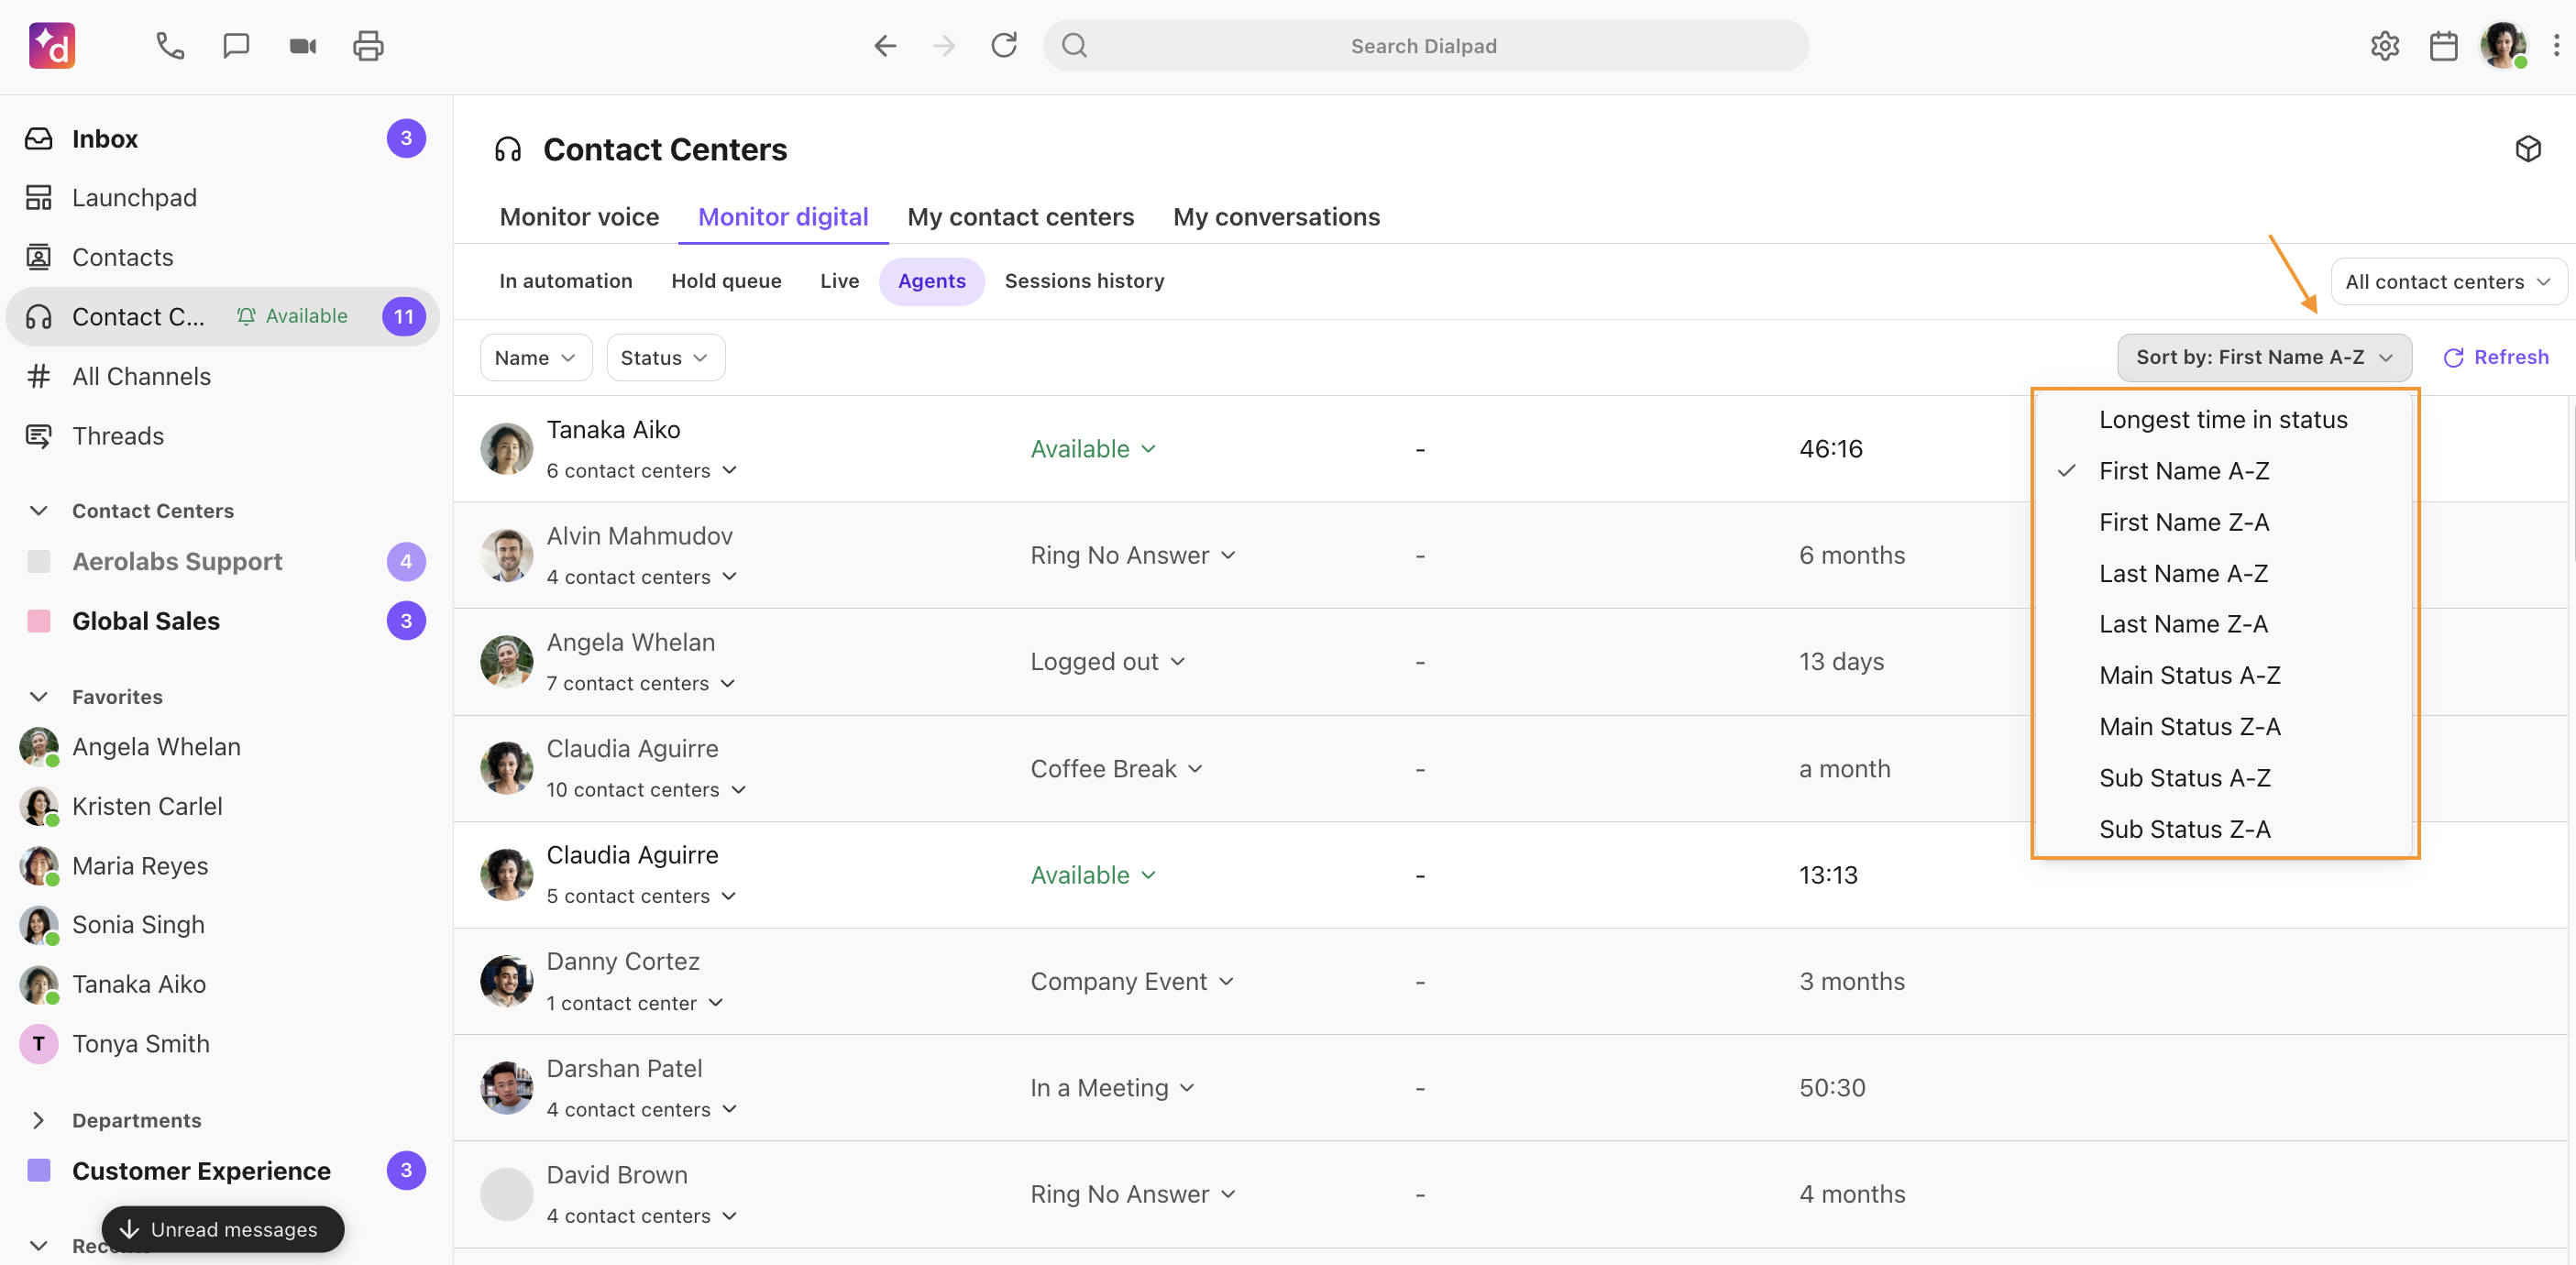
Note
The default agent sort order is Agents on call. It prioritizes all agents who are signed into the queue and are actively participating in contact center interactions. Agents on a call will be prioritized at the top, followed by those receiving a call, in wrap-up, available, or in any customizable off-duty state.
Change agent status
From the individual contact center Agents view, Digital Contact Center Admins and Supervisors with Contact Center Administrator Permissions can easily update an agent’s global availability status.
Simply select the agent's current status and choose a new status from the drop-down menu.
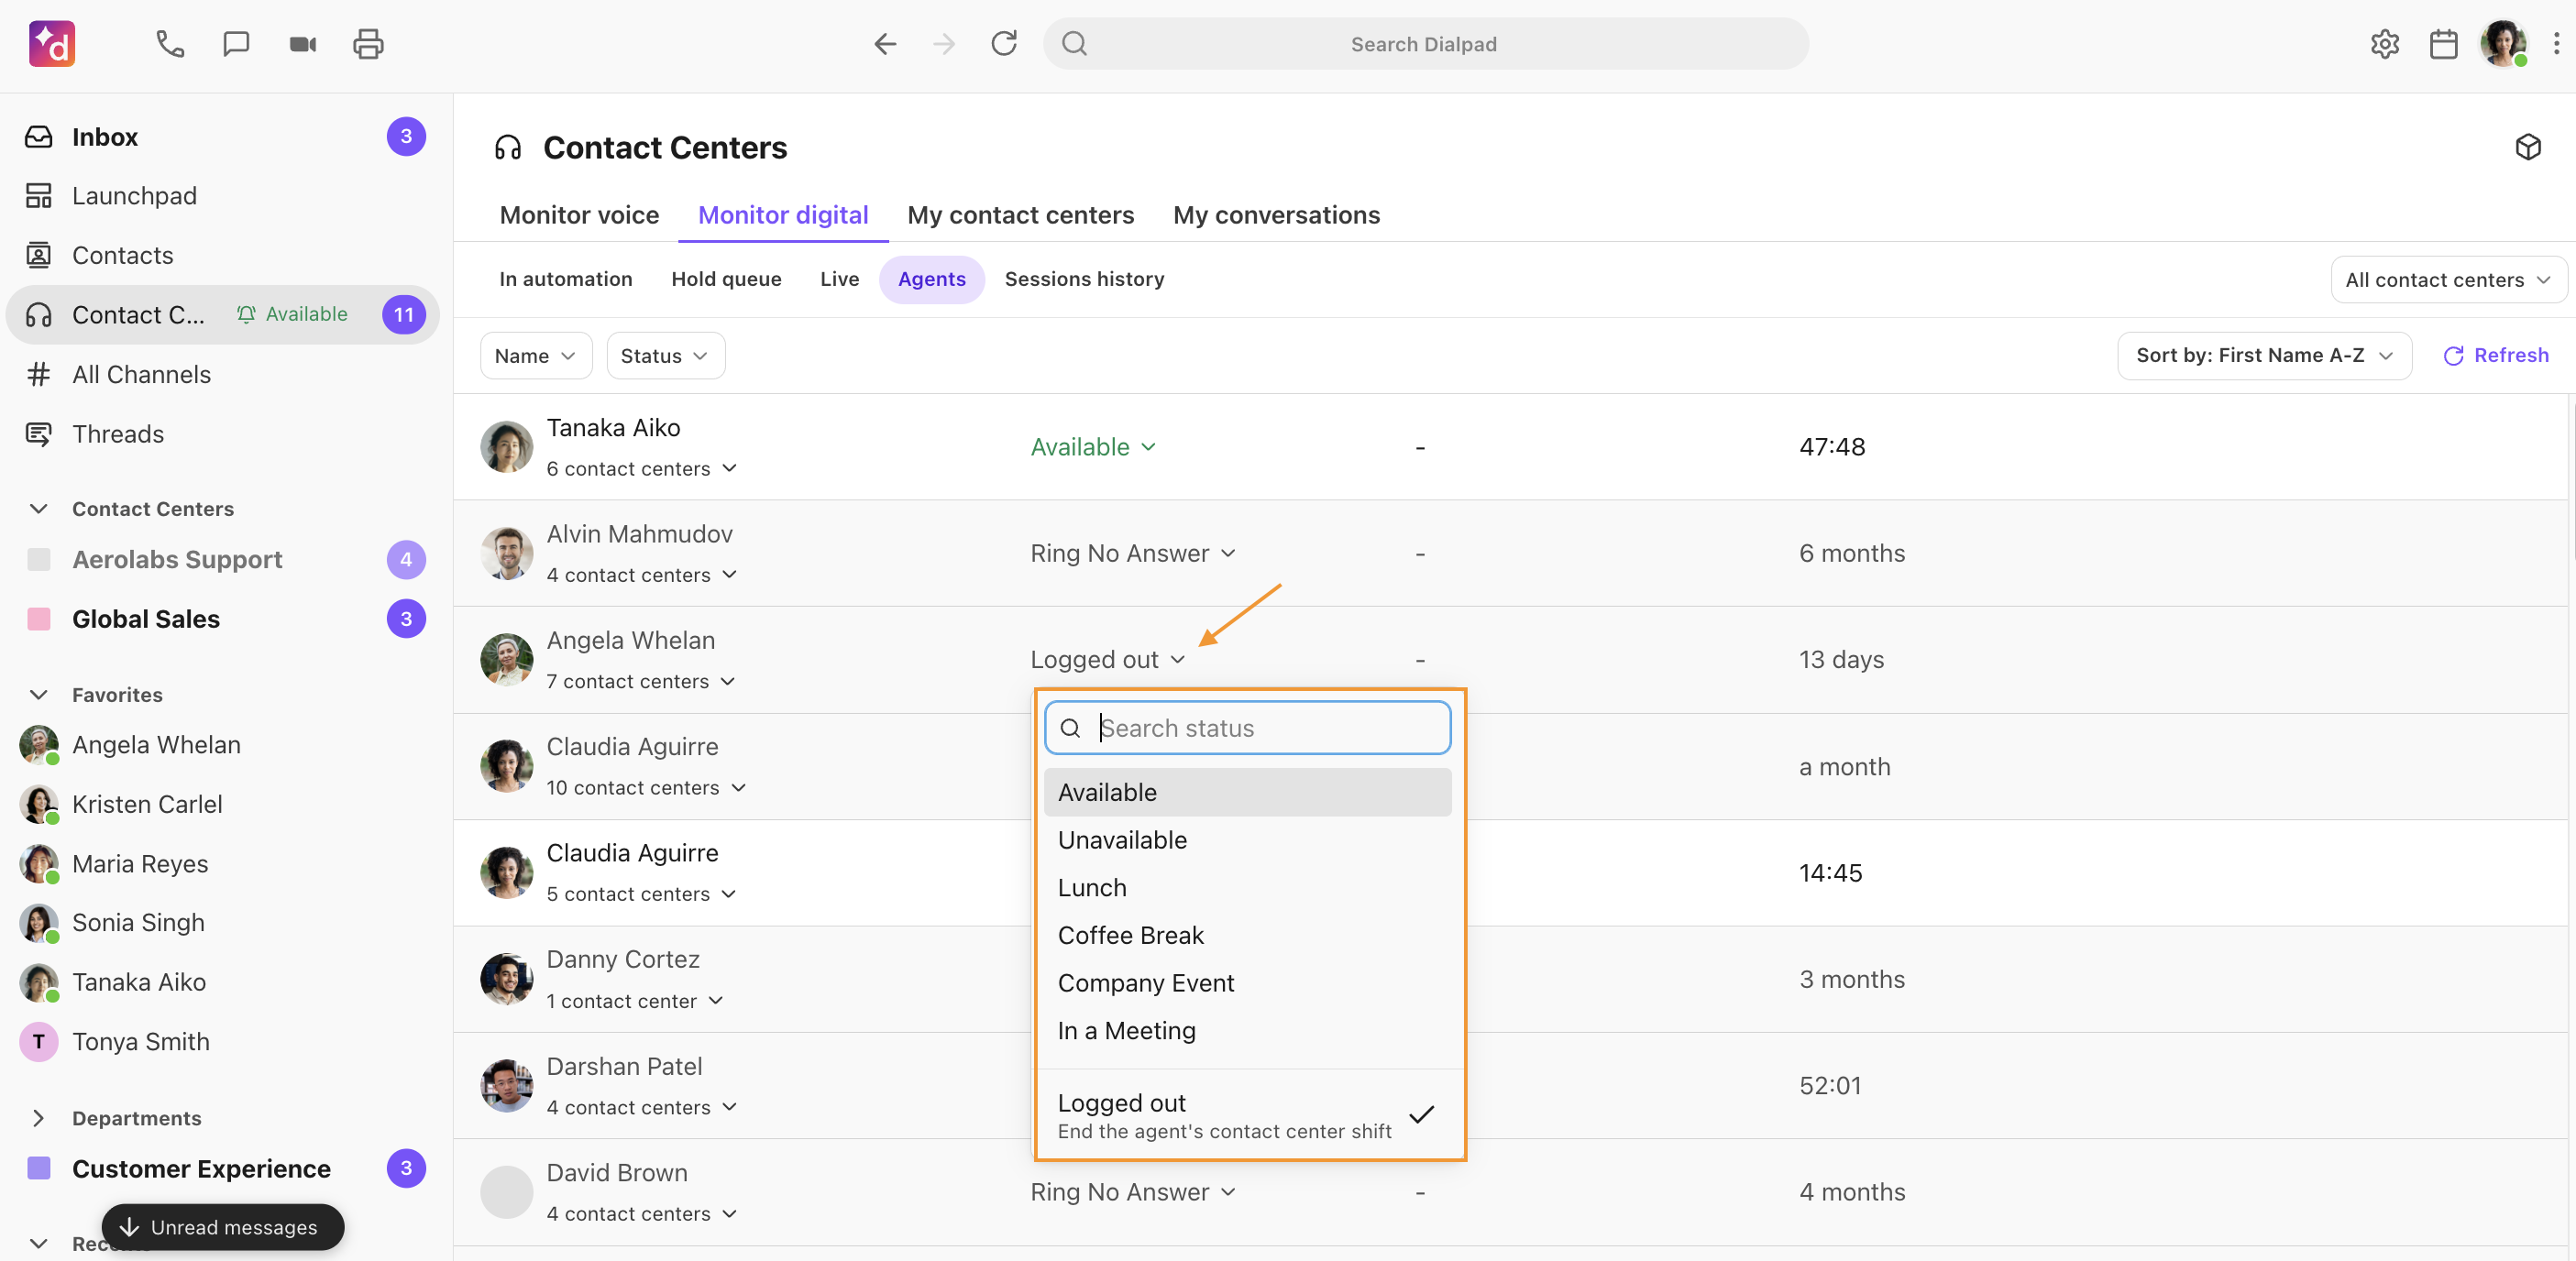
Change an agent's DND status
Digital Contact Center Admins and Supervisors with Contact Center Administrator Permissions can quickly set an agent to DND from the contact center's Agents view. Toggle the DND slider on or off and their availability will update instantly.
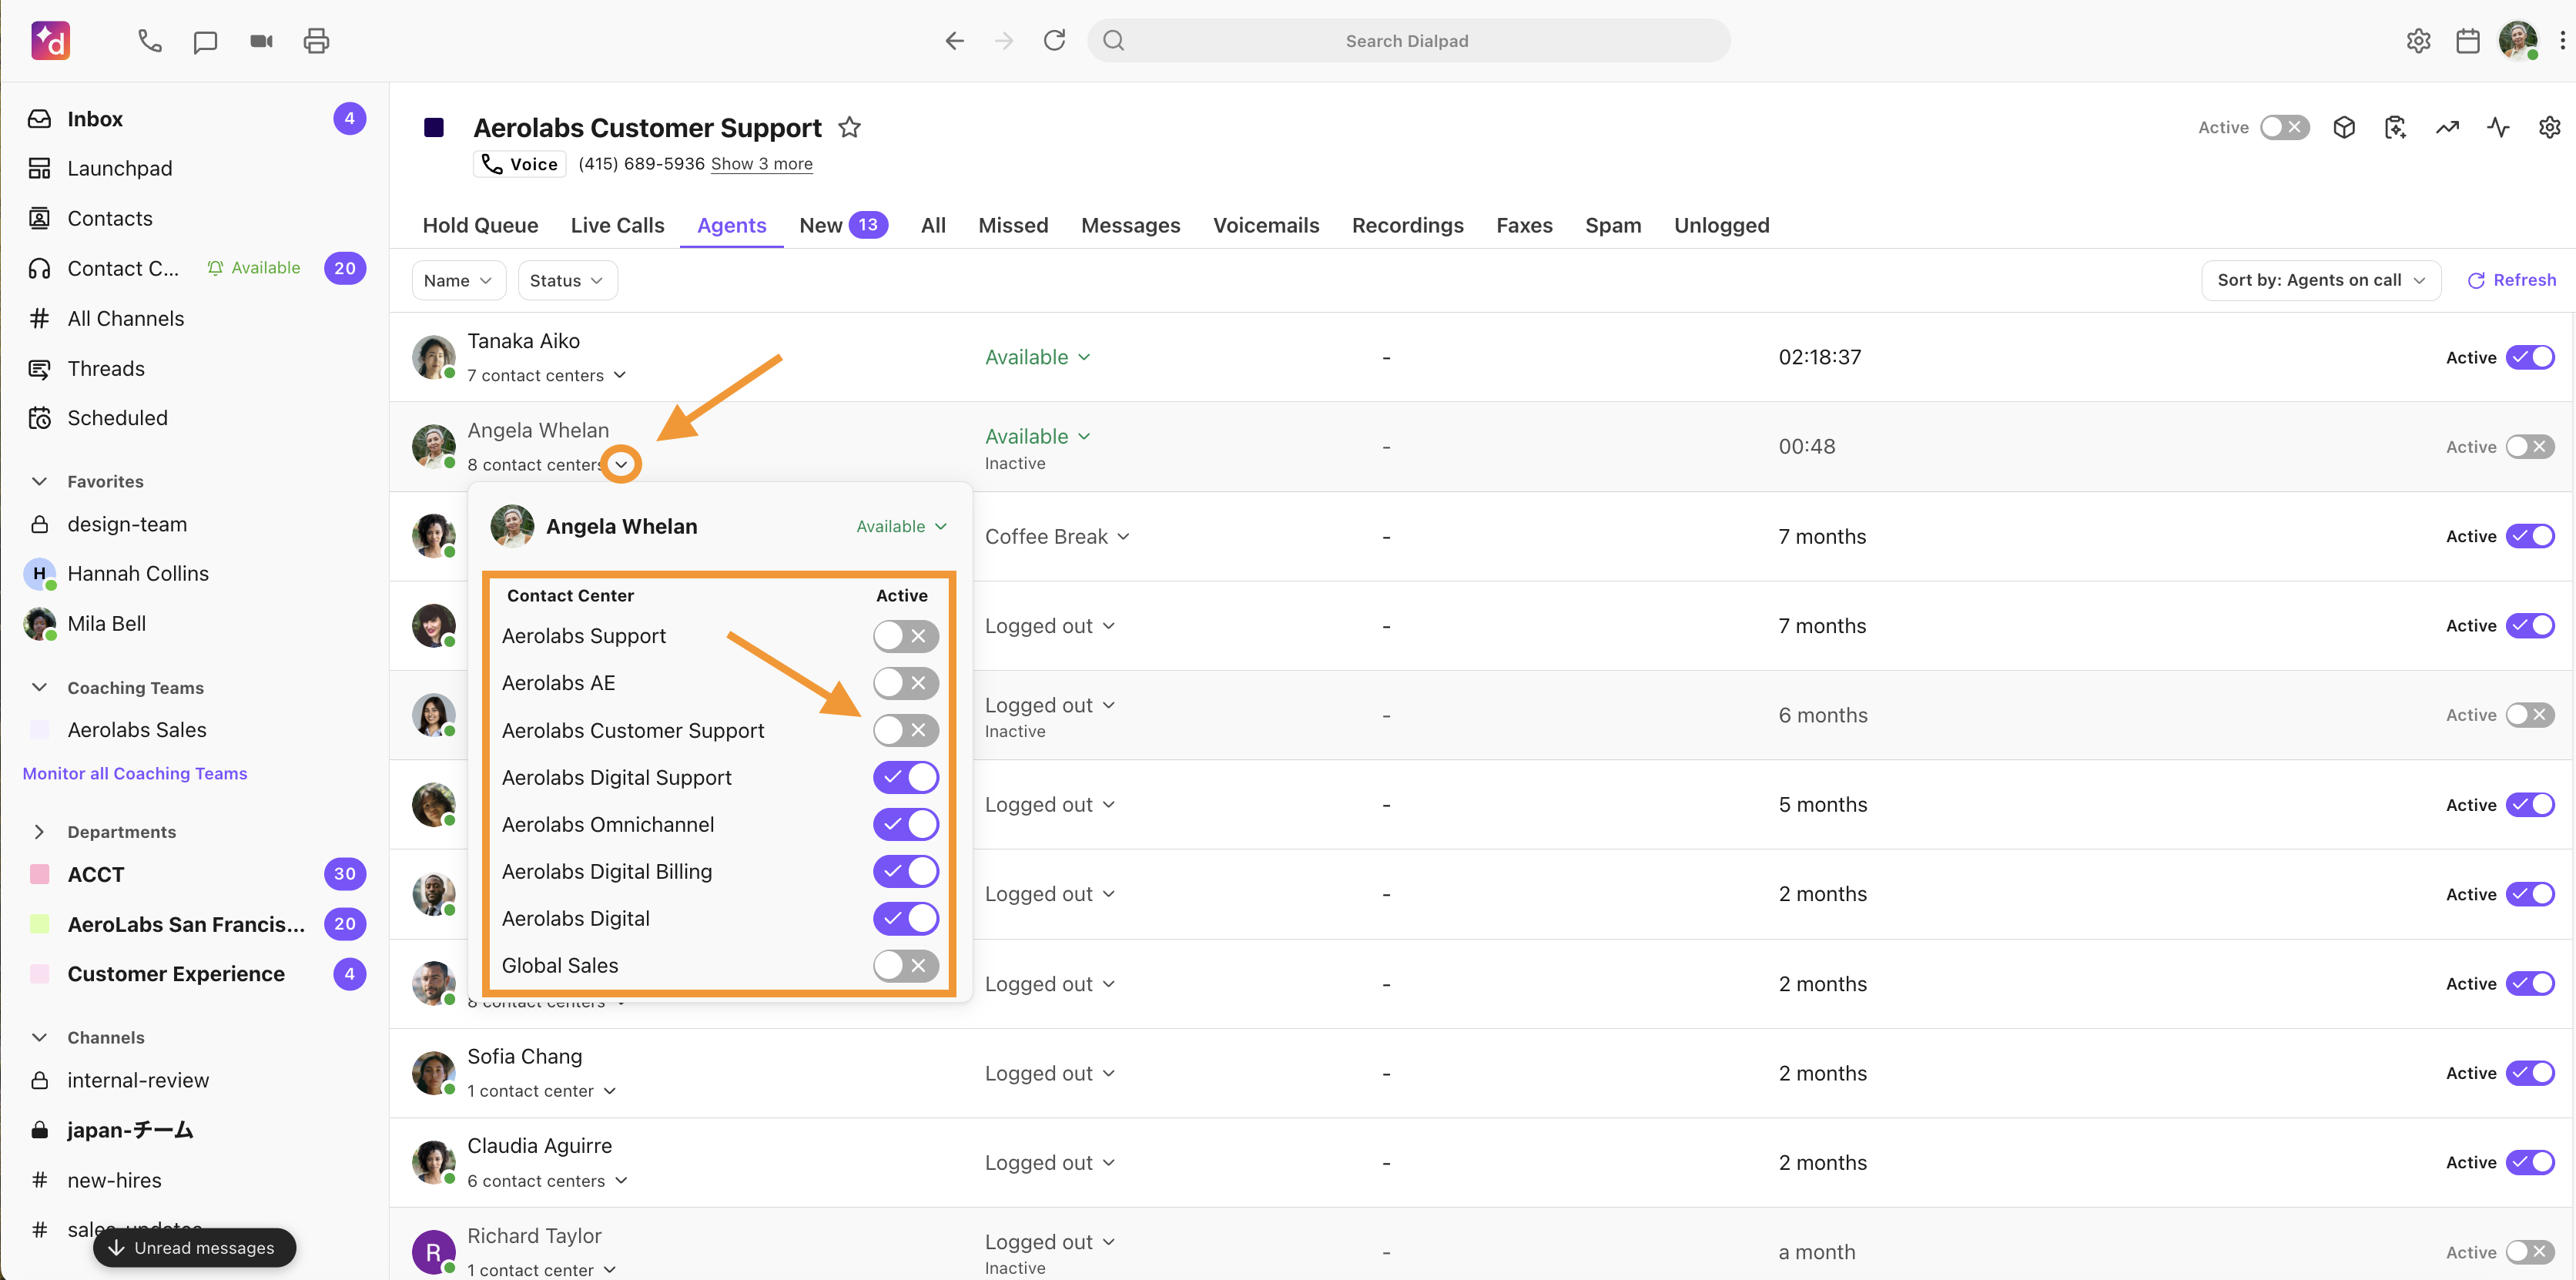
Change an agent's DND status for select contact centers
Digital Contact Center Admins and Supervisors with Contact Center Administrator Permissions can change an agent’s DND status for multiple contact centers by clicking the arrow menu button beside the agent’s name.
Here, they can view the agent's DND settings for each Contact Center and toggle DND on or off for the desired contact centers.
Note
You can only change an agent's DND status in a specific Contact Center if you are a Digital Contact Center Admin or Supervisor for that Contact Center.
Template configuration
Contact Center Admins can configure Templates for their team from their Dialpad Admin Portal.
To create a Template, go to your Dialpad Admin Settings.
Select Contact Centers, then select the Digital Contact Center
Select Templates
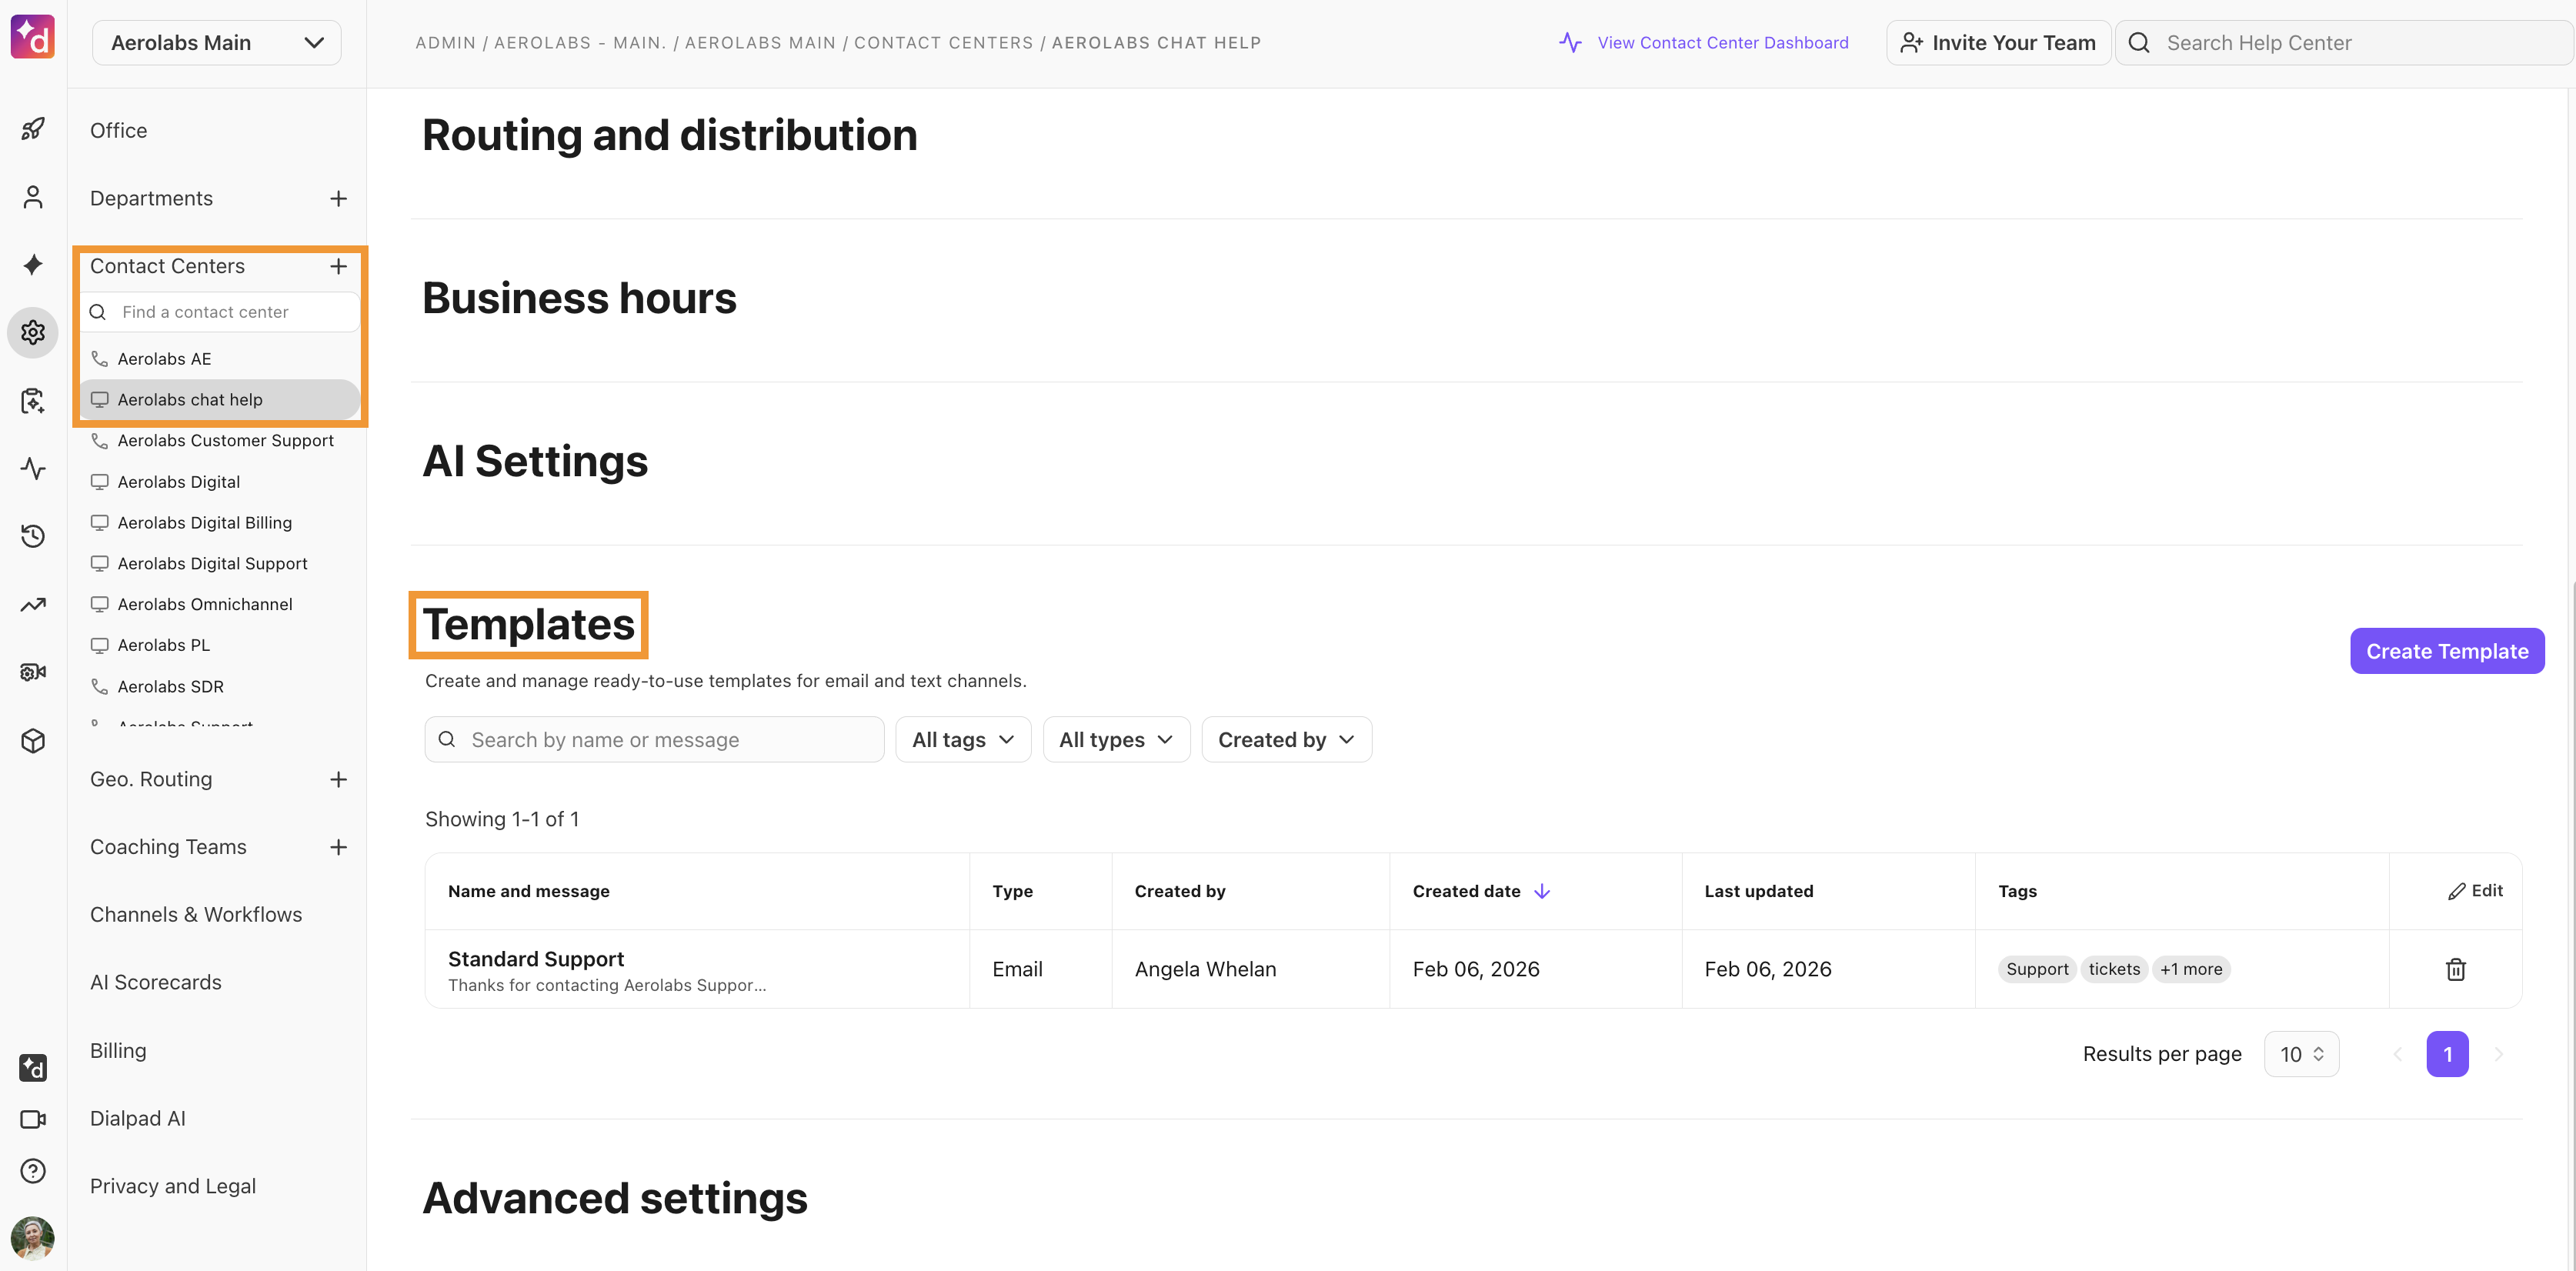
Here, you can manage and create Templates.
To create a Template, select Add and enter the desired response.
Add tags to manage and organize them based on their purpose.
To edit an existing Template, hover over the reply, then select Edit (that’s the pencil icon).
To delete an existing Template, hover over the reply, then select Delete (that’s the trashcan).
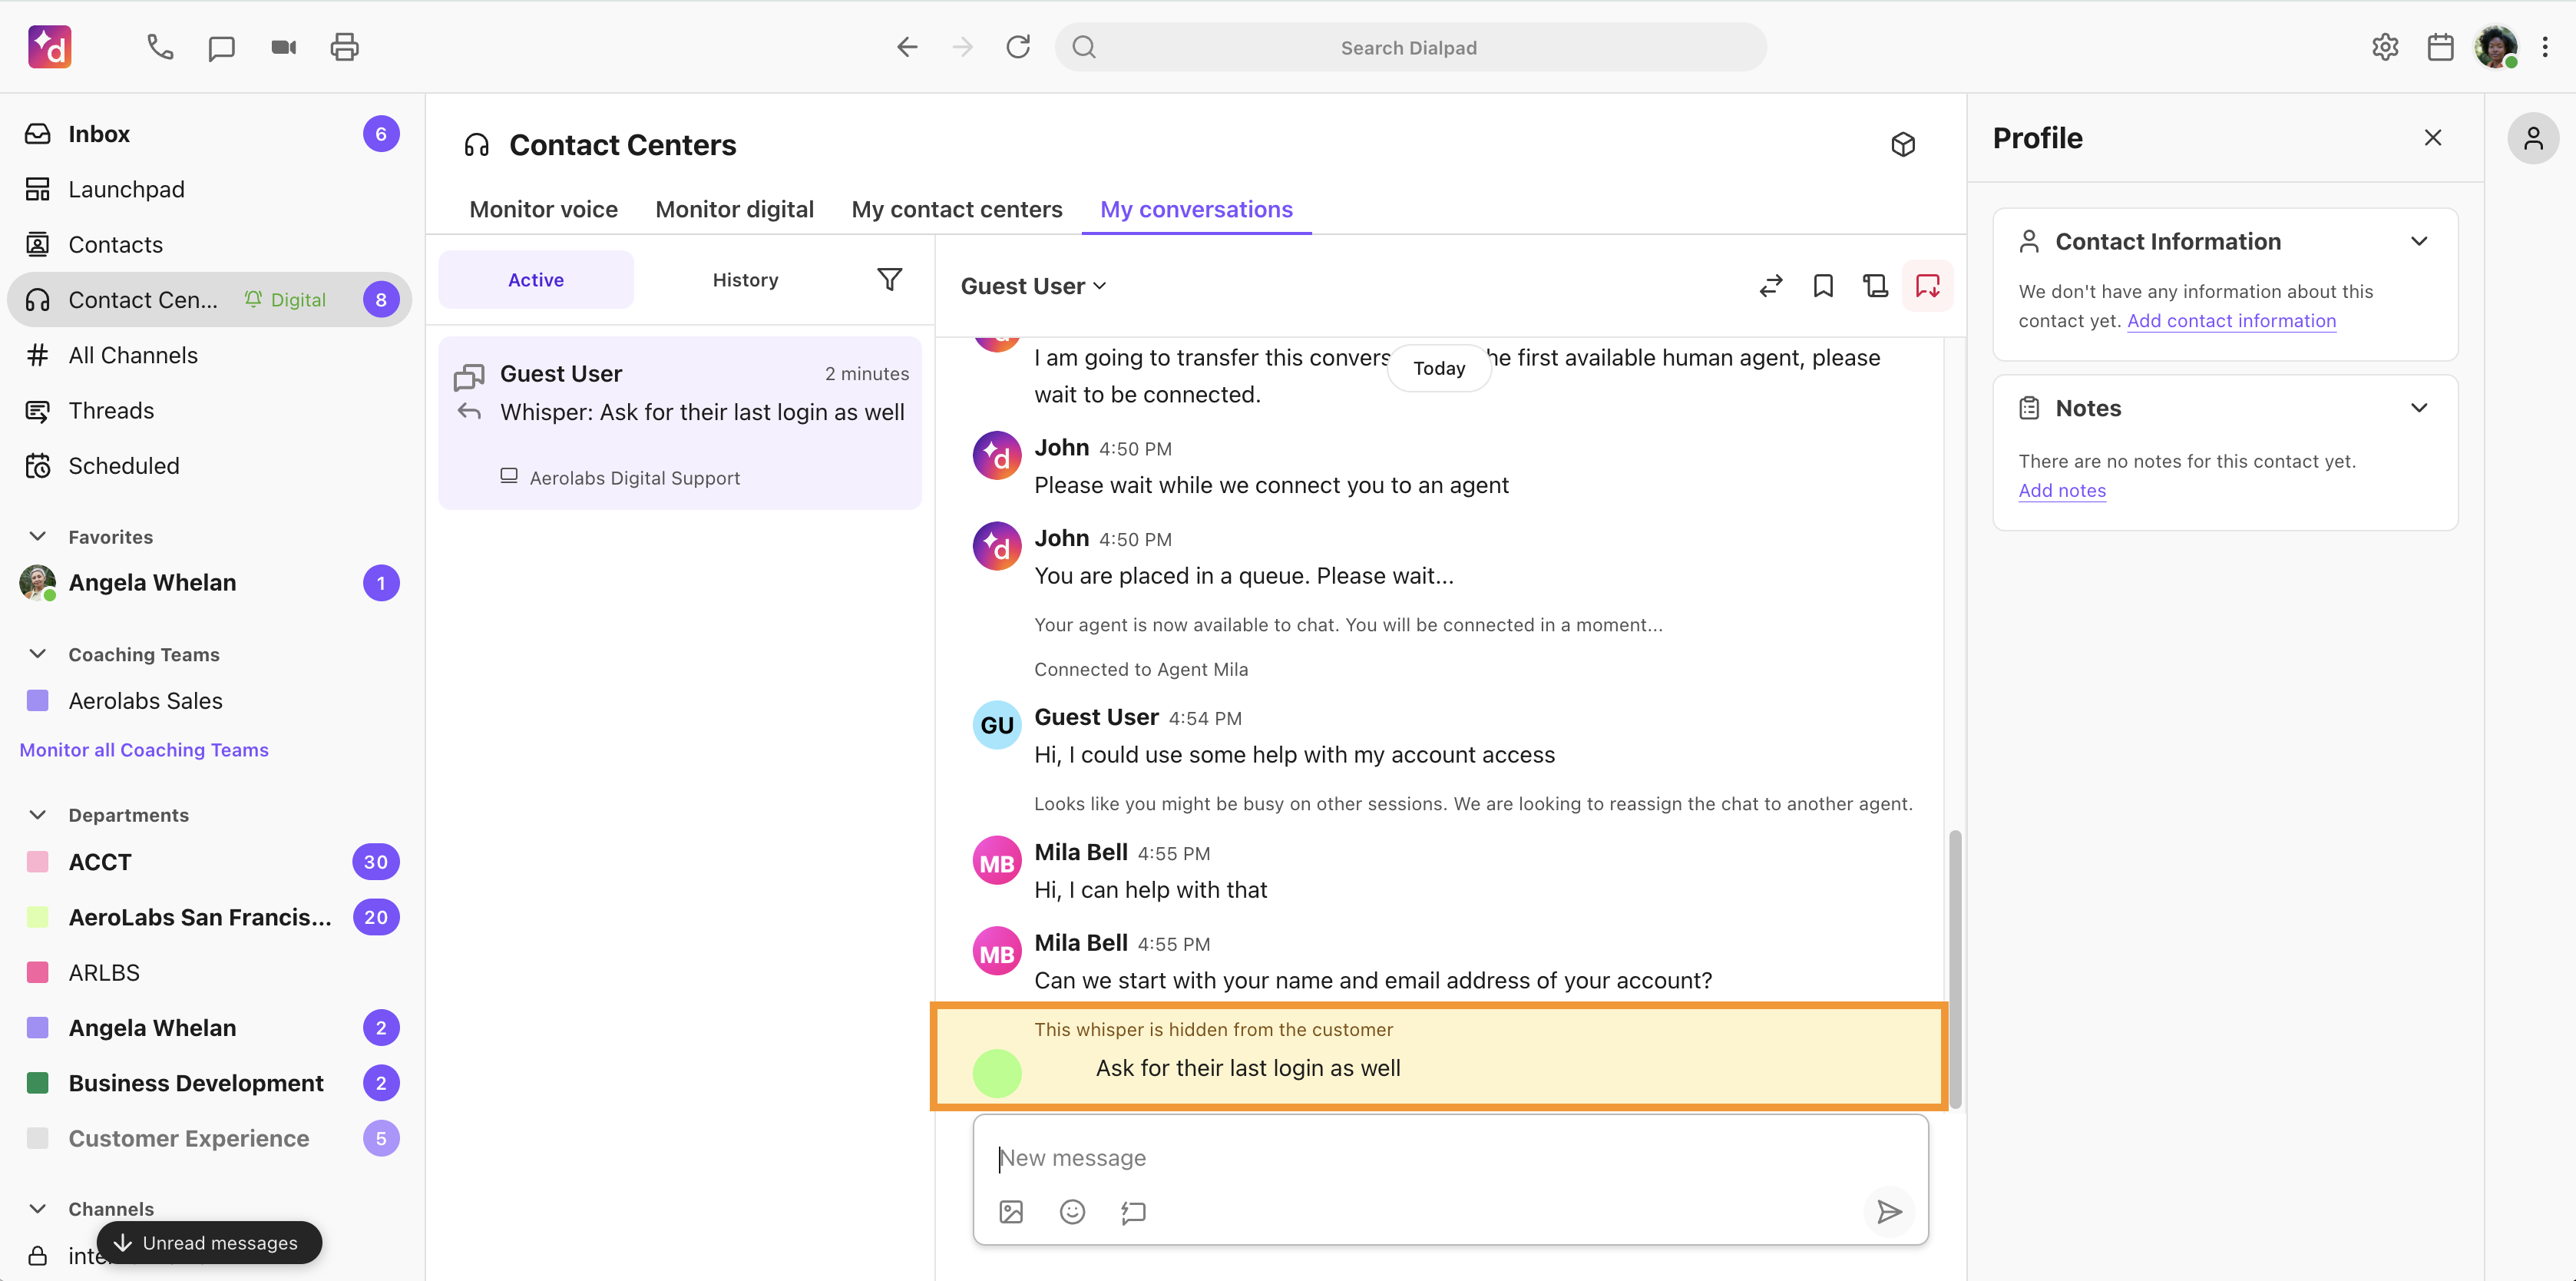
Supervisor whisper
Live chat whispering enables Digital Contact Center Supervisors to communicate with agents without the customer knowing. This is useful not only when training, but also to help agents navigate challenging customer interactions.
To whisper on a chat, navigate to the Monitor digital tab of your Contact Center.
Select Live
In the desired conversation, select View
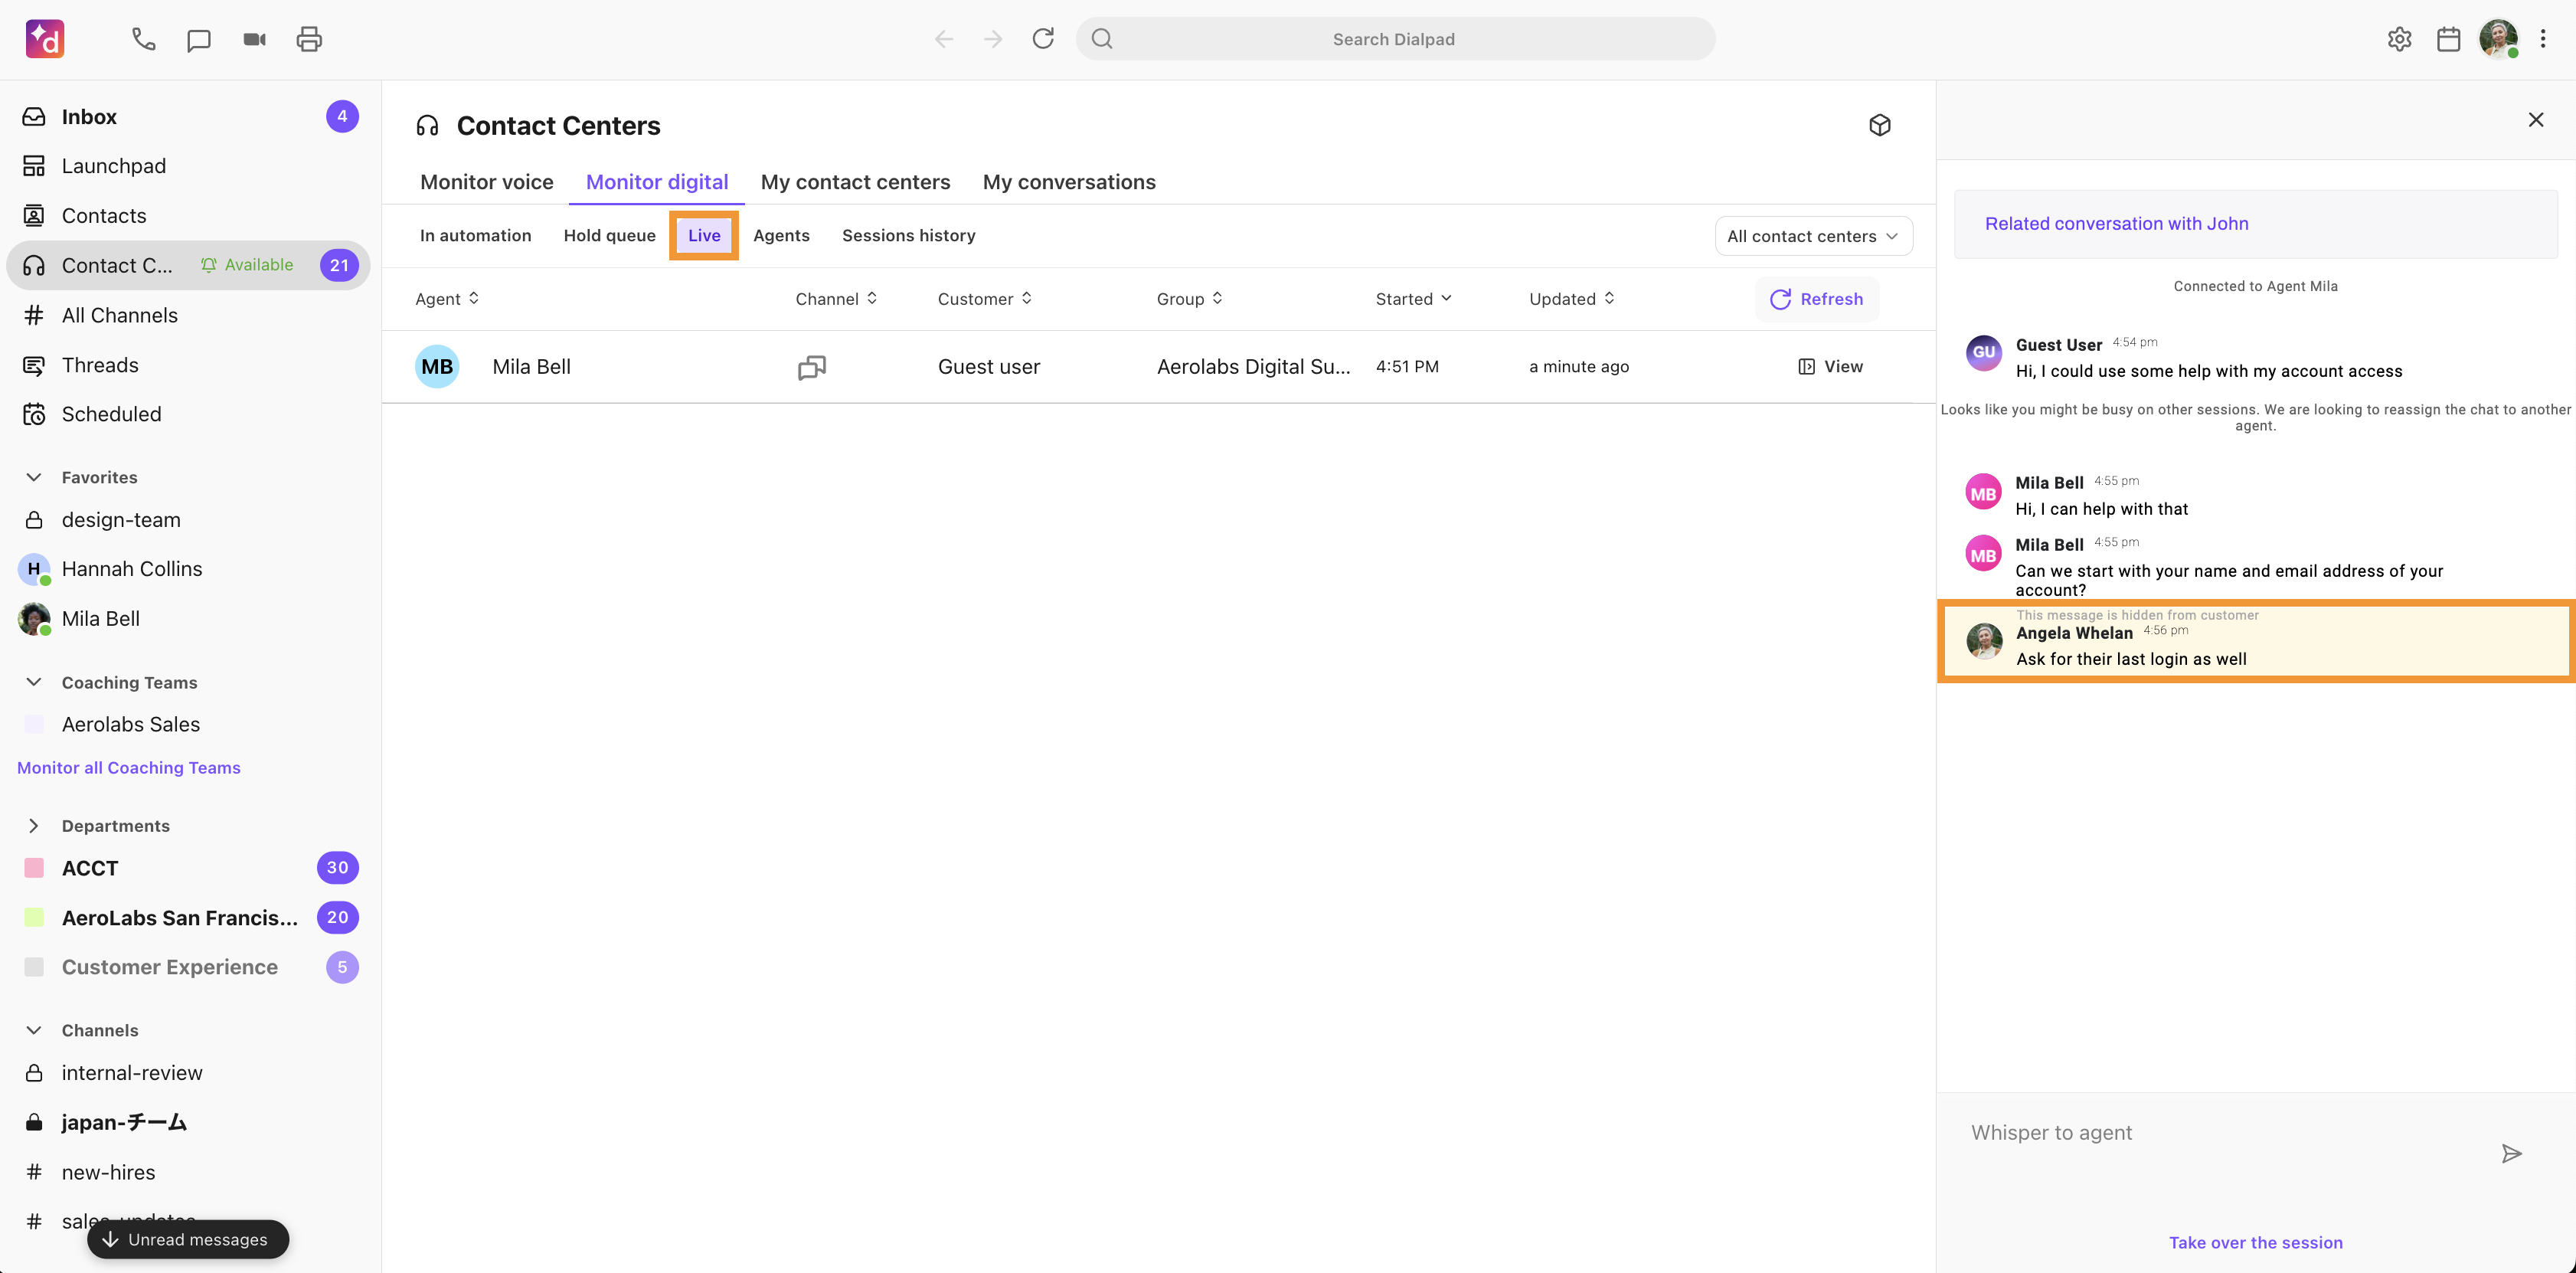
Type the whisper message
Whisper messages are visible to the supervisor in the live conversation.
Agents see the whisper message in the active conversation - new whisper messages are highlighted in orange.
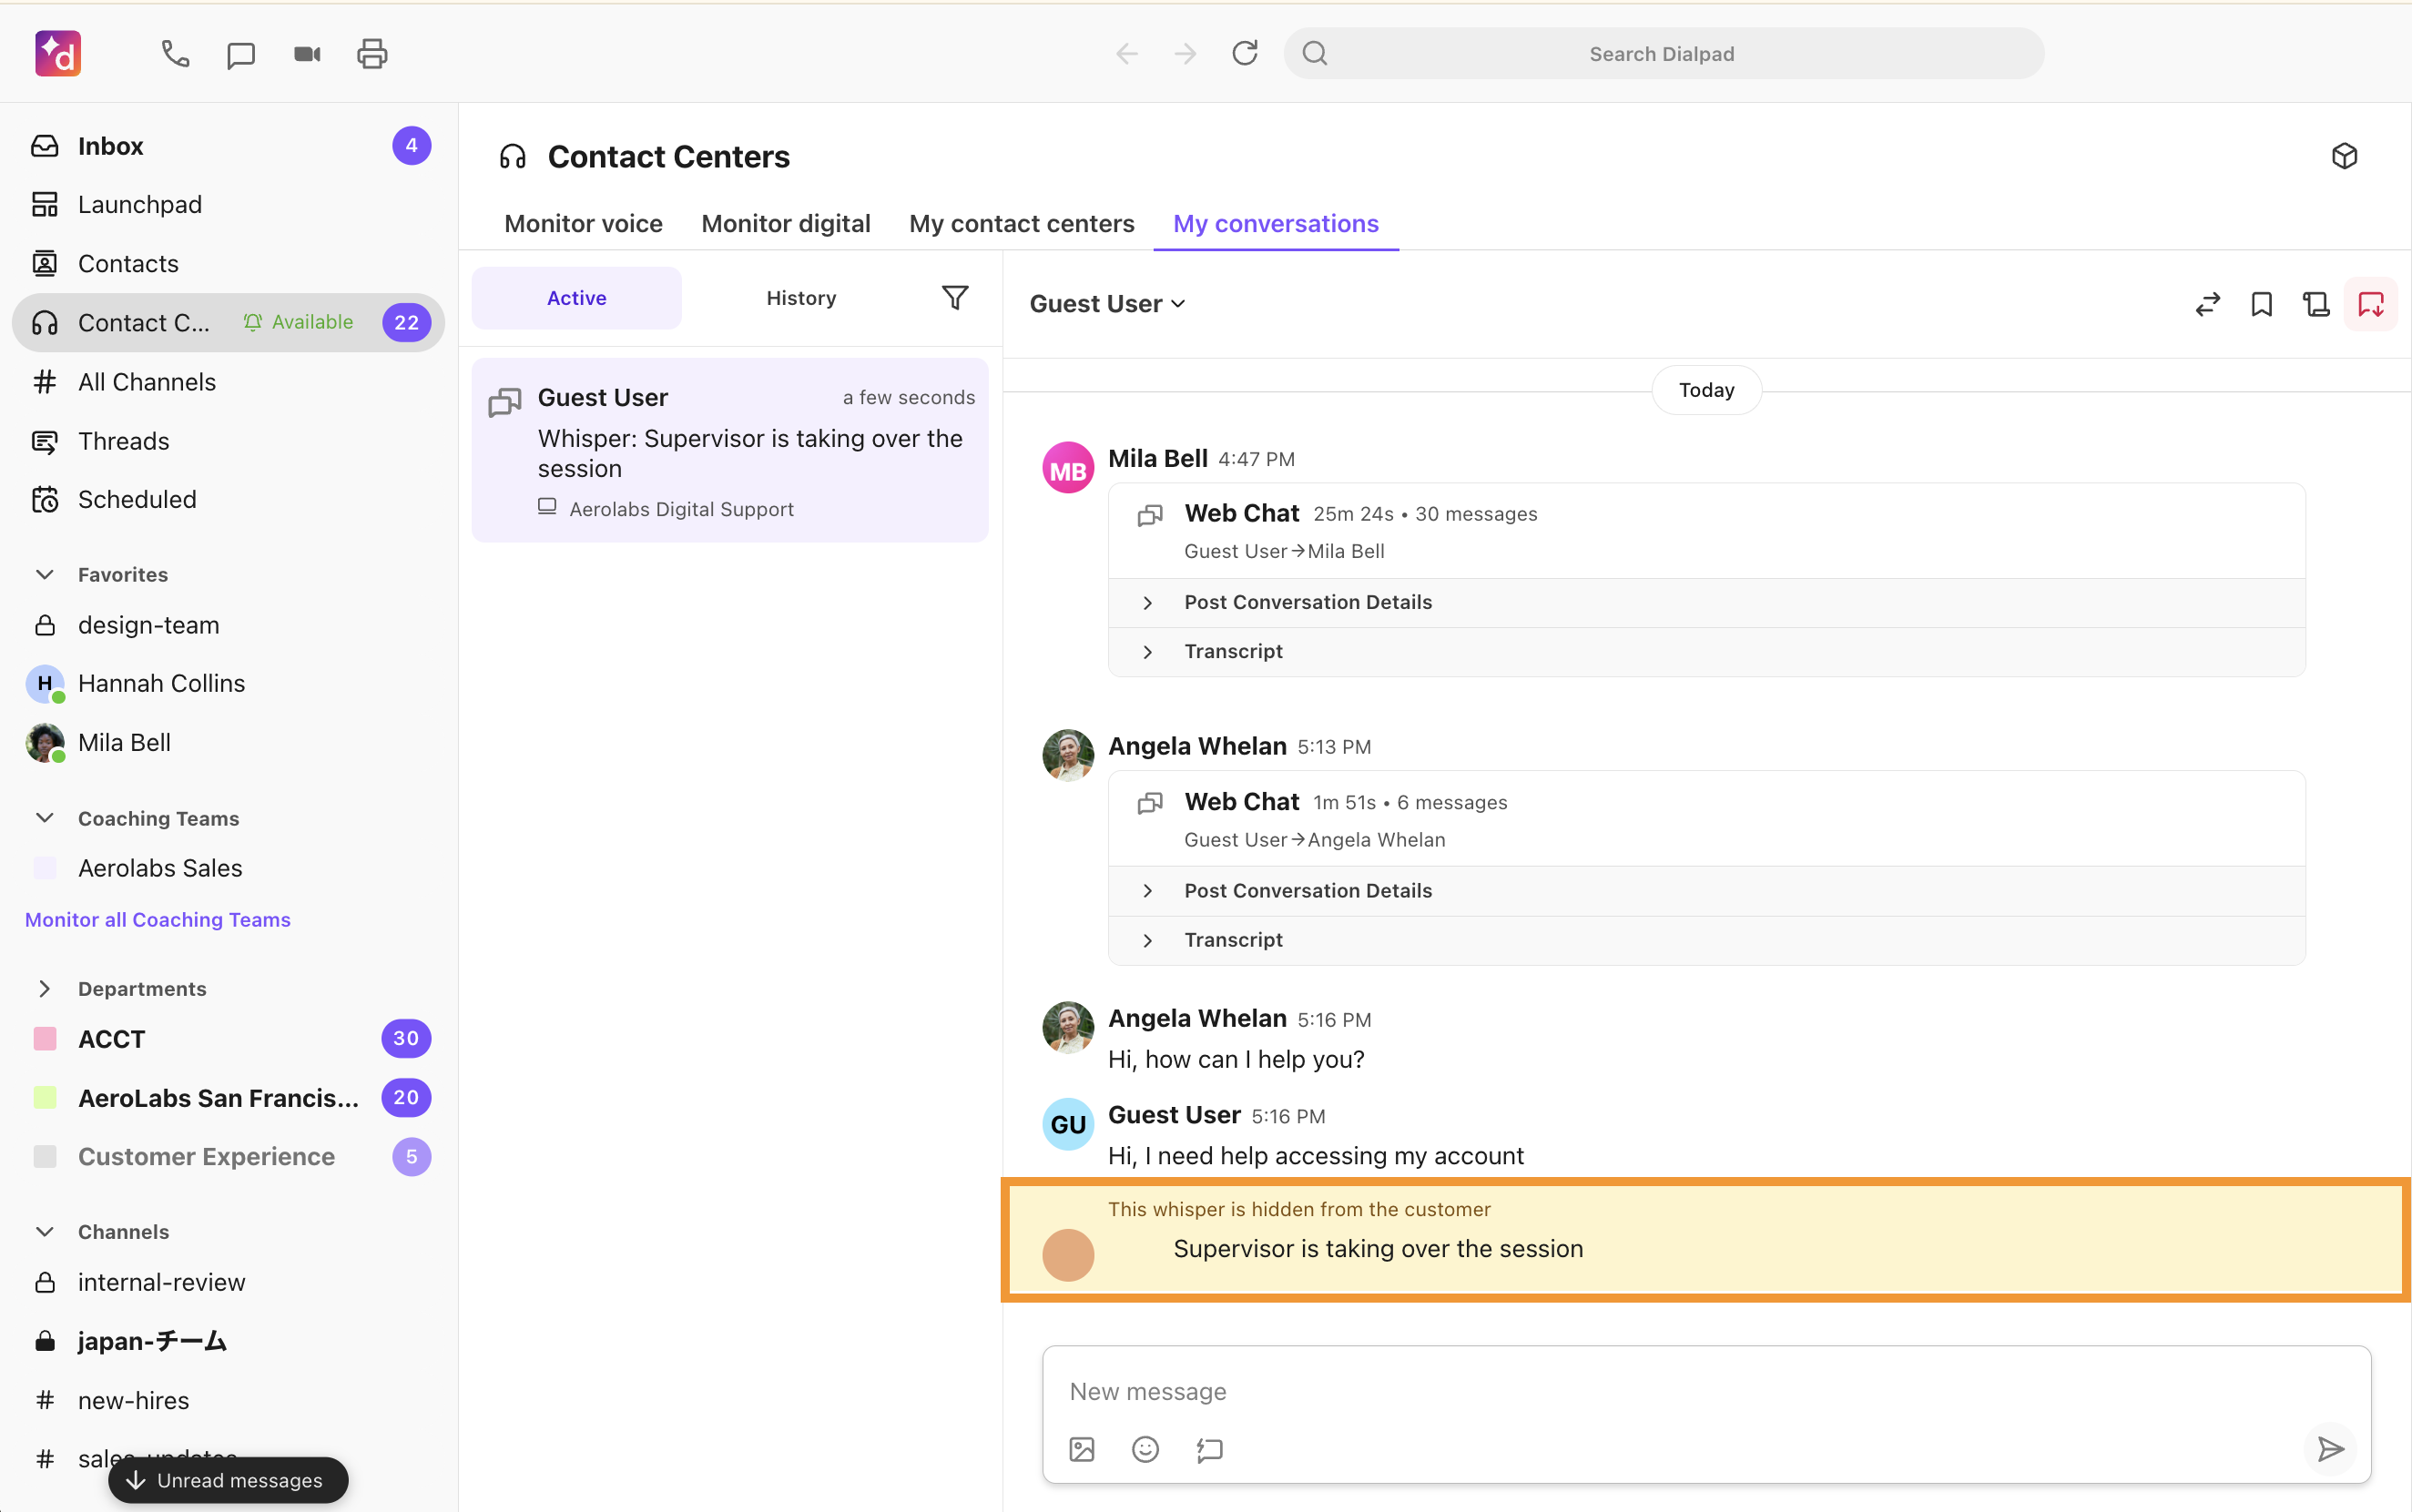
Supervisor take over
If a supervisor feels an agent is not handling the conversation correctly, they can step in and take over.
To take over a chat, navigate to the My Conversations tab of your Contact Center.
Select Live
In the desired conversation, select View > Take over the session
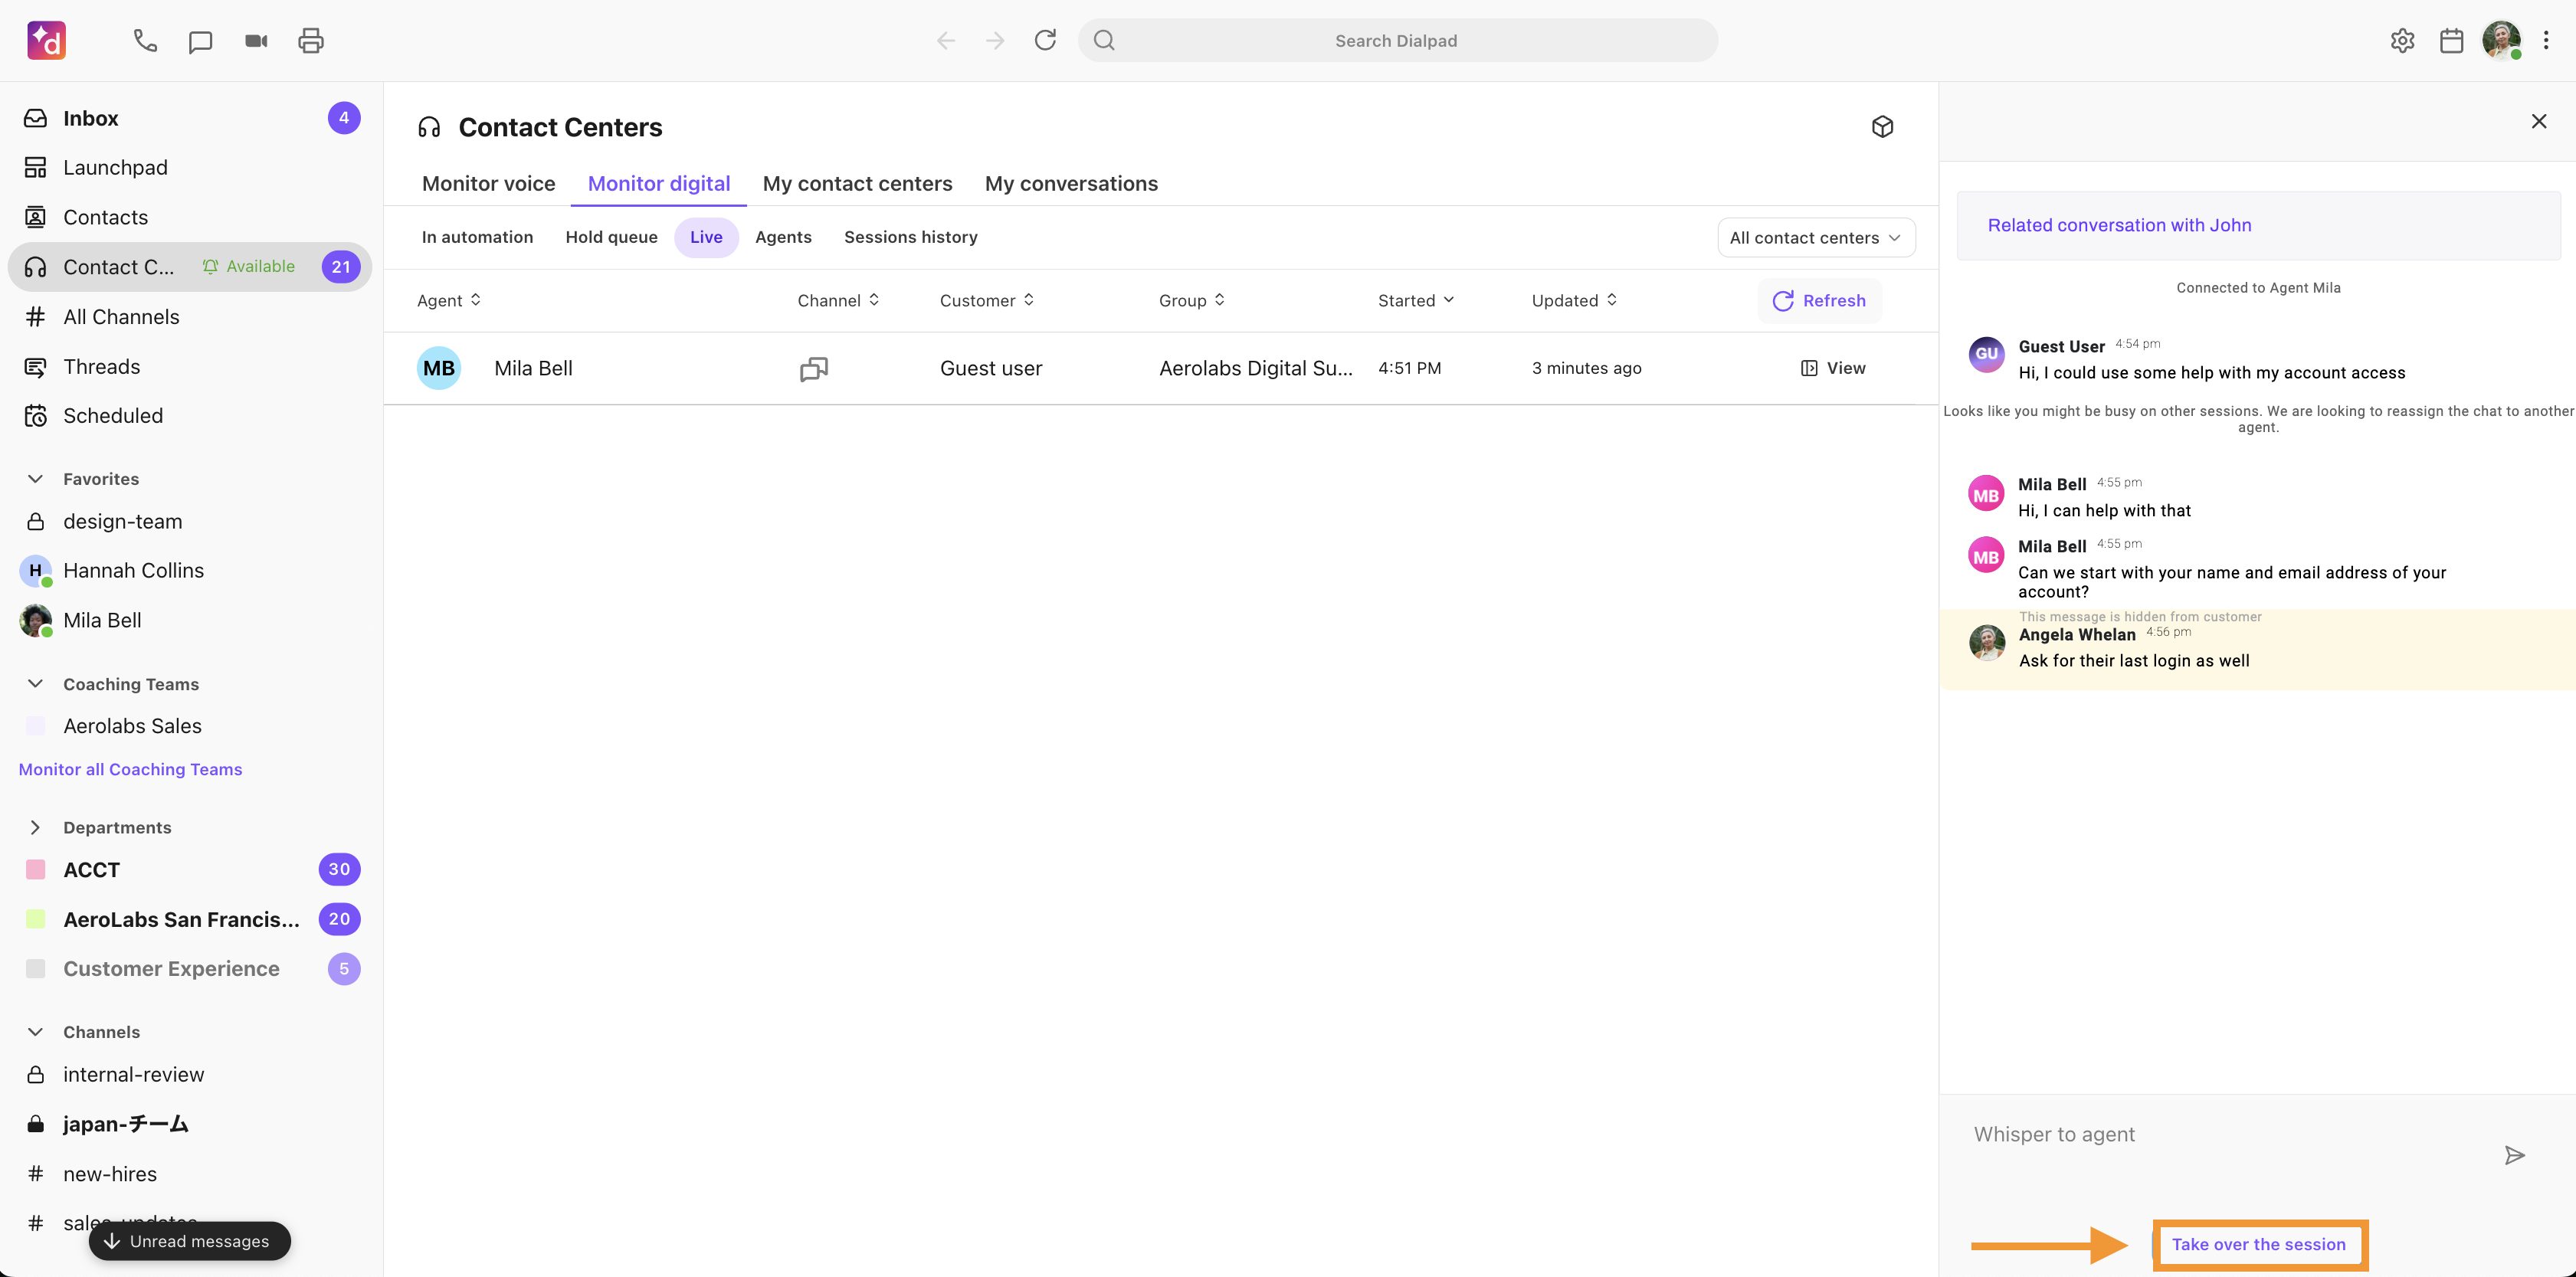
Select Take over
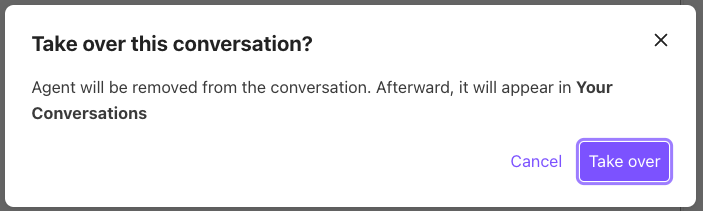
The conversation appears in the supervisor’s My Conversations tab, and the agent sees a notification that the supervisor took over the chat.
Reopen a conversation
Supervisors can reopen conversations from the Sessions history tab.
To reopen a conversation:
Expand the session to see the segment
Select View beside the segment you want to reopen
Select Reopen conversation
Note
Voice and webchat sessions cannot be reopened.
WhatsApp conversations can only be reopened within the 24-hour contact window.