Dialpad is proud to support Yealink desk phones!
Let's review how to provision them to set you up for success.
Compatibility
This procedure is for Yealink T3, T4, or T5-series desk phones whose front display shows anything except Dialpad Activate.
Note
Before proceeding with these steps, your Yealink phone must be on the list of Supported Desk Phones and use at least the listed firmware version.
Access the phone’s web interface
First, you'll need to access the web interface of your desk phone.
Connect the device to the network and wait for it to complete the boot process
Get the device’s LAN IP address:
Navigate to Menu and select Status
Select IPv4 Address
Note or copy the IPv4 address for the next step
Enter https://IPv4 address into the browser address bar
When the page loads, you will see either of two browser errors that you would typically call out to your IT team, but in this case, the phone is within your network and so the error is irrelevant. Choose the next step based on the error you receive
For NET::ERR_CERT_AUTHORITY_INVALID, click Advanced, then Proceed
For NET::ERR_CERT_INVALID, type thisisunsafe, then Proceed
Then, log in to the desk phone's web interface using ‘admin’ as your username and the default Yealink-generated admin password.
Factory reset
Now, we need to make sure that any previous configuration data has been removed and cannot interfere with your Dialpad service.
Yealink provides two ways to factory reset their devices:
Factory reset from the device
Press and hold the "OK" button for 10 seconds
Factory reset from the browser
Navigate to Settings
Select Upgrade
Select Reset to Factory
Configuring for Dialpad
Next up, you will need to configure the desk phone for Dialpad.
The factory reset logs you out, so please complete the steps from the first section (above) to return to the web administration page.
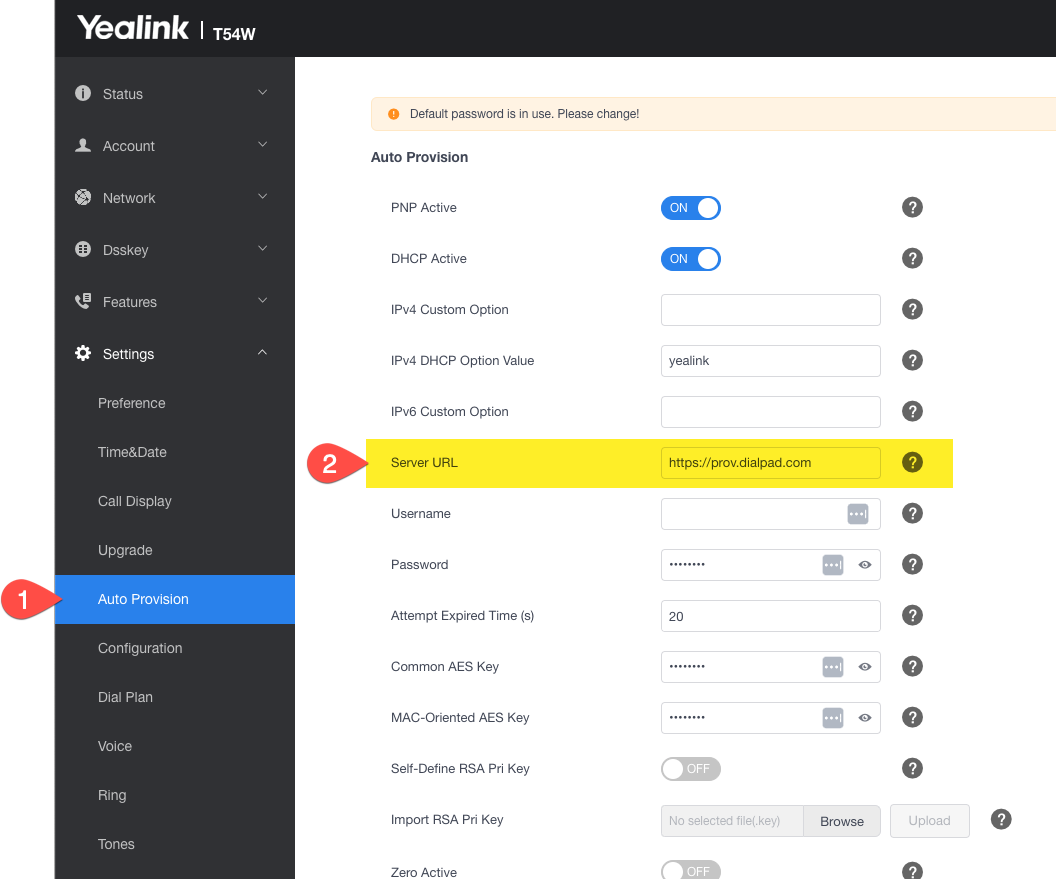
Navigate to Settings > Auto Provision
In the Server URL field, enter https://prov.dialpad.com/
Navigate to the bottom of the page and select Auto Provision Now
Select Ok, then Confirm
The desk phone’s status LED will blink red as the provisioning process begins. When it shows Dialpad Activate, continue to the next step.
To complete activation, navigate to Dialpad Settings > Your Devices > Add
Select Yealink phone
Name the Device and click Next - you will then be provided a 4-digit Activation code
Pick up the receiver and the phone will automatically dial out. When prompted to enter the activation code, enter the 4 digit code provided in the Dialpad portal.
The phone will restart and register with Dialpad service
If you have any issues, please get the 12-character MAC address from the bottom of the phone and then contact Customer Care.
Frequently asked questions
Why can't I hear anything?
If you can't hear anything, check that the handset is plugged in. Yealink phones require a connected handset for call audio.
How can I fix 'Warning Set e911 Location Failed'?
Press the Cancel button and your device will function properly.
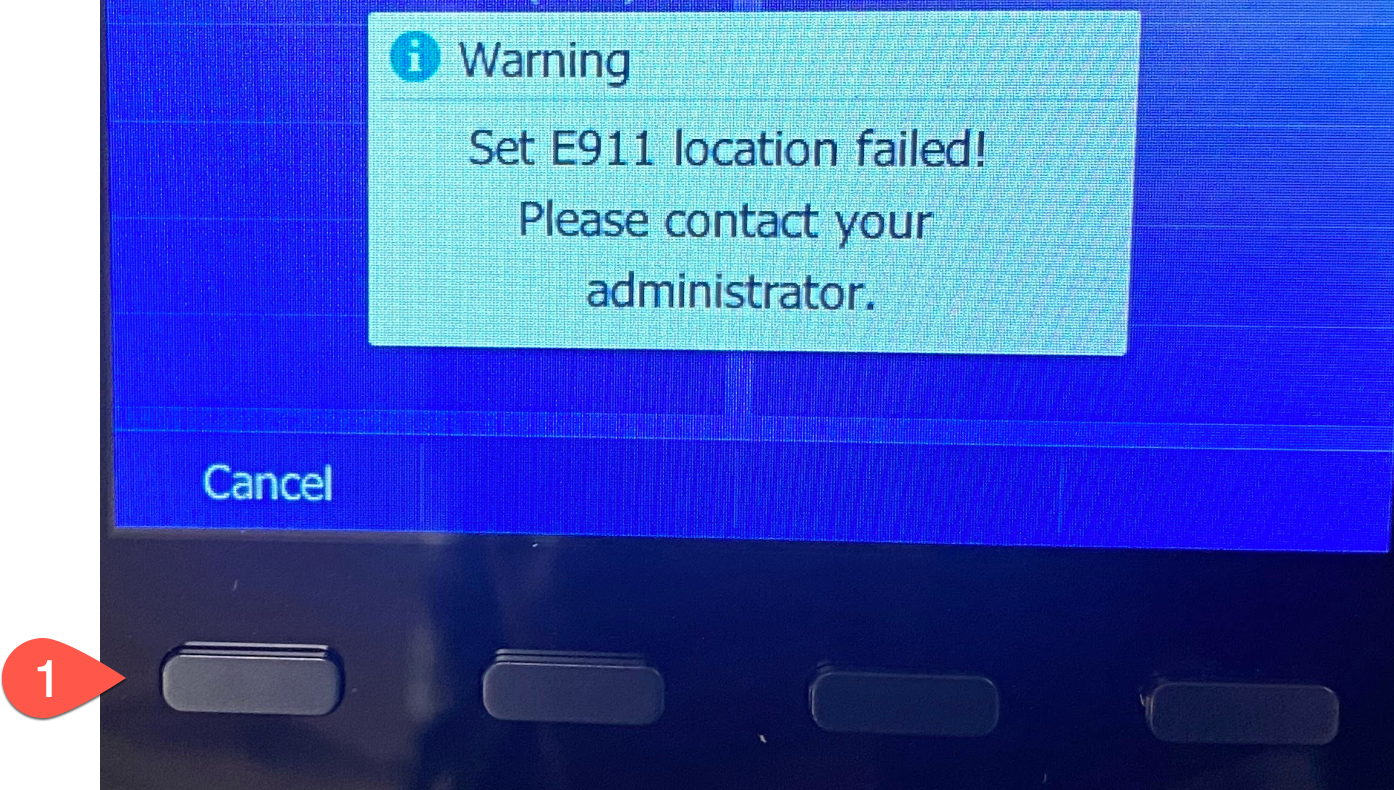
This warning can appear when a device is power cycled, factory reset, re-provisioned, or newly registered.
If you'd like to confirm that your e911 location is accurate, please call 933 (a complementary third-party service) to verify the details.
Notes
User and Office e911 are required to use Dialpad.
Dialpad stores and transmits e911 information via our core network to e911 operators; the information is not stored in the phone.