Managing multiple offices within Dialpad will require you to become a Company Admin. For open sign-up accounts (meaning you signed up with Hotmail, Yahoo, etc.), have your primary office admin contact our Customer Care Team to enable Company Admin status.
If you signed up with Google Workspace or Office 365, your primary office admin (meaning the first person who signed up for your account) automatically becomes a Company Admin.
Let's take a look at adding and managing multiple offices.
Who can use this
Multiple offices are available to Dialpad Connect and Dialpad Sell users.
If you're an invoiced customer, please reach out to our Customer Care Team to create multiple offices.
Add a new US office
To add a new US office to your account, head to your Dialpad Admin Settings.
Select My Company from the drop-down menu in the upper left-hand corner
Select Add New Office
You'll be walked through creating a new office, which includes sections to:
Name your office
Add the office admin
Add E911 location
Select main line phone number
Enter payment information (credit card)
If on unified invoice billing, you'll skip this step
If not on unified invoice billing, you provide billing details
Once your new office is created, you'll see it appear under the Offices section of your Company Settings.
Clicking on an individual office will pull up your office settings, including areas to:
Create/edit your office name
Export your entire company list of users
Add/Remove Office Admins (or via your Team page)
Adjust office-wide settings
Note
Need to move users from one office to another? If you're on a Pro or Enterprise Plan, Company Admins can easily transfer users from one office to another. Read this Help Center article to learn how.
Add an international office
To add an international office, please reach out to Dialpad Customer Care.
Don't forget, you'll need to be the Company Admin to add an office.
Company settings
To view your company settings, navigate to the Dialpad Admin Settings and select My Company from the drop-down menu.
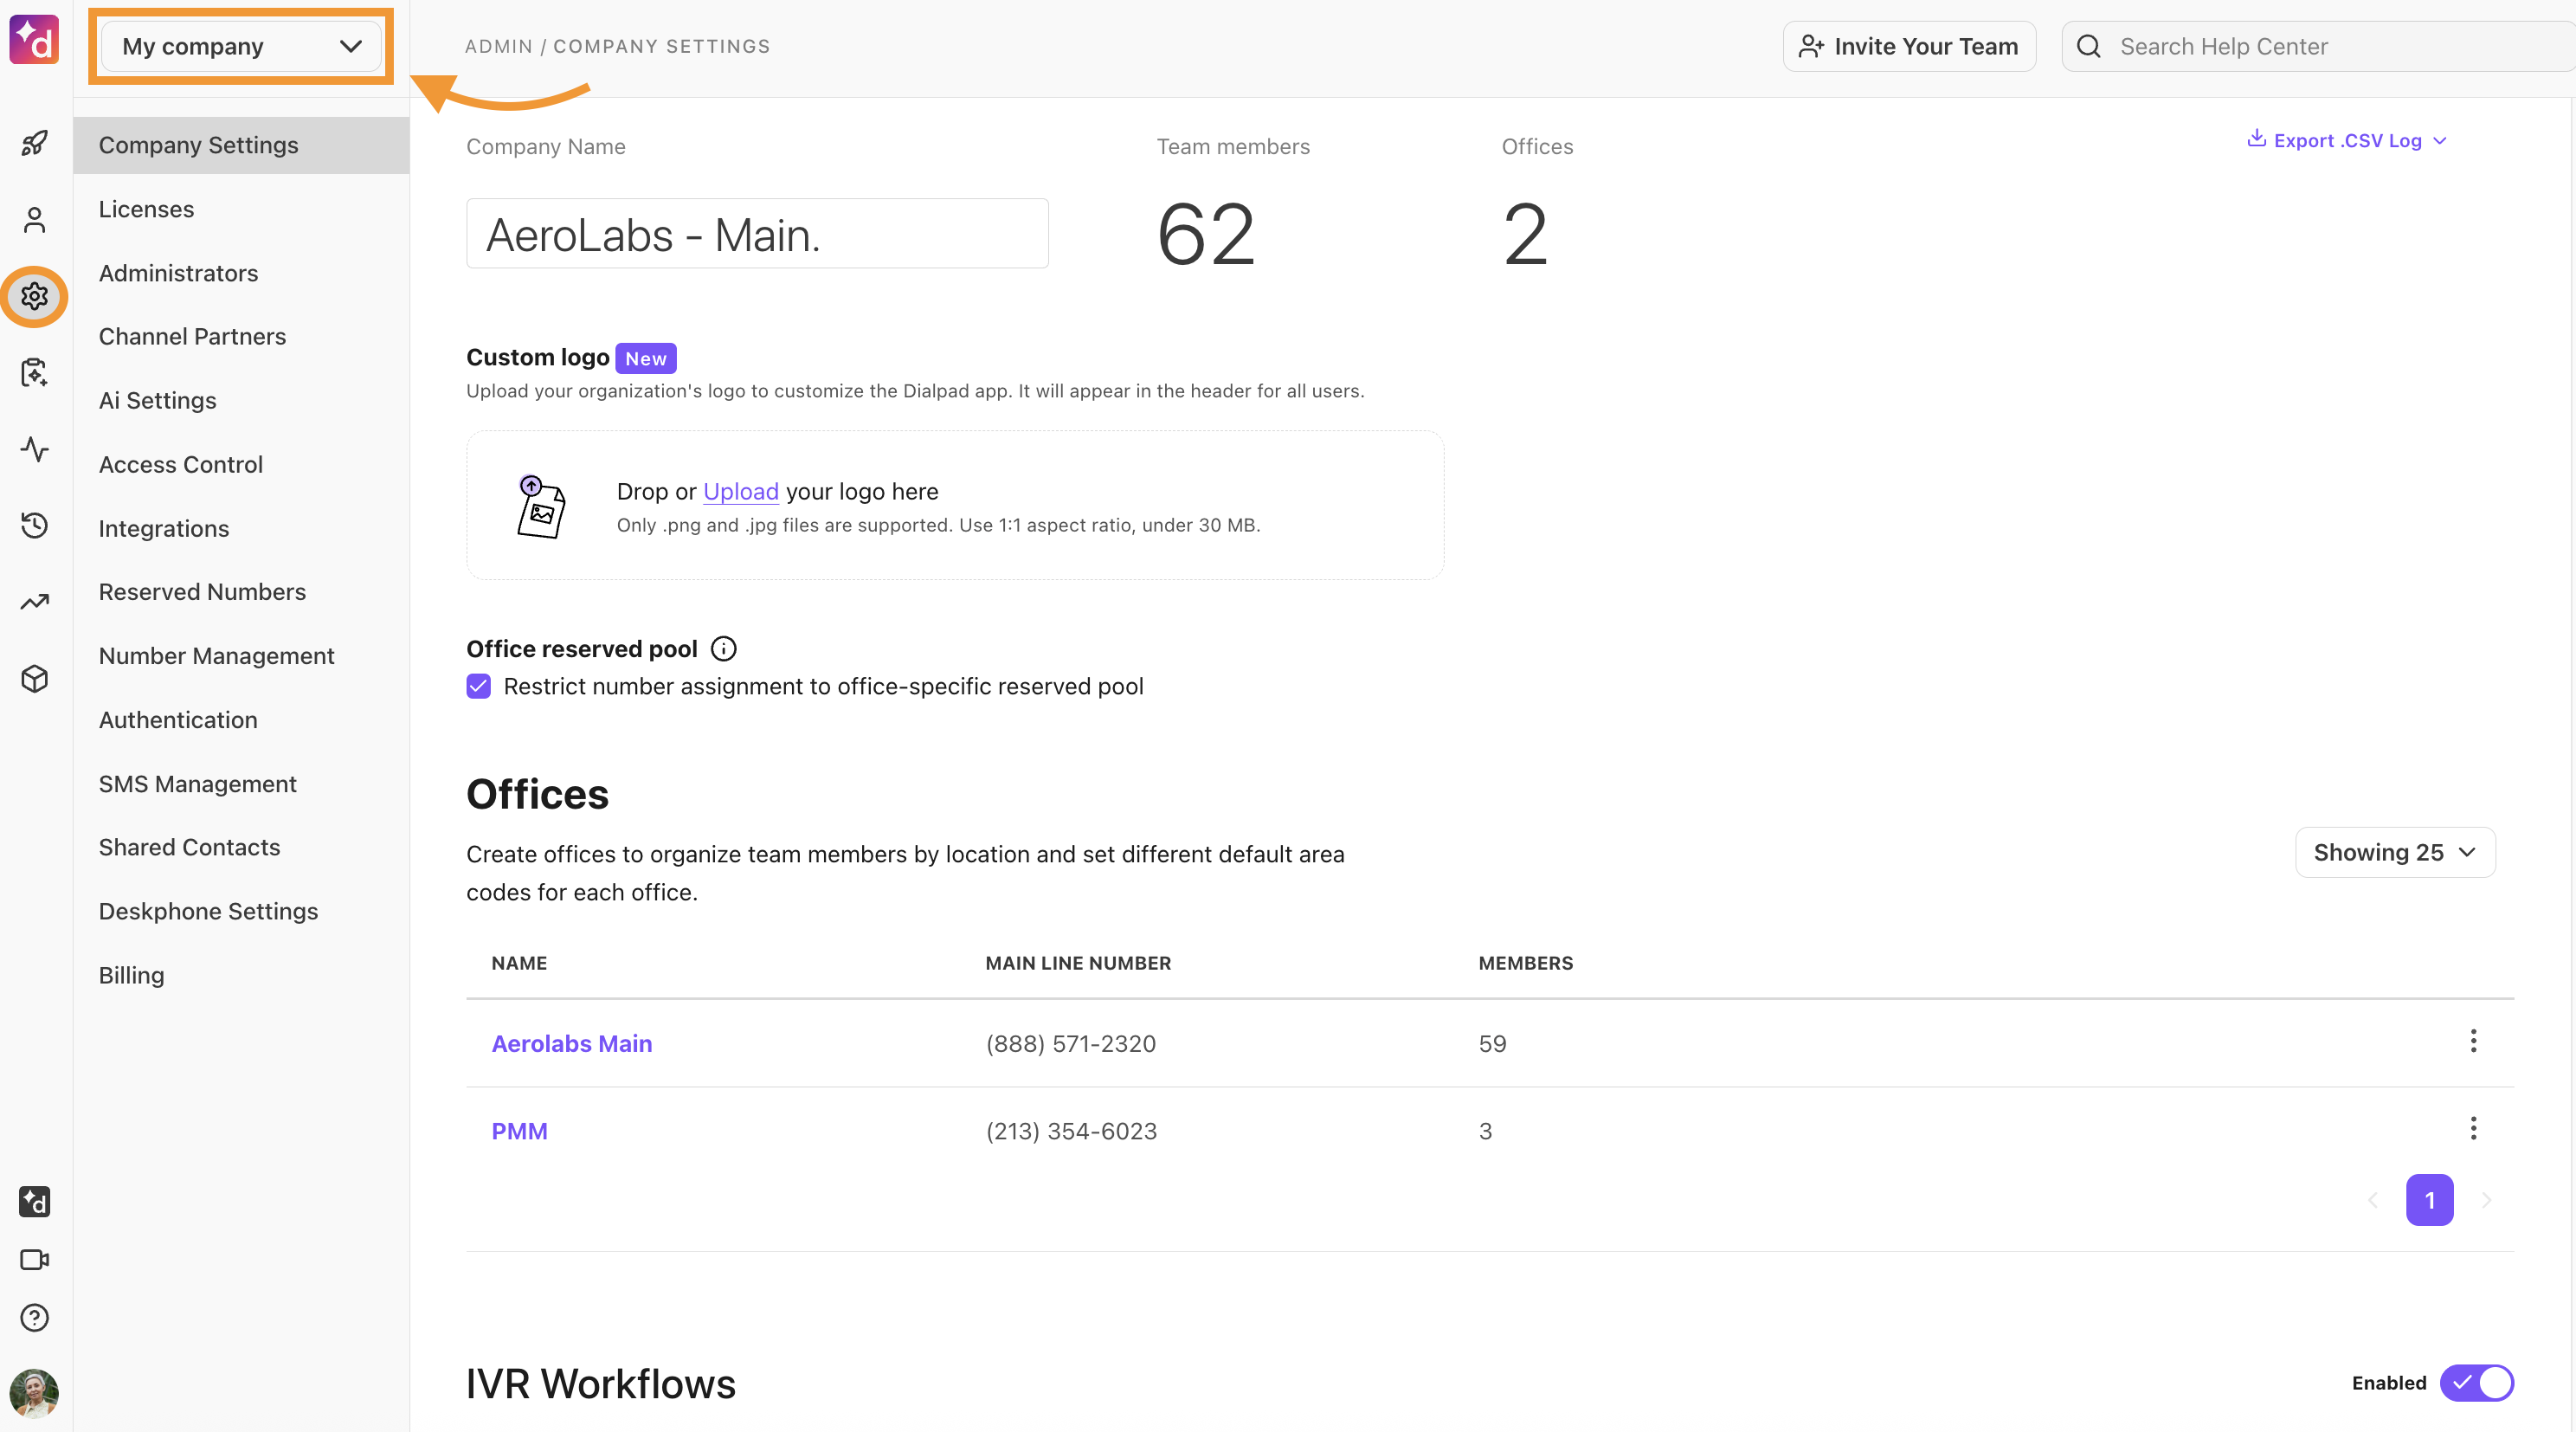
Each office listed in your company settings page has its own drop-down menu which gives you the ability to rename your company or jump to your office settings, team page, or billing.
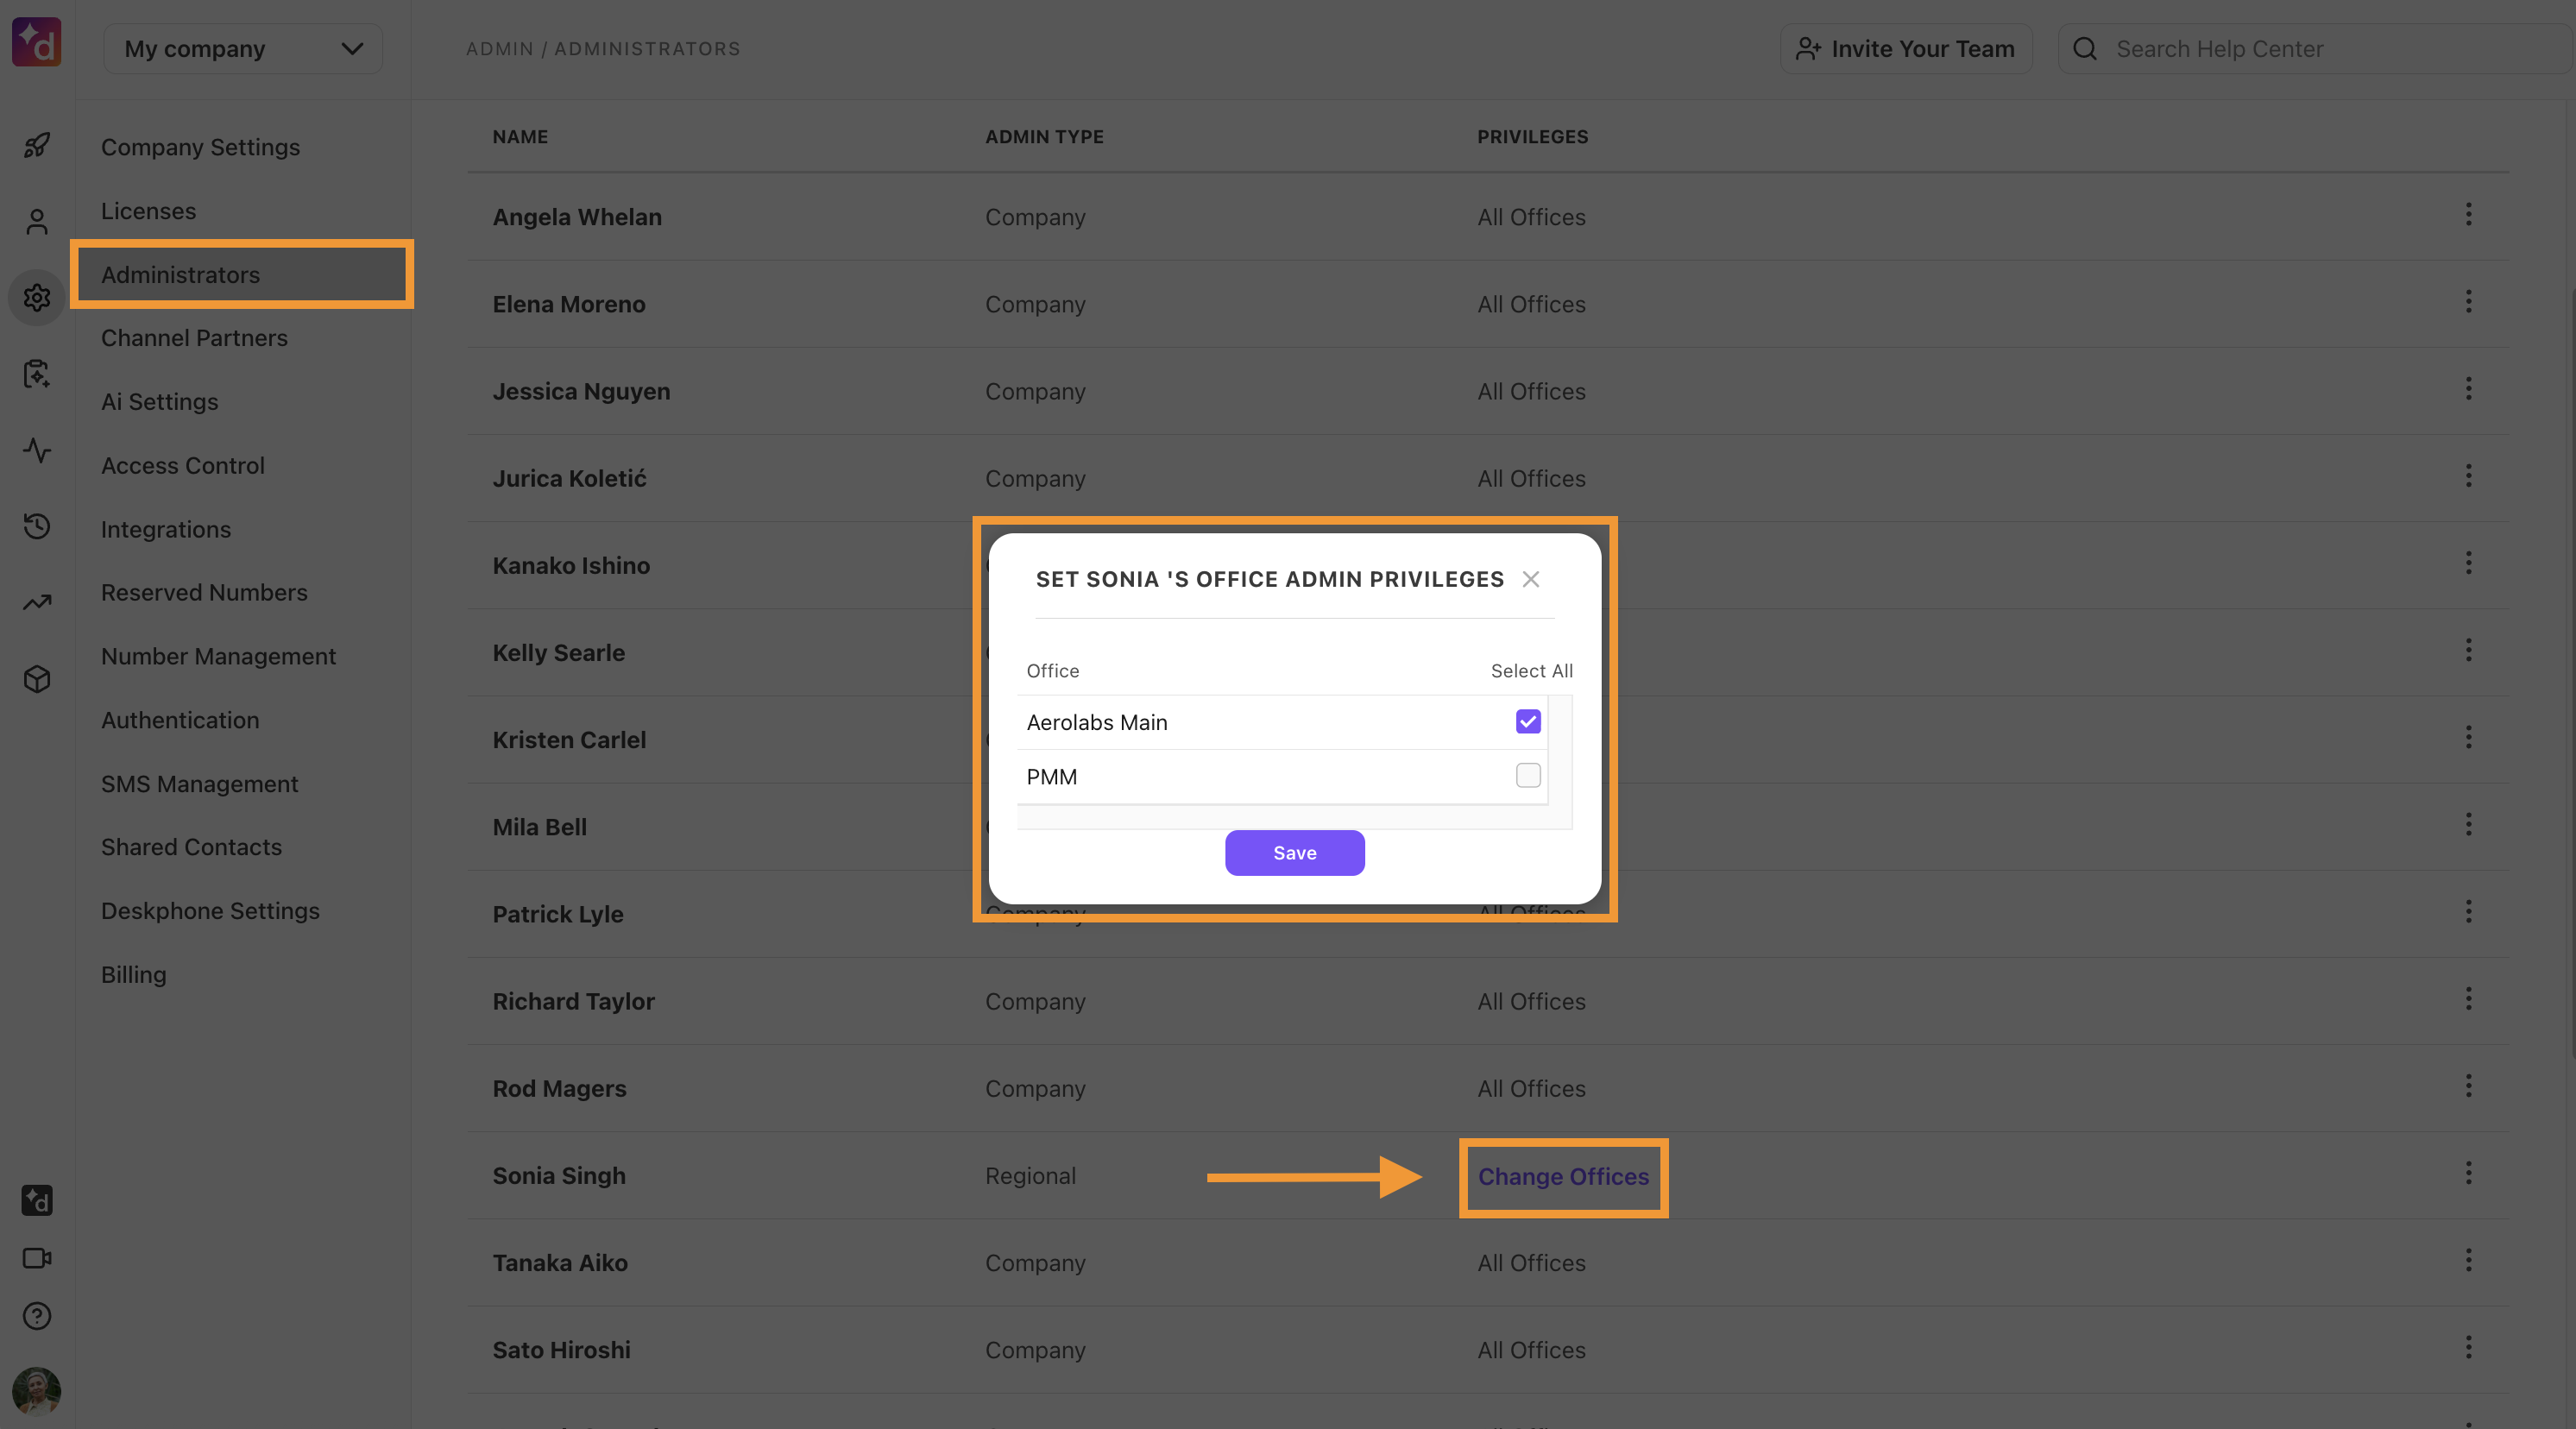
Add a regional office admin
Assign a regional office admin when you need a specific administrator to manage more than one office at a time.
To assign a company administrator as a regional office administrator, head to your My Company settings.
Select Administrators
Add the team member if they're not already displayed
Select Options > Make Regional Administrator
Choose Select Offices
Choose the offices you want the team member to manage, and select Save
To change the offices that a regional administrator manages, simply navigate back to the Administrators section of your My Company settings.
Select Change Offices next to the user's name
Select the desired offices
Select Save