Build stronger customer connections by integrating Zendesk with Dialpad! With our Zendesk integration, your agents can:
Receive and place Dialpad calls from Zendesk
Receive and send Dialpad messages from Zendesk
Automatically log calls as new tickets in Zendesk
Connect customers in Dialpad to existing Zendesk records
Create new support tickets directly in Dialpad
View and access unresolved + resolved tickets
Lets dive into the details.
Who can use this
Dialpad's Zendesk integration is available to Dialpad Sell and Dialpad Support customers, as well as Dialpad Connect users on Pro and Enterprise plans.
Agents must be on Zendesk Talk Partner Edition with access to the tickets and user management.
Install Dialpad in Zendesk
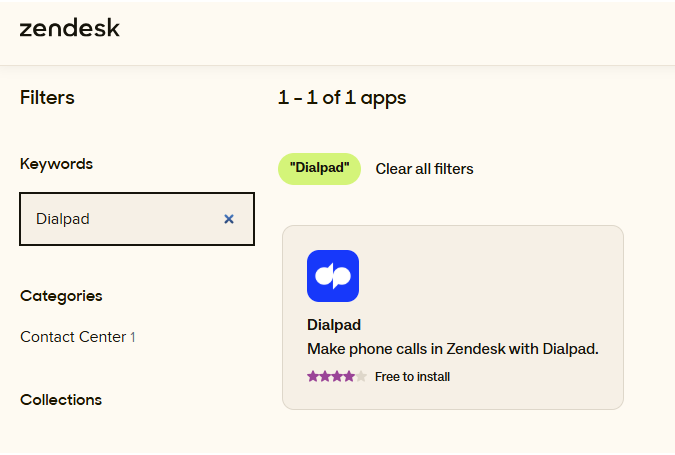
To use the Dialpad + Zendesk integration, first, you’ll need to install the Dialpad app from the Zendesk app store.
Search for Dialpad
Select Install
Choose the account
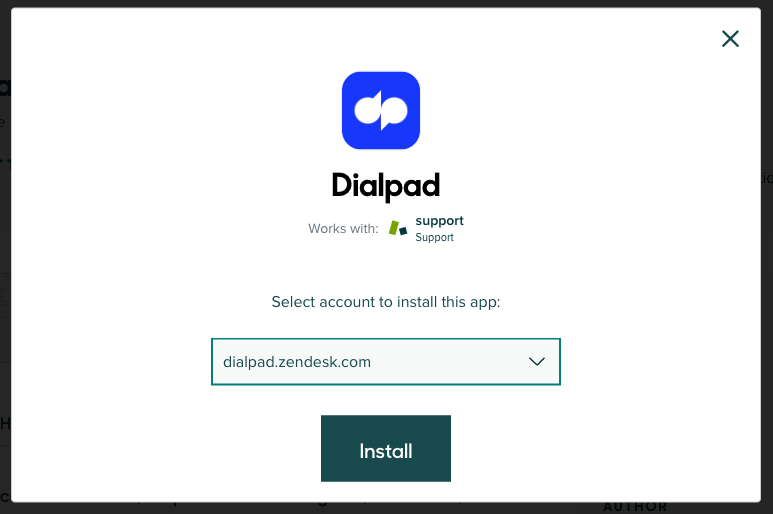
Select Install
Once installed, return to the Dialpad Admin Portal to enable the integration.
Enable Zendesk
Zendesk must be enabled at the Company level before it can be enabled and customized for an Office.
To enable Zendesk for your company, go to your Dialpad Admin Portal and select My Company.
Select Integrations
Navigate to Zendesk
Select Options
Select Manage Settings
Select Enable this feature
Select the desired preferences
Select Save
Note
You can select Lock settings for all offices to ensure that each office follows your Company's preferred configurations.
Enable Zendesk - Office
To enable Zendesk integration for your office, go to your Dialpad Admin Settings.
Navigate to Office Settings
Select Integrations
Select Options
Select Manage Settings
Select Customize for this Office
Select Enable this feature
Select the desired preferences
Select Save
Note
You can select Use Company Presets to apply the settings configured by your Company Admin.
Manage exceptions
Customize access and manage exceptions for the entire Company or across all Offices.
Tip
Selecting Active Exception applies the specific settings you made to the chosen target group.
Selecting Inactive Exception ignores any specific settings you made for the target group and applies the default Company settings.
Add exception - Company
To add an exception at the Company level, go to your Dialpad Admin Portal and select My Company.
Select Integrations
Navigate to Zendesk
Select Options
Select Manage Exceptions
Select Add Exception
Navigate to Assign Groups
Select a group from the drop-down
Select a single or multiple target within the group
Select the desired preference
Select Save
Note
You can Edit an exception to adjust settings for the target group, or Remove an exception to delete custom settings and revert to default settings from the Company, Office, or Group.
Add exception - Office
To add an exception at the Office level, go to your Dialpad Admin Settings.
Navigate to Office Settings
Select Integrations
Navigate to Zendesk
Select Options
Select Manage Exceptions
Select Add Exception
Navigate to Assign Groups
Select a group
Select a single or multiple target within the group
Select Save
Note
You can Edit an exception to adjust settings for the target group as needed, or Remove an exception to delete custom settings for the group and revert to default settings from the Company, Office, or Group.
Enable call logging
Call logging must be enabled to create tickets automatically during inbound calls. Call logging can be enabled at the company, office, and shared line level.
To enable call logging preference, go to your Dialpad Admin Settings.
Navigate to My Company, Office Settings, or Shared lines
Select Integrations
Navigate to Zendesk
Select Options
Select Manage Settings
Navigate to Call logging
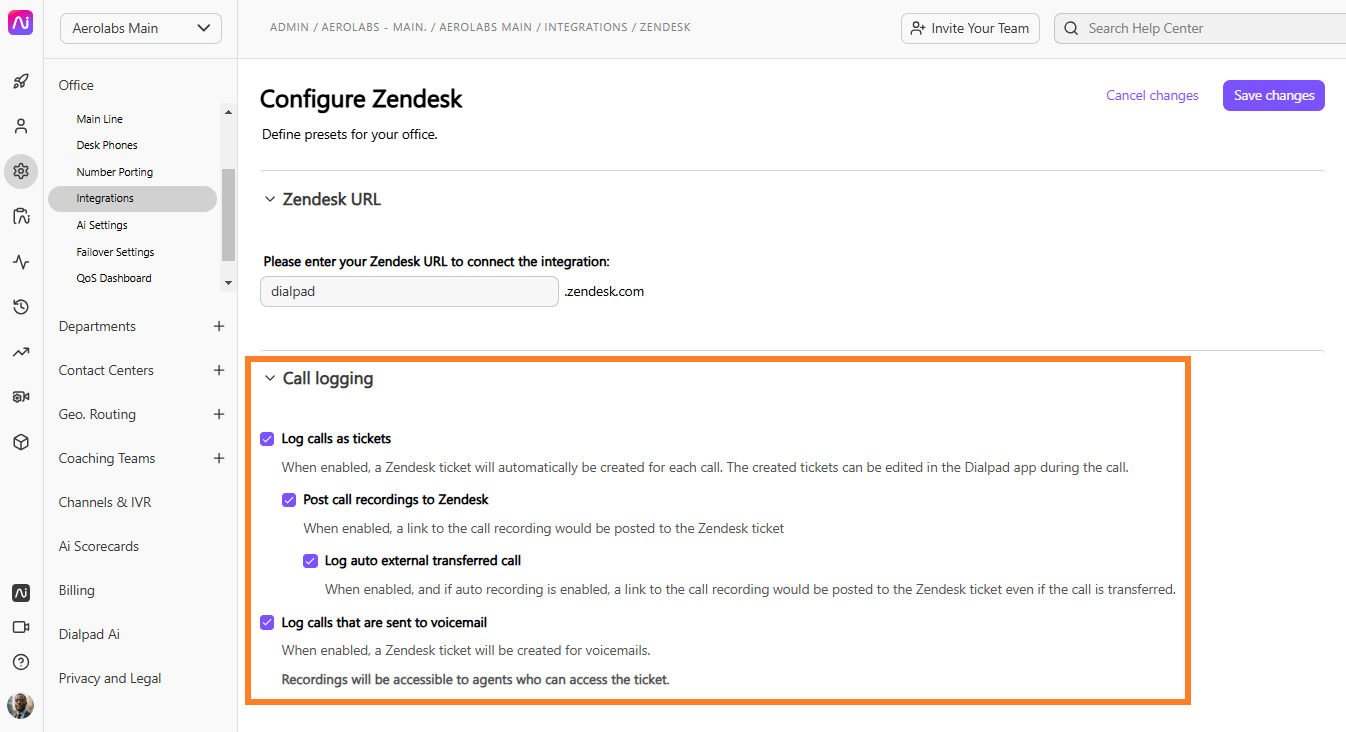
Select desired preference
Select Save
The following activities can be logged in Zendesk:
Log calls as tickets
Post-call recordings to Zendesk
Log auto external transferred calls
Log calls that are sent to voicemail
Tip
Call logging in Zendesk is for external communication only. If you receive a call from another Dialpad user in your company, that call will not log in to Zendesk.
Once call logging is enabled, all voicemails and recorded calls will automatically be tied to the ticket created so agents have a central place for all customer information.
Supported AI fields
Dialpad Ai tracks recaps, action items, call tags, and outcomes, so follow-ups aren’t missed. If you use Ai CSAT or Ai Playbooks, you’ll also see agent’s performance and CSAT scores.
Let's look at at which AI features are logged to, and supported in Zendesk.
Field label | Data type | Description |
|---|---|---|
Rich Text | Ai Recap of a call with 255 character limit. | |
Rich Text | The Action Items that were detected in the call, as generated in the Ai Recap. | |
Ai Outcome | Text | The Ai-detected outcome of the call. Accessible in the Ai Recap object. |
Text | The Ai-detected Call Purpose category assigned to the call. Accessible in the Ai Recap object. | |
Percentage | Numeric value that explains how much a person adheres to the Ai Playbook. | |
Number | Ai generated CSAT score. |
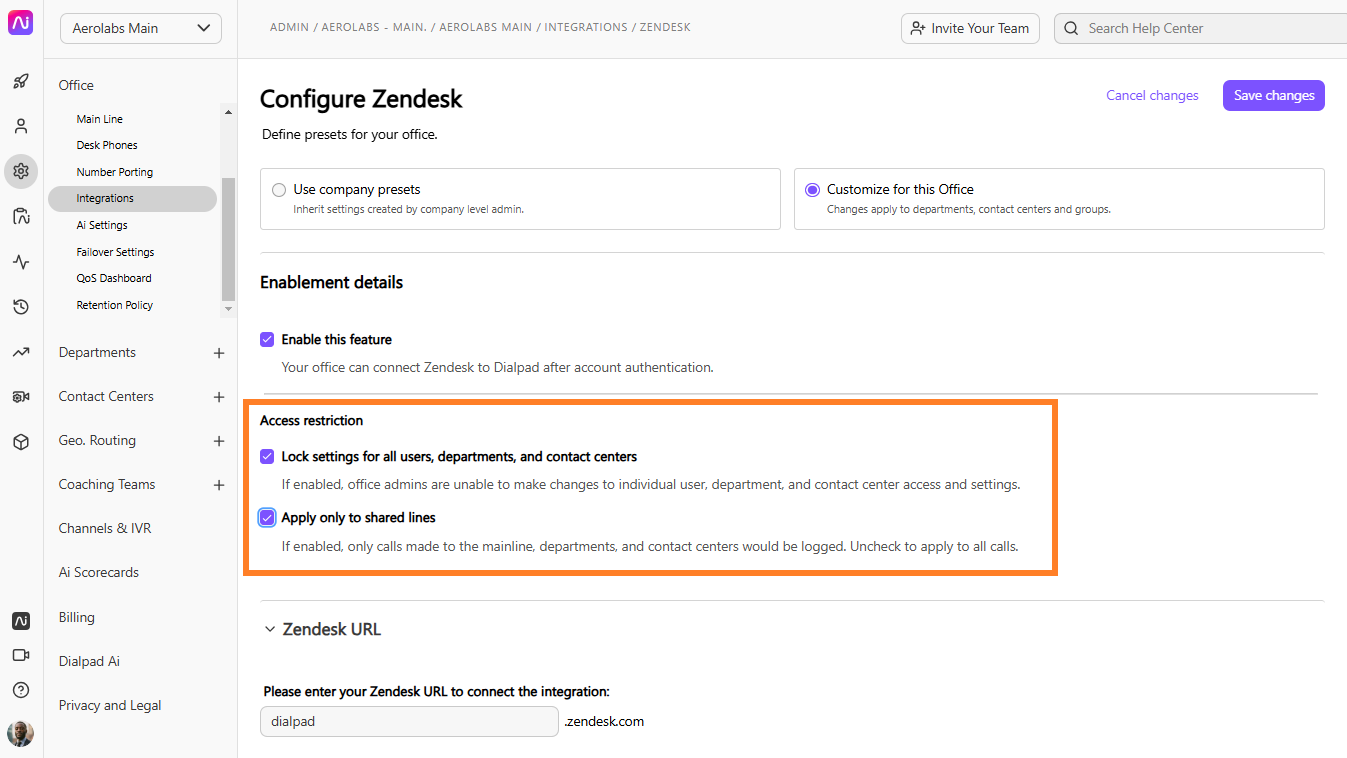
Access restriction
In addition to call logging, admins can also determine who can access which settings for certain lines.
Dialpad offers 2 sets of access controls:
Lock settings for all users, departments, and contact centers: When enabled, Office Admins cannot make changes to user, Department or Contact Center access and settings.
Apply only to shared lines: When enabled, only mainline, Department, and Contact Center calls are logged.
When this setting is disabled, all calls will be logged.