The integration of Filevine with Dialpad improves the experience and efficiency for Dialpad users by facilitating a direct connection with Filevine CRM. This feature allows Dialpad users to associate calls with a Contact Project resource in Filevine directly from the Dialpad interface, eliminating the need to toggle between platforms. It enables agents to search for a Contact by phone number, name, or email, view contact information, and access related Projects directly from the Dialpad widget. Once a call ends, the pertinent call details are automatically recorded in the corresponding Project in Filevine.
Who can use this
All users can use this on any Dialpad license, with options to activate it at various levels:
Company-wide activation: All users within the account will have access to the integration.
Office-specific activation: Only users in a designated office will have access.
This feature must be configured by Dialpad’s Professional Services team and is subject to additional cost. Please contact your Customer Success Manager or the Dialpad Professional Services team for more details.
Enable Filevine in Dialpad
To enable Filevine in Dialpad, go to your Dialpad Admin Settings.
Navigate to My Company > Integrations
Note
If you want to enable Filevine for a specific office, select Office Settings > Integrations.
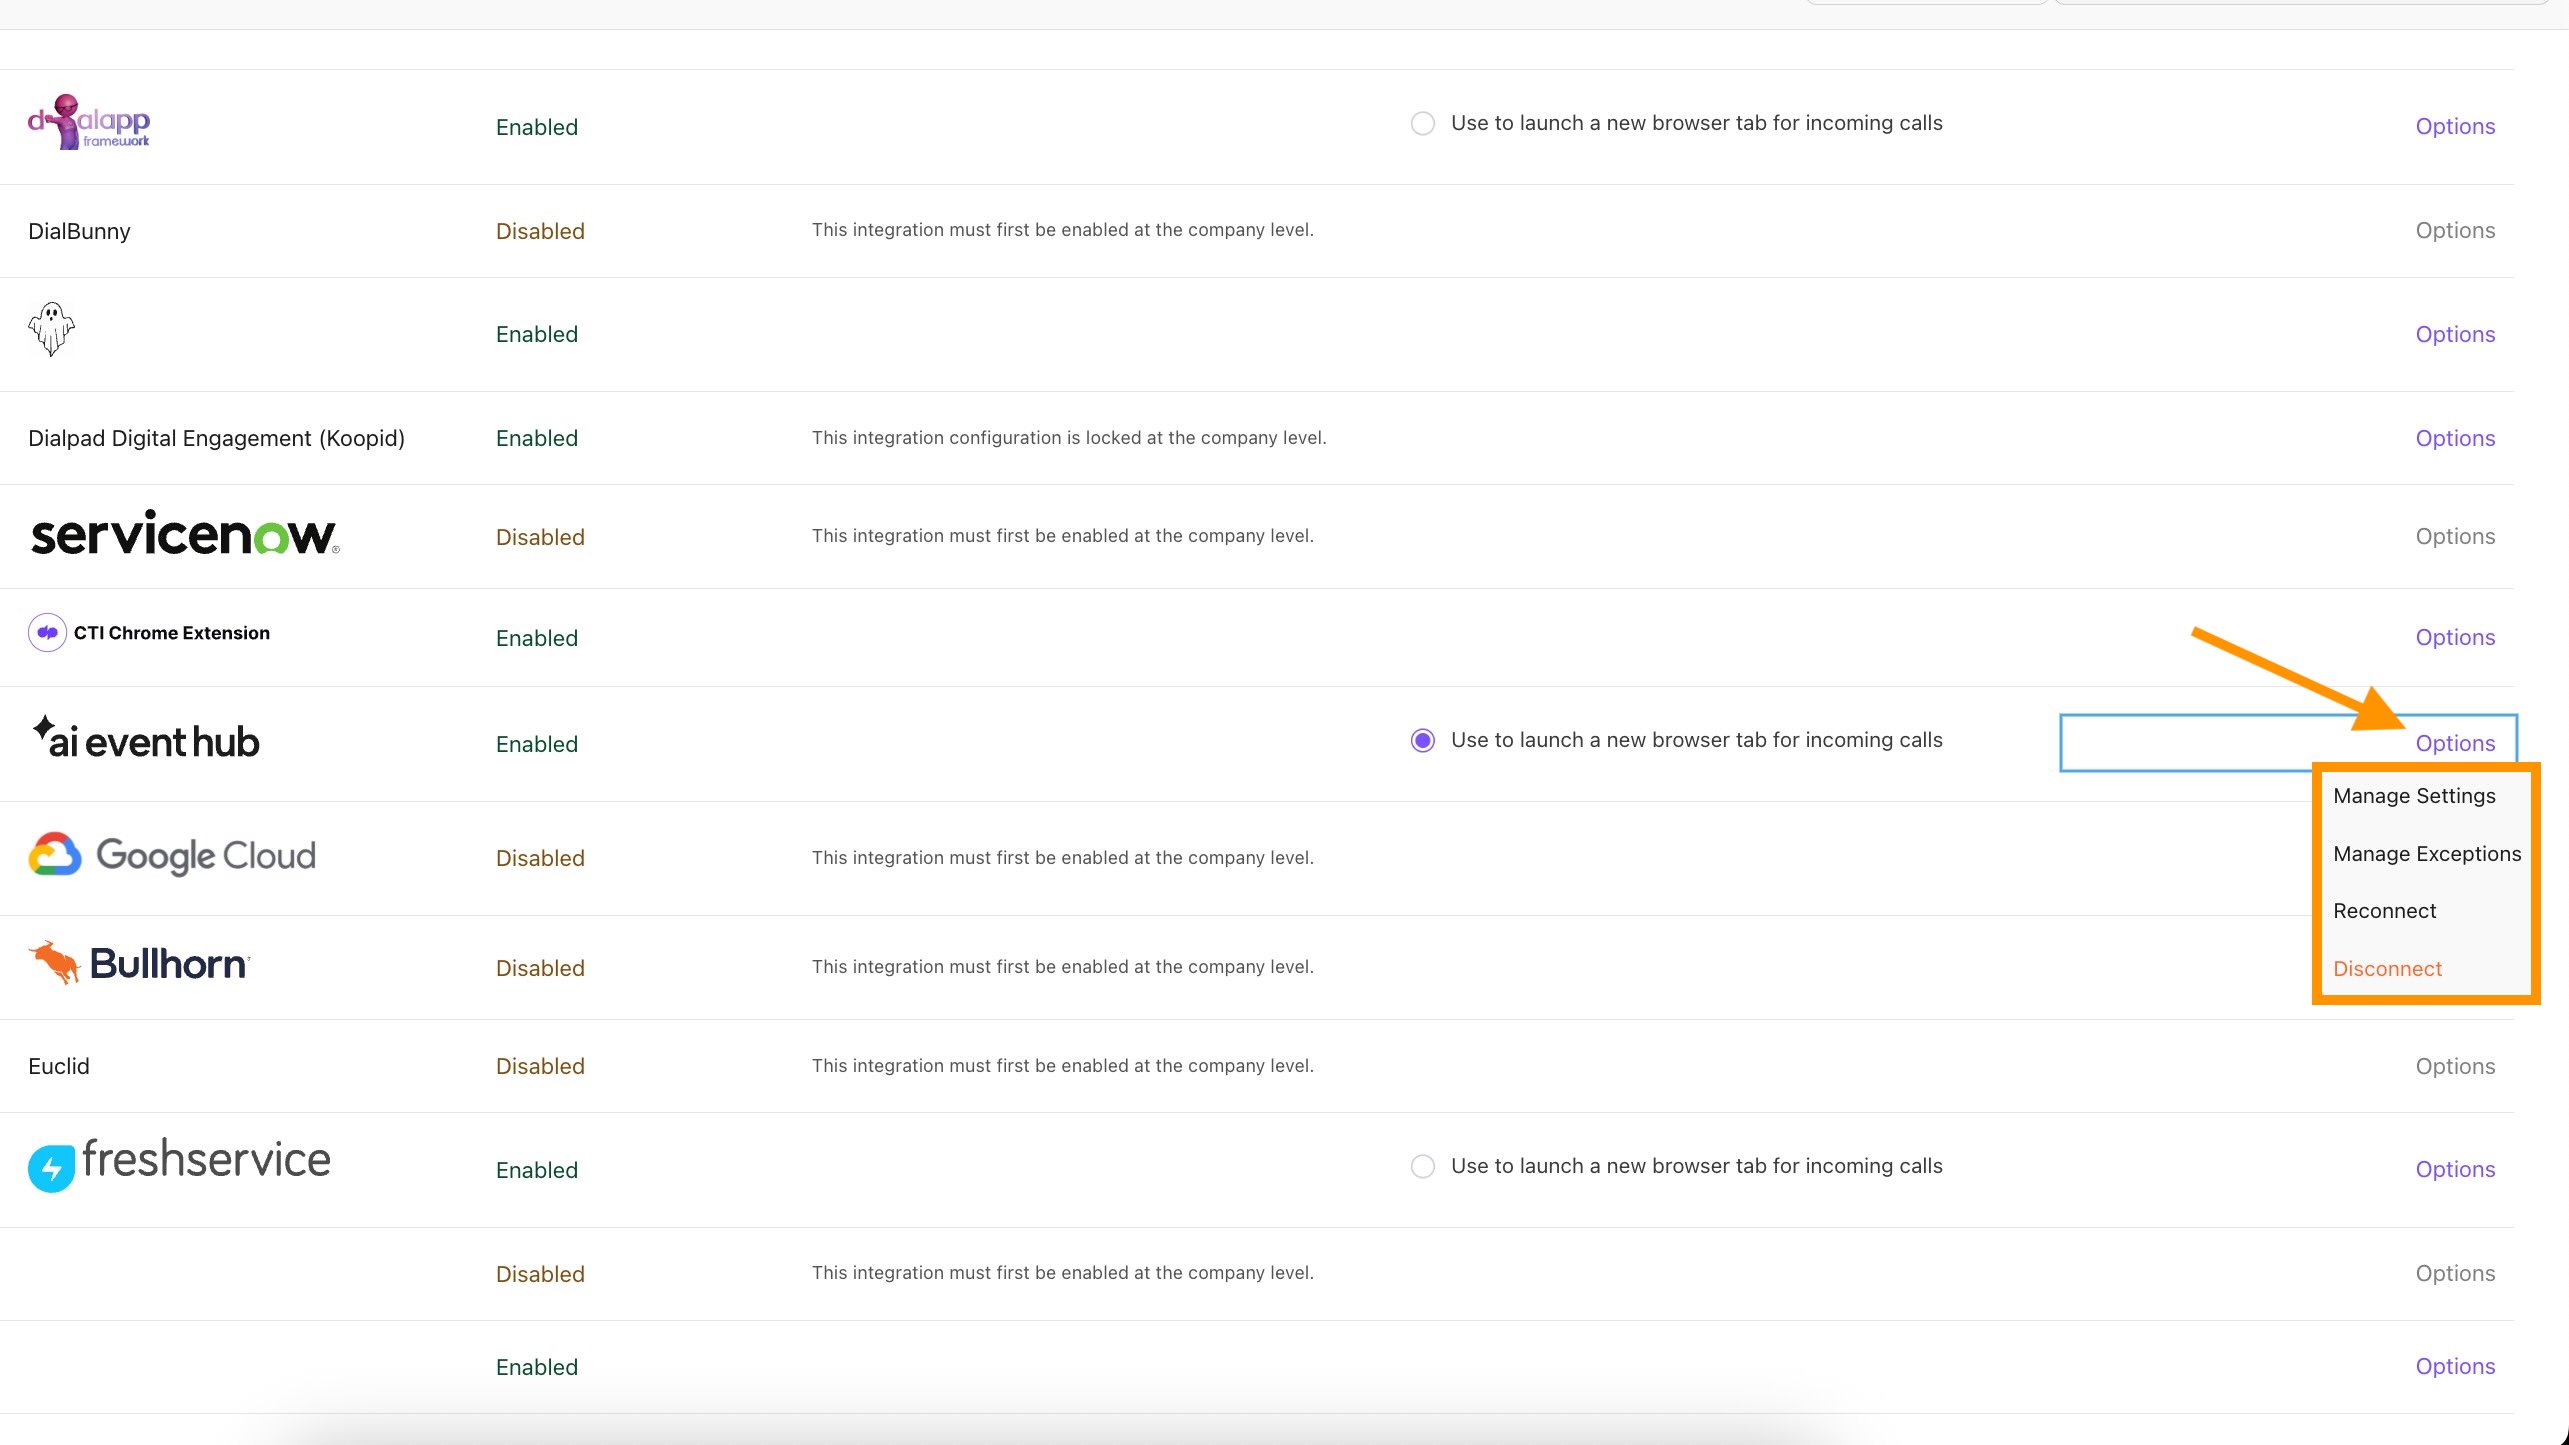
Navigate to the AI Event Hub integration and select Options > Manage Extension > Enable
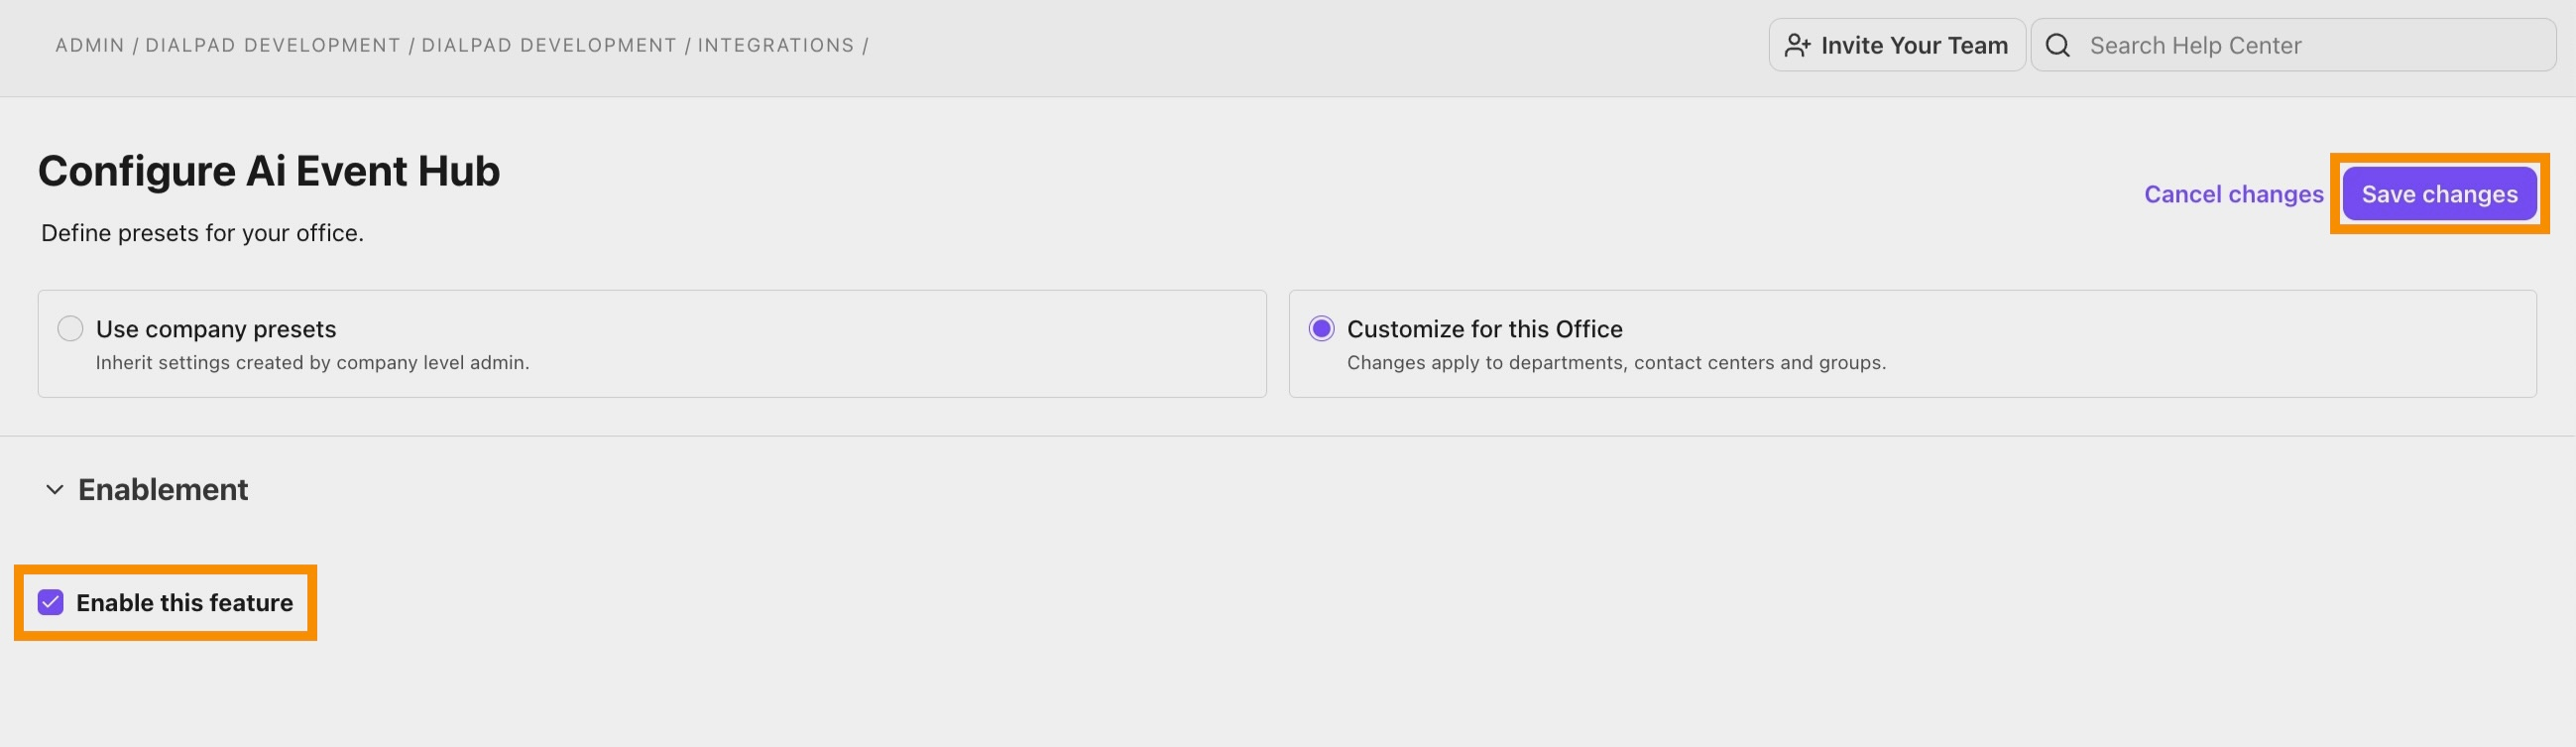
Select Save Changes
Return to the Integrations page and navigate to the AI Event Hub integration again
Select Options > Connect / Reconnect
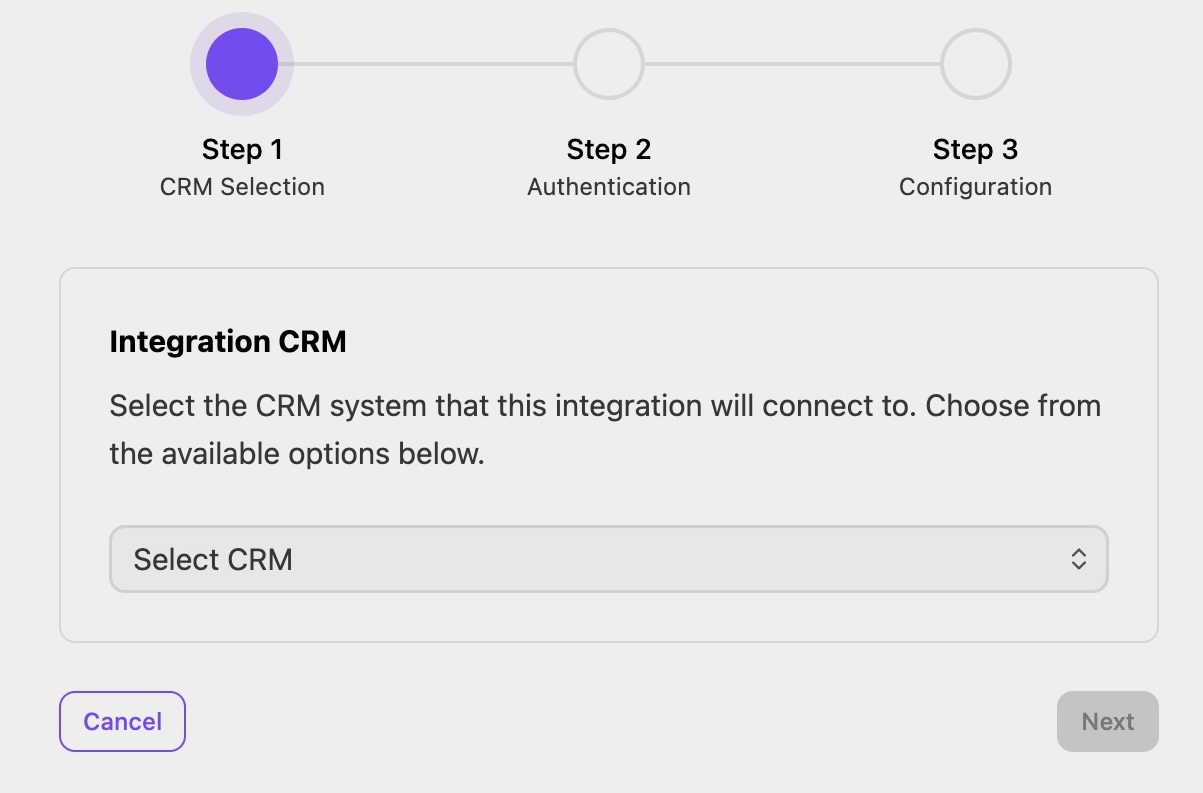
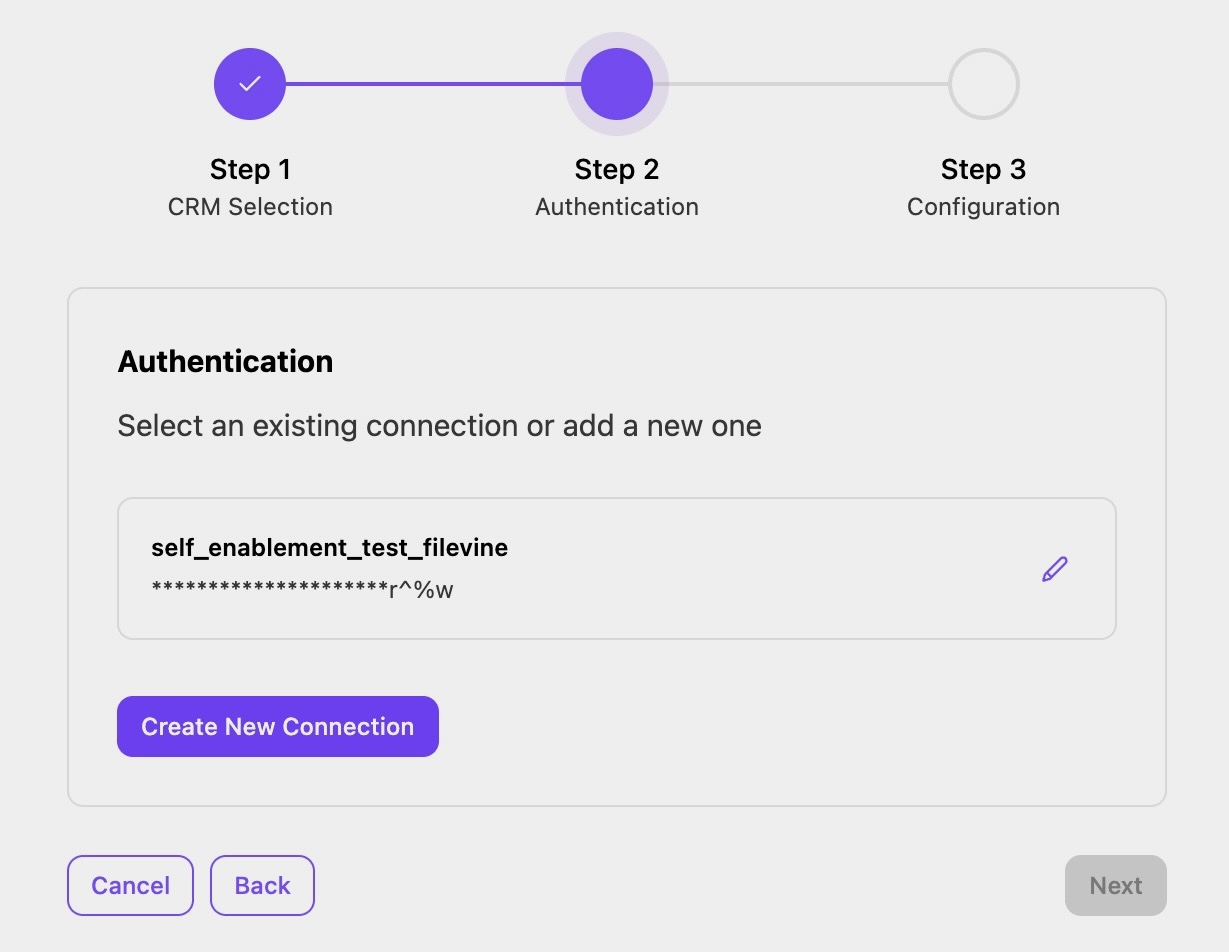
Select Filevine as your CRM, then select Next
Choose a connection to use for activation
Note
You can either create a new connection or utilize an existing one.
To create a new connection:
Select Create New Connection
Enter the credential parameters for Filevine. You may need to reach out to Filevine support to obtain these credentials.
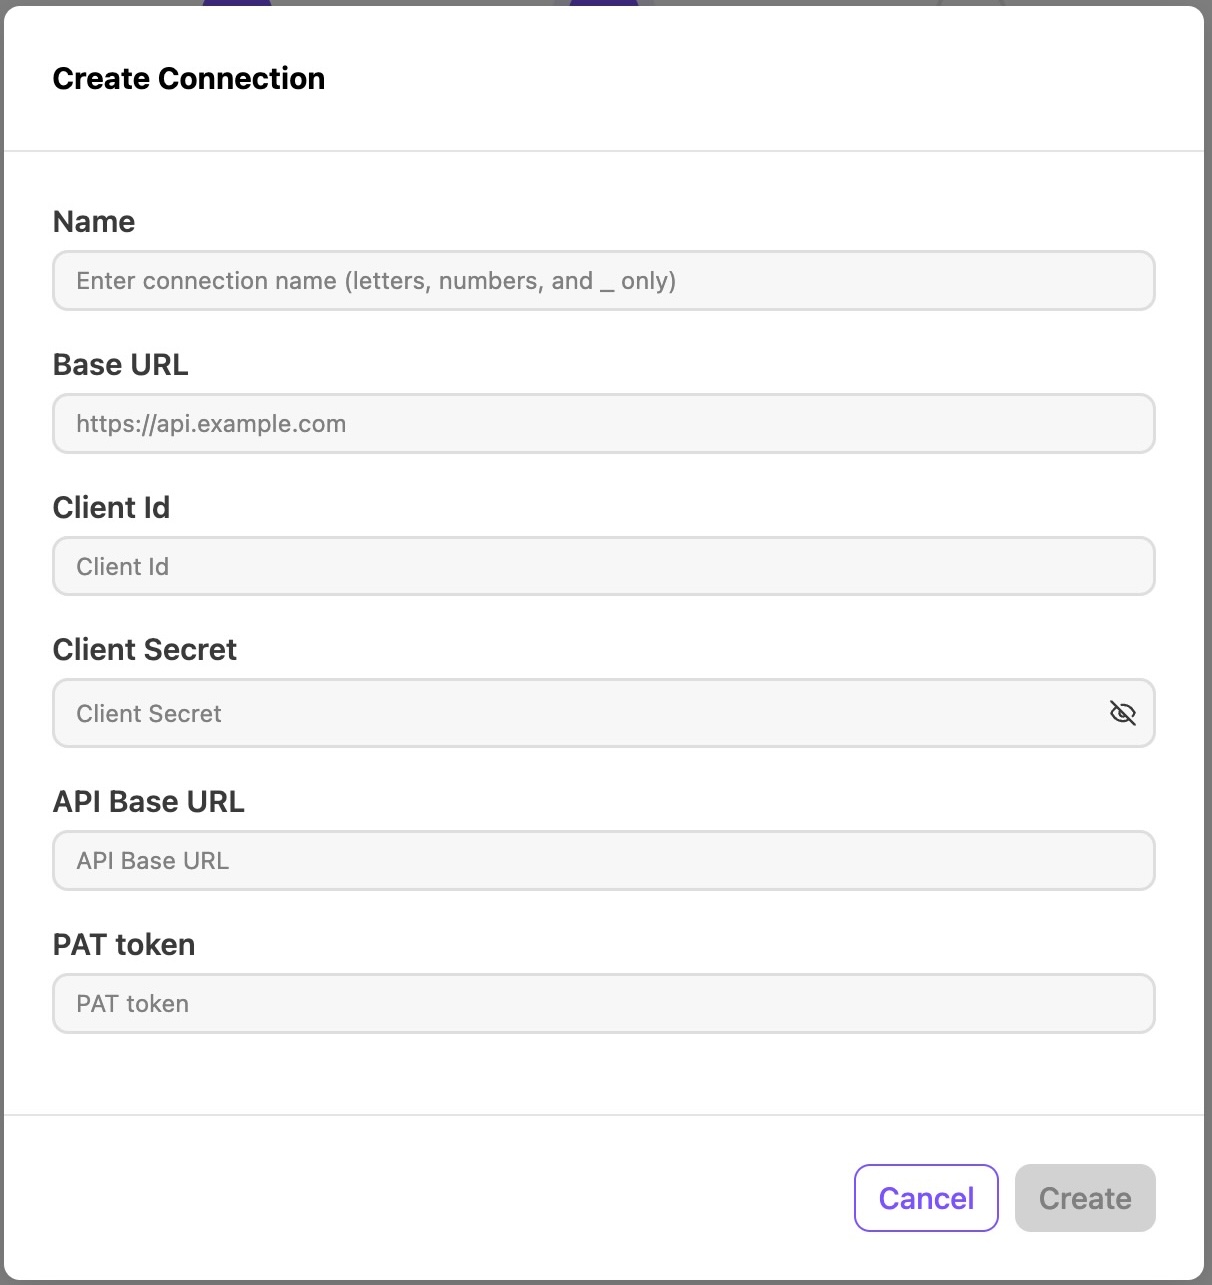
Once the form is filled in, select Create
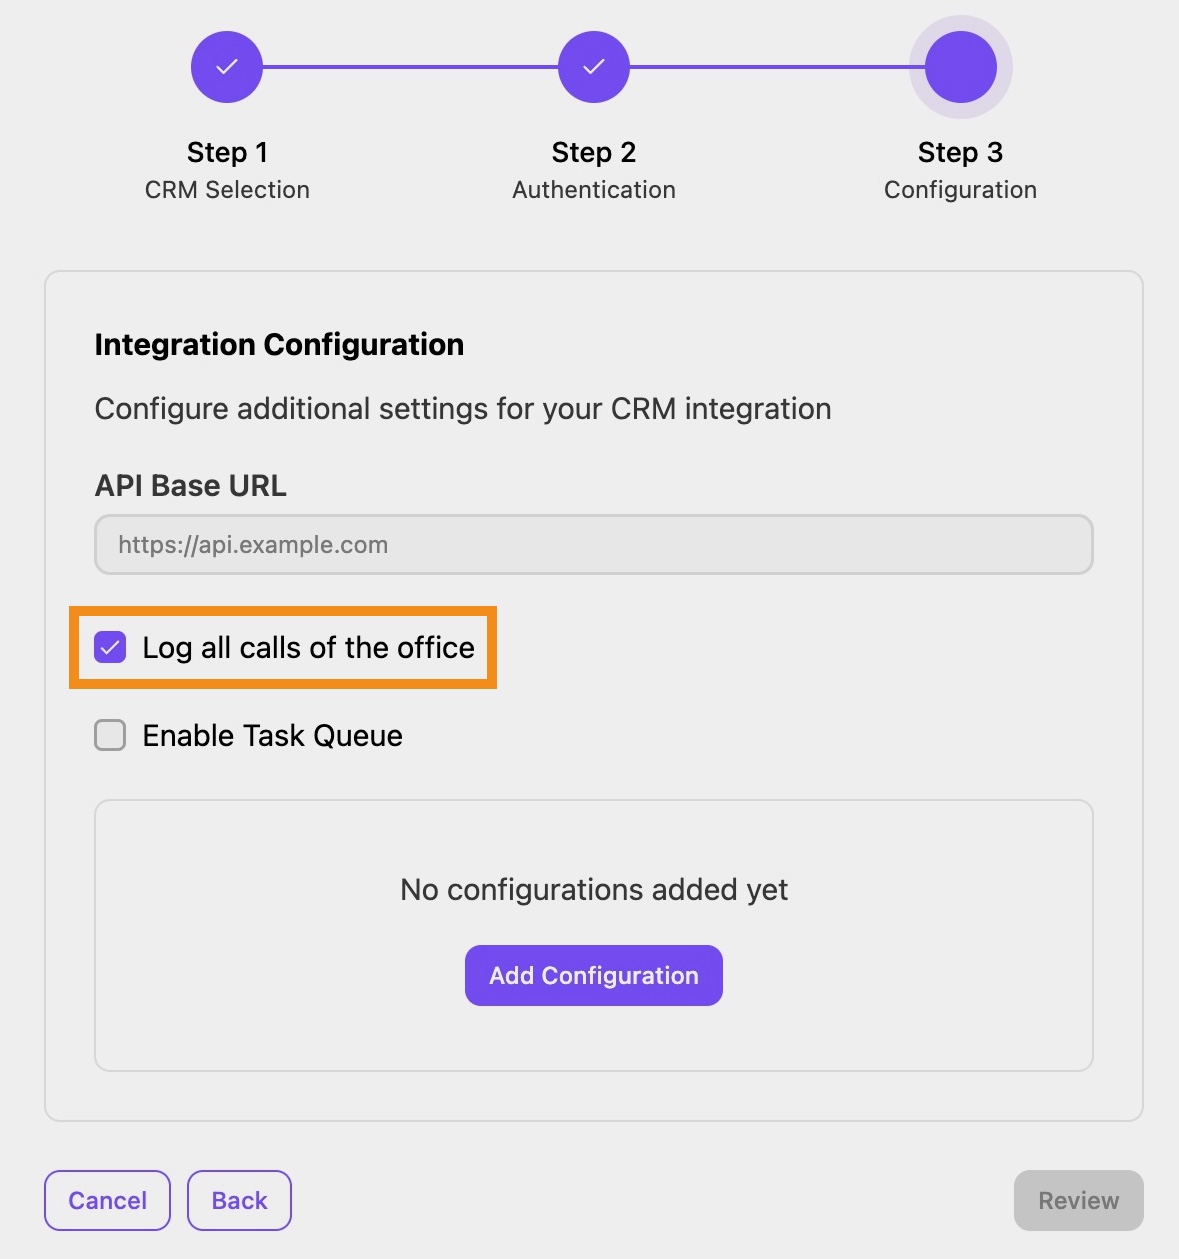
After selecting the connection, set up the integration and define features such as call logging
Note
Additional settings for creating a new Contact or Project can also be configured, but these fields are optional.
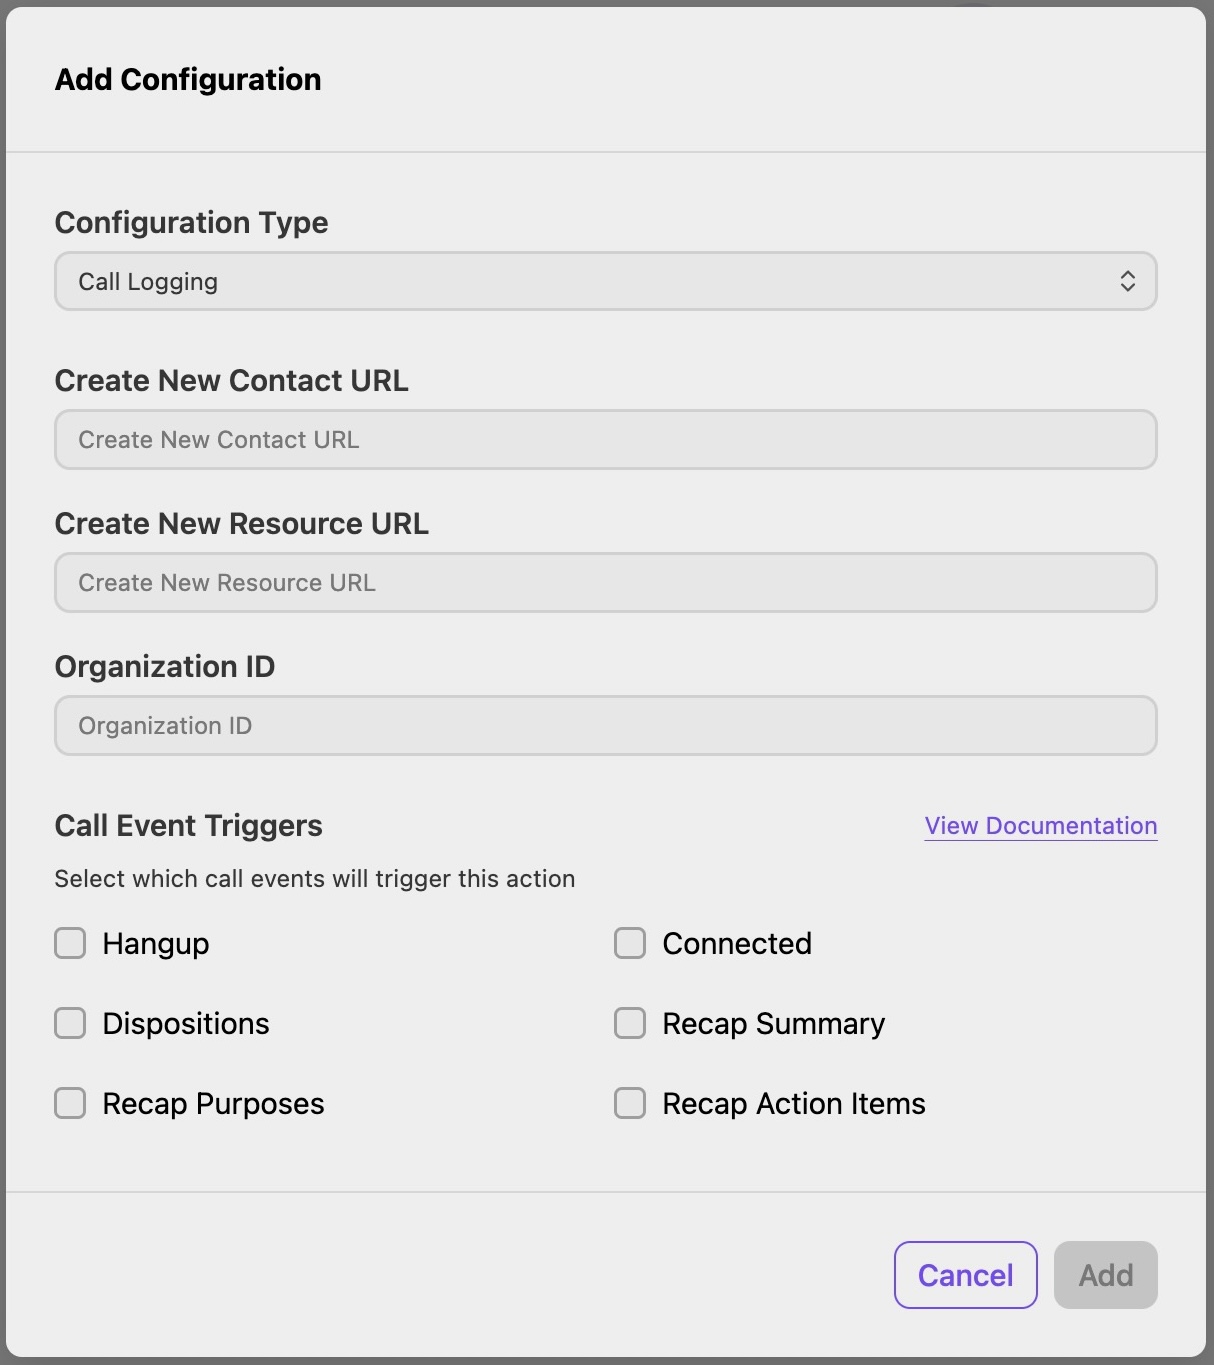
You can select which call events trigger the addition of a configuration. These triggers include:
Hangup: When the call ends.
Connected: When a call is picked up and connected to an agent.
Dispositions: When a call disposition is submitted for the call by an agent.
Recap Summary: When the recap summary is ready for the call.
Recap Purposes: When ai recap purposes are identified for the call.
Recap Action Items: When AI recap actions are identified for the call.
The View Documentation option displays Filevine Help documentation.
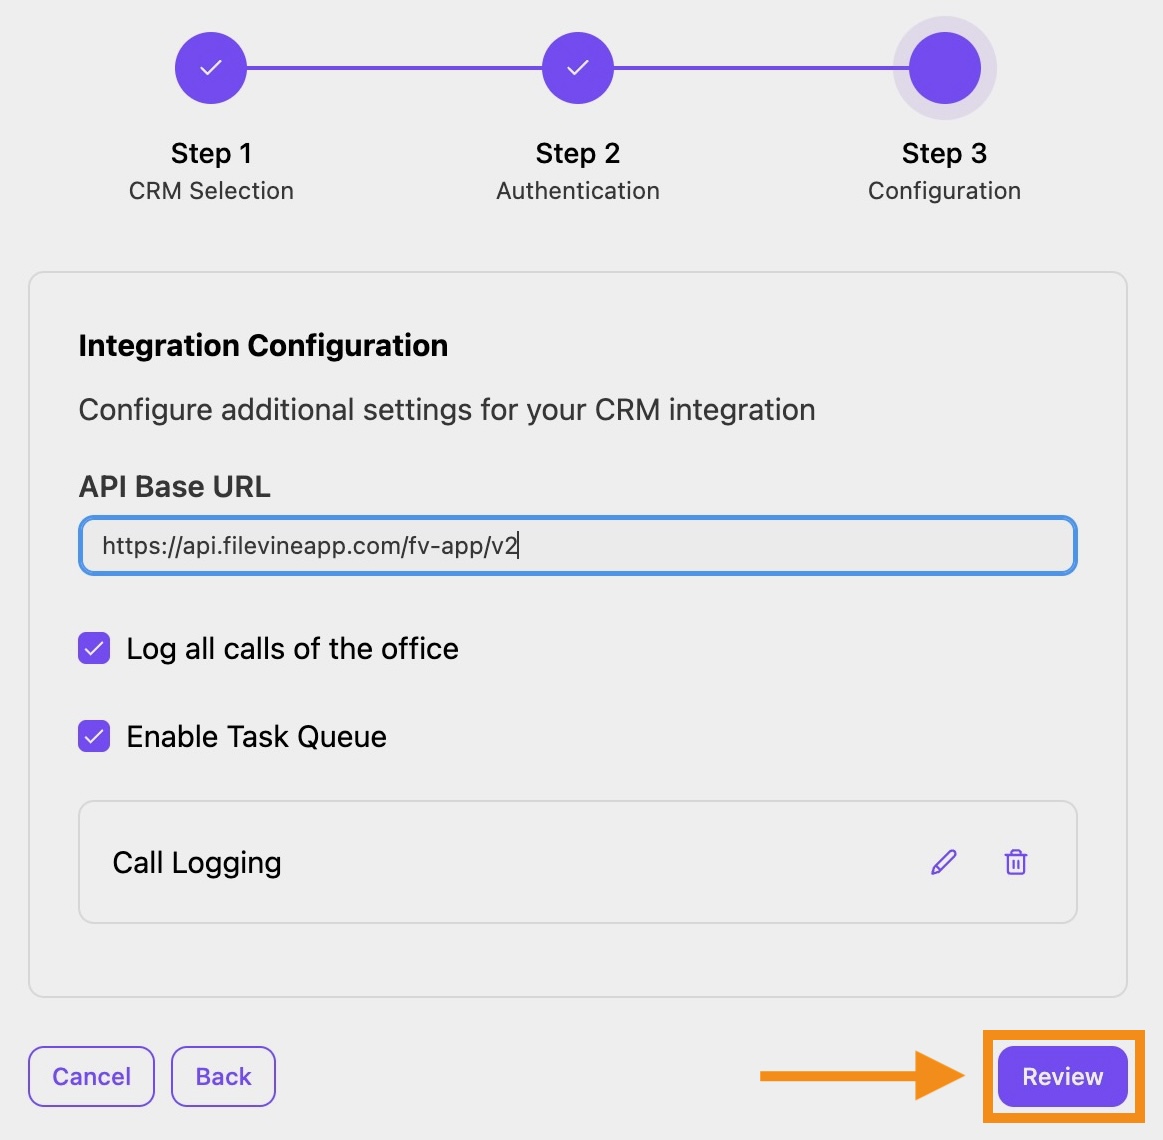
Once complete, select Review and Finish
To show the widget in your Dialpad sidebar, navigate to your Dialpad Admin Settings.
Select Office Settings > Integrations
Select Options > Manage Settings
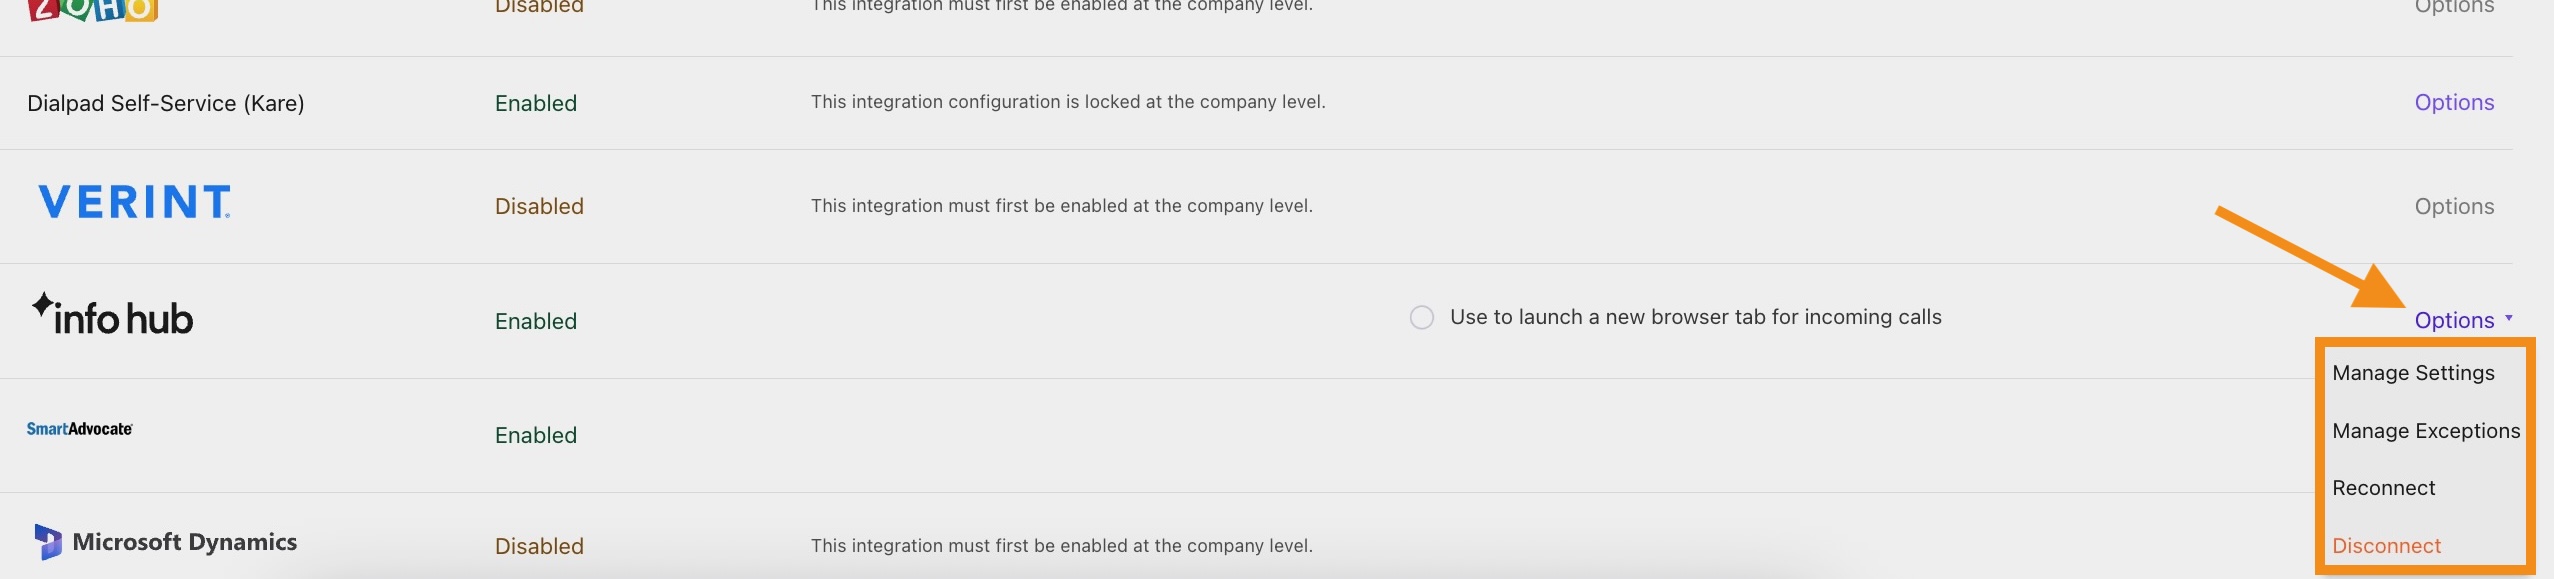
Select Enable Info Hub
Under Template, select Manage Contact Resources
Select Save Changes
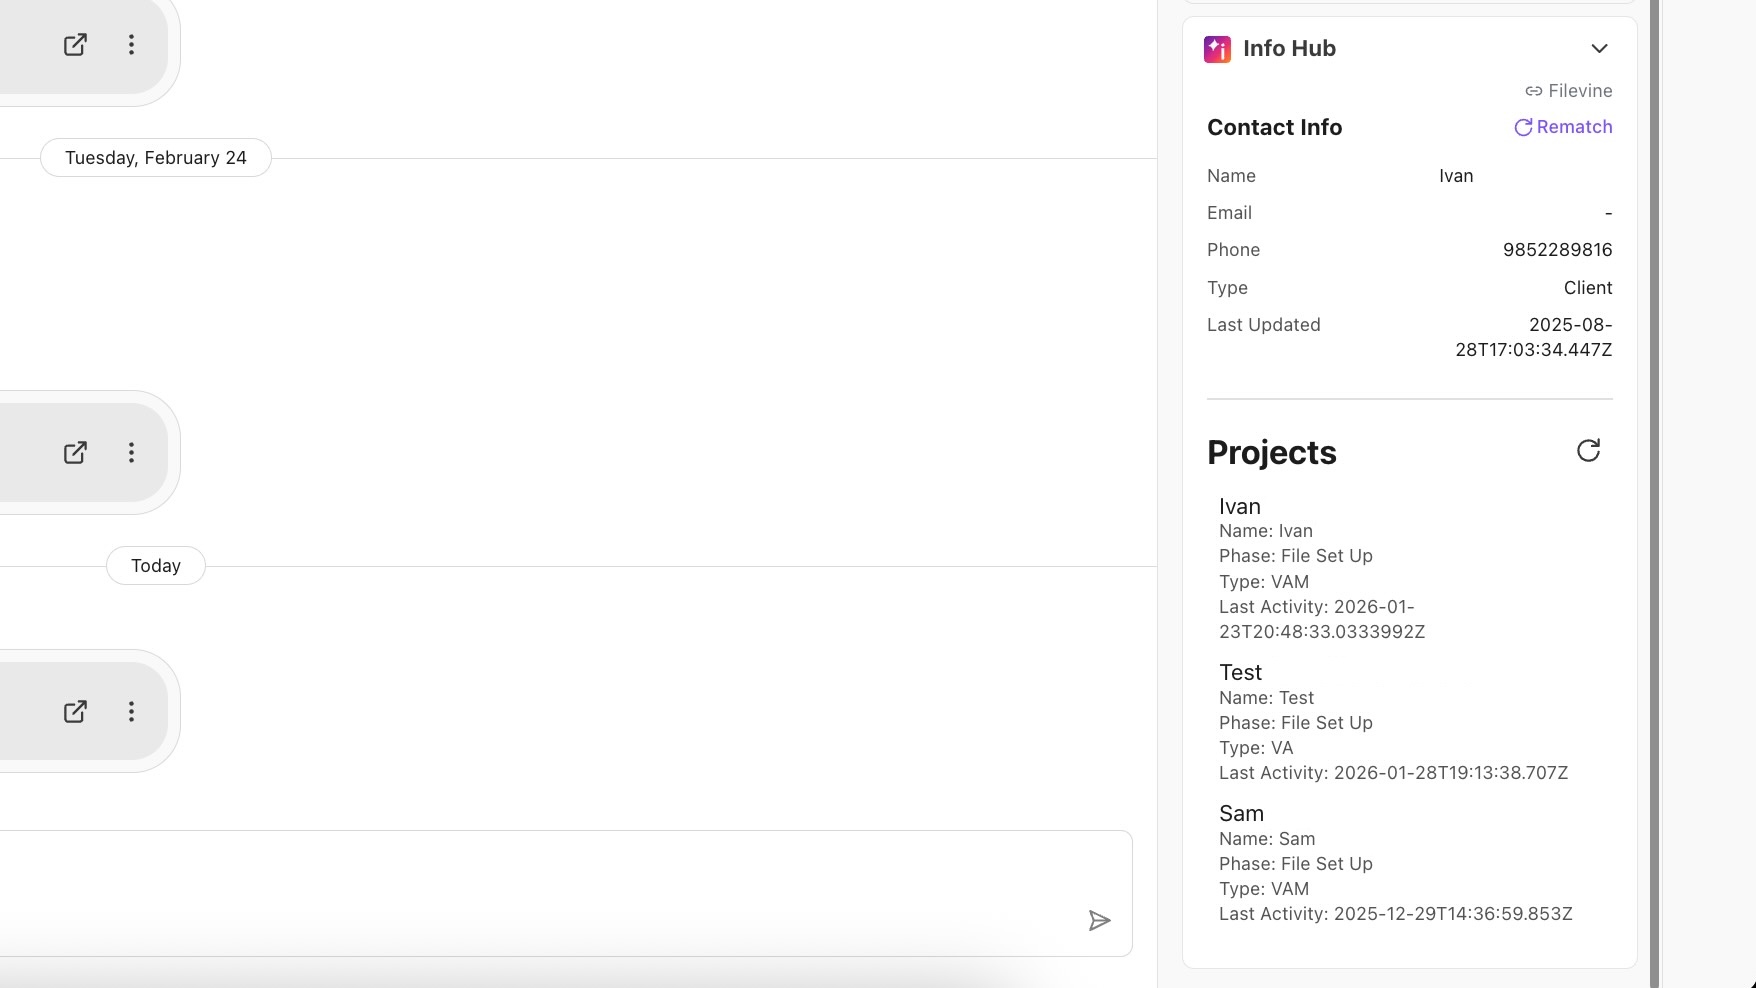
Your Filevine integration is now established. Look for the InfoHub widget in the sidebar to verify a successful connection to Filevine.
Using the Integration
Agents can access the integration via the "InfoHub" widget in the integrations sidebar.
Search contacts
Search for Filevine contacts by entering their phone number, email, or name in the Search field.

Create a new contact
Create a new contact that isn’t available in Filevine. To create a new contact in Filevine:
Search for a name, email or phone number
Select Create new contact
In Filevine, enter the contact information in the required fields
Select Save
Match a contact
Selecting “Match” allows you to view the contact details while linking the current Dialpad Contact to the Filevine Contact.
To match a contact in Filevine:
Search for a name, email, or phone number
Select Match next to the contact
Select the contact to match with
Select Merge
If you need to unmatch a call instance from a contact:
Search for contact (name, email, or phone number)
Select Rematch
Choose which instance to unmatch from the contact (based on contact ID)
Note
Contact details will be displayed in a list, and associated Projects will appear at the bottom.
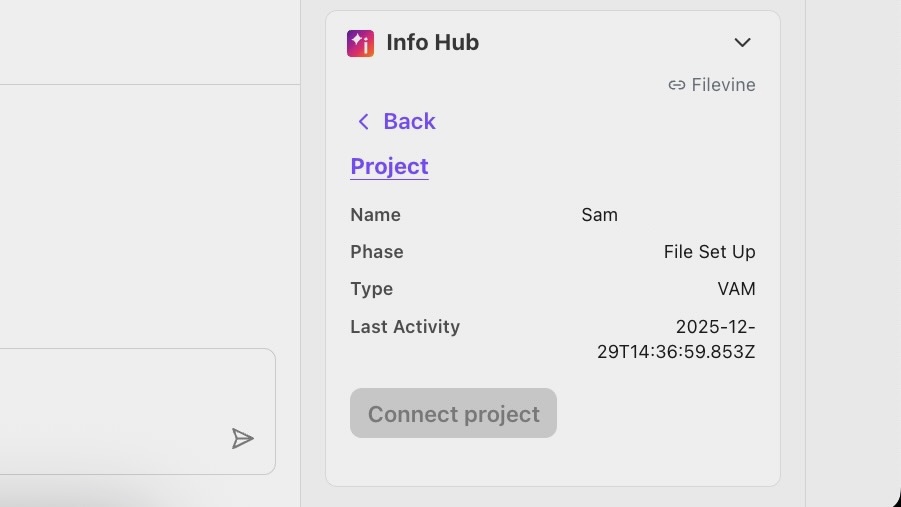
Connect to a project
Connect to and view project details in Filevine. To search for and connect to a project during a call:
Search for a contact (name, email, or phone number)
Select the project listed in their contact details
If the call isn’t connected to the project, select Connect project
Note
This is available only during an active call.
Troubleshooting
If you experience issues with call logging where the AI Recap indicates that “Summaries are currently not generated for short calls or voicemails,” be aware that AI Recap generation requires around 2 minutes and at least 50 words of recognized speech from the call.
Frequently asked questions
How long does it take for a call to show in Filevine?
Depends on the integration enablement type. If using Event Task Queues, the call logging will happen about 3 minutes after hang-up. Otherwise, it will happen at hangup. We recommend using Event Task Queues despite the delay, as they provide greater consistency.
Can I ask my CSM/PM to proxy the admin configuration for me?
No, this needs to be done by an admin of your company and cannot be proxied.
What fields are taken into account for matching the Filevine record?
Integration relies on the phone number, name or email set in Filevine for the contact. When an agent searches for a Filevine contact, the system returns any contacts that match any of those fields with the input value.
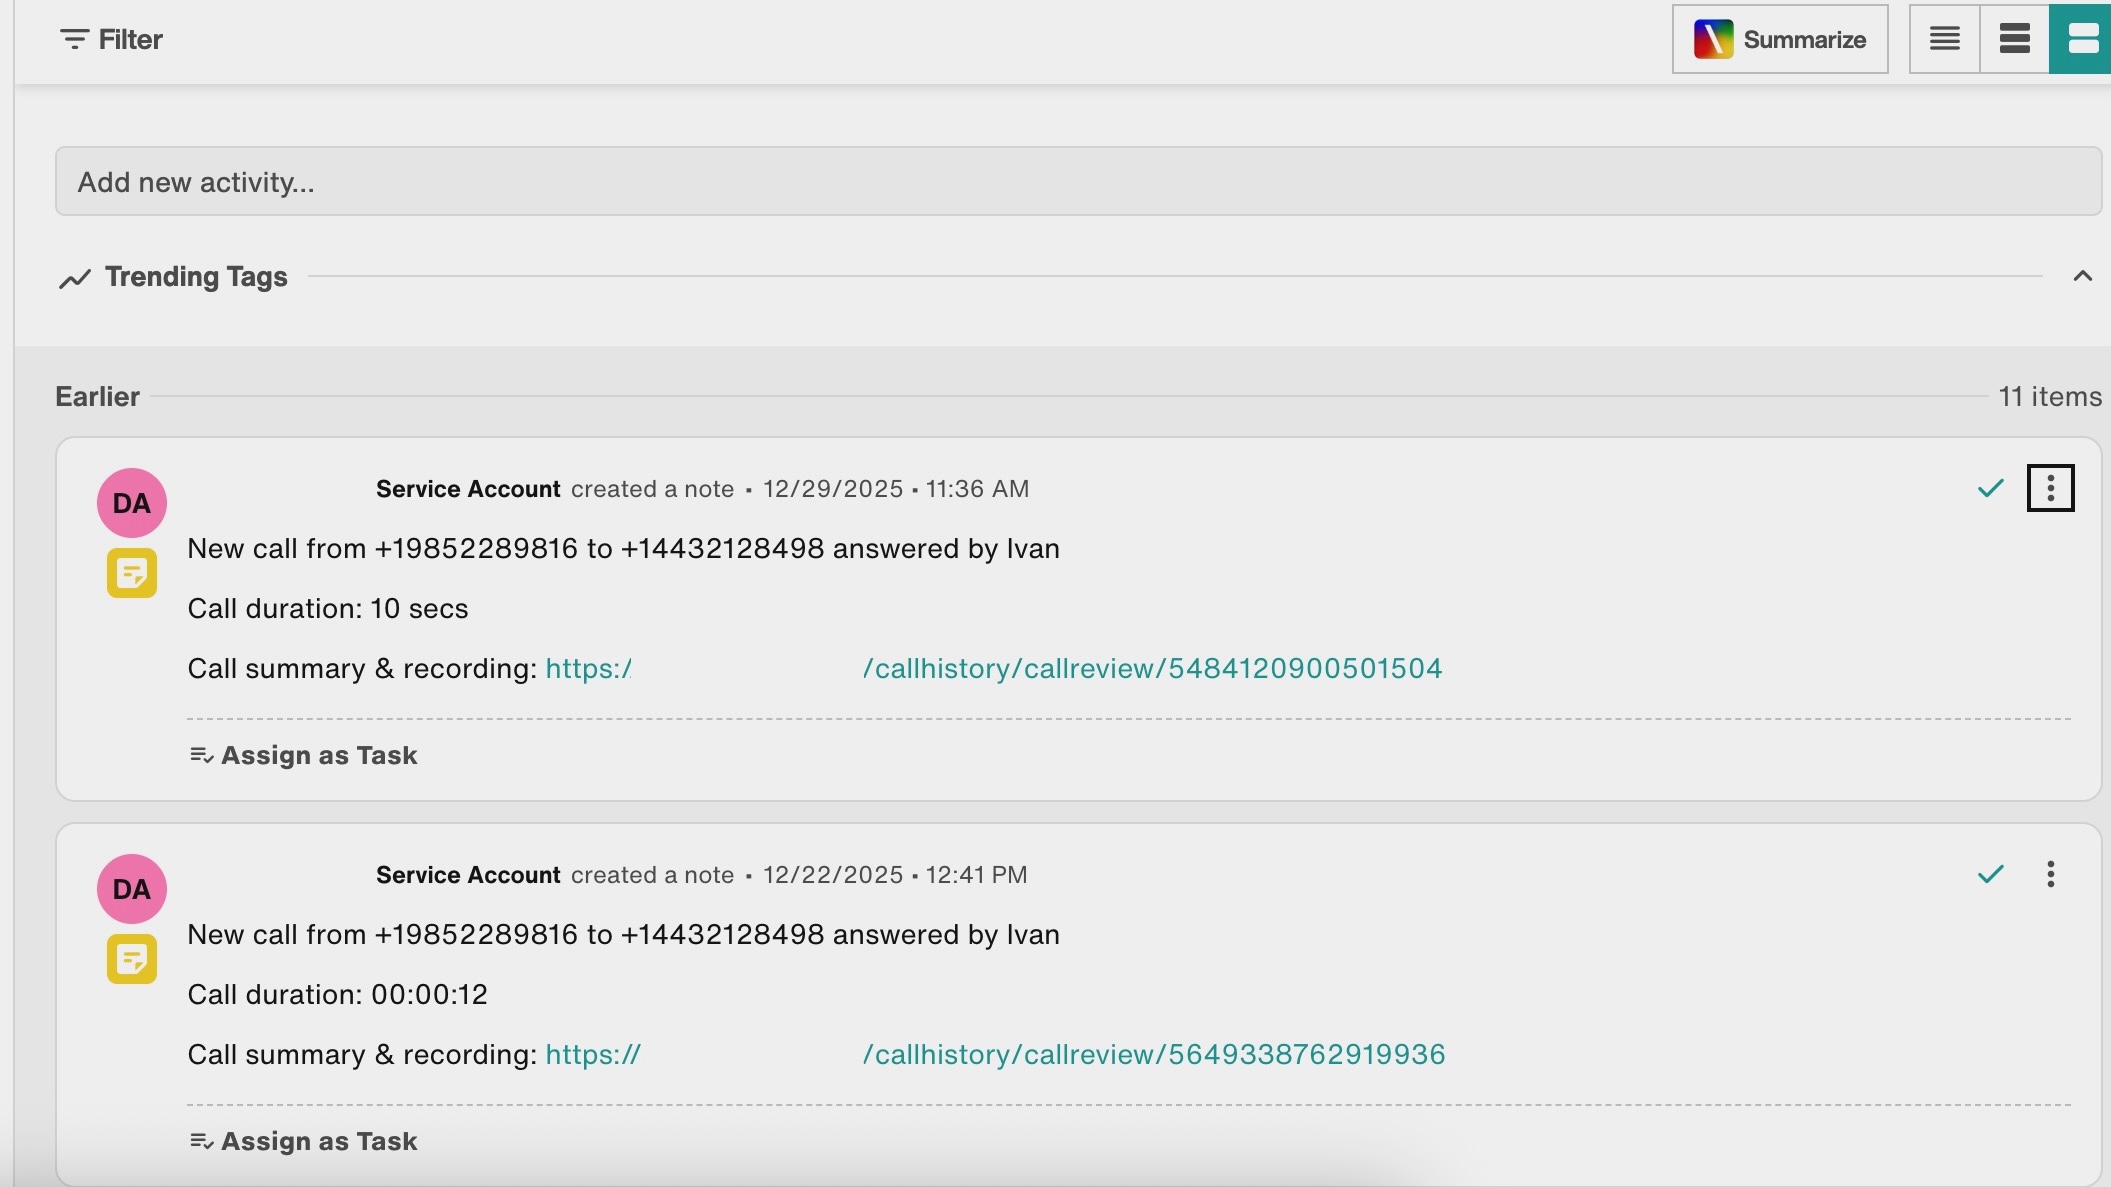
What information gets logged in a typical call log?
Call log information typically includes:
Incoming call phone number to agent phone number, including who answered the call
Call duration
Link to the call summary and the recording
Where is the data written in Filevine?
Call logging in Filevine occurs when a new Project Activity record is created.
Is there any configuration needed on the Filevine end?
The Filevine integration is Dialpad-sided, meaning configuration is handled on the Dialpad side. No configuration needed on the Filevine side.