In a contact center, it’s important to carefully plan how agents’ time is utilized to optimize time spent with customers.
Dialpad WFM’s Activity Plans allow you to define and prioritize the work agents do and the time they spend doing it, like Contact Center coverage, breaks or training.
Let’s dive into the details.
Who can use this
Dialpad WFM is available to all Dialpad users.
Activity Plans can only be managed by Dialpad WFM admins.
Contact your Customer Success Manager to discuss adding Dialpad WFM to your plan.
What is an Activity Plan?
An Activity Plan is a collection of rules which determine how a team’s time is utilized. Activity Plans are applied to shifts to populate them with breaks and activities.
Within each Activity Plan, you can configure:
The team(s) the Activity Plan applies to, allowing you to manage each team’s responsibilities and ways of working separately.
The breaks agents different are required to have and when.
The different queues your team need to provide coverage for.
Any additional activities agents need to perform, like training or admin.
The priority of different activities, so you can prioritize your most important responsibilities if capacity is low.
Once created, Activity Plans are then used to generate more personalized schedules, or can be applied to shifts for more custom use-cases.
Create an Activity Plan
Activity Plans are created and managed by admins from within the Dialpad WFM schedule. Admins can only create and use Activity Plans for teams they have View and Edit privileges for.
To create an Activity Plan, head to the schedule:
Select Activities
Make sure you’re in Draft mode. The published toggle should be set to off.
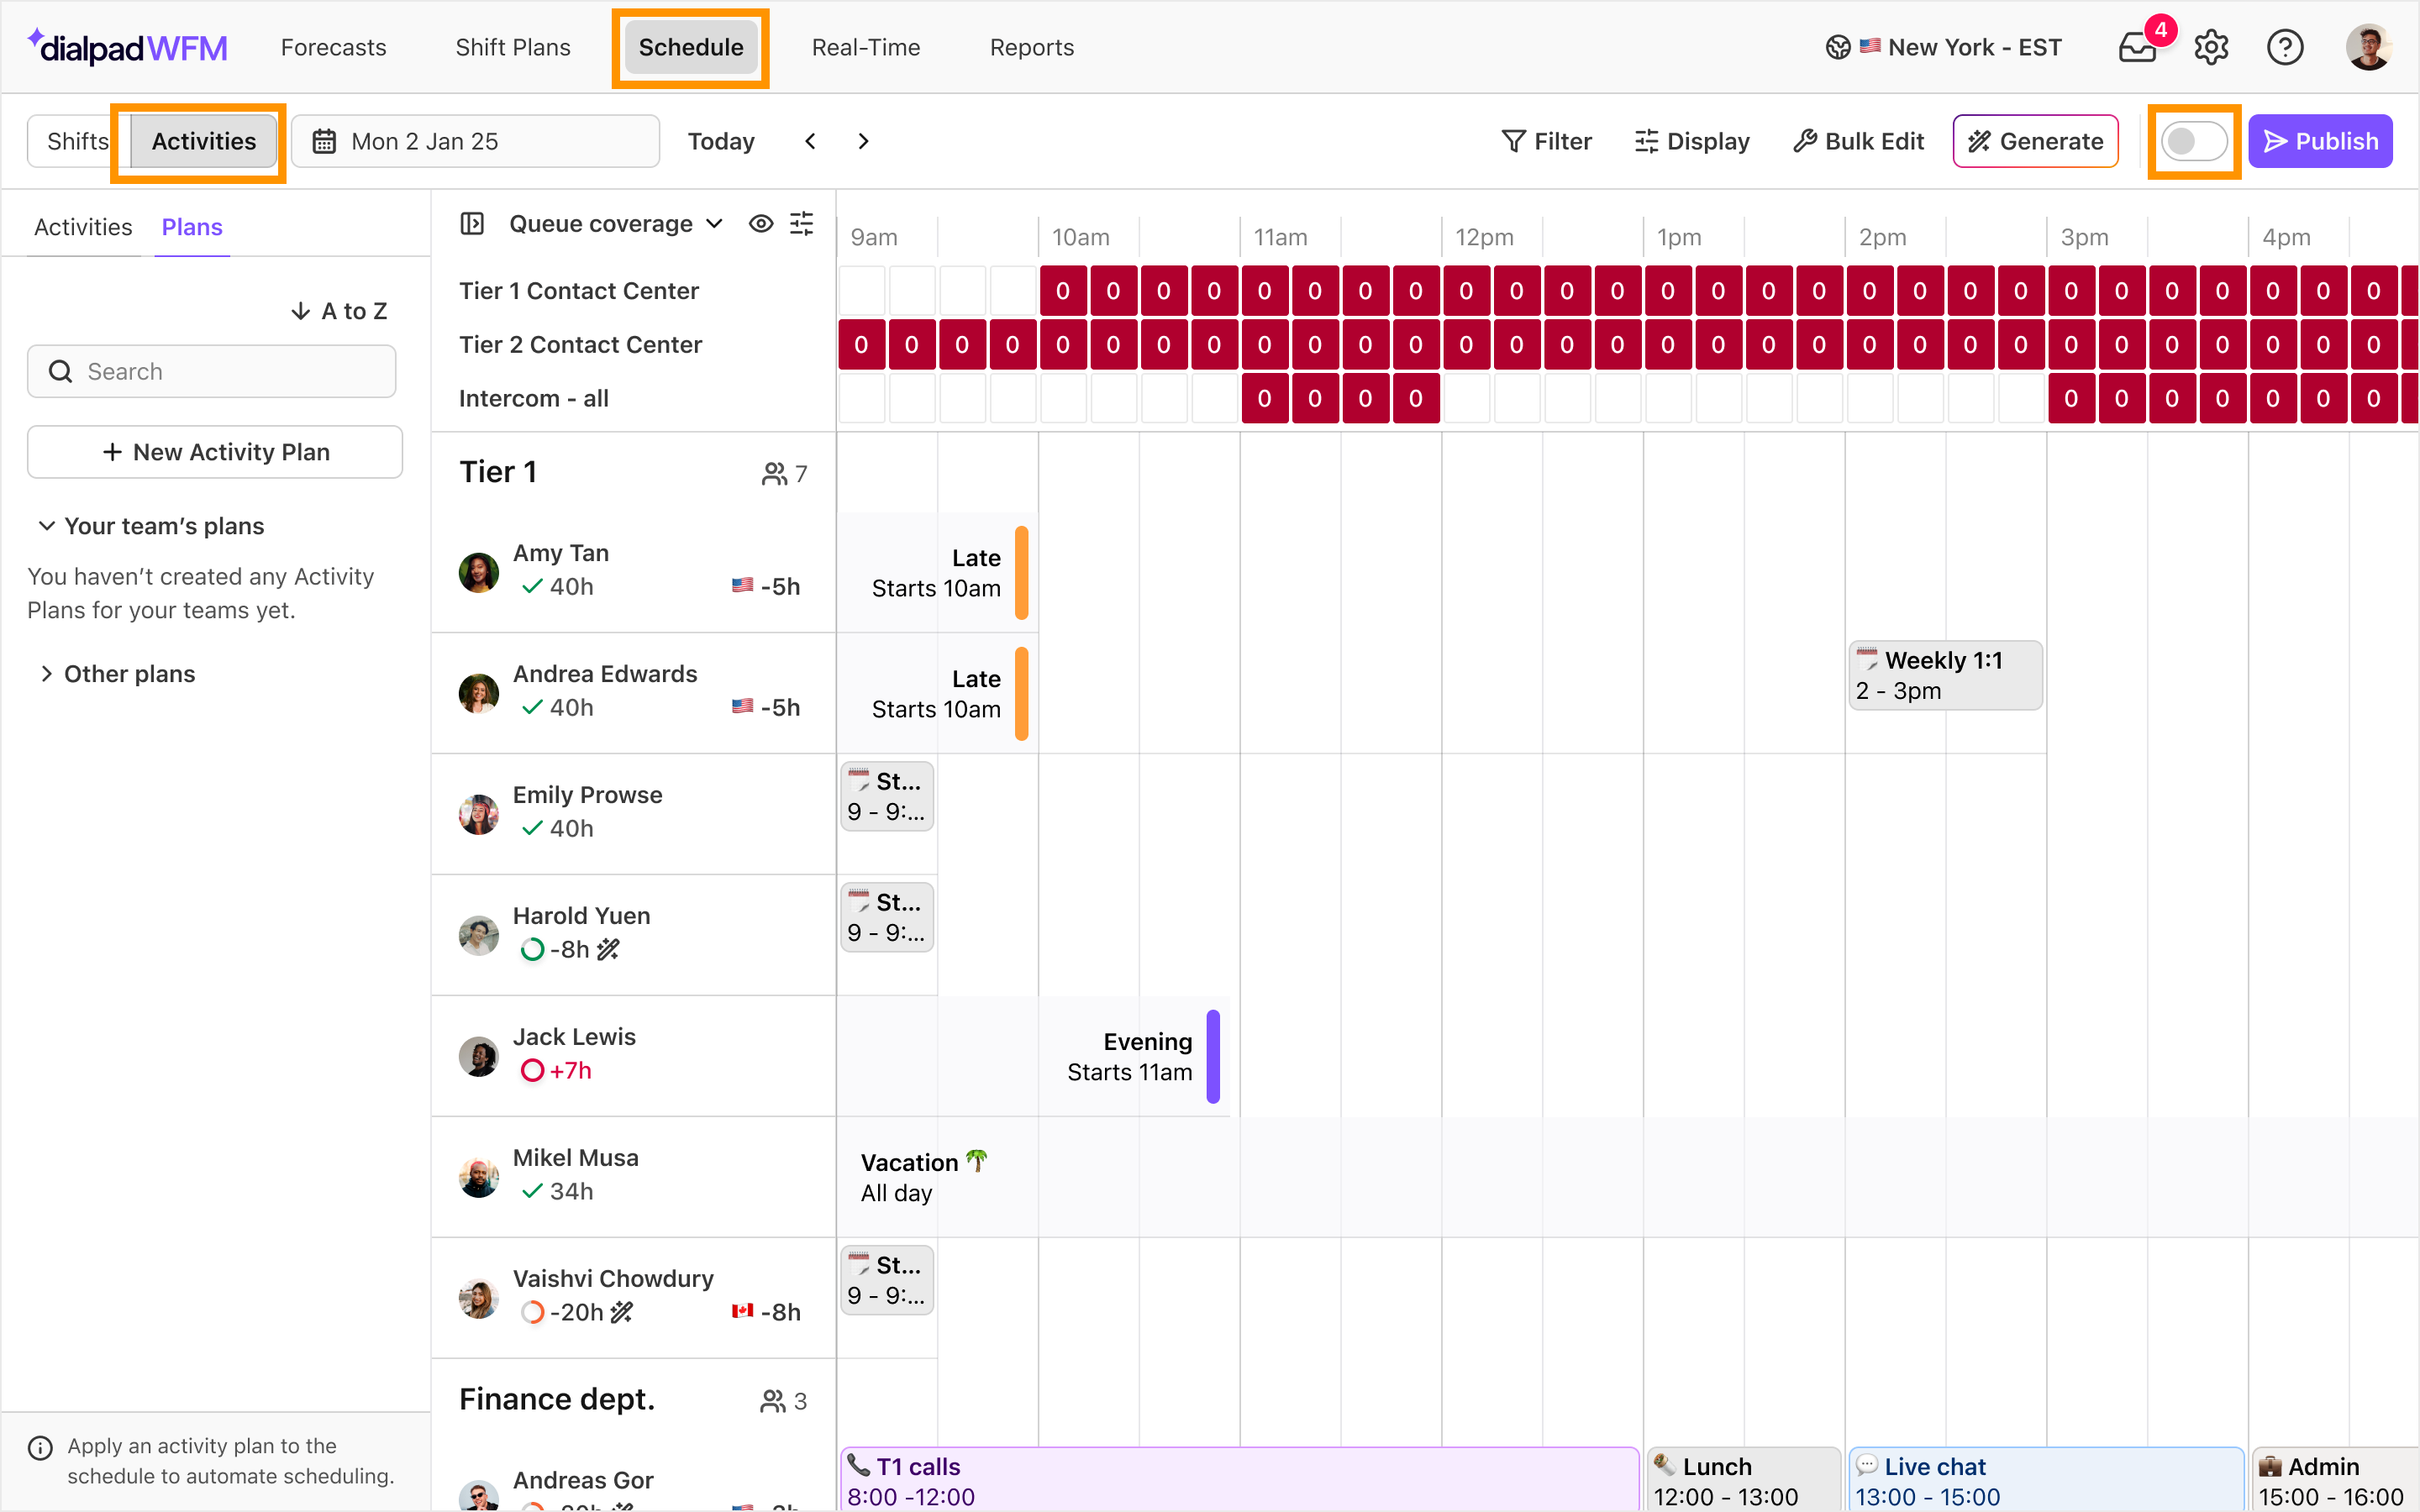
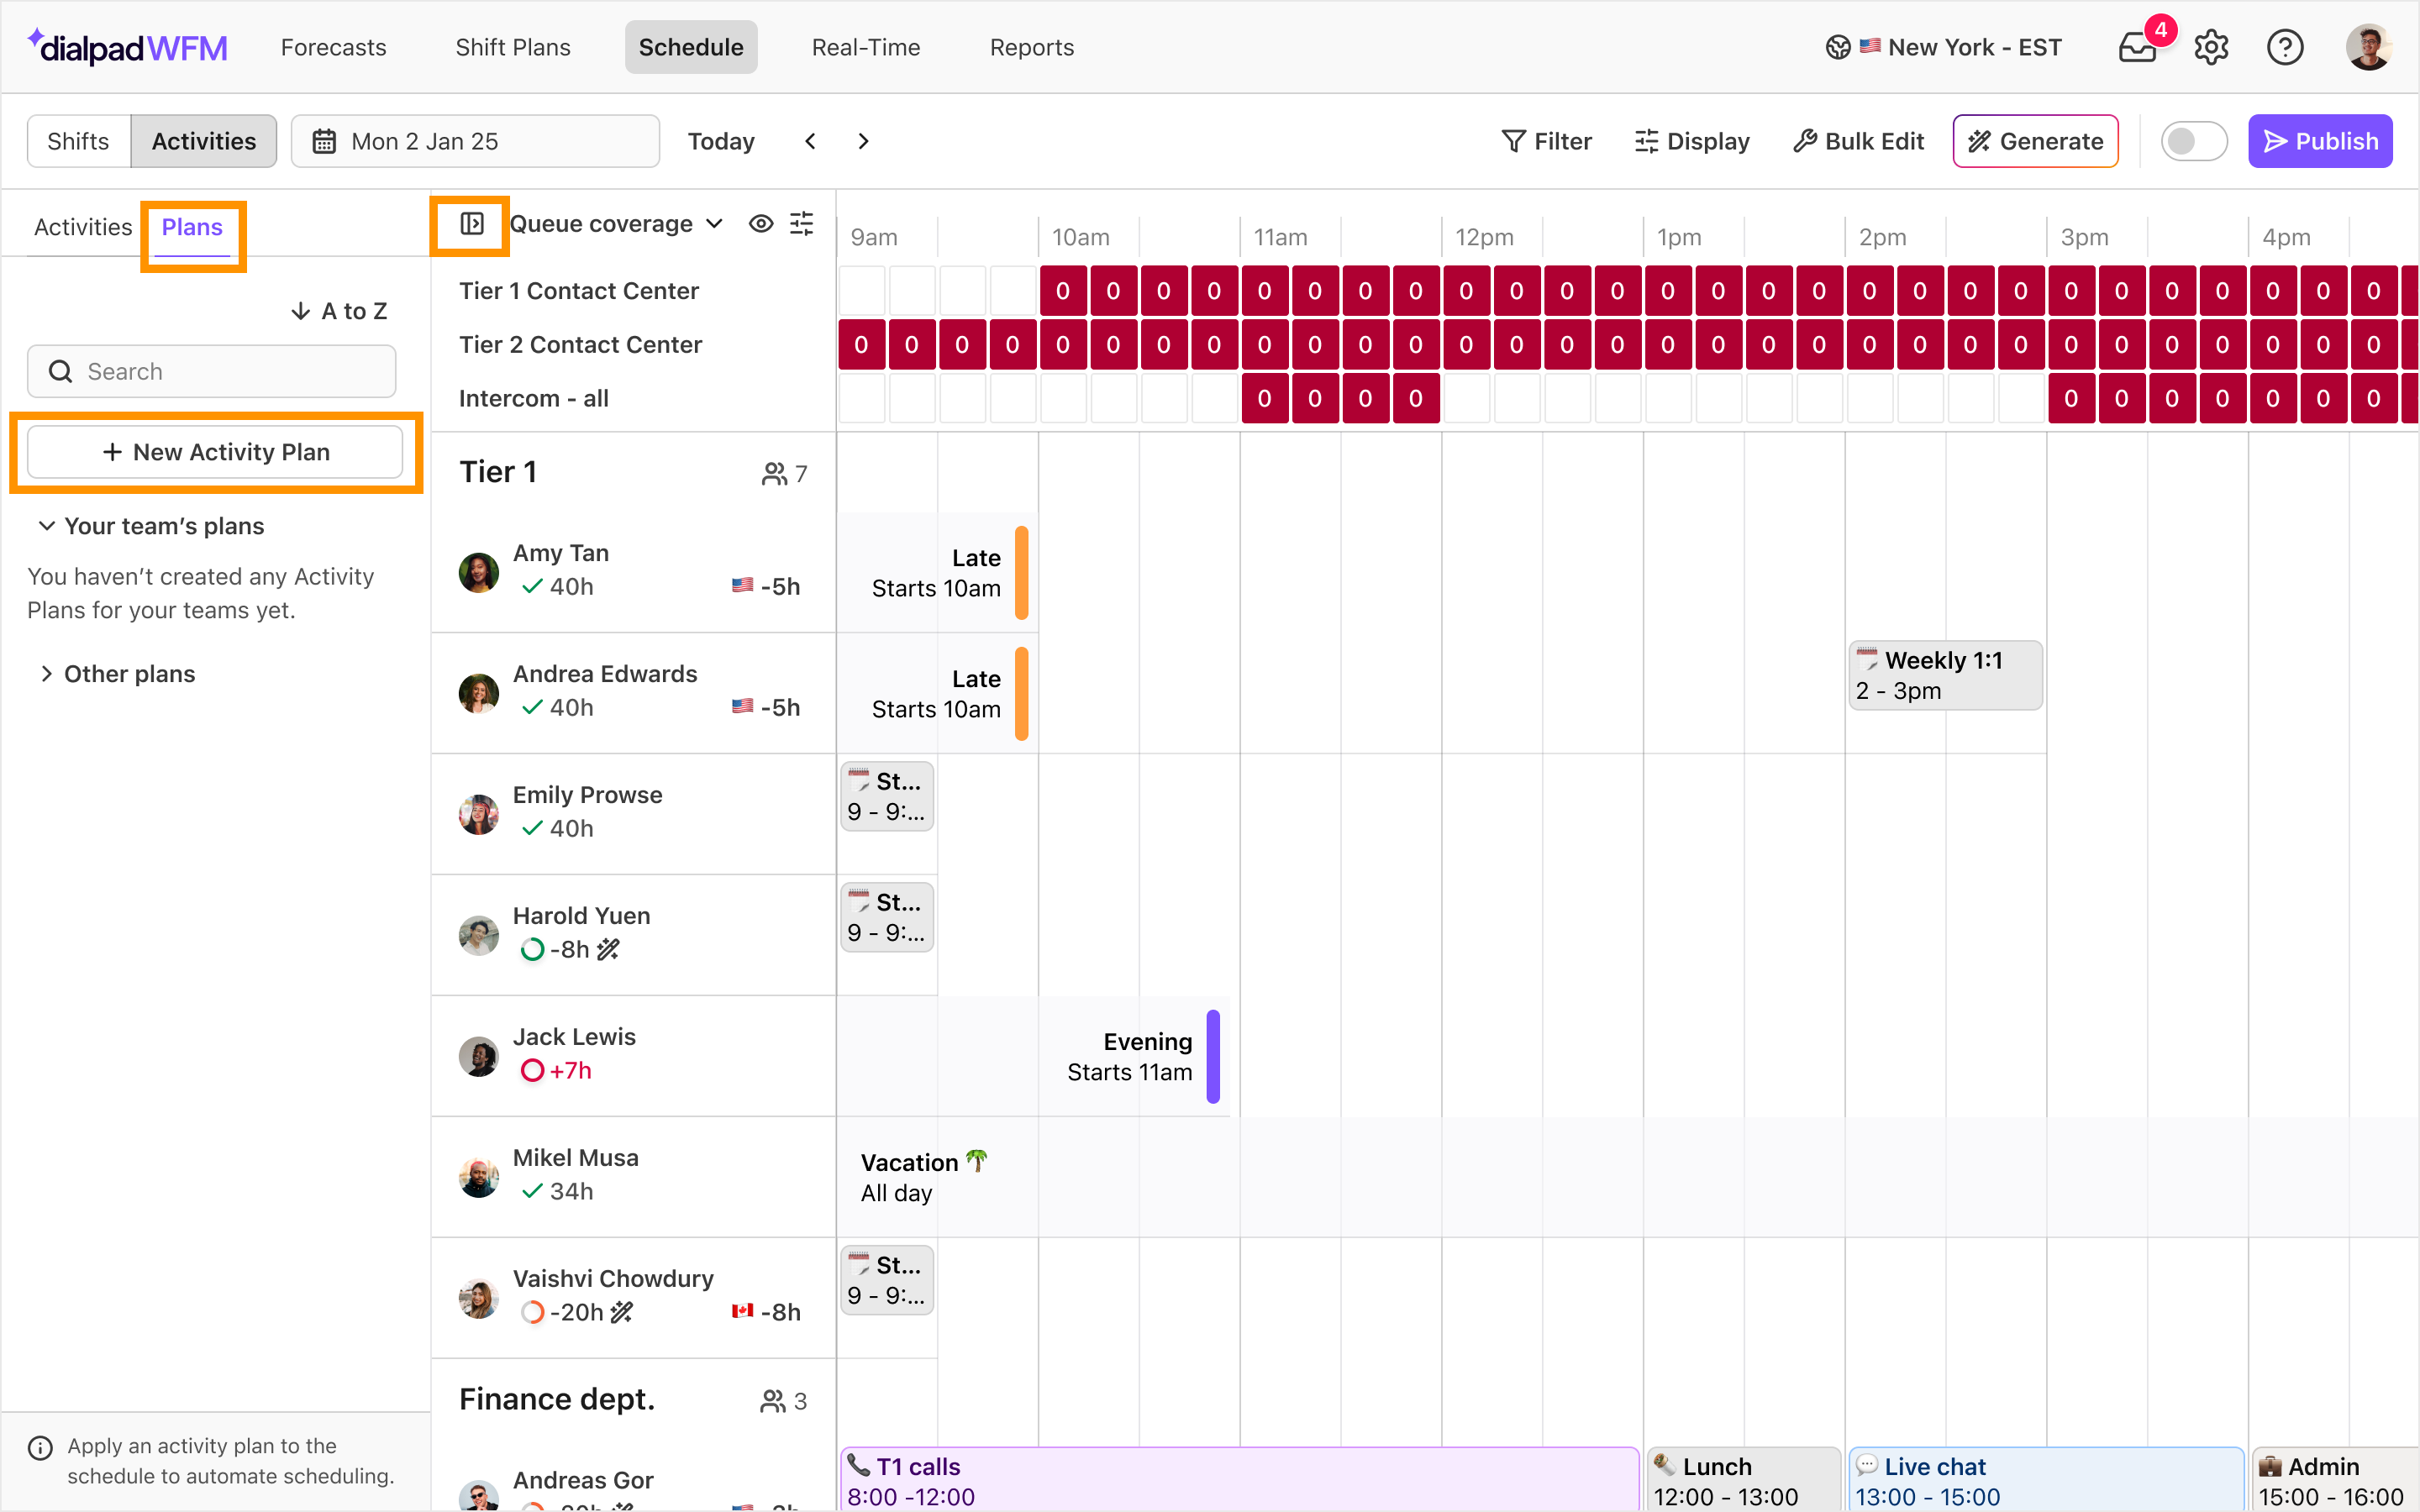
Select the toolbar button in the top left of the schedule
Select Plans
Select New Activity Plan
Select the team(s) this Activity Plan is for
.png)
Now, select how to create your plan:
Suggest Plan (recommended): Dialpad WFM will generate rules to best utilize the skills of your team. You can always modify these rules or add additional rules.
Blank Plan: Start from scratch.
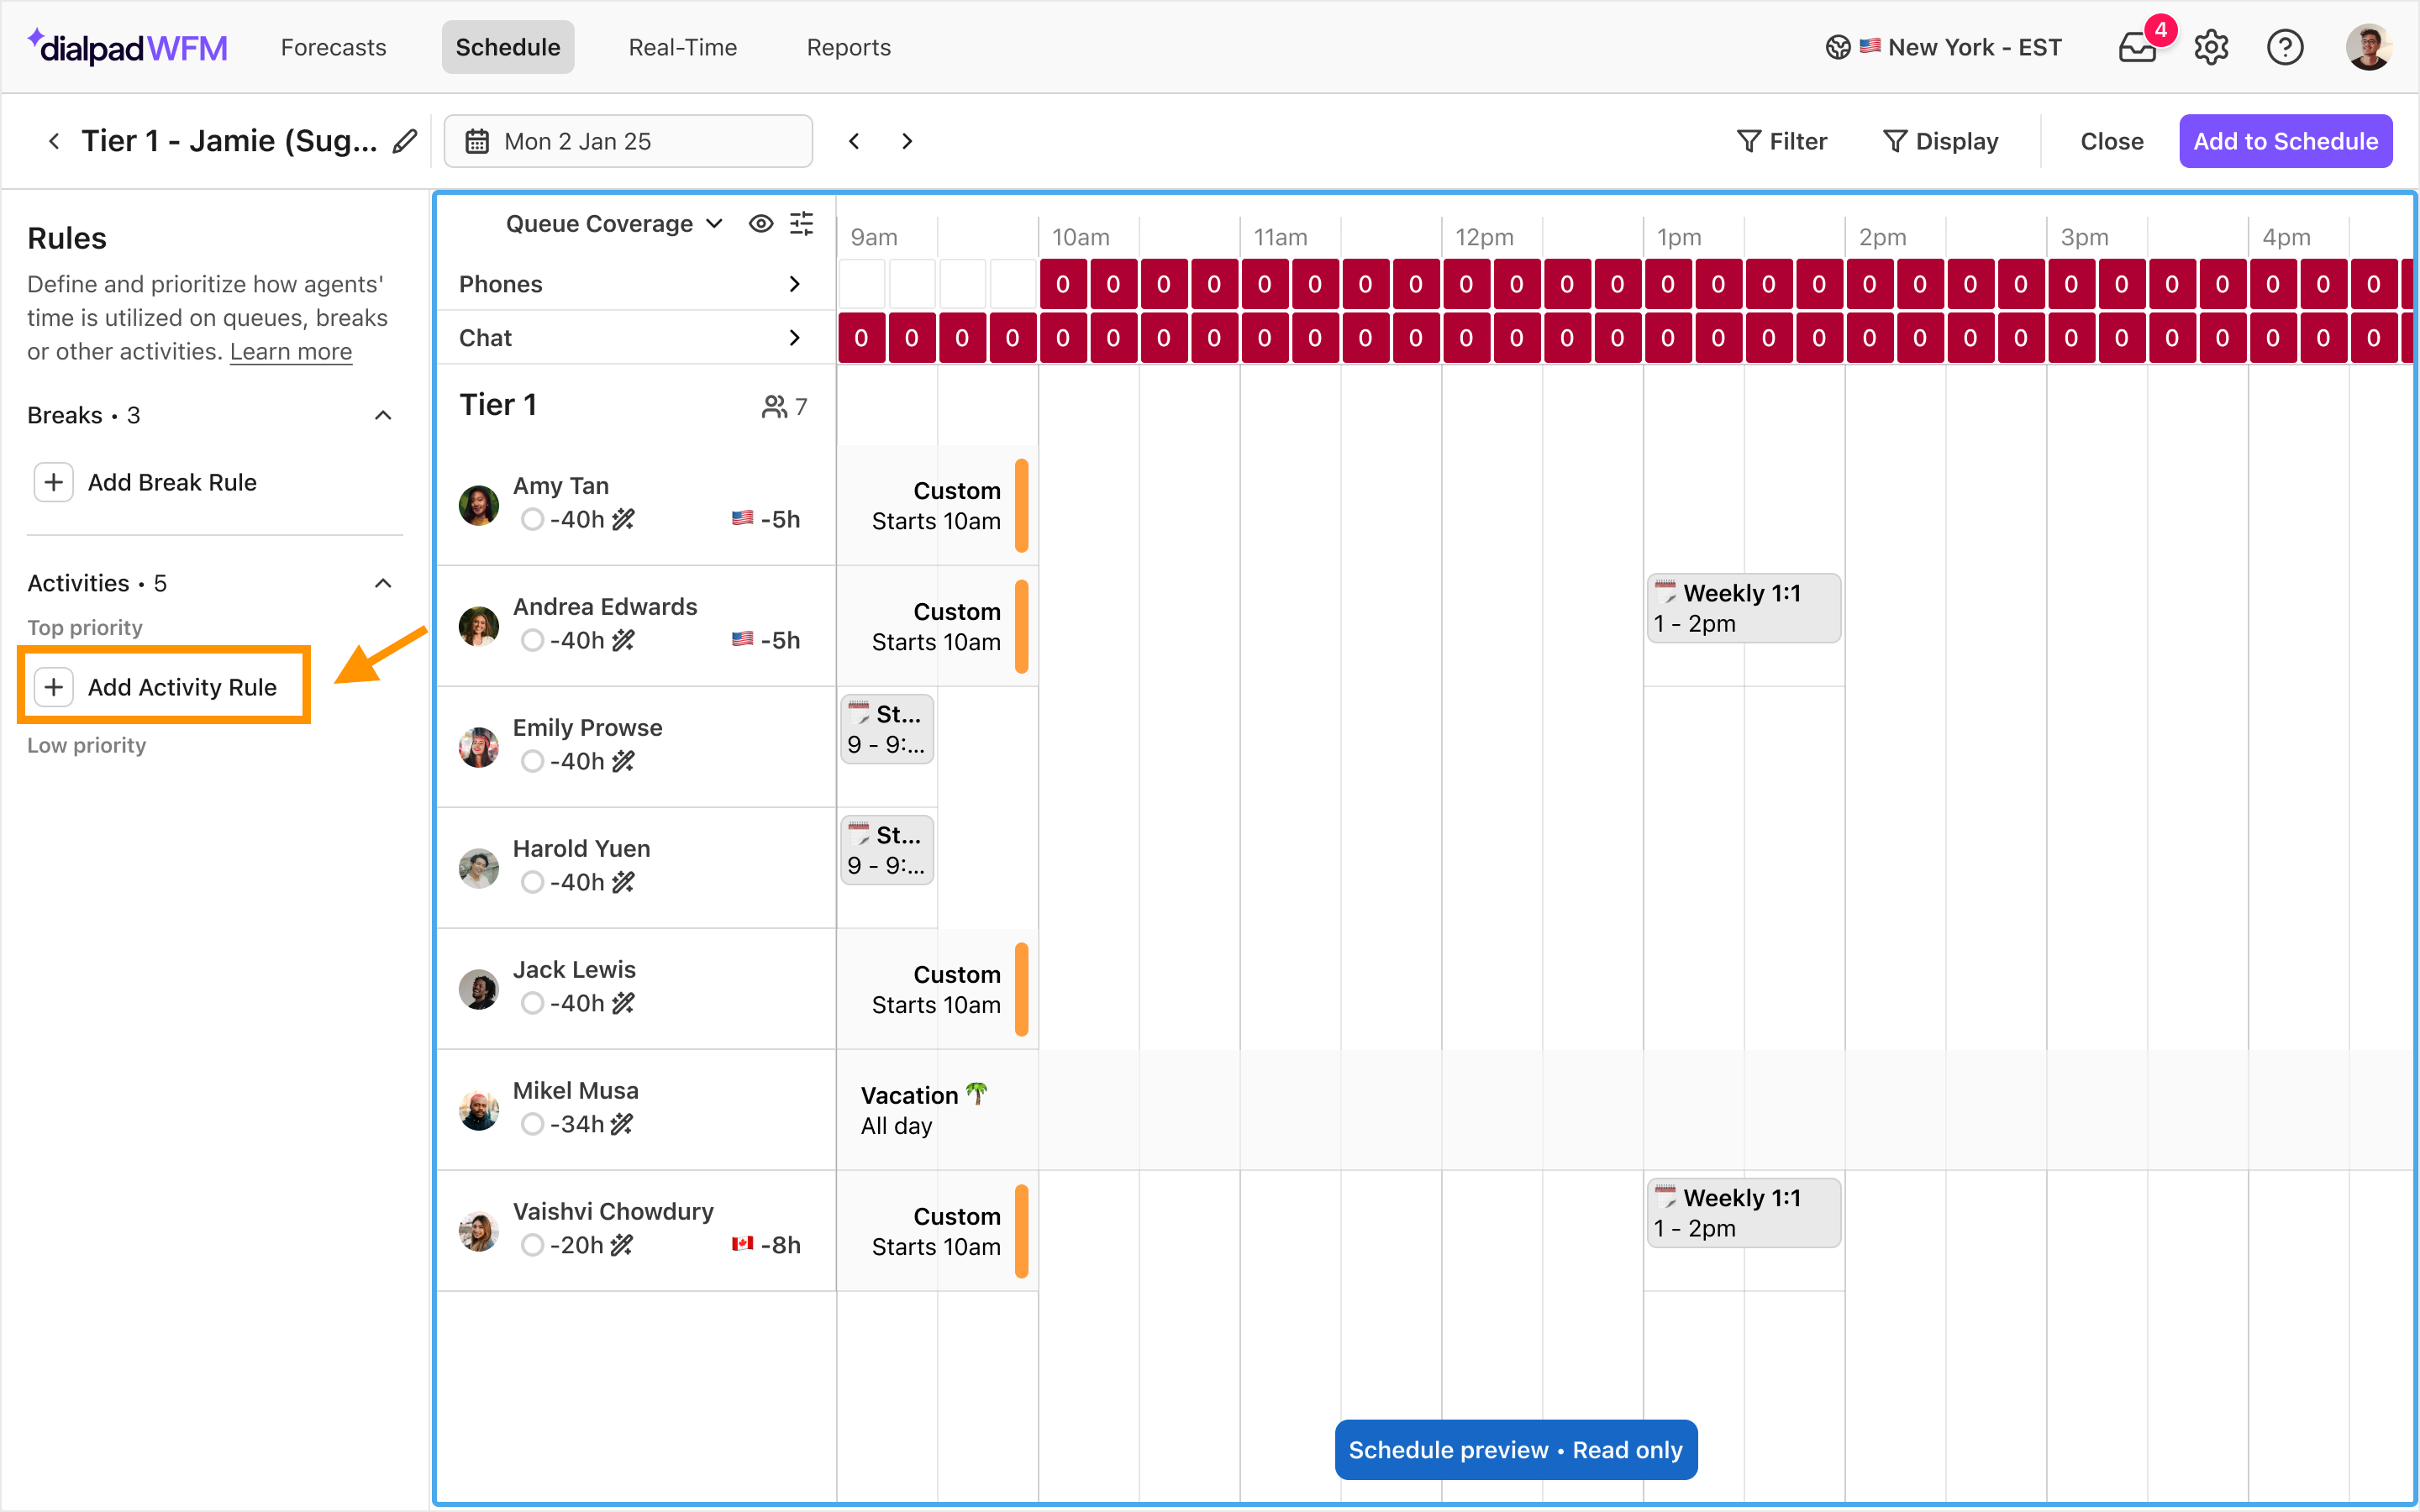
Get to know the Activity Plan builder
When you open up an Activity Plan, you will enter the Activity Plan builder. This allows you to create or modify rules and view a preview of how the Activity Plan will be scheduled once added to the schedule.
The rule panel is where you can create, view and manage your rules. Rules are grouped by breaks and activities, making it easy to navigate.
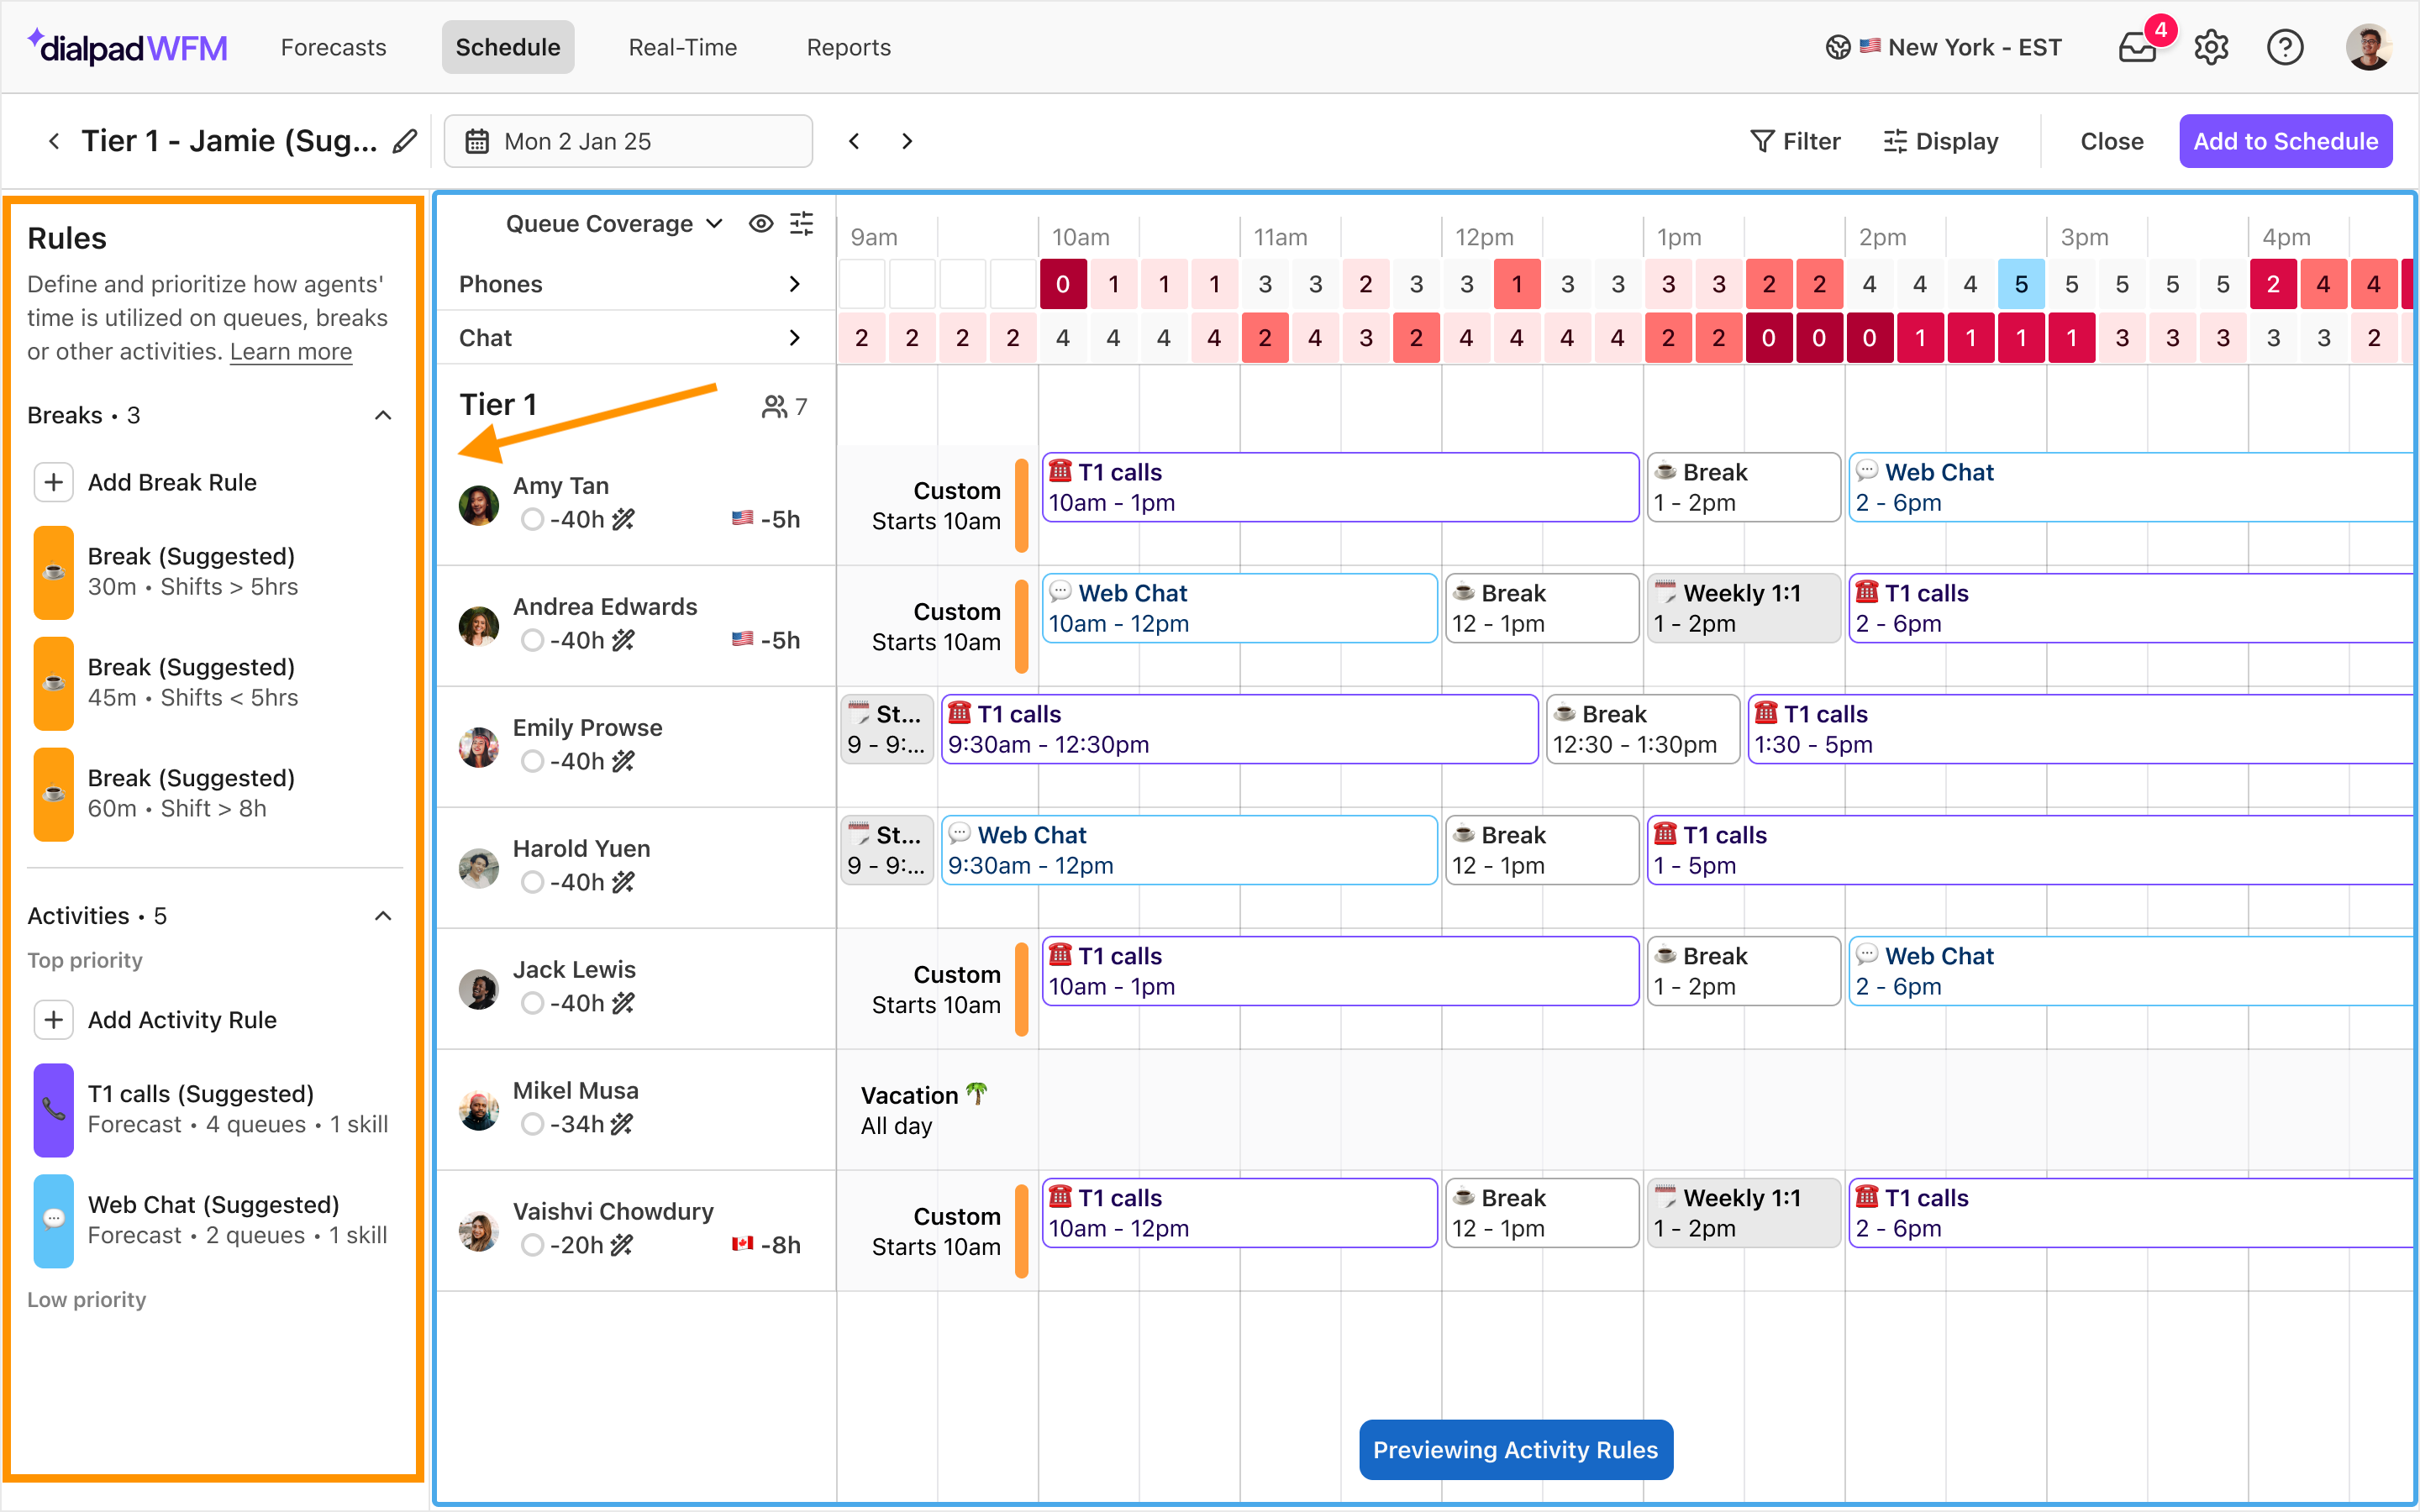
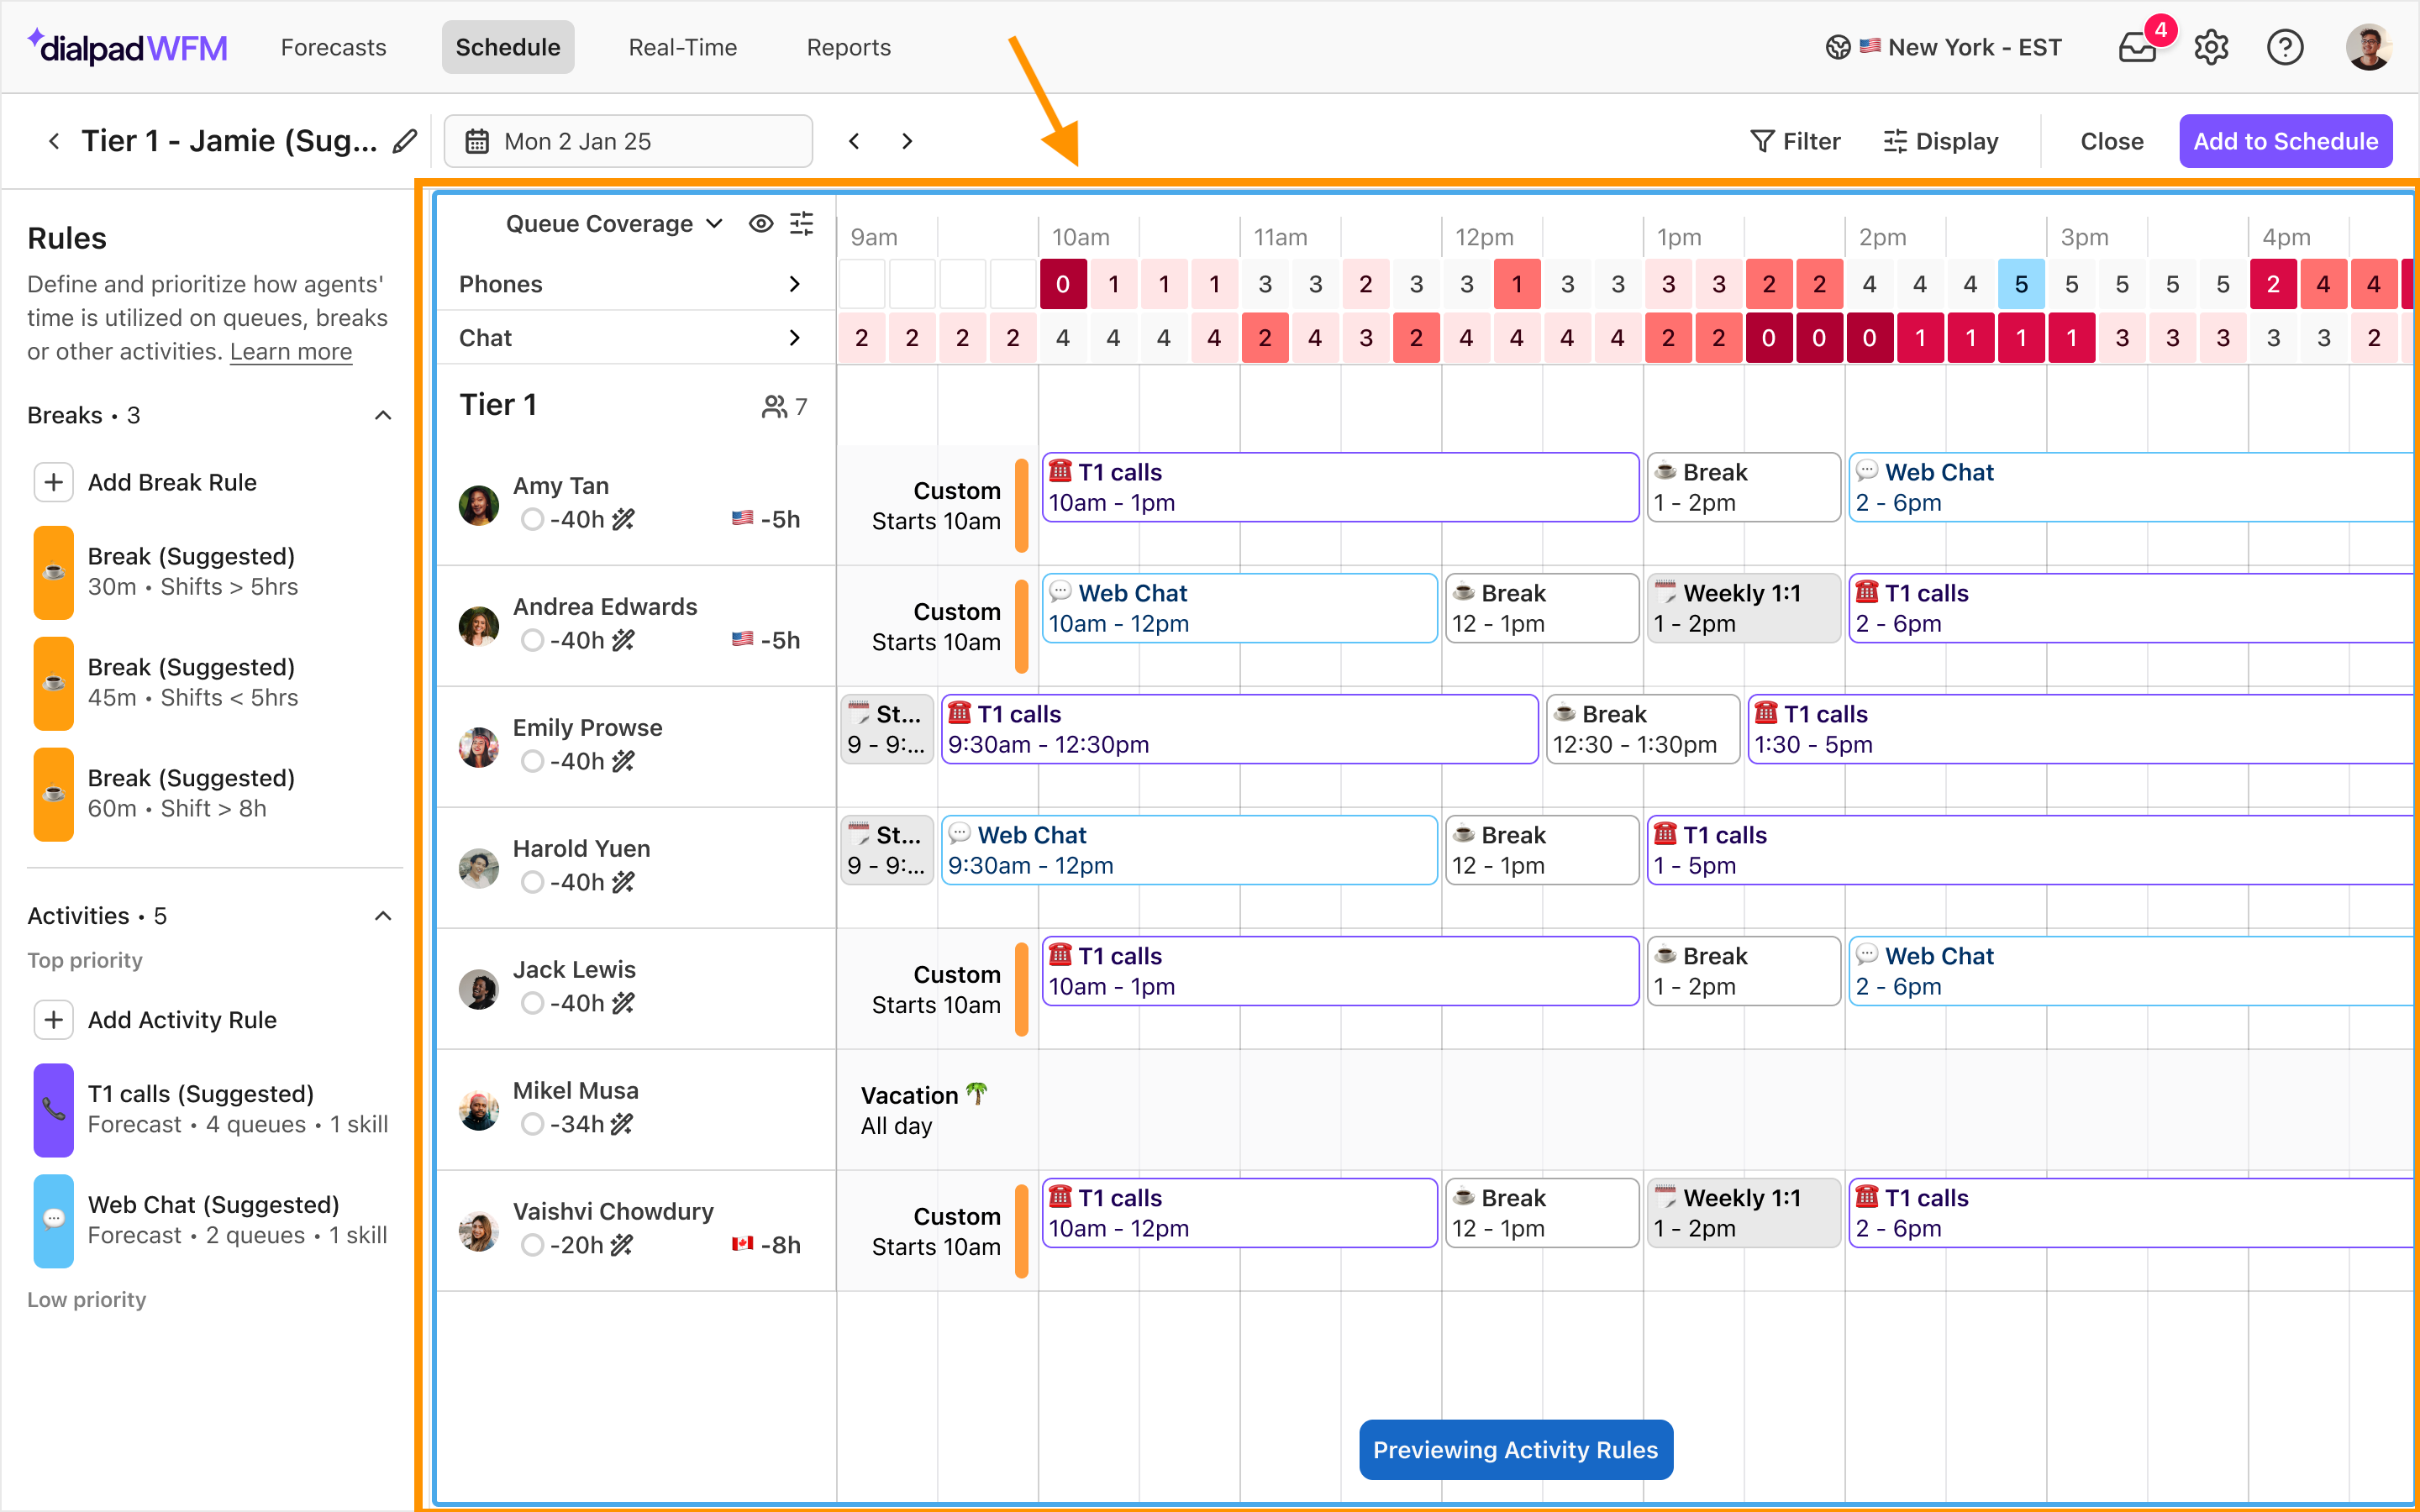
On the right, you will see a read-only preview of the activity schedule for the selected date. Every time you create or modify a rule, the preview will update, giving you instant feedback. You can’t make manual edits here, but you are able to once the Activity Plan is added to the schedule later.
You can change the date you are previewing by using the date picker or left and right arrows.
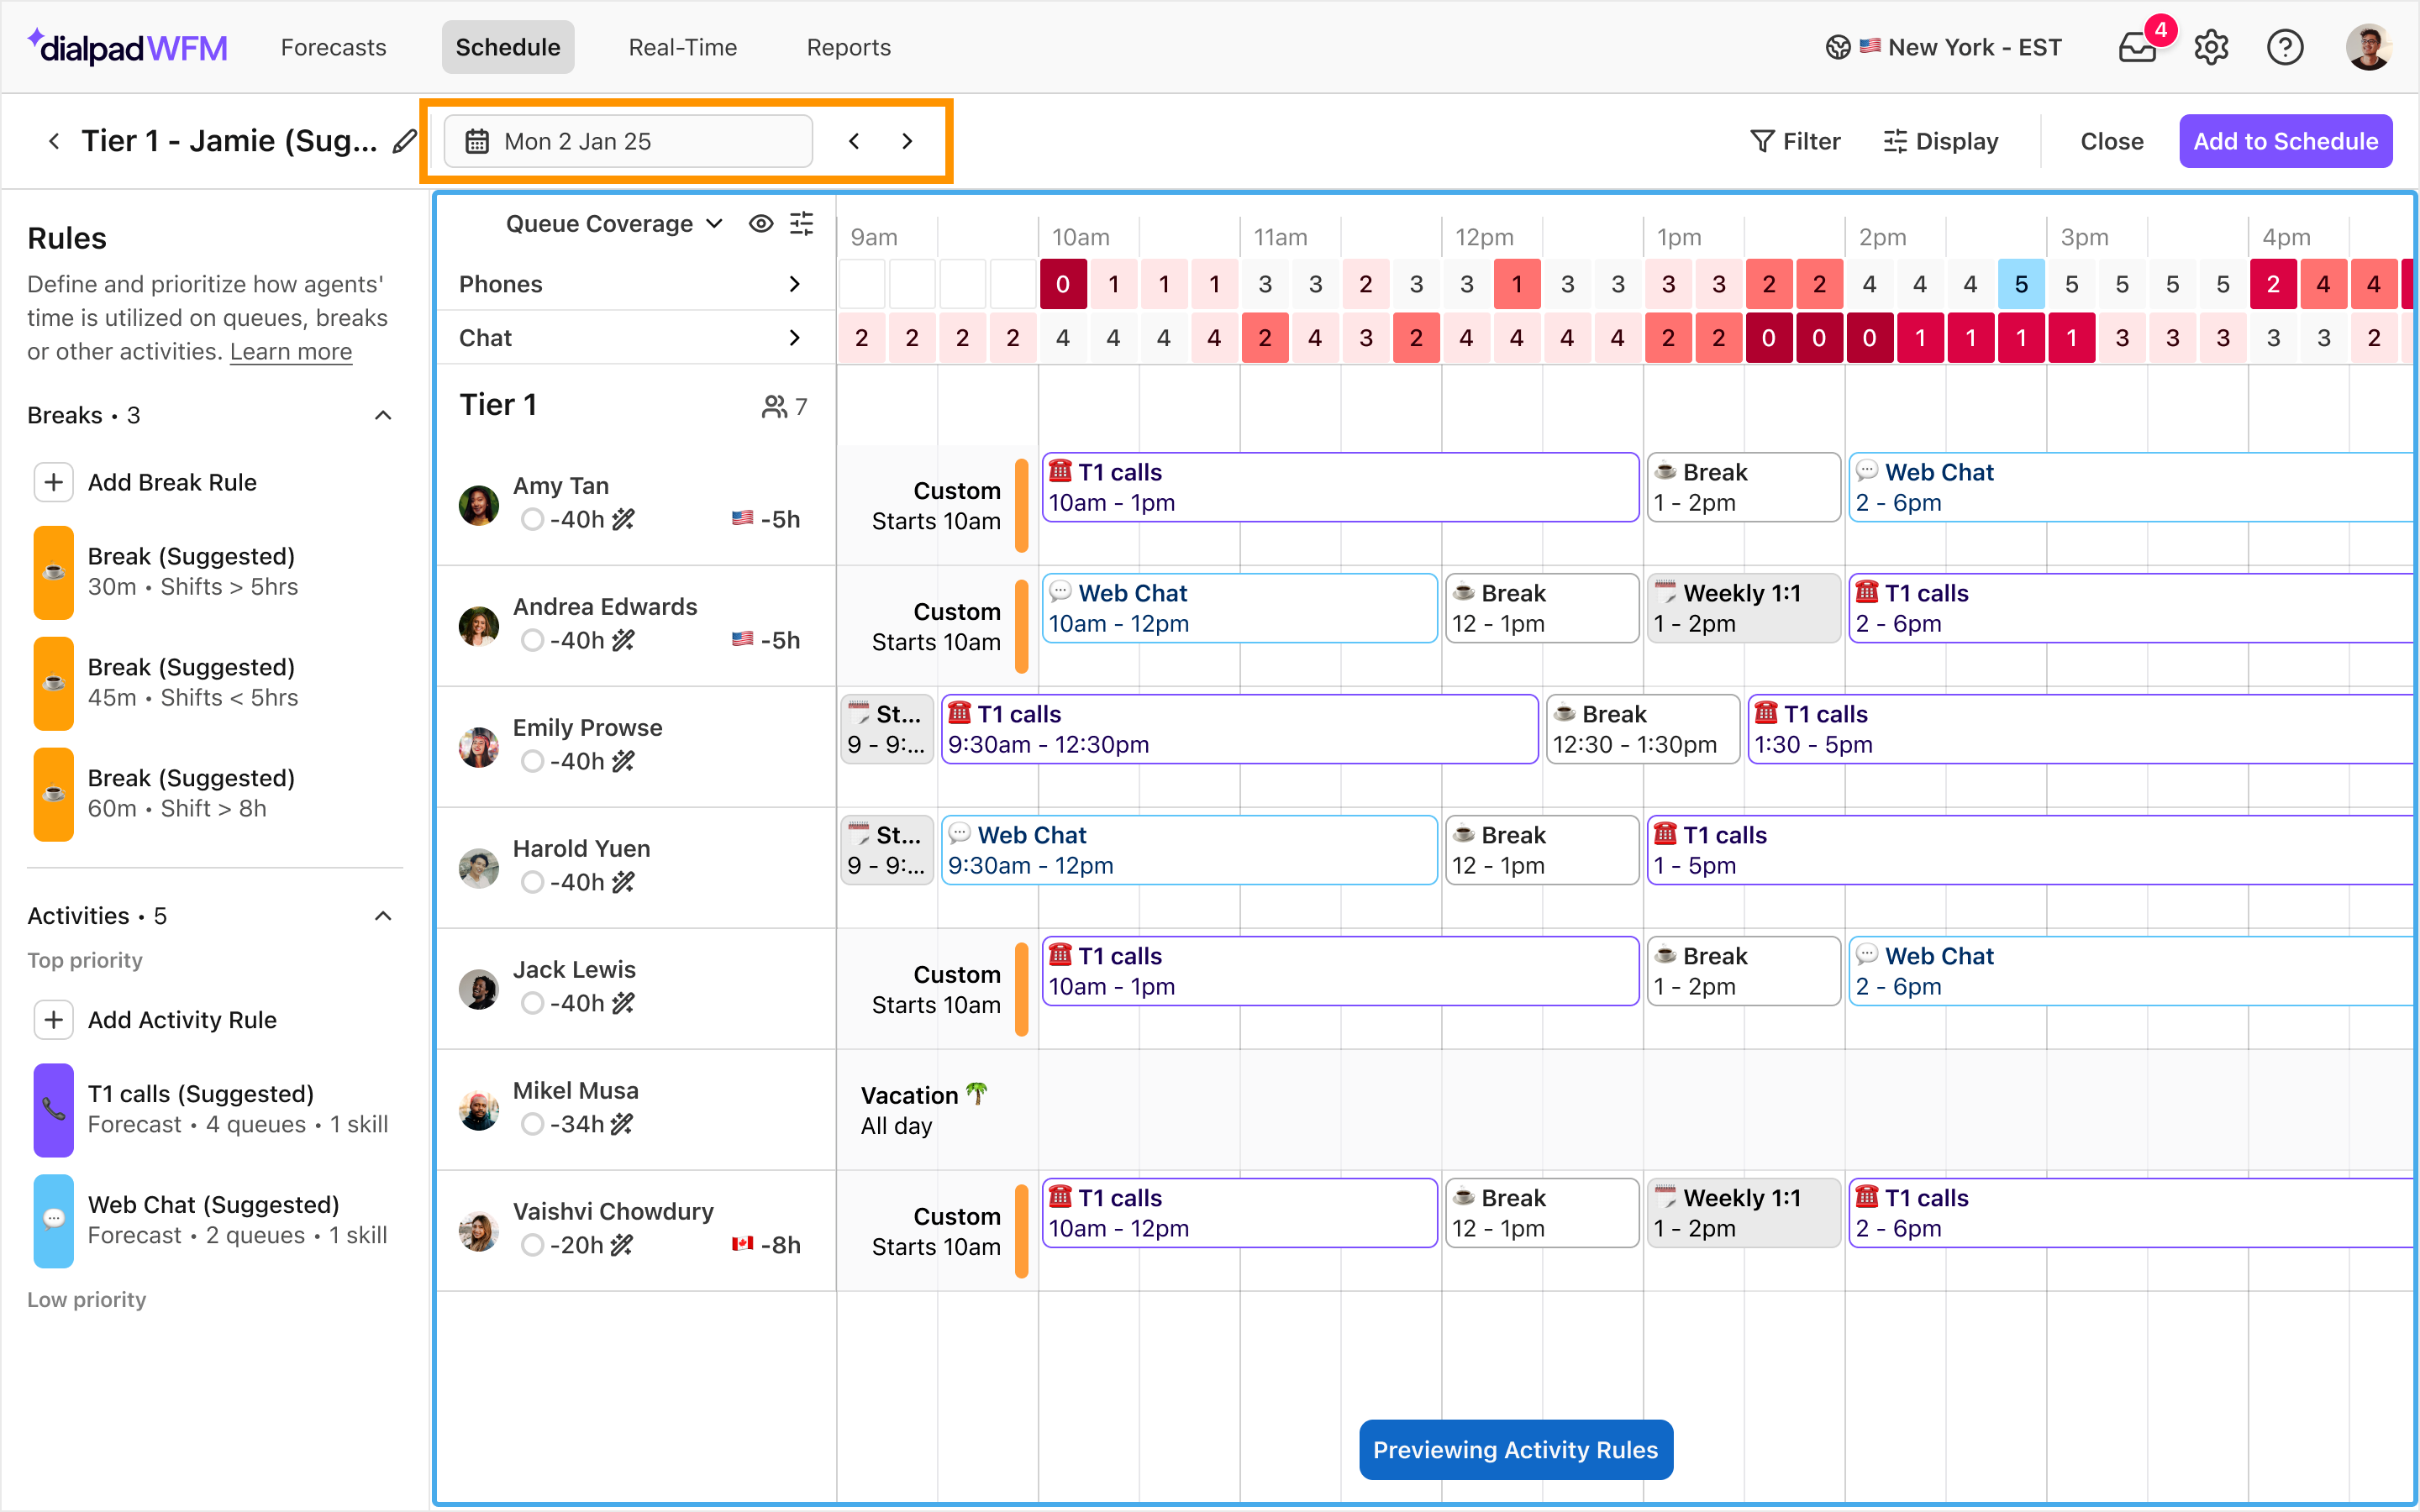
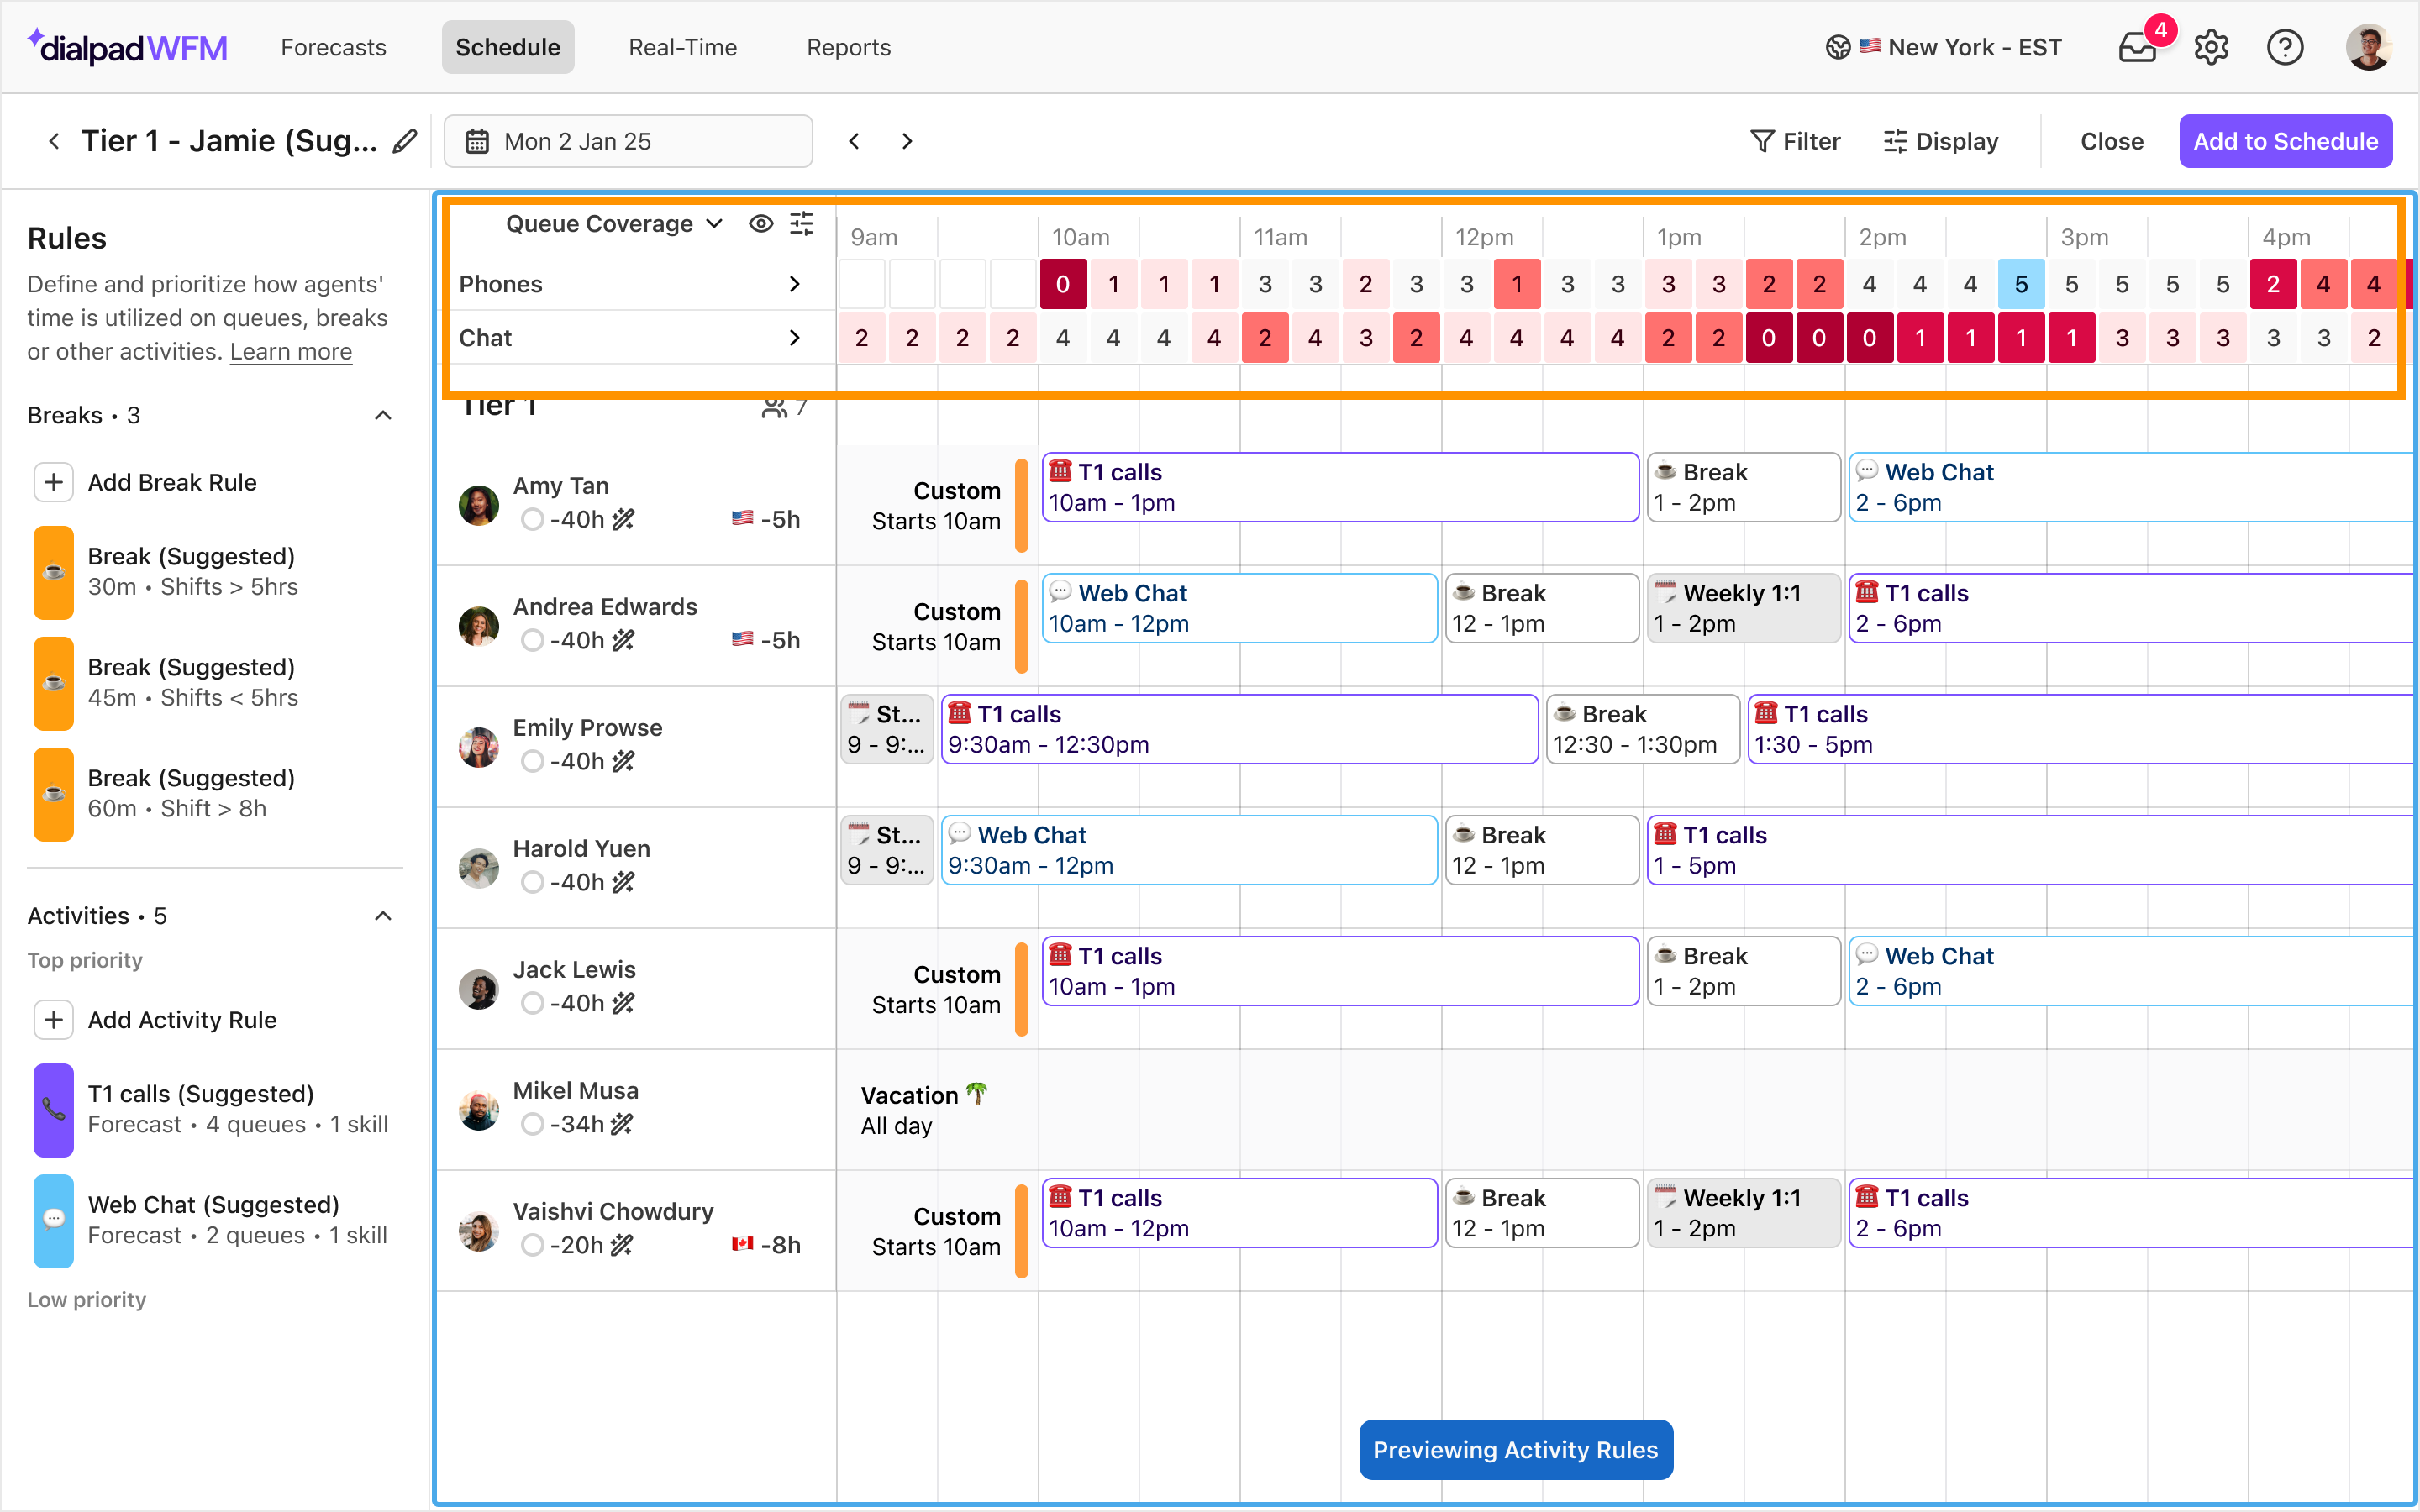
The coverage bar shows you the coverage you can achieve with the rules you have created. You can switch between queue coverage (best suited for follow forecast rules) and Activity Plan coverage (best suited for fixed staffing rules) by clicking the label in the coverage control bar.
Don’t see anything?
You need to have scheduled shifts to view a preview of how the Activity Plan would populate those shifts. If you don’t see anything, head back to the schedule and generate a schedule, then return to your plan.
Add or edit break rules
Break rules allow you to define the different breaks your team needs each day.
It’s likely that your team may require multiple breaks in a day, like a coffee break and meal break, and that different agents may require different breaks too, for personal preferences or shift length. You can easily configure these requirements using break rules.
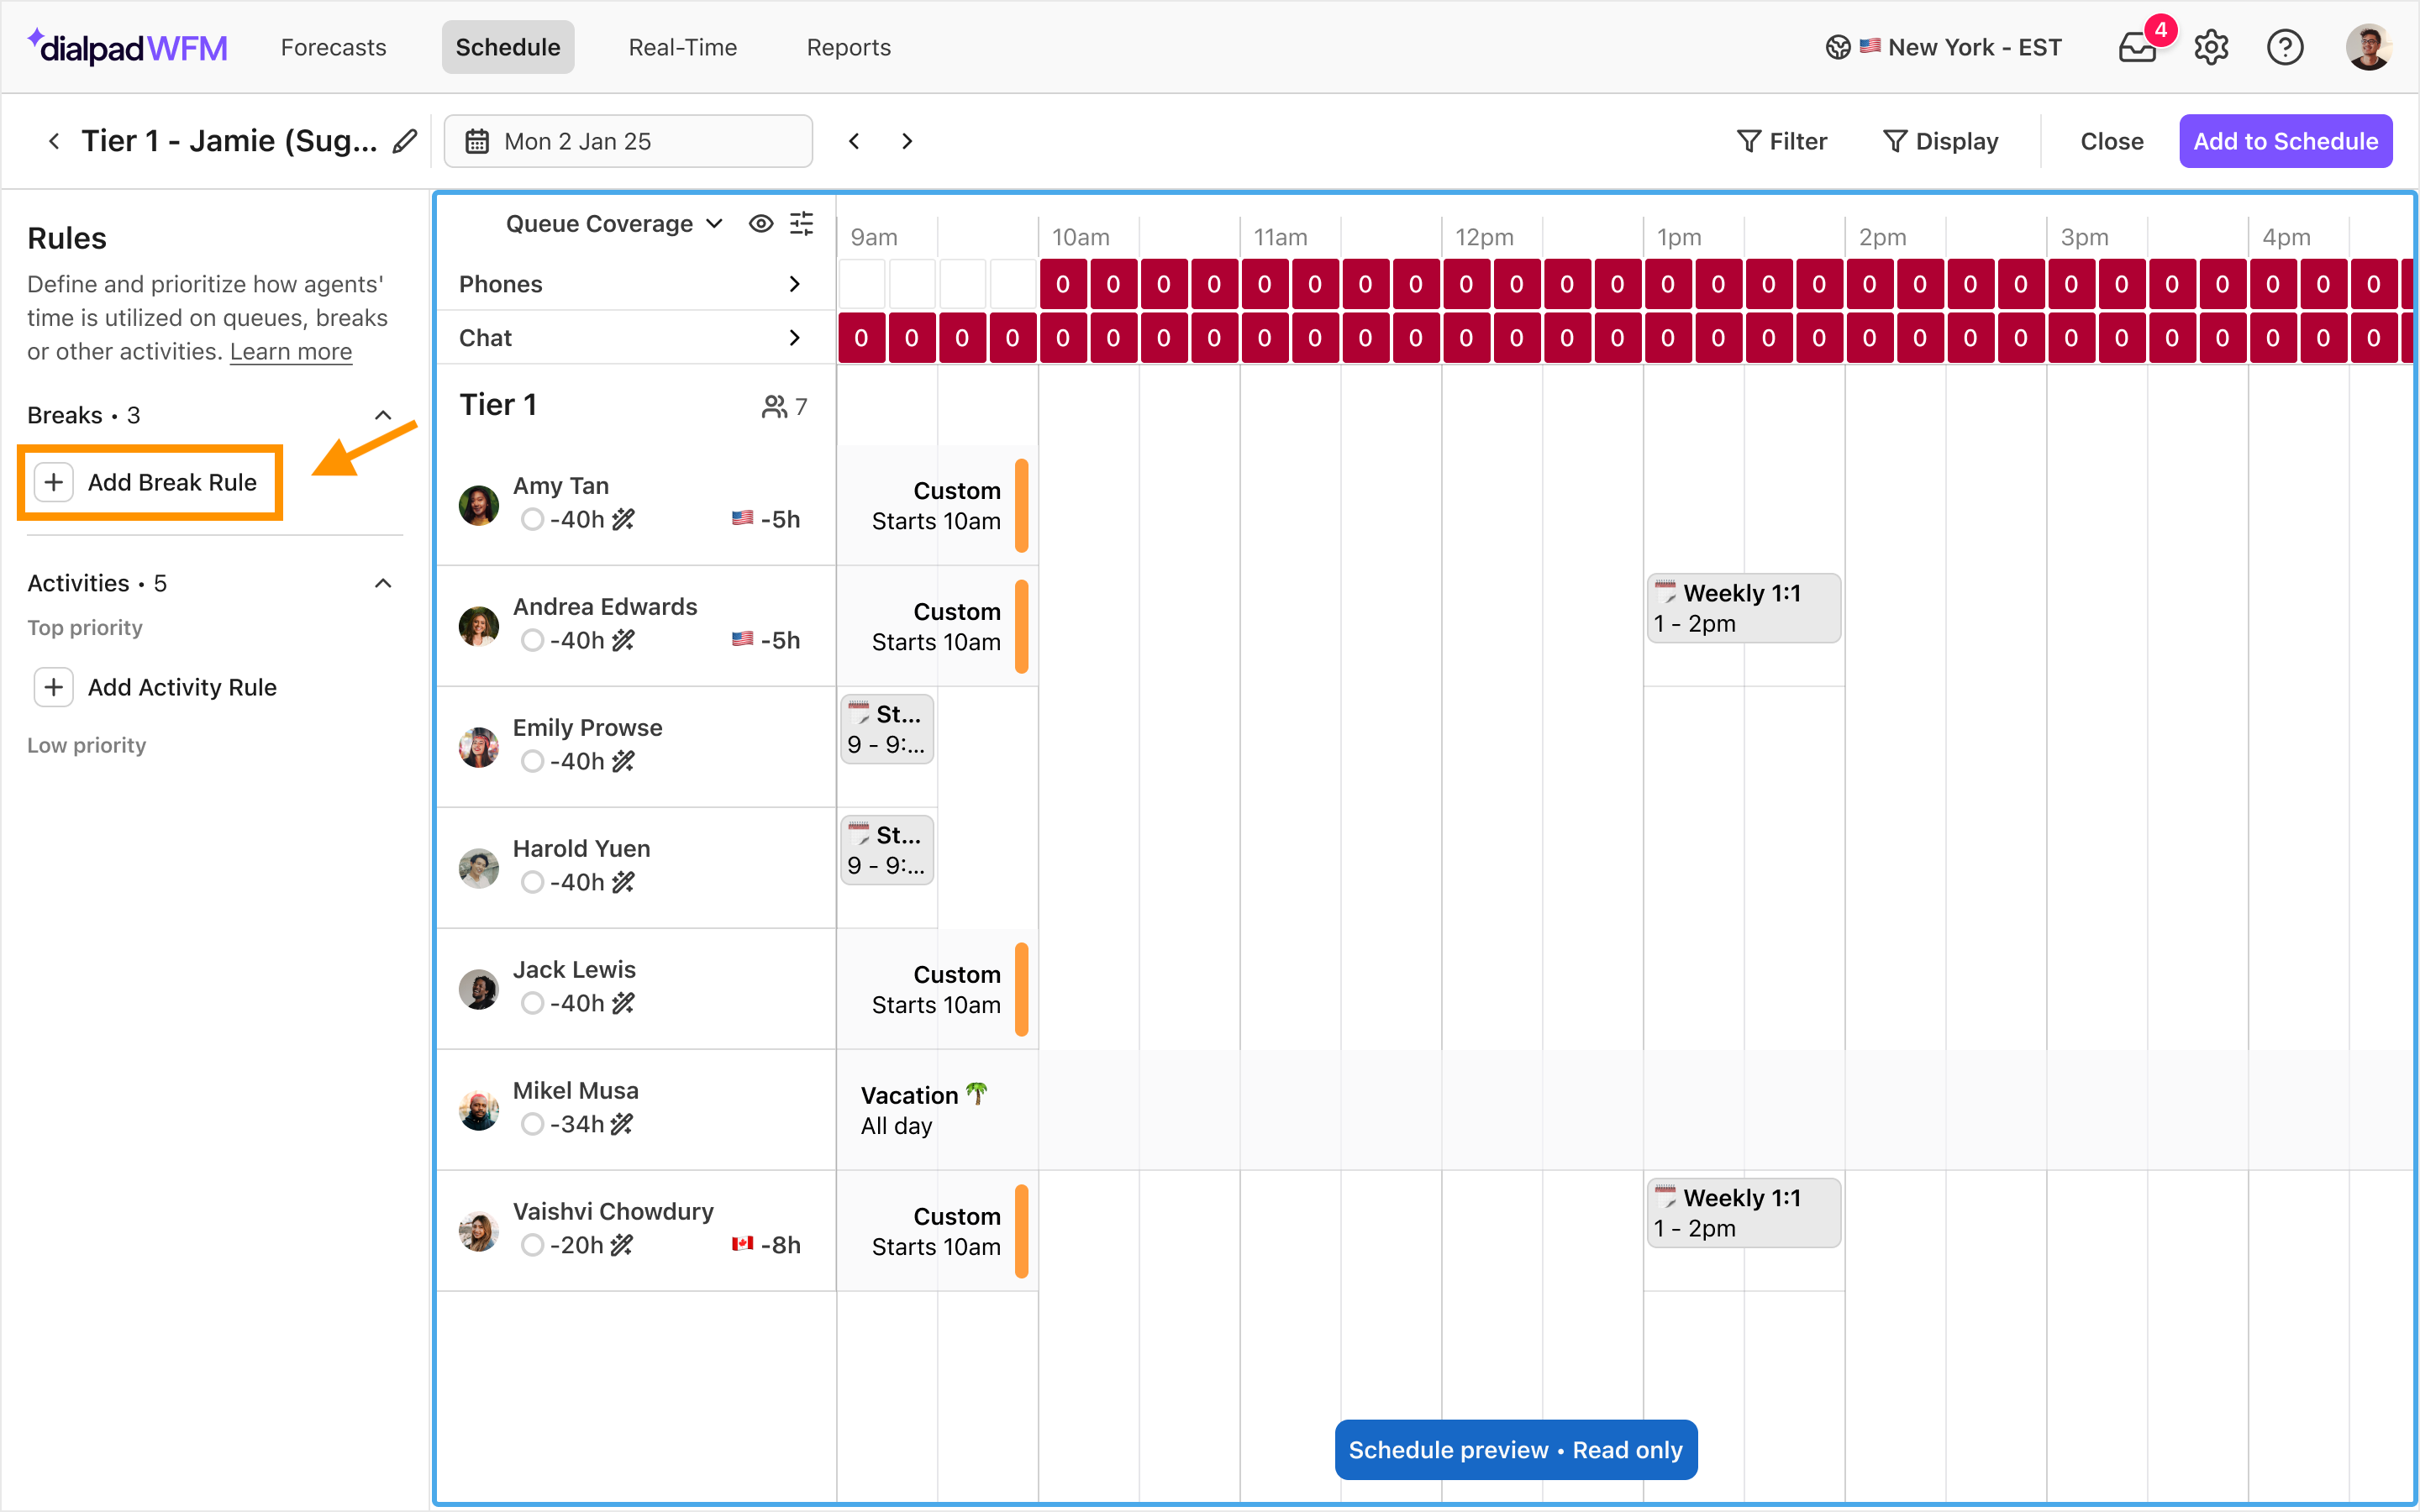
Head to the rule panel to create rules:
Select Add Break Rule
Select the type of break you want to schedule, or click the + button to create a new one.
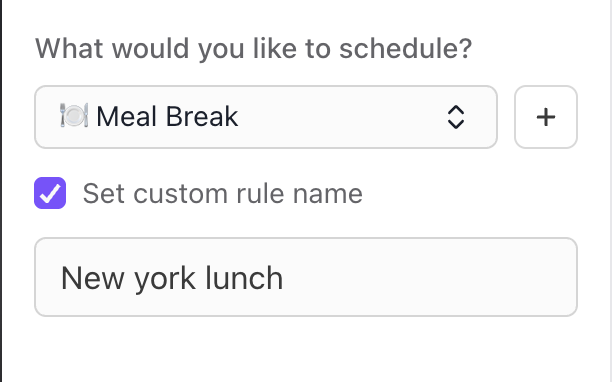
If you’re creating multiple break rules, you can check “Set custom rule name” to give the rule an additional label, e.g. “New York Lunch”
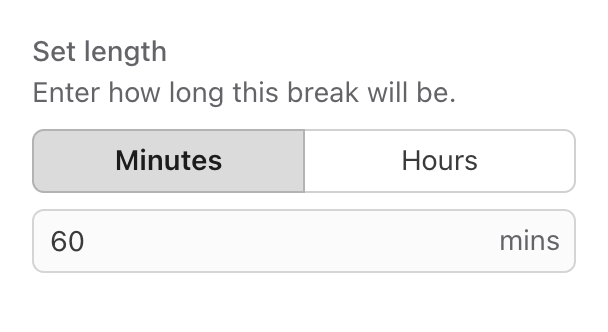
Enter how long the break should be in minutes or hours.
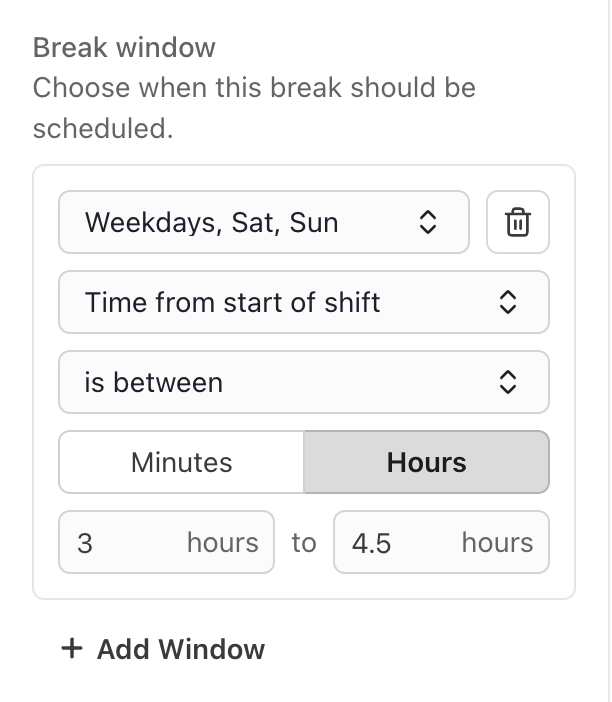
Set a window for the break to be scheduled within. We recommend using '“time from start/end of shift” for most flexibility.
At end of shift: The break will be the last activity scheduled in each agent’s shift.
At start of shift: The break will be the first activity scheduled in each agent’s shift.
Time from end of shift: Select a range of time anchored to the end of the agent’s shift, e.g. 2 - 3h from the end of shift.
Time from start of shift: Select a range of time anchored to the start of the agent’s shift, e.g. 1.5 - 2h from the start of shift.
You can create additional windows if breaks should be scheduled at different times on different days.
Choose how much to stagger the start times of breaks
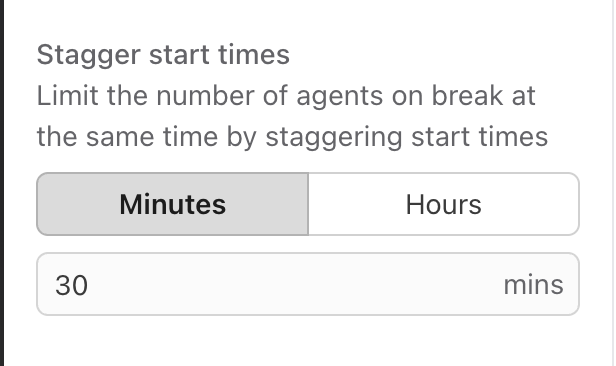
This determines the amount of time between the start of each agent’s break so that all your agents aren’t on break at the same time.
If you do not want to stagger breaks, set the time to 0.
Filter the agents this break should be assigned to (optional)
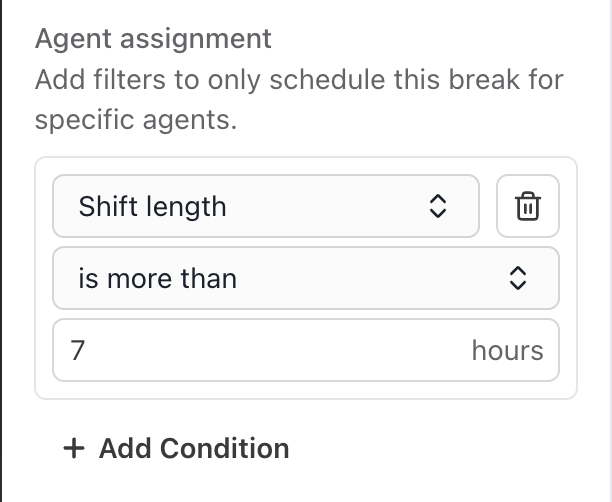
If no filters are applied, the break will be scheduled for all agents within this plan.
Use conditions to select or exempt specific agents and/or teams. You can filter by agent/team name, skill, shift length and more.
Select Save rule
Your rule will now be created and displayed in the list of break rules. Select the rule at any time to edit it.
Select Add Break Rule to create another break rule.
Tip
You can duplicate rules to make it faster to set-up similar requirements.
Hover over the right side of a rule, select the three dot menu … and select duplicate.
Add or edit activity rules
Activity Rules allow you to set different requirements and goals for different types of work.
For many teams, agent’s time isn’t spent solely on customer-facing channels, you also need to make time for other responsibilities like admin, projects and training. Activity rules allow you to configure these requirements and prioritize tasks to best utilize agent’s time.
Dialpad WFM offers four types of Activity Rules to account for different use-cases:
Follow forecast: Schedules activities according to the forecasted demand within Business Hours.
This ensures you have the right level of coverage to serve your customers and meet your SLAs.
Fixed staffing: Manually specify the number of agents needed at certain times.
This is helpful if you have required specific staffing levels for activities that aren't linked directly to queues.
Allocate time: Specifies the amount of time that should be spent on an activity.
You can choose to share this requirement across the team, or set it as an individual target.
Fill unscheduled time: Fills all unscheduled time in an agent's shift.
Helpful to use as a default or fallback activity to fill any available time in an agent’s shift.
Head to the rule panel to create or edit existing rules:
Select Add Activity Rule
Select the type of activity you want to schedule, or click the + button to create a new one.
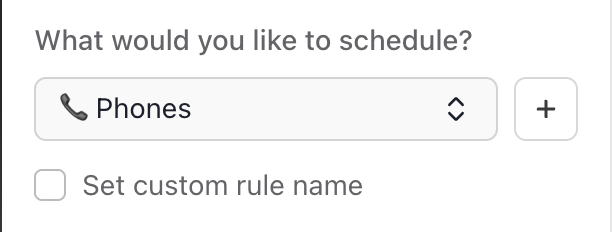
If you’re creating multiple activity rules, you can check “Set custom rule name” to give the rule an additional label, e.g. “New joiner training”
Choose how you’d like to schedule the Activity Rule from the four options.
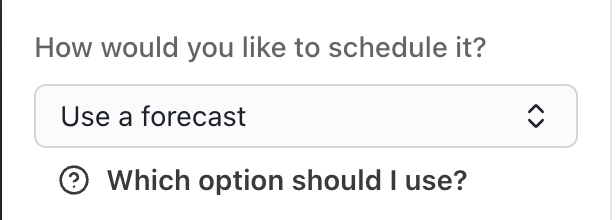
If you select follow forecast:
This rule will schedule coverage according to the forecast of the queues linked to this activity. If you have not yet linked a queue to this activity, select one from the list and click save.
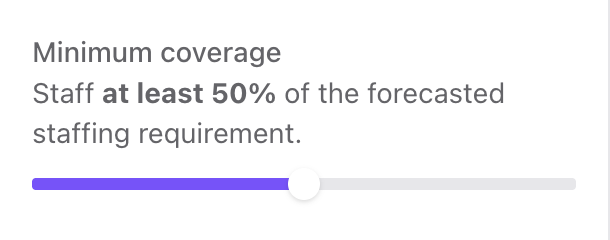
Next, set the minimum coverage you wish to achieve. The rule will aim to meet this minimum at all times, and then provide additional coverage if capacity is available.
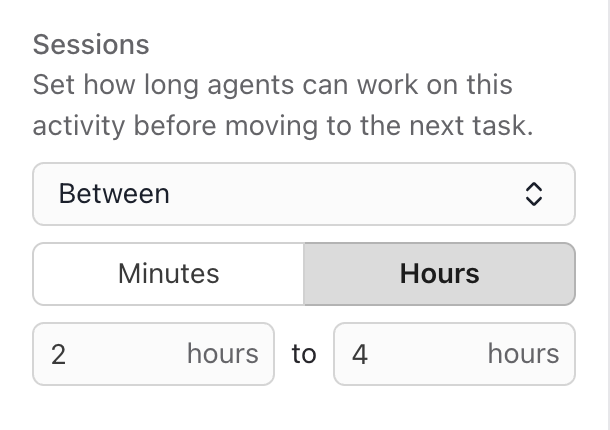
(Optional) Add a session limit, this limits the amount of time agents will be scheduled on this activity at a time, e.g. 2hrs at a time.
If you select fixed staffing:
Select the days of the week, times and timezone that you require coverage on this activity for. Then enter the number of agents required for each interval.
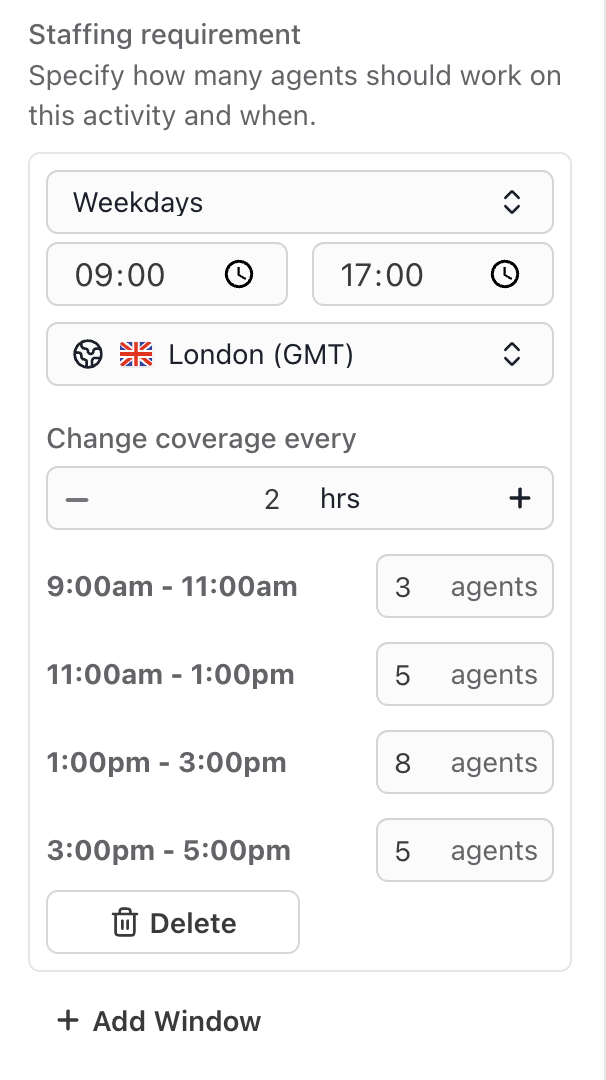
(Optional) Add a session limit, this limits the amount of time agents will be scheduled on this activity at a time, e.g. 2hrs at a time.
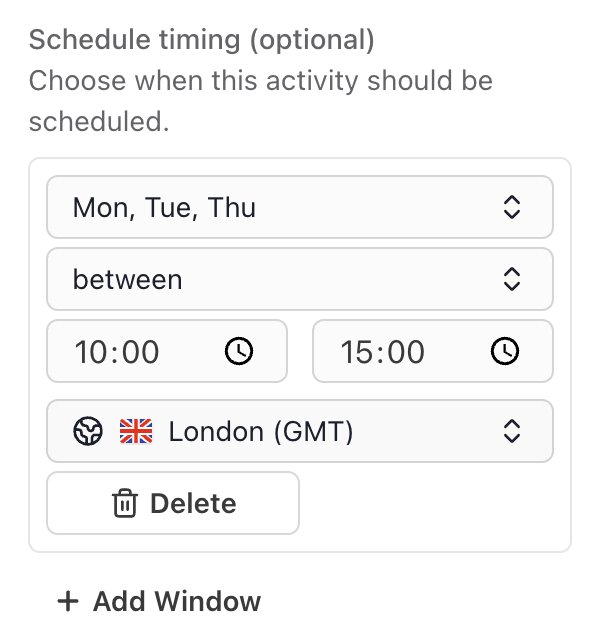
If you select allocate time:
Enter the amount of time required for this activity. This can be set as a requirement per day or per week, and per agent or shared across the team.

(Optional) Specify when this activity should be scheduled. If no window is applied, the activity can be scheduled whenever time is available. Select Add another window to specify different times on different days.
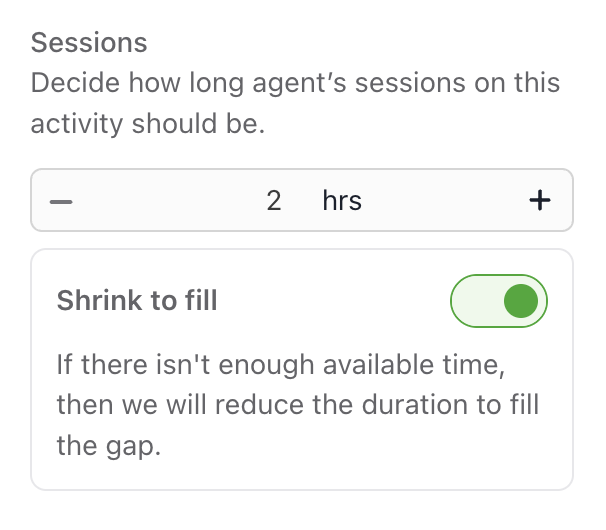
(Optional) Add a session limit, this limits the amount of time agents will be scheduled on this activity at a time, e.g. 2hrs at a time.
If you select fill unscheduled time:
Choose if this rule should fill all agents’ shifts, or only a specific number.
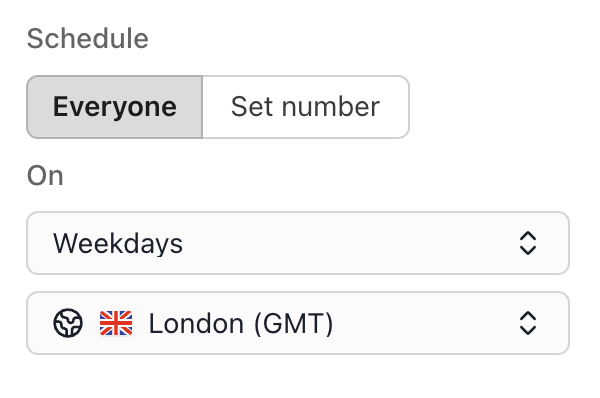
Specify the days of the week and timezone this rule should apply for, e.g. fill agents shift with training on Mondays.
Filter the agents this activity should be assigned to (optional)
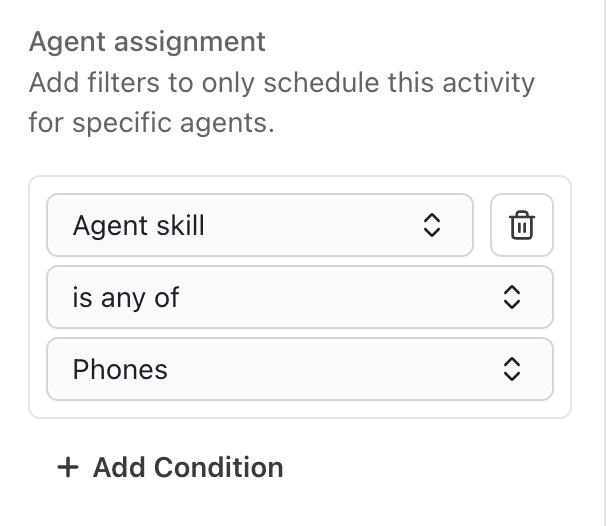
If no filters are applied, the activity will be scheduled for all agents within this plan.
Use conditions to select or exempt specific agents and/or teams. You can filter by agent/team name, skill, shift length and more.
Select Save Rule
Prioritizing rules
Activity and Break rules are scheduled in priority order.
This means the requirements of each rule are attempted to be met one by one. Activities at the top of the list are most likely to meet their requirements, whereas activities at the bottom may not be scheduled if there is no capacity available.
New activity rules will be set to top priority by default, which means it will be scheduled first. If an activity doesn’t appear to be scheduled enough, or is taking up too much of an agent's time, then you may want to adjust the priority.
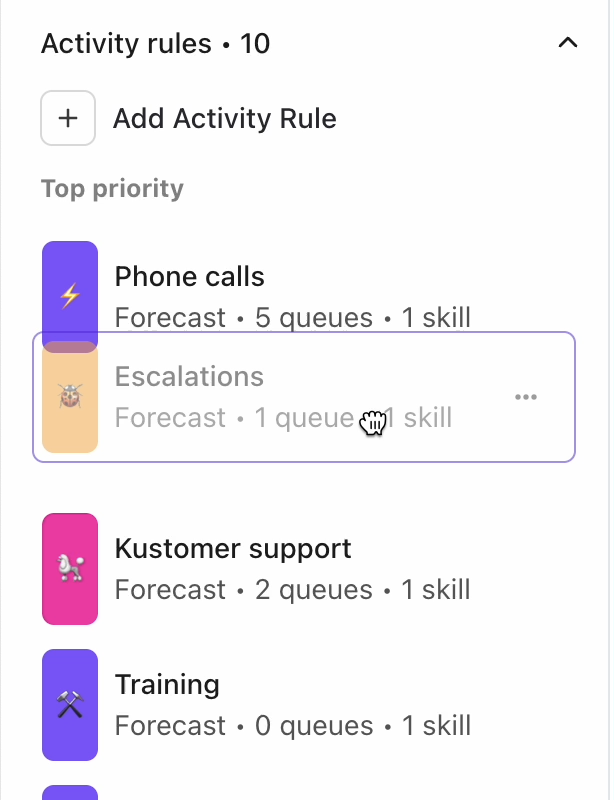
Head to the rule panel to prioritize rules:
Select and hold the rule you want to prioritize
Drag it higher up the list to increase the priority, or drag it lower down the list to decrease the priority.
Tip
We recommend putting live channels and time-sensitive activities at the top. If you want a fallback or ‘filler’ activity, you can put that at the bottom of the list to fill any free time.
Delete a rule
You can delete break or activity rules at any time.
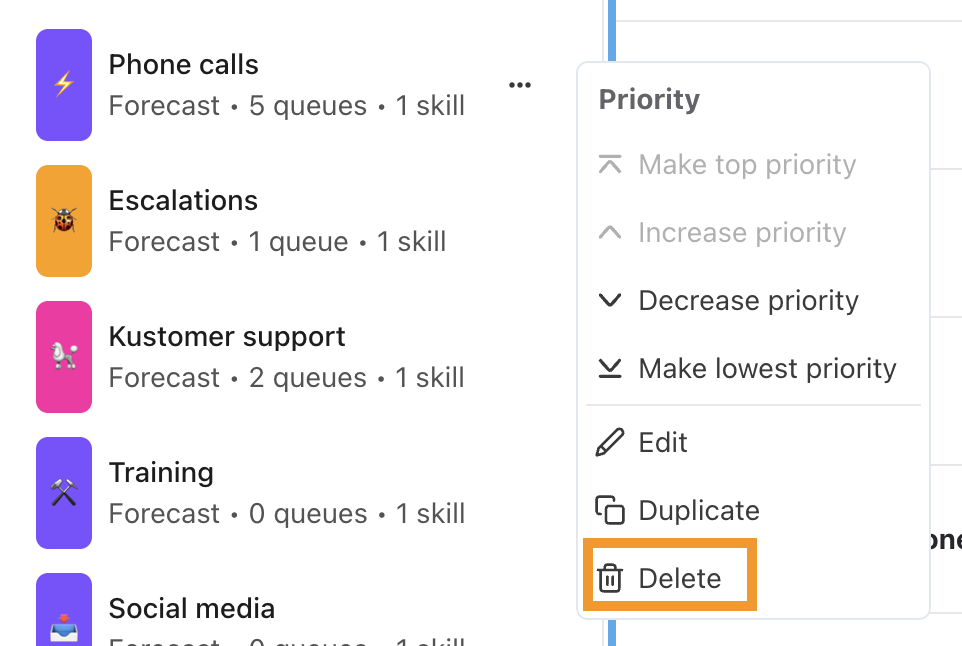
Head to the rule panel to delete rules:
Hover over the right side of a rule
Select the three dot menu …
Select Delete
Schedule using an Activity Plan
To use your Activity Plan, you need to add it to the schedule.
Once added to the schedule, the rules within the Activity Plan will be used to generate schedules for agents’ shifts in the selected period.
The Activity Plan will remove and replace any existing schedules with new breaks and activities. Activities will be added in draft, distributed based on your rules, and synced with calendar events.
You can use Activity Plans in two ways:
Add to schedule: You can add your Activity Plan to any period of the schedule at any time. This is helpful when pushing changes into the schedule.
Generate schedule (in Early Access Program): Select your Activity Plan when generating a schedule.
To add an Activity Plan to the schedule:
From within the Activity Plan, select Add to Schedule

Select the period you want to apply it to and the timezone.
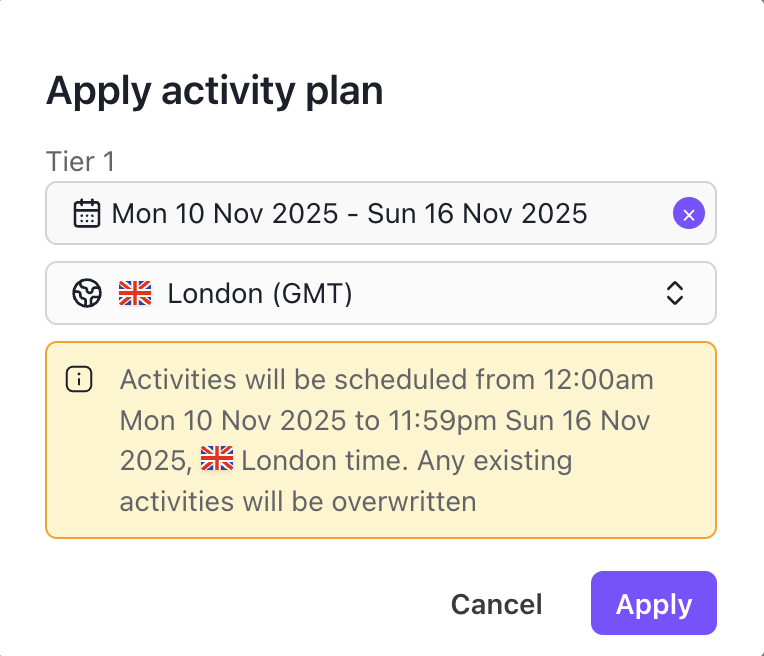
Select Apply
A draft schedule will then be generated for all of the agents in the plan for the selected period, working around any time off or meetings. Any previously scheduled activities will be removed and replaced.
You are now able to make any manual edits or tweaks, as needed.
When you are finished editing and ready to share the schedule with the team, select Publish.
Duplicate an Activity Plan
If you want to experiment or make changes to your ways of working, you can duplicate an Activity Plan. This will create a copy with the exact same assignment and rules that you can then edit without effecting the original Activity Plan.
To duplicate an Activity Plan, head to the schedule:
Select Activities
Make sure you’re in Draft mode. The published toggle should be set to off.
Select the toolbar button in the top left of the schedule
Select Plans
Select the three dot button ….
Select Duplicate
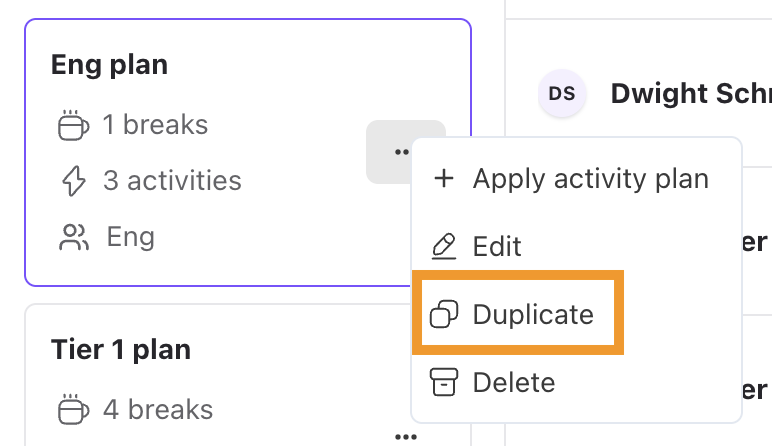
The new plan will be created at the bottom of the list and labelled with the suffix (copy).
Delete an Activity Plan
You can delete an Activity Plan at any time. When you delete an Activity Plan, it won’t remove any schedules generated with it, but you won’t be able to use it going forward.
To delete an Activity Plan, head to the schedule:
Select Activities
Make sure you’re in Draft mode. The published toggle should be set to off.
Select the toolbar button in the top left of the schedule
Select Plans
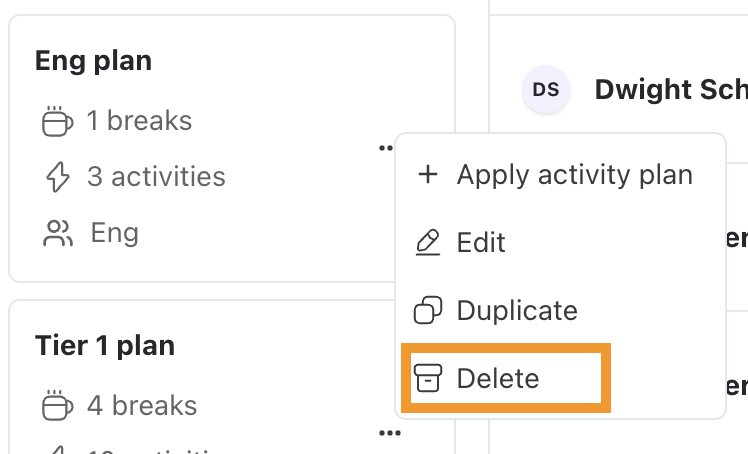
Select the three dot button ….
Select Delete
Frequently asked questions
Will the schedule automatically update when I make changes to an Activity Plan?
The Activity Plan preview will update whenever you make an edit to your Activity Plan, but the schedule will not update automatically
To update the schedule with your updated rules, you need to re-apply the Activity Plan.
Why can’t I edit the schedule in the Activity Plan?
The Activity Plan preview is read only. This displays a preview of how your rules will be applied to shifts once the Activity Plan has been applied.
Activities or breaks cannot be manually edited in this view, you can only edit the rules.
You are free to edit, replace or delete any activities in the schedule, after the Activity Plan has been applied.
Can I apply an Activity Plan to a single agent?
No, when applied, the Activity Plans will be applied to the shift of every agent included in the Activity Plan. This is so activities can be adequately distributed to the team.
How does Dialpad WFM suggest rules?
A ‘follow forecast’ rule will be created for each queue activity skill agents in the team possess. No session limit will be applied. The agent assignment filter will be 'skill is [activity name]'
If no agents have queue activity skills, then no ‘follow forecast’ rules will be generated
Four default break rules will be created, to account for different lengths of shifts:
A 10 minute break near the start of an agent’s shift
A 10 minute break near the end of an agent’s shift
A 60 minute meal break for shifts longer than 7 hours
A 30 minute meal break for shifts longer than 4 hours, but less than 7 hours
A training rule will also be created to assign agents an hour of training time each week.
Can I edit Suggested plans or rules?
Yes! Suggested plans are designed to give you a heads start. You are free to modify or delete any suggested rules, or create your own.
Will the schedule automatically update if the forecast changes?
No, the Activity Plan will schedule coverage according to the forecast at the time it was applied. If you adjust the forecast, you’ll need to reapply the Activity Plan to re-optimize for the new forecasted demand.
Why isn’t an activity being scheduled?
If an activity you have created a rule for isn’t being scheduled, there may be a few reasons:
No agents match the filters: Check the agent assignment filters in the rule to ensure that agents in the plan are eligible.
Activity is too low priority: If an agent has a very low priority, and there is a lot of demand for other rules, then there may not be enough capacity available to schedule this activity. Consider increasing the priority of this rule, or lowering the requirements of other rules.
Windows do not align with agent’s shifts: Check that any windows you have specified for the activity align with agent’s shifts. If there is no overlap then the activity cannot be scheduled.
Can I correct an error in an Activity Plan after applying it?
Yes, Activity Plans can be updated at any time. Simply update your Activity Plan and reapply it to the schedule. All previous schedules will be overwritten.
Will breaks be scheduled according to the forecast?
Not yet - but we’re working on it. If you enter a window of time, then the start time of different agent’s breaks will be staggered according to the inputted amount.
For example, if you create a rule to schedule a 30min break between 12 - 2pm, with a stagger of 30mins, then each agent will go to break 30mins after the last at 12pm, 12:30pm, 1pm and 1:30pm.
If there are more agents assigned to the break than there are unique windows, then break slots will be looped through again.
How do I account for meetings?
When an Activity Plan is added to the schedule, it applies breaks and activities around any existing synced calendar events.
If new meetings are added after the Activity Plan is applied to a schedule, they will overwrite any previously scheduled activities or breaks.
What happens if someone calls in sick or goes on vacation?
If an agent goes on vacation or calls in sick, their schedule will be replaced by a time off booking. Activities will not be automatically reassigned to other agents to cover this drop in coverage.
If you want to re-optimize the schedule, you need to reapply the Activity Plan.
What happens if an activity in my Activity Plan is deleted?
When an activity is deleted, the plan will clearly show that the activity is missing.
Any rules that you have set for the previous activity will remain, so admins can easily apply them to another (including a new) activity.
Will my manual edits be kept if I re-apply an activity plan?
No, applying an activity plan will overwrite anything that was previously in the schedule.
An activity I used in a rule has been deleted, what do I do?
If the activity you used in an activity rule is deleted, then you can either delete the rule or assign a new activity to the rule.
To reassign a new activity to the rule:
Select the activity rule from the list
Select the new activity from the dropdown
Review the settings in the rule
Select Save
You’ll need to reapply the Activity Plan to the schedule to update any existing schedules.
e