Agent schedules are set up to match staffing with customer demand, keeping service smooth. Creating a Shift Plan helps organize agent schedules and easily adjusts for needs like extended hours or extra staff, so the right agents with the right skills are available when needed.
Let’s dive into the details.
Who can use this
Dialpad WFM is available to all Dialpad users and as a standalone product.
Contact your Customer Success Manager to discuss adding Dialpad WFM to your plan.
You must be a WFM Admin to create a Shift Plan.
What is a Shift Plan?
A Shift Plan is a flexible, reusable template to organize your team's fixed or rotating shift patterns and round robins.
Shift Plans help adapt schedules to changing needs, such as extending hours or adding staff during peak times.
Shift Plans are added to the schedule to plan shifts for multiple agents and periods of time in one-click.
For new teams, it’s best to create a Shift Plan that reflects your current scheduling approach or pre-existing shifts, ensuring a smooth transition.
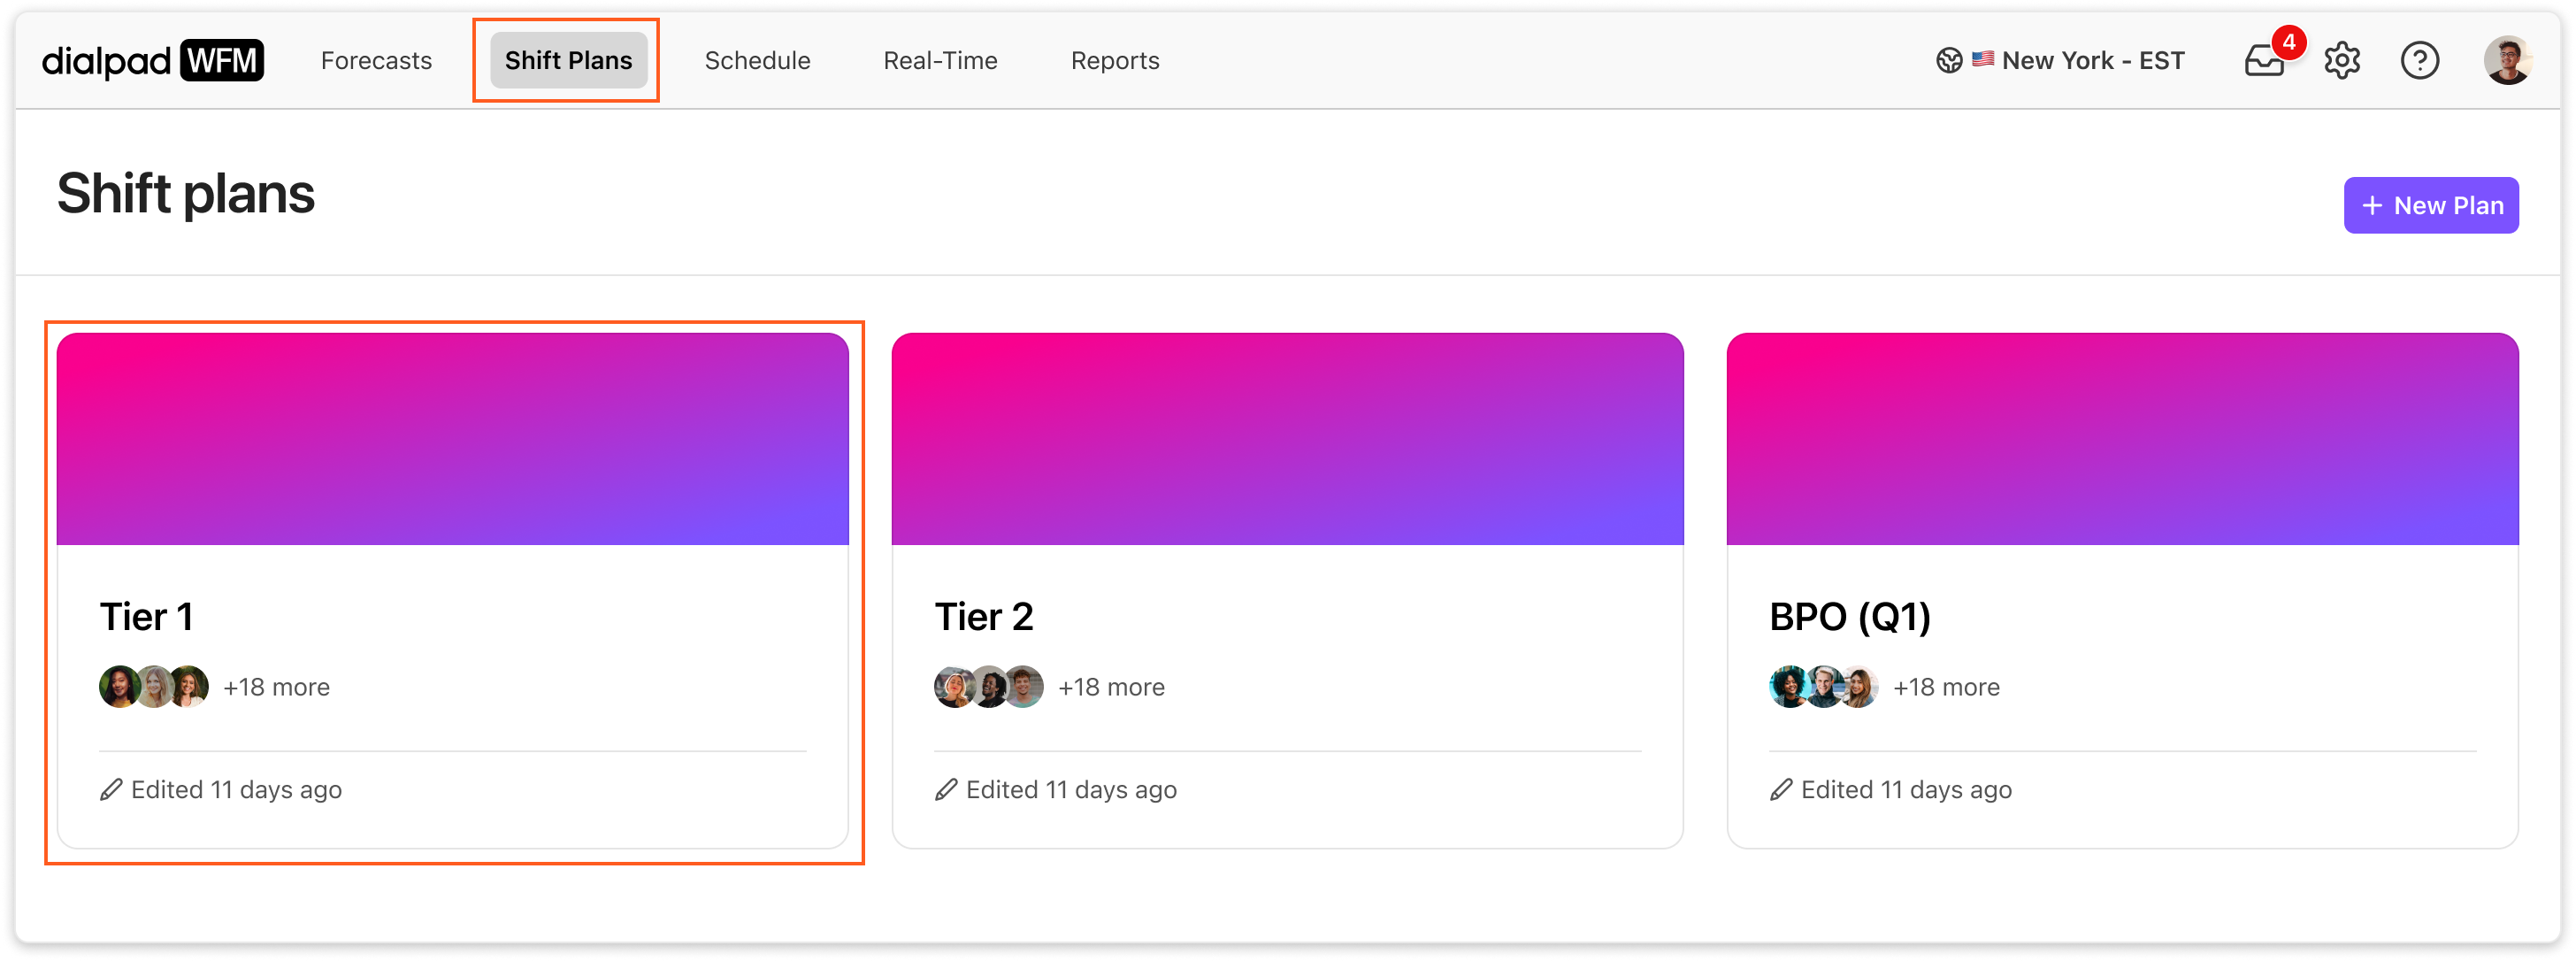
Create a Shift Plan
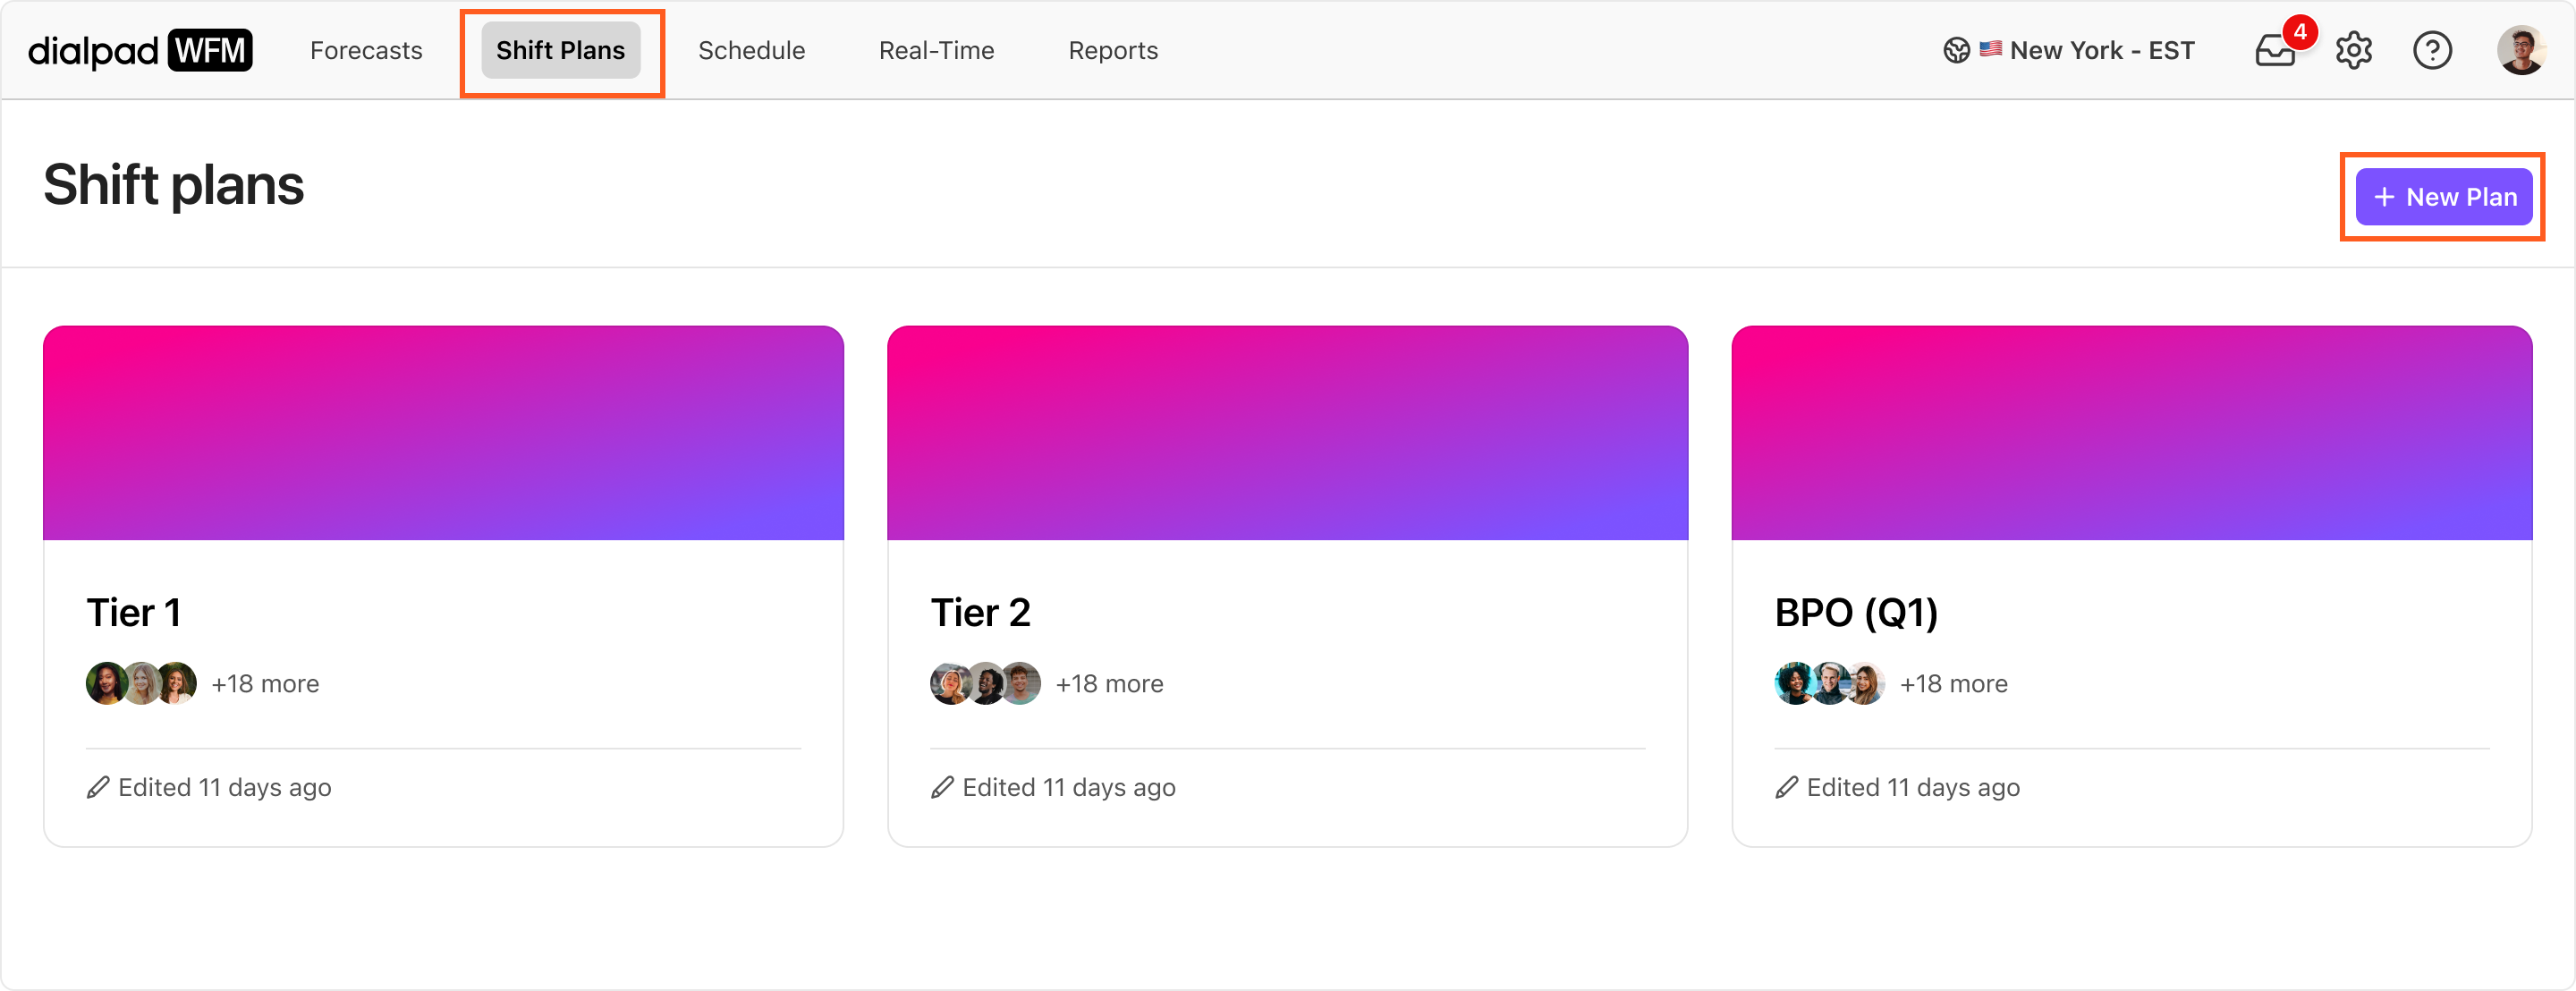
To create a Shift Plan, head to Dialpad WFM.
Select Shift plans
Select + New plan
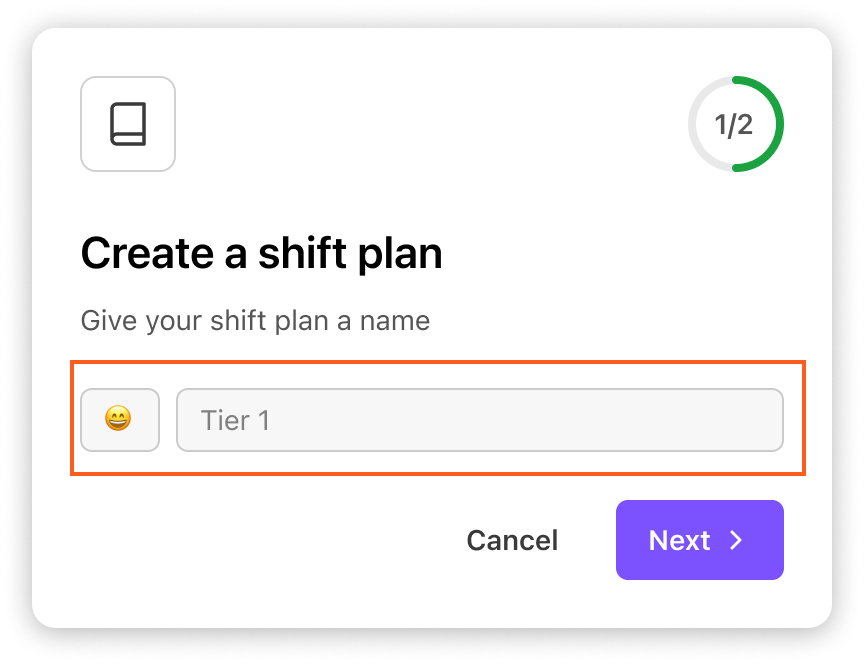
Name the shift plan, then select Next
Select the agents and/or teams you want to schedule with this Shift Plan
.png)
Select Save
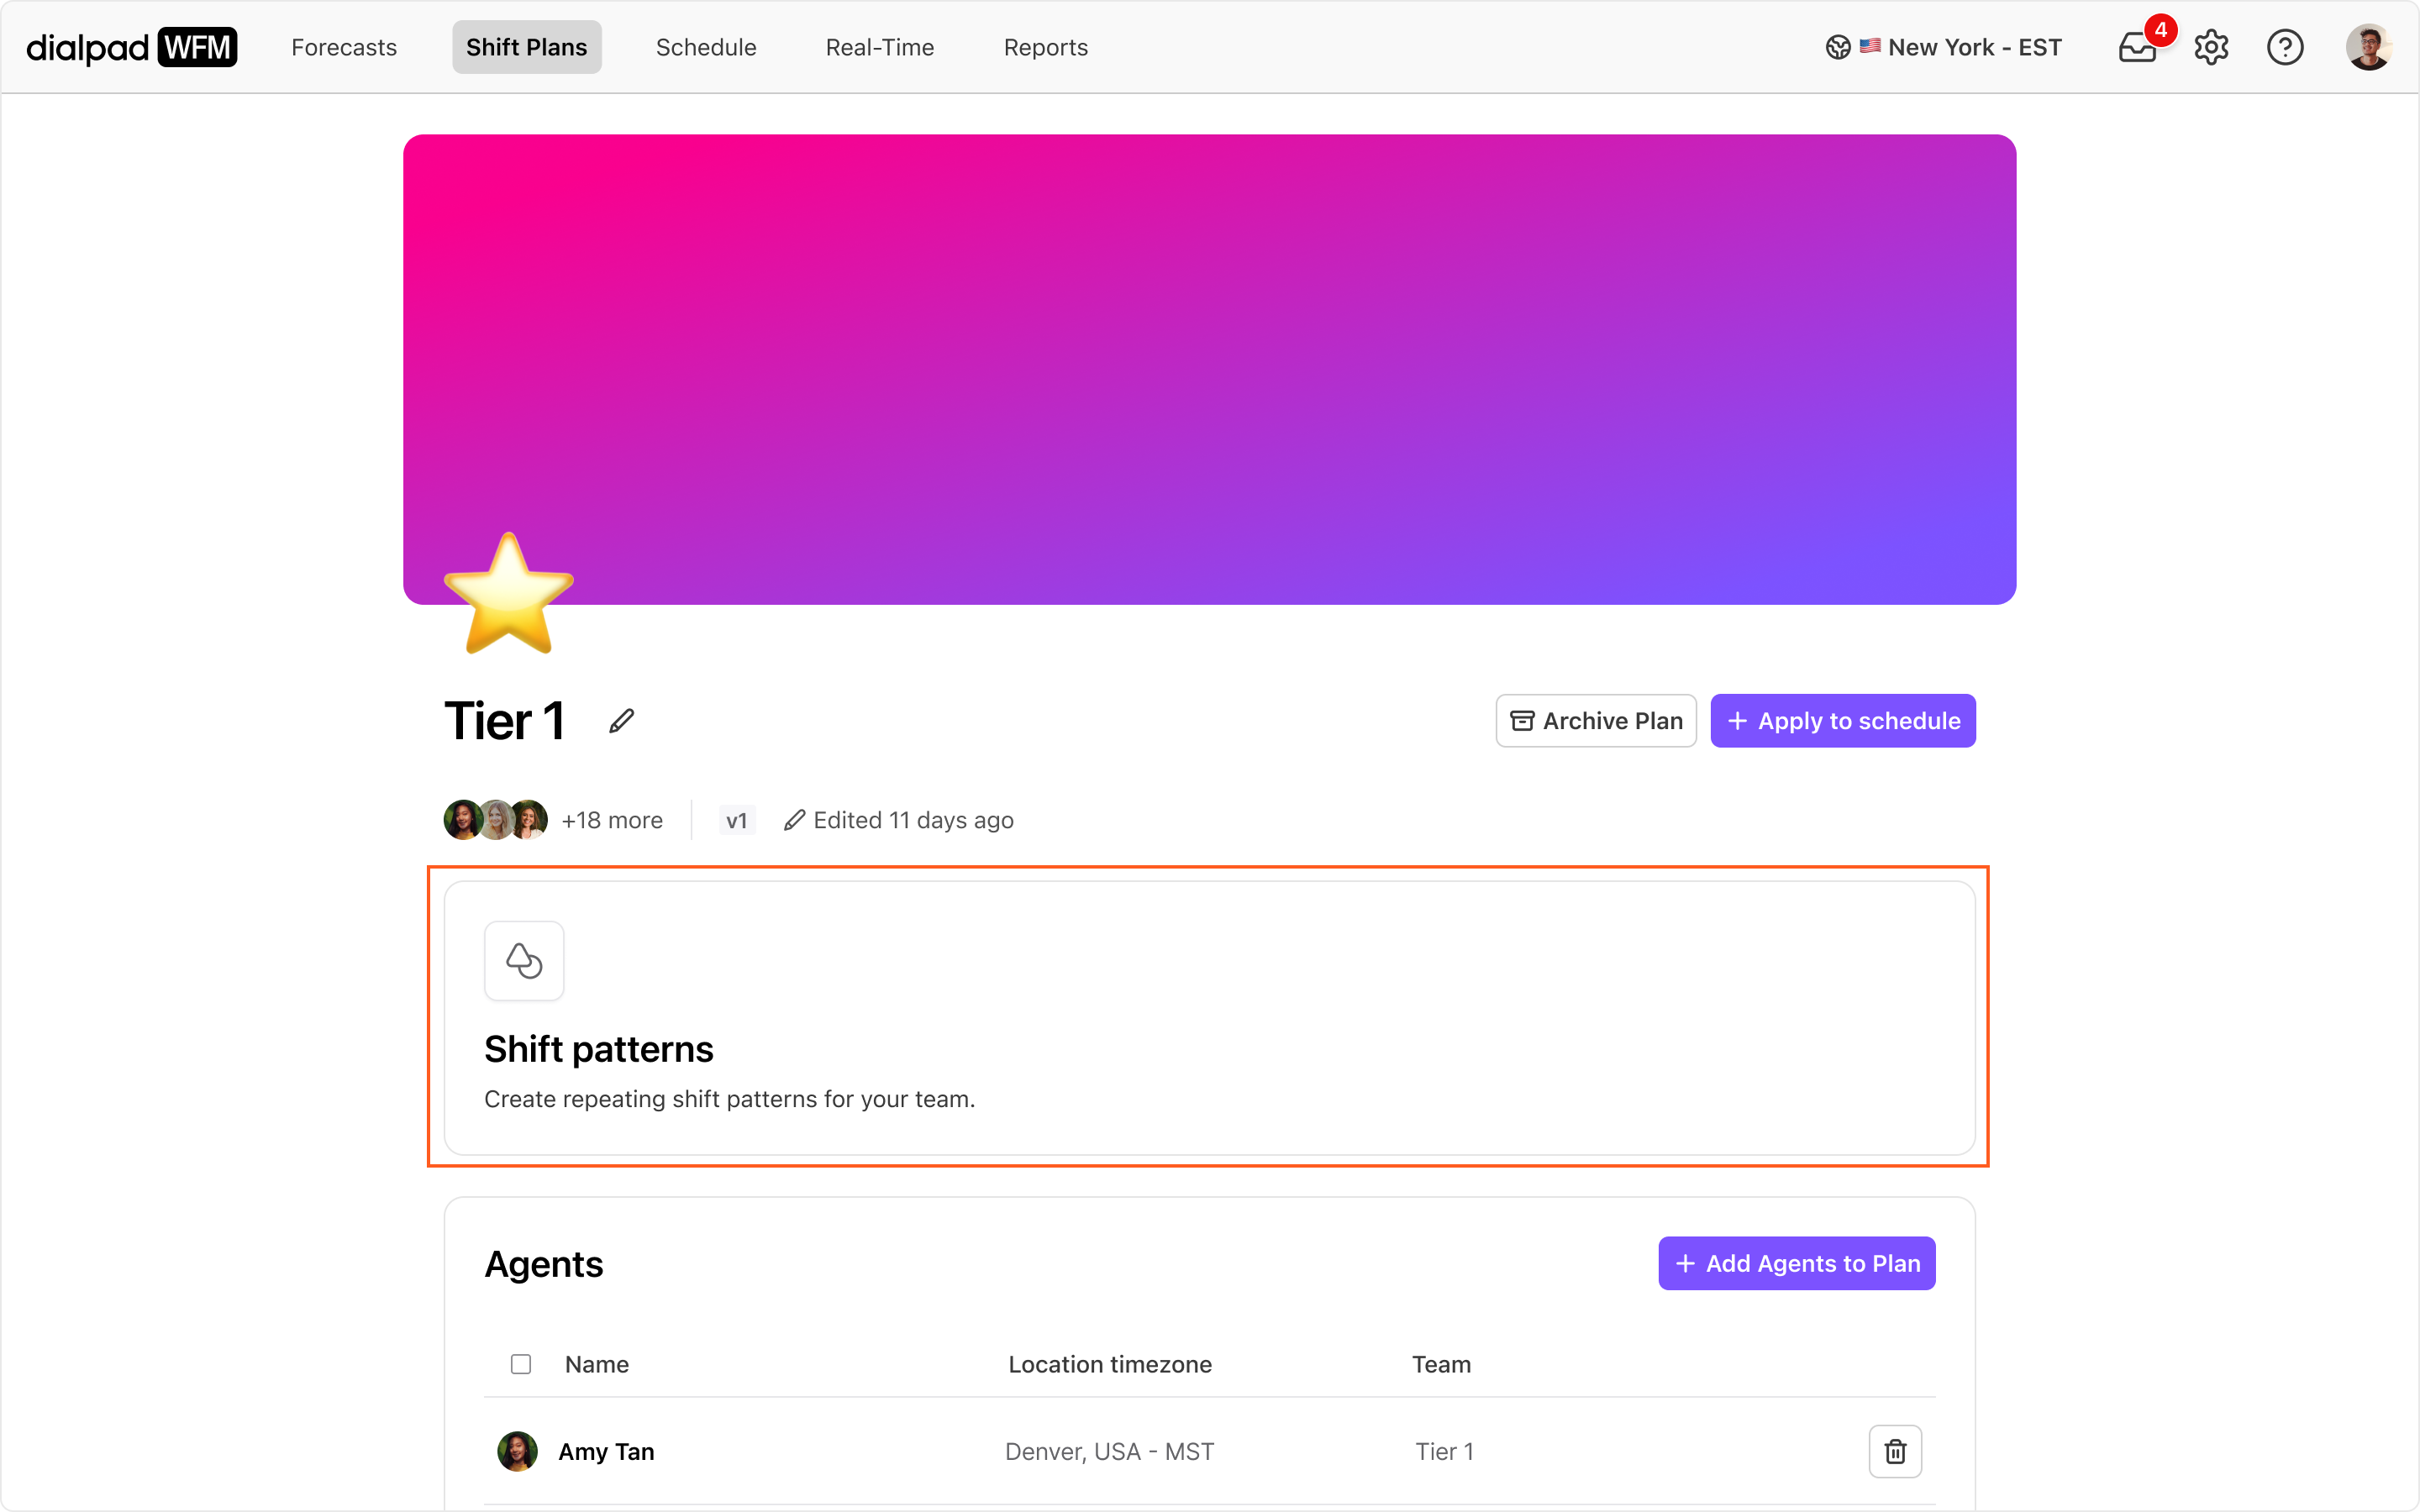
You’ll now be taken to the homepage for your newly created shift plan. Select shift patterns to enter the shift pattern builder.
Understanding the shift pattern builder
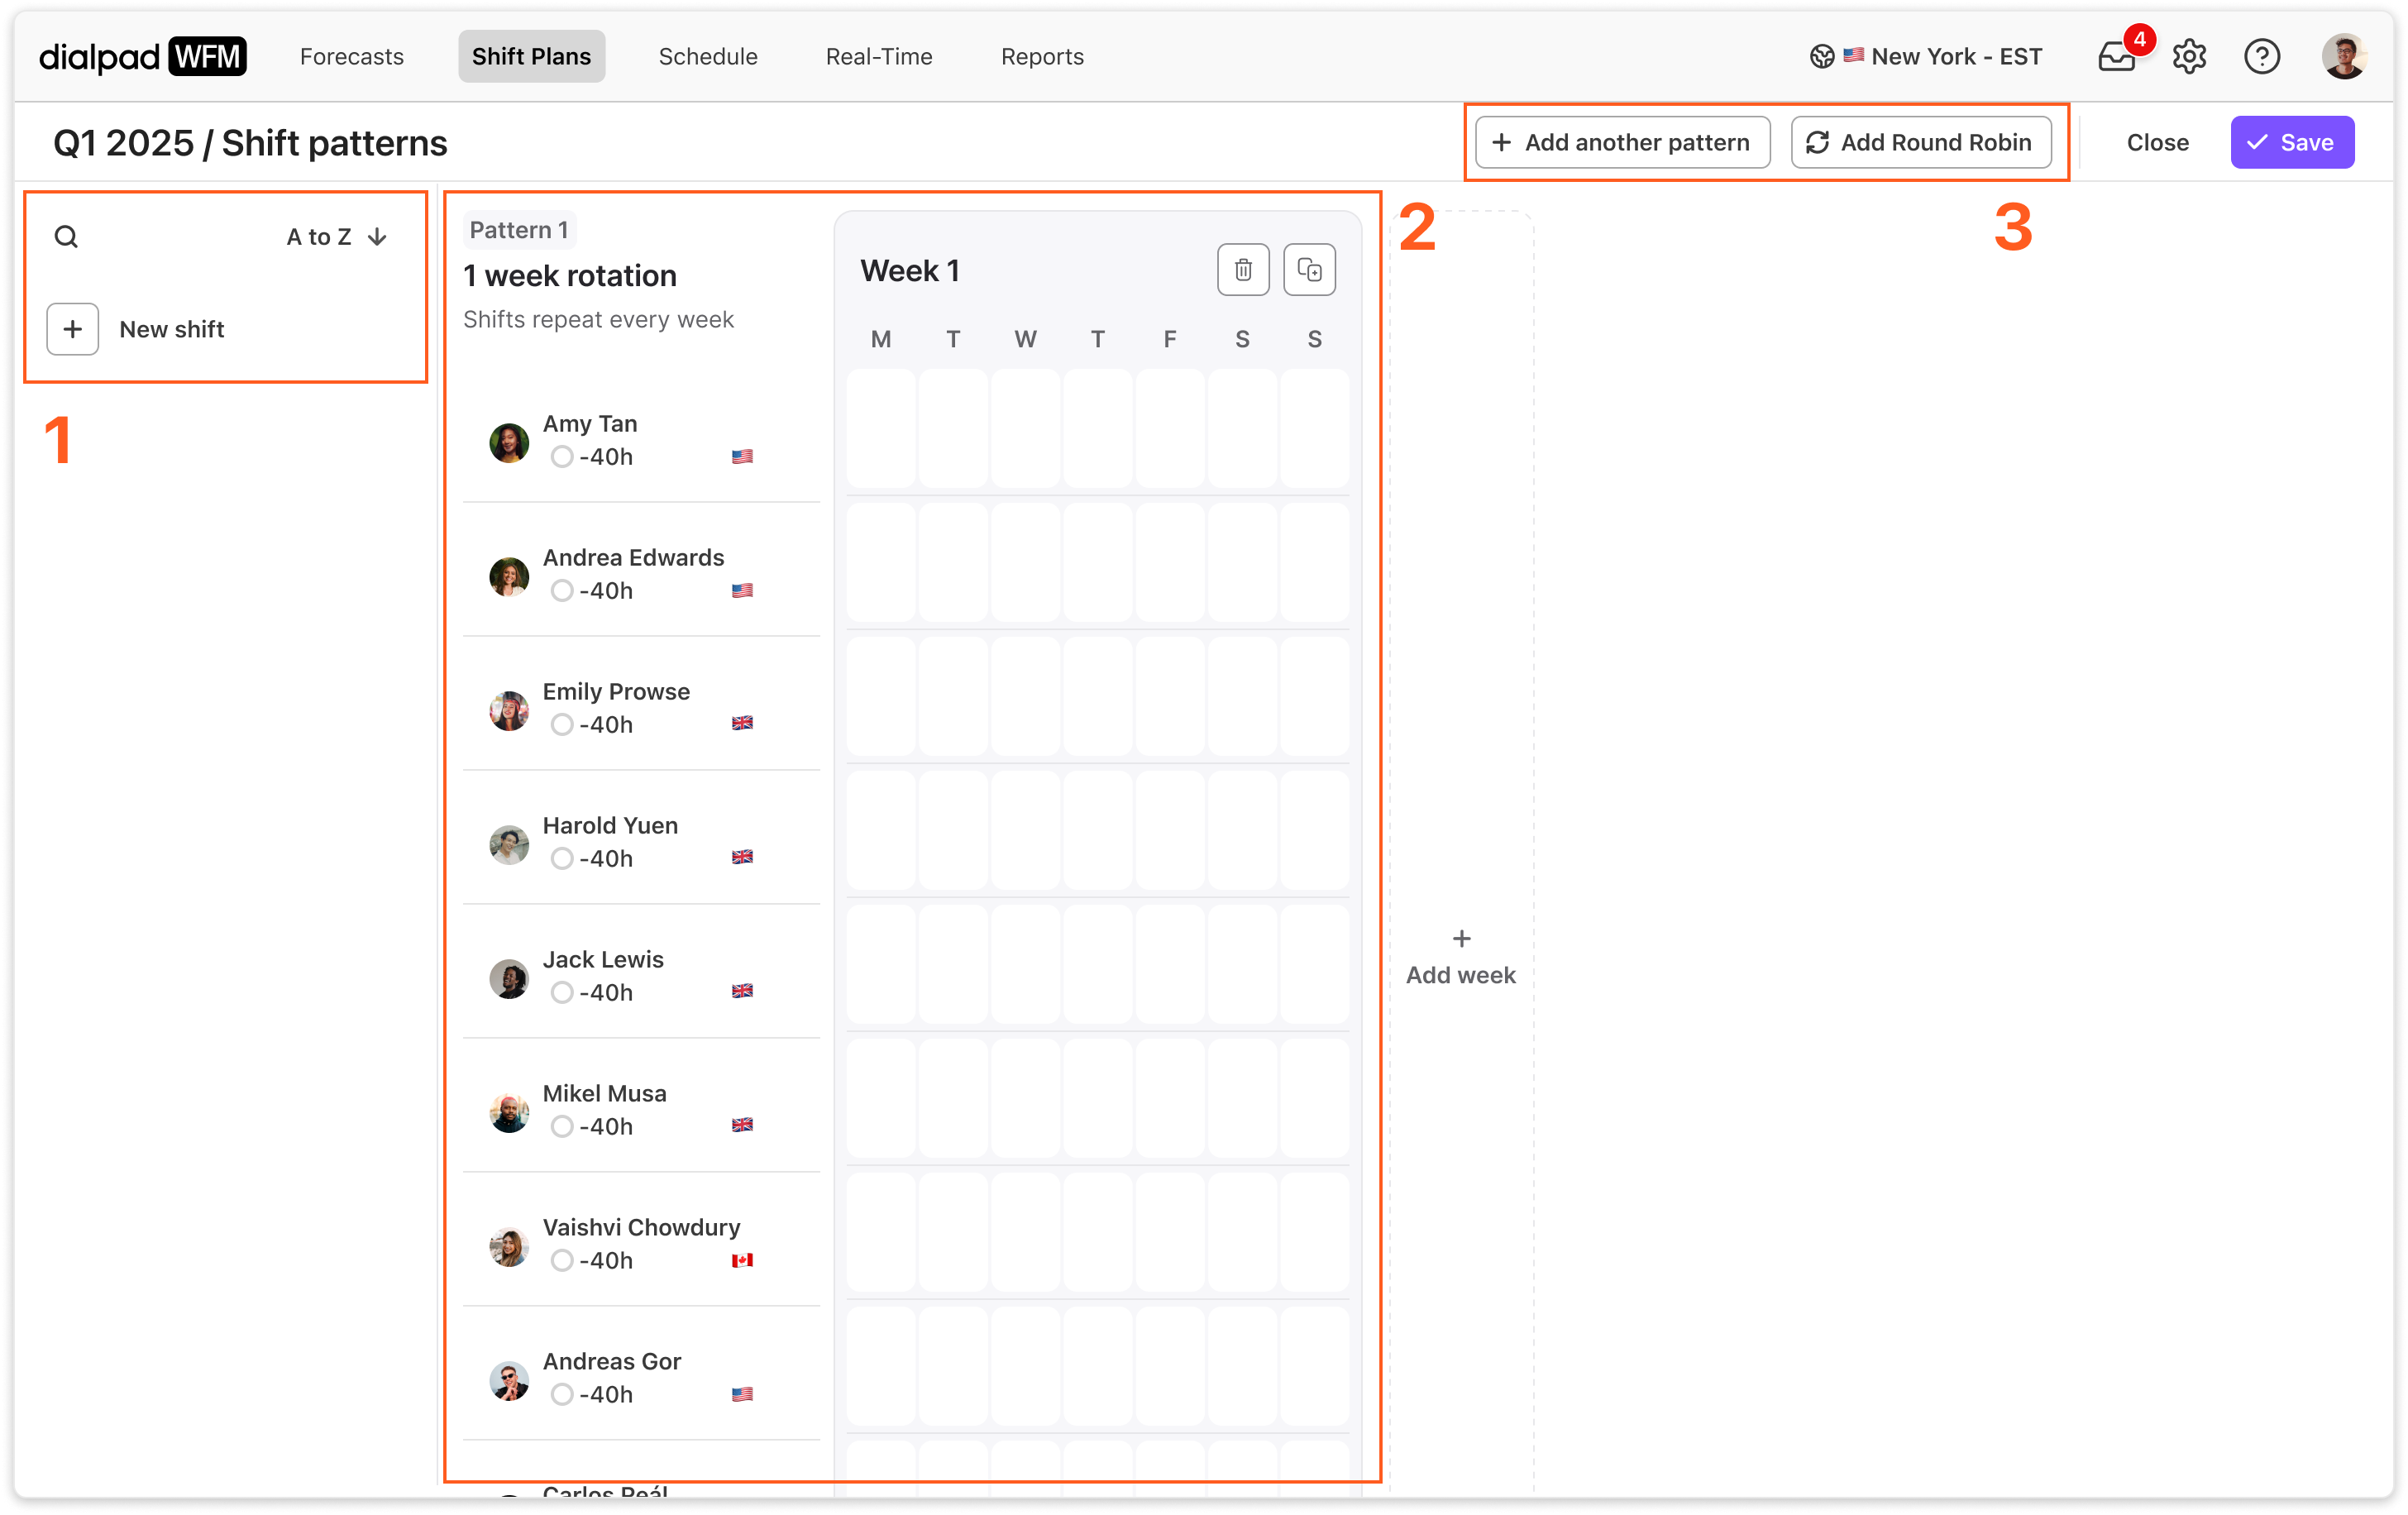
The shift pattern builder is where you will create shift patterns for your team. Let’s get to know the page.
Shift panel: This panel will contain all of the types of shifts your team works. If this is your first shift plan, this list will be empty. If you have existing shift plans, you will see a list of existing shifts.
Pattern: The pattern is where you will build out agent’s shift patterns. When you create a new plan, all agents will be added to a one week pattern. You can split out agents into other patterns or add additional weeks.
Optional controls: From the toolbar, you can create another pattern (to create patterns of different lengths) or add a Round Robin.
Create shifts
If no shifts have been created in your account already, you’ll need to create shifts.
Shifts are used to build out shift patterns and add shifts to the schedule. Shifts are reusable and shared by all admins in the account - they don’t belong to only 1 shift plan.
Each shift includes a name, start and end time, and timezone.
For example:
Early: 7 AM - 3 PM (London, UK)
Mid: 9 AM - 5 PM (London, UK)
Late: 12 PM - 8 PM (London, UK)
Daily US: 8:30 AM - 5:30 PM (New York, USA)
To create a shift:
Select Create new shift
.png)
Name the shift and select a color. This is how the shift will display in the schedule.
Enter the start and end time.
Select a timezone location. This is the timezone this shift will be scheduled in.
.png)
Select Save
Your shift will now be created and added to the shift panel, ready to be used.

Note
There is no limit to the number of shifts you can create. Assign shifts as needed across various time zones to accommodate team needs and optimize coverage.
Create shift patterns
Next, you need to use shifts to create shift patterns for agents:
A shift pattern is a repeatable pattern of shifts that an agent, or groups of agents, will work.
Shift patterns can be one week or multiple weeks long.
Once a shift plan is added to the schedule, shift patterns will repeat. For example, if you create a 2 week shift pattern, and add it to the schedule for 3 months, it will repeat 6 times (once every 2 weeks).
Each pattern has a set number of weeks. All agents within that pattern will work for the same number of weeks.
If you want agents to work rotations of different lengths, e.g. some agents have the same shifts every week, whereas another group’s shift patterns repeat every 3 weeks, then you can split agents into separate patterns.
To create a shift pattern:
Select the shift you want to schedule from the shift panel
.png)
Find the agent you want to add shifts for, and select the day of the week to add a shift.
When you hover over an agent’s week, you will see how many of their contracted hours have been used.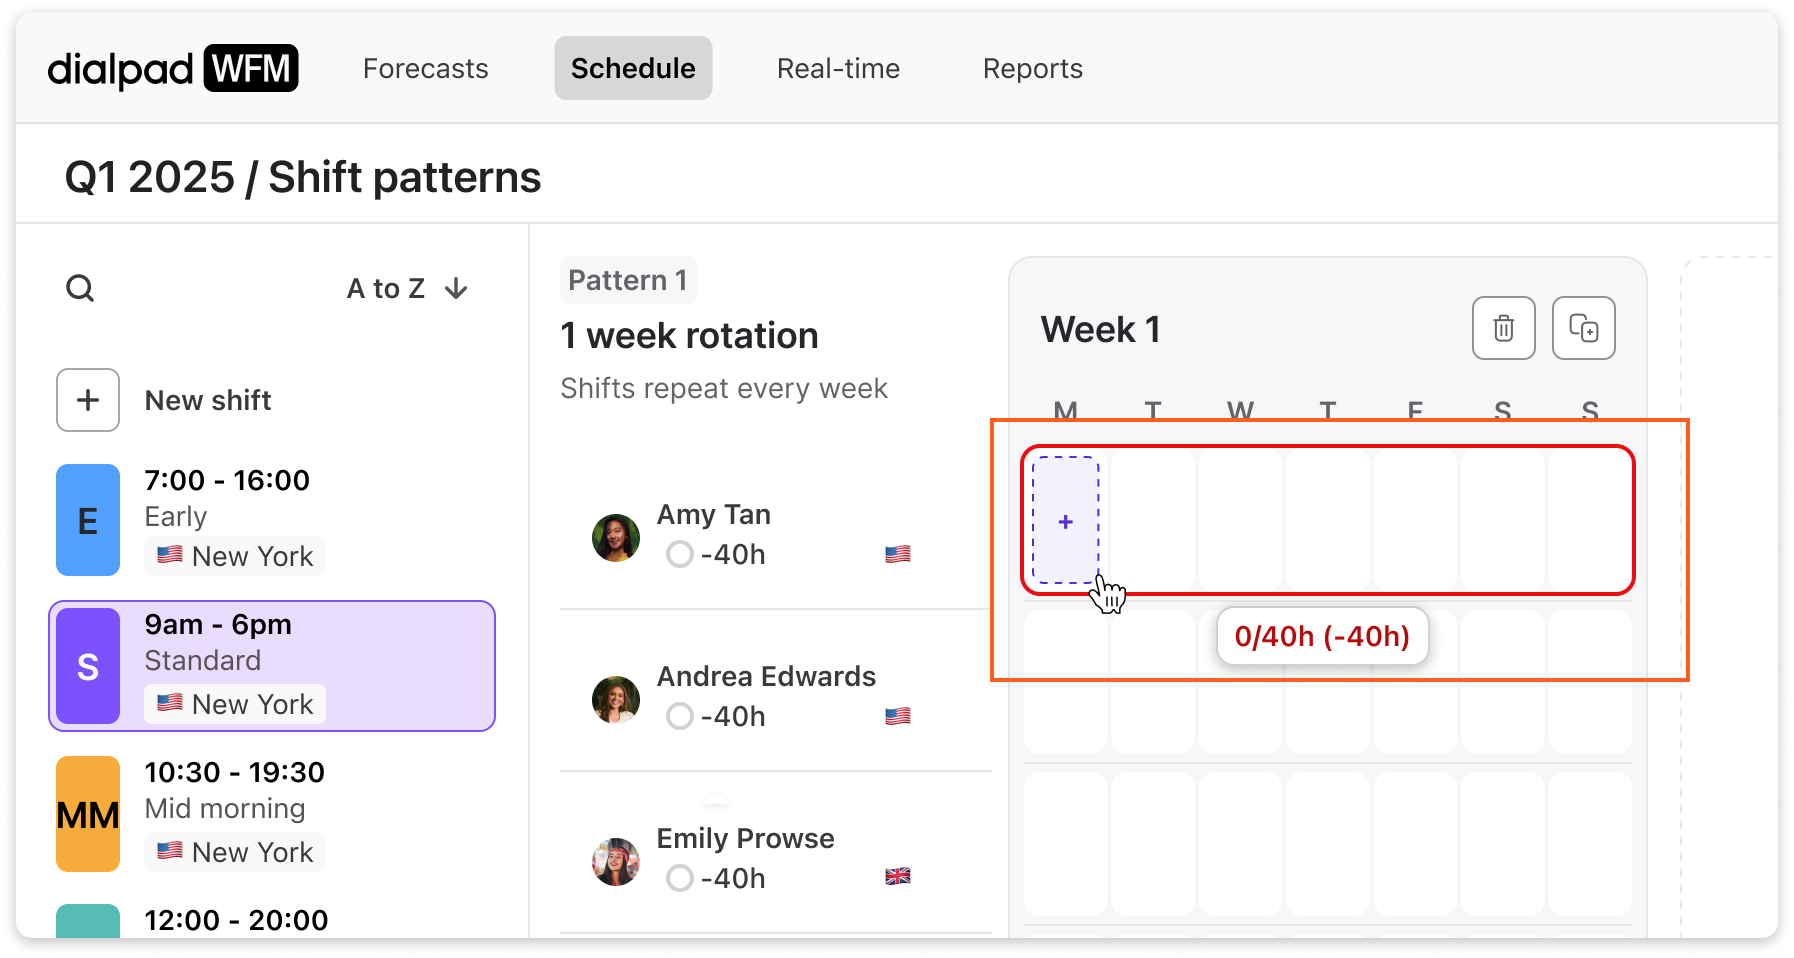
The shift will now be added to the day you selected!
The agent’s contracted hours counter will also update to show you how many of their contracted hours have been used.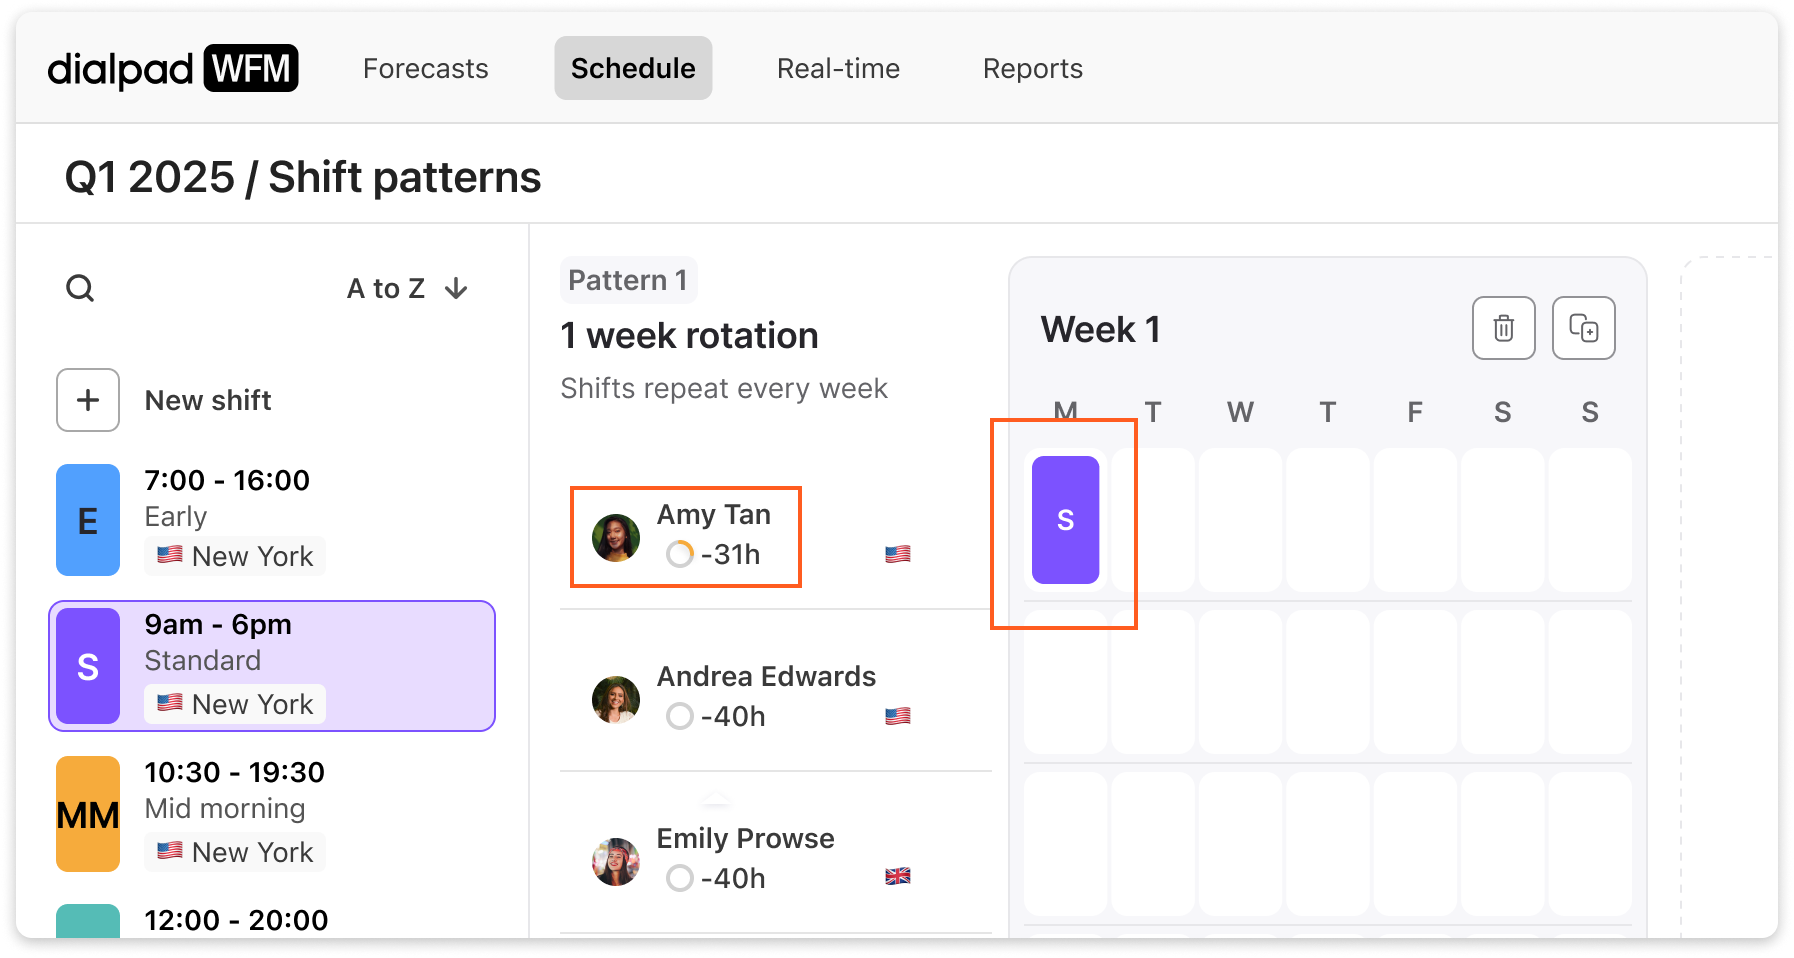
You can then continue to add shifts to the shift pattern builder as needed. You can add multiple types of shifts to a single week.
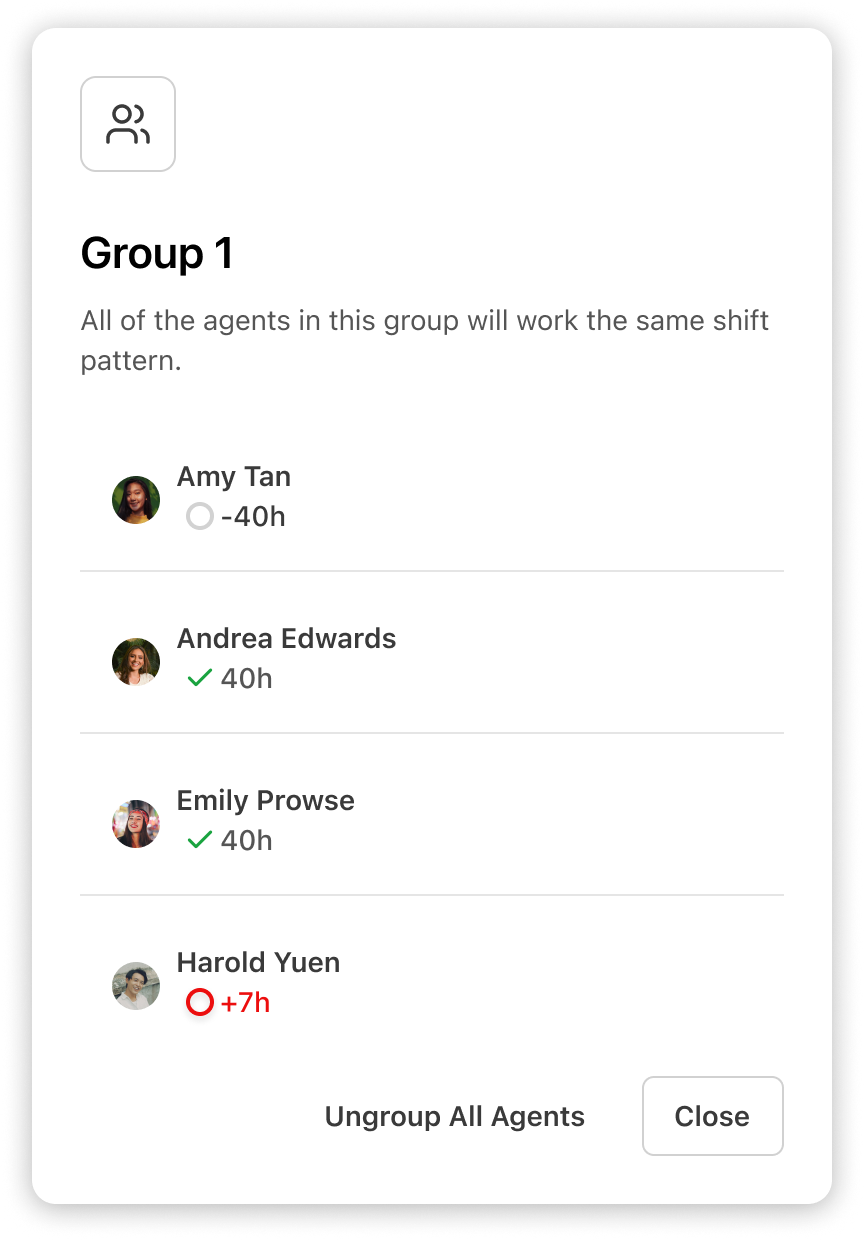
To group agents
If multiple agents work the same shift pattern, then you can group them. All agents within a group will work the same shift pattern.
To group agents:
Select an agent
Hold shift and select other agents
Select the three dot (…) menu button
Select group
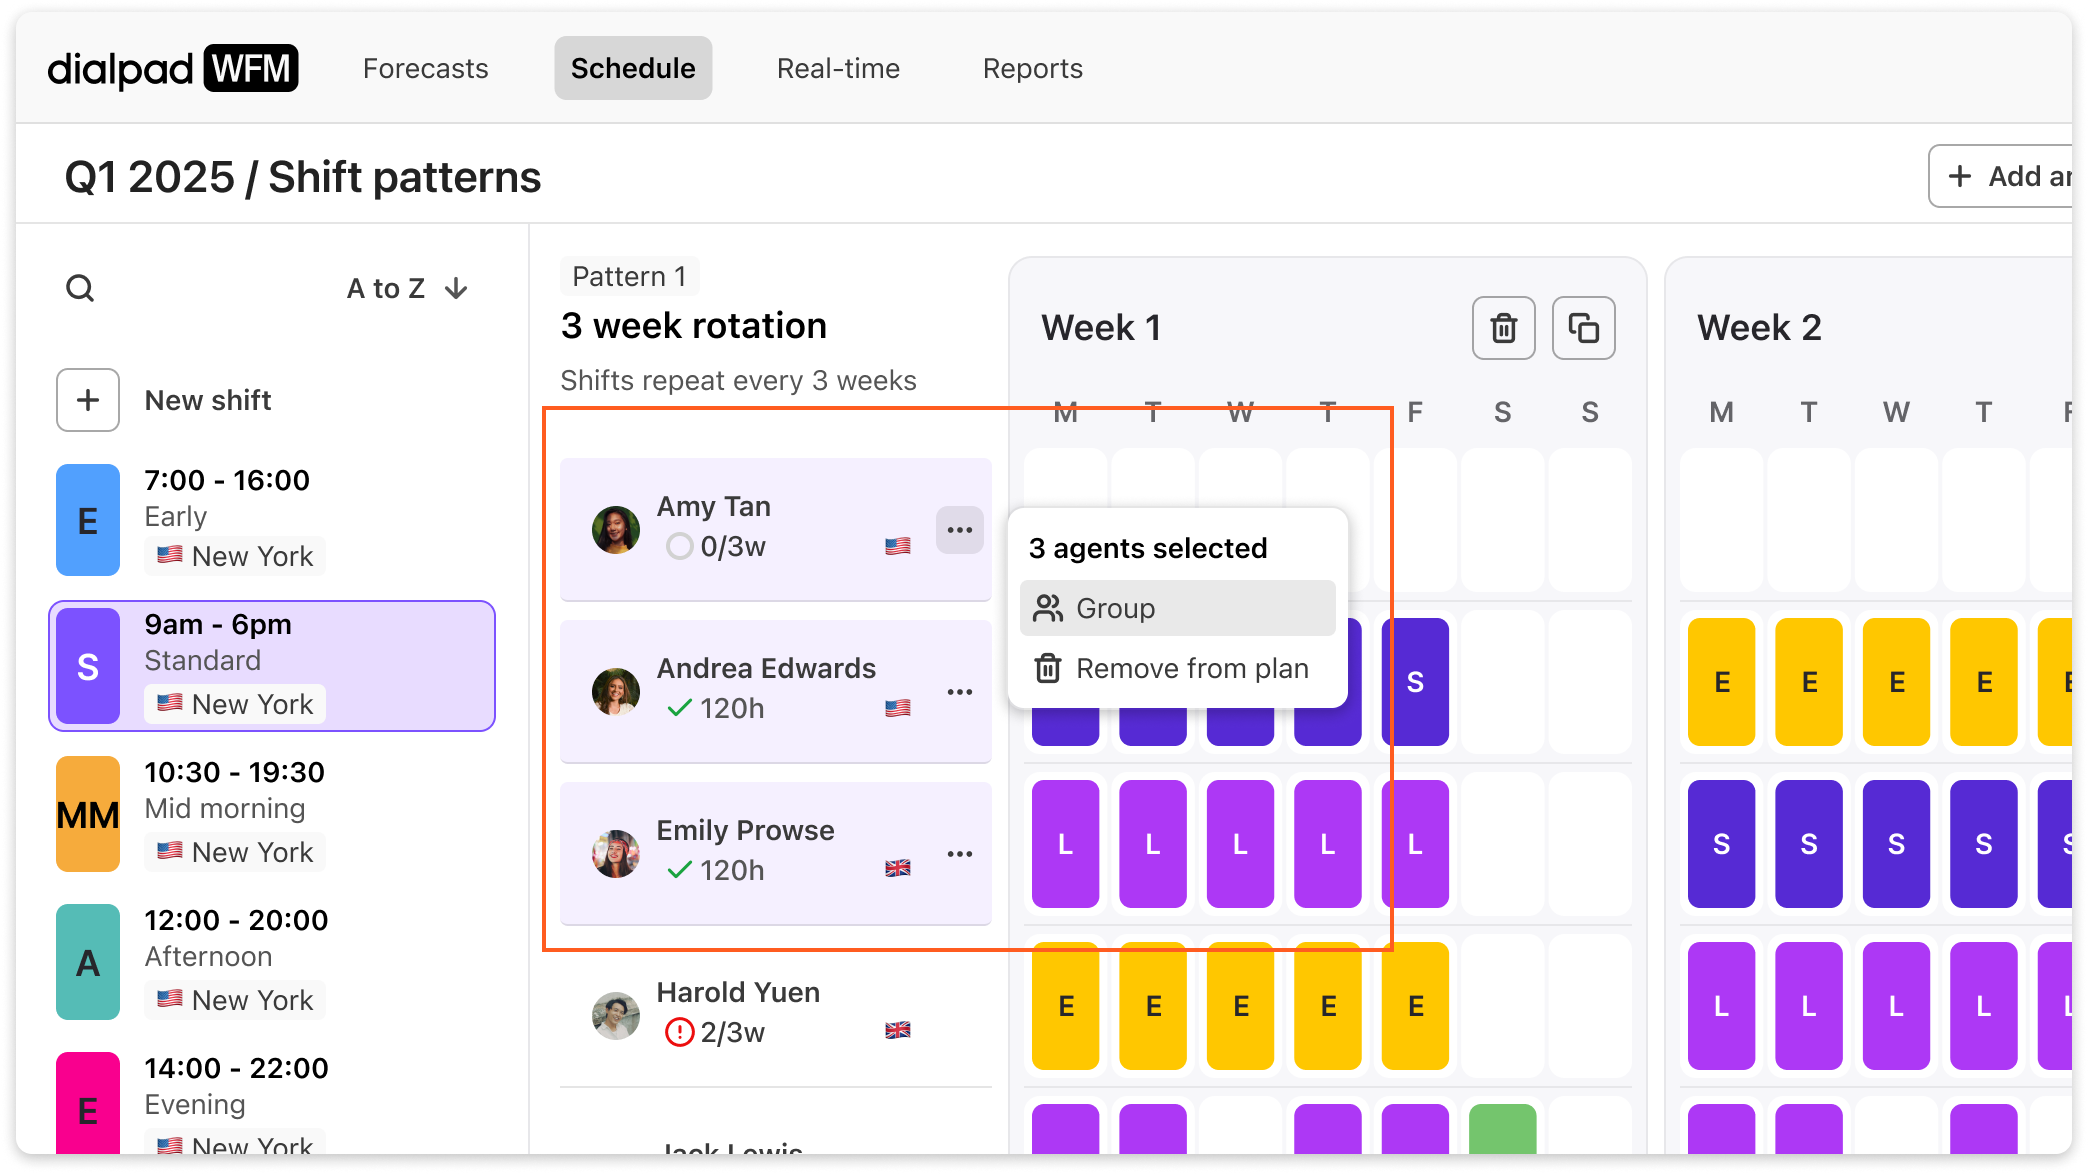
The agents will now be added to a group. The contracted hours counter will now display a sum of the contracted hours of all agents in the group.
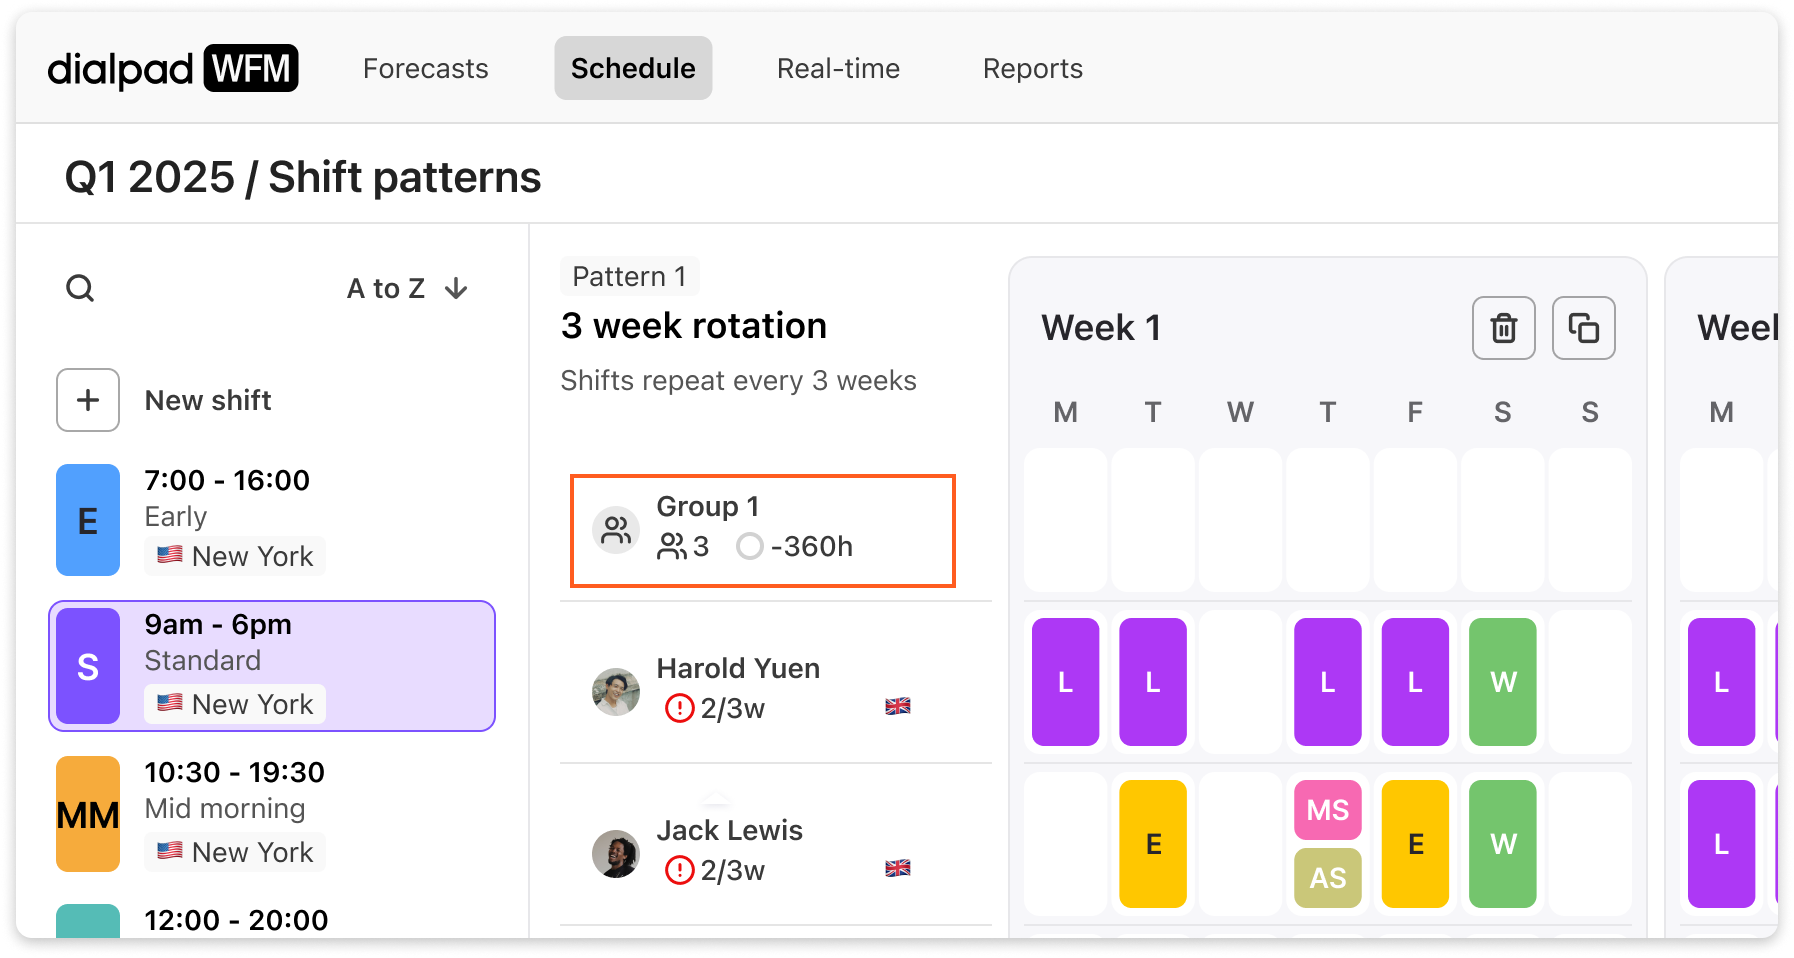
Select the group to view the agents within the group, including their own contracted hours. You can also ungroup agents by selecting ungroup all agents.
To add another week to a shift pattern:
To add another week to your Shift Pattern, select + Add week and follow the above steps to fill the availability slots..png)
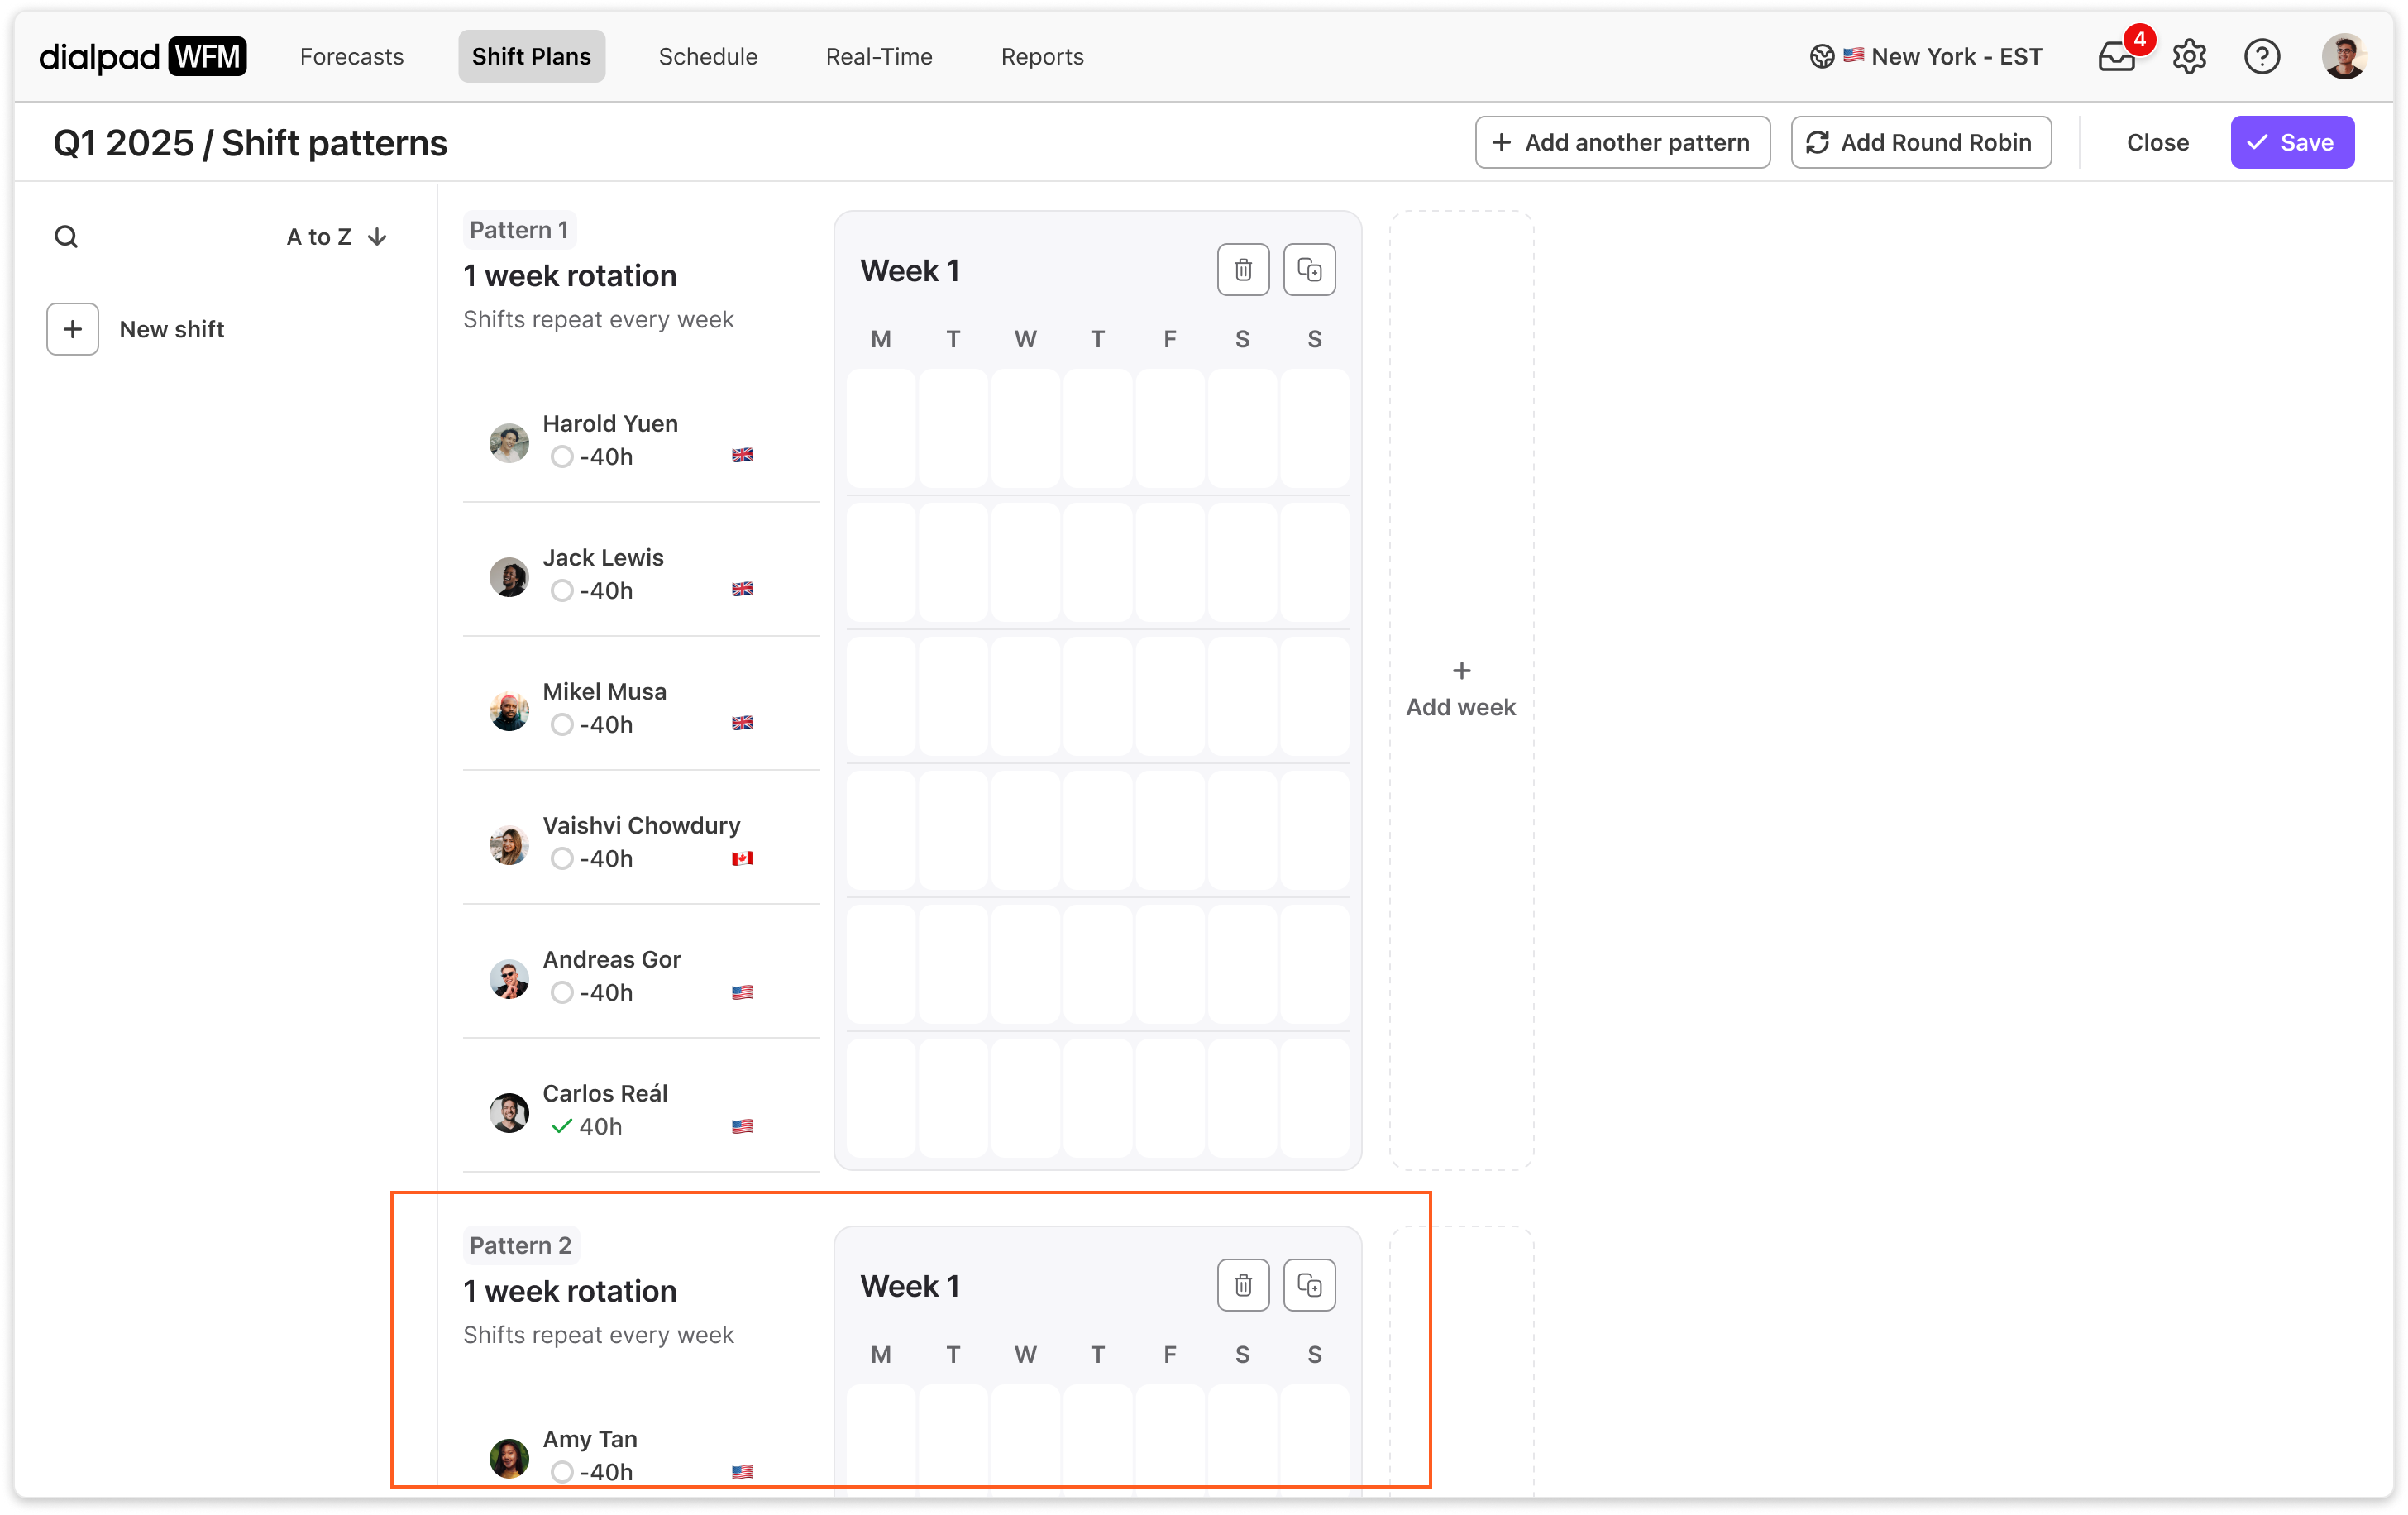
To create a new pattern:
If you want agents to work rotations of different lengths, e.g. some agents have the same shifts every week, whereas another group’s shift patterns repeat every 3 weeks, then you can split agents into separate patterns.
To create a new pattern:
Select create new pattern
.png)
Select the agents you want to add to the pattern
.png)
The new pattern will be created and you can add shifts as before.
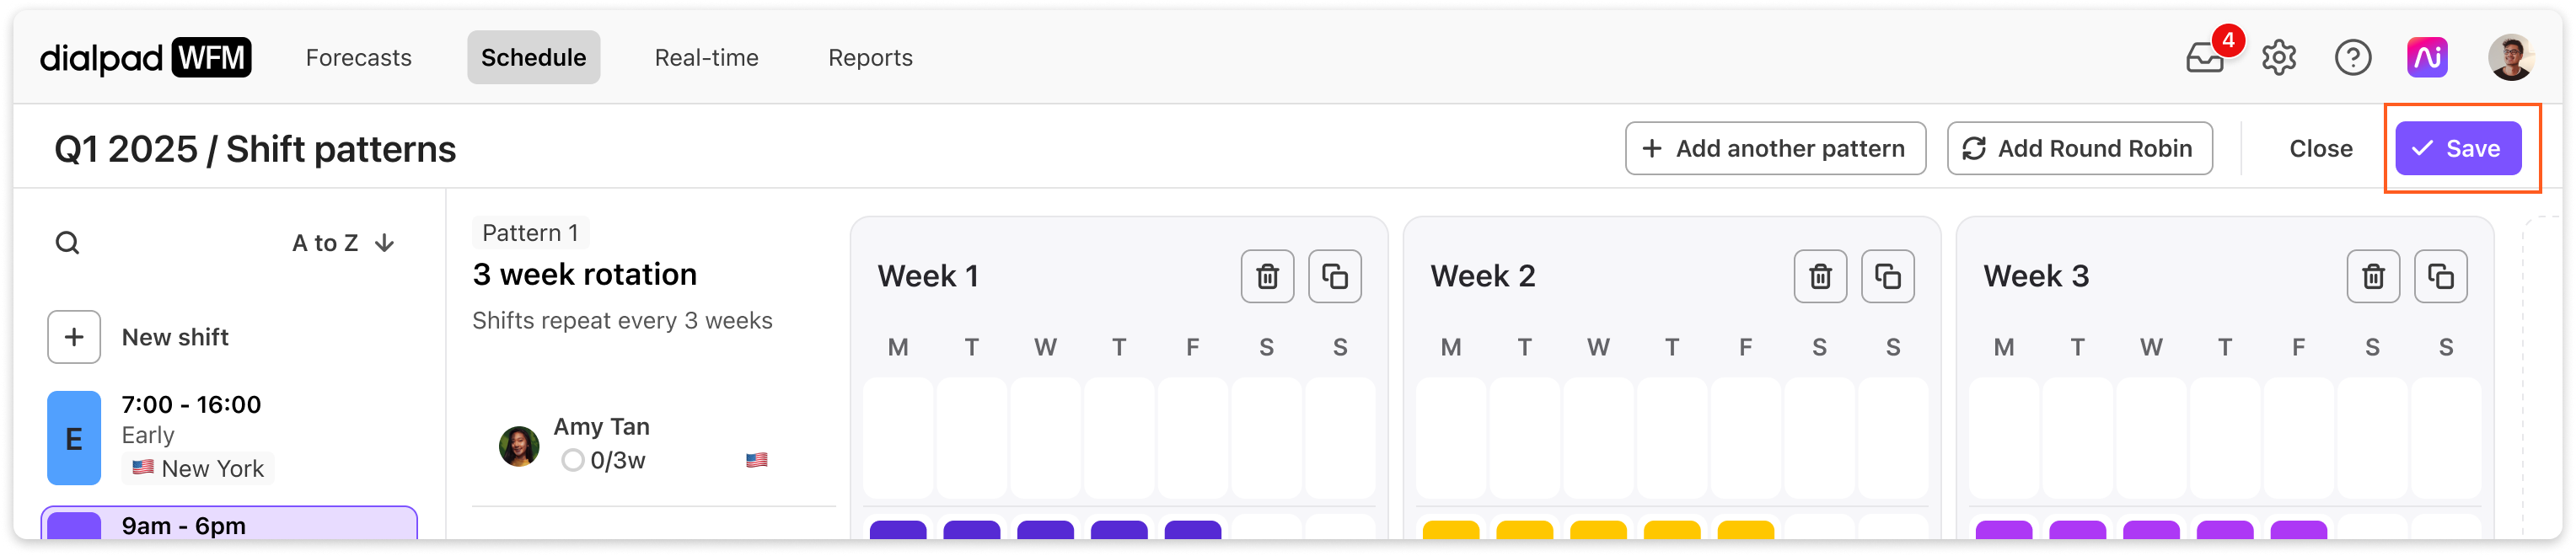
Save your shift plan:
Once you have finished creating all of your agents shift patterns, select save.
You’ll then be asked if you want to add your shift plan to the schedule:
If you’re ready, select yes, continue.
If you’re not, then select not right now. Your shift plan will be saved and can be edited or added to the schedule later.
.png)
Editing tips
There are a few tools you can use to make editing faster and easier:
Hover over an agent and select the three dot menu (….) to move them to a different shift pattern, or to remove them from the plan.
Select the trash button to clear a shift pattern
Select the copy button to duplicate a week
.png)
Add a shift plan to the schedule
Once you have finished editing your shift plan, it’s time to add it to the schedule to produce shifts.
Applying a shift plan will:
Replace all shifts within these dates, according to your viewed timezone.
Remove any previously scheduled activities.
Any manual edits or time off will be shown as conflicts in the schedule.
How to add a shift plan to the schedule:
Navigate to Shift Plans
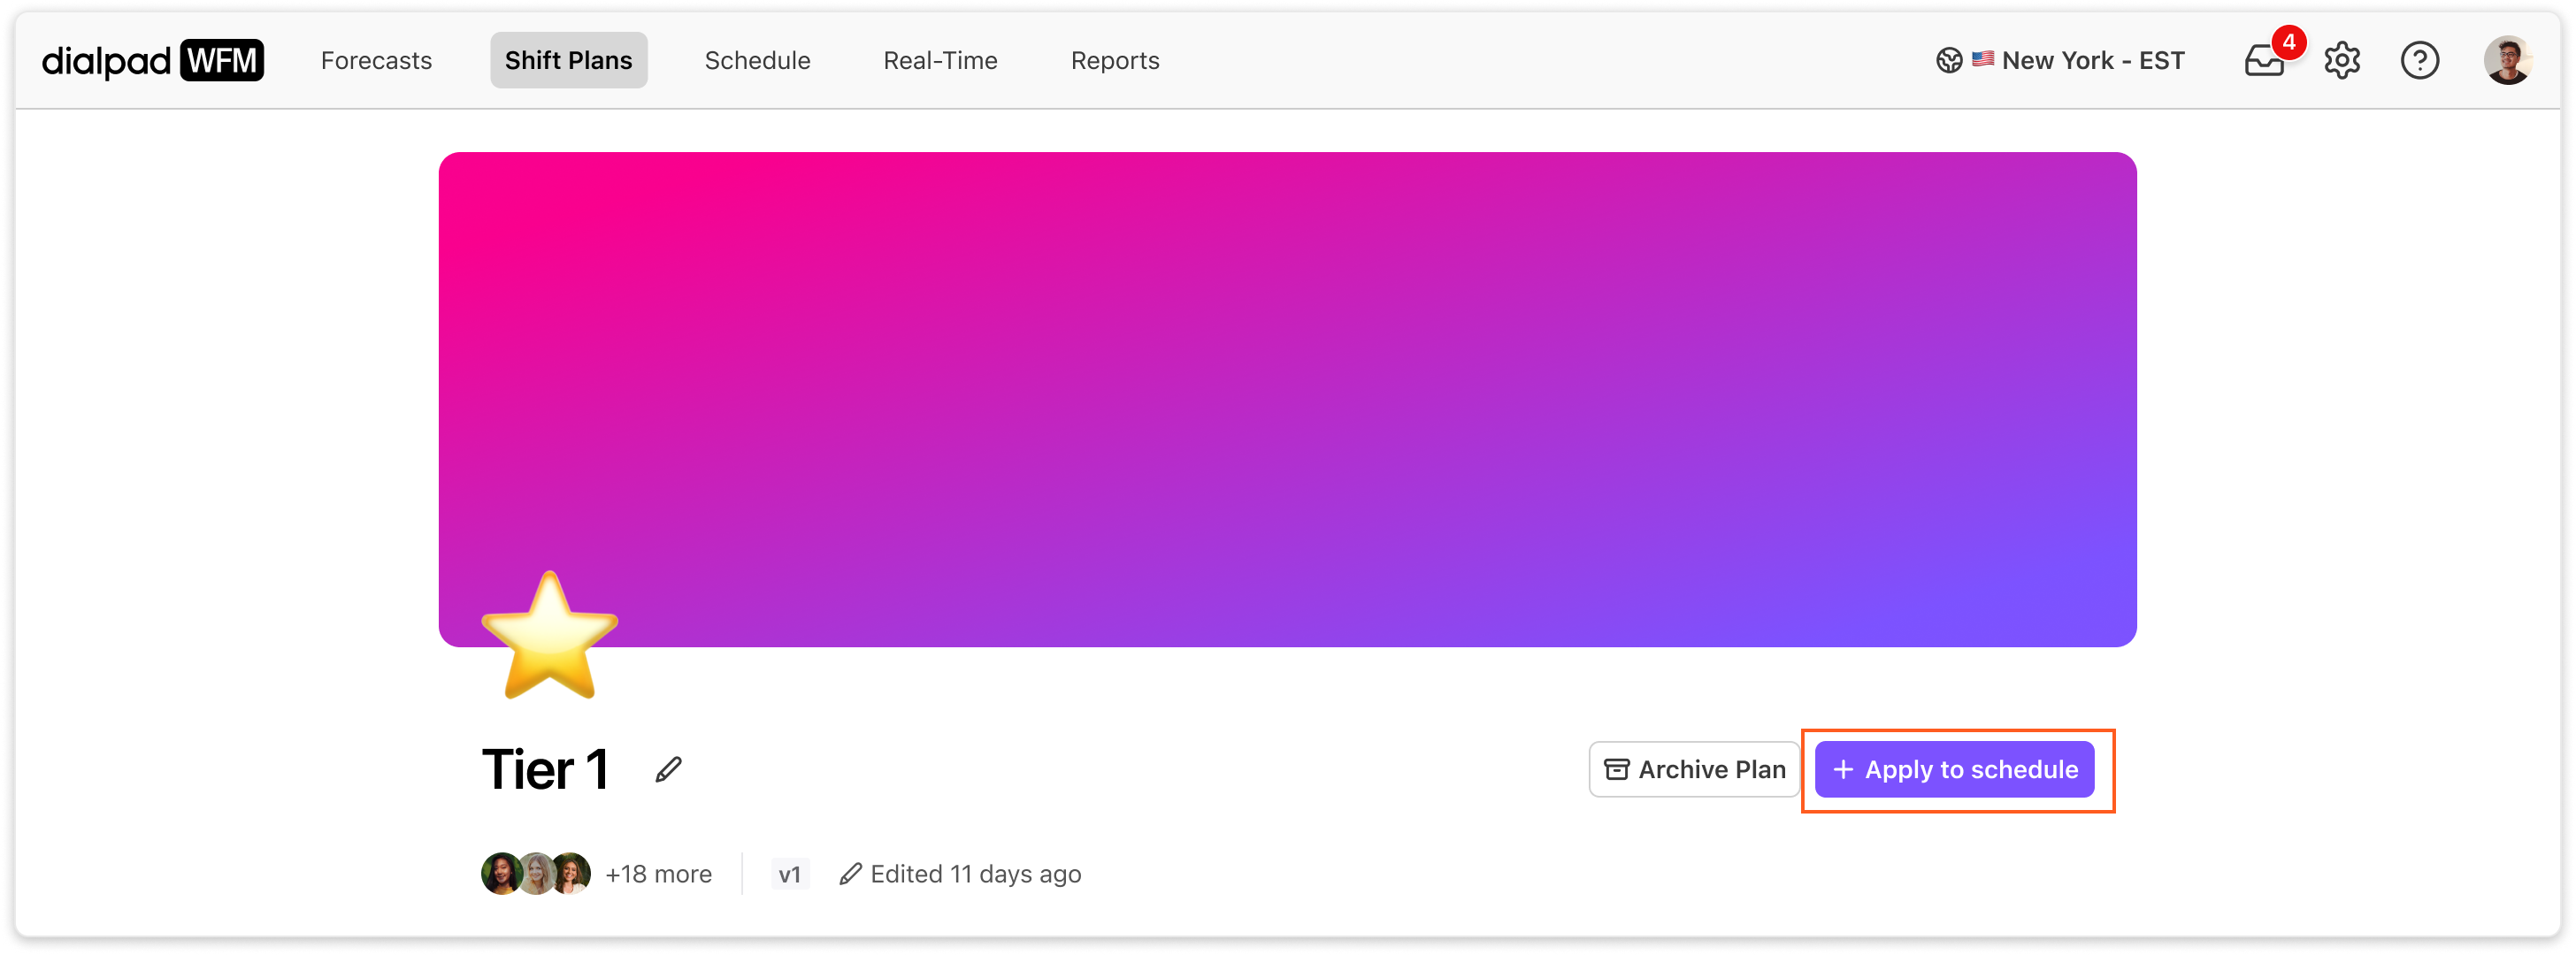
Select the Shift Plan you want to add to the schedule
Select Apply plan to schedule
You’ll then be taken to the shift schedule and the apply plan form will be open.
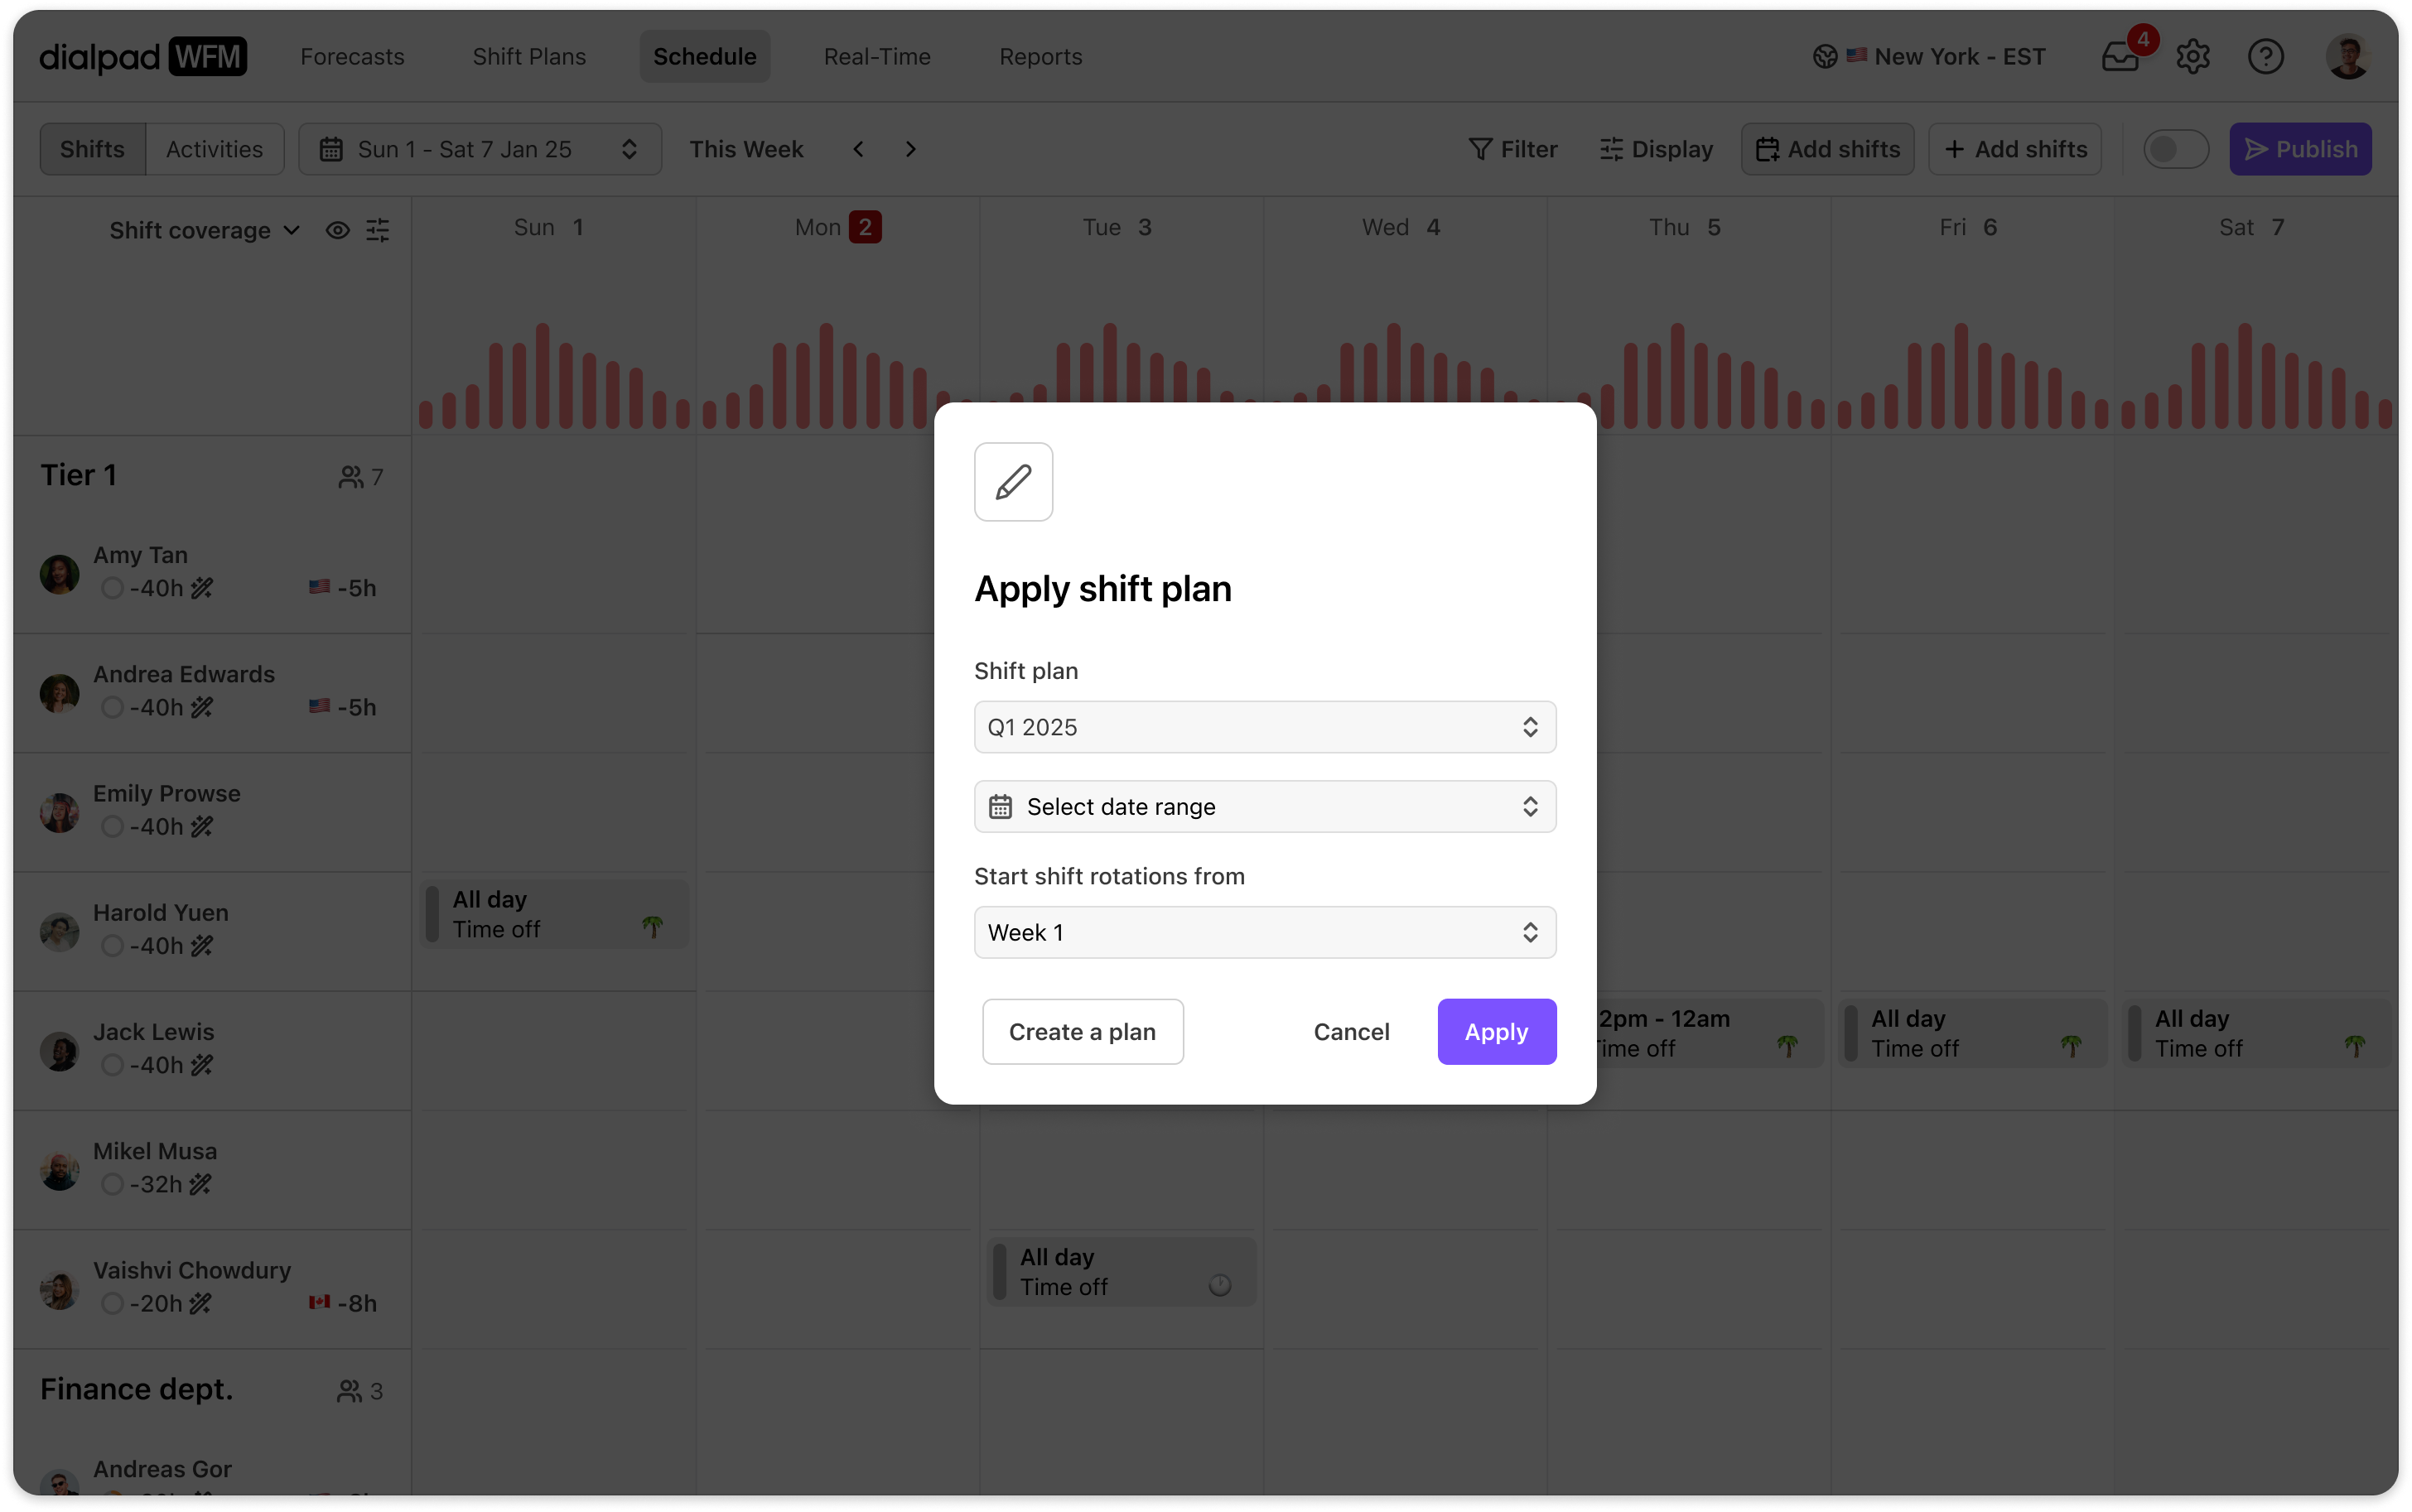
Select the date range you want to schedule shifts for.
(Optional) You can also choose the week that rotations will start on. By default this will be week 1.
Select apply.
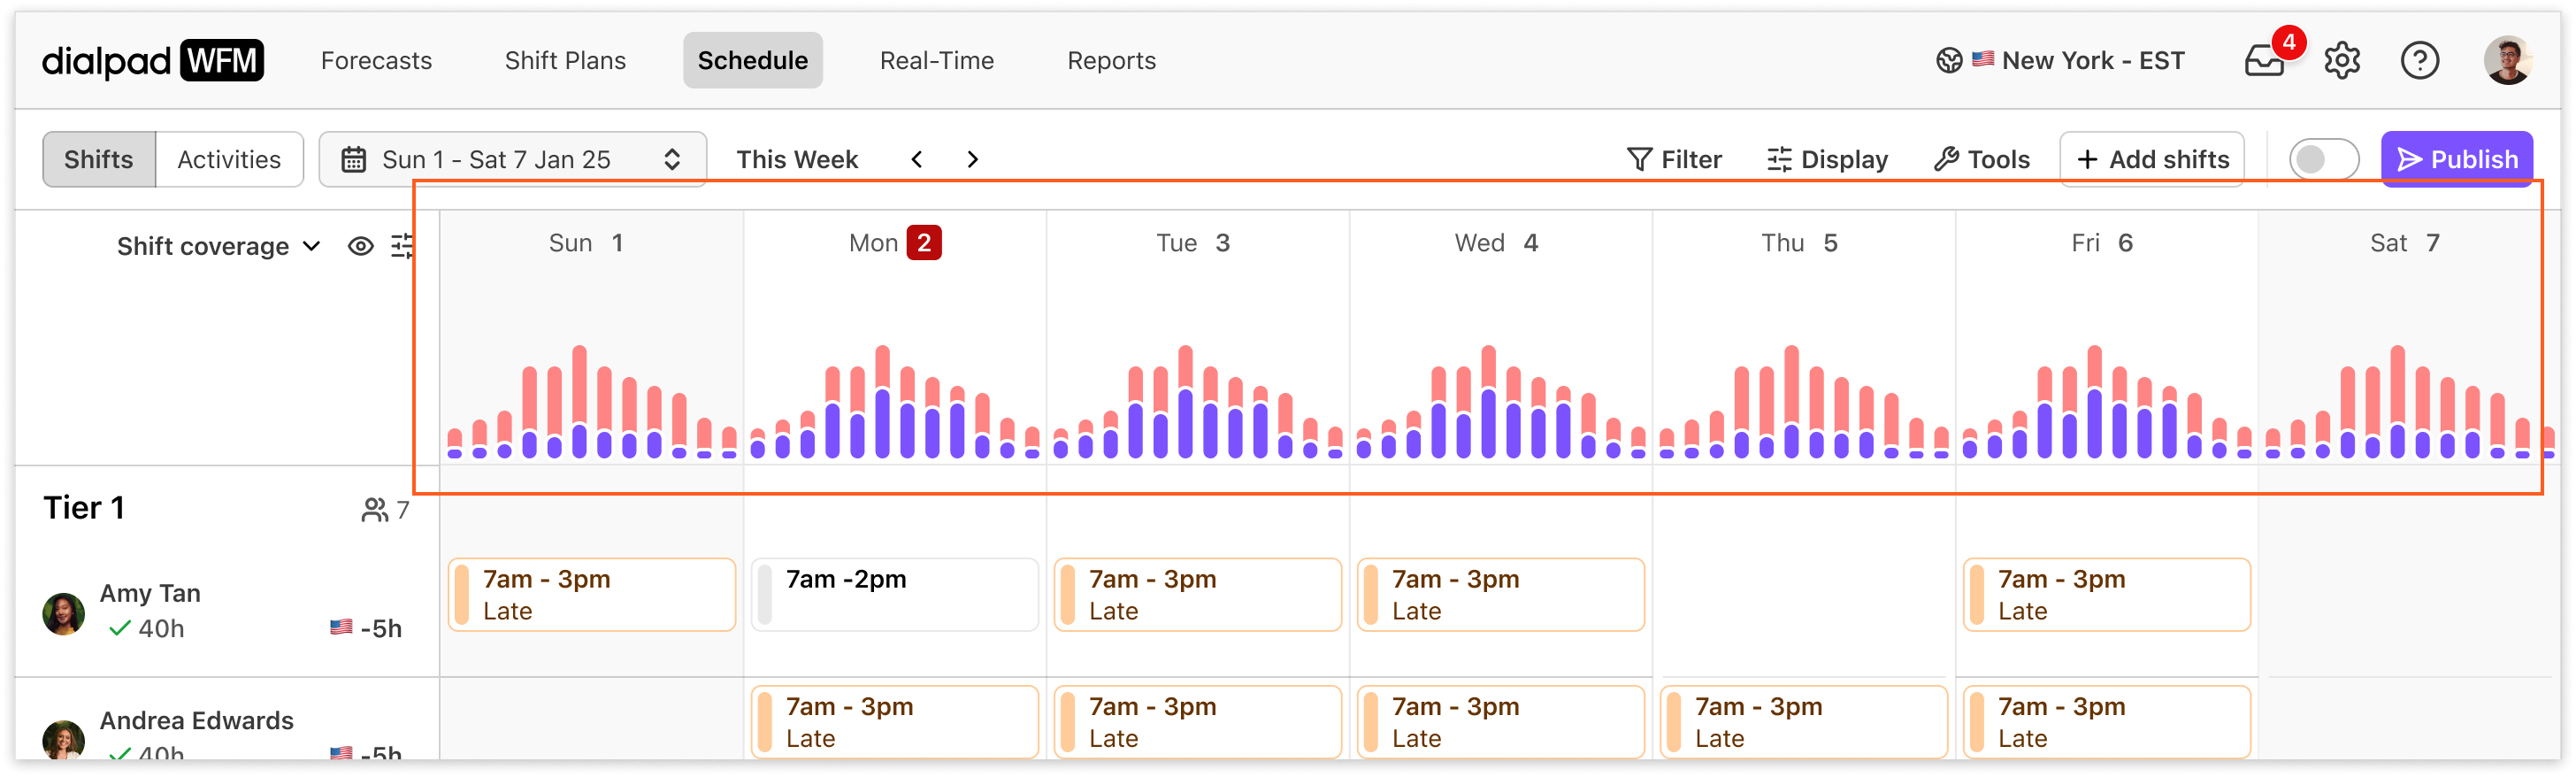
The shift plan will be used to generate a shift schedule for the selected period, repeating shift patterns to fill the time allocated.
At the top of the schedule, you will now see the shift coverage chart. This displays how well staffed each day is compared to the forecasted requirement.
You can learn more about shift coverage in this article.
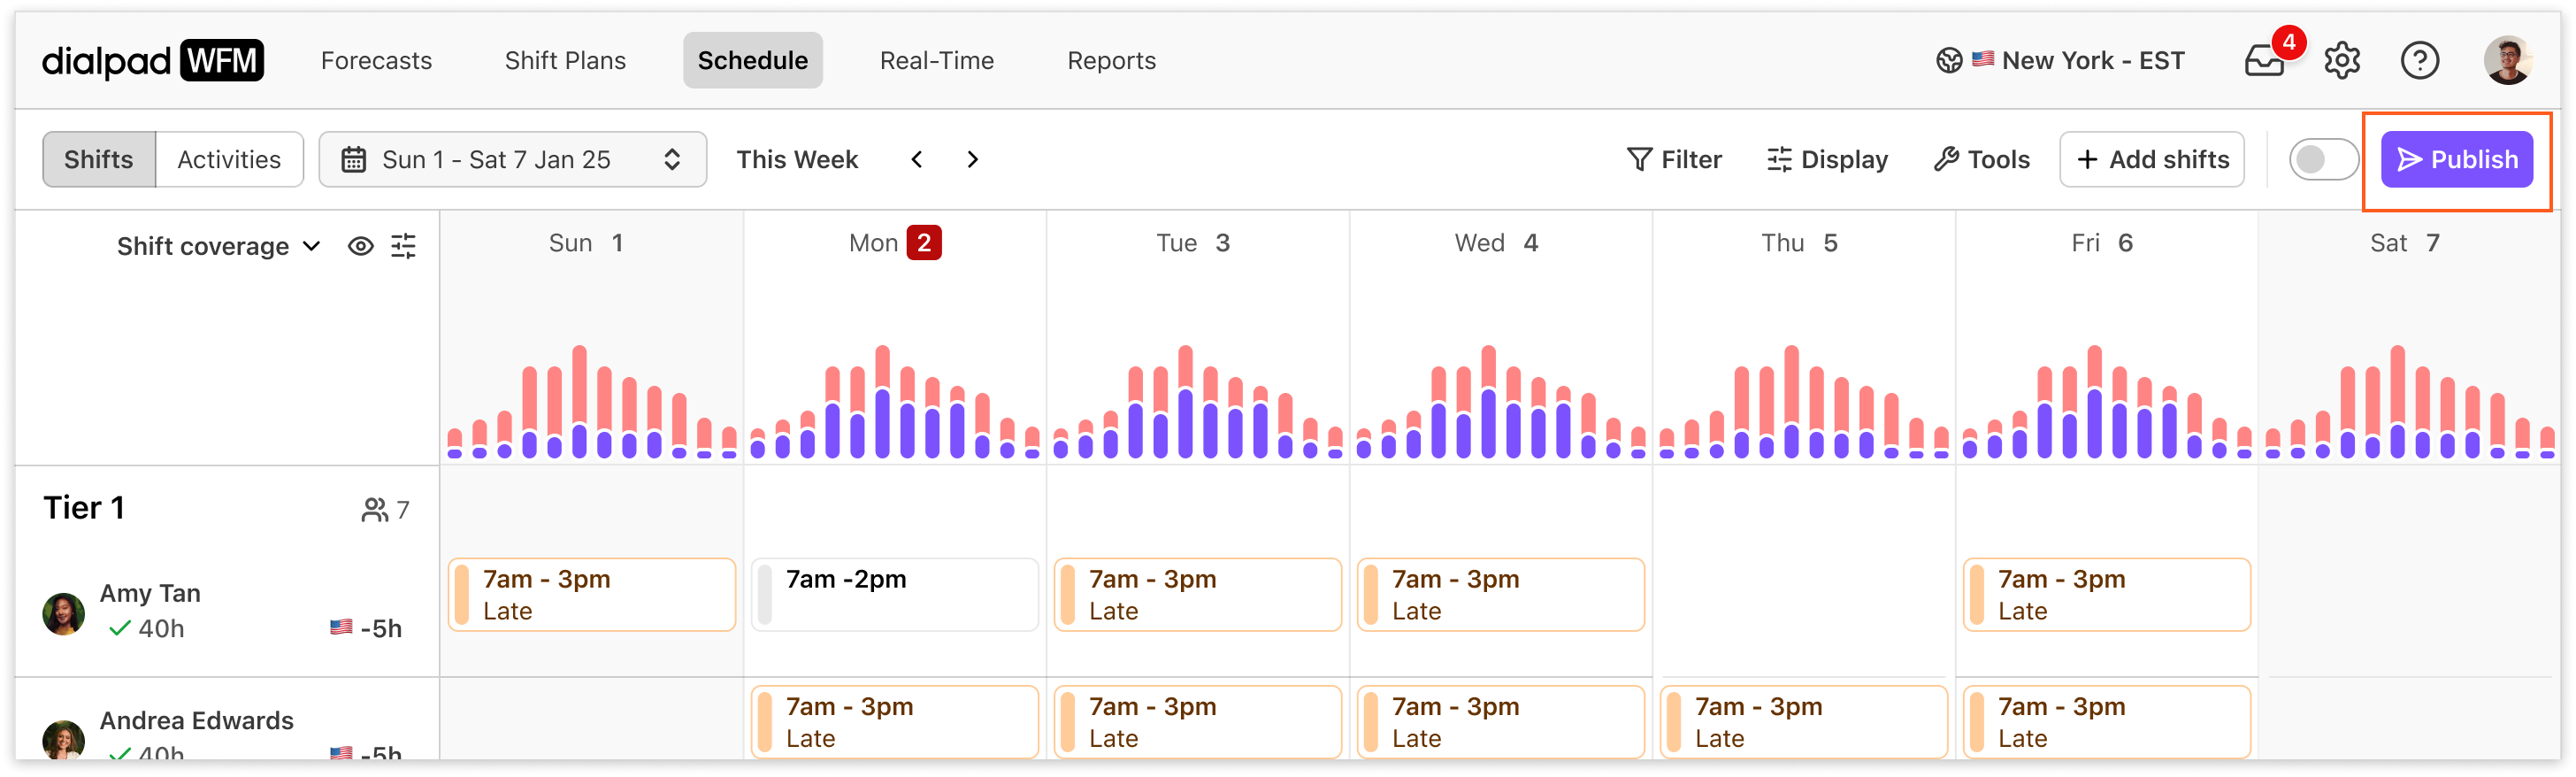
All shifts will be added in draft. This means that only admins can view these shifts. You need to publish the schedule to share it with agents.
Publishing the schedule
Navigate to the schedule
Select publish
Select the agents whose schedules you want to publish
Select the date range you want to publish
.png)
Select publish
Agents will now be able to view theirs and their teammates shifts from within the Agent app!
Frequently asked questions
Will the schedule automatically update when I update a Shift Plan?
No, to update the schedule you need to re-apply the Shift Plan.
What is the difference between Shift pattern and Round Robin?
Round Robins are ideal for use cases like extra weekend or evening shift. For distributing multiple shifts fairly at scale, we recommend creating a Shift Pattern.
My Shift Plan has a mistake—can I fix it?
Yes. If there is an issue with the Shift Plan, or you made a mistake, you can remove it by going to Schedule > Tools, then select Clear shifts.![]()
Can I edit shifts from the schedule?
Yes, you can manually edit the schedule at any time by selecting on shifts or by clicking into empty space. This will not affect or update the Shift Plan, though.
What happens if a shift conflicts with an agent's time off?
Once the schedule is applied, any shift conflicts with an agent's time off will be flagged, so you can arrange coverage.