The Global Contact Center Settings page allows admins to configure centralized settings across multiple Contact Centers. These settings help maintain consistency and simplify management.
Who can use this
Office and Company Admins have default access to the Global Contact Centers Settings page. Contact Center Admins and Supervisors can also manage these settings if given permission.
Access Global Contact Center Settings
To access your Global Contact Center Settings, go to your Dialpad Admin Settings and select Contact Centers.
.png)
Here, you’ll see 3 sections:
Agent and Call Settings: Lets you manage agent and call settings for Voice Contact Centers.
Digital Settings: Lets you manage settings for Digital Contact Centers.
Contact Center Holidays: Lets you create and manage holidays for all contact centers within the Office.
Assign Global Contact Center Settings permission
Contact Center Admins and Supervisors can edit the Global Contact Center Settings page once granted permissions.
Note
By default, only Office and Company Admins can edit the Global Contact Centers Settings page.
To assign the Global Contact Center Settings permission set:
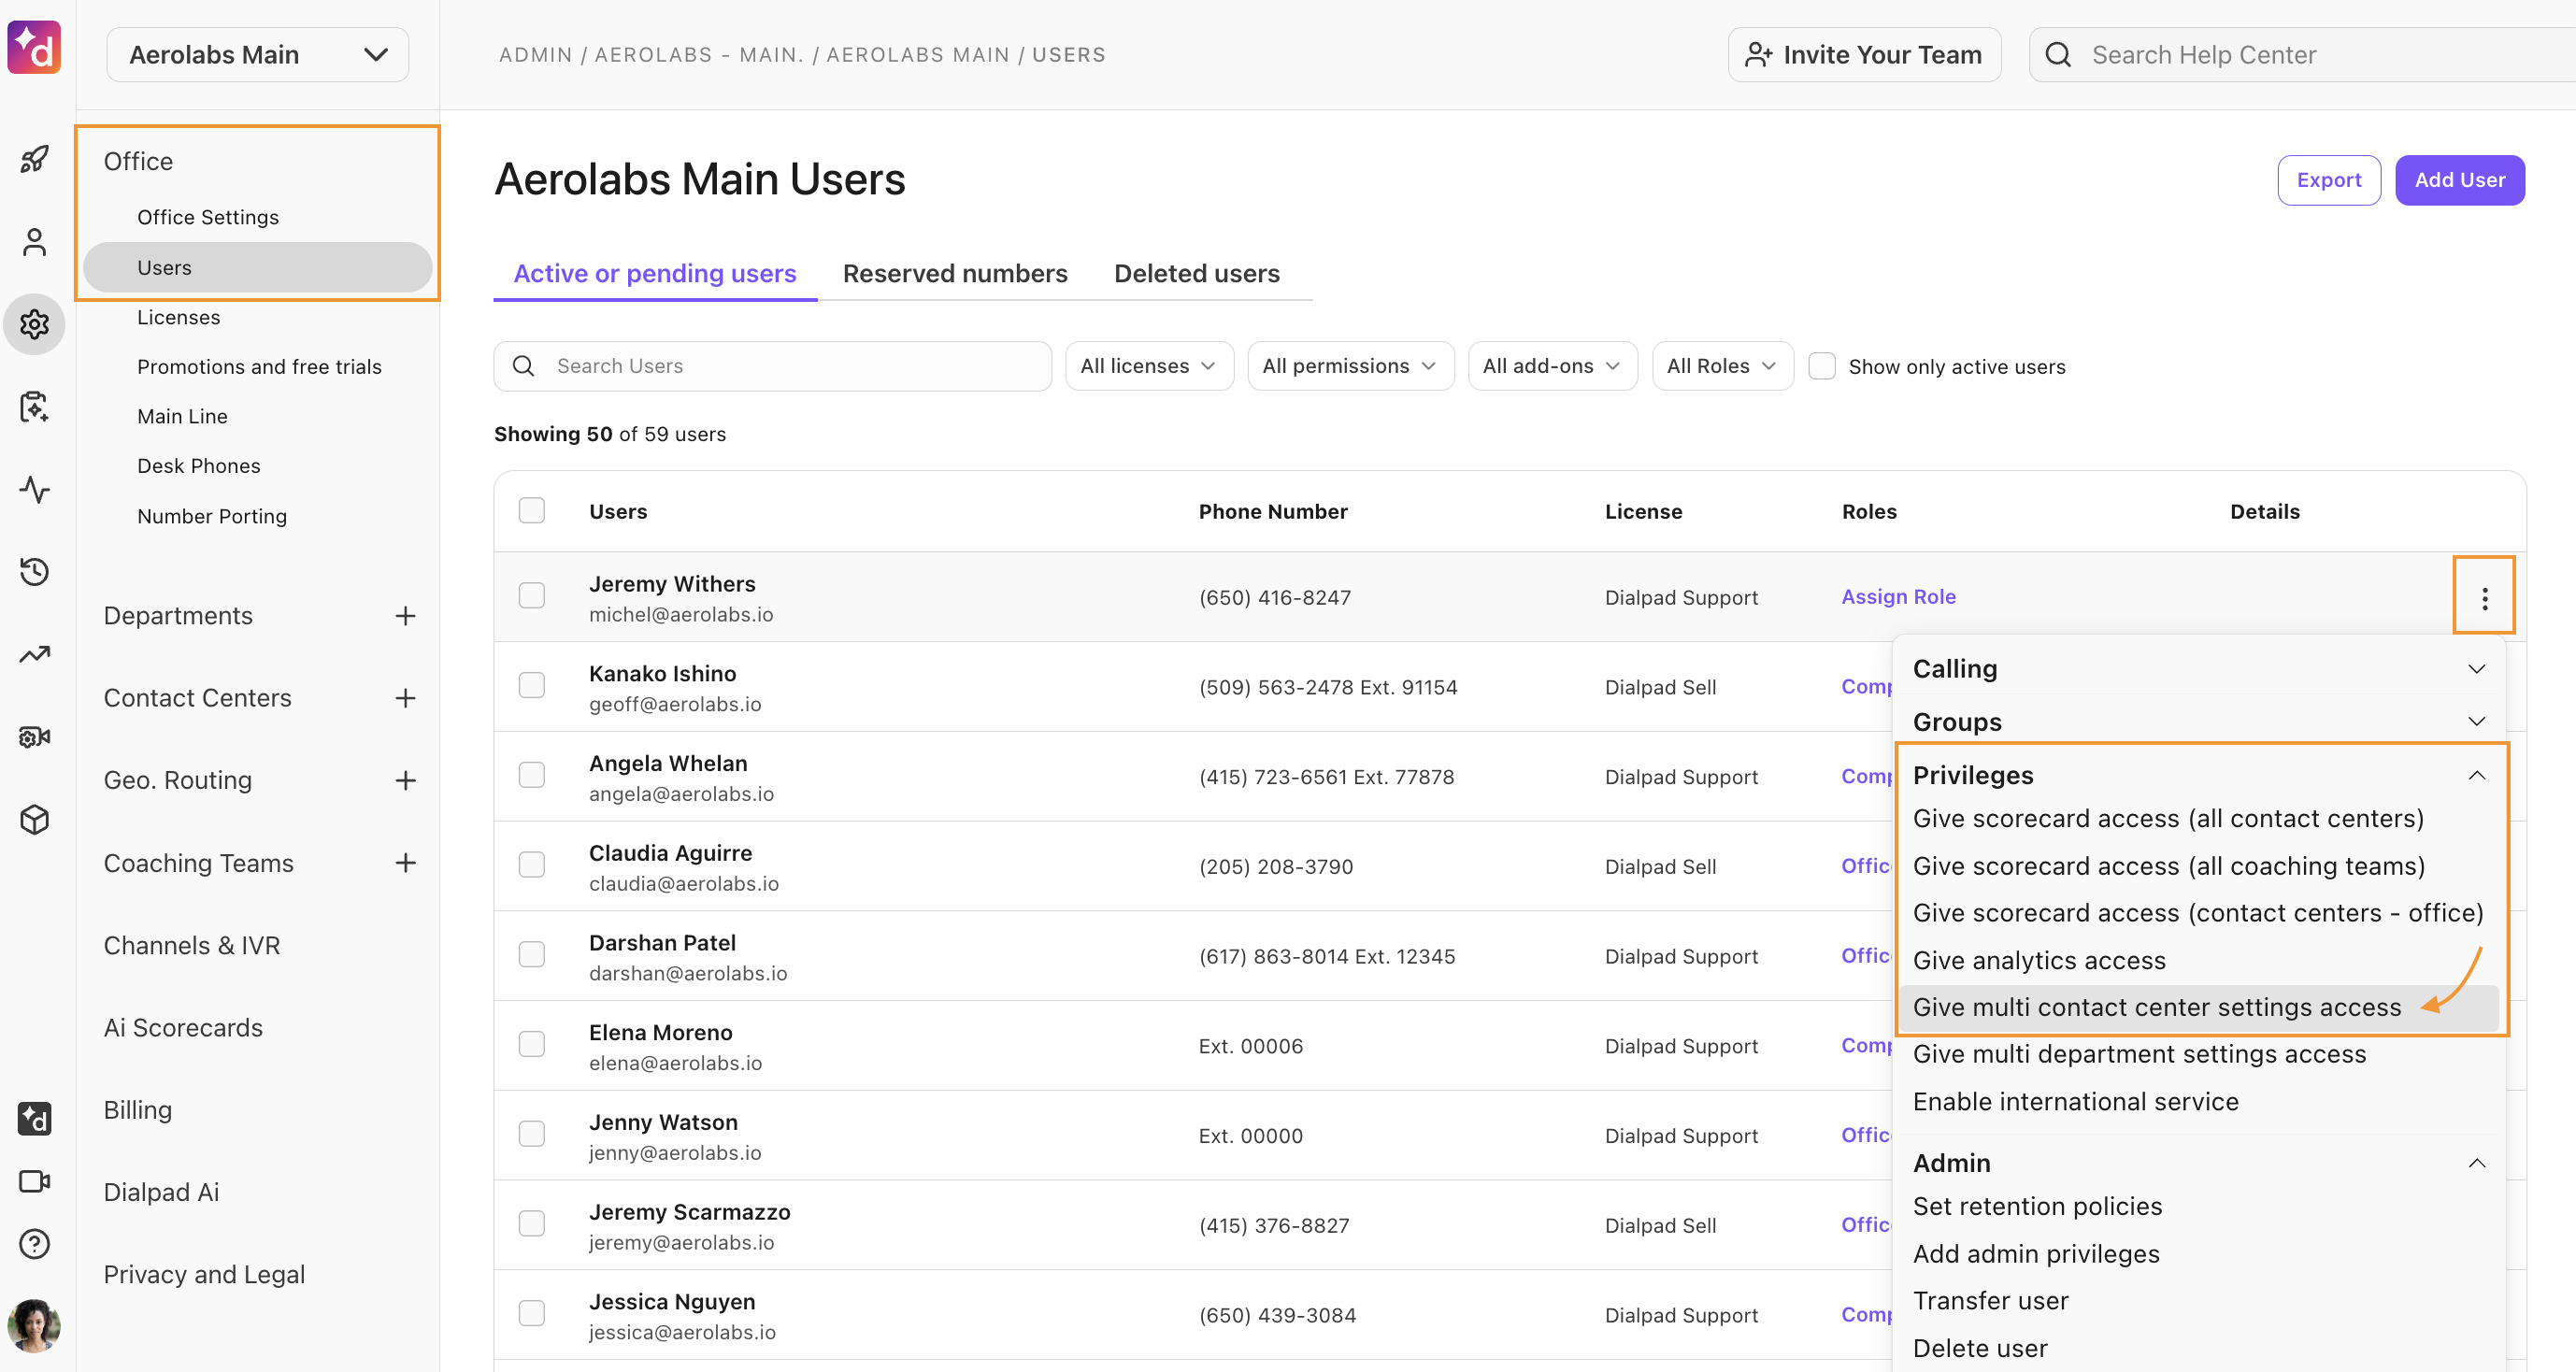
Navigate to Dialpad Admin Portal > Office, and select Users
Find the user you want to assign Global Contact Center Settings access > select Options
From the drop-down menu, select Privileges > Give multi contact center settings access
Agent and call settings
From the Agent and Call Settings Page, you can restrict agents, from viewing their contact center settings, manage routing and SMS auto-reply options, enable the off-duty timer and call transferring options, as well as enable automatic call recording backup rules. 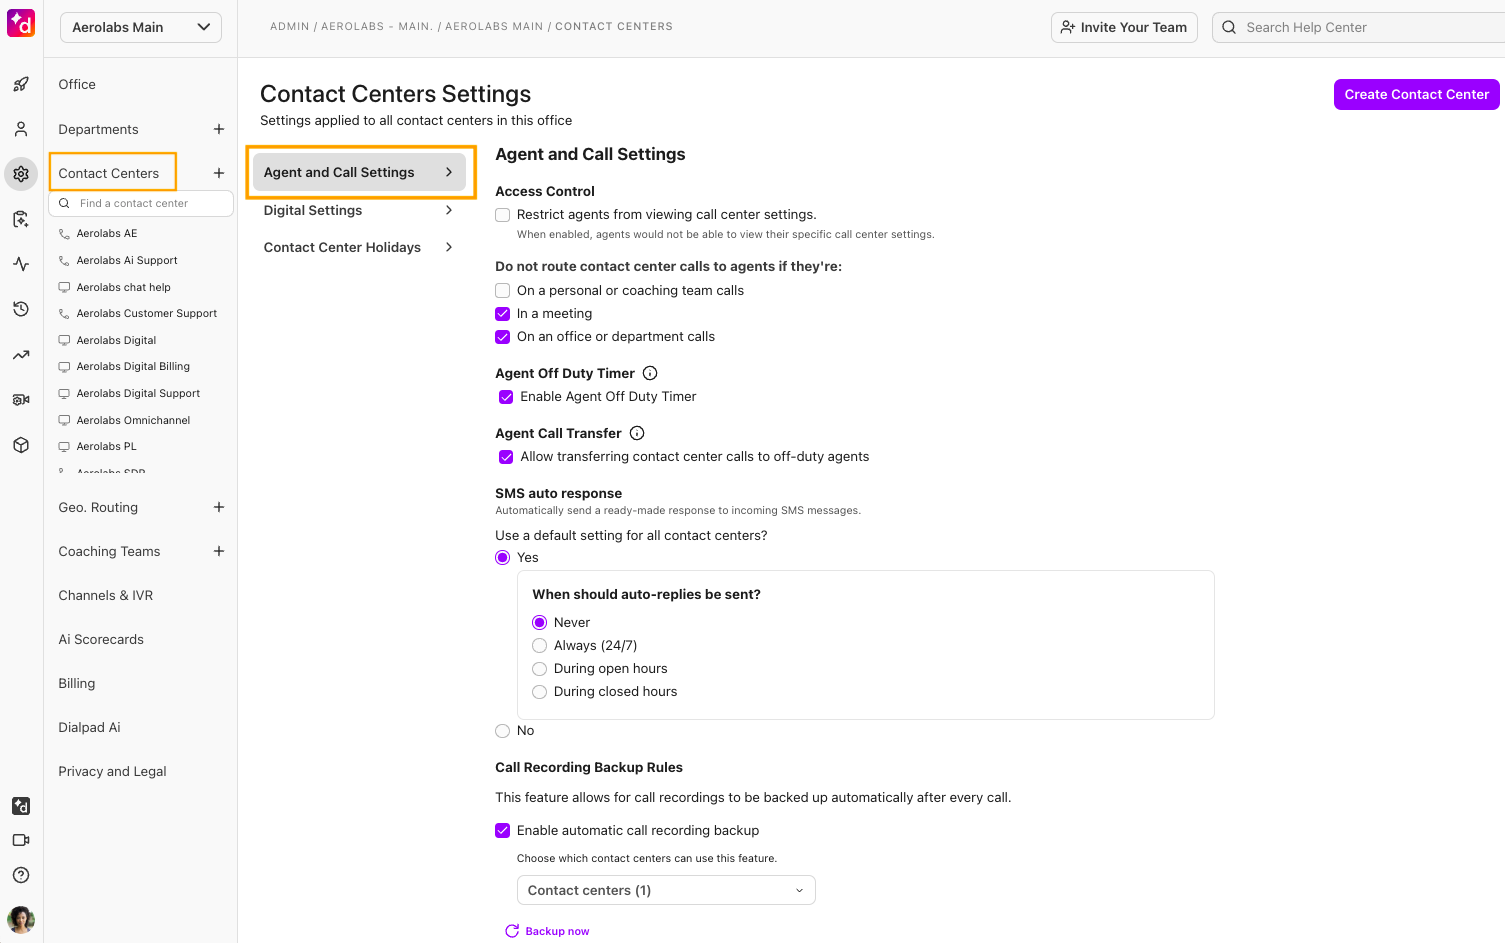
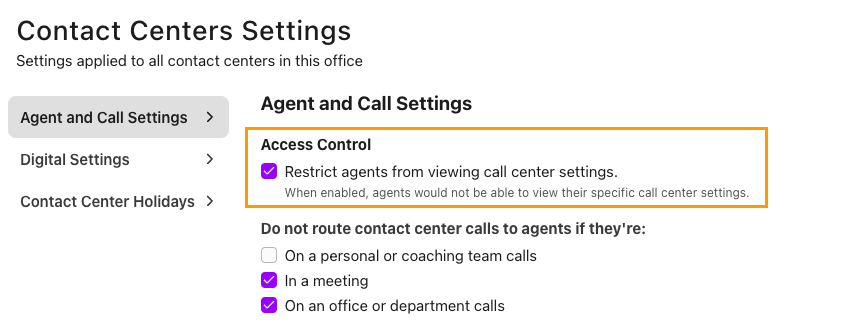
Access control
Use Dialpad’s access control settings to determine if agents can view their contact center settings. When this setting is enabled, agents will be prevented from viewing these settings.
To set access control preferences, go to your Global Contact Center Settings.
Select Agents and call settings
Navigate to Access Control
Check the box beside Restrict agents from viewing call center settings
Set available and busy state preferences
Choose whether you'd like your agents to remain available or busy when they are receiving or placing direct calls (or while they are in a meeting) by setting available and busy state preferences.
Here are the differences between the available and busy states.
Available | When an agent's state is Available, they can still receive direct and Contact Center calls. If they ignore a Contact Center call while available, they will be put into an Off-duty state. This lets you prioritize Contact Center calls over all other calls. |
Busy | When an agent is in a Busy state, they are unable to receive a Contact Center call until they revert into an Active state. This state will not allow for wrap-up, or dispositions, and upon the termination of a call, the agent will immediately revert to an Available state. This lets agents handle other calls outside of Contact Center calls but can be tracked in analytics and accurately reflects the agent's activity. |
To set agent state preferences, go to your Global Contact Center Settings.
Select Agents and call settings
Navigate to Do not route contact center calls to agents if they're:
Choose when you don’t want your agents to handle calls
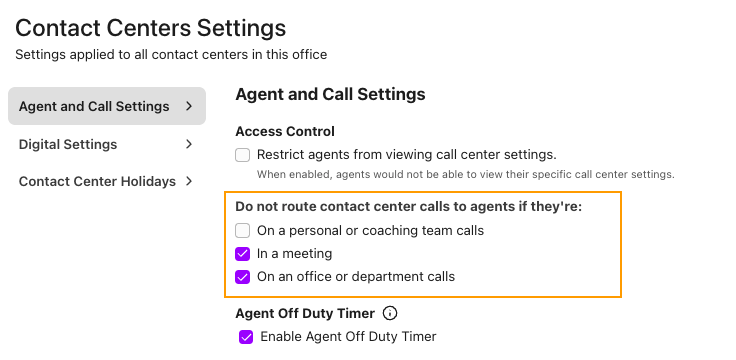
Note
If you don't select any options, the agent's state will remain available when on calls (personal, coaching team, office, or departmental) or in a meeting.
Agent off duty timer
Set an off-duty timer to inform agents of how long they’ve been in an Off Duty state.
To set the off-duty timer for all your Contact Centers, go to your Global Contact Center Settings.
Select Agents and call settings
Navigate to Agent Off Duty Timer
Check the box to enable the timer
.png)
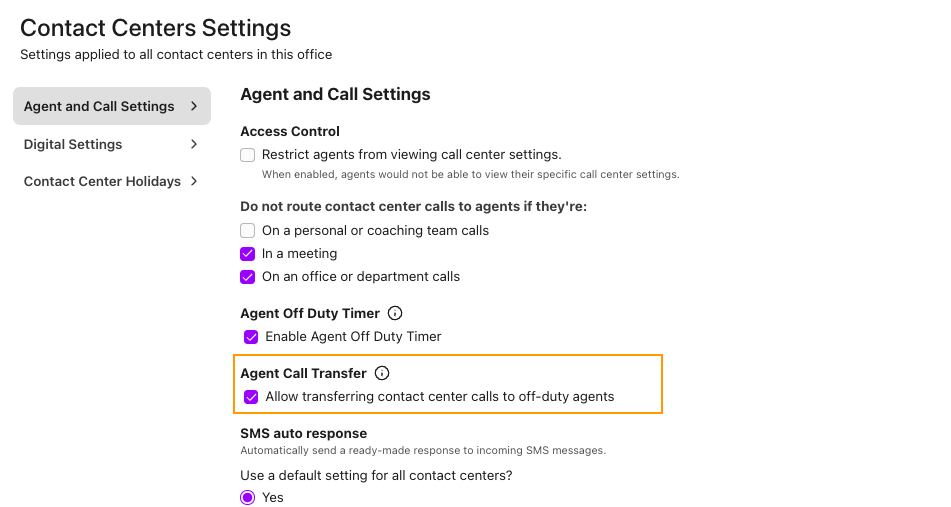
Agent call transfer
Allow to transfer calls to agents that are in off-duty or an off-duty custom state.
To enable Agent Call Transfer, go to the Global Contact Center Settings.
Select Agents and call settings
Navigate to Agent Call Transfer
Check the box to allow agents to transfer calls to agents in off-duty or custom state
SMS auto reply
Choose to use an auto response that customers will receive when they send an SMS to your contact centers.
To enable SMS auto reply, go to the Global Contact Center Settings.
Select Agents and call settings
Navigate to SMS auto reply
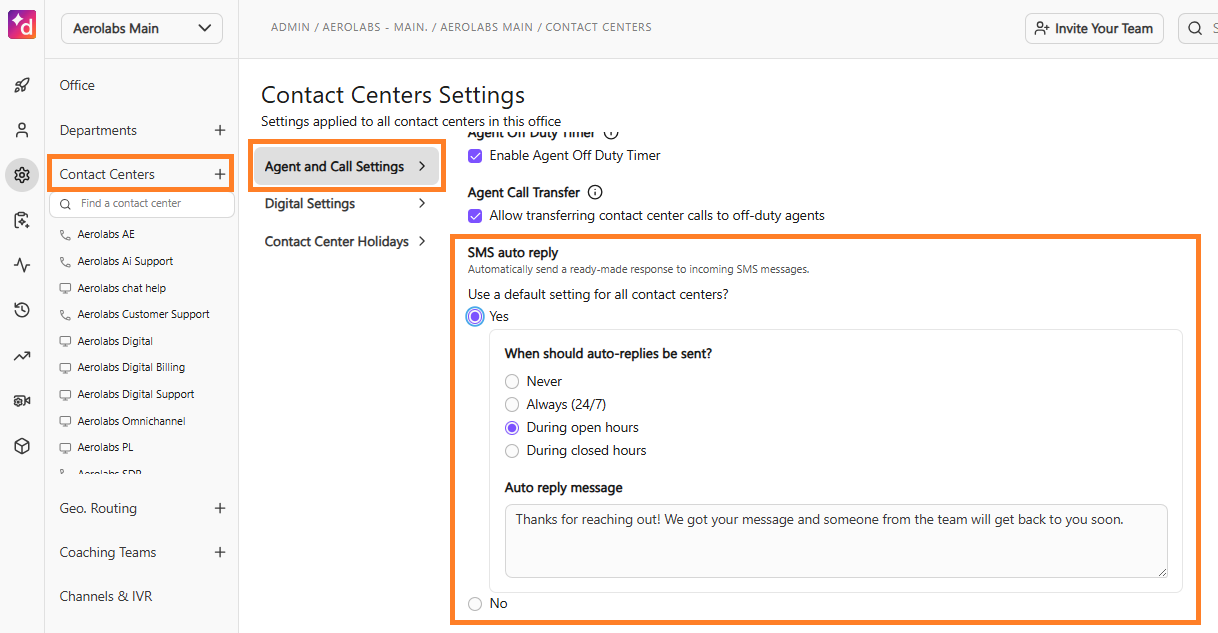
Select Yes to set a single auto reply to all departments.
Select No to set an individual auto-reply for each department.
Enter the auto reply message
If you choose No, you need to set up each auto-reply for each contact center by going to Business Hours and Call Routing > SMS Auto Reply..png)
Note
Standard messaging rates apply for SMS auto-replies.
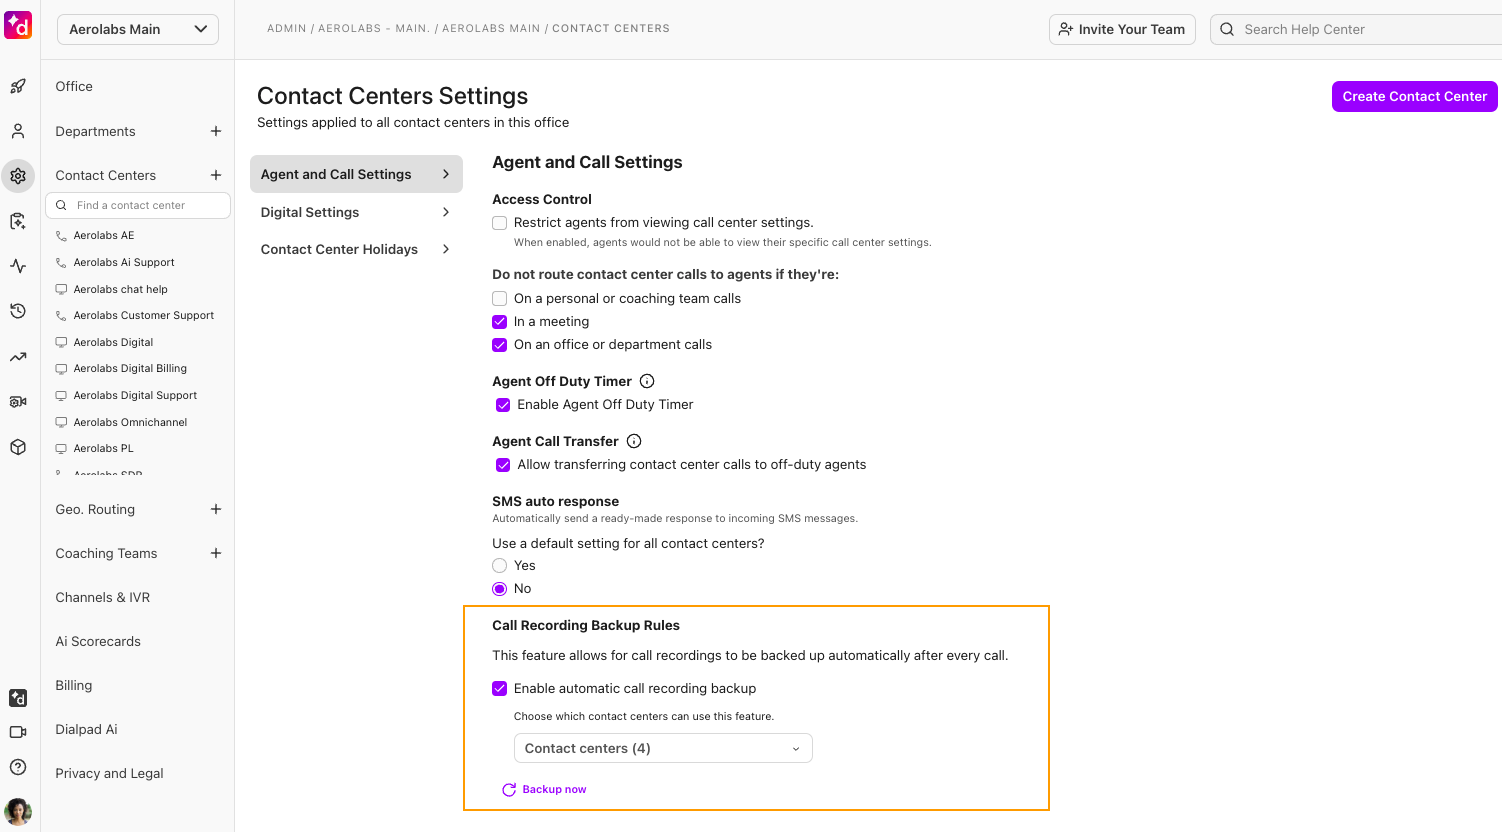
Call recording backup rules
Use the call recording backup rules to determine which contact center’s calls will be automatically be backed up after every call.
To enable automatic contact center call backup, go to the Global Contact Center Settings.
Select Agents and call settings
Navigate to Call Recording Backup Rules
Check the box beside Enable automatic call recording backup
Choose which contact center(s) calls you want to backup
Select Backup now
Digital Settings
From the Digital Settings Page, you can control settings for all the Digital Contact Centers in your Office.
Agent Sessions Limit
Set an Agent Sessions Limit to determine the maximum number of digital sessions your agents can have at once.
Note
This setting is only visible if you have a Digital Contact Center.
To set an Agent Sessions Limit, go to Global Contact Center Settings.
Select Digital Settings
In the Agent Sessions Limit section, enter the maximum number of sessions agents can have at once
.png)
Tip
If you don’t want to apply a session limit, check the box beside Allow unlimited sessions.
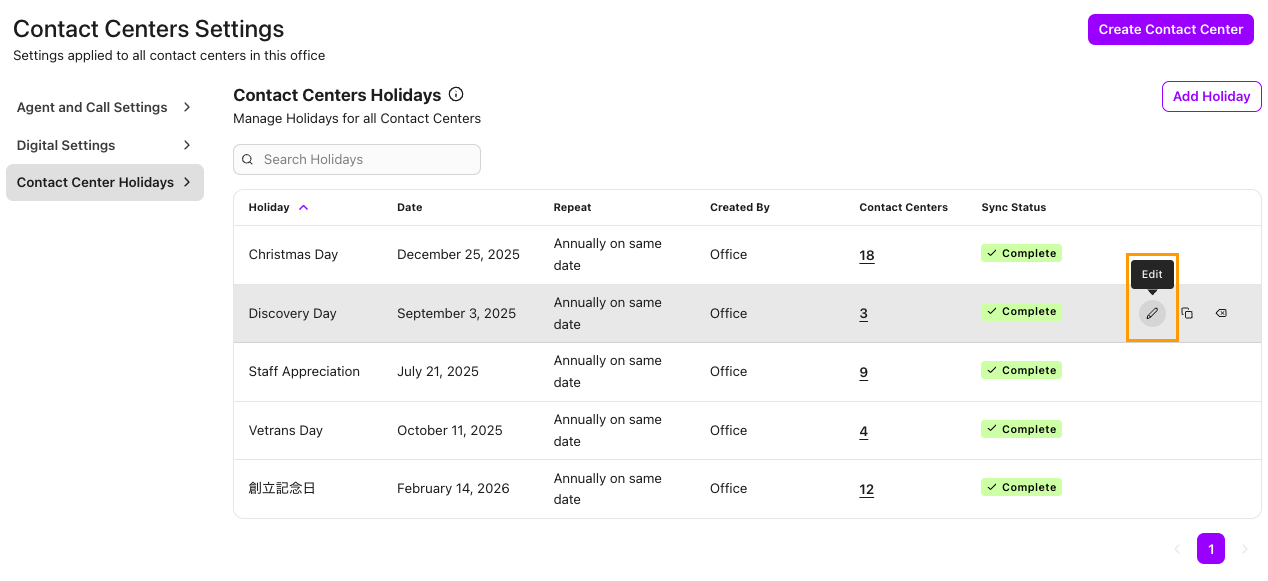
Bulk holiday updates for Contact Centers
Holiday updates can be applied across all linked Contact Centers at once to help streamline workflow. Admins can add, modify, or delete holidays quickly to maintain consistency across operations.
To make a bulk update to a holiday Contact Centers, go to your Global Contact Center Settings
Select Contact Center Holidays
Hover over the holiday you want to update, then select Edit, Clone, or Delete
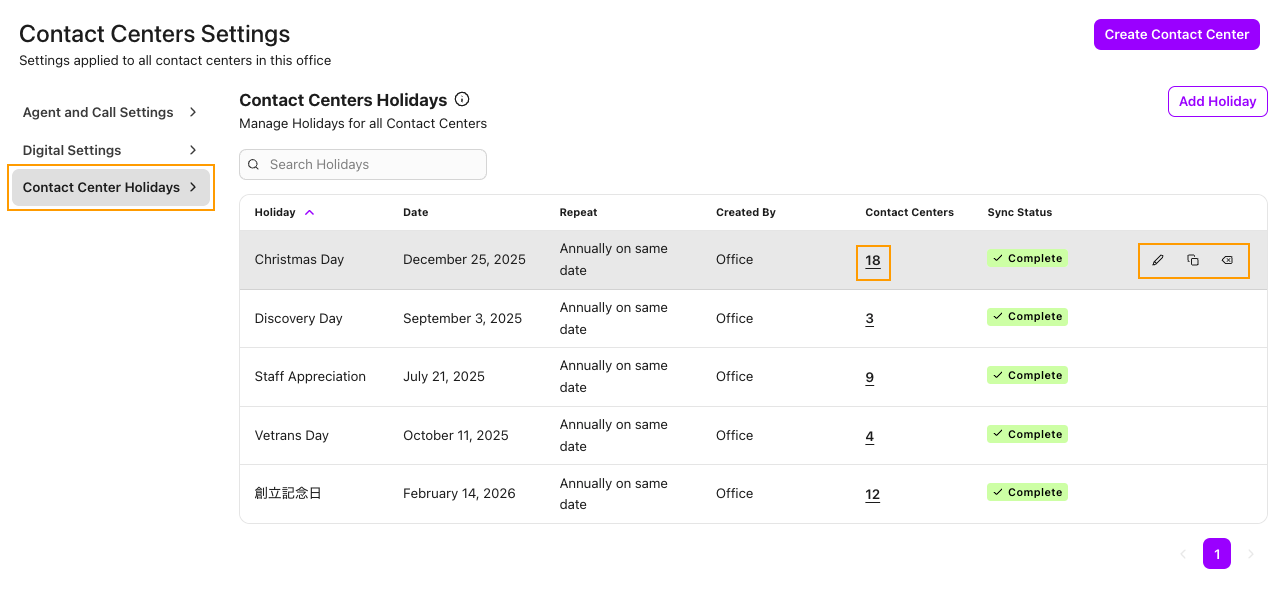
Update the information for the holiday
Select Update
Tip
In the Contact Centers Column, select the number to see which Contact Centers the holiday is assigned to.
Create a multi-Contact Center holiday
To create a holiday and apply it to multiple Contact Centers, go to your Global Contact Center Settings.
Select Contact Centers Holidays
Select Add Holiday
.png)
Add information about the holiday, including:
Name
The name of the holiday
Date
The date of the holiday
Frequency
How often the holidays repeats
Open/Closed
Choose whether the Contact Center is open or closed
Hour and routing
Choose the operating hours and routing rules during the holiday. If business hours are closed, the Closed routing rules automatically apply.
Contact Center
Choose which Contact Centers the holiday applies to
Select Create
Edit an existing holiday
Existing holidays can be updated should you need to add new information, such as routing or another Contact Center.
To edit an existing multi-Contact Center holiday, to to Global Contact Center Settings
Select Contact Centers Holidays
Hover over the holiday you want to update and select Edit
Make the changes to the holiday
Select Update