Engage customers on every channel and continuously up-level your customer experience by adding emerging channels as they become available.
Let's dive into the details below.
Who can use this
Contact Center Admins can manage all things Digital Experience from the Historical Administration Portal.
Digital Engagement Historical Administration Portal
Update your channels, users, branding, and more from the Historical Administration Portal.
To access the Historical Administration Portal, go to your Dialpad Admin Settings.
Select Channels & IVR
Select Historical administration
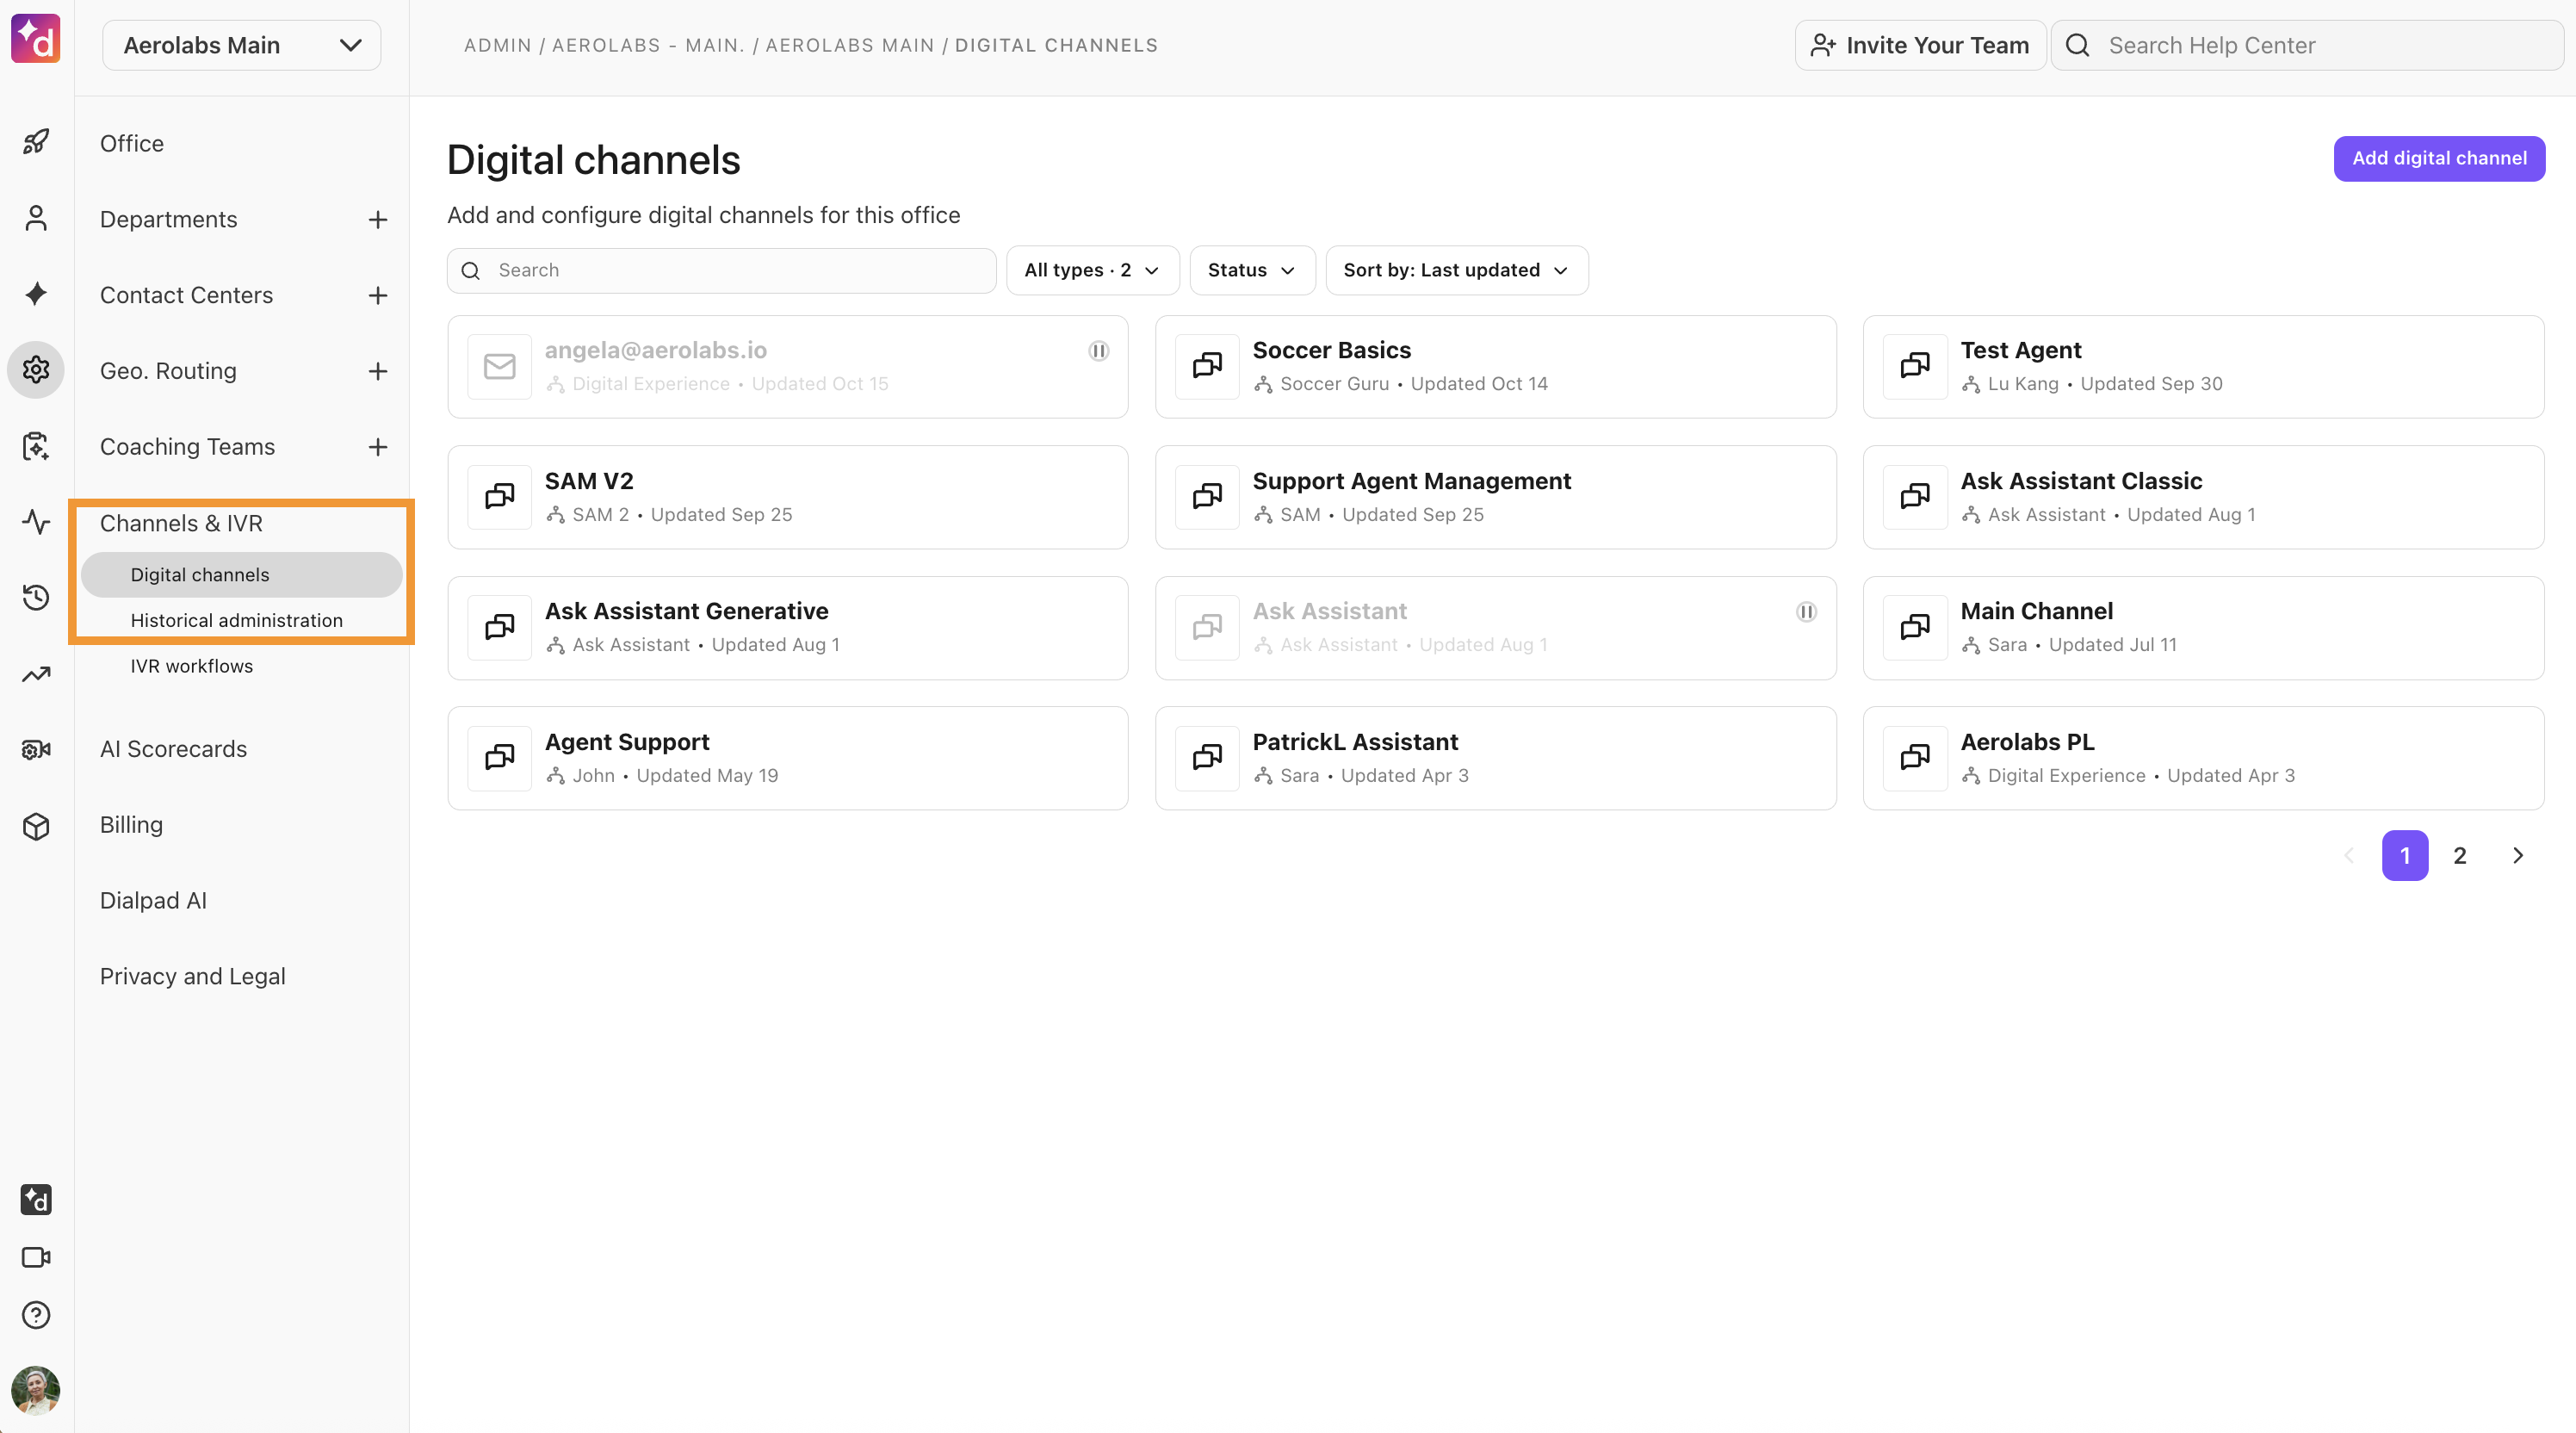
A new tab will open, taking you to your Digital Experience Admin Portal
Channel overview
The Channels section displays your live channels and their selected experiences. These channels allow you to receive contacts from different platforms, such as SMS or WhatsApp.
From the Historical Administration Panel, select Admin, then navigate to Channels.

Dialpad currently integrates with the following channels:
Facebook Messanger
Facebook
Instagram
SMS
WhatsApp
Email
Read this Help Center article to learn more about our supported channels and their capabilities.
Add a channel
First, you need to ensure that you have the correct platform log-in information to authorize Digital Experience access to a new channel.
Some channels require the business to have login access to authorize the Dialpad app for their social/messaging site. In some instances, you may need to provide keys, tokens, or credentials to complete the linkage (they will ask for the appropriate information).
To add a channel, go to your Historical Administration Panel.
Select Admin
Navigate to Channels
Select Add
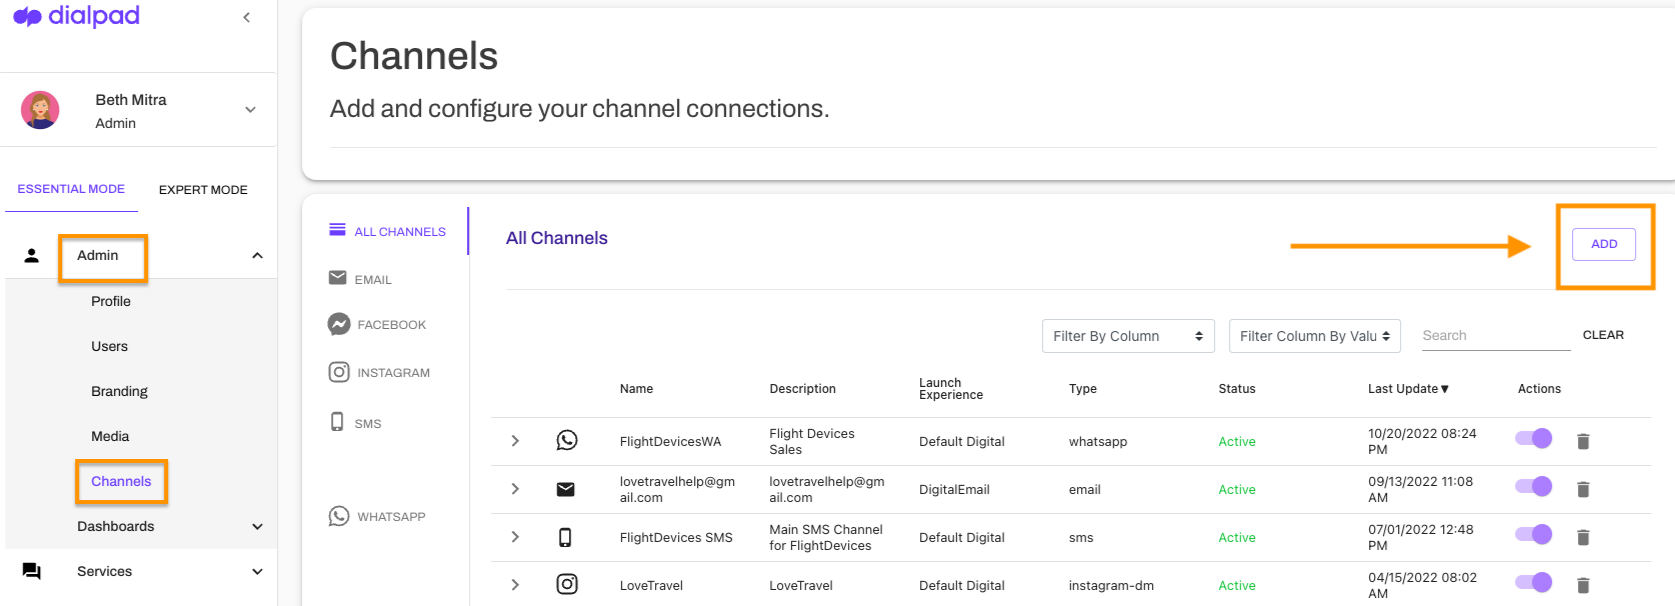
Select the channel type
Follow the prompts (login or enter your credentials)
Remove a channel
Communication methods are constantly changing. Fortunately, Dialpad makes it nice and easy to remove a channel when your business needs evolve.
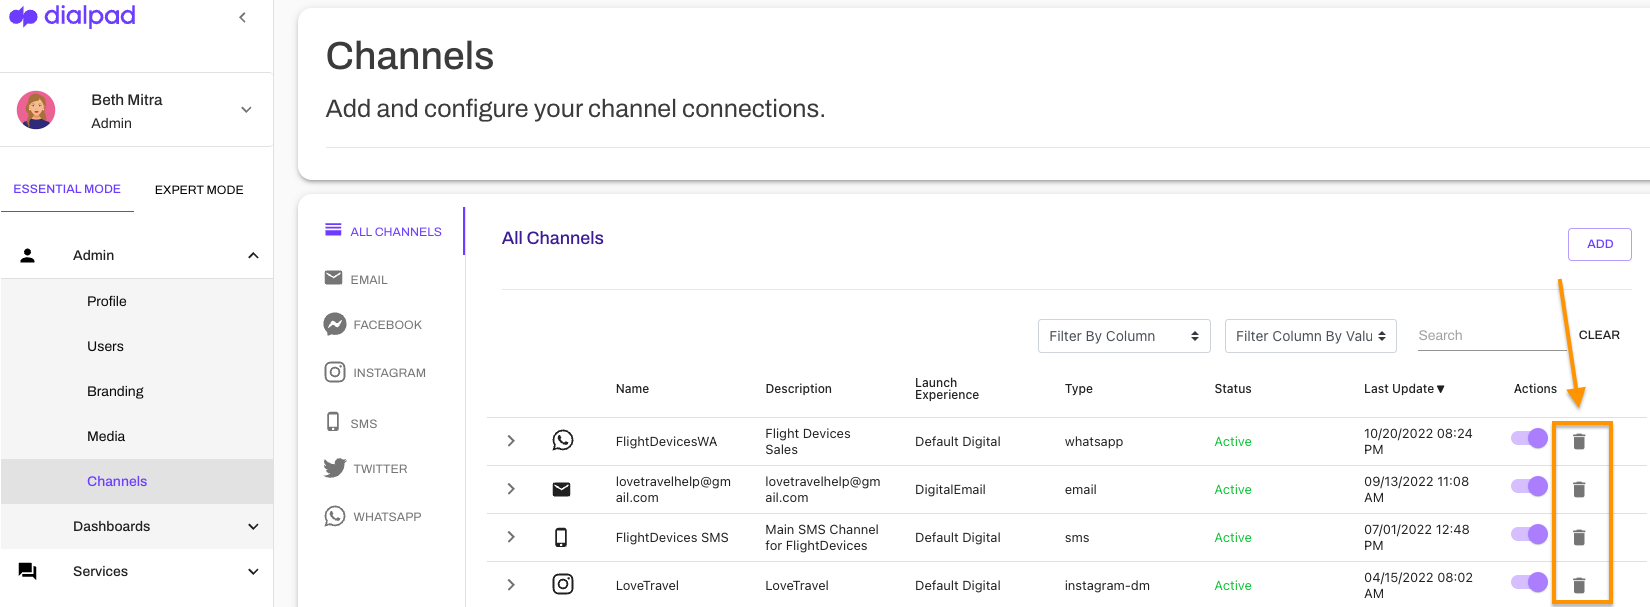
To remove a channel, head to your Historical Administration Panel.
Select Admin
Navigate to Channels
Select the trash can icon beside the channel you'd like to remove
Name change for agents in digital channels
When customers ask your chatbot for a live agent, you decide what name appears for that agent, regardless of which channel they’re using.
To change the name of the agent in a digital channel, go to your Dialpad Admin Settings.
Select Channels & IVR > Historical administration
From the Historical Administration Panel, select Expert Mode
Select Admin > Platform Settings
Select Messages > Announce agent to Customer
Locate the channel you want to edit and select the Edit icon
In the Message field, change the name format. For example, you can change Connected to Agent {{agent.name}} to Connected to Agent {{agent.firstname}}
This changes the agent’s name to only display their first name when they are connected to a customer in the web chat. You could also remove the variable and leave it as Connected to Agent or a general message.
Select Save
The new name now displays when the agent’s name is announced in the digital channel when a customer asks to speak with a live agent.