Dialpad and the Salesforce CTI allow you to access Dialpad’s features inside Salesforce Lightning. With the Salesforce CTI, you’re able to make and receive calls, send and receive messages, and much more.
Let’s take a look at the Salesforce CTI with Dialpad.
Dialpad's Salesforce Lightning integration is available to Dialpad Connect users on a Pro or Enterprise plan, as well as Dialpad Sell and Dialpad Support users.
Log in & access settings
First, ensure you’ve installed the latest version of the Dialpad for Salesforce CTI from Salesforce AppExchange.
Launch the CTI, and log in to Dialpad.
If you can’t access this integration, please ensure that your Salesforce Admin has enabled it.
Log In
To login from the Salesforce CTI, select Login.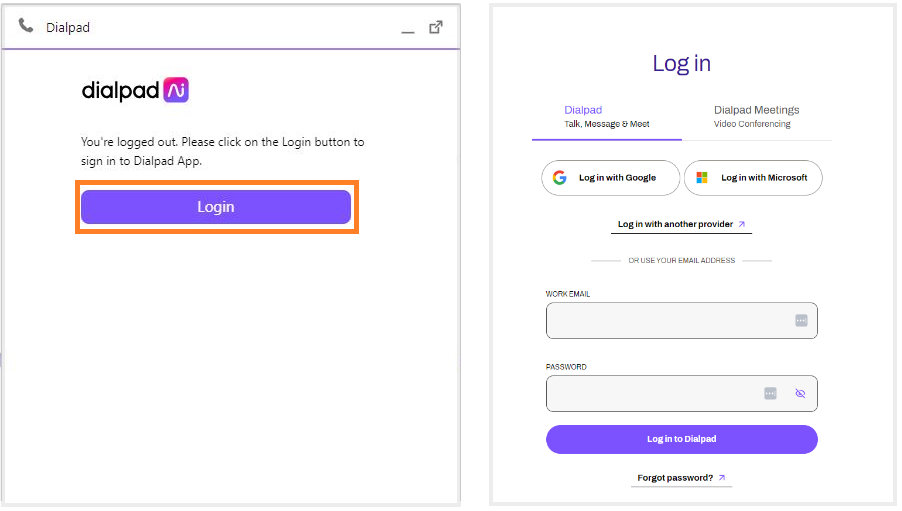
You'll be redirected to a web browser page to enter your credentials and then directed back to the Salesforce CTI.
CTI Settings
Access your CTI settings by selecting the drop-down icon beside your avatar to launch the CTI’s settings..png)
- Do Not Disturb: Send all calls to voicemail.
- Send Feedback: Give product feedback to Dialpad.
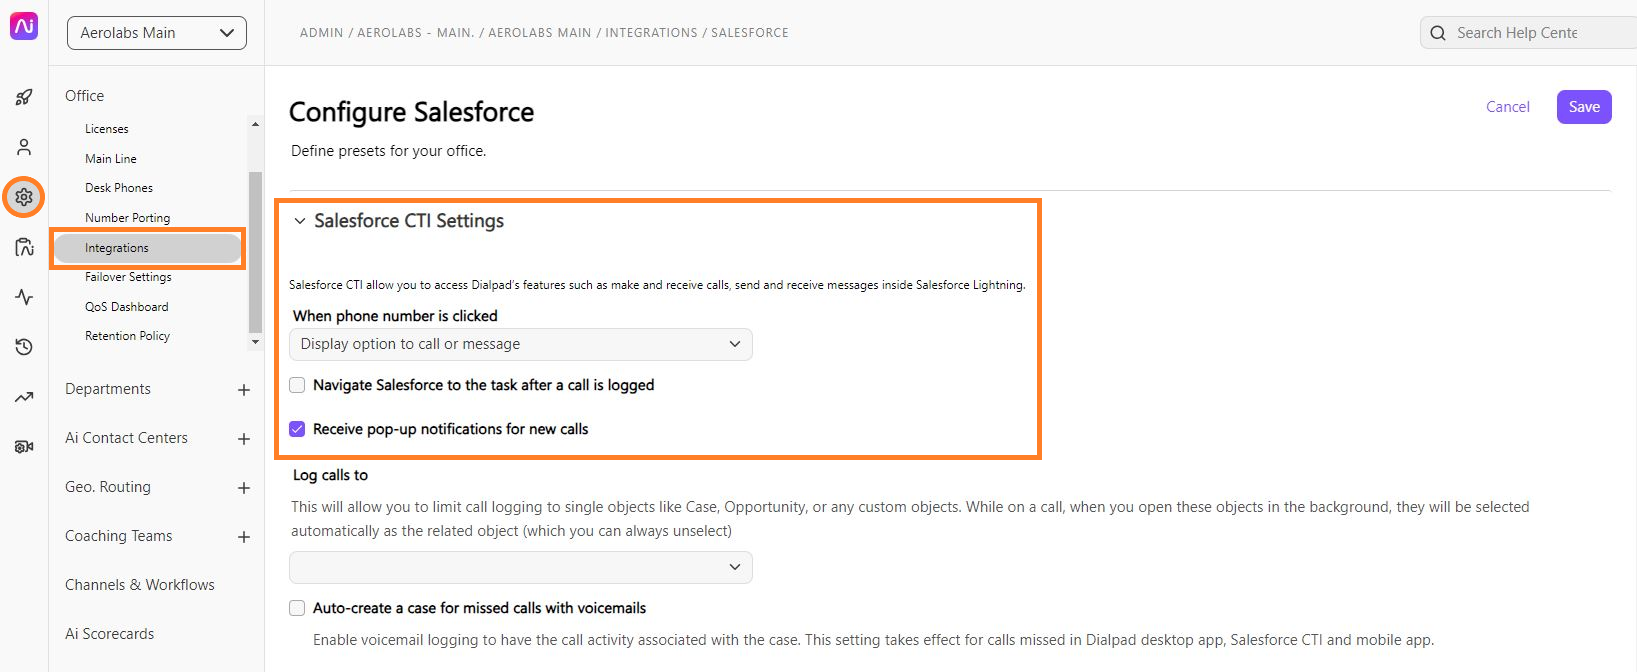
- App Settings: Manage settings specifically for the CTI. You can control these settings as a Company/Office Admin from the integration settings pages.
- Account Settings: Manage settings specifically for Dialpad across all devices.
- Analytics: Access the Analytics menu in Dialpad.
- What's New: Access new Dialpad features and updates.
- Help: Access to the Dialpad Help Center.
- Report an Issue: Report an existing issue.
- Save App Logs: Logs activities and events that take place within the app.
Hardware Settings
Access the Hardware settings from the CTI, select the Headset icon to choose the microphone and speaker/headset to use. .png)
You can also test your microphone, speaker/headset, and network to ensure all work properly.
View & search contacts
View contacts
You can access your Recent and Favorite contacts through the CTI
- Recent: Show contacts you’ve recently called or messaged.
- Favorites: Show contacts you've marked as favorites.
.png)
Search contacts
Search contacts from the Salesforce CTI by selecting the Search icon (That's the magnifying glass) and enter a name or number. .png)
Dialpad searches across personal contacts, Directory, Department, and Contact Center contacts.
Make a call
To call from the Salesforce CTI, select Make a Call and type the name or number of who you’d like to call. .png)
You’re also able to click-to-call in Salesforce Lightning or search and contact and then make a call. Not just that, you can also use our click-to-text capability to search a number in Salesforce & click on that to initiate text messaging.
Once the call connects, you’ll see call controls including record, mute, hold, transfer, and hang up..png)
When making a call, you may see Enable Calling as an option. It means that you have more than one web browser tab open with Salesforce Lightning. Choose this option to make or receive calls.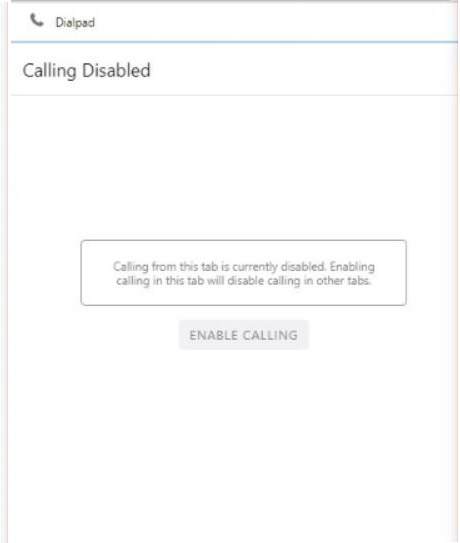
Record a call
Record an active call in the Salesforce CTI by selecting the Record button to start recording and press the button again to stop recording.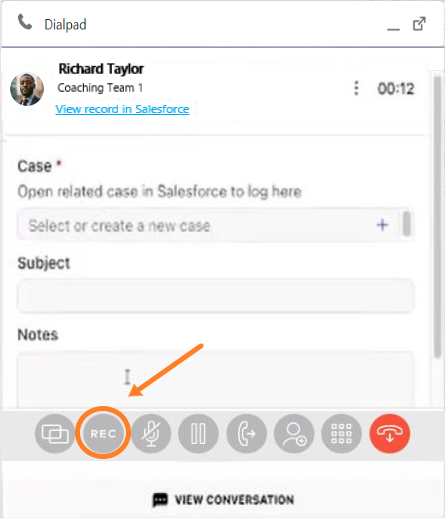
From the Dialpad app, navigate to Inbox > Recordings. Salesforce also stores this under the Task associated with the call.
If your Dialpad Admin enabled automatic call recording on Shared Lines, you’ll find a recording link automatically saved in Salesforce as well as Dialpad.
Transfer a call
Transfer an active call to another agent from the Salesforce CTI.
- Select Transfer
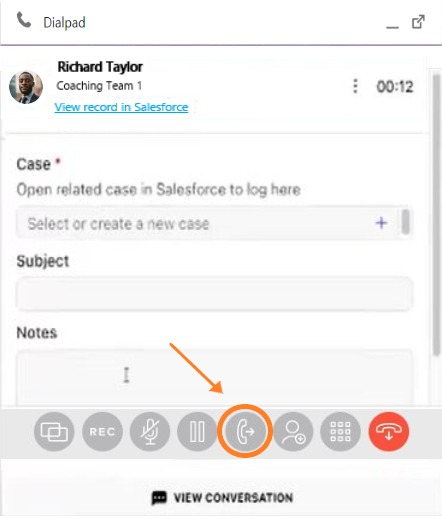
- Search for a contact
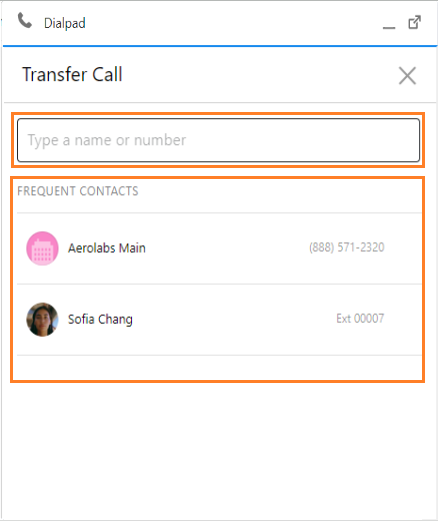
- Manually type in a number, or select one of your most frequent contacts.
- Select Transfer Now
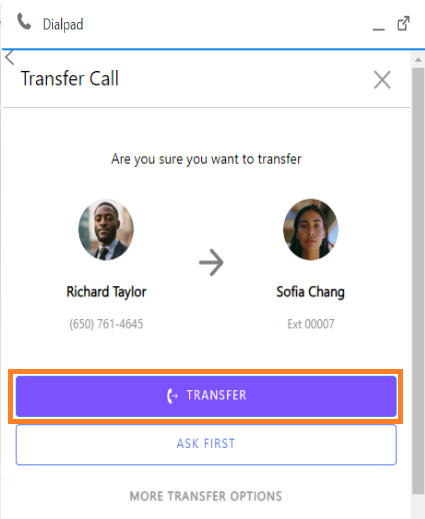
- You can select Ask First to confirm with the recipient before transferring the call.
If the next agent also uses this integration, they’ll receive the call within Salesforce Lightning.
Assign to Case, Opportunities, & Custom Objects
Use the Relate To drop-down menu to select the case, opportunity, or any custom objects you want to associate the call to.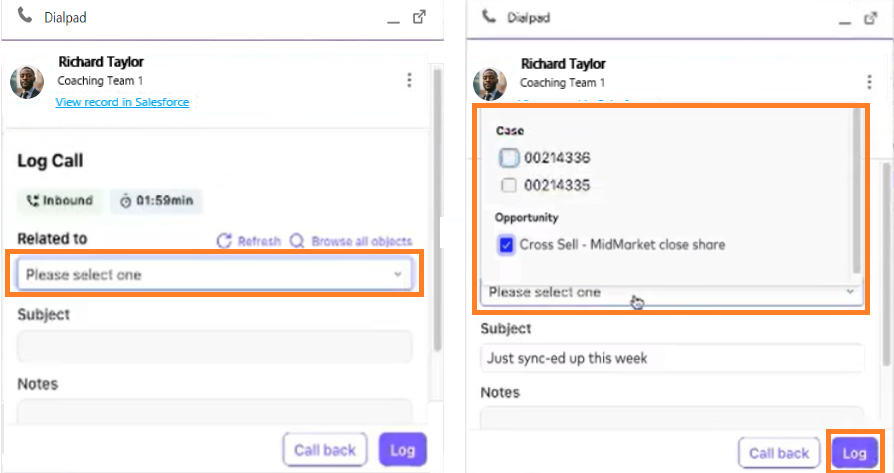
If you want to log your call to cases or opportunities that are not related to the contact record, use the Browse all objects button to search for the record in the Salesforce instance and associate the call to it.
If you'd like to create a new case during a call and associate the call to it, follow these instructions:
- Head to Screen Pop Settings in Salesforce
- Select Single-matching record
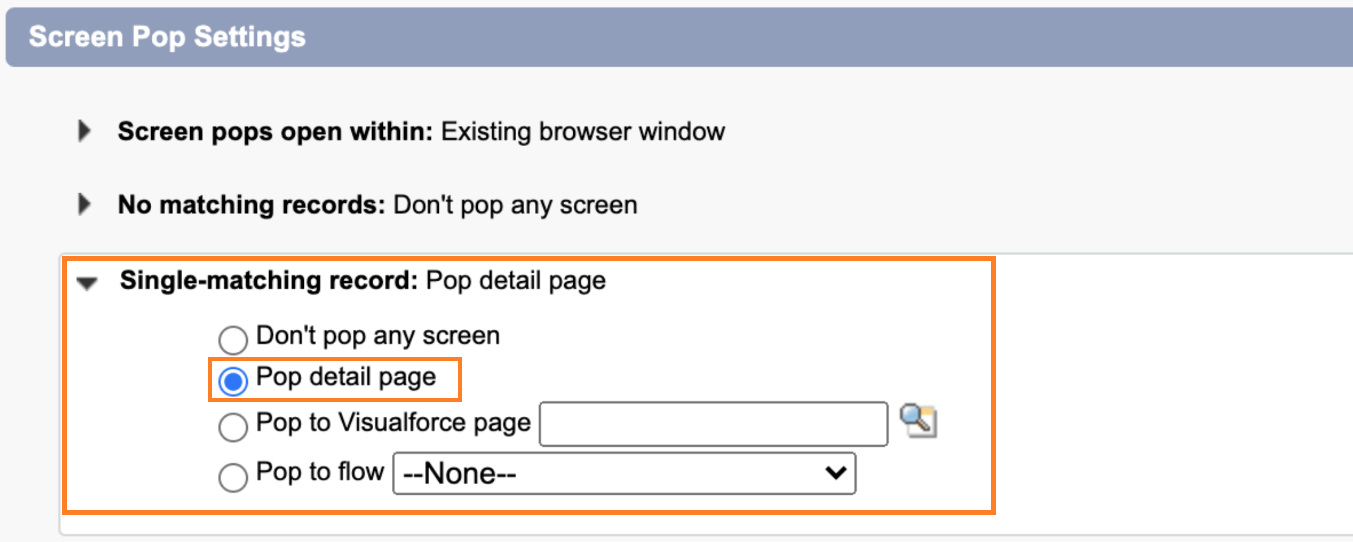
- Select Pop detail page
With the above setup, Dialpad will automatically open the Salesforce record details page when the user receives an incoming call
Use the standard Create Case option in the Salesforce record details page to create a new case and save it. 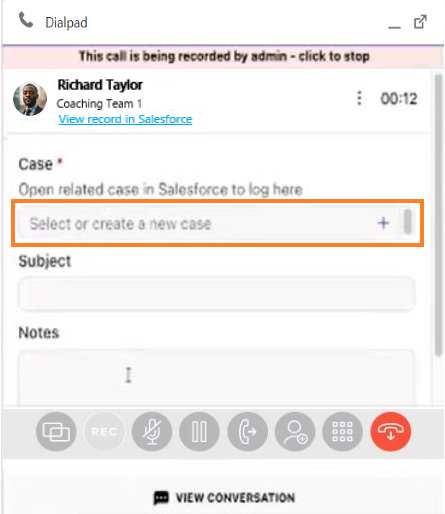 Once the new case is saved, select the Refresh button in the CTI; this will bring up the new case in the Relate to menu and you should be able to select it to associate the call
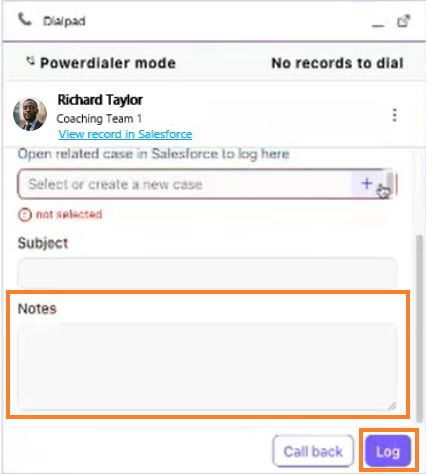
Log a note
Need to jot down a quick note? You’ll have the option during an active call and right after it ends.
- Navigate to Notes
- Enter the note details
- Select Log Call to be pulled into the newly-created Task
Adjust caller ID
Choose another Contact Center caller ID when making a call from the Salesforce CTI
- Select the Make a Call
- Select the drop-down under New Call From
.png)
- Select a Contact Center
- Navigate to Your caller ID displays as
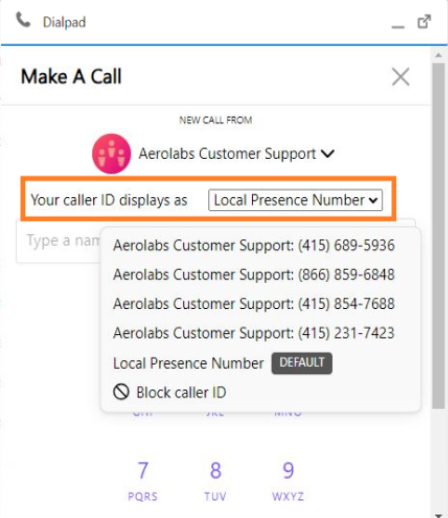
- Select your preferred caller ID from the drop-down
Receive a call
Receive a call on the Salesforce CTI by selecting Answer. 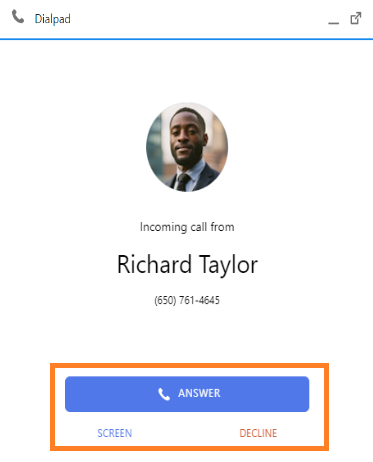
- Select Screen to answer the call at any time while the caller is leaving a voicemail.
- Select Decline to reject the call.
If the caller is already a contact in Salesforce, you’ll see a tag beneath their name denoting this.
Select View record in Salesforce during an active call to view contact information.
Call waiting
Take an incoming call even while you're on an active call using the CTI..png)
- Select Answer to place the current call on hold
- Select Merge to combine the incoming call with the current call
- Select View all to view live calls
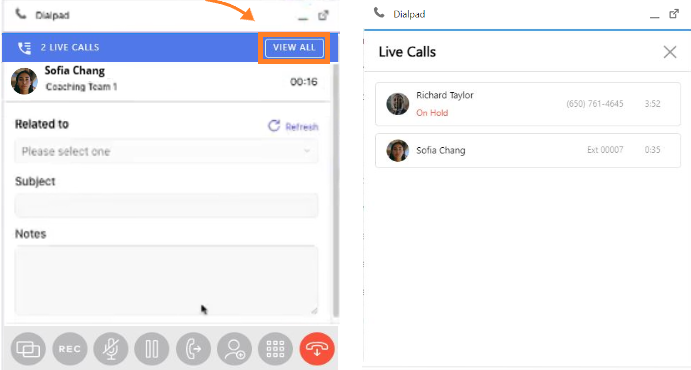
Switch calls by selecting the call and pressing the pause button to take it off hold.
Find a match
Don’t stress over multiple matches — we recognize when more than one contact calls in with the same number, giving you the option to select the right contact for that number..png)
Choose a contact, then select Connect.
Switch devices
Answered a call on another device first? You can move the call to Salesforce CTI..png)
To move the call to the Salesforce CTI, Select Switch Call to this Devices in the pop-up.
Send a message
Send a message from the Salesforce CTI, use the drop-down beside the Make a Call and select Send a Message.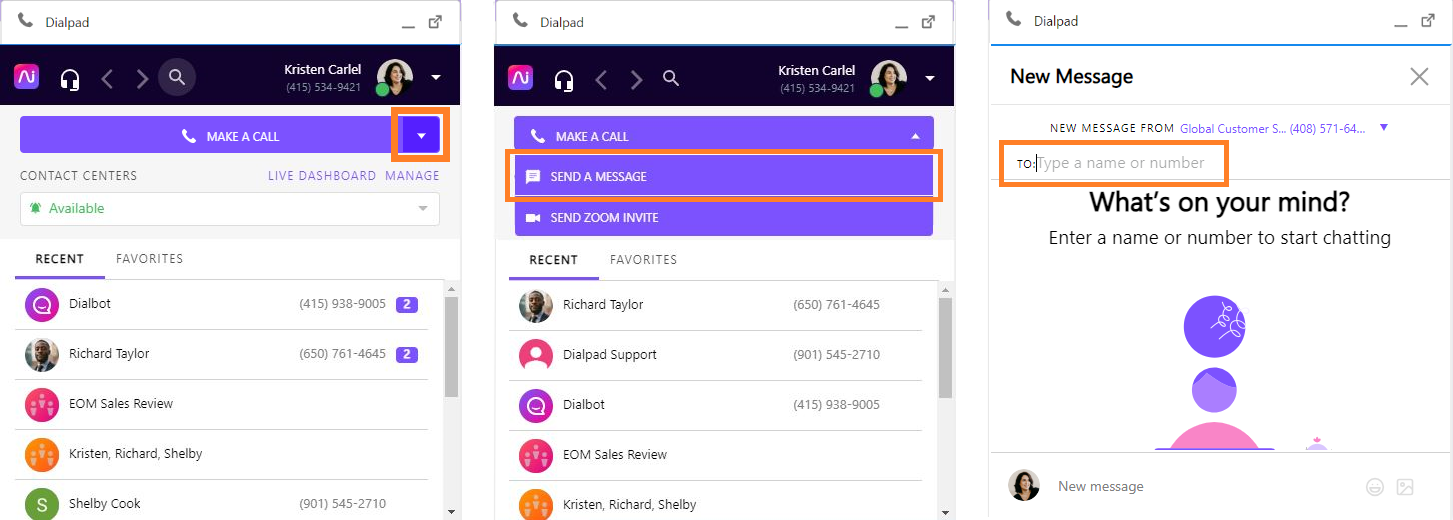
Enter the name or number of who you’d like to communicate with, then start typing a message.
Contact Center availability status
Change your Contact Center status to Available or Off Duty from the Salesforce CTI..png)
- Select the drop-down under Contact Centers
- Select a status to apply to all Contact Centers that you’re assigned to
- Select Manage to apply the status for specific Contact Centers and Departments
Create new Account, Contacts & Leads
If no matching records are found for calls with unknown callers, you can create an Account, Contact, or Lead..png)
- Select Create new record
- Select Create Account
- Select Create Contact
- Select Create Lead
New objects are then created in Salesforce to log the call.
Related object logging (Standard & Custom Objects)
The CTI allows you to associate your calls to Salesforce objects related to the contact you’re on a call with..png)
It includes standard objects (cases and opportunities) as well as custom objects.
Change Salesforce match
Were the Salesforce records incorrectly matched?
Select Rematch record during a call to change the associated Salesforce contact or lead.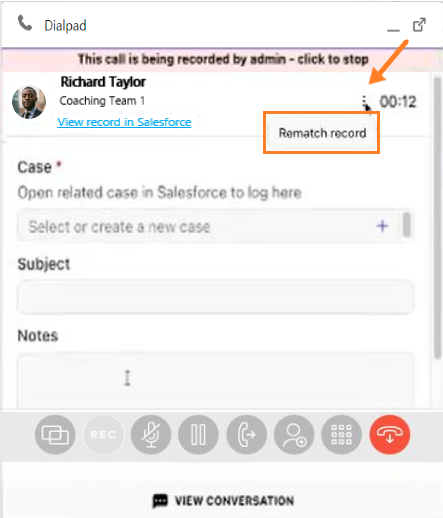
Screen Pop
Head to the standard softphone layout configurations in Salesforce for setting up the CTI’s screen pop.
Choose to automatically open a Salesforce record details page for incoming calls from existing Salesforce contacts.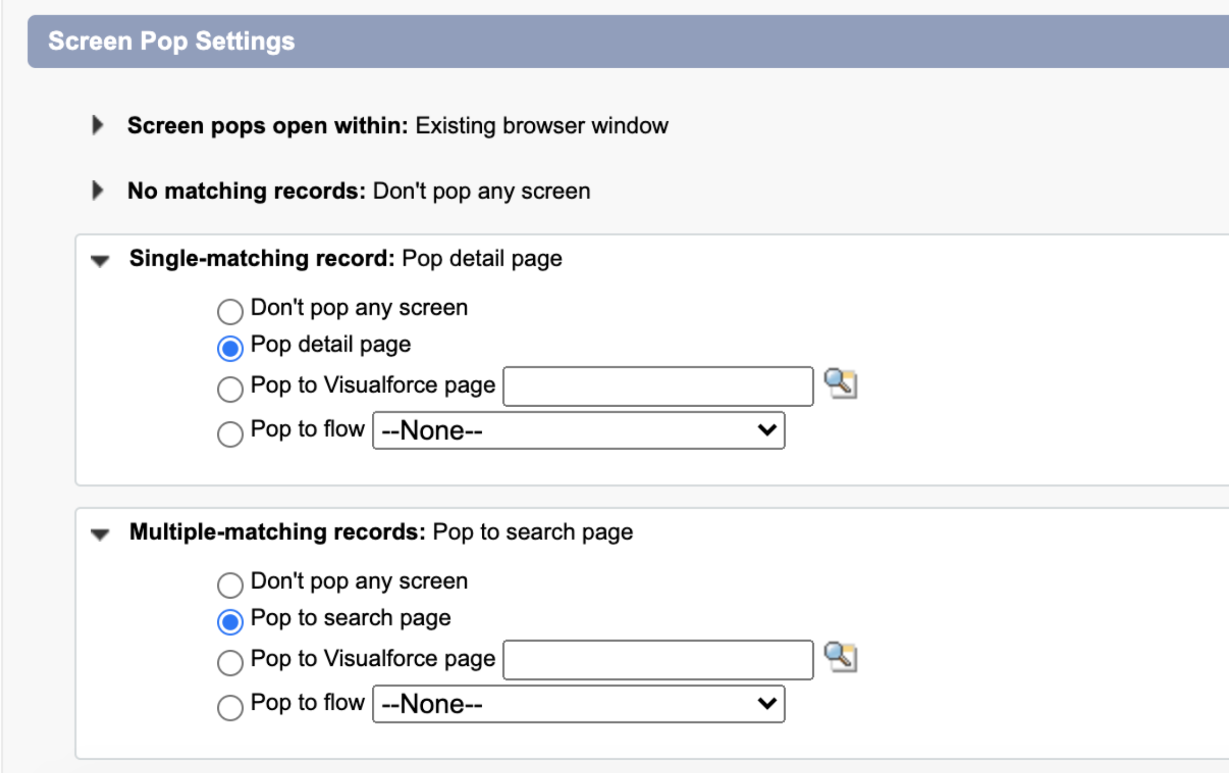
Visit this Help Center article to find answers for frequently asked questions regarding Dialpad for Salesforce Lightning.