Using Security Assertion Markup Language (SAML), your users can use their Google Cloud credentials to sign into Dialpad.
Let's dive into the details.
Who can use this
Dialpad's Google Workspace SAML integration is available to all Dialpad users.
If you're on a Standard or Pro level plan, you must contact Customer Care to enable this feature.
To configure this integration, you must be signed in to Google Workspace as a Super Admin.
Configure Google Workspace SSO SAML
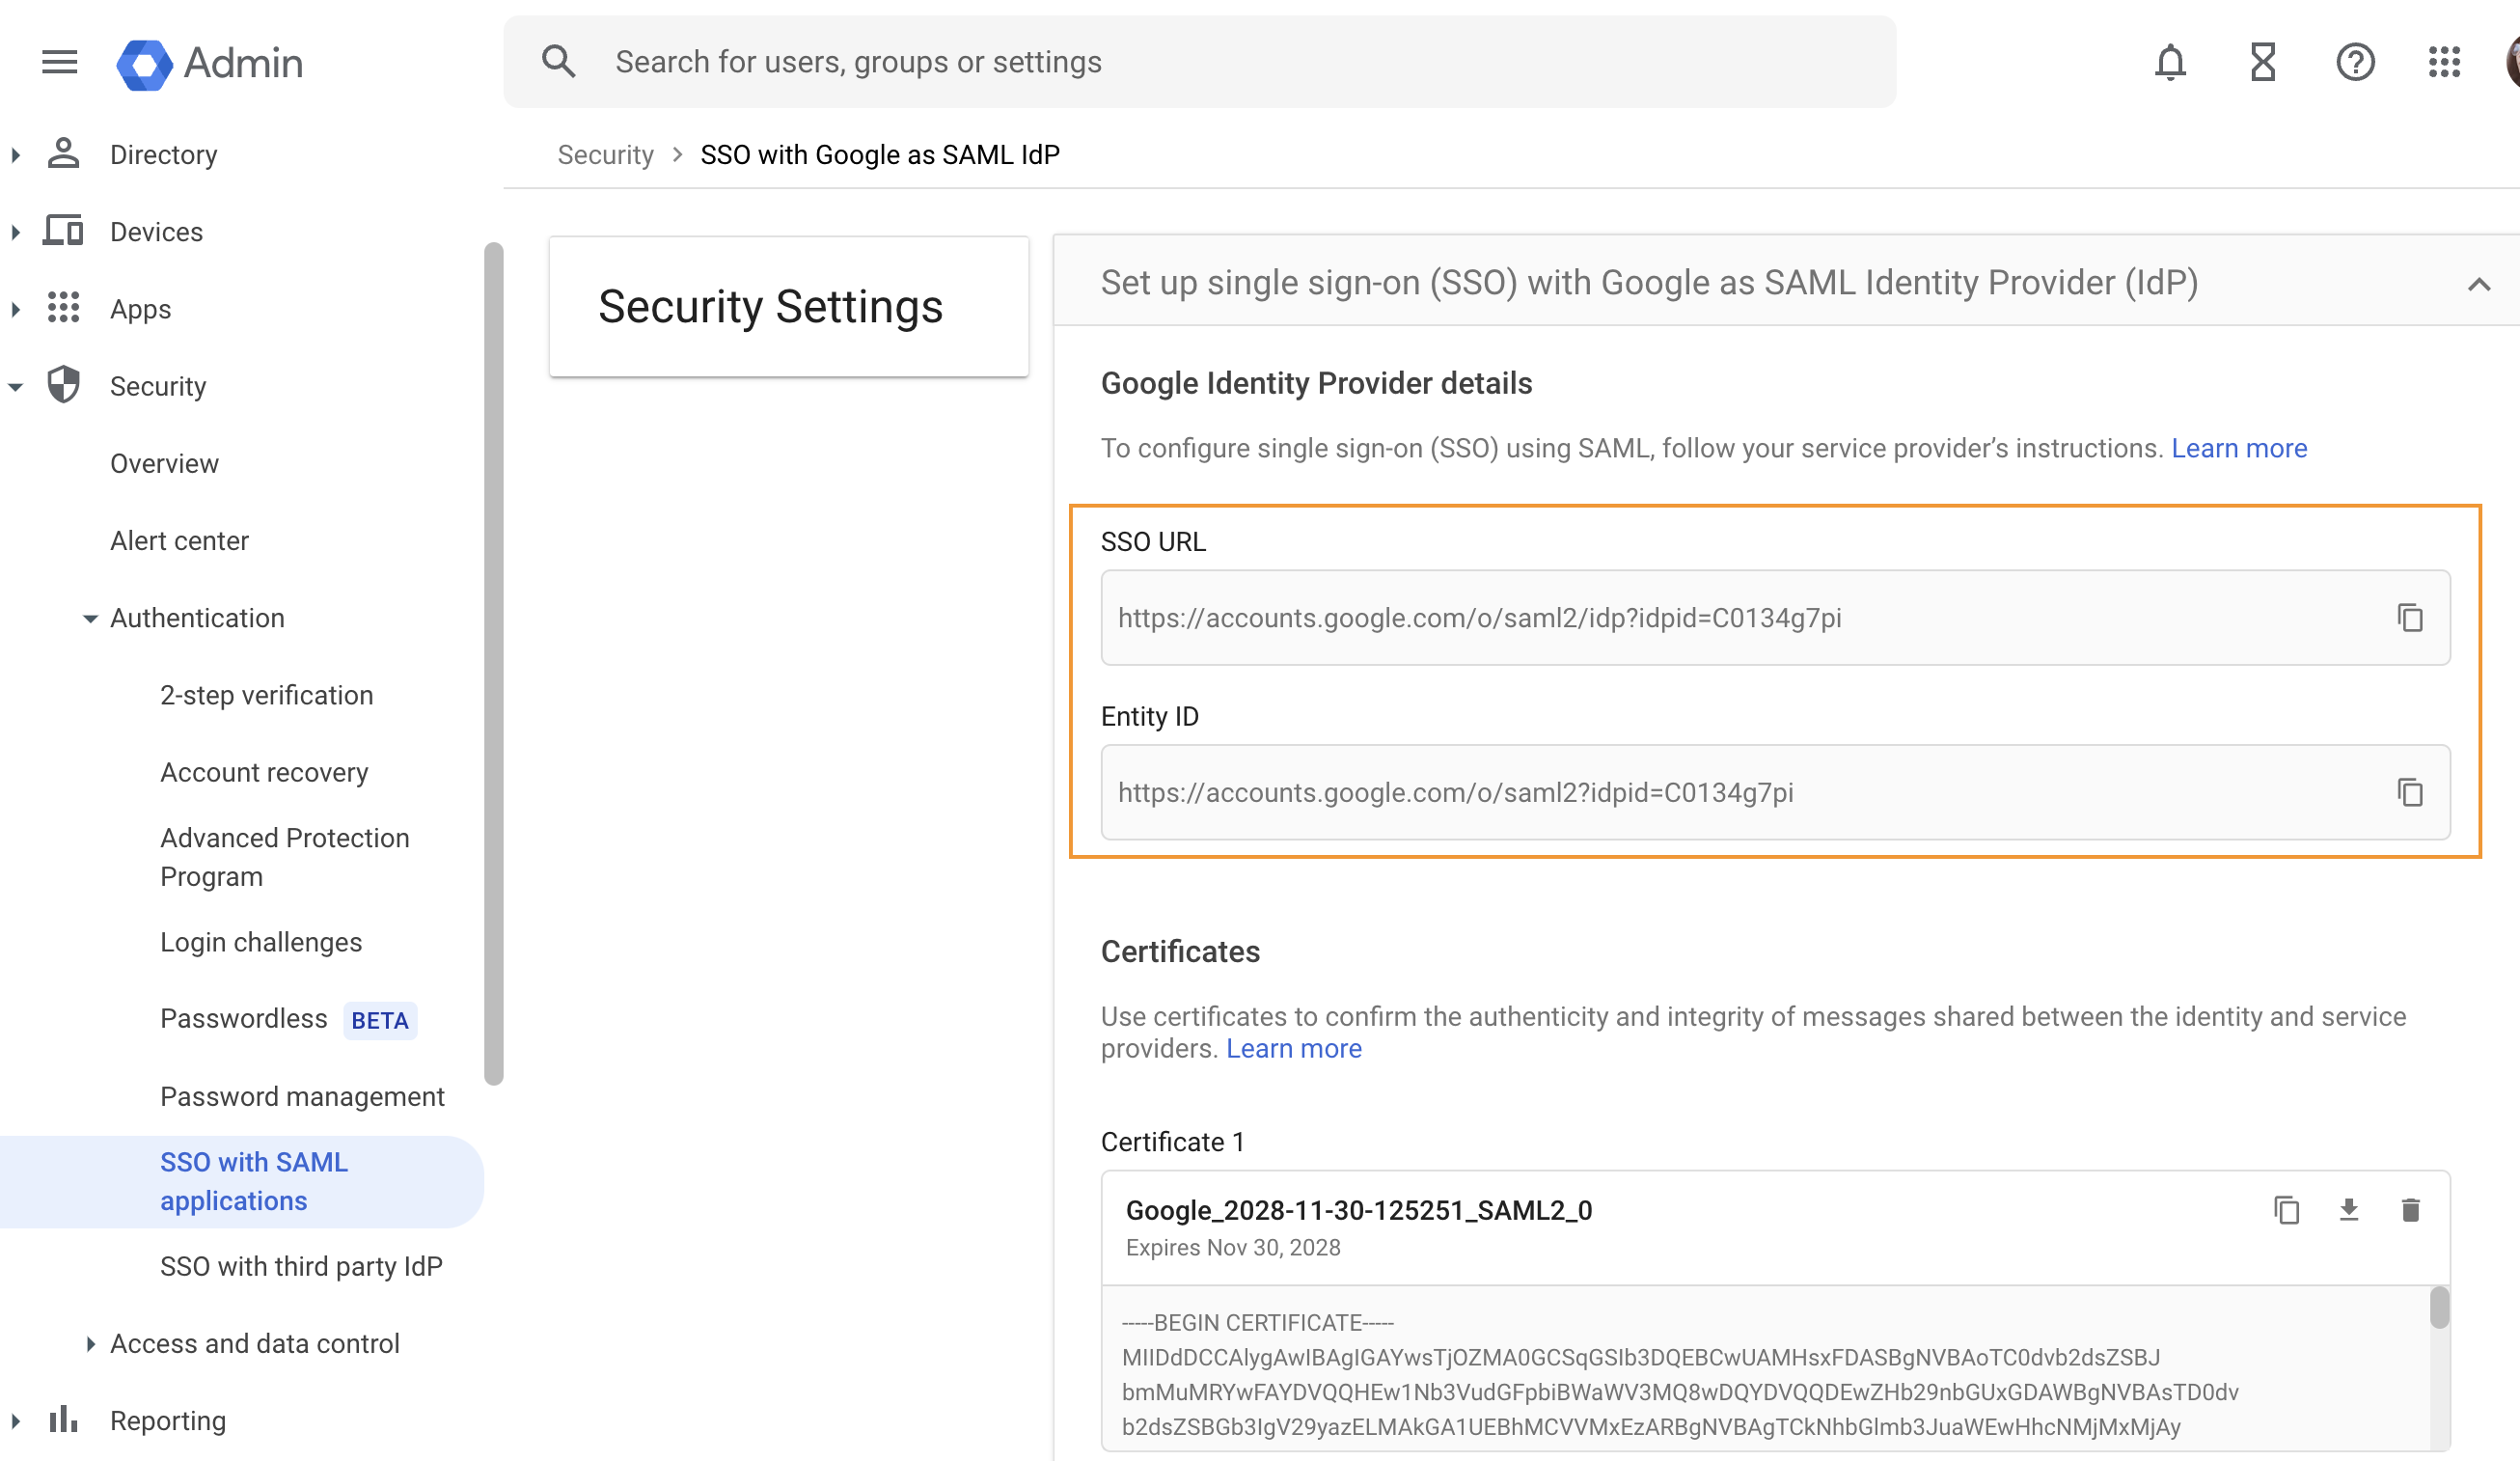
First, you'll need to configure SSO with Google as SAML IdP.
From your Google Admin Portal:
Select Security
Select Authentication
Select SSO with SAML applications
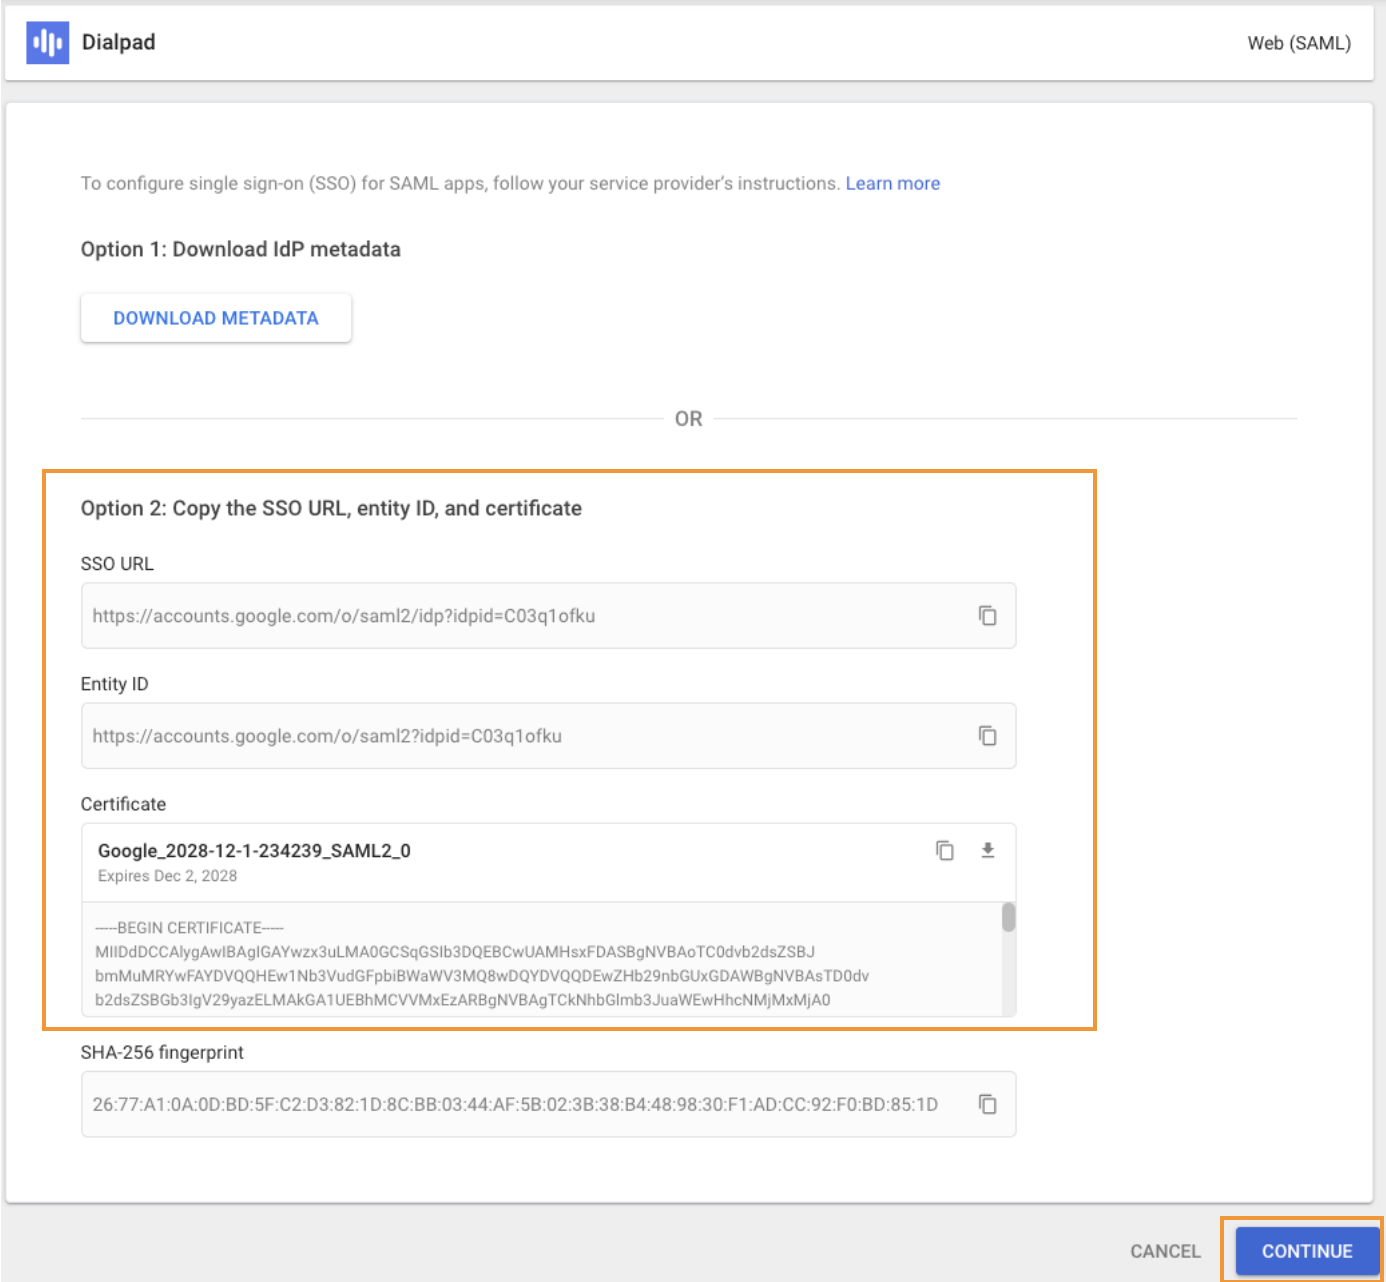
Copy the SSO URL and Entity ID
You will need these details when configuring your Service Provider (SP)
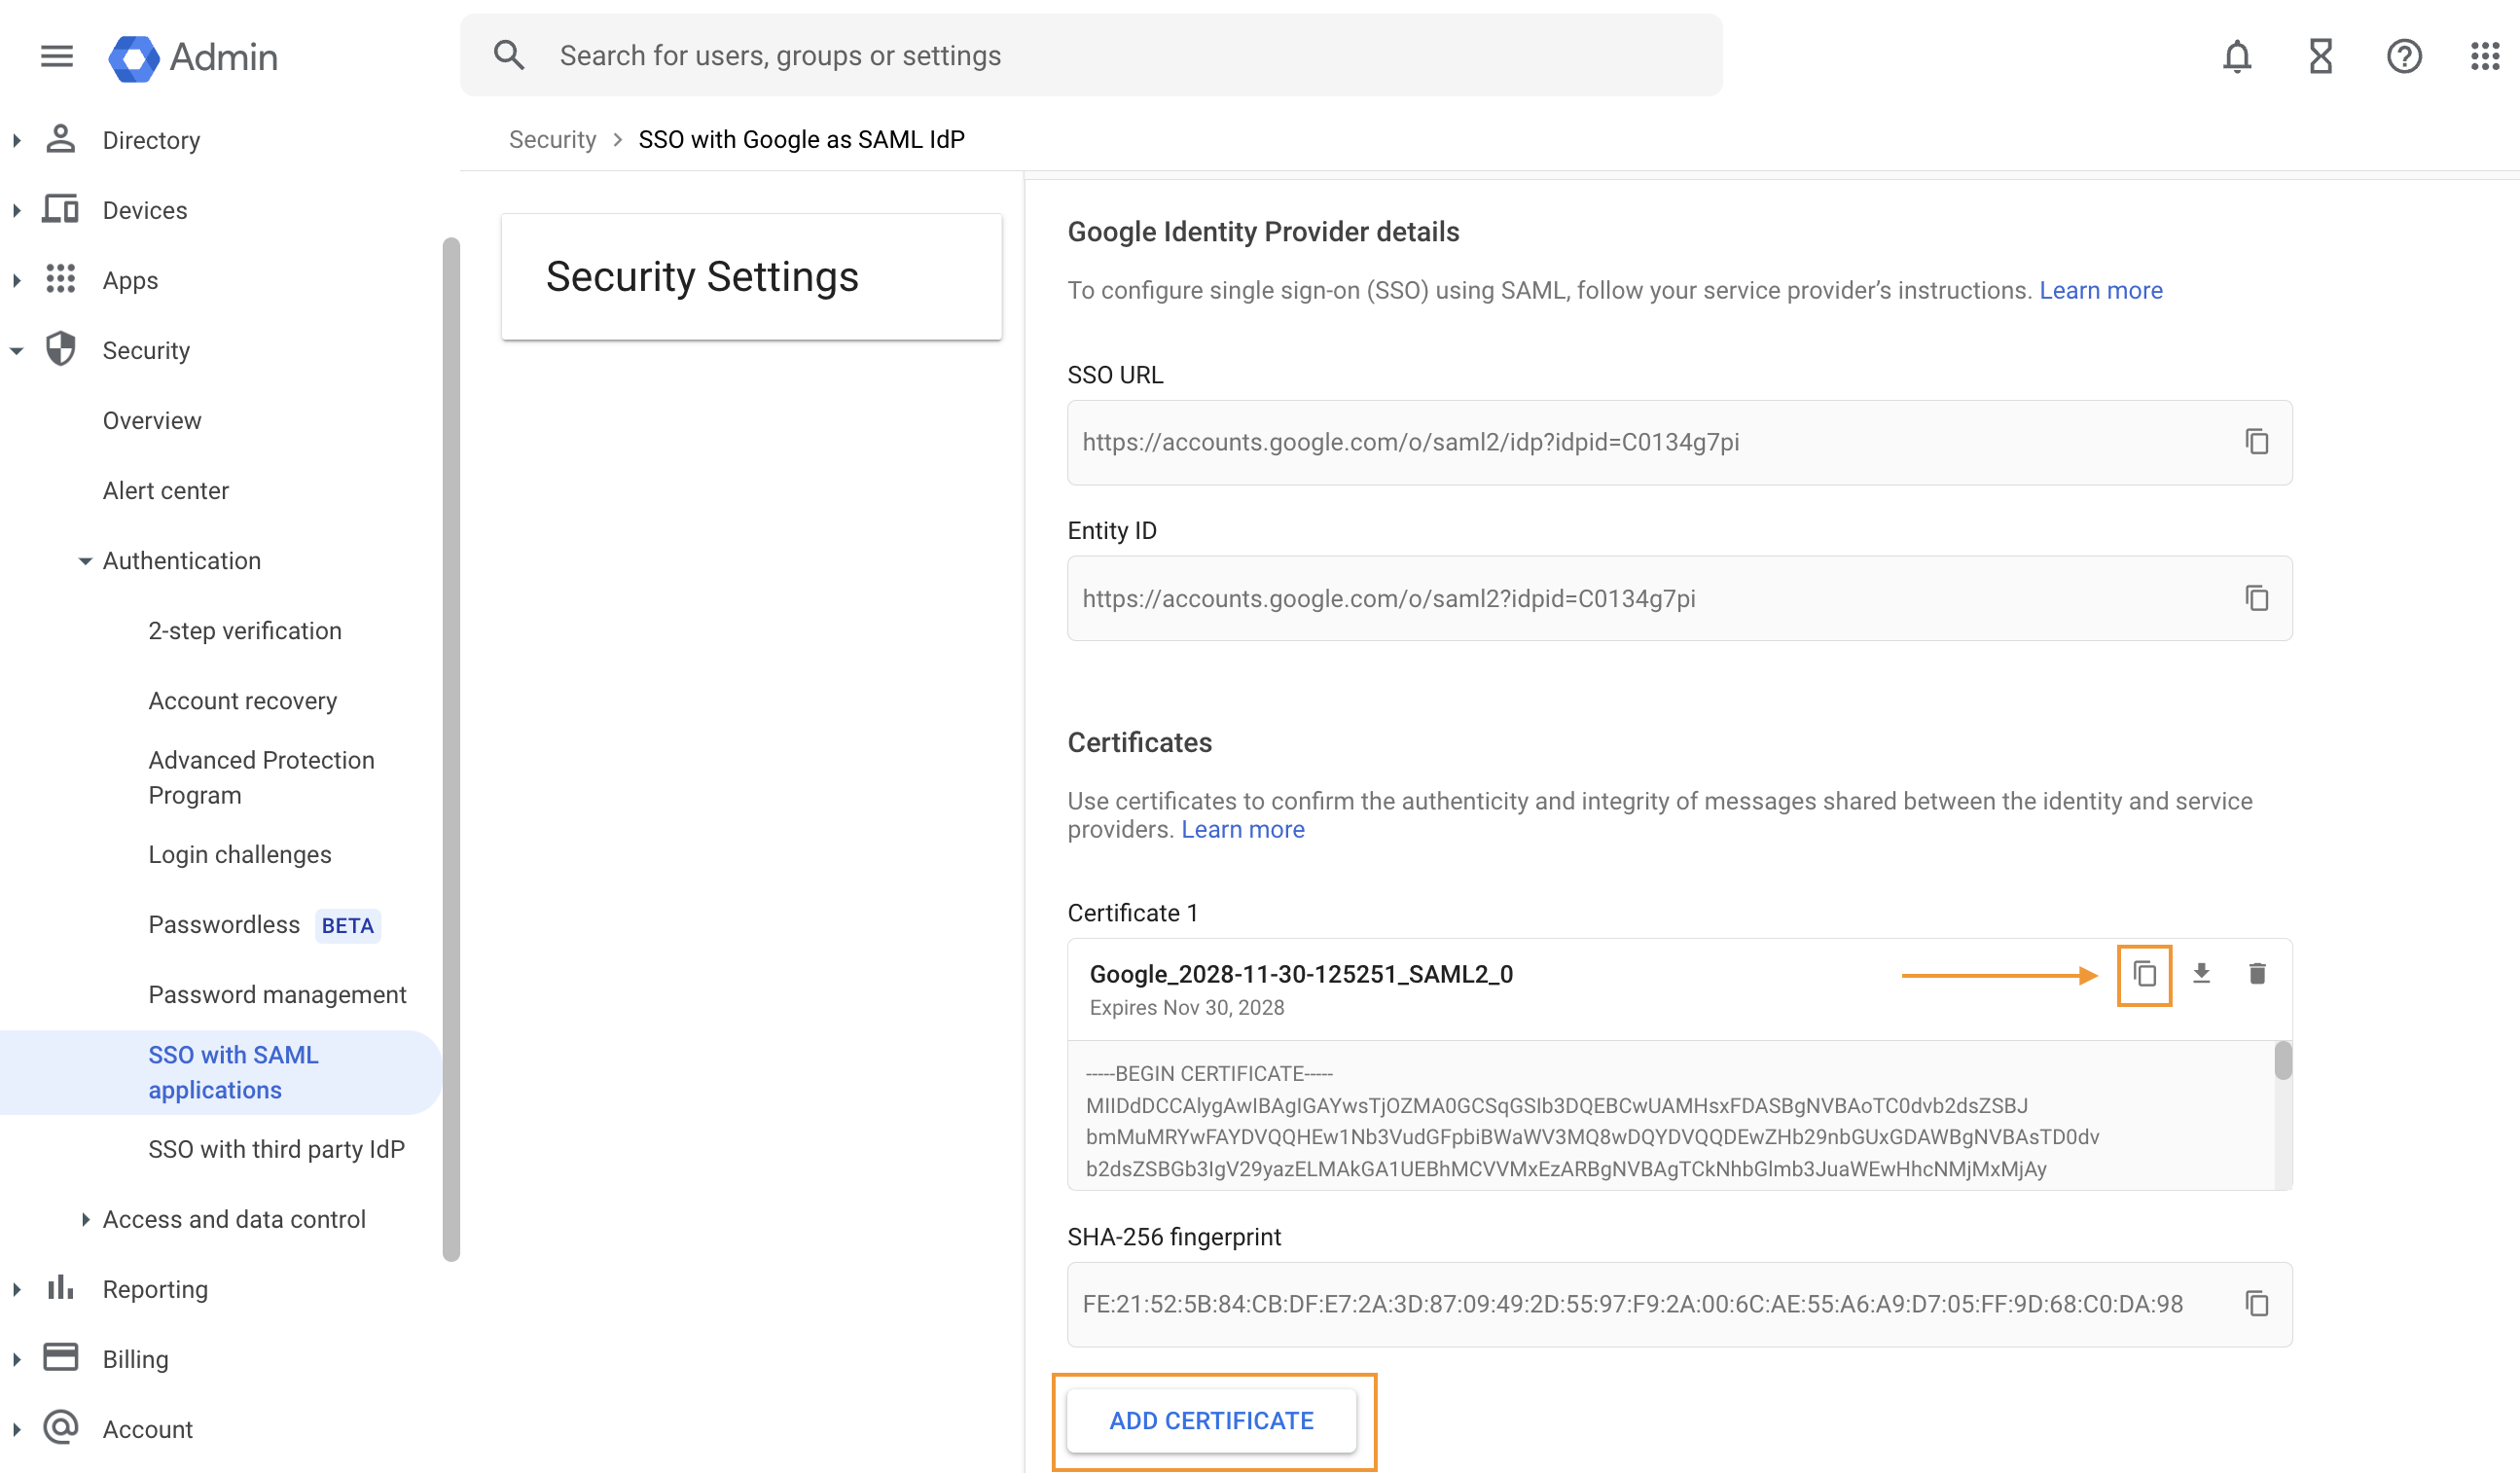
Select ADD CERTIFICATE
Copy the certificate
You will need the certificate details when configuring your Service Provider (SP)
Set up Dialpad as a SAML 2.0 Service Provider (SP)
Next, it's time to set up Dialpad as a SAML 2.0 Service Provider.
Select Google from the list of providers
Enter the SSO URL and Entity ID in the appropriate fields
Paste the copied X.509 Certificate into the Certificate box
Remove “BEGIN” and “END CERTIFICATE”
.png)
Select Save
Set up Google Workspace as a SAML Identity Provider (IdP)
Now it's time to set up Google Workspace as a SAML Identity Provider.
From the Google Admin Portal:
Select Apps
Select Web and mobile apps
Select the Add app, then Search for apps
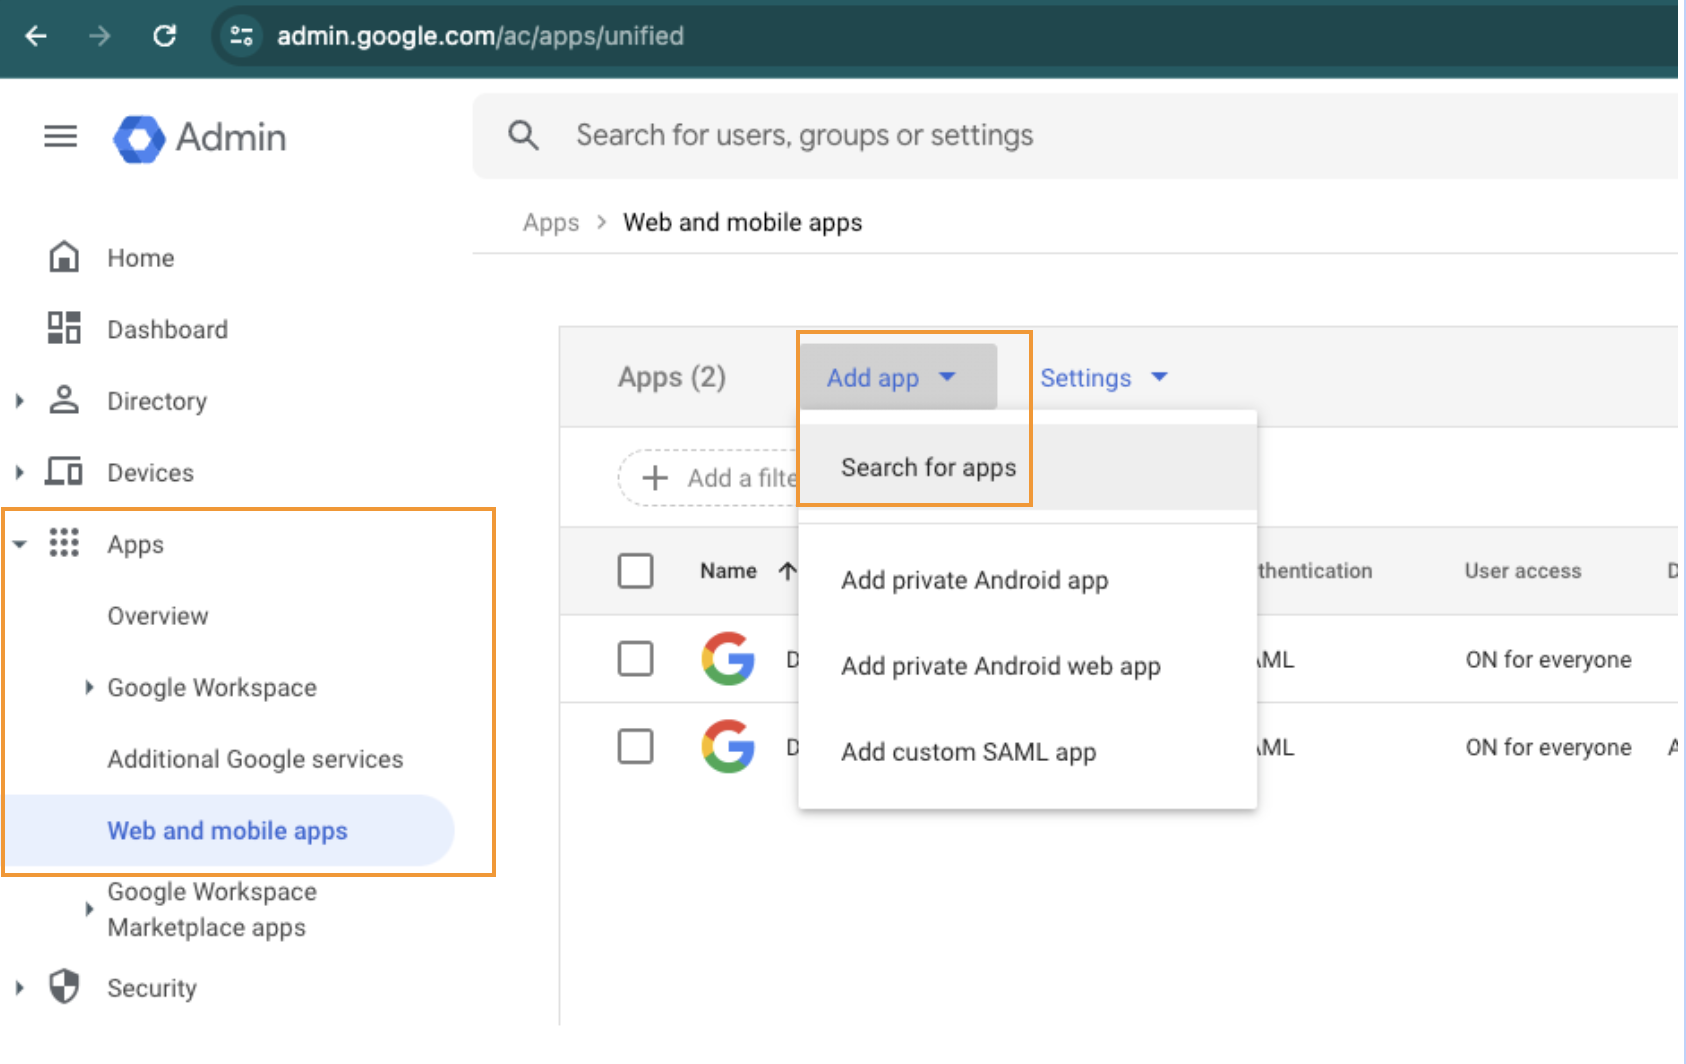
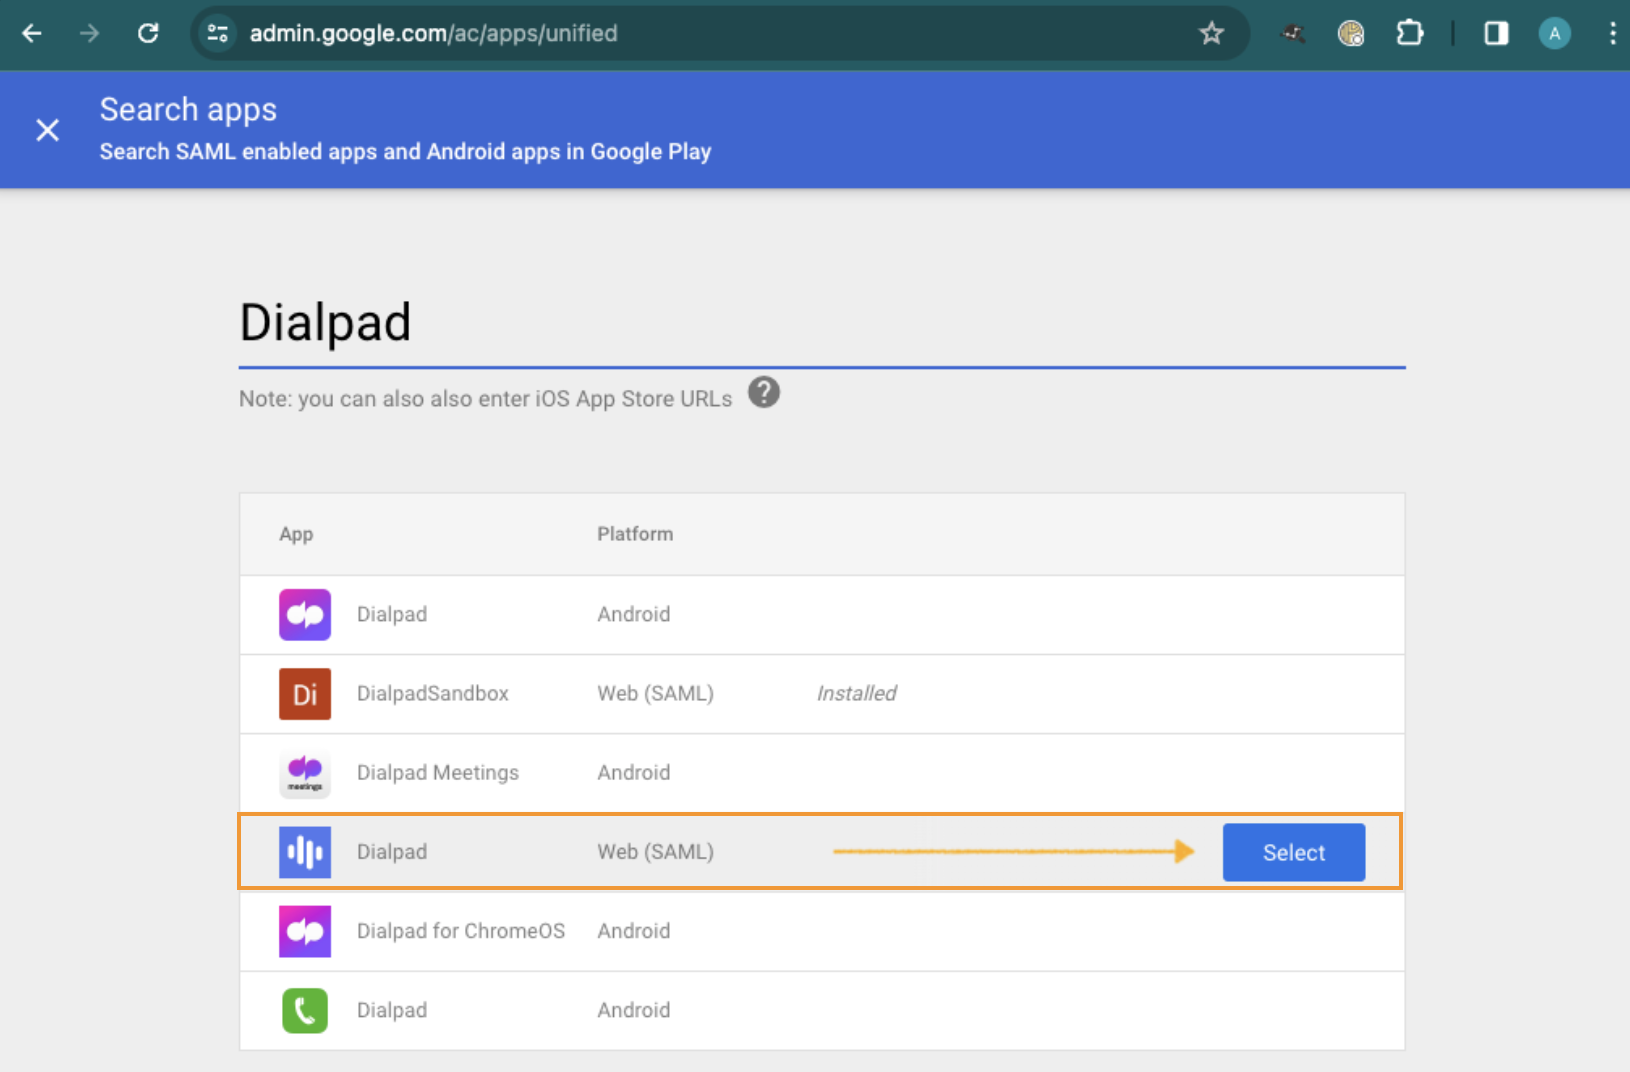
Enter Dialpad
Select Dialpad Web (SAML)
Navigate to Option 2 and enter the SSO URL, Entity ID and Certificate saved from Step 1
Select Continue
Enter the following Dialpad-specific provider details
ACS URL: https://dialpad.com/saml/sso/google/your-domain.com
Entity ID: https://dialpad.com/api/saml/metadata/google/your-domain.com
Start URL: https://dialpad.com
Leave the Signed Response box unchecked
When the Signed Response box is unchecked, only the assertion is signed
When the Signed Response box is checked, the entire response is signed
Set the NameID Format to Transient
Set the Name ID as the primary email
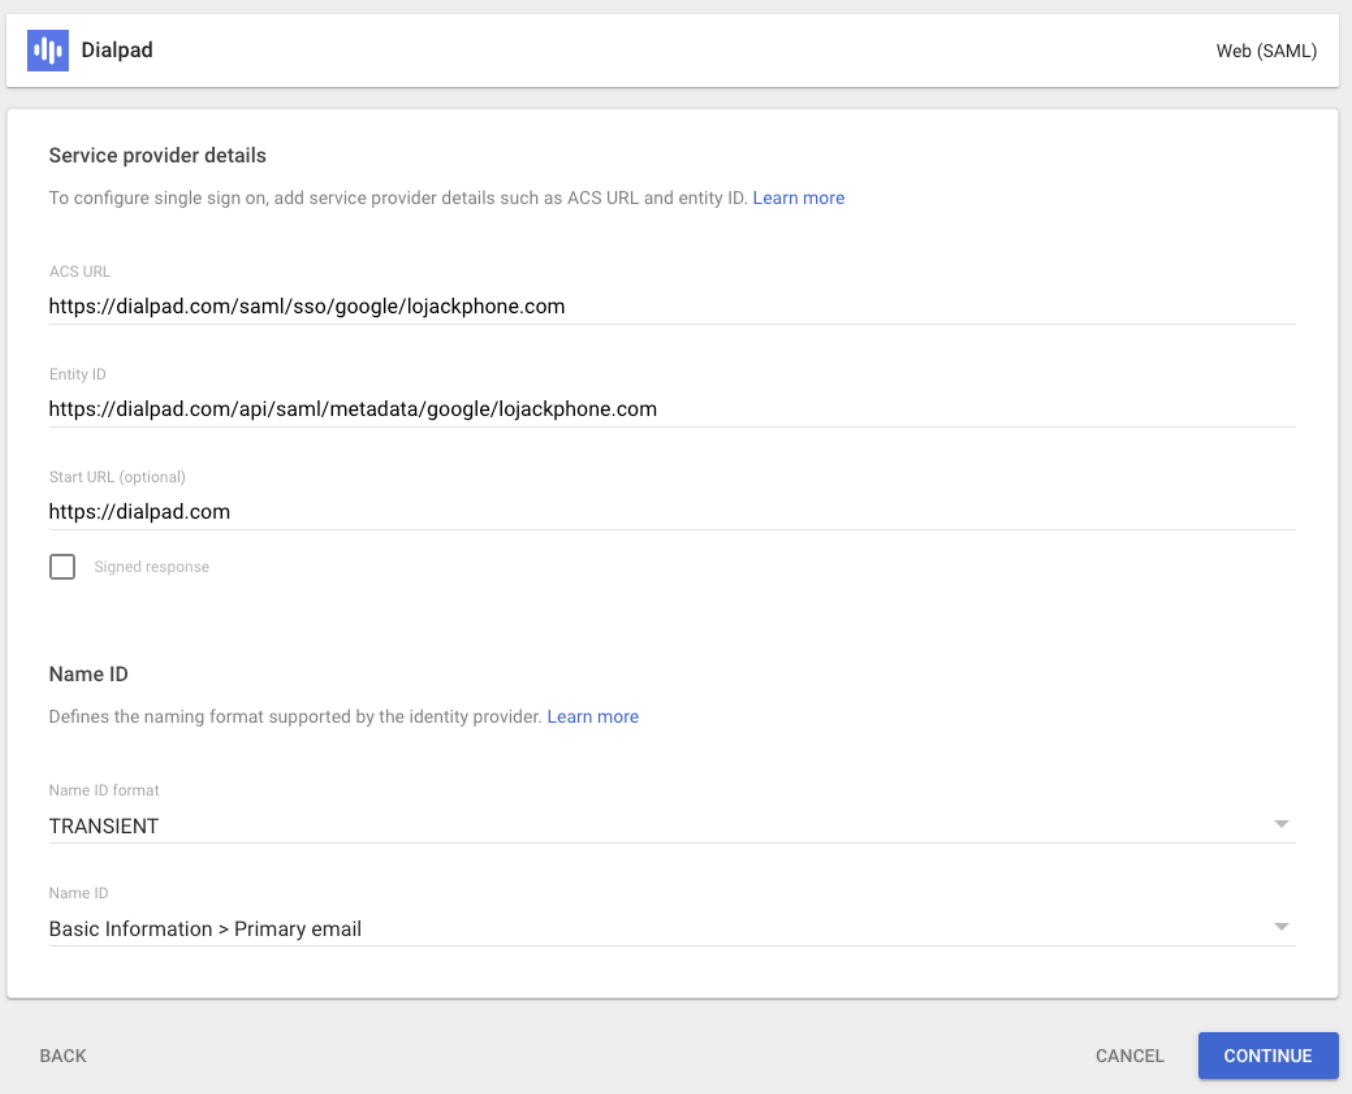
Select Continue
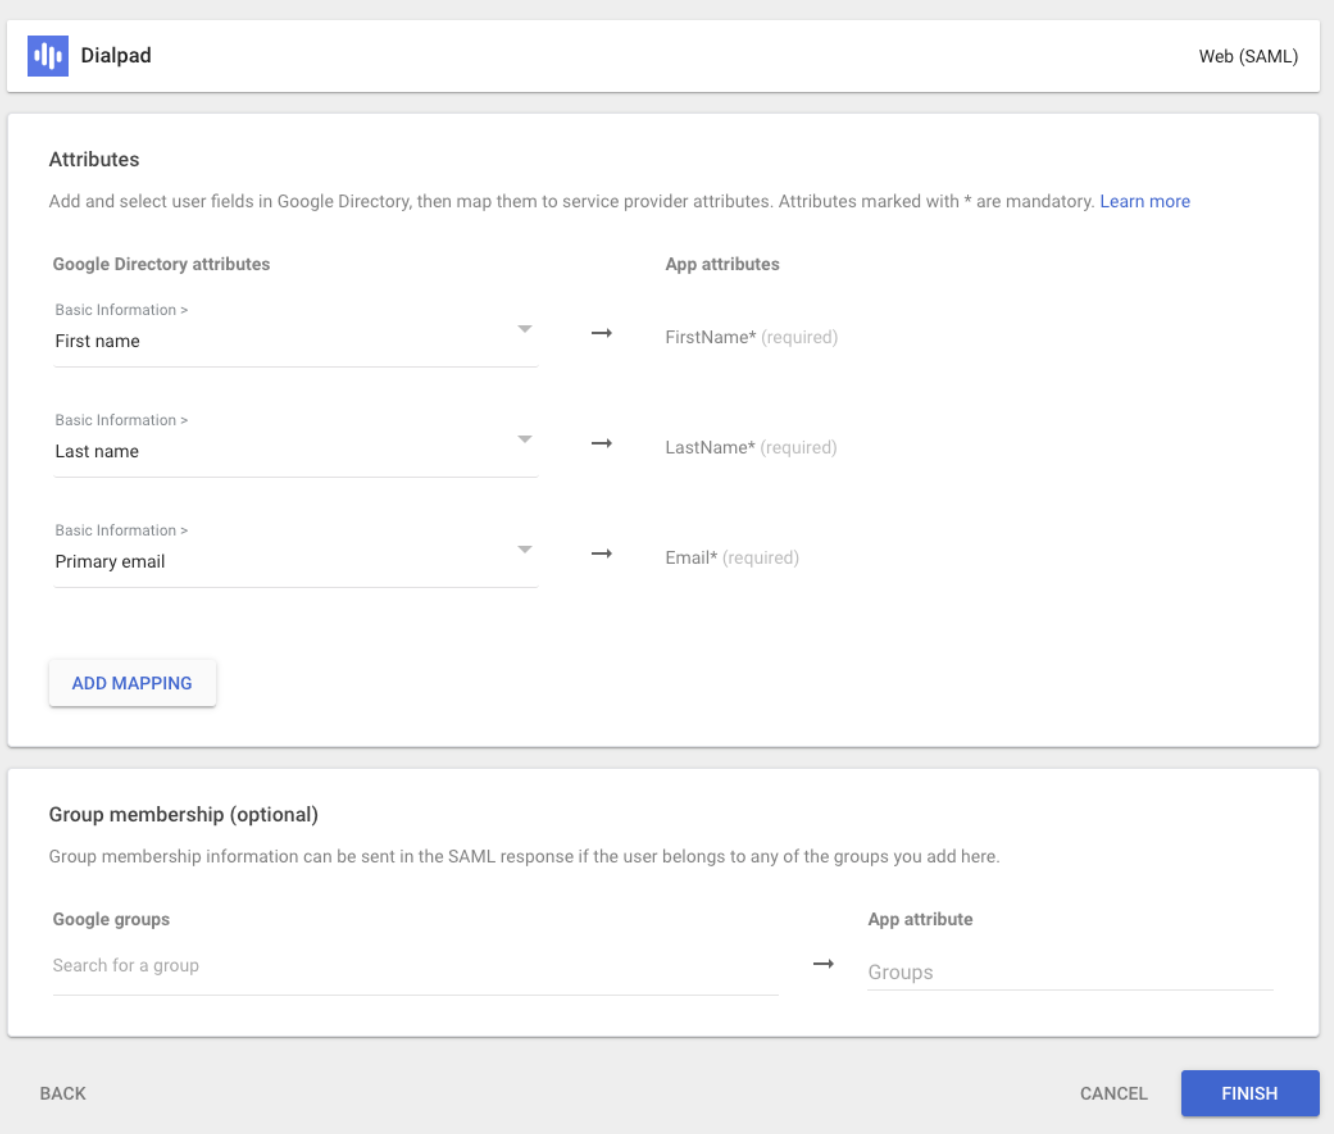
Navigate to Attribute Mapping
In the Basic Information category:
Provide the "Primary Email" [Email], "First Name" [FirstName], and "Last Name" [LastName]
Select Finish
Turn on SSO for Dialpad
Now it's time to turn on SSO for your Dialpad App.
From the Google Admin console:
Navigate to Apps
Select Web and mobile apps
Select Dialpad
Select User Access
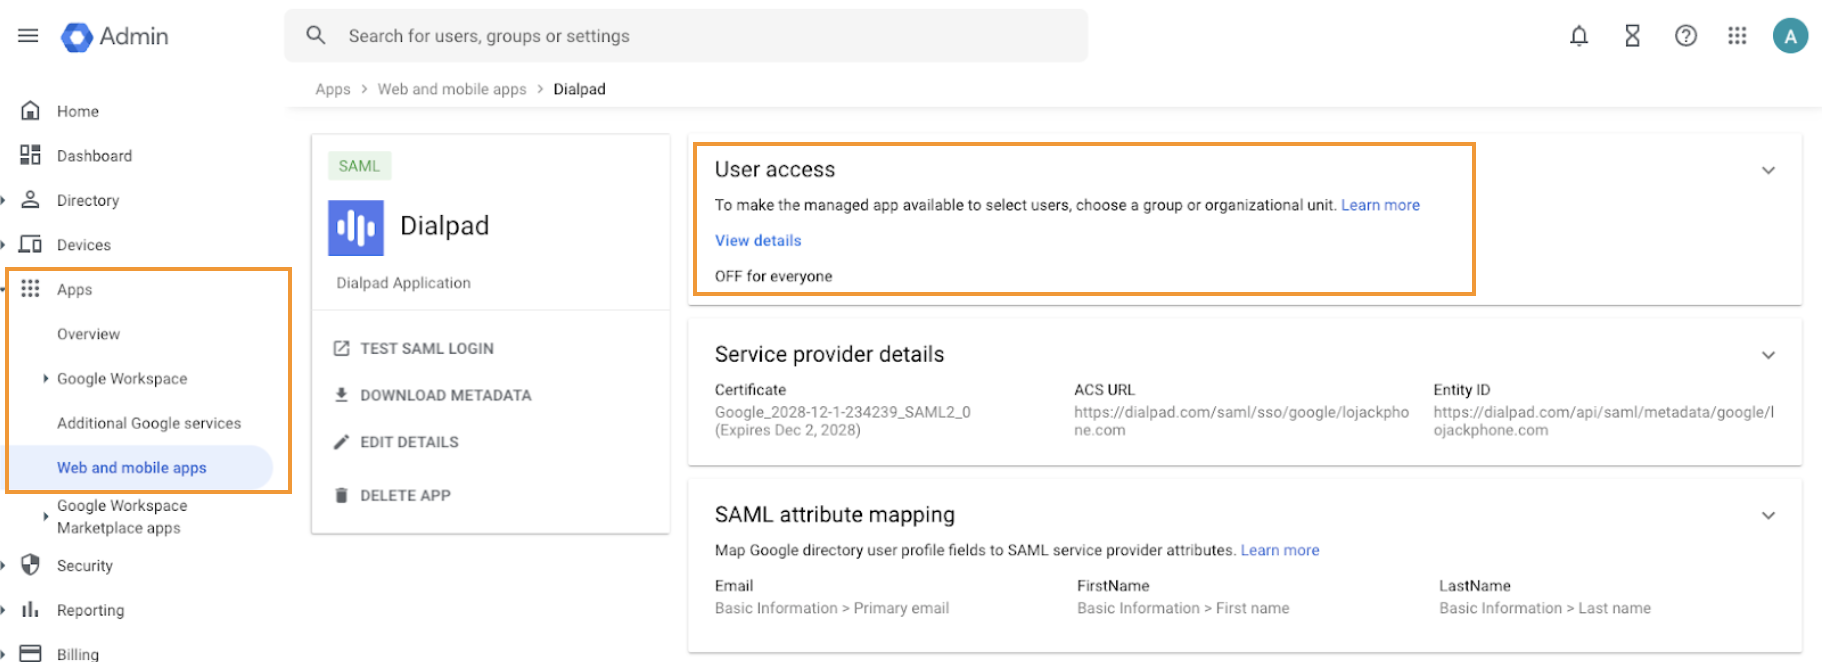
Select an organizational unit
Select On for everyone
Select Save
.png)
This will activate the single sign-on for the selected organizational unit.
Verify SSO is working between Google Workspace and Dialpad
Now it's time to do a final check and verify that SSO works between Google Workspace and Dialpad.
Open https://dialpad.com/saml/login/google/your-domain.com
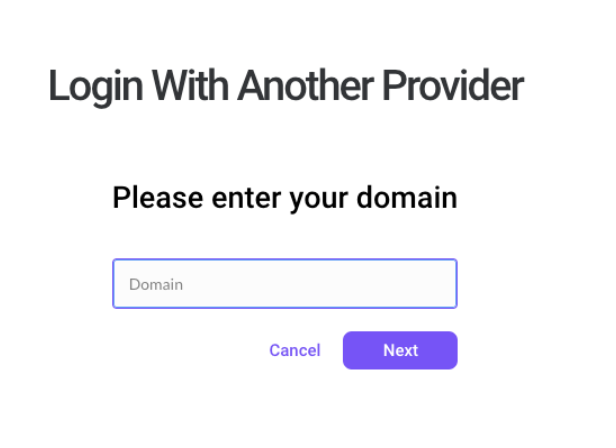
or, head to https://dialpad.com/login and select Log in with another provider
.png)
Enter your company domain, then select Next
That's it! You'll be redirected to Google for authentication and then automatically redirected back to Dialpad.<
Enforcing SAML-based SSO
Add an extra level of security by blocking your users from using other SSO providers when logging into Dialpad.
To restrict the use of other authentication providers, navigate to your Admin Settings at Dialpad.com
Select My Company
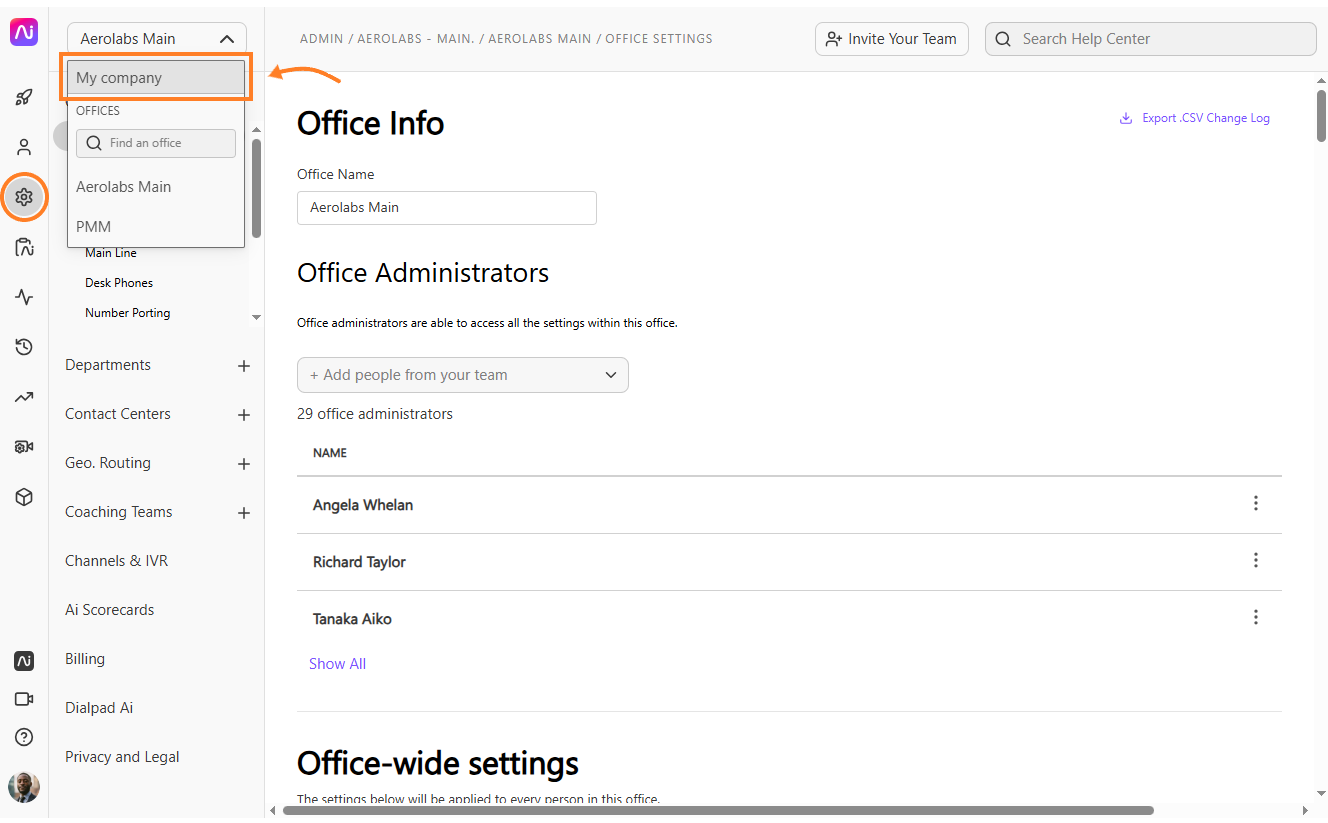
Navigate to Authentication
Select SAML
Select Prevent users from logging in with other SSO providers
Select Save

Note
Once changes were saved, your users won't be able to use Microsoft and Google SSO, (or even their username and password) to log in to Dialpad.