Dialpad WFM's Talkdesk integration seamlessly pulls historical data from Talkdesk to provide valuable insights within your Dialpad WFM dashboard.
Connecting Dialpad and Talkdesk is a 2-step process. First, you’ll need to create a Talkdesk OAuth client, and then you’ll connect Dialpad WFM to Talkdesk.
Let’s dive into the details.
Who can use this
Dialpad WFM is available to all Dialpad users.
Contact your Customer Success Manager to discuss adding Dialpad WFM to your plan.
Create a Talkdesk OAuth client
A Talkdesk OAuth client is required to connect Dialpad WFM to your Talkdesk account, which can be generated by a Talkdesk admin.
To generate a Talkdesk OAuth client, head to your Talkdesk Settings.
Navigate to the Builder section
Select OAuth client
Select New OAuth client
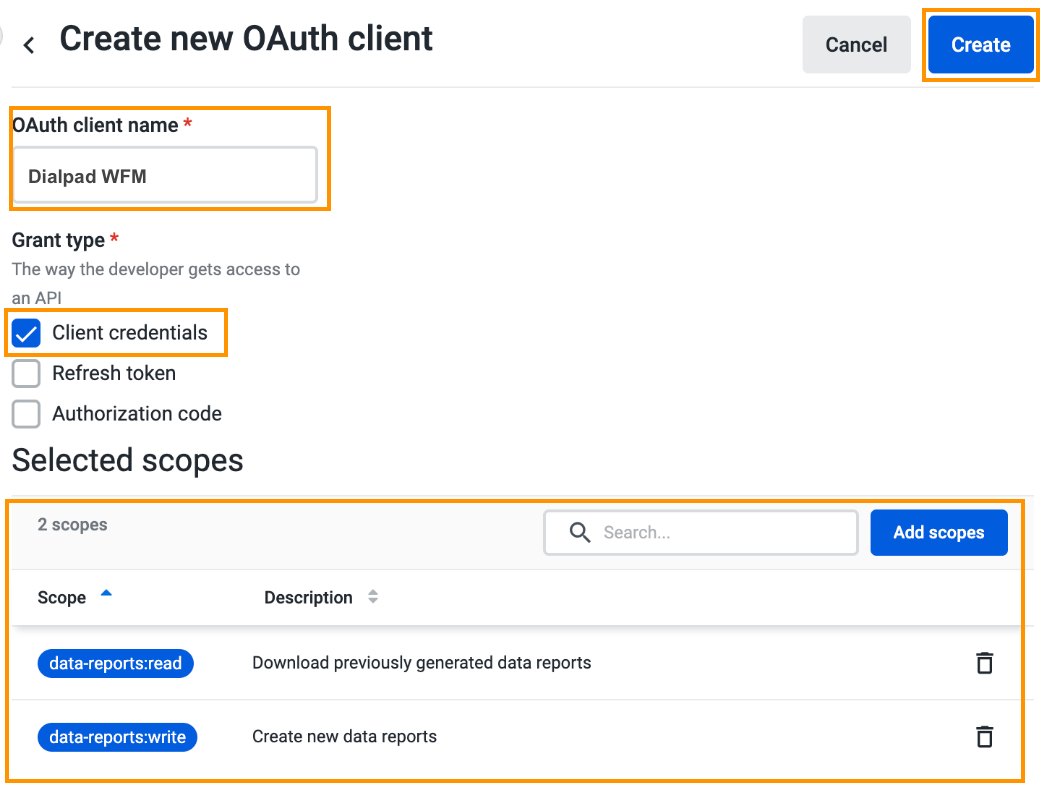
Name your new OAuth client
We recommend you name this client 'Dialpad WFM' to make it easy to identify.
Navigate to Grant Type, then check the box beside Client credentials
Select Add scopes
Add the following 2 scopes:
data-reports:write - Create new data reports.
data-reports:read - Download previously generated data reports.
Select Save scopes
Select Create

A modal will now open with your OAuth IDs — you'll only be able to view this once, so leave this tab open and open Dialpad WFM in a new tab. You’ll need to remember your subdomain, Client ID and Client Secret.
Connect Dialpad WFM to Talkdesk
Now that you have your Talkdesk OAuth details, its time to connect Dialpad WFM to Talkdesk.
To connect Talkdesk, head to your Dialpad WFM Settings.
Navigate to Integrations
Select Customer service
Select Connect to Talkdesk
.png)
Enter the following OAuth client details:
Subdomain
Client ID
Client Secret
Select Save
That’s it! Your Talkdesk account will be connected and ready for forecasting.