• CP-6821-3PCC • CP-7811-3PCC • CP-7821-3PCC
• CP-7841-3PCC • CP-7861-3PCC • CP-8811-3PCC
• CP-8841-3PCC • CP-8851-3PCC • CP-8861-3PCC
If your device is not noted above, but falls in between the model list (for example; CP-7841-3PW) and by default contains 3PCC firmware version, then it might be supported using the same configuration details as noted below.
Note
Dialpad can only support Cisco phones that are already running on the Multi Party Platform (MPP) firmware.
Collect the required information
First things first, you'll need to collect the required configuration information (your IP address, MAC address, model number etc).
Check the back of the device itself to find the model number and minimum supported versions.
Next, turn on your device and press the Settings button (that's the gear icon).
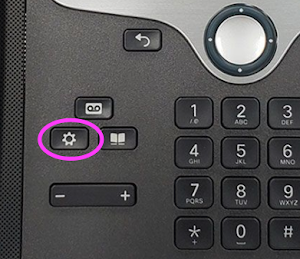 Use the up/down directional arrows and the center button (pictured at the top right in the above image) to navigate to the Status menu and select Product Information.
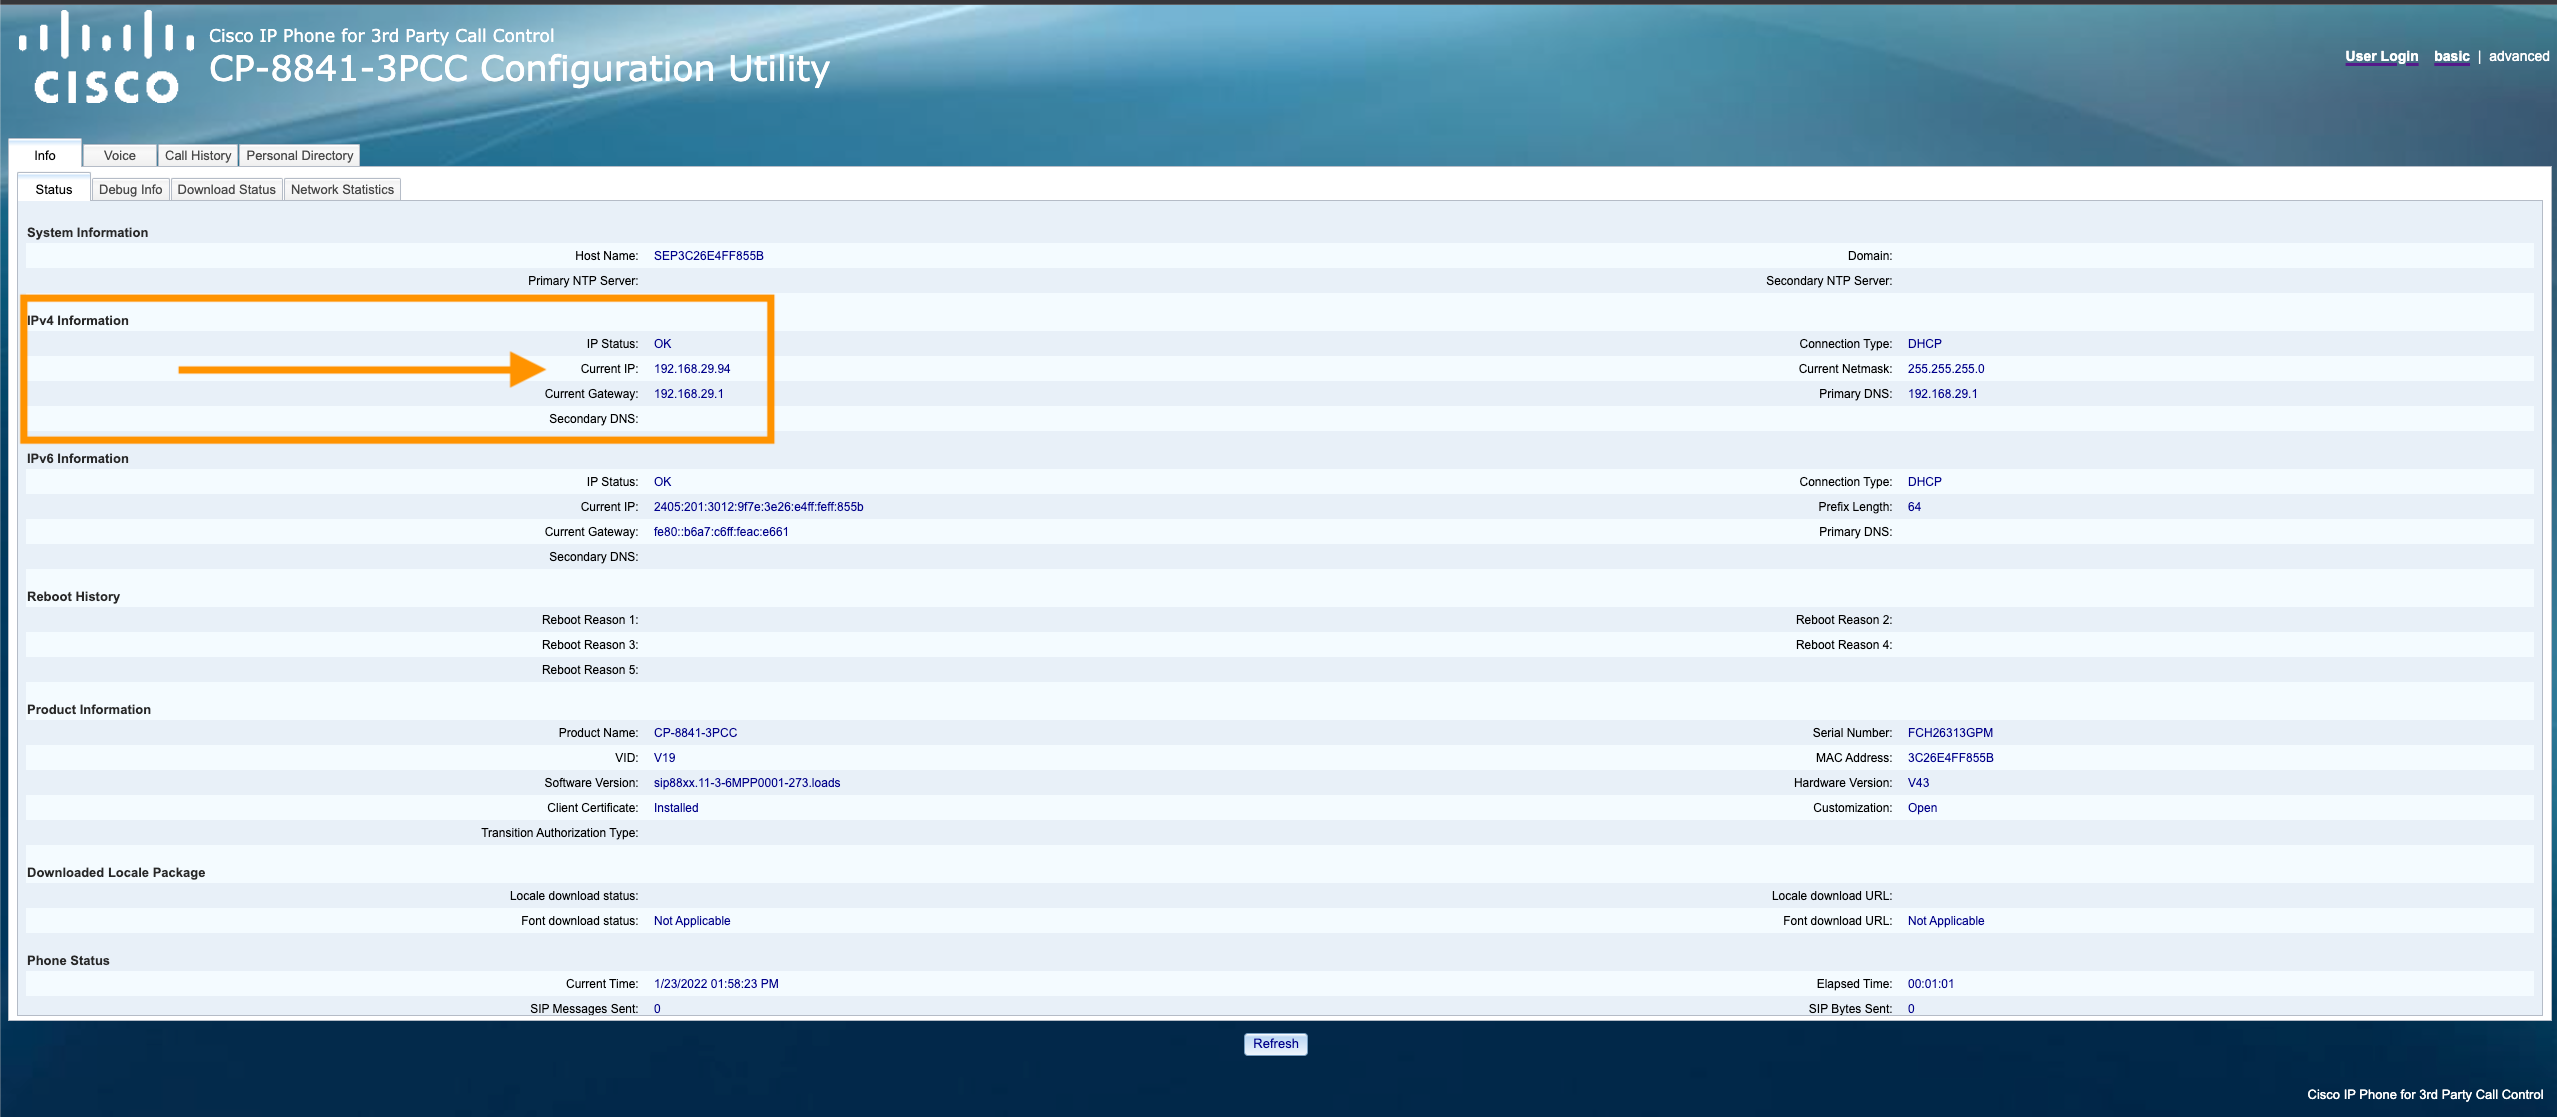
Navigate to IPv4 to view your IP address.
You can also view your IP address from the WebUI (http://10.15.1.57/admin/advanced)
Access deskphone admin password
Company admins can access their organization’s deskphone password directly from the Company Settings. This admin password applies to all deskphones activated with Dialpad.
To access the deskphone admin password, navigate to Dialpad Admin Portal.
Select My Company
Select Deskphone Settings
.png)
Navigate to Deskphone Admin Password
Select the eye icon to see the password
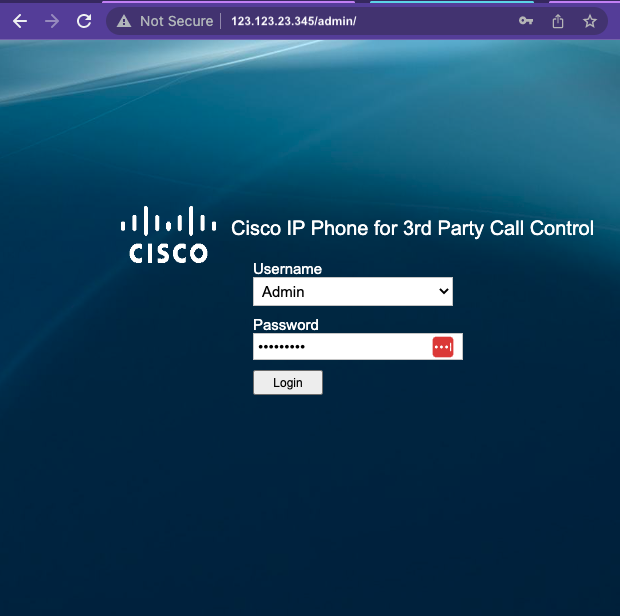
Then, log in to the deskphone's web interface using ‘admin’ as your username and your assigned deskphone admin password.
Note
For unassigned Dialpad provisioned devices use the default deskphone password: 3425723, which spells "Dialpad" on a phone keypad.
Factory reset
Now that you've collected the required information, we need to do a factory reset to ensure that any previous configuration data has been removed and cannot interfere with your Dialpad service.
Cisco provides two ways to factory reset:
Method #1
Press and hold the # keywhile turning on the device
Hold the key until the headset or speaker light turns off
Press 123456789*0# in sequence
That's it! The device will be factory reset and shall reboot automatically.
Method #2
Press the Setting button on your device
Navigate to Device Administration
Search for Factory reset and select it
Press OK to confirm
Your device will reboot and reset automatically.
Configuring for Dialpad
Next up, you will need to configure the deskphone for Dialpad.
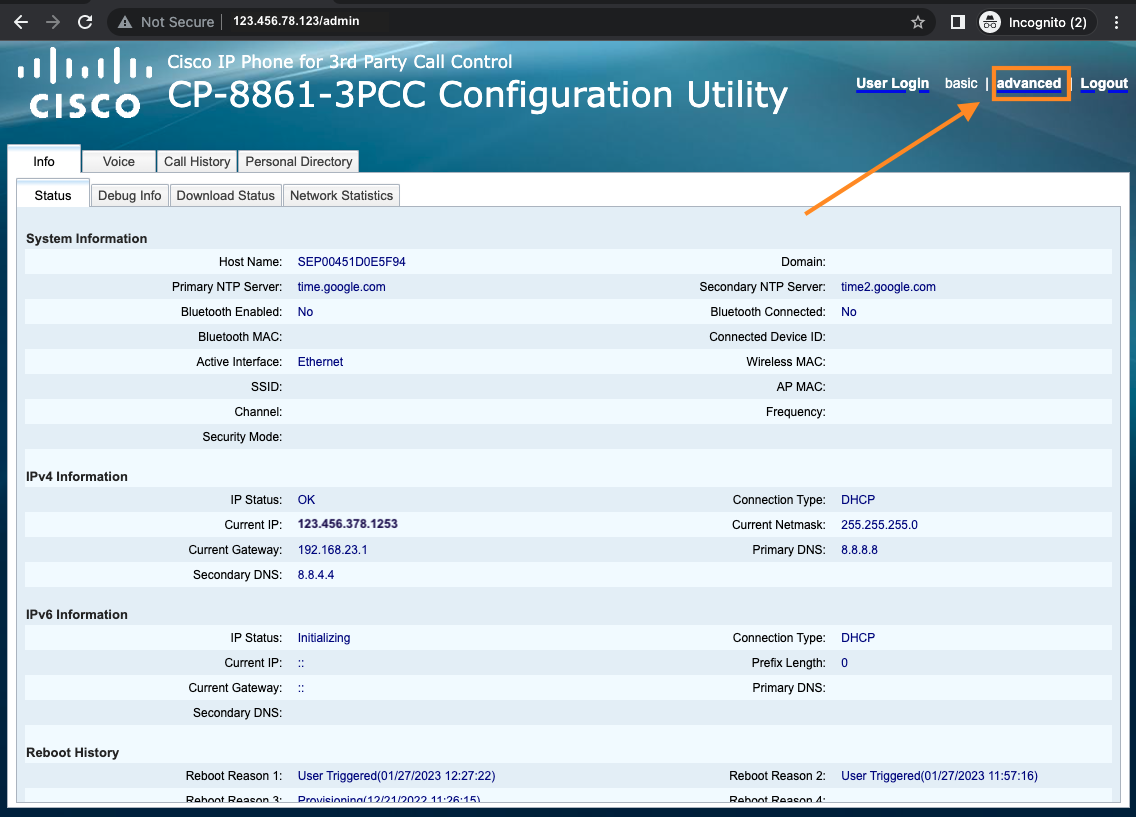
Navigate to the Local IP
Sign in using the deskphone admin credentials
Select Advanced (top right corner) to switch to the Advanced view
Select the Provisioning tab
Add your provisioning URL into the Profile Rule
Set Profile Authentication Type to Disabled
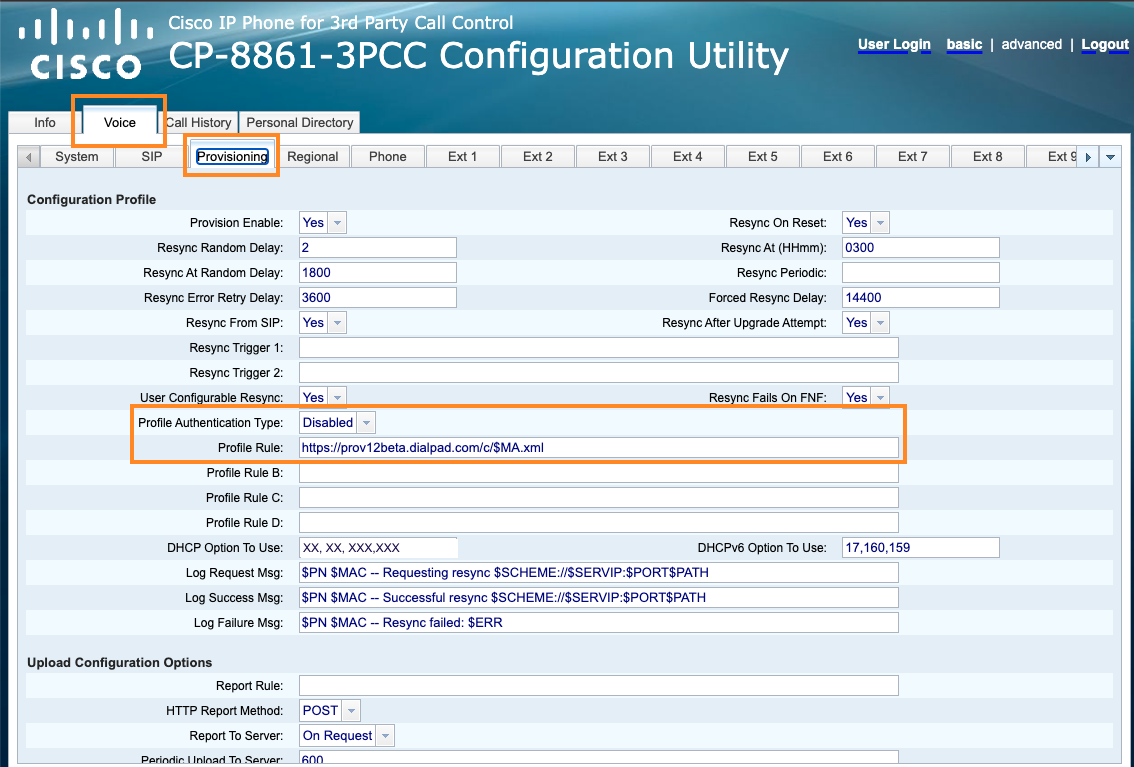
Select Submit all changes
Your device will automatically provision and restart. Once it has rebooted, you will see the Dialpad Activate notification.
Activate the device with Dialpad
To complete activation, navigate to Your Settings.
Select Your Devices
Select Add New
Select Add a desk phone
.png)
Select See More Options
Select Cisco device
Name the device
Select Next
You will then be provided a 4-digit Activation code.
Pick up the receiver — the phone will automatically dial out (if it doesn't, select the line key beside Dialpad Activate to dial in).
When prompted to enter the activation code, enter the 4 digit code provided in the Dialpad portal.
The phone will restart and register with your Dialpad service.