Use Dialpad’s Bulk Backup feature to automatically save Contact Center call recordings to Google Cloud Storage. No need to back up all Contact Center calls, Admins can choose to back up call recordings from specific Contact Centers and even save them to different Buckets.
Want to back up historic call data? No problem! Dialpad can manually back up call recordings as far back as 2 years.
Let’s dive into the details.
Who can use this
Bulk Backup for Call Recordings is available to users on a Dialpad Support plan and to users with Coaching Teams. To enable Bulk Backup for Call Recordings, you must be a Dialpad Company Admin, and have a Google Cloud Storage Account.
Setup process
To set up Bulk Backup for Call Recordings, you’ll need to:
Set up a Google Cloud Storage Account
Create a Bucket
See manual Bucket creation steps
Enable the Google Cloud Storage Integration in the Dialpad Admin Portal
This integration must be enabled at the Company level
Edit office-level Google Cloud Storage settings and add a Bucket
Determine which Contact Centers should have their call recordings backed up
This is configured in the Global Contact Center settings
This step is only applicable if you want to configure specific Contact Center recordings to backup into a different Bucket
Edit the Contact Center’s integration settings and add the Bucket name
Create a Bucket
Once you’ve created your Google Cloud Storage account, it’s time to create a Bucket. Buckets are the storage location where Dialpad holds call recordings.
First things first, select the project where you want to create the Bucket. Use the project selector to choose your project.

Once the project is selected,
Enter BUCKETS in the search bar
Select Buckets

Select Create
.png)
Enter a unique bucket name, then select Continue
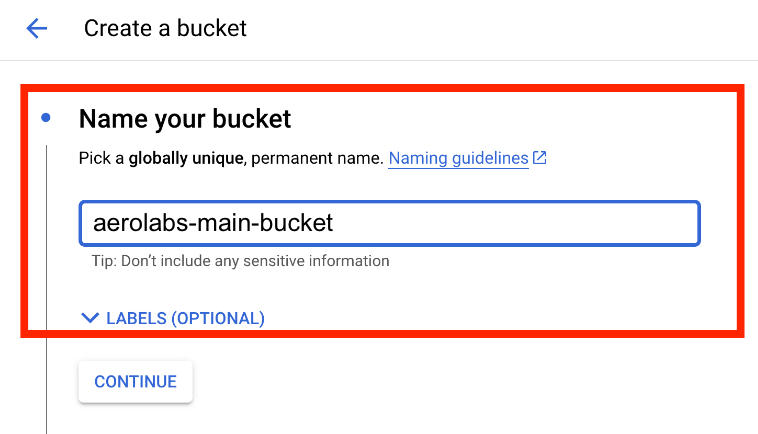
In the “Public Access Prevented” pop up, select “do not show me this warning again” and keep the “confirm to enforce public access prevention on this bucket”
Select Confirm
That’s it, your bucket is created!
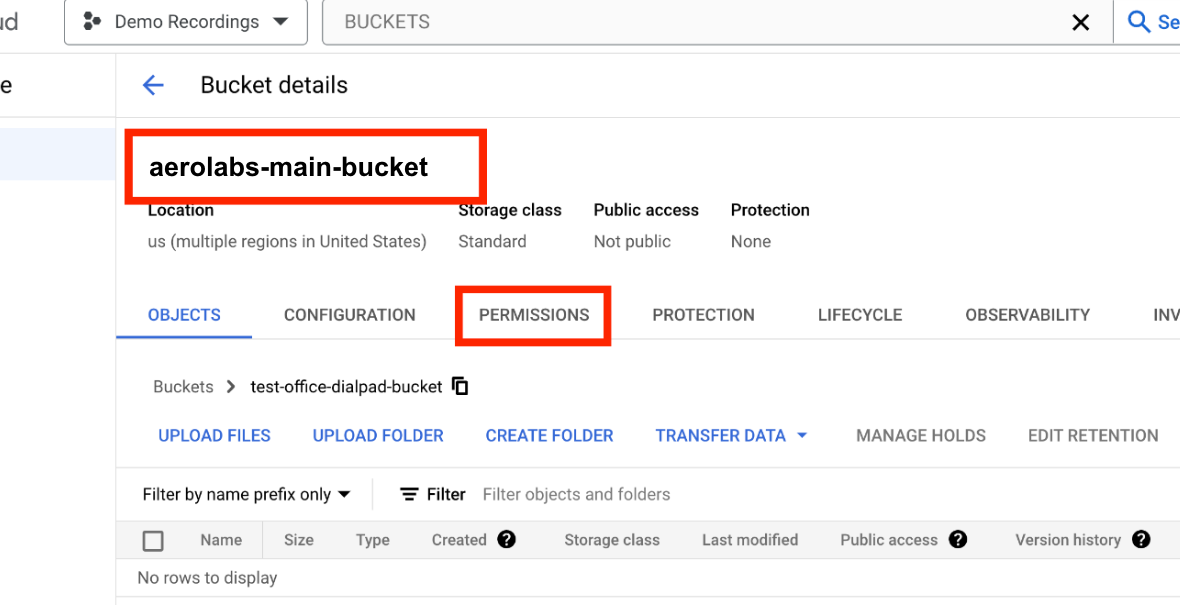
Now, on the Bucket details page:
Select Permissions
Select Grant access
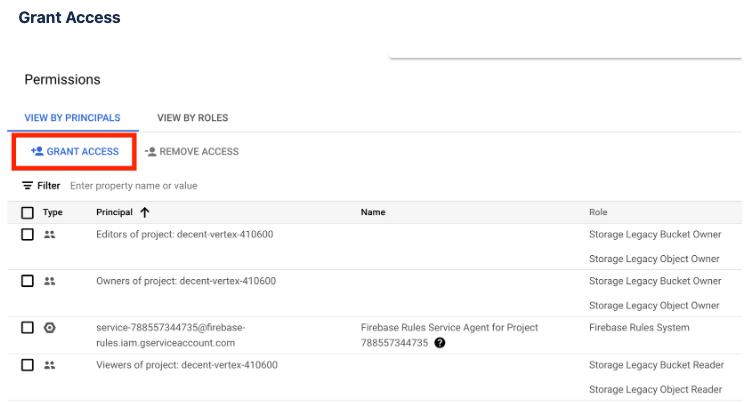
In New principals, add the Dialpad account export@dialpad-external.iam.gserviceaccount.com
.png)
Without adding this role, Dialpad will not be able to write files into your Bucket or check access
Once you have entered in the New Principal, select SELECT A ROLE
Search for, and select Storage Object User
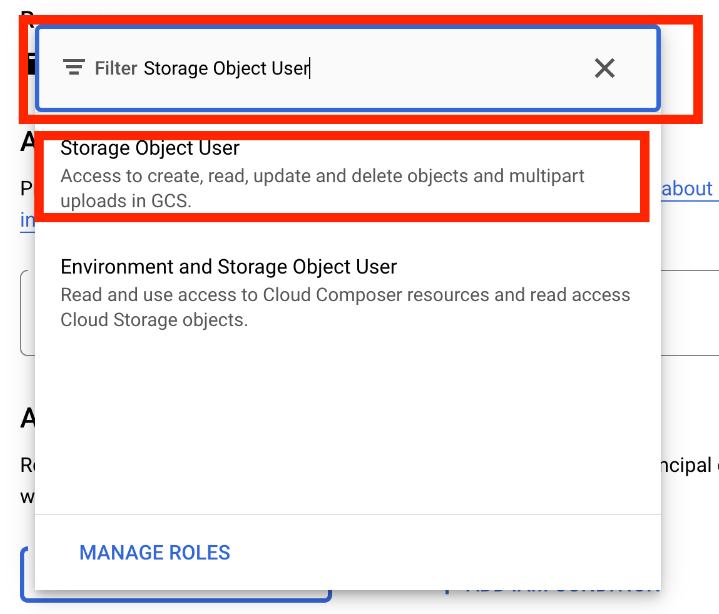
Select Save
Enable the Google Cloud Storage Integration
Now that your Bucket has been created, its time to enable the Google Cloud Storage Integration in Dialpad.
First, you’ll need to enable the integration at the company level. Once enabled for your company, you can configure it at the Office and /or Contact Center level.
Note
You must be a Company Admin to enable integrations at the company level.
Head to your Dialpad Admin Settings.
Select My Company
Select Integrations
Beside Google Cloud Storage, select Options
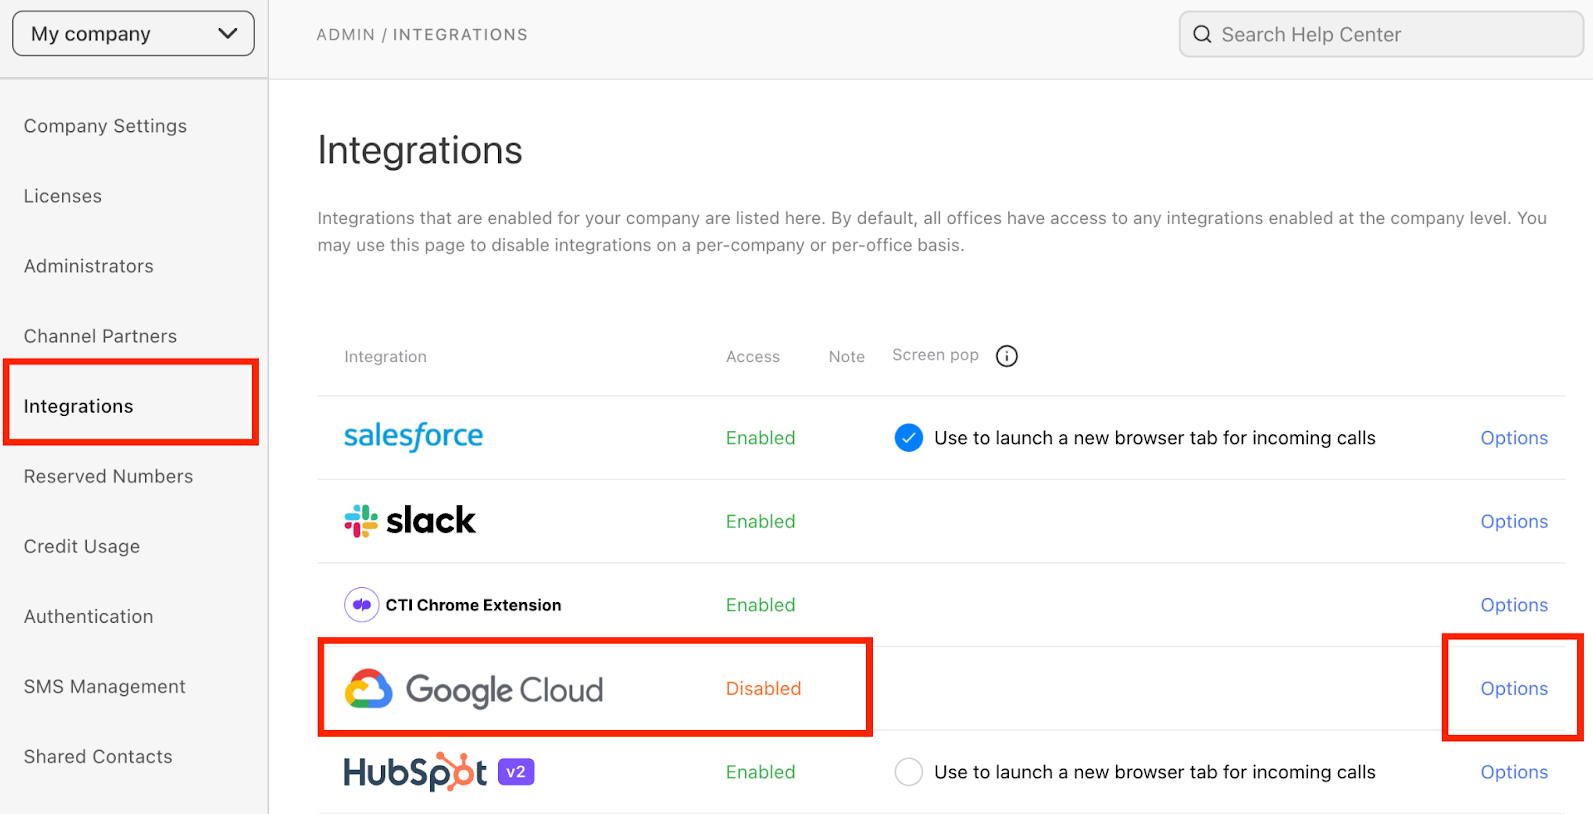
Select Manage Settings
Check the box beside Enable this feature
Enter the Bucket name
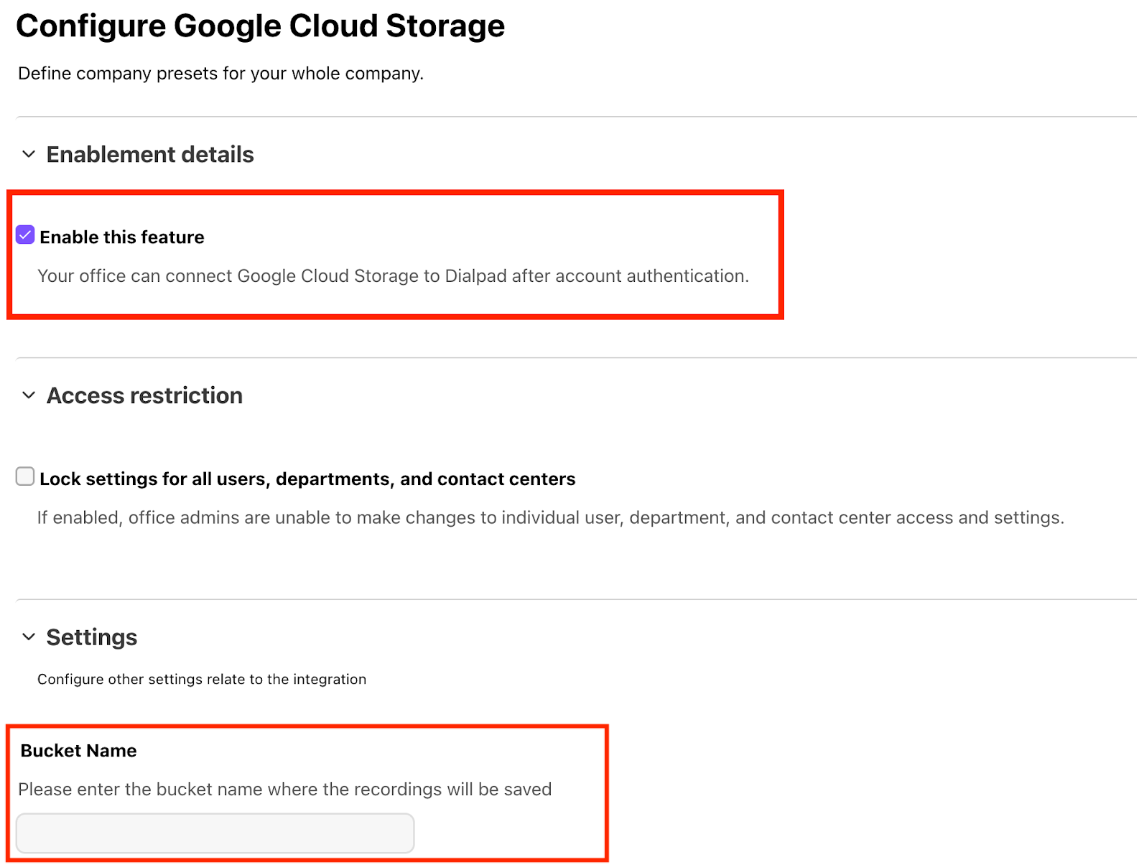
If you want to restrict settings check the box beside Lock settings for all users, departments, and contact centers
If access restriction is enabled, all Contact Center calls that are set to be backed up (across all offices) will go to the bucket added at the company level.
If access is not restricted, office admins can access and edit the office-level Google Storage settings and input a different bucket name at the office level.
Select Save
Customize Google Cloud Storage for an office
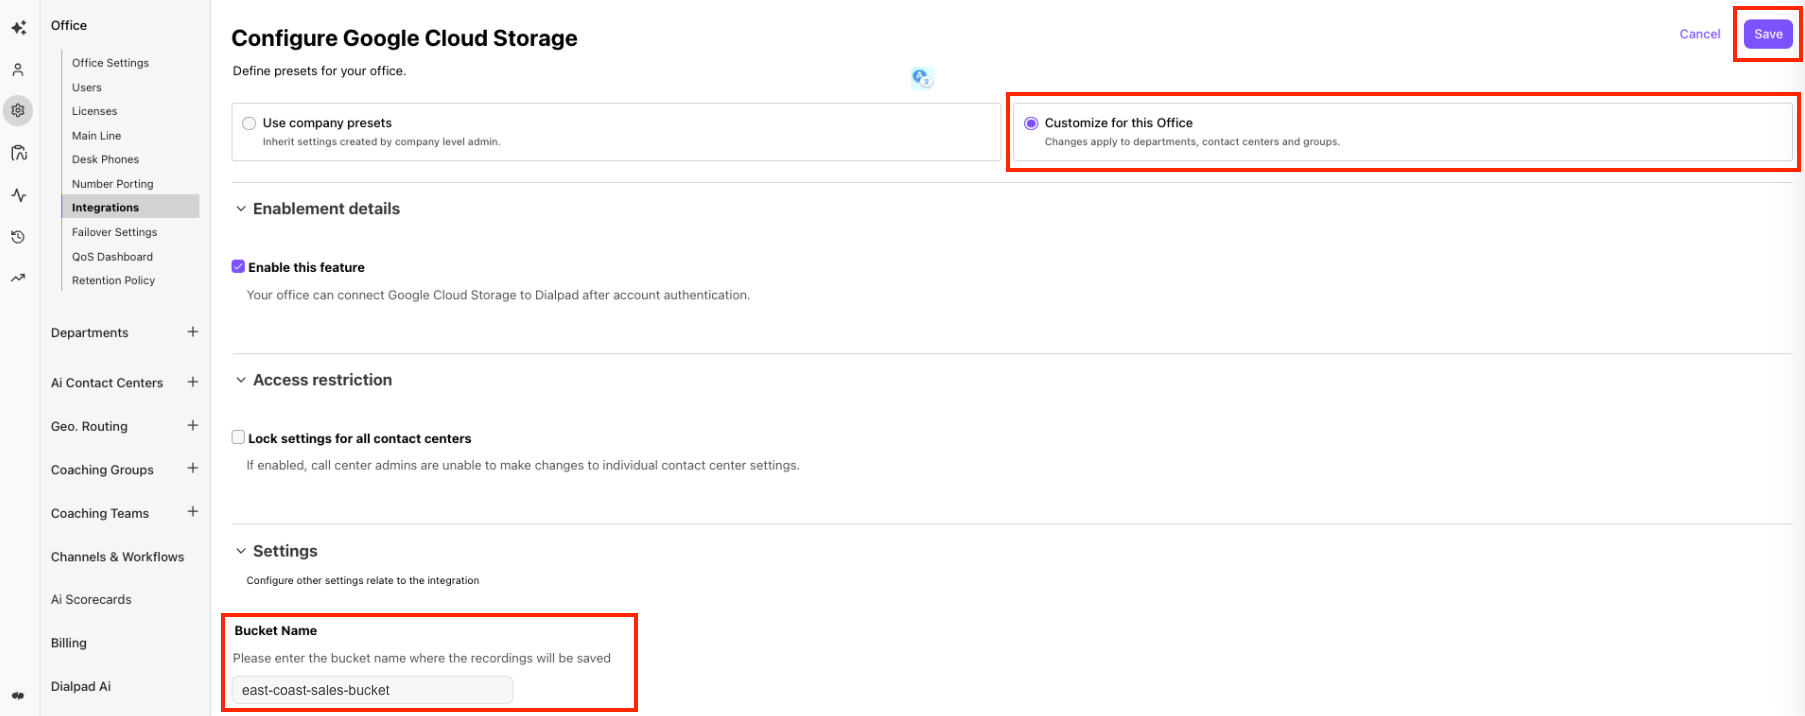
If you’d like to customize your Google Cloud Storage settings for a specific office (ie. you want the recordings to go a different storage Bucket), head to your Office Settings.
Select Integrations
Beside Google Cloud, select Options
Select Manage settings
Select Customize for this office
Enter a different Bucket name
Select Save
Note
Individual office customization is only applicable if the Company Admin has not restricted access.
Customize Google Cloud Storage for a Contact Center
If you’d like to customize your Google Cloud Storage settings for a specific Contact Center (i.e., you want th o a different storage Bucket), go to your Dialpad Admin Settings.
Go to Contact Centers
Select a Contact Center
Select Integrations
Beside Google Cloud, select Options
Select Manage settings
Select Customize for this Contact Center
Enter a different Bucket name
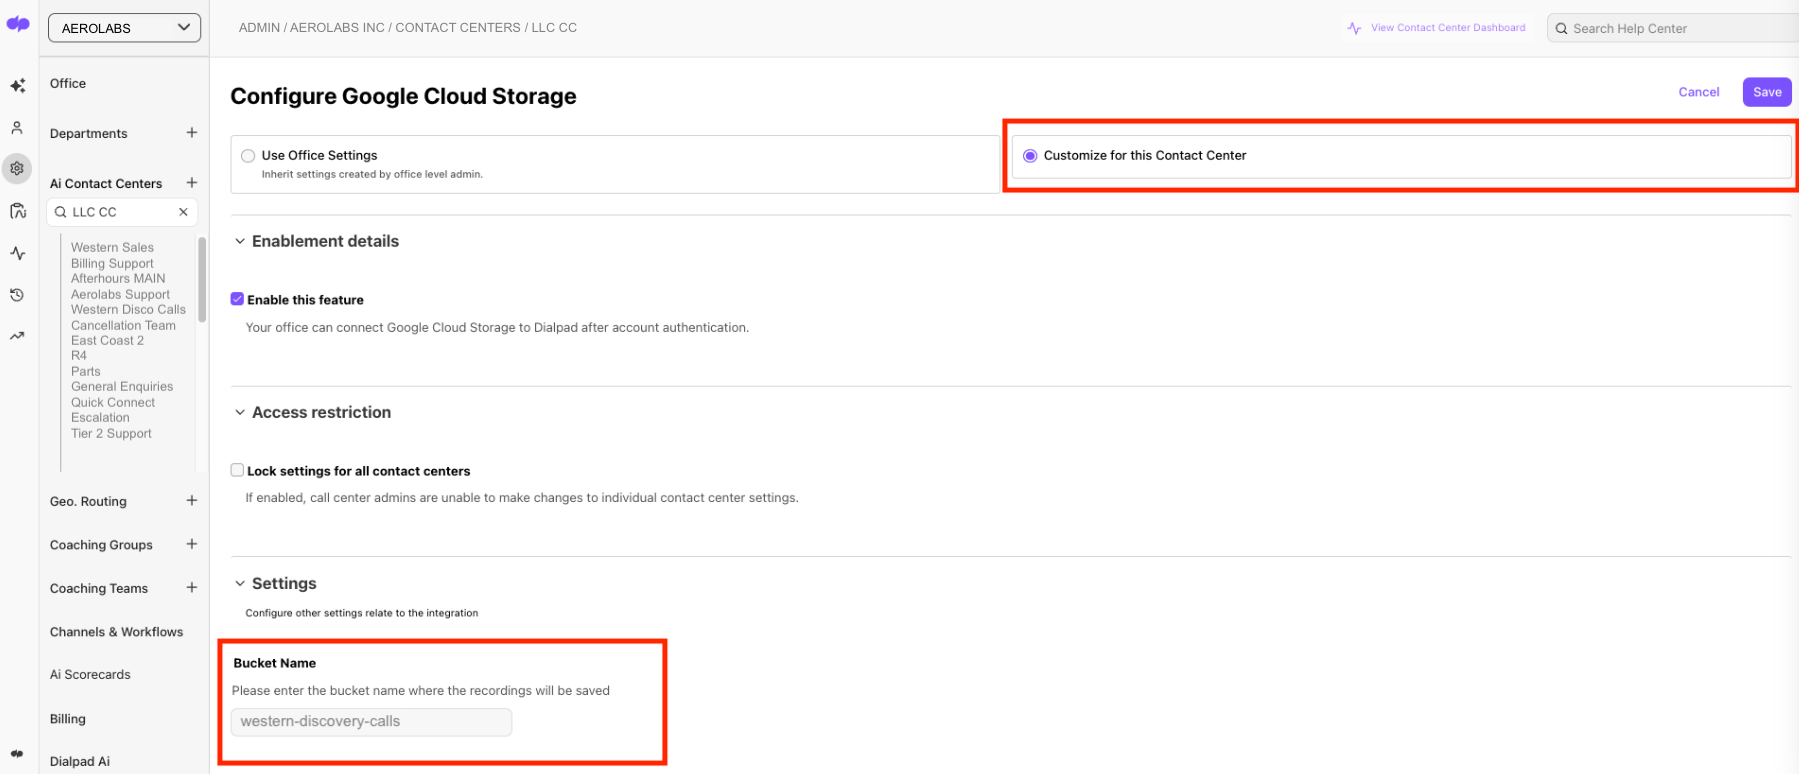
Select Save
Note
Individual Contact Center customization is only applicable if the Company Admin has not restricted access.
Contact Center Buckets will always override Office and Company Buckets. If a Bucket is enabled at the Contact Center level it will always override the assigned Bucket in the Office and Company level settings.
Bucket verification
When you save a Bucket name to the integrations setting, you’ll always see a message informing you that the bucket was added successfully. You can also go back to your Google Cloud Storage Bucket to verify. When a Bucket is saved and successfully connects back to Google Storage, you’ll see a new folder called call-recordings/ within the bucket.

This folder will be empty until call recordings start to back up to it.
Enable call backup
Now that the Google Cloud integration has been set up, its time to enable call back up for your Contact Center(s) and Coaching Teams.
Enable call backup for Contact Centers
To enable call backup for your Contact Center(s), head to your Admin Portal from Dialpad.com
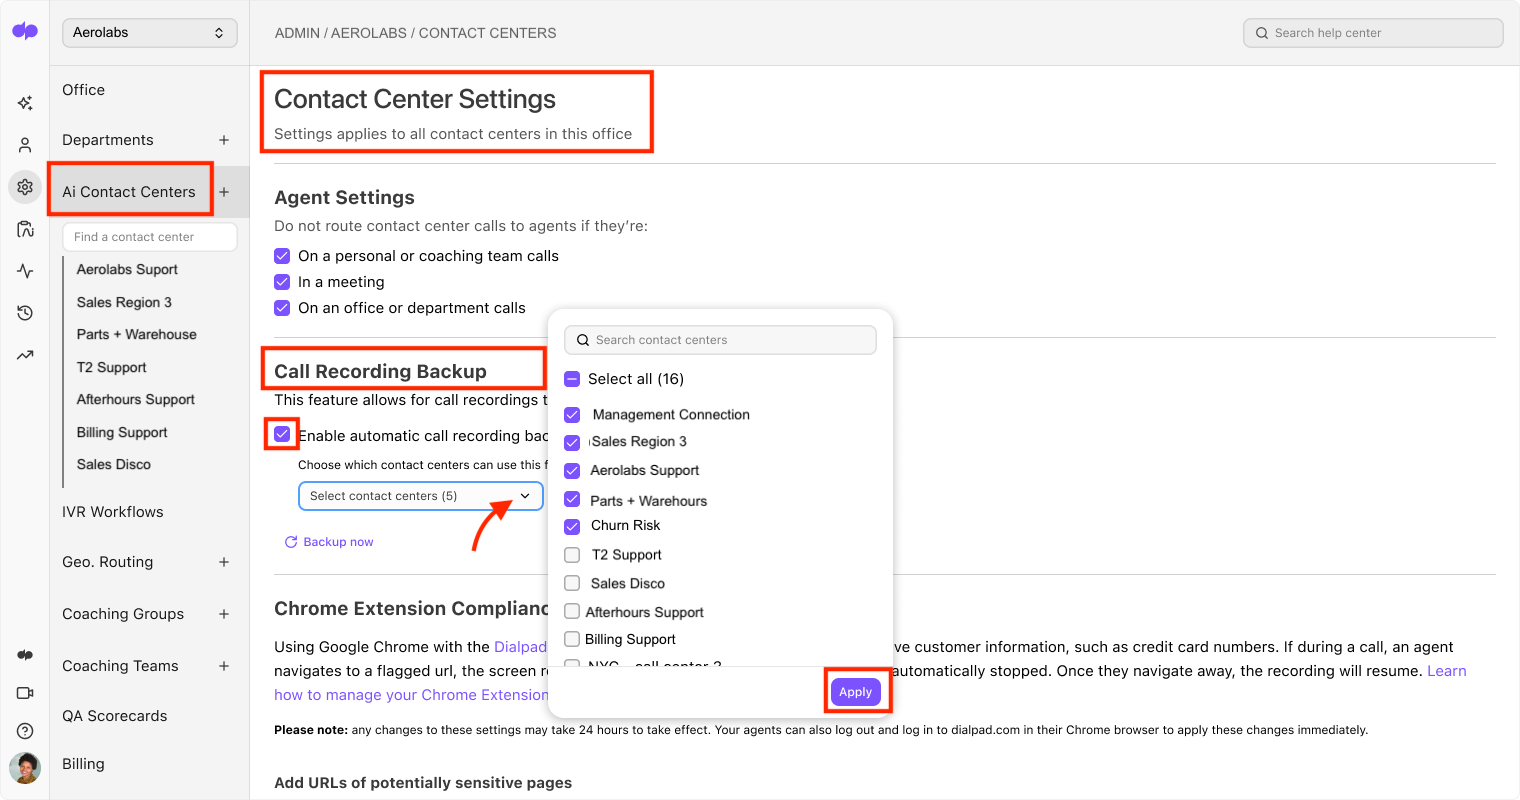
Select Ai Contact Centers to access your Global Contact Center Settings
Navigate to Call Recording Backup
Check the box beside Enable automatic call recording backup
Select the desired Contact Centers
Select Save
Enable call backup for Coaching Teams
To enable call backup for your Coaching Teams(s), head to your Admin Portal from Dialpad.com
Select Coaching Teams to access your Global Coaching Teams Settings
Navigate to Call Recording Backup Rules
Check the box beside Enable automatic call recording backup
Select the desired Coaching Teams
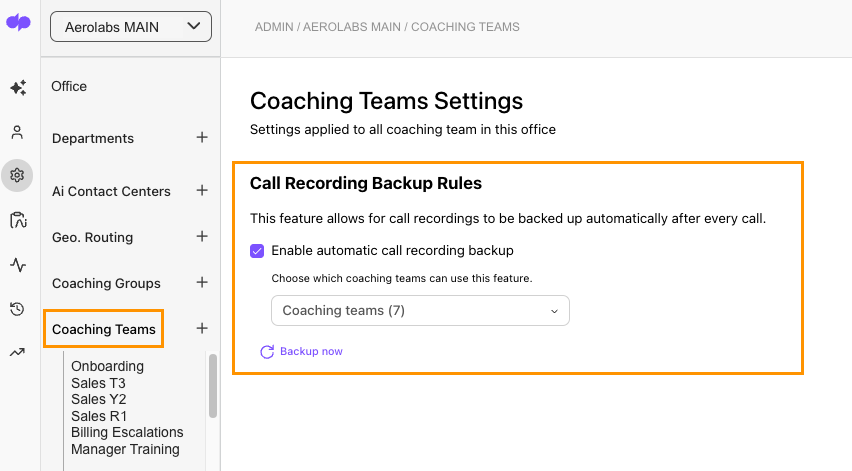
Select Save
That’s it! Once call recording backup is enabled, every call recording for the selected Contact Centers will be backed up and uploaded after the call ends.
As call recordings accumulate, you’ll notice newly established directories in their designated bucket.
.png)
The folder and file name hierarchy is Bucket > Call-recordings/ > Call center name > Date > Call Recordings (Agent Name-Call ID-Recording ID.mp3)

Note
Each Contact Center has its own backup folder. Call recordings will not be mixed up between various Contact Centers.
Backup now
Use our Backup Now feature to back up the last year’s worth of call recordings.
After the initial 1-year backup, each time you run a Backup Now, it will only run for the last calls that are not backed up or that failed to backup.
During a routine backup, if a backup call fails, the Office Admin will receive an email notifying them of the failure. They can then access this view and choose to initiate the backup again to re-run the process for the failed call recordings.
Frequently asked questions
Will I get an error if the backup doesn’t work?
Yes, if your backup was unsuccessful, Dialpad will send your Office Admin an email.