Dialpad’s Zendesk integration keeps everything in one place, no matter where your support team is. Data syncs automatically, so agents can create tickets while making HD calls inside Zendesk. Agents can also view a contact’s open and closed Zendesk tickets directly within Dialpad—leading to quicker resolutions and happier customers.
Let's take a look at Dialpad’s Zendesk integration.
Who can use this
Dialpad's Zendesk integration is available to Dialpad Sell and Dialpad Support customers, as well as Dialpad Connect users on Pro and Enterprise plans.
Agents must be on a Zendesk Talk Partner Edition, with access to tickets and user management.
Connect the integration
Once Dialpad’s Zendesk integration has been enabled for your company and your Office, you'll need to connect Zendesk in the Dialpad app and connect Dialpad in Zendesk.
Connect Zendesk in Dialpad
To connect Zendesk in the Dialpad app:
Open a conversation
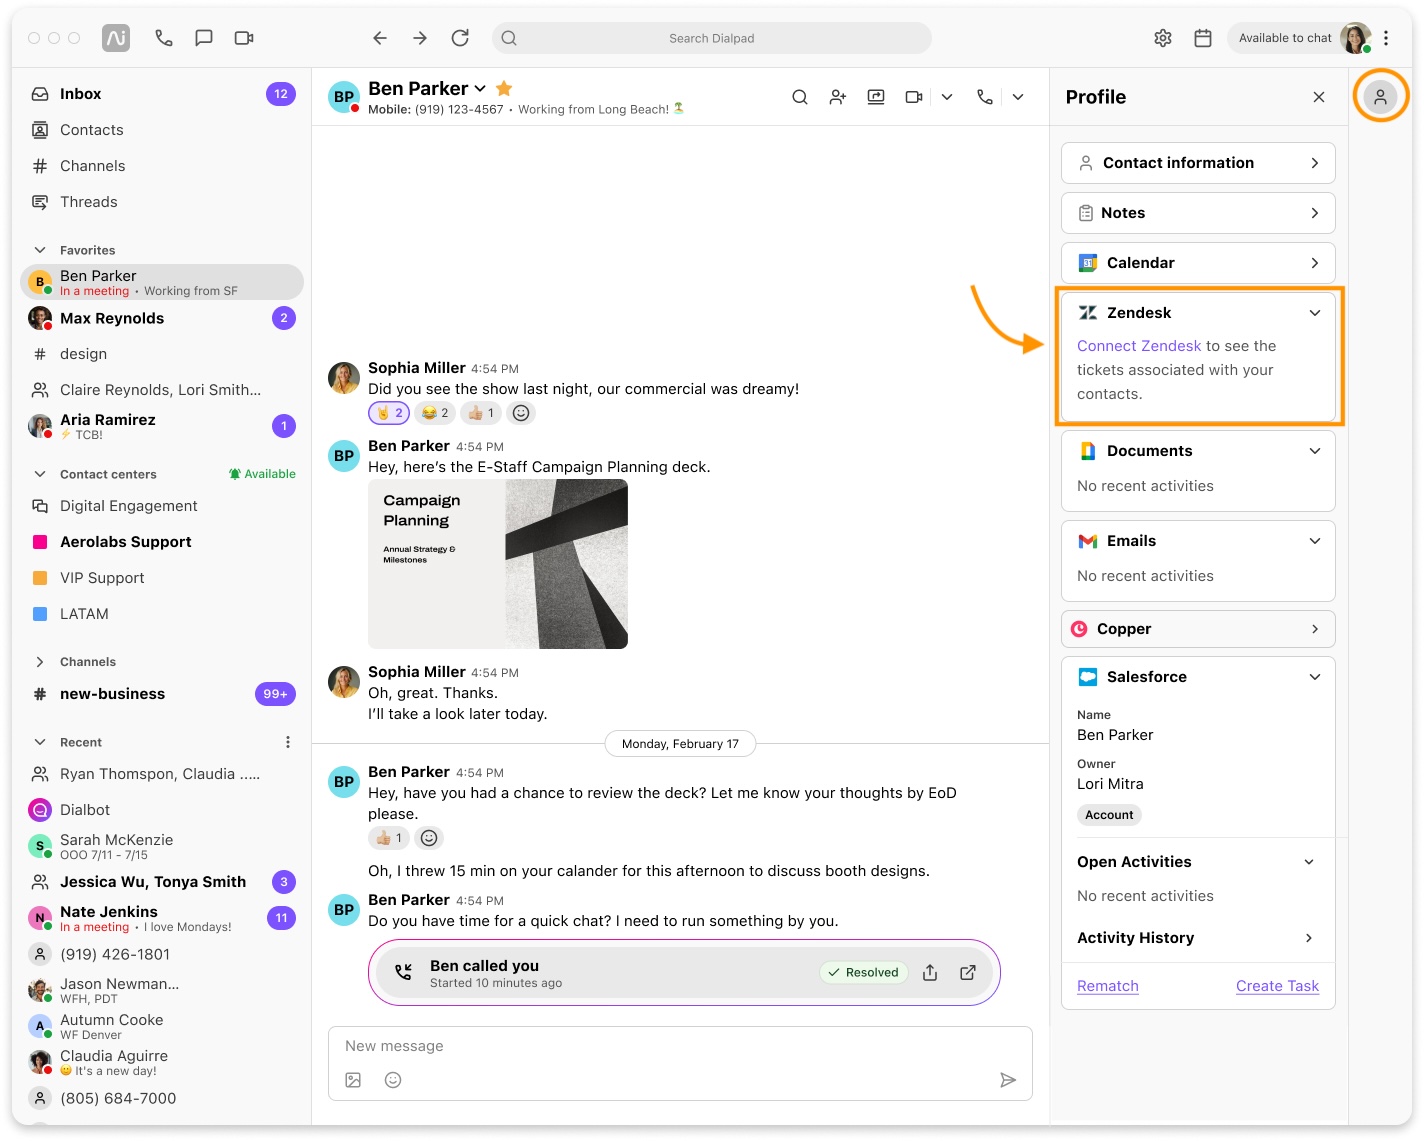
Select the Skinny Bar to open the contact’s profile details
Select Zendesk
Select Connect Zendesk
Follow the prompts — you'll need to enter your Zendesk domain and your login credentials
Connect Dialpad in Zendesk
Once Zendesk is connected in your Dialpad app, you must connect Dialpad in Zendesk (make sure your Admin has already added Dialpad from the Zendesk app store).
On your Zendesk Agent view, select the Dialpad logo
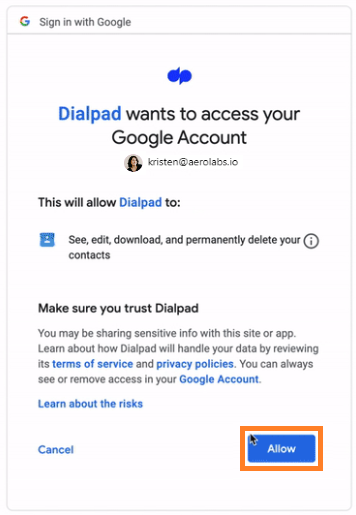
Choose your login option (G-Suite, O365, or email and password)
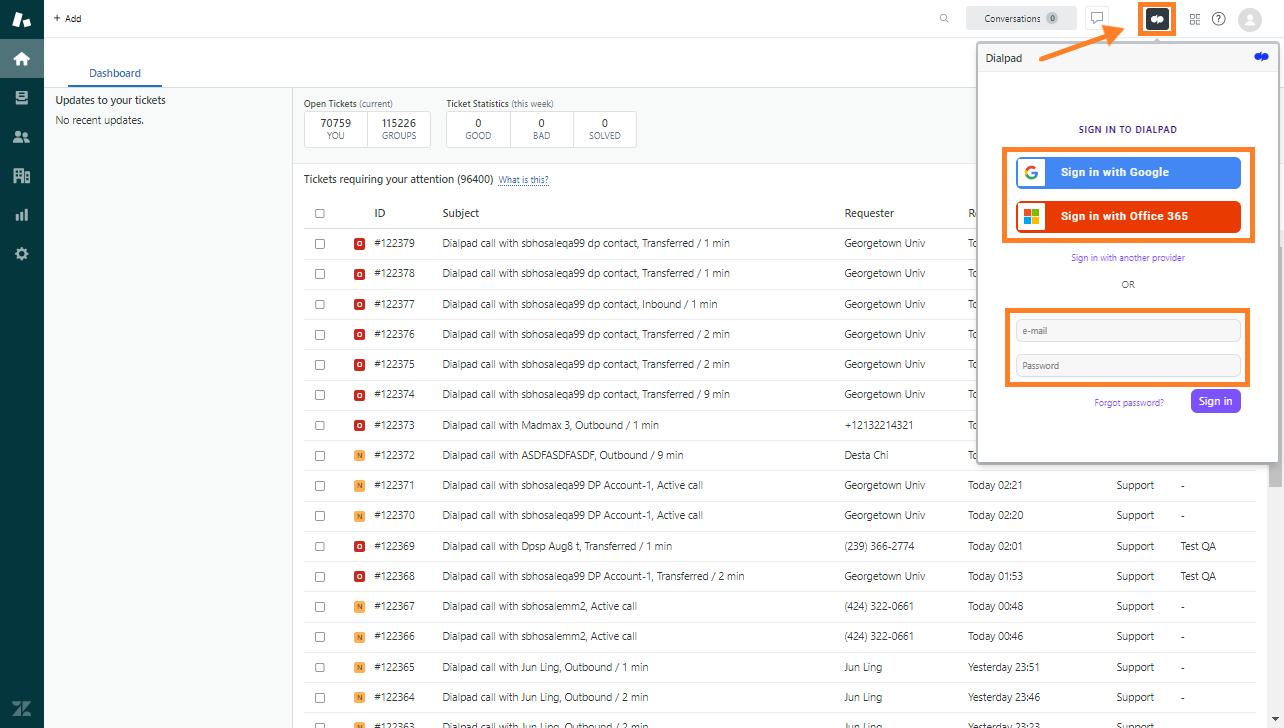
Select Allow
Contact matching
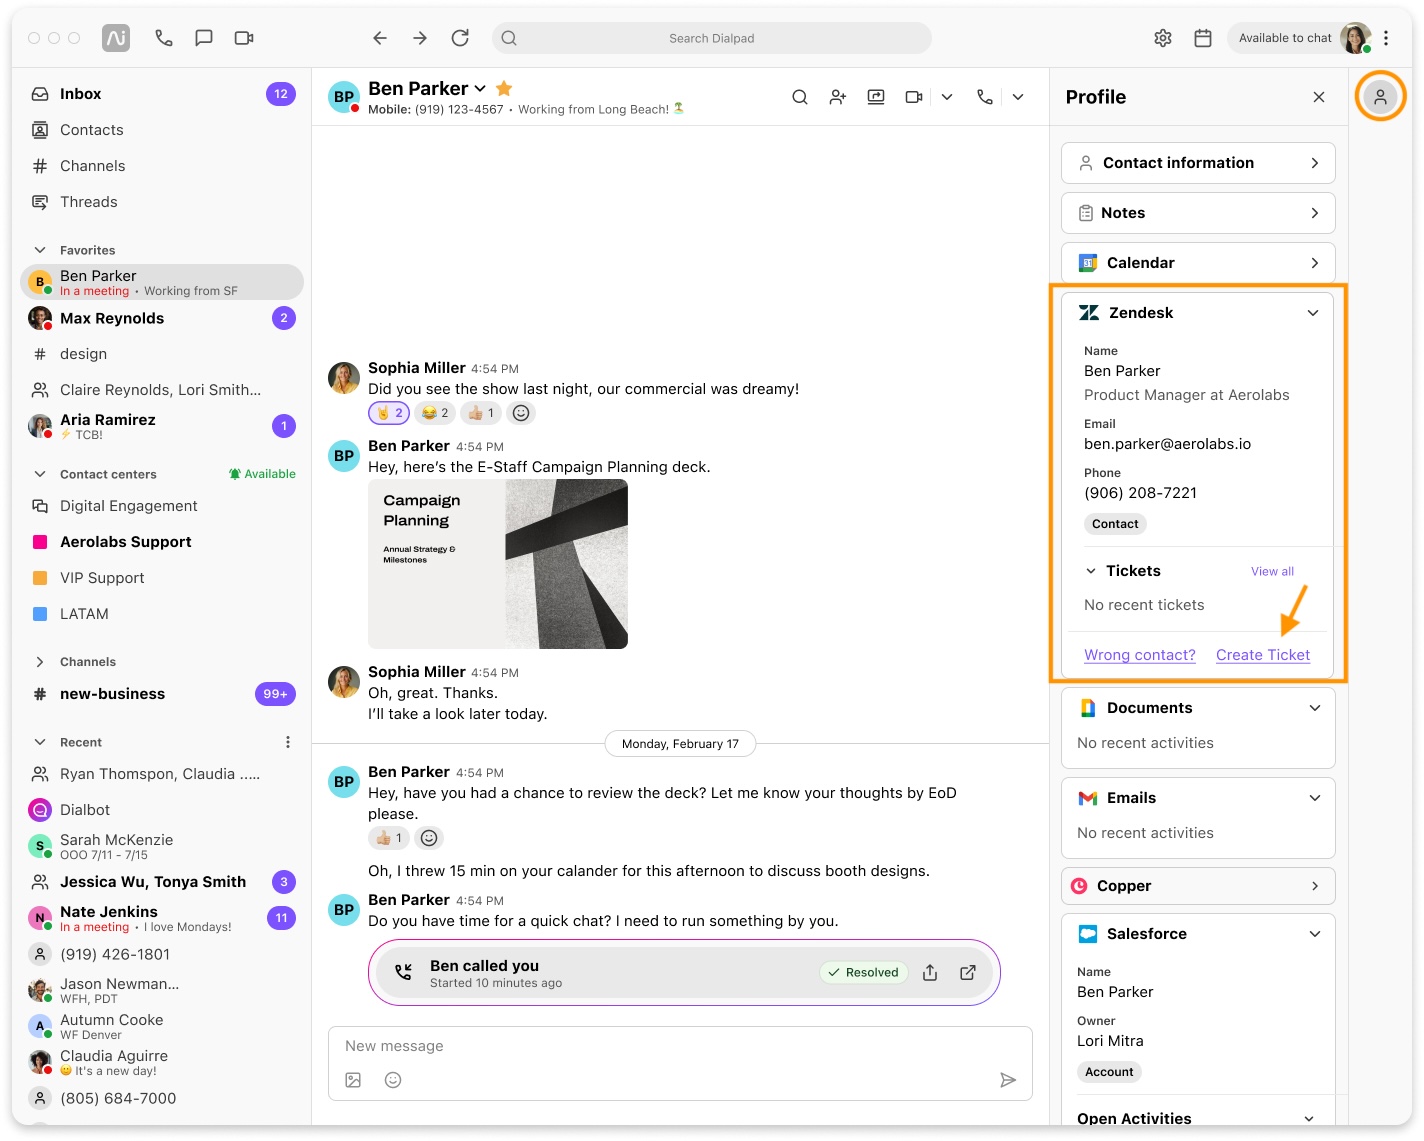
Once connected, Dialpad will search through Zendesk to match your contacts with existing Zendesk users.
Anytime you select a contact in Dialpad, their Zendesk information will appear in the sidebar in the Zendesk Widget. .jpg)
Contact matching is simple—create a new record when no match is found or re-match to a different contact if an incorrect match was made.
Let's walk through some common contact matching scenarios and how to handle them.
Create a new contact
On a call with someone who isn’t a Zendesk contact? No problem! You can create a new Zendesk contact (record) to ensure the details are logged to the correct record.
Note
To generate a ticket from a Dialpad call, the call must be linked to an existing Zendesk contact. If no contact exists, you'll need to create one during the call.
To create a Zendesk contact, agents must have permission to create end-users in Zendesk.
To create a Zendesk contact (record) in the Dialpad app:
Select the Skinny Bar
Open the Zendesk Widget
Search for the contact to ensure an existing record doesn’t already exist
Select Create record
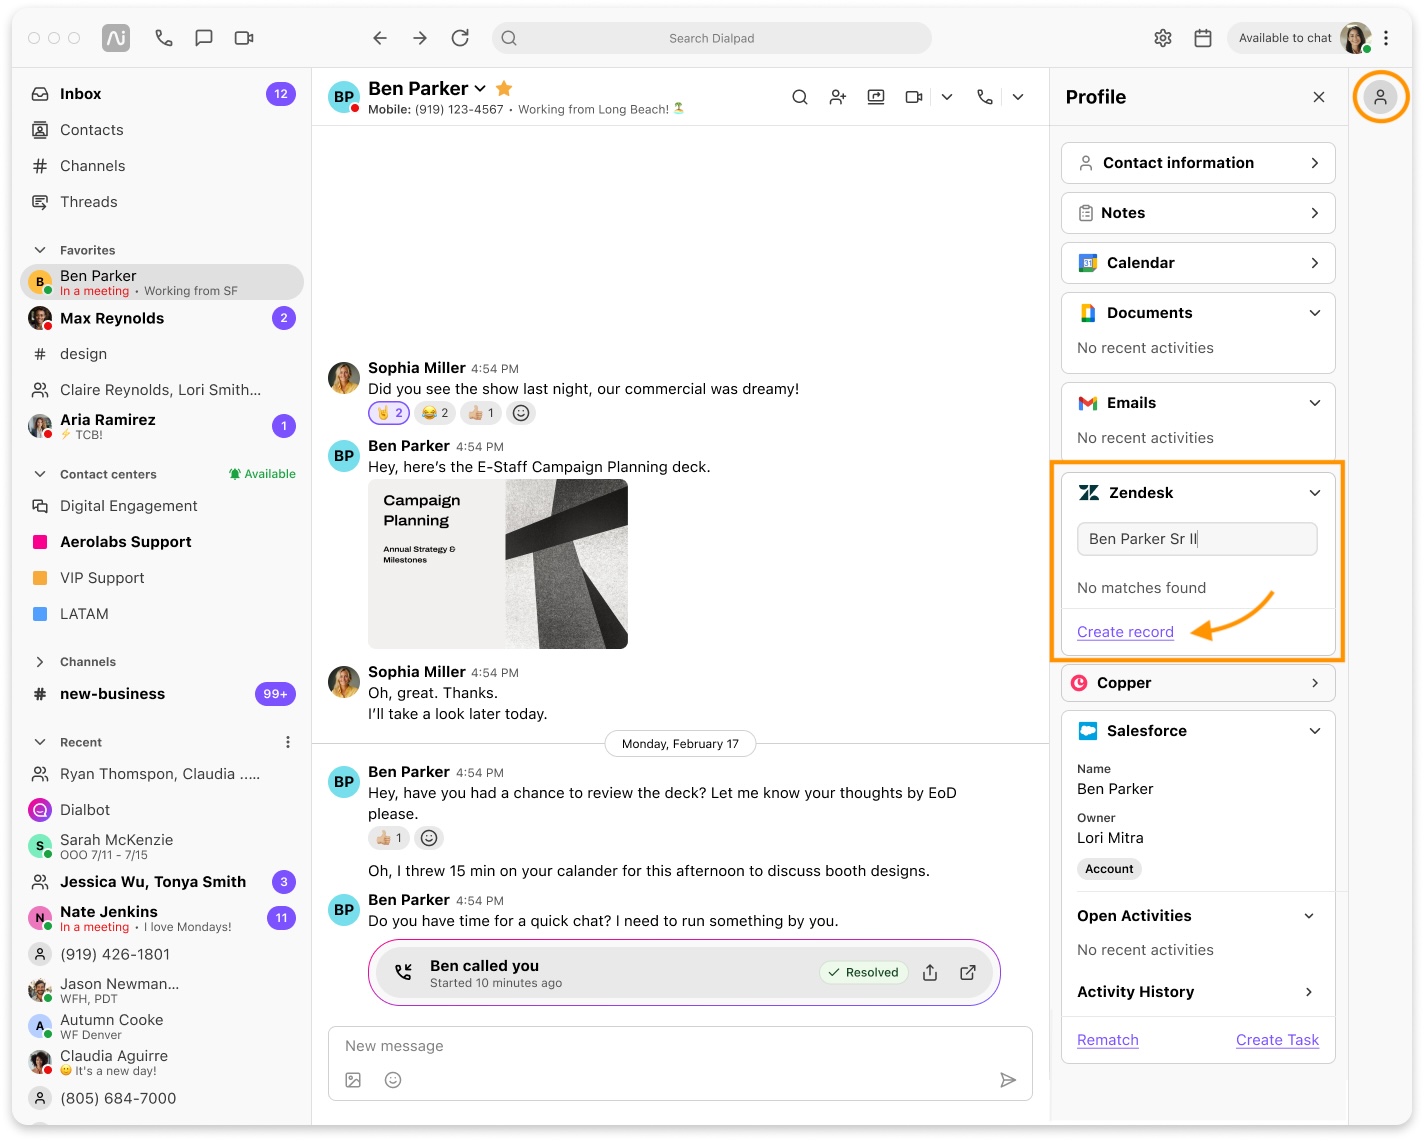
Enter the contact details
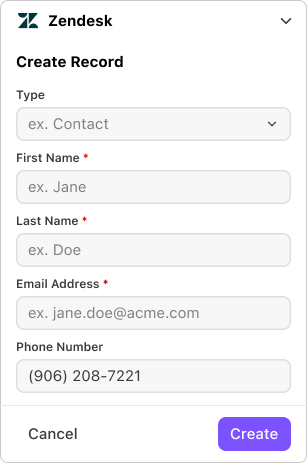
Select Create
Rematch a contact
Need to change a matched contact? No problem, contacts/records can be re-matched in the Dialpad app.
Note
Contact rematching must be done in the Dialpad app, not in Zendesk.
To re-match a Zendesk contact, agents must have permission to create end users in Zendesk.
To change (rematch) a Zendesk contact:
Select the Skinny Bar
Open the Zendesk Widget
Select Wrong contact?
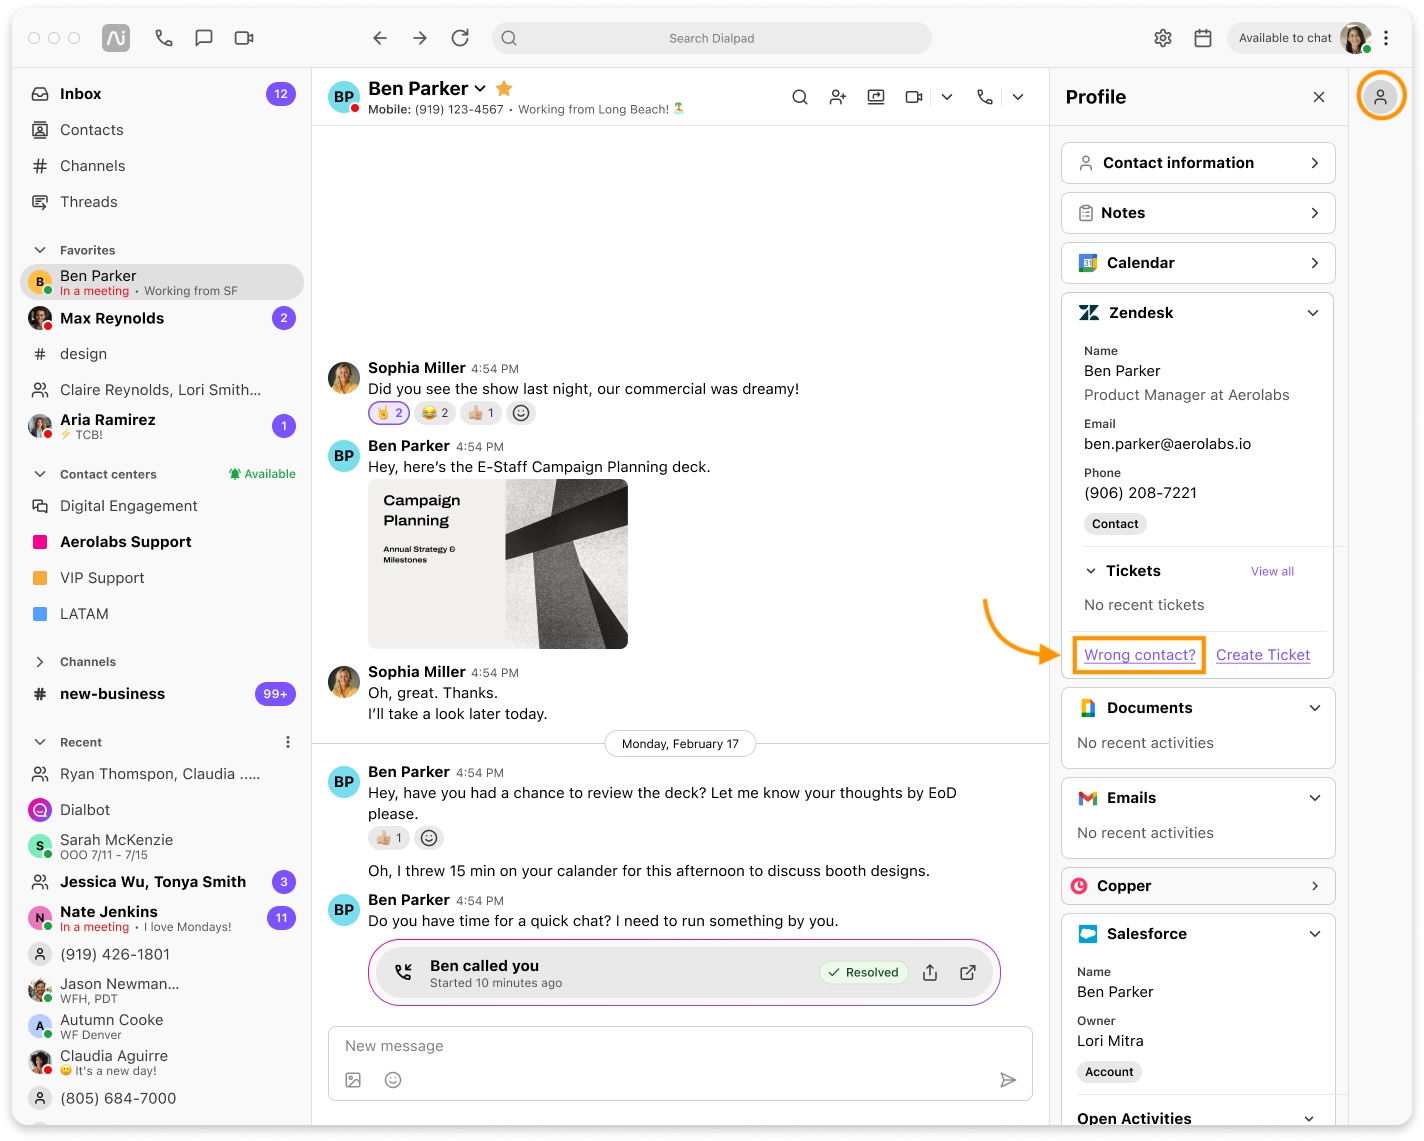
Use the search tool to find the correct contact, then select their name to update the record
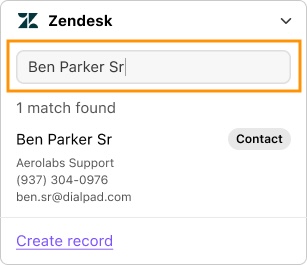
If no record is found, select Create a record to add one
Agents need to have access to create end users in Zendesk
Multiple contact match
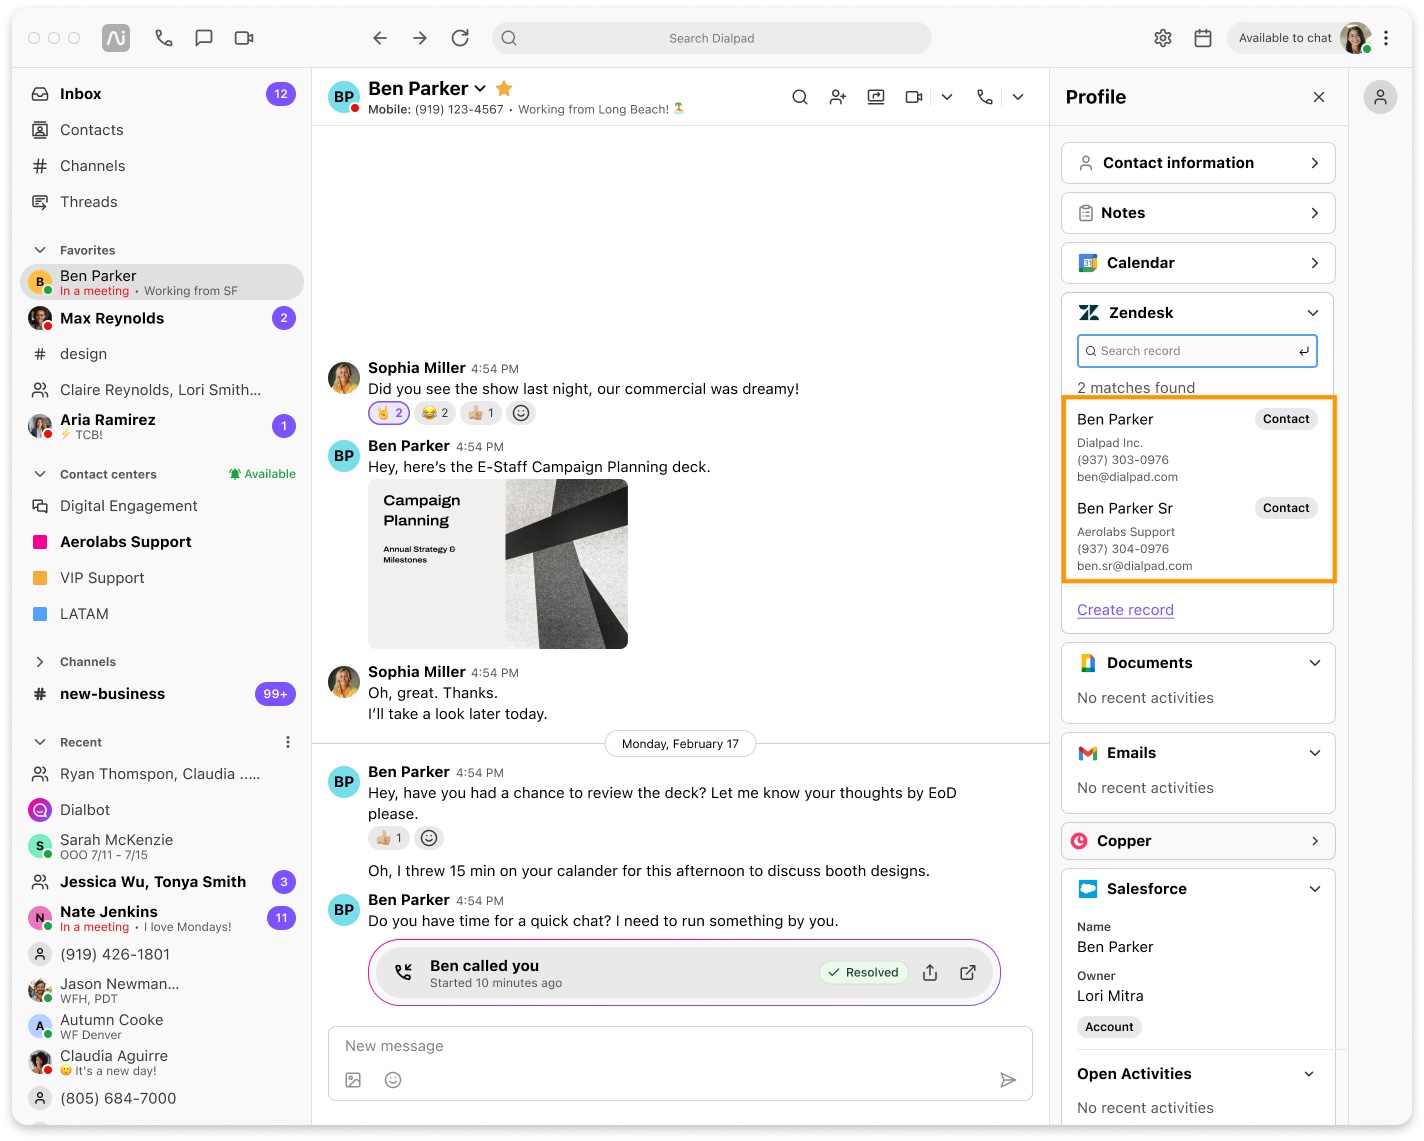
If multiple Zendesk contacts are found, your Dialpad call won’t auto-match to a record. You’ll need to manually select the correct contact in Dialpad. Fortunately, it’s an easy fix—you can update the contact during the call.
To select the correct contact when there are multiple matches:
Select the Skinny Bar
Open the Zendesk Widget
Select the correct contact
Notes
Contact selection must be done in the Dialpad app, not in Zendesk.
To match a Zendesk contact, agents must have permission to create end users in Zendesk.
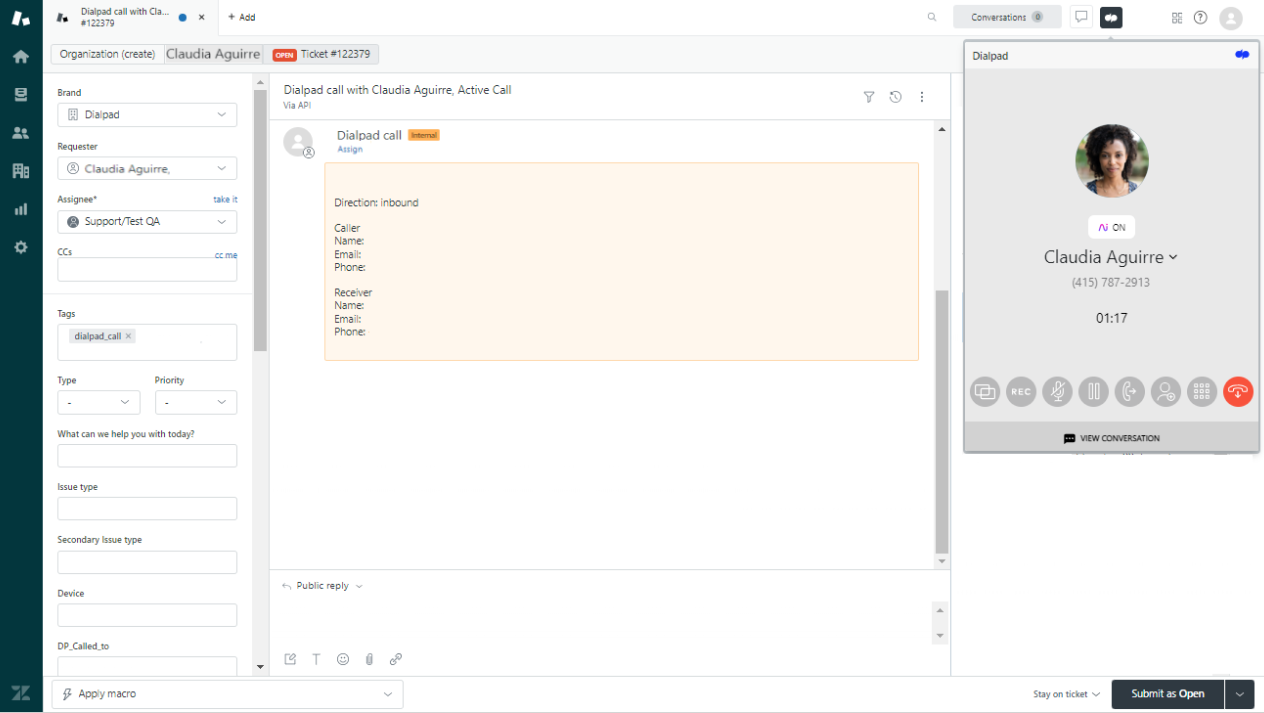
Create a ticket in Dialpad
Zendesk tickets can be created during calls, right from the Dialpad app.
Note
Tickets can only be created for existing Zendesk contacts. Before creating a ticket, you must create a contact or match the phone number to an existing Zendesk contact.
To create a new ticket during a live Dialpad call:
Select the Skinny Bar
Open the Zendesk Widget
Verify the contact is correct
Select Create Ticket
Select your brand and priority from the drop-down option
Add the ticket details
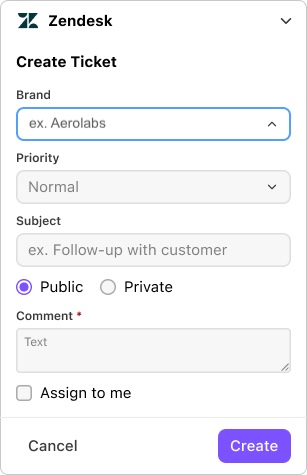
Select Create
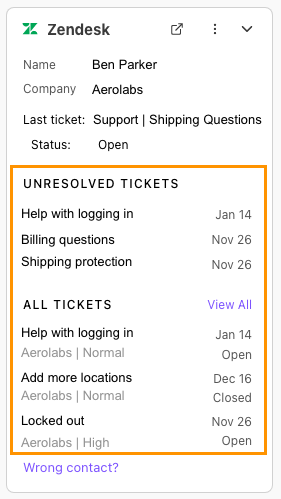
Once created, you'll see the ticket appear in the Zendesk Widget, under Unresolved Tickets and All Tickets.
Here, you’ll see the ticket name, which brand it is/was associated with, and the priority level. You can also select the ticket to launch your Zendesk portal.
Note
Tickets can only be created in during live calls—they cannot be created retroactively.
Receive calls and create tickets in Zendesk
When agents receive a call, the Dialpad Widget will automatically expand to display answer options.
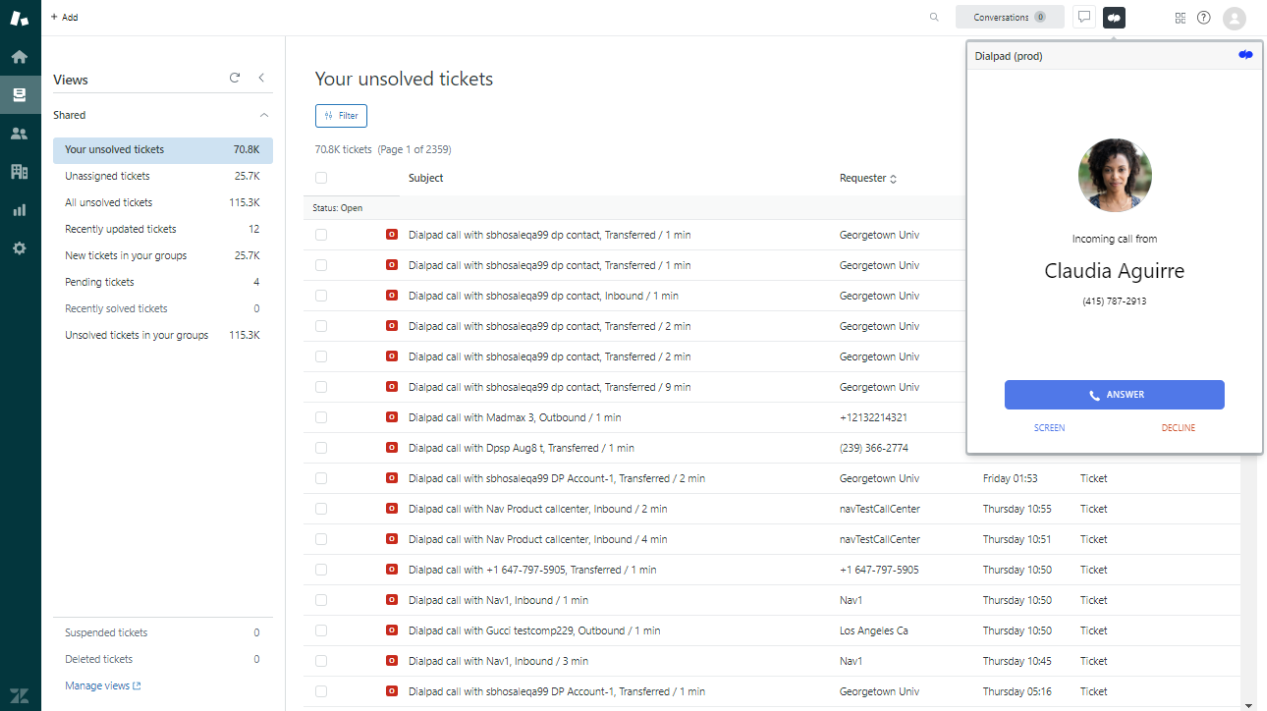
Plus, we'll automatically load a New Ticket page for agents to log the call and any notes.
Note
Department calls will not log to Zendesk if the call was answered by an operator on a room phone.
Send Dialpad messages in Zendesk
Not able to leave Zendesk, but need to send a quick message? No problem! Search and click on the contact you need to reach out to.
Click to call in Zendesk
Need to place an outbound call? Simply navigate to any ticket in Zendesk to have the Dialpad widget automatically populate the Call button with the phone number for the last customer you talked with over Dialpad.
Additional features
The Dialpad widget also houses general app settings that agents will be familiar with using the desktop app. Those include:
Profile settings
Caller ID toggle
DND toggle
If applied, Custom Off Duty Status for contact center
Call screen/search
Widget settings (Department DND + call queue DND)
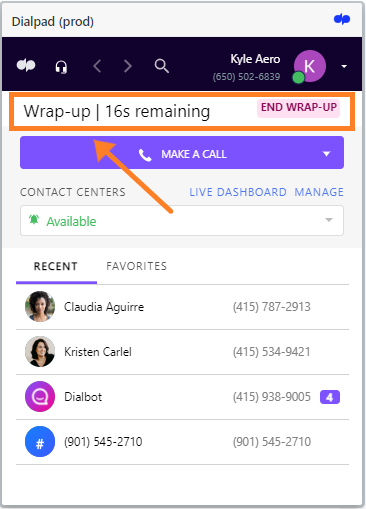
View post wrap up time
After ending a call, you'll see your post wrap up time displayed across your widget with the option to end early and hop back in the queue.
Frequently asked questions
Are canceled calls logged in Zendesk?
Yes, however, calls made and canceled within 5 seconds will not be logged in Zendesk.
Are missed calls without voicemails logged to Zendesk?
No, missed calls without voicemails are not logged to Zendesk.
How are voicemails logged for Departments and Contact Centers?
We do a round-robin to decide which user in a Department/Contact Center to log tickets created from voicemails. Preference is given to the Department and Contact Center Admins. At least one of the members of the Department or Contact Center must be connected to Zendesk with permission to log tickets.
Does this integration sync my Zendesk contacts to Dialpad?
Yes and no. When a call comes into Dialpad using the Zendesk integration, the system will attempt to match the caller to an existing Zendesk contact. If no match is found, the phone ticket will be created with just the caller’s phone number.
However, if you create a new contact record within Dialpad, it will sync to Zendesk, ensuring future calls are properly associated.
Any updates or changes to a contact record must be made within Zendesk, not Dialpad.
How do I get the names of my callers to show up on Zendesk?
You will need to manually add them to Zendesk as an end user.
Do I need to provide browser access to anything?
Yes, you must provide browser access to your microphone and sound to use our CTIs. While using Google Chrome, copy and paste chrome://settings/content/siteDetails?site=https%3A%2F%2Fdialpad.com to launch the configuration menu.