With our Dialpad and Shopify integration, we're making it easier for you to manage your Shopify business right from Dialpad!
You can access your customer's information, create and view order details, and also log notes directly from the Dialpad app.
Why does this matter? It lets you focus on building a connection with your customers while we simplify the processes to ensure a smoother customer experience.
Let's take a closer look at this integration.
Enable the Shopify Integration
Dialpad’s Shopify integration is available to users with a Shopify account on a Pro or Enterprise plan.
Setting up Shopify is a three-step process:
- Enable the integration for your company
- Enable the integration for your offices
- If your company has only 1 office, Shopify is automatically enabled once the integration has been configured for the Company
- You can also enable and customize Shopify for each Department or Contact Center
- Enable Shopify for your users
- The owner must be the first one to connect to Shopify from the Dialpad app
- Each team member must manually connect to Shopify from the Dialpad app after
Get started by heading to your Dialpad Admin Portal.
- Select My Company
- Navigate to Integrations
- Besides Shopify, select Options
- Select Manage Settings

- Navigate to Enablement
- Select the check box beside Enable Shopify DialApp
- Select Save

Next, turn on Shopify integration for every Office, Department, and Contact Center individually.
Enable Shopify for an Office
To enable Shopify for your Office, head to your Dialpad Admin Portal.
- Navigate to Office Settings
- Navigate to Integrations
- Next to Shopify, select Options
- Select Manage Settings

- Select Customize for this Office
- Navigate to Enablement

- Select the check box next to Enable Shopify DialApp
- Select Save
If you want to customize your Shopify settings for each Office, select Customize for this Office.
Enable Shopify for a Department
To enable Shopify for your Department, head to Admin Settings and select a Department
- Navigate to Integrations
- Besides Shopify, select Options
- Select Manage Settings

- Select Customize for this Department
- Navigate to Enablement

- Check the box beside Enable Shopify DialApp
- Select Save
If you want to customize your Shopify settings for each Department, select Customize for this Department.
Enable Shopify for a Contact Center
To enable Shopify for your Contact Center, head to Admin Settings and select a Contact Center
- Navigate to Integrations
- Next to Shopify, select Options
- Select Manage Settings

- Select Customize for this Contact Center
- Navigate to Enablement

- Check the box beside Enable Shopify DialApp
- Select Save
If you want to customize your Shopify settings for each Contact Center, select Customize for this Contact Center.
Enable Shopify for users
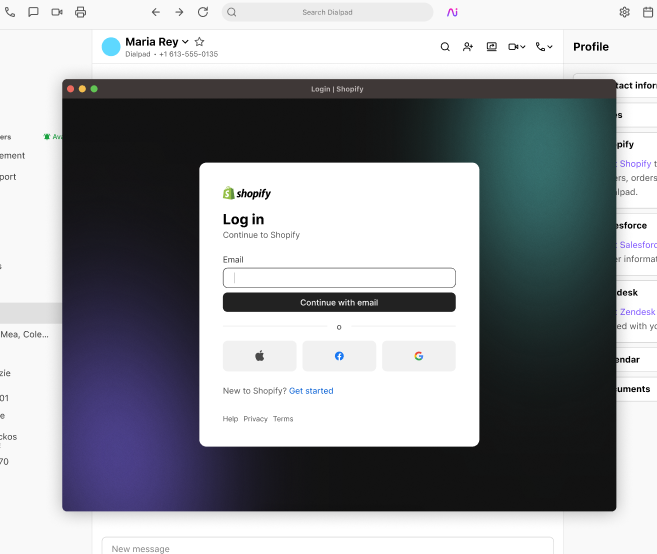
Once the integration is enabled for your Company and Offices, the shop owner must connect their Shopify account.
After the owner has connected, individual users will need to follow the same steps.
From the Dialpad app:
- Navigate to any 1:1 conversation
- Open the contact details
- Contact details can be accessed via the skinny bar menu, or by clicking the contact's name
- Open the Shopify widget
- Select Connect to Shopify

5. Enter your Shopify login details and follow the prompts
Contact matching
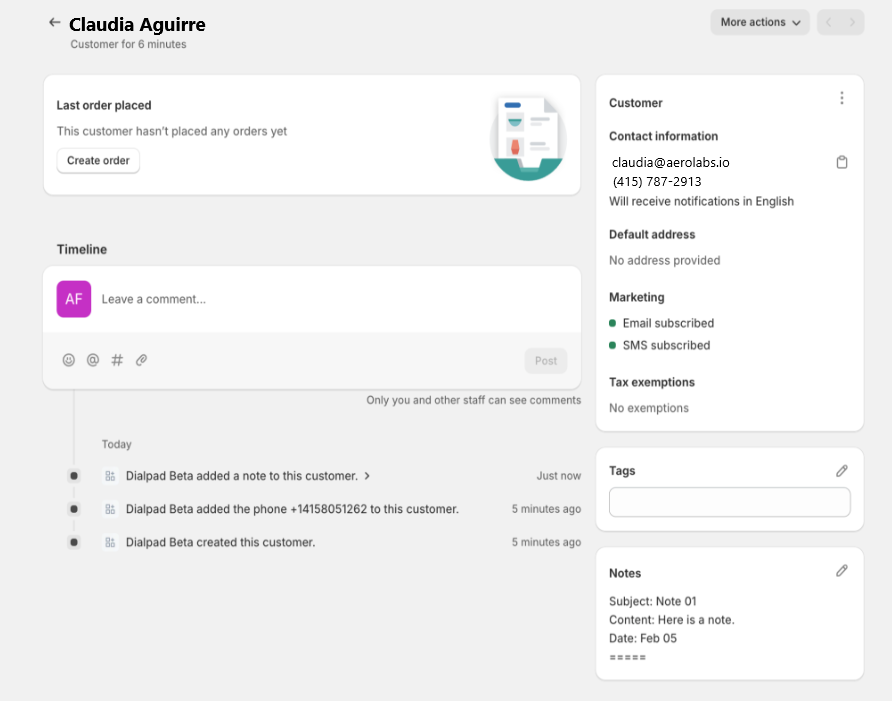
When a Dialpad contact matches a Shopify profile, the person’s Shopify details are displayed in the Shopify widget on the right-hand sidebar.
Here, you can see any logged notes, up to 3 recent Shopify orders, and more.

Multiple contact match
If more than one Shopify profile is found, a list of potential matches will be displayed. To confirm the correct profile, select the profile to confirm.
Rematch a contact
Need to match a contact with a different Shopify profile?
- Select the Refresh icon, or tap anywhere in the gray area

- Enter a contact name or number in the search bar
- Select the correct contact
No match found
If the contact details do not match any profile, use the search bar to find an existing Shopify profile or select Create Customer to create a new profile.
.png)
Create a contact
No contacts found? Easily create a new Shopify profile from the Dialpad app.
To create a new contact
- Select the Shopify widget from your sidebar
- Select Create Customer

- Enter their contact details
- Add tags (optional)
- Subscribe them to marketing emails (optional)
- Subscribe them to marketing SMS(optional)
- Select Create

Create an order
Create Shopify orders right from Dialpad!
To create an order, open the sidebar during an active call and select the Shopify widget.
- Select Create Order

- Search and choose specific products by name through the search bar

- Adjust the quantity and review the pricing
- Select Create

After you submit the draft order, you’ll be redirected to Shopify to complete the order.
Dialpad displays the 3 most recent active orders in the Shopify widget.

Dialpad will not handle order fulfillment and Shopify payments.
Orders created in Dialpad are sent to Shopify in a draft state — you'll need to complete the order from Shopify.
Log a note
When you log a note, it’ll be directly linked to the customer’s Shopify profile, and formatted in a simplified, easy-to-read way.
To log a note, open the sidebar and select the Shopify widget
- Select Log Note

- Enter the subject
- Enter your note
- Select Log

The date listed is the date the note was logged.
To edit a Shopify note, click anywhere on the gray area to make changes.
If you need to delete a note, hover over it, then select the trashcan icon.

Frequently asked questions
Can I take payments from the Dialpad Integration?
No, Dialpad does not take Shopify payments.
Can I view the order status in Dialpad?
No. You need to go to your Shopify shop’s order status page to track the order.
Do I have to use the existing Shopify tags or can I create tags from Dialpad?
Tags can be created in Dialpad and will be saved in Shopify.
I edited my note in Shopify, why does it look weird?
Notes are deserialized from the free text field in the Shopify customer profile. We recommend you avoid manually editing notes in Shopify—or, if you do edit them, that you keep the same written structure to prevent the note from becoming garbled.
Are calls being logged?
Not at this time.
I have thoughts, how can I share my feedback?
A huge part of the EAP process is getting your feedback on what’s working and what could use some more attention before we publicly launch the feature.
To provide feedback to our team, please contact our Customer Care Team or your Customer Success Manager.
Please note that we may use your responses in marketing promotions for the product launch (don’t worry, we will ask for approval before doing so).