Azure's single sign-on (SSO) lets you easily log in to Dialpad with your Azure (Microsoft) login.
Let's dive into the details.
The Azure SAML integration is available to all Dialpad users.
*If you're on a Standard or Pro level plan, you must contact Customer Care to enable this feature.
You must have an Azure Active Directory subscription that allows the addition of SAML Toolkit SSO.
Enable SAML In Dialpad
Before enabling this integration, make sure you have SAML permissions.
If you don't see the SAML section in the Authentication section of your Company Settings, please contact Customer Care.
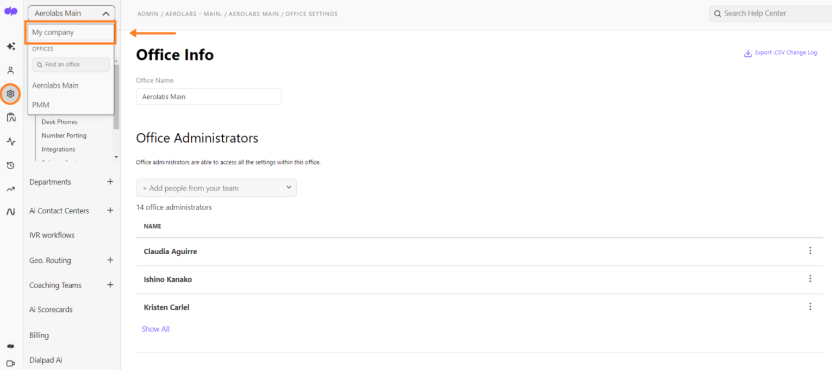
To enable SAML on your account, head to your Dialpad Admin Settings.
- Select My Company
- Navigate to Authentication
- Select SAML
- Choose Custom from the 'Choose your provider' menu
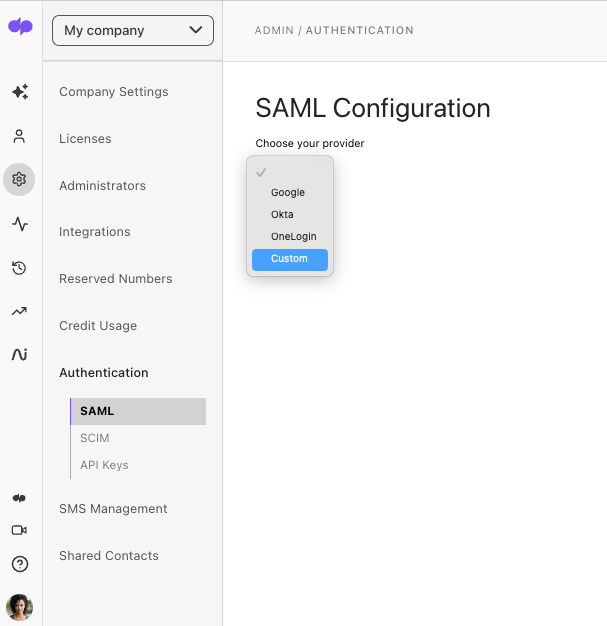
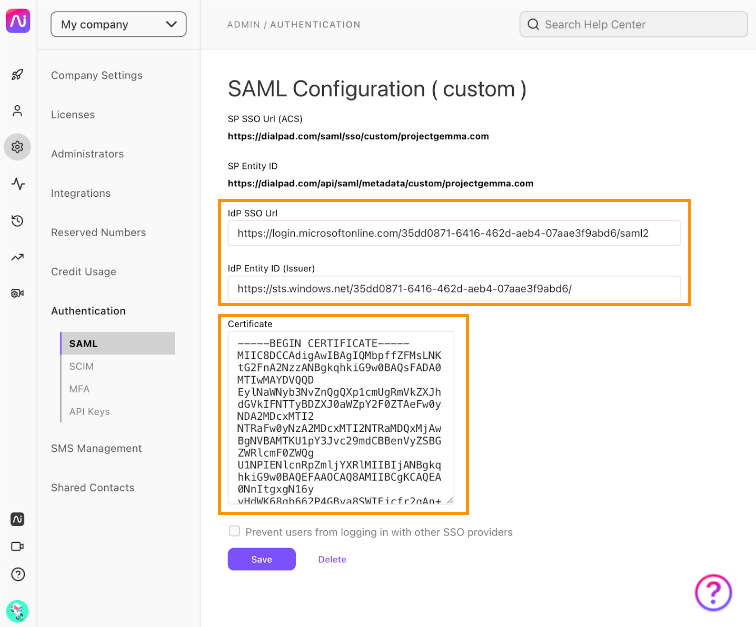
- Take note of the listed SP SSO URL (ACS) and SP Entity ID values

Keep this tab open — we'll revisit this page after configuring SAML on Azure.
Configure SAML in Azure
Next, it's time to configure SAML in Azure.
- Navigate to the Azure Portal
- Select Show portal menu
- This will open options on the left pane.
- Navigate to Azure Active Directory
- Ensure that the tenant is correct.
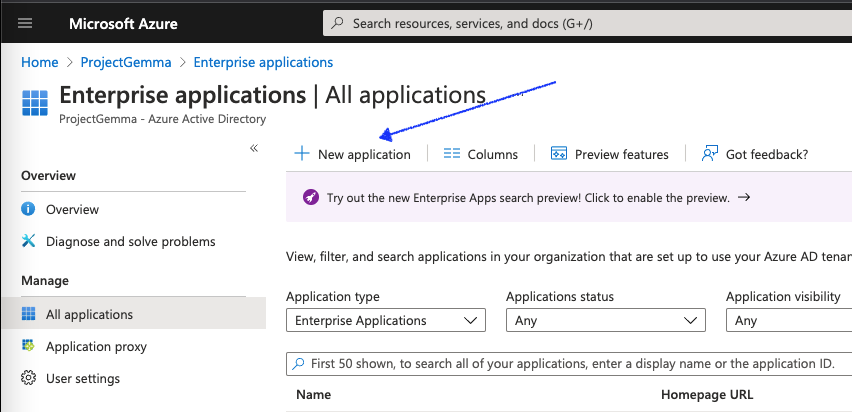
- Select Enterprise applications
- Select New application
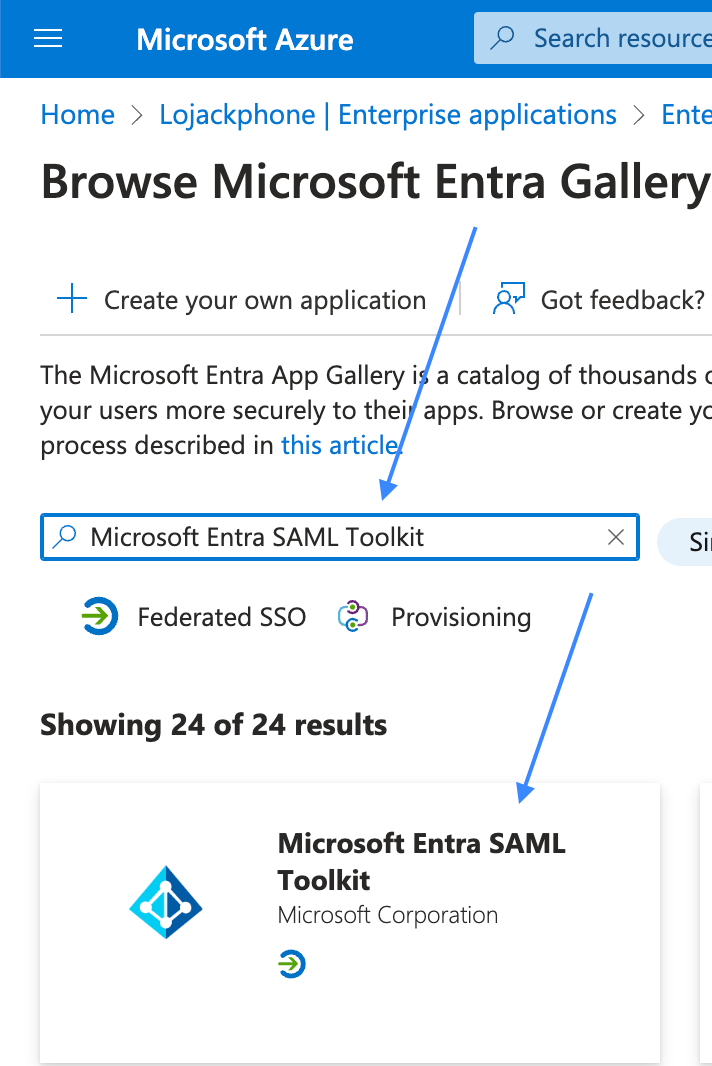
- Search for, and then select Microsoft Entra SAML Toolkit
- In the pop-up side widow, Name the application
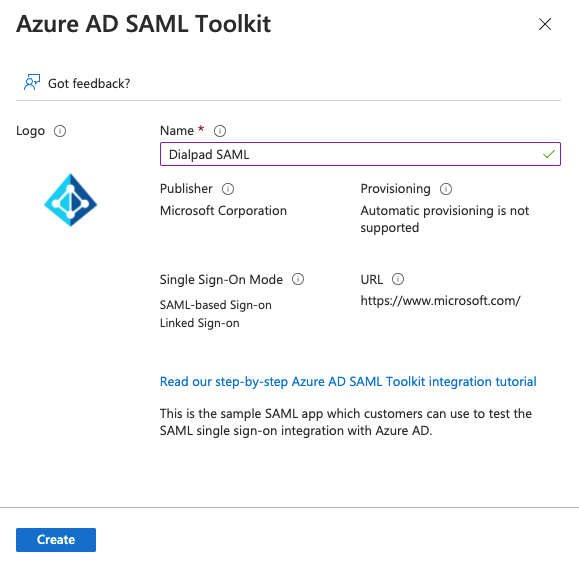
- Select Create
- The page will take a few moments to configure. Once the application is created, you'll be redirected to its main page.
- Navigate to the Manage section of the Dialpad SAML application’s main page
- Select Single sign-on
- Select SAML
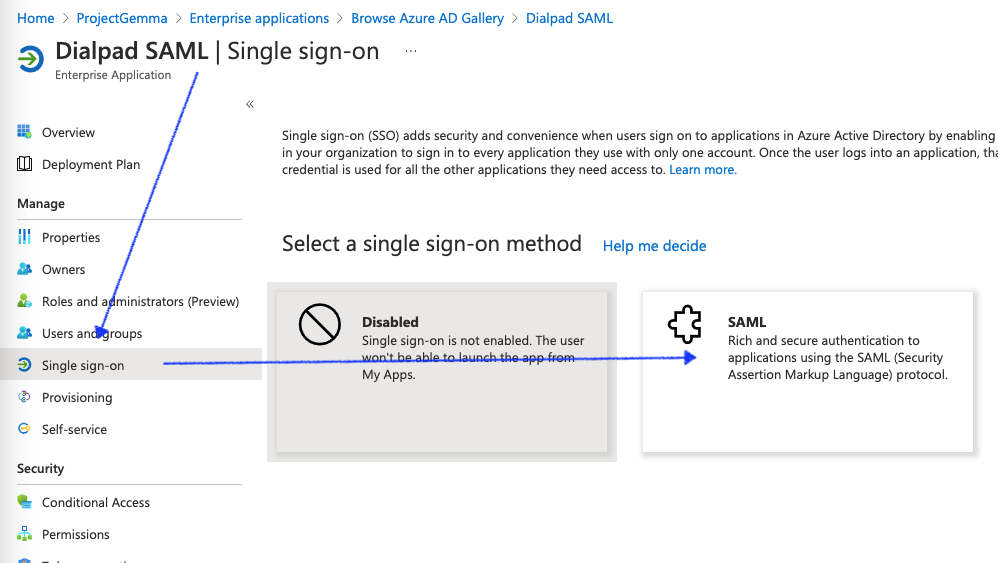
- In the basic SAML Configuration tile, select Edit
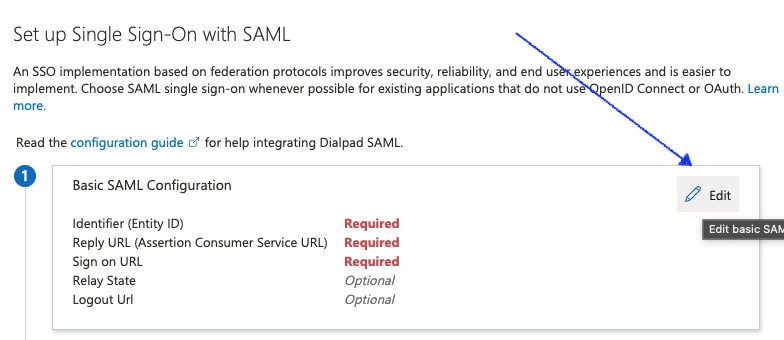
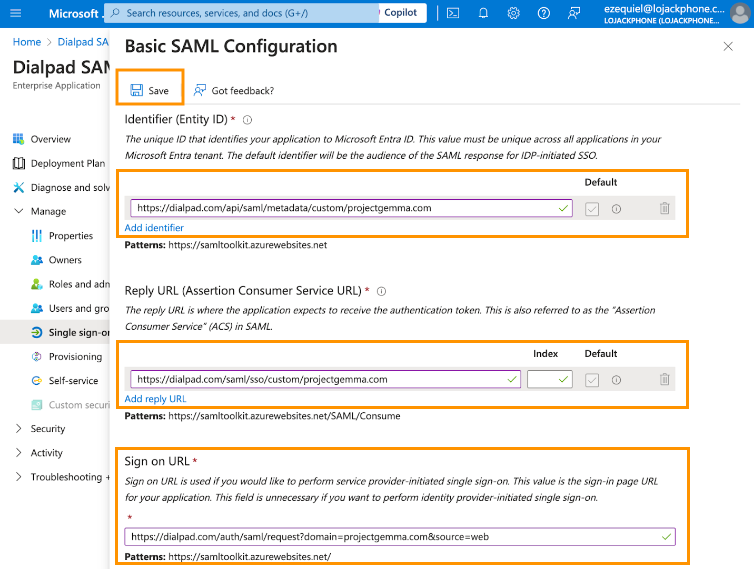
- Here, enter the SP SSO URL (ACS) and SP Entity ID attributes from Dialpad
- Next, you'll need to provide values for the three mapped attributes, as detailed below.
Azure Attribute Mapped Dialpad Attribute Identifier (Entity ID) SP Entity ID Replay URL (Assertion Consumer Service URL) SP SSO URL (ACS) Sign On URL https://dialpad.com/auth/saml/request?domain=projectgemma.com&source=web
*Use your domain in lieu of projectgemma.com - Select Save
- On the resulting page, select Add new claim

- In the Name field, enter Email
- In the Source attribute field, enter user.mail
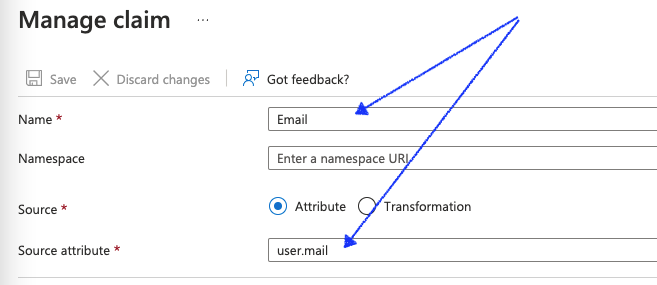
- Select Save
- Under User Attributes & Claims, you'll now see the newly added claim.
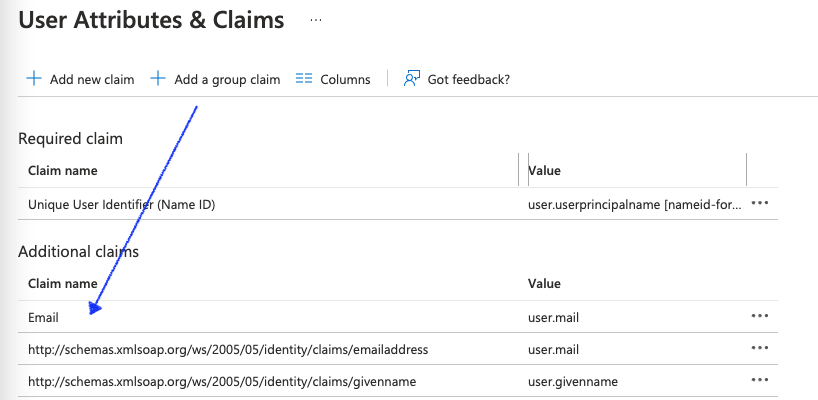
- Under User Attributes & Claims, you'll now see the newly added claim.
- Back on the Setup Single Sign-On with SAML page, locate the Certificate (Base64) attribute in the SAML Signing Certificate tile
- Select Download
- On the Set up Azure AD SAML Toolkit tile, take note of the values against Login URL and Microsoft Entra Identifier
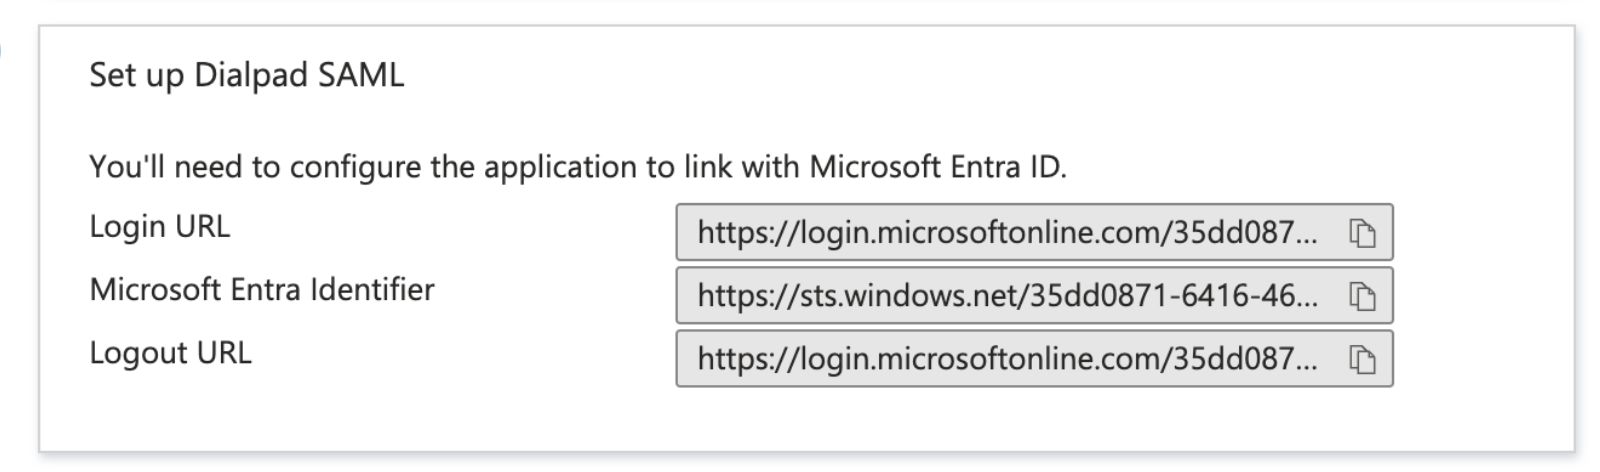
- Switch back to the Dialpad SAML Configuration page. Here, populate the remaining attributes with the values obtained from steps 13 and 14 in this section.
Azure Attribute Mapped Dialpad Attribute Login URL (from step 14) IdP SSO URL Microsoft Entra Identifier IdP Entity ID (Issuer) Certificate(Base64) (Downloaded) Certificate - Select Save
Assign a user in Azure
To assign a user in Azure:
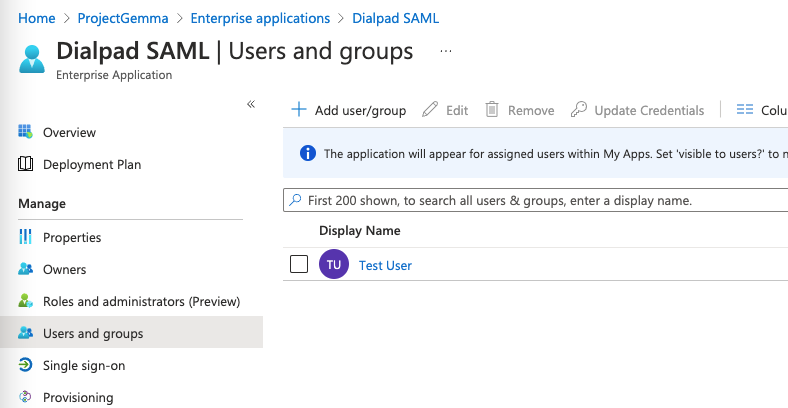
- Navigate to the configured enterprise application (it's called Dialpad SAML in the screenshot below)
- Select Users and Groups
- Select Add user/group
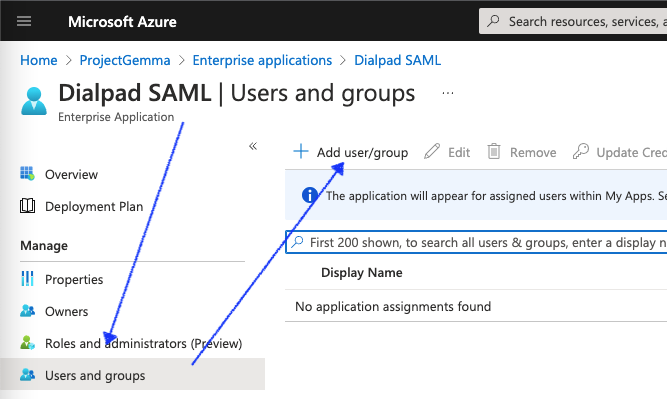
- Choose a user to test out the SAML-based login, then select Assign
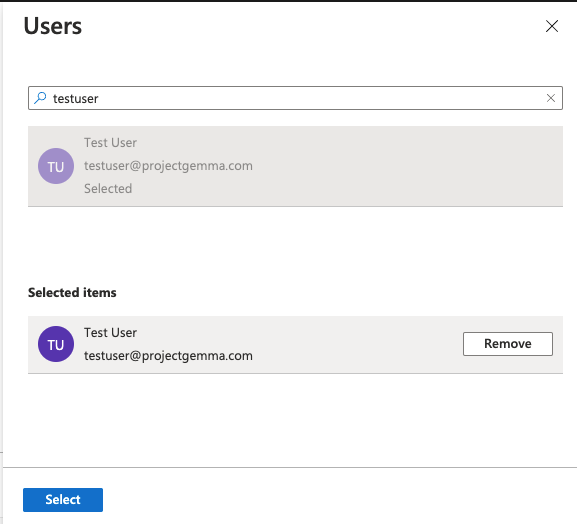
- The user should now be listed in the main page, as shown below
Test user login
Now that Azure SAML has been configured, it's time to test it.
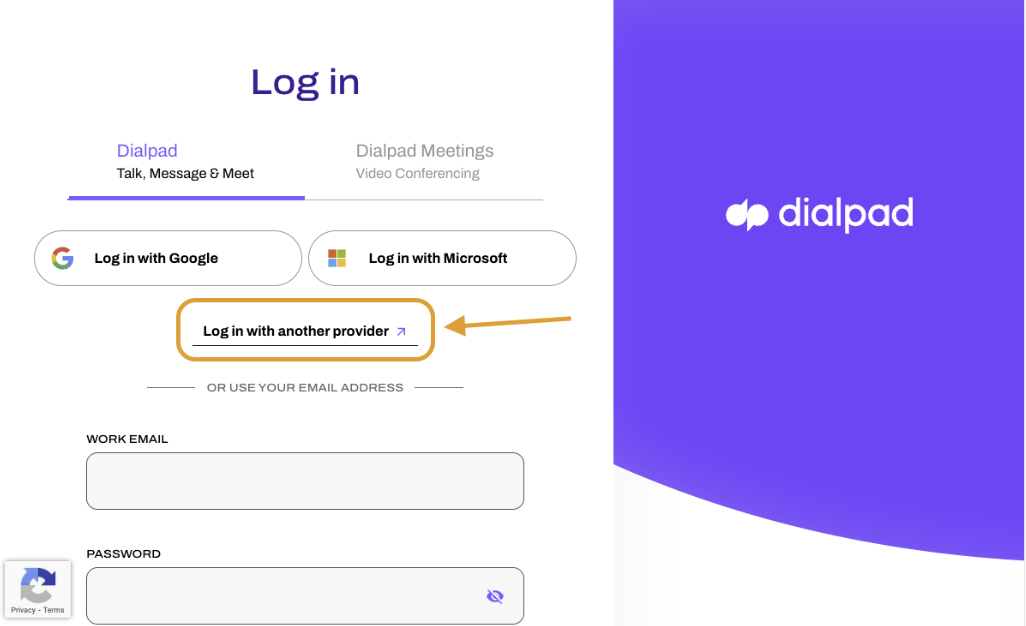
- Head to https://www.dialpad.com/login
- Select Log in with another provider
- Enter the domain of your company
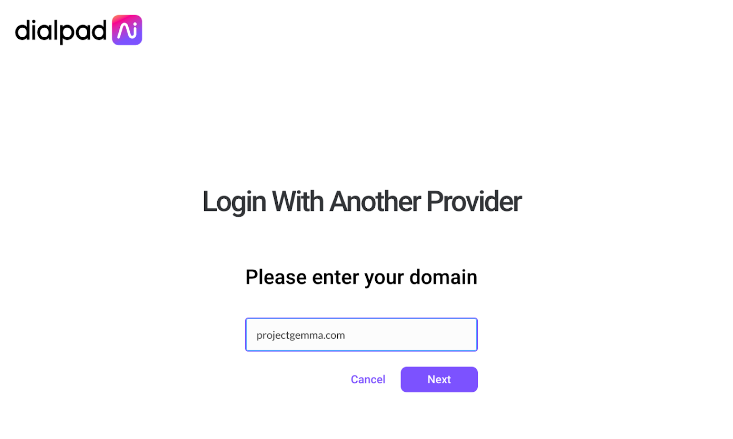
- Select Next
That's it! You'll be redirected to Microsoft Login for authentication. After entering your credentials, you should be logged into Dialpad via SAML.
Enforcing SAML-based SSO
Add an extra level of security by blocking your users from using other SSO providers when logging into Dialpad.
To restrict the use of other authentication providers, navigate to your Admin Settings at Dialpad.com
- Select My Company
- Navigate to Authentication
- Select SAML
- Select Prevent users from logging in with other SSO providers
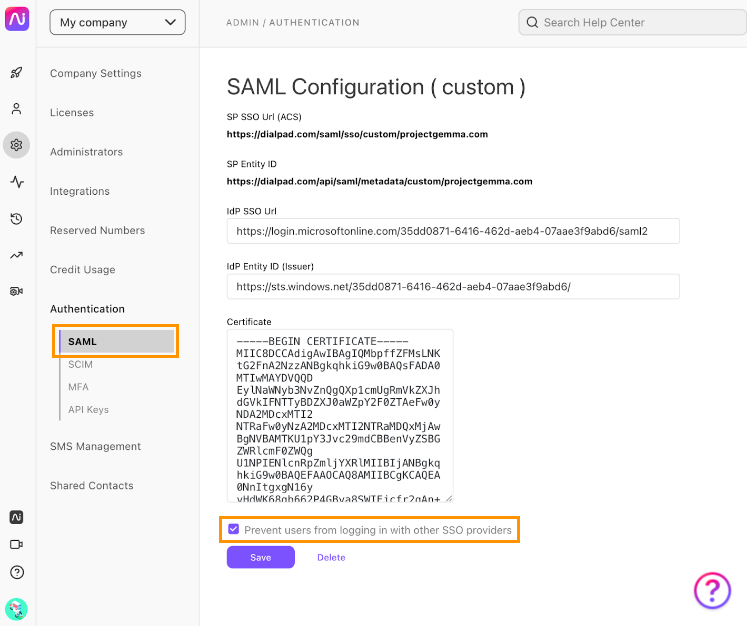
- Select Save
Once saved, your users won't be able to use Microsoft and Google SSO (or even their username and password) to log in to Dialpad.