With Dialpad Meetings for Salesforce, your team can:
Schedule a meeting with a Contact/Lead
Schedule a meeting from any screen within Salesforce
Schedule a meeting from the Create New Event view
Enable Dialpad Dialpad Meetings on your Chatter Feed
Additionally, your meetings will be saved under the Activity History for that Contact or Lead.
Enable Dialpad Dialpad Meetings for Salesforce
First things first, you’ll need to install the Dialpad Meetings package from the Salesforce AppExchange.
Follow the installation steps, then select Install for All Users.
Add Dialpad Meetings Tab
Once you’ve installed the Dialpad Meetings package, it’s time to add the Dialpad Meetings Tab to Salesforce.
This process varies depending on which Salesforce instance you’re using, Lightning or Classic.
Let’s look at each.
Add Dialpad Meetings Tab to Salesforce Lightning
In your Salesforce Lightning App Builder:
Select Set Up
Navigate to Platform Tools
Select Apps, then App Manager
Within App Manager find Sales - Lighting Sales, then select Edit
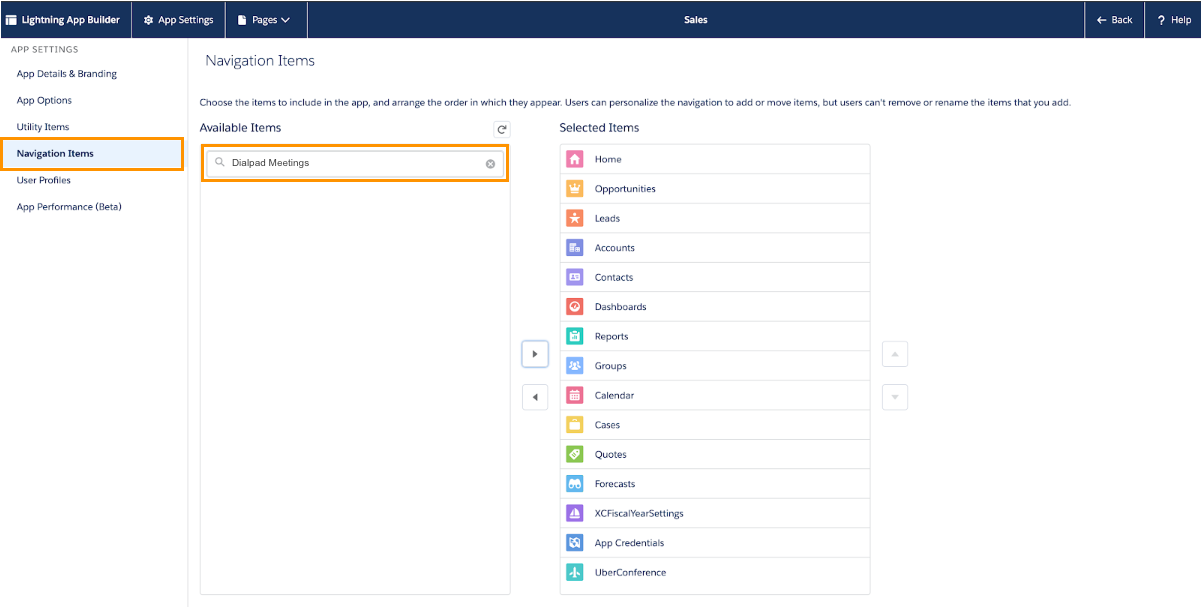
Navigate to Navigation Items
Search for Dialpad Meetings under Available Items, then select to Add
Add Dialpad Meetings Tab to Salesforce Classic
From Salesforce Classic:
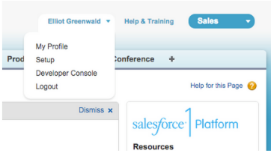
Navigate to Set Up from the User menu
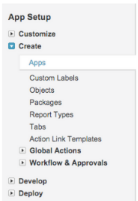
From the sidebar, select Create
Select Apps
Locate the app where you want to add the Dialpad Meetings tab
Click Edit
Under Available Tabs, select Uberconference, then select Add
.png)
Check the box beside Overwrite users personal customizations

Select Save
Enable new layout and scheduled events
Next, its time to enable new layout and schedule events. This process varies depending on which Salesforce instance you’re using, Lightning or Classic.
Let’s look at each.
Enable new layout and scheduled events for Salesforce Lightning
To enable the new layout and scheduled events for Salesforce Lightning:
Select Set Up
Navigate to Object Manager
Select the Object you want to add Dialpad Meetings to (i.e. Events)
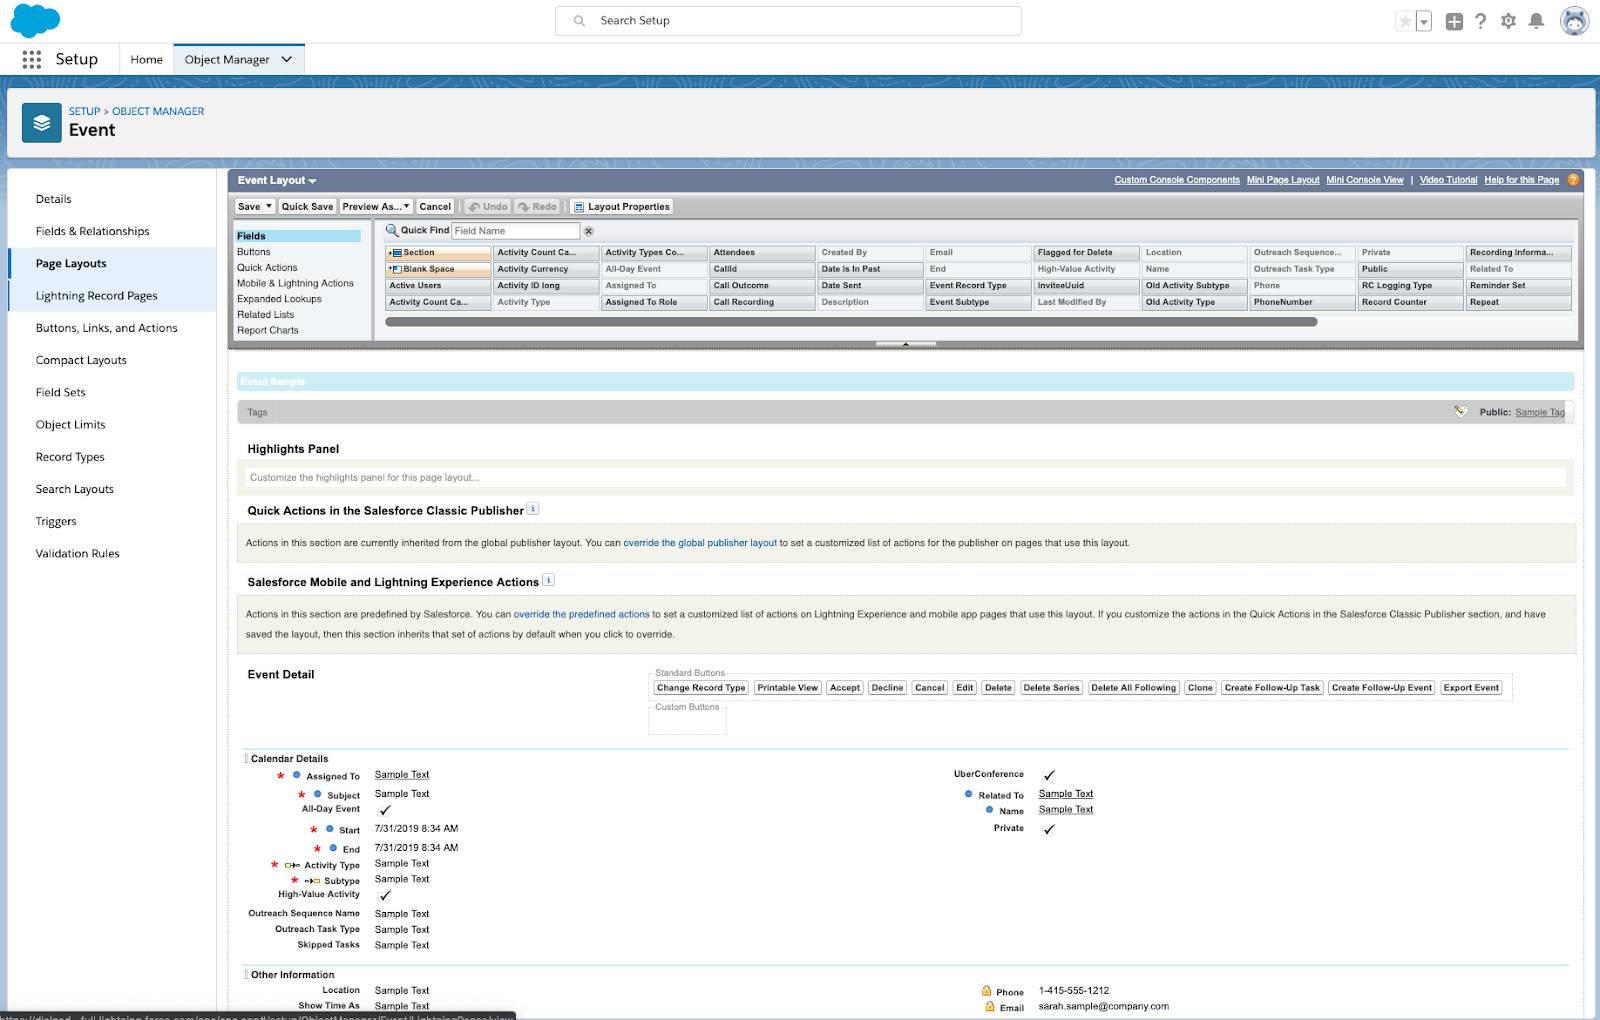
Within the Object, select Page Layouts
Select Edit
Search for Dialpad Meetings fields in object layout to add
Don’t forget to add Dialpad Ai!
Enable new layout and scheduled events for Salesforce Classic
To enable the new layout and scheduled events for Salesforce Classic:
Navigate to Set Up from the User menu

Under App Setup, select Customize
Select Activities
Select Event Page Layouts
.png)
Search for uberconference
Drag and drop the field anywhere on the event page under Calendar Details
Don’t forget to add Dialpad Ai!
.png)
Enable Chatter Feed
To enable the Chatter Feed:
Select Set Up from the User menu

Navigate to Customize, then select Chat
Select Feed Tracking
Select Events from the left-hand column
Click on Enable Feed Tracking Checkbox
.png)
Select UberConference (Dialpad Meetings), then Save
Uninstall Dialpad Meetings for Salesforce
To uninstall Dialpad Meetings for Salesforce, you'll need to remove the Leads and Contacts buttons from the page layout.
Remove Leads button
To remove the Leads button:
Navigate to Set Up from the User drop-down menu
Navigate to Customize > Leads > Search Layouts
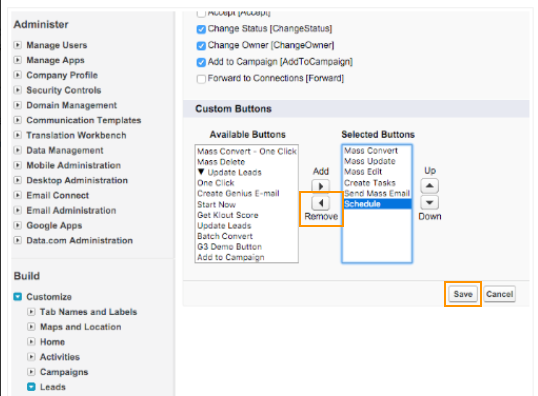
Locate the Leads List View then click Edit
Navigate to Custom Buttons
Remove the Schedule button, then select Save
Remove Contacts button
To remove the Contacts button:
Navigate to Set Up from the User drop-down menu
Navigate to Customize > Leads > Search Layouts
Locate the Contacts List View and click Edit
Scroll down to the Custom Button section
Remove the Contacts button, then select Save