Keeping users secure is a must! Multi-factor authentication (MFA) is a security protocol that reduces the possibility of fraud and compromised accounts by requiring users to authenticate their identity with multiple methods.
Dialpad’s simple, yet highly effective MFA solution requires users to verify their identity through a code sent directly to their email.
Let’s dive into the details.
Who can use this
Multi-factor authentication (email or SMS) is mandatory for all Dialpad users who are not using one of our SAML or SSO integrations.
MFA is supported on Dialpad’s desktop, web, and mobile apps (Android & iOS).
To use this feature on the mobile app, make sure you’re running Dialpad version 30.0.0 or later on iOS, and 27.0.0.5 or later on Android.
How multi-factor authentication works
Once your Dialpad Company Admin has enabled multi-factor authentication (MFA), each time a Dialpad user signs in with their email and password, they’ll receive a one-time password (OTP) in their email.
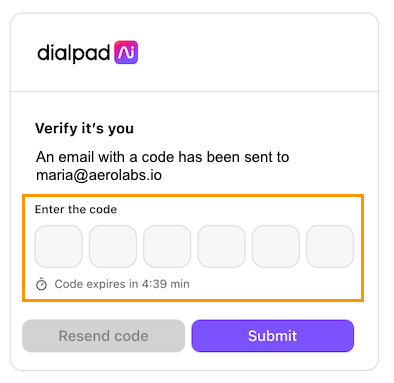
Once they’ve verified the OTP, they can log into Dialpad.
When MFA is required for all users, users must complete MFA registration upon their next login to any Dialpad app or the Admin Portal.
Set up is a breeze; there’s no need to configure emails individually, as our MFA service uses the email addresses associated with your user's Dialpad account.
Add MFA exception
While unusual, sometimes a user might not have access to their email to receive the one-time-code. Not to worry, Company Admins can create exceptions that let specific users bypass the MFA process.
To add an MFA exception, go to your Company Settings.
Select Authentication > MFA
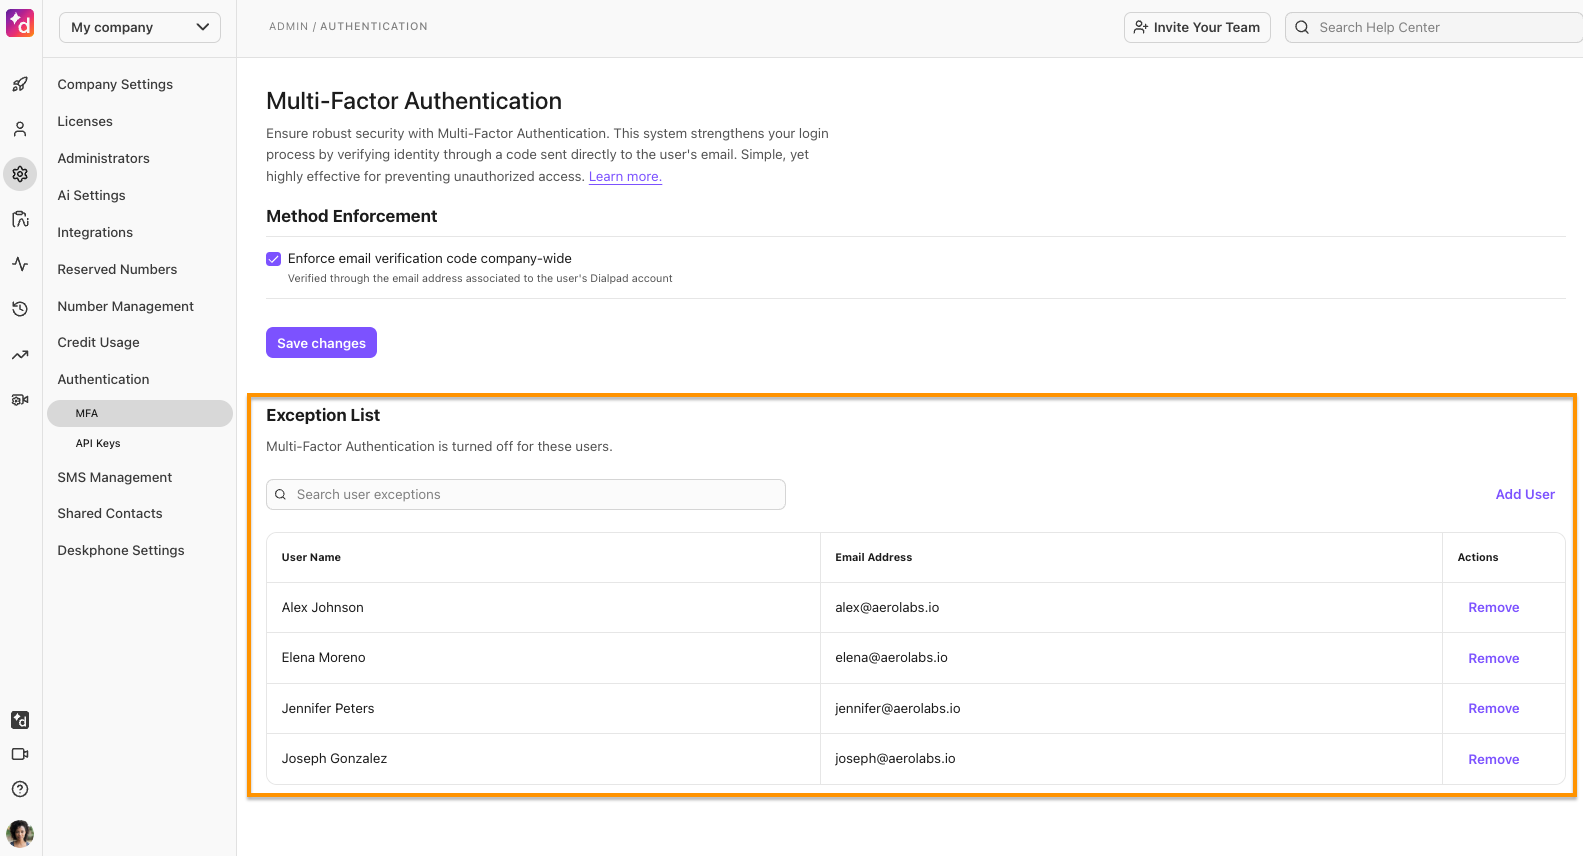
Navigate to Exception List
Select Add User
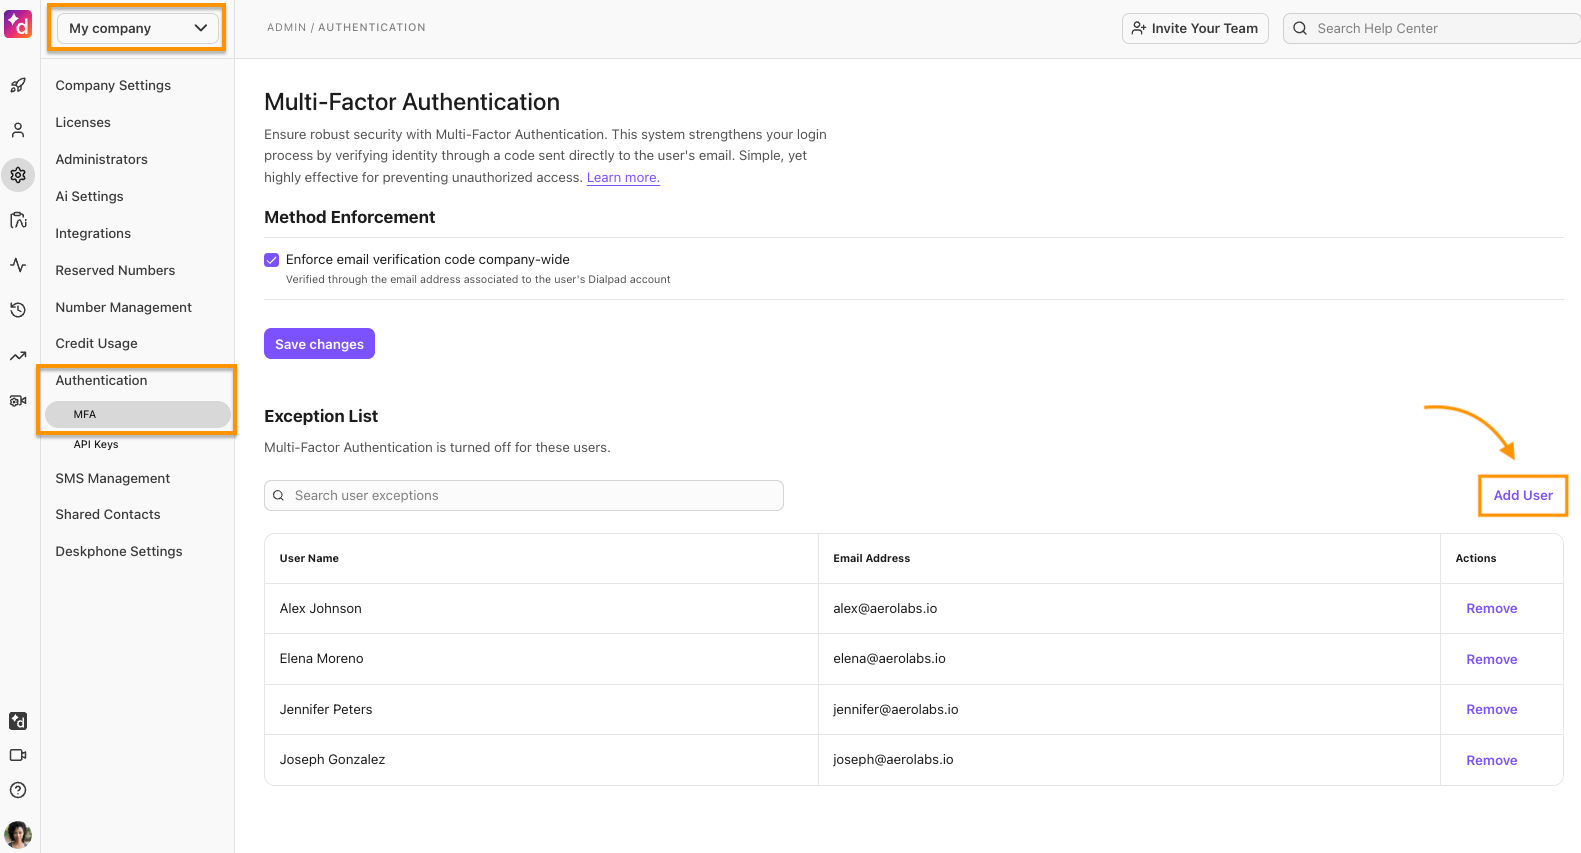
Enter the user’s name in the search bar
Select Add user
Select Save Changes
The user(s) will now appear in the Exception List.
Remove user from MFA Exception List
Company Admins can remove users from the Exception List at any time.
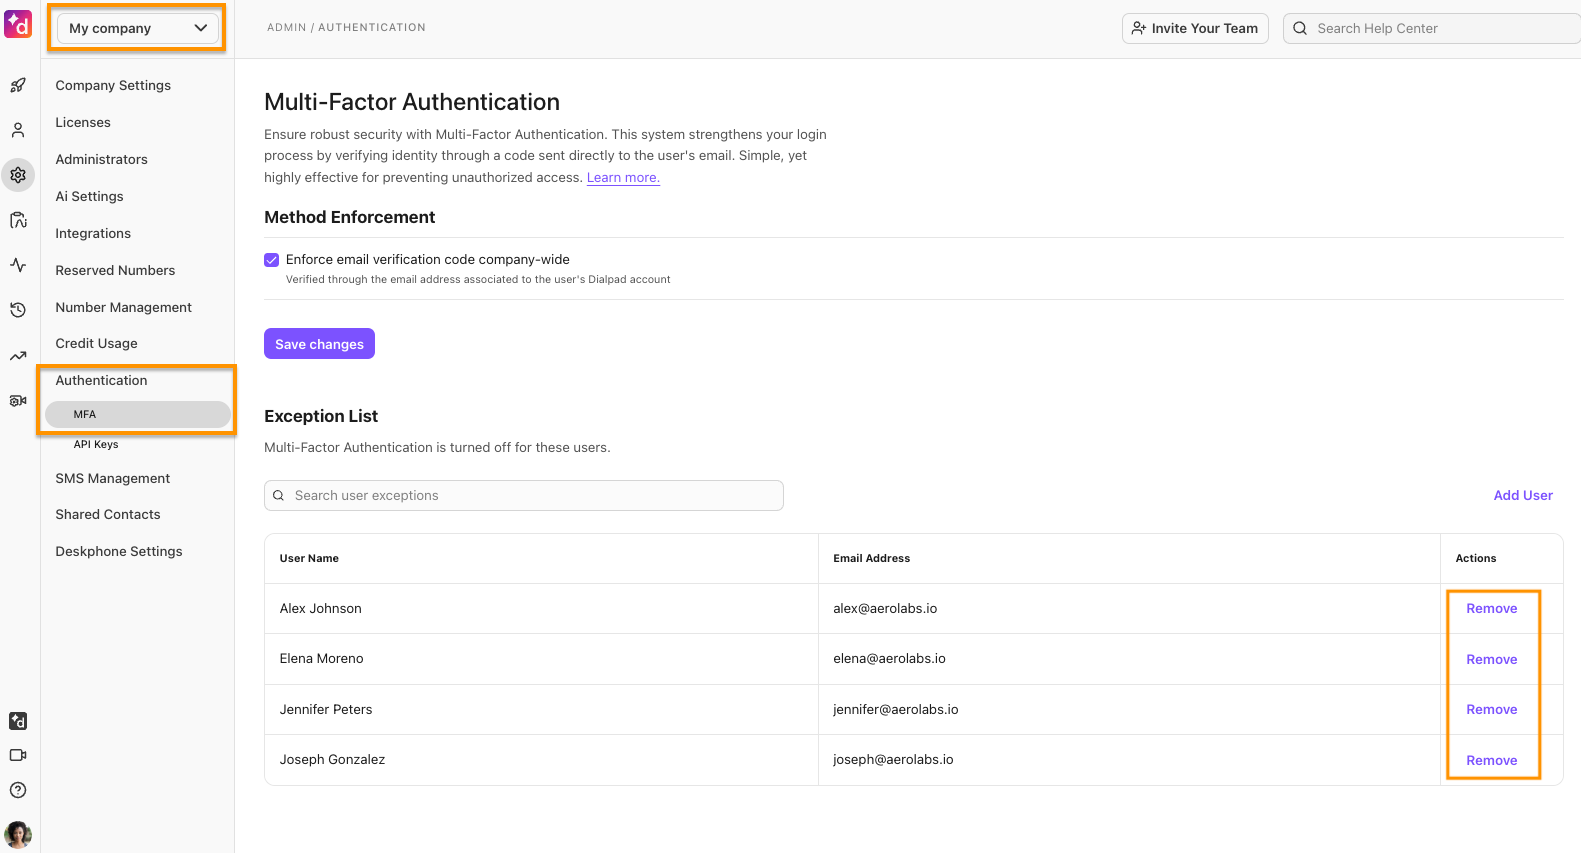
To remove a user from the MFA Exception List, go to your Company Settings.
Select Authentication > select MFA
Navigate to Exception List
Beside the user you want to remove, select Remove
Unlock a user
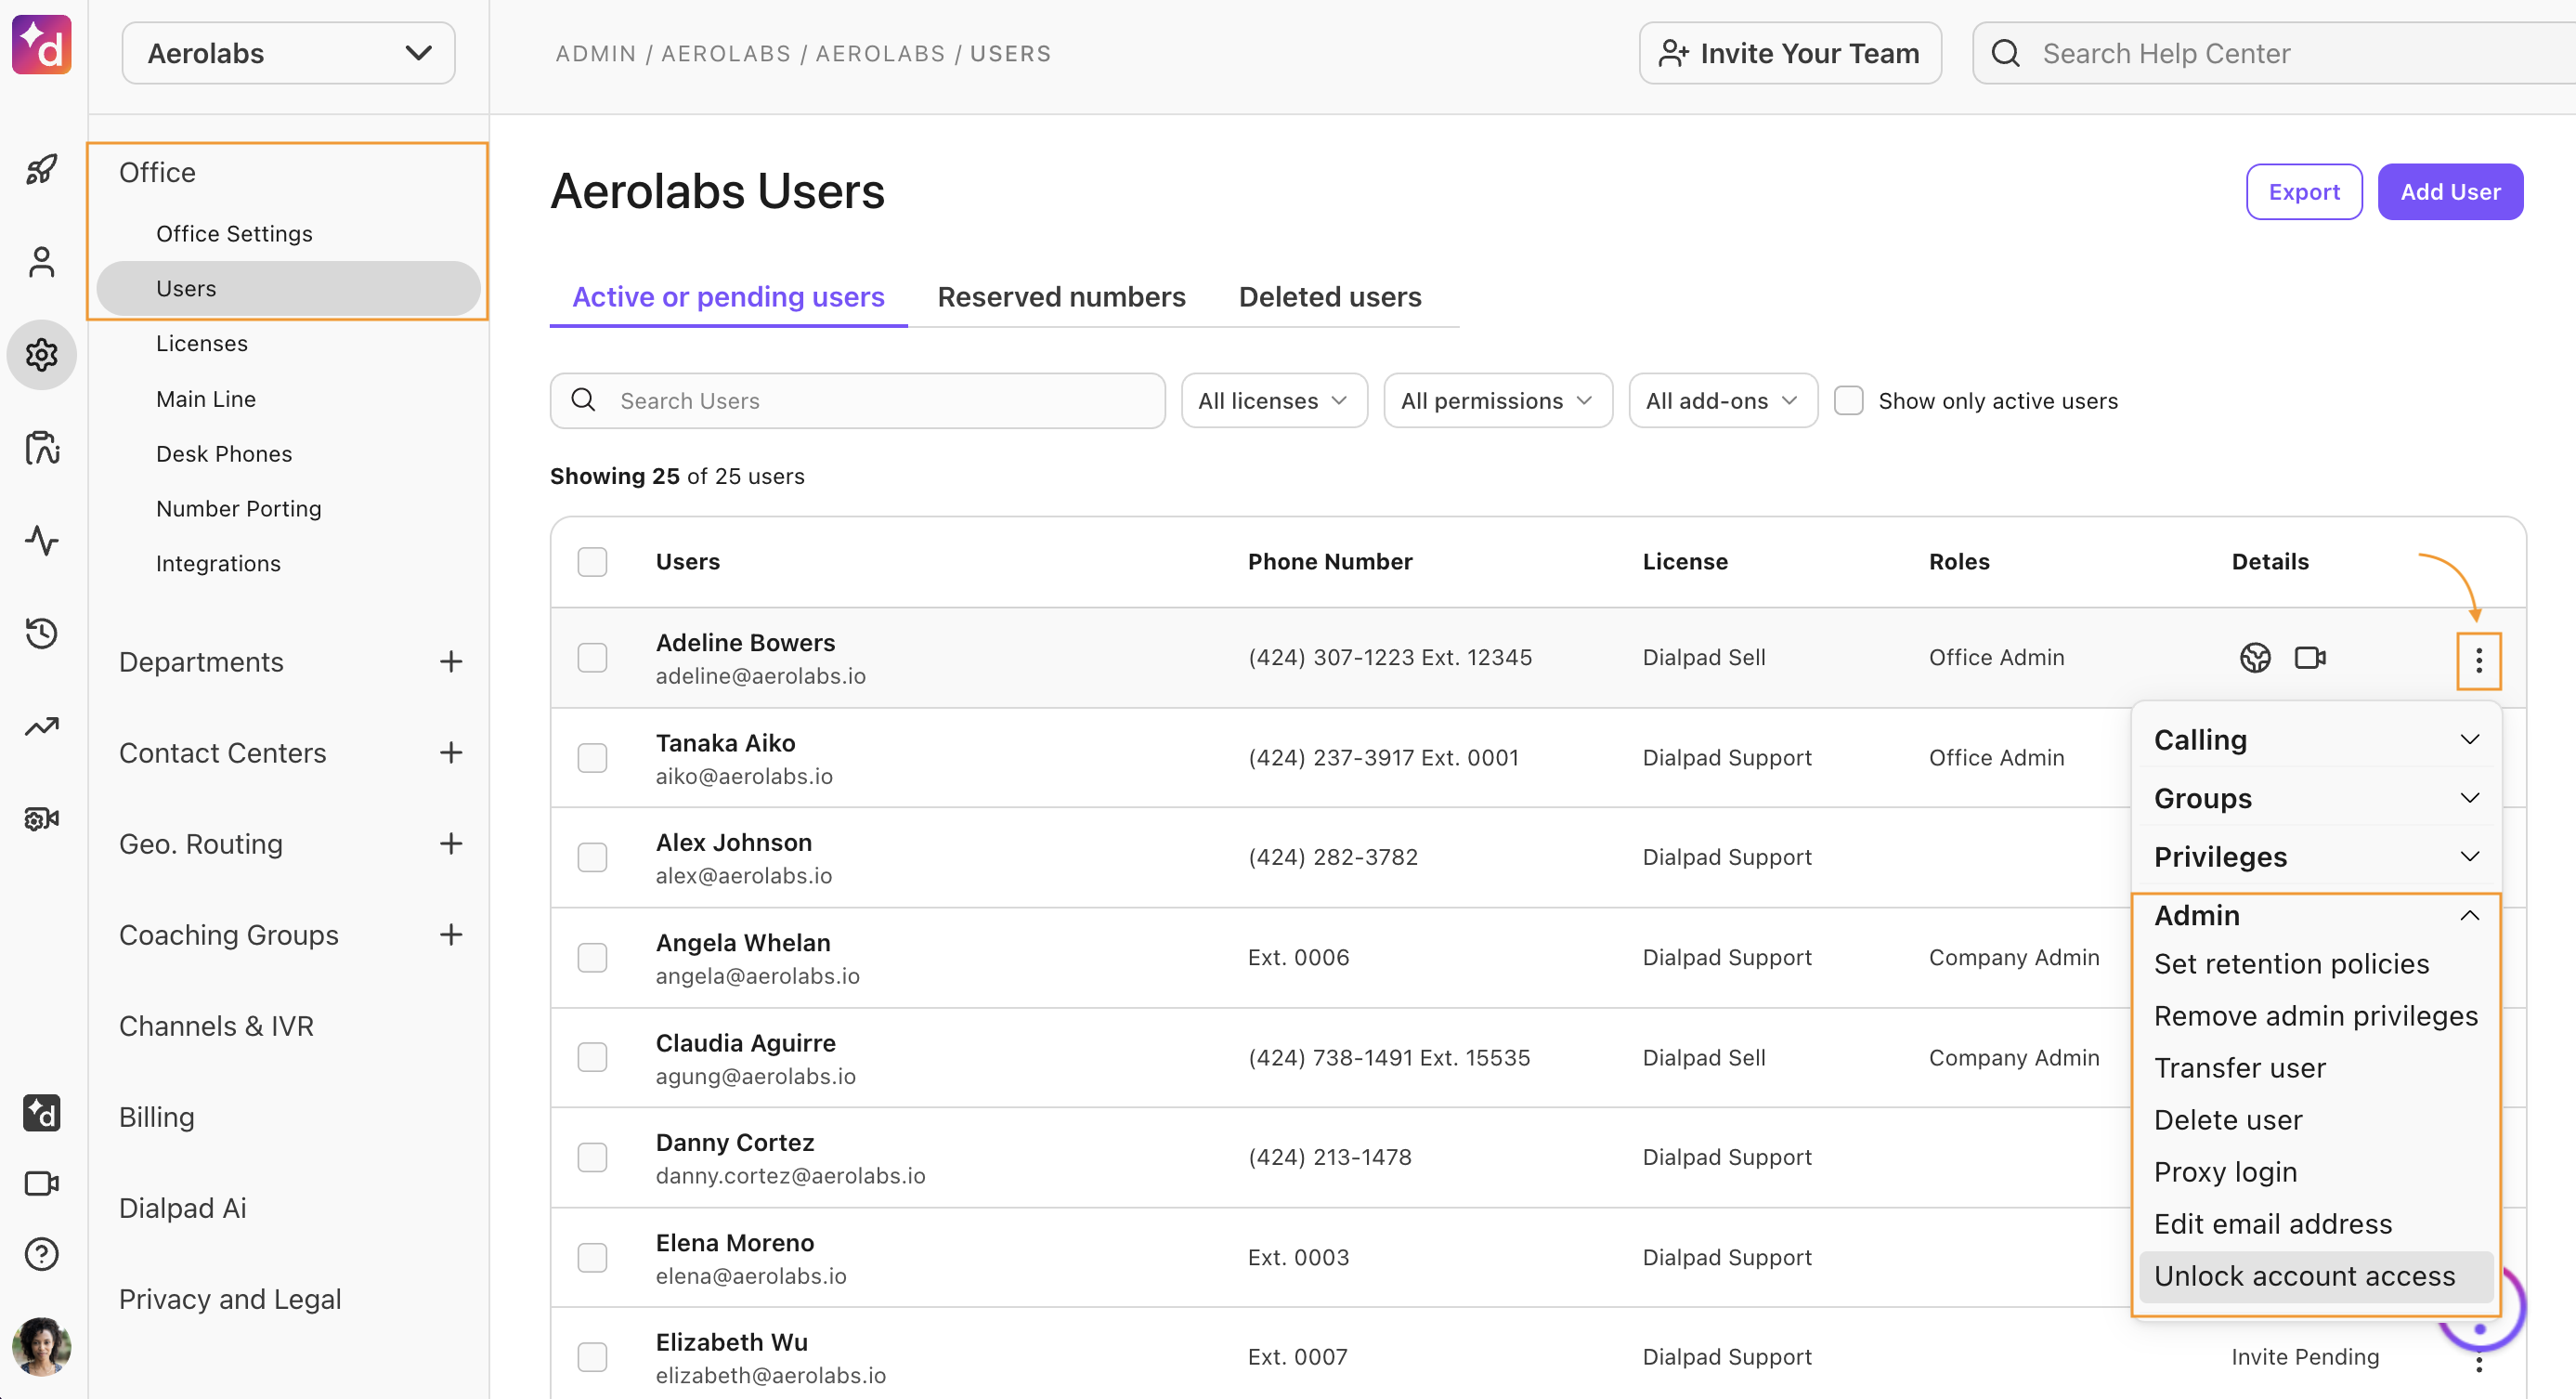
If a user has locked themselves out by entering the incorrect one-time password 5 times, admins can manually unlock the user.
To unlock a user, go to your Dialpad Admin Portal.
Navigate to Office Settings
Select Users
Select Options beside the user
Select Admin > select Unlock account access
Frequently asked questions
What if I enter the wrong verification code?
Dialpad gives you 4 chances to enter the verification code.
30 seconds after the first code is sent or four wrong attempts, the resend-code button will be enabled.
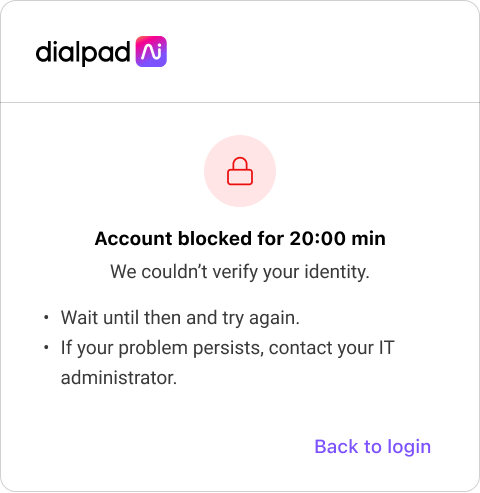
After 5 incorrect entries, you’ll be locked out of your account for 20 minutes.
What if I don’t have access to my email account?
If you can’t access your email account to receive the verification code, contact your Company Admin to have them add your email to the exclusion list, or use SMS MFA.
Can you send my code using SMS instead of email?
Yes. For more details about SMS verification codes, see Multi-Factor SMS Authentication with Dialpad.
Does the one-time-password expire?
Yes. The one-time password code will expire in 10 minutes. Once expired, it can not be used to verify multi-factor authentication, and you’ll need to request a new code.
Can I change the email address used to receive the code?
No. The one-time password will be sent to the user's primary email registered at Dialpad.
What if there is an outage with my email provider?
If your email provider is experiencing an outage, you can turn off email MFA so users can authenticate using SMS MFA.
To turn off email MFA, go to your MFA settings and uncheck the box beside Enforce email verification code company-wide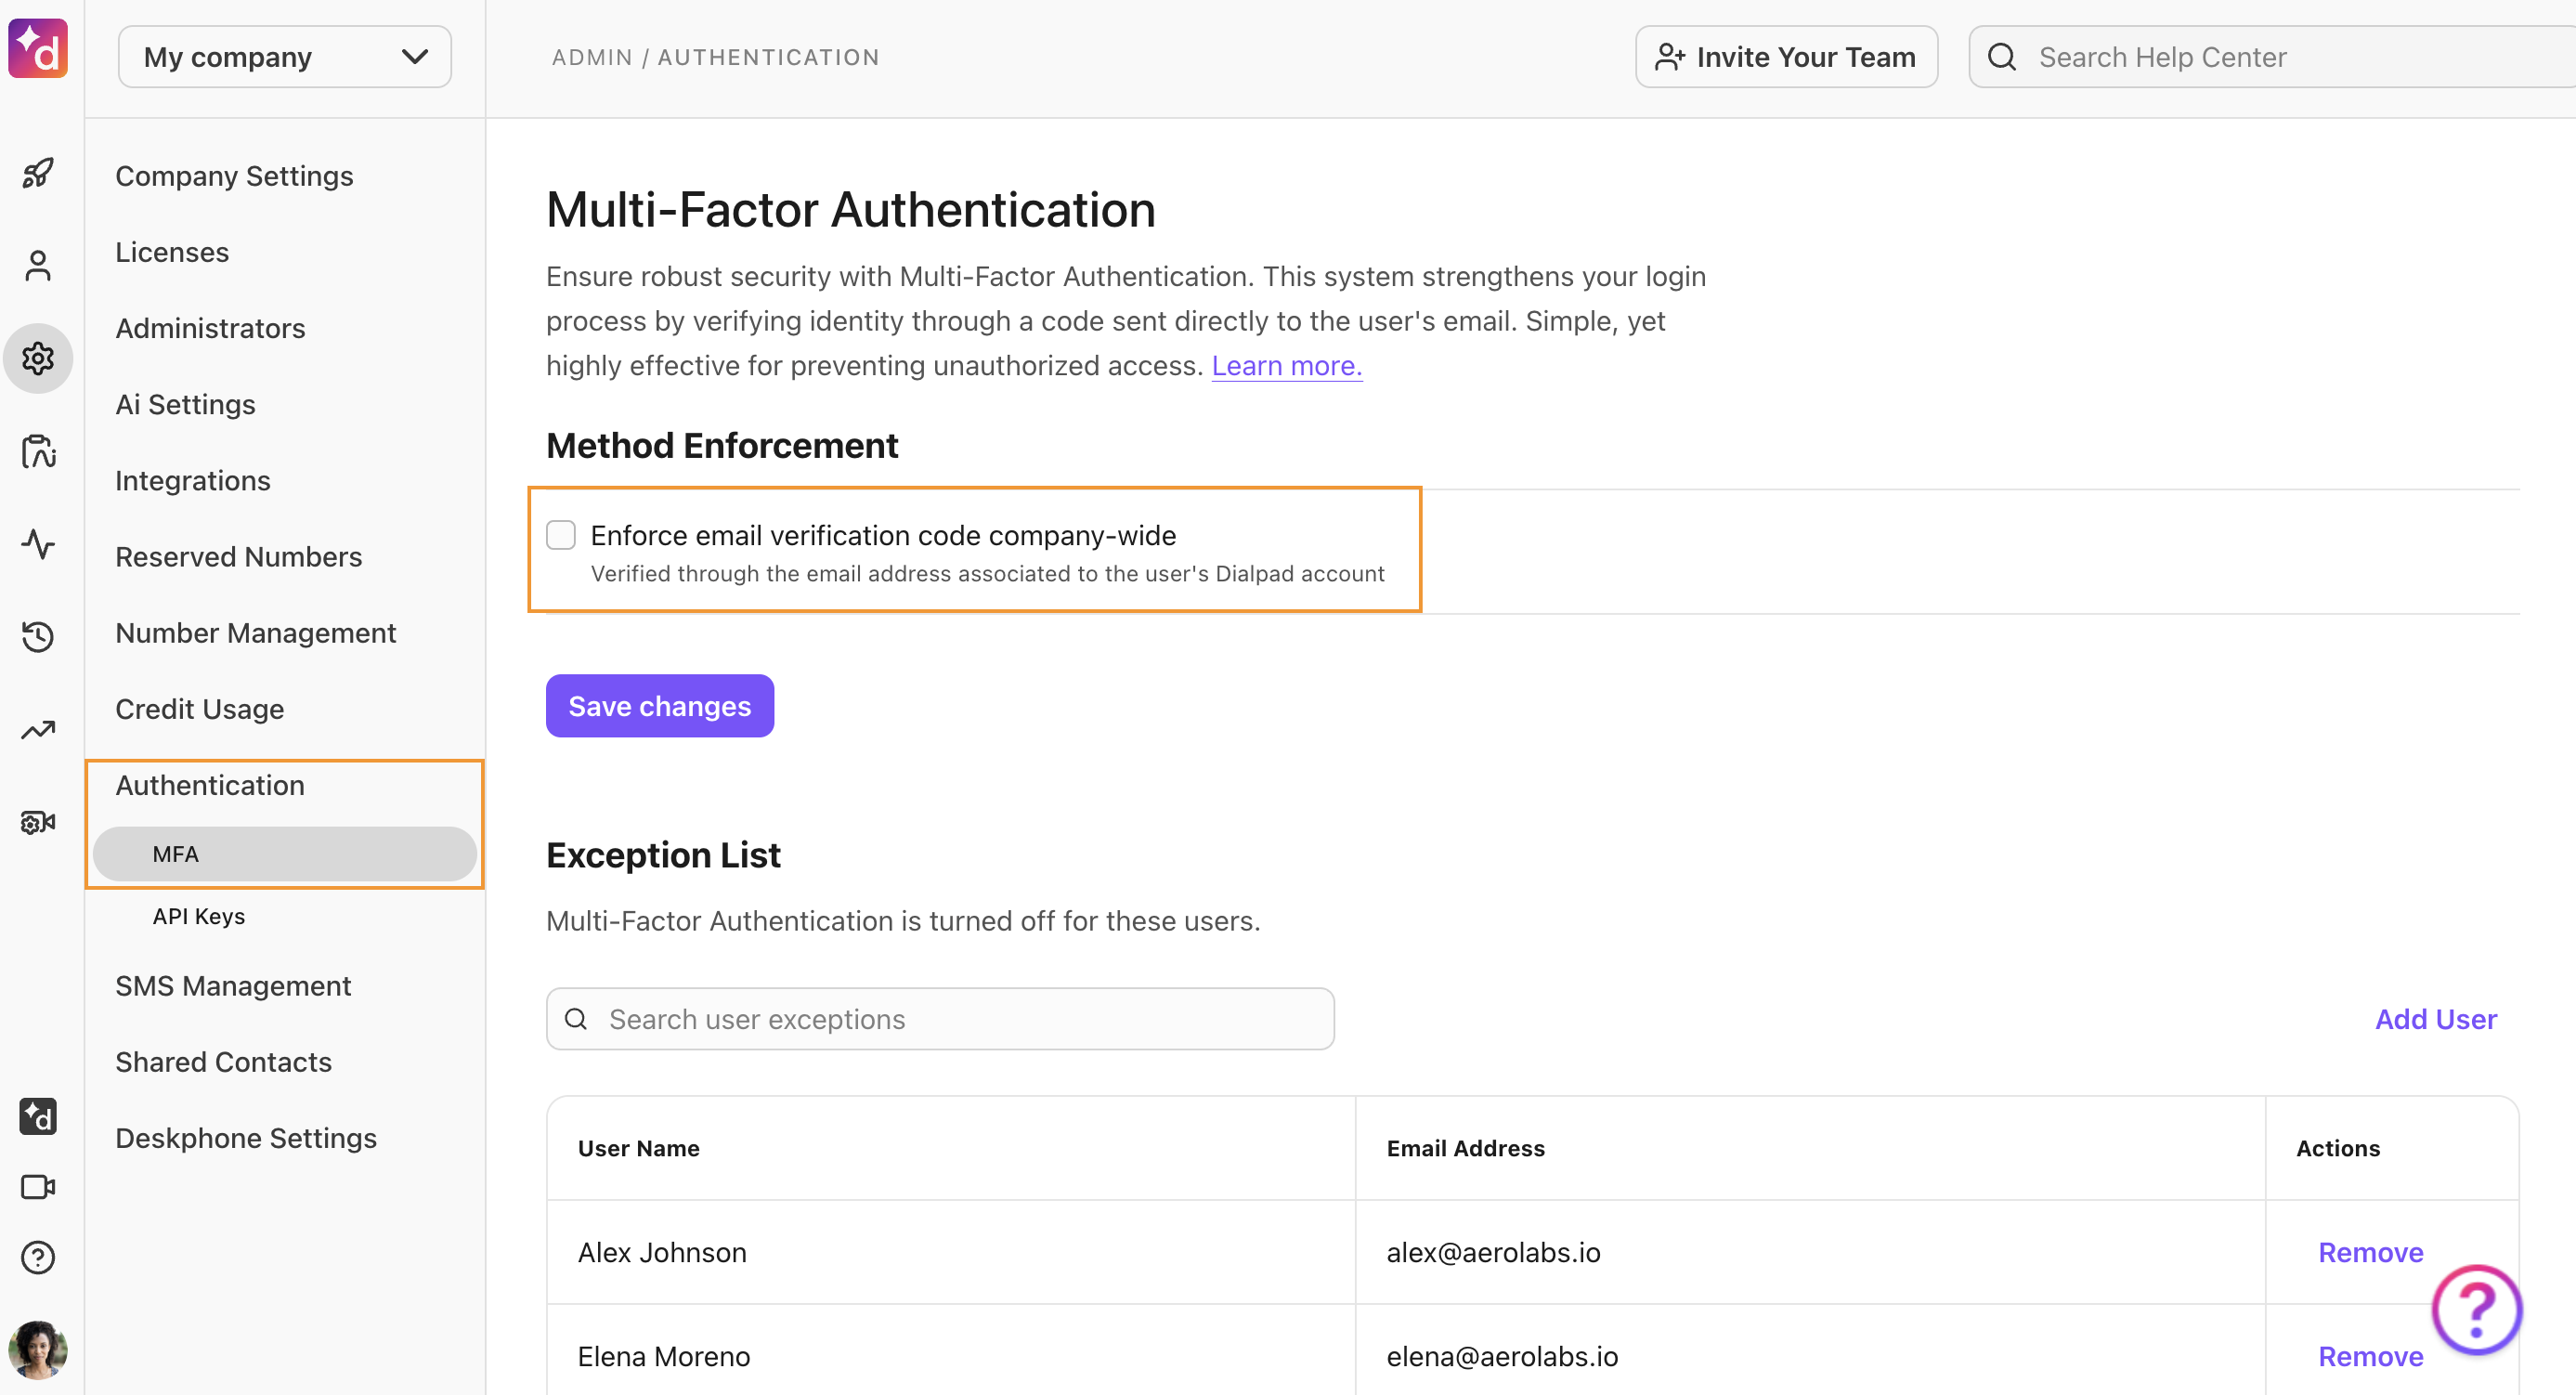 . Your account will automatically switch to SMS MFA.
What if I don’t receive the verification email?
If you don’t receive the verification email, check your spam folder. If you still cant find it, contact our Customer Care team to verify that it was sent successfully.
If you’re using this feature on the mobile app, make sure you’re running Dialpad version 30.0.0 or later on iOS, and 27.0.0.5 or later on Android.