Discover the power of an Omnichannel Digital Contact Center! Multiple digital connection options, such as Web Chat, help you deliver seamless and engaging customer experiences. The Dialpad Admin Portal enables you to manage all interactions in one place, streamlining operations and enhancing efficiency.
Let’s take a look at how Digital Contact Centers work.
Who can use this
Digital Contact Center creation and deployment is available to Dialpad Connect, Dialpad Support and Dialpad Sell users with a digital plan.
Create a Digital Contact Center
To create a Digital Contact Center, go to your Dialpad Admin Settings.
Navigate to Contact Centers and select the + icon
Select Digital
Name the Contact Center
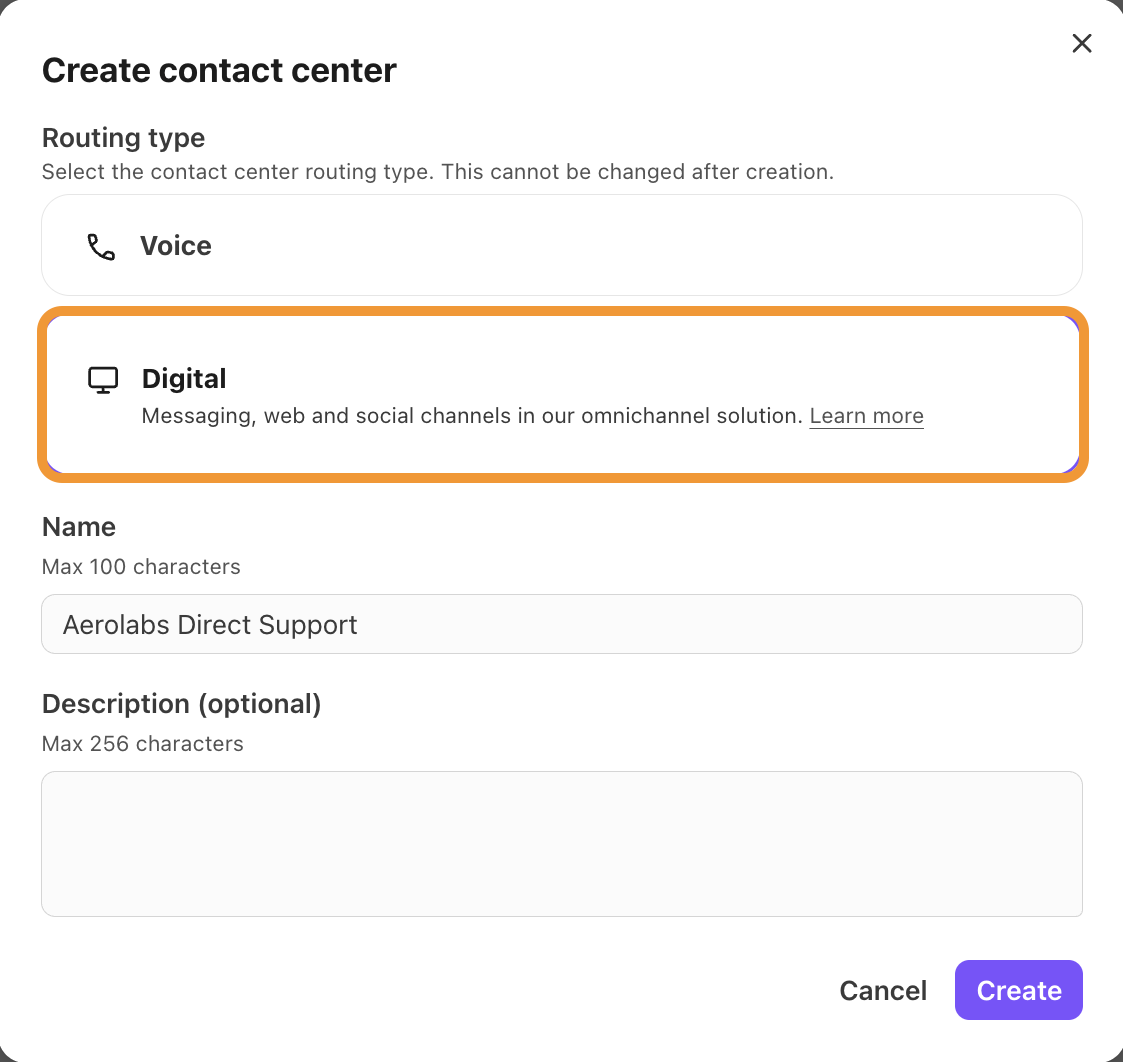
Add a description (optional)
Select Create
That’s it! Your new Digital Contact Center is now ready for you to add agents, configure routing preferences and skill-based expertise groups, and add digital channels.
Add and remove digital agents
Digital agent management is a breeze — adding and removing Digital Contact Center agents can be done right from the Dialpad Admin Portal.
Add digital agents
To add agents to your Digital Contact Center, go to your Dialpad Admin Settings.
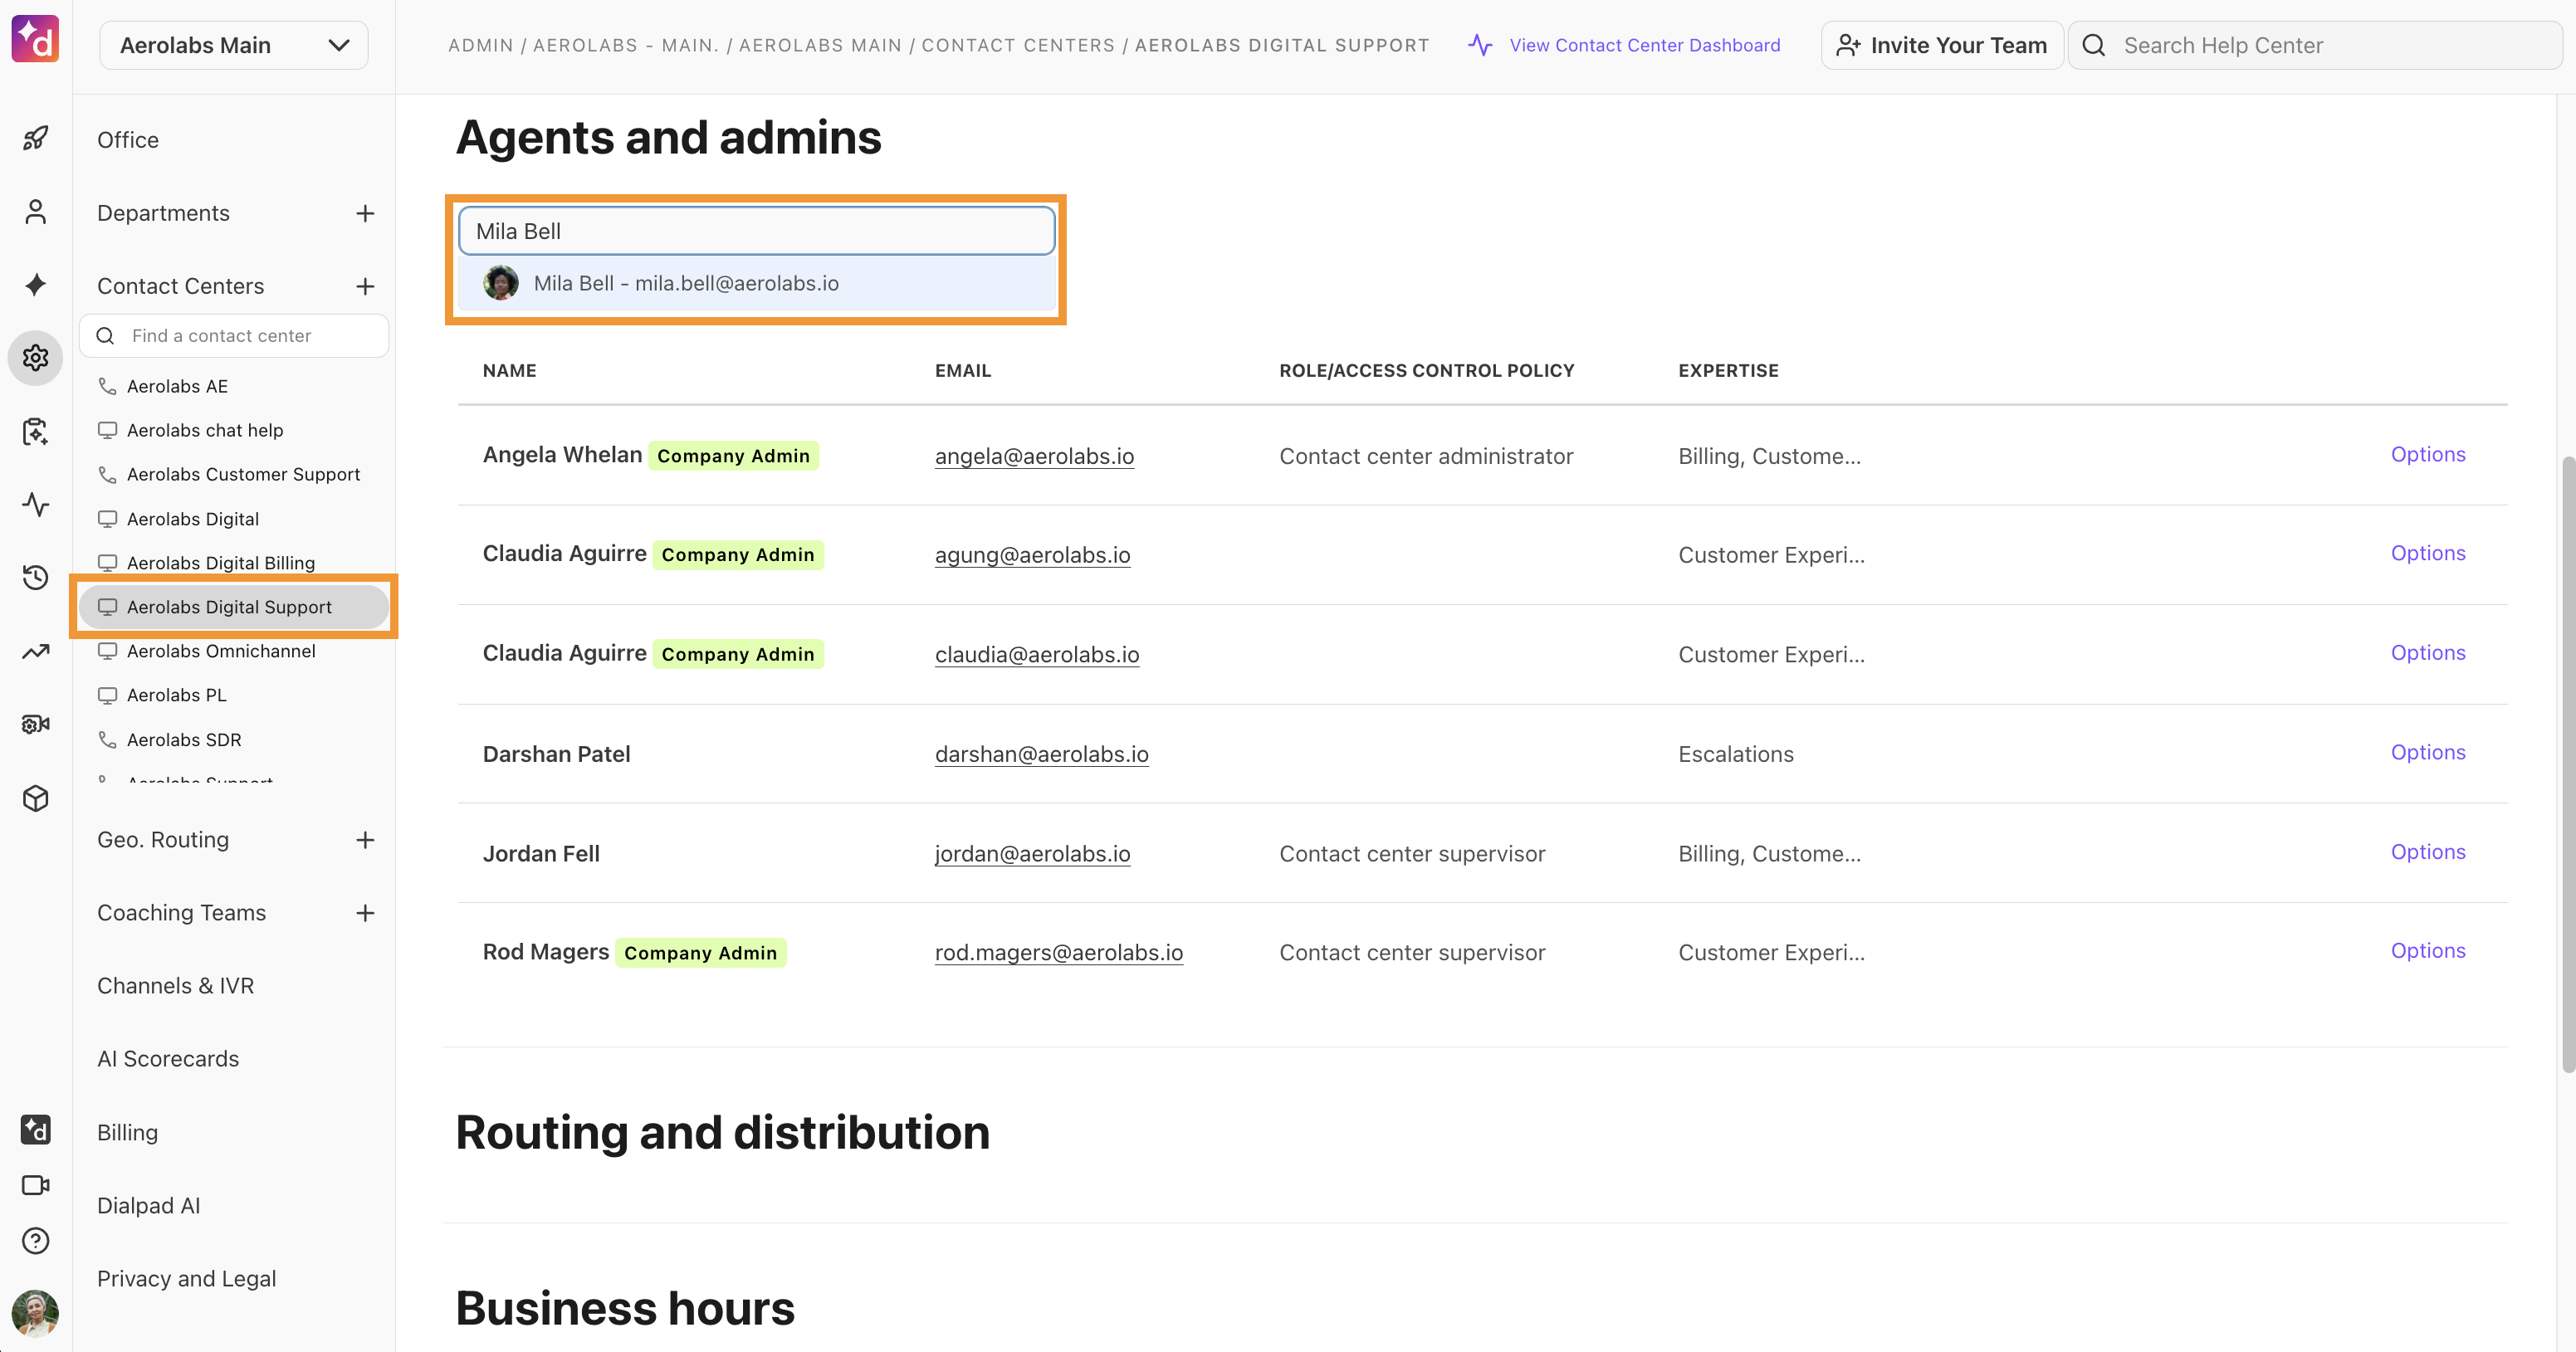
Navigate to Contact Centers and select the Digital Contact Center
Navigate to Agents & Admins
Enter the agent’s name in the search bar
Select the name, or press enter, to confirm
Once added, use the Options menu to update their expertise skill set, admin permissions, or even remove the agent completely.
Remove digital agents
To remove agents from your Digital Contact Center, go to your Dialpad Admin Settings.
Navigate to Contact Centers and select the Digital Contact Center
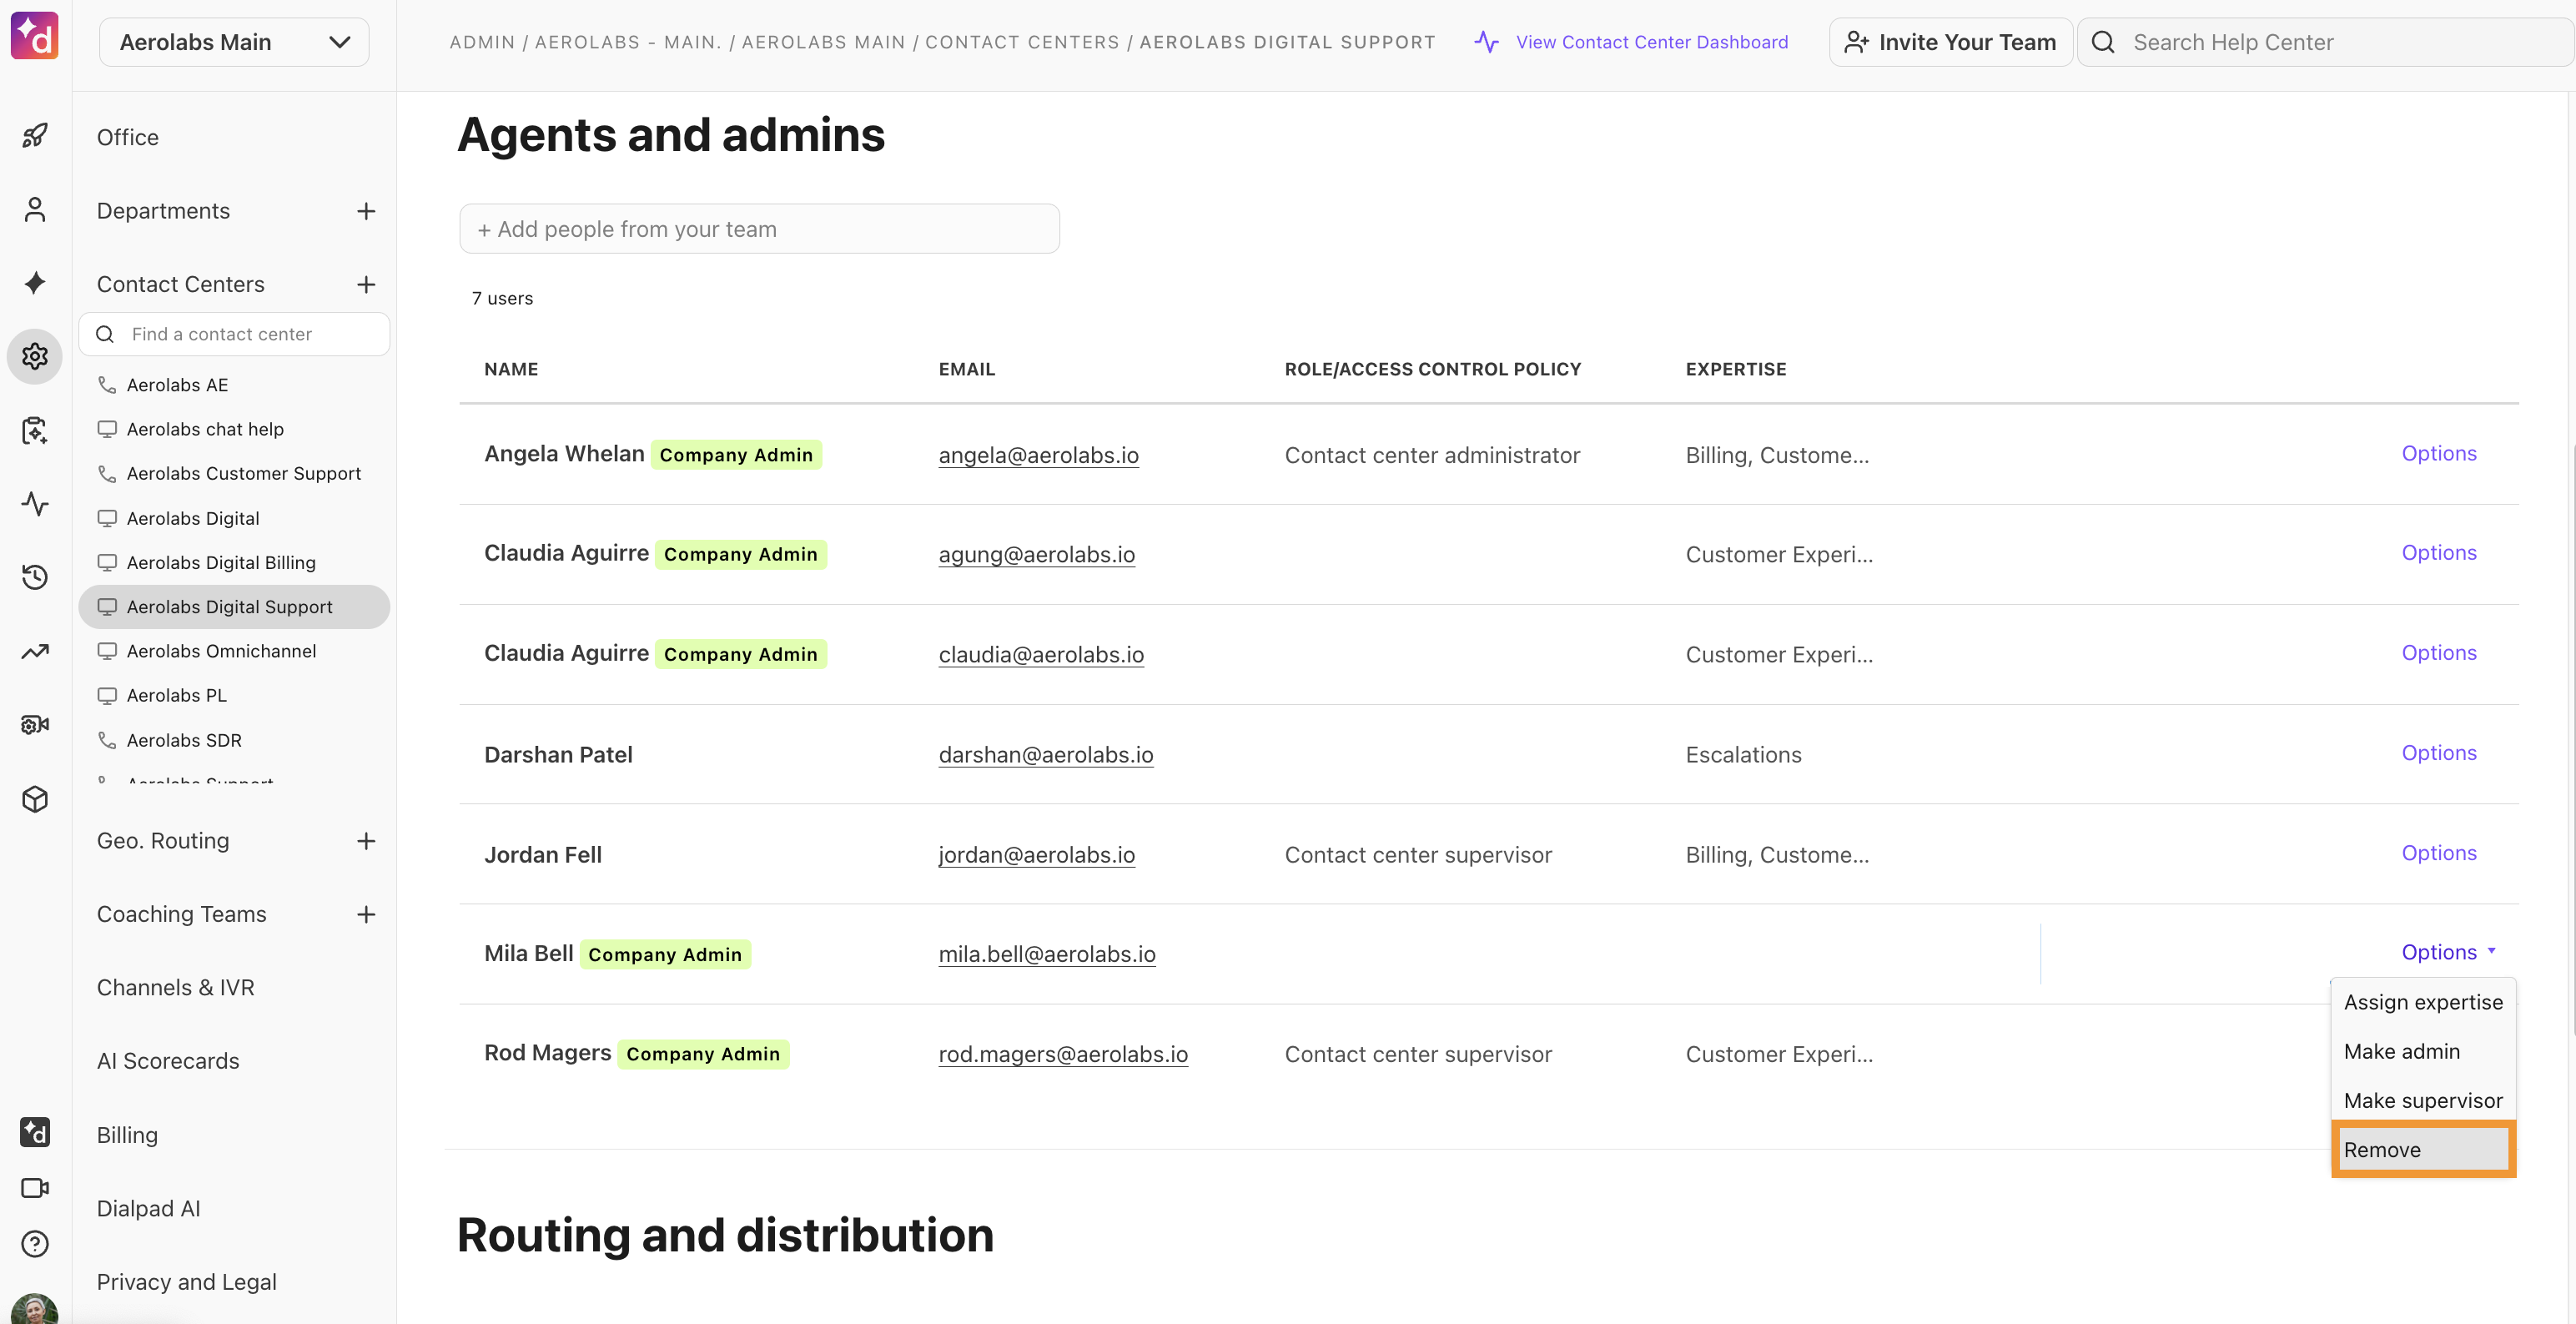
Navigate to Agents & admins
Beside the agent’s name, select Options > Remove
Note
Removing an agent from a Digital Contact Center does not affect their Dialpad license; it only impacts their ability to interact within the Digital Contact Center.
Assign admin permissions
Assign admin permissions or make an agent a Contact Center Supervisor from the settings of your Digital Contact Center.
To make an agent a Digital Contact Center Admin or Supervisor, go to your Dialpad Admin Settings.
Go to Contact Centers and select the Digital Contact Center
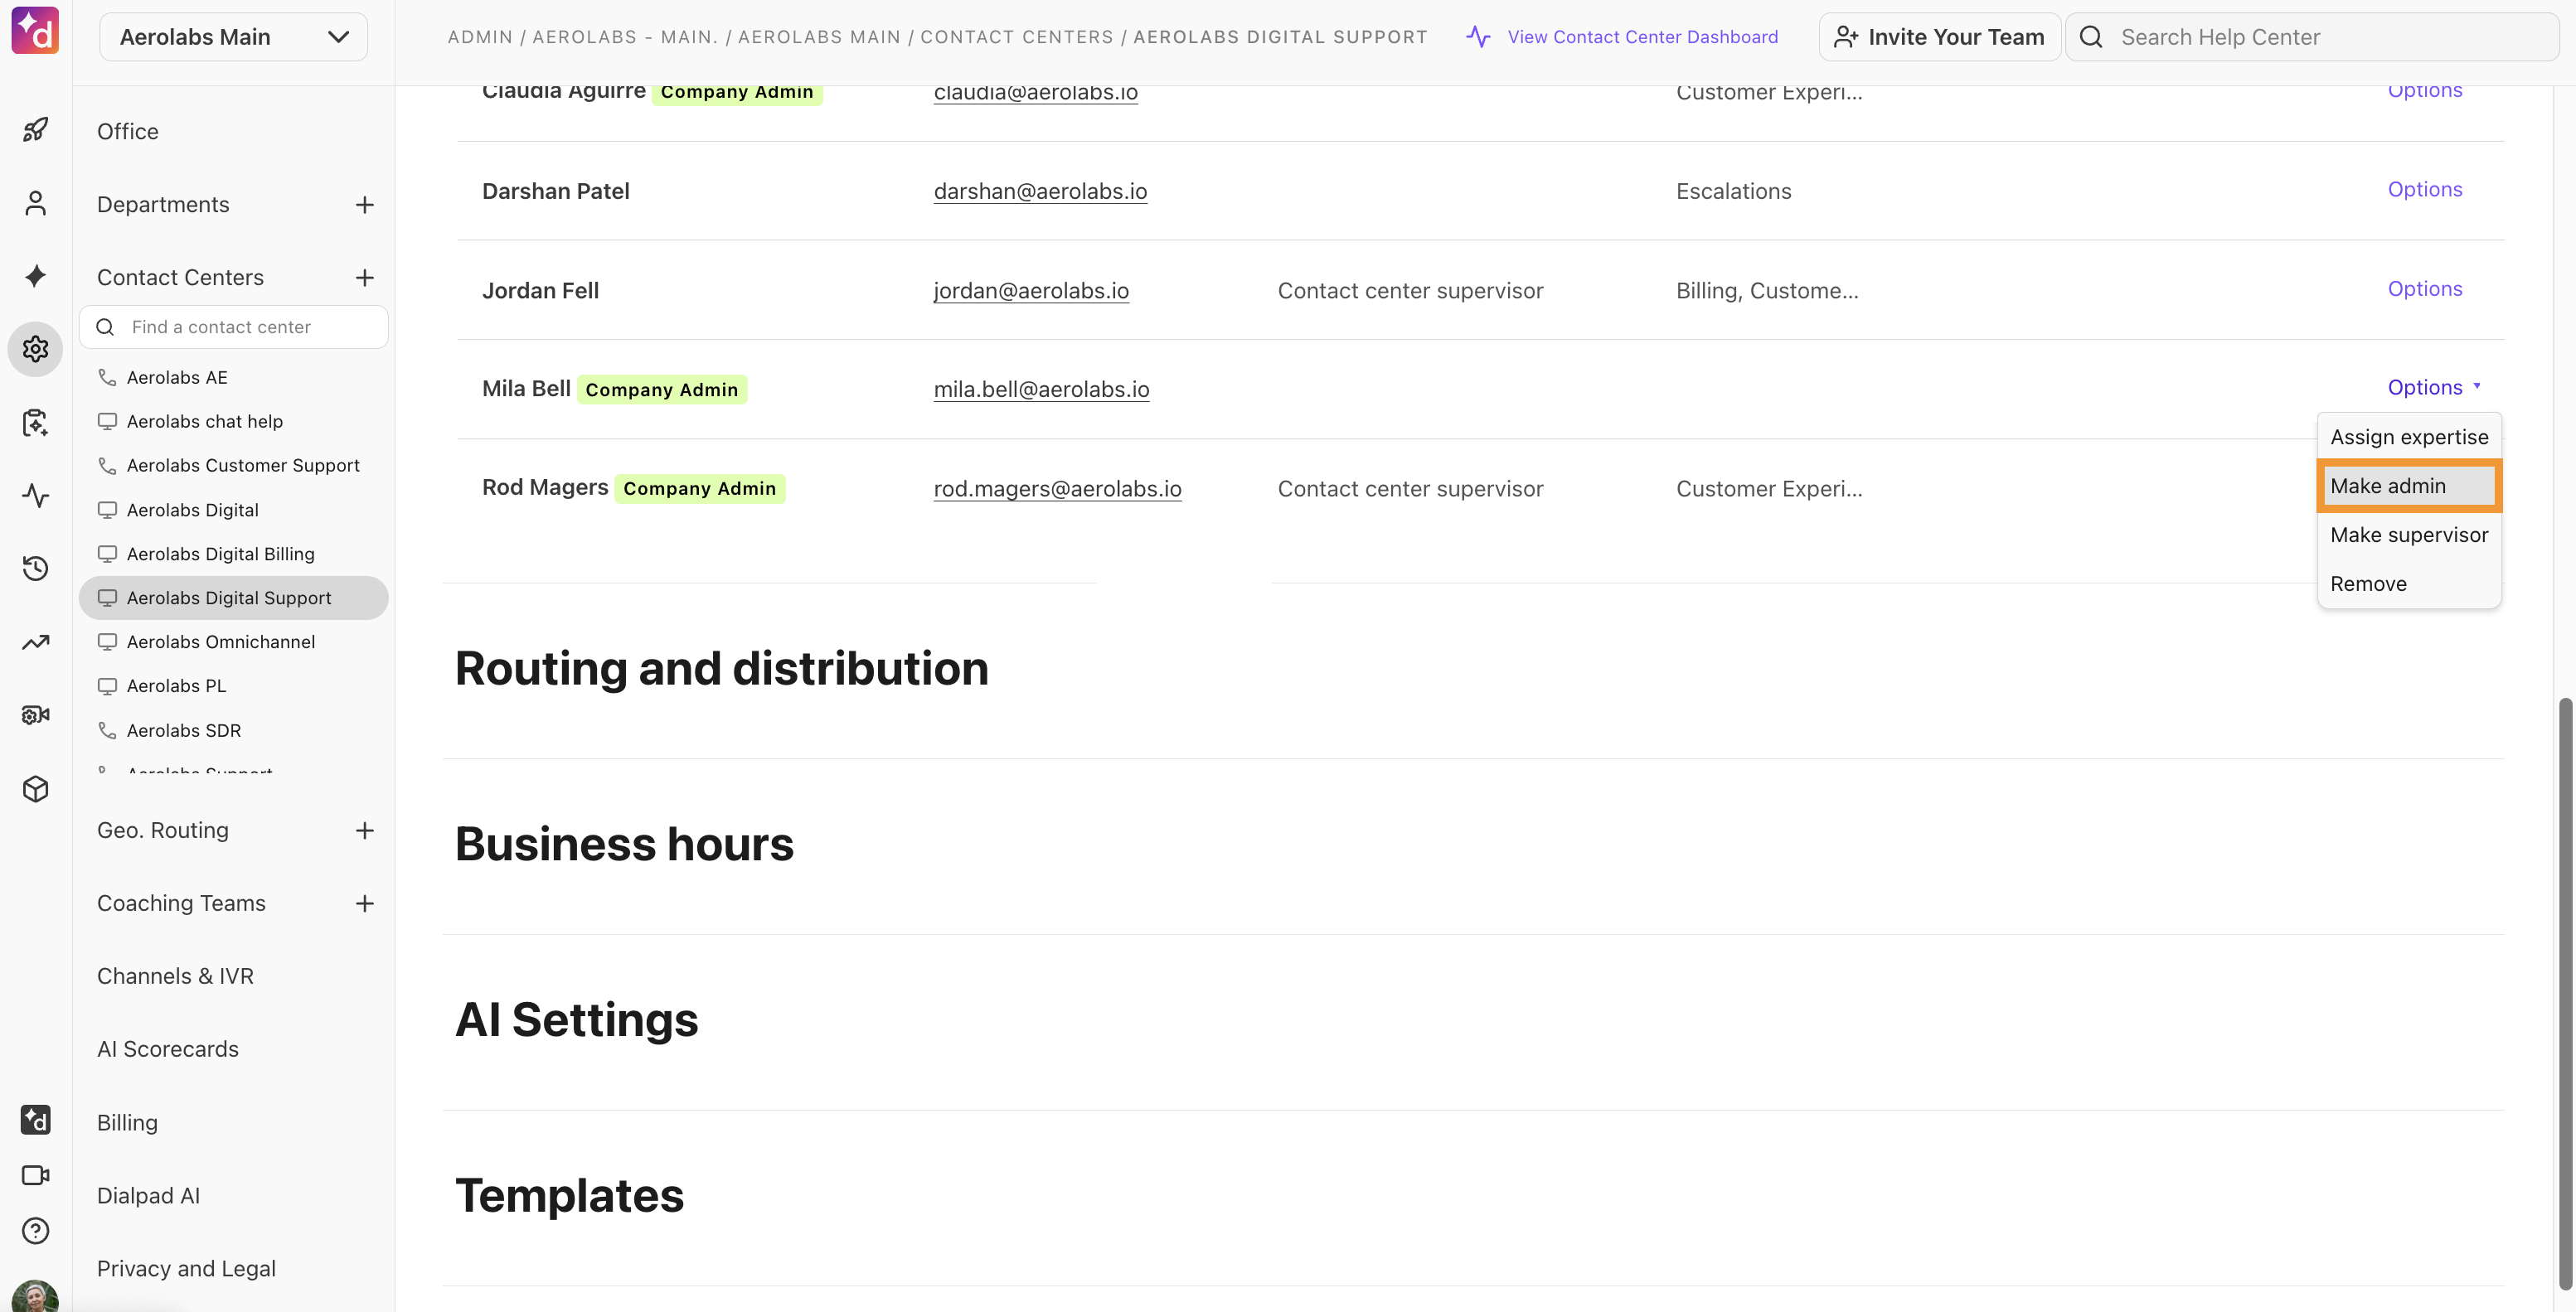
Navigate to Agents & admins
Beside the agent’s name, select Options > Make Admin
Create and assign expertise groups
Utilize Expertise Groups to direct customers to the most suitable agents every time. Expertise groups enable you to highlight specific agents with specialized knowledge within your team, defined for each Contact Center.
To create and assign expertise groups, head to your Dialpad Admin Settings.
Navigate to Contact Centers and select the desired Digital Contact Center
Navigate to Agents & admins
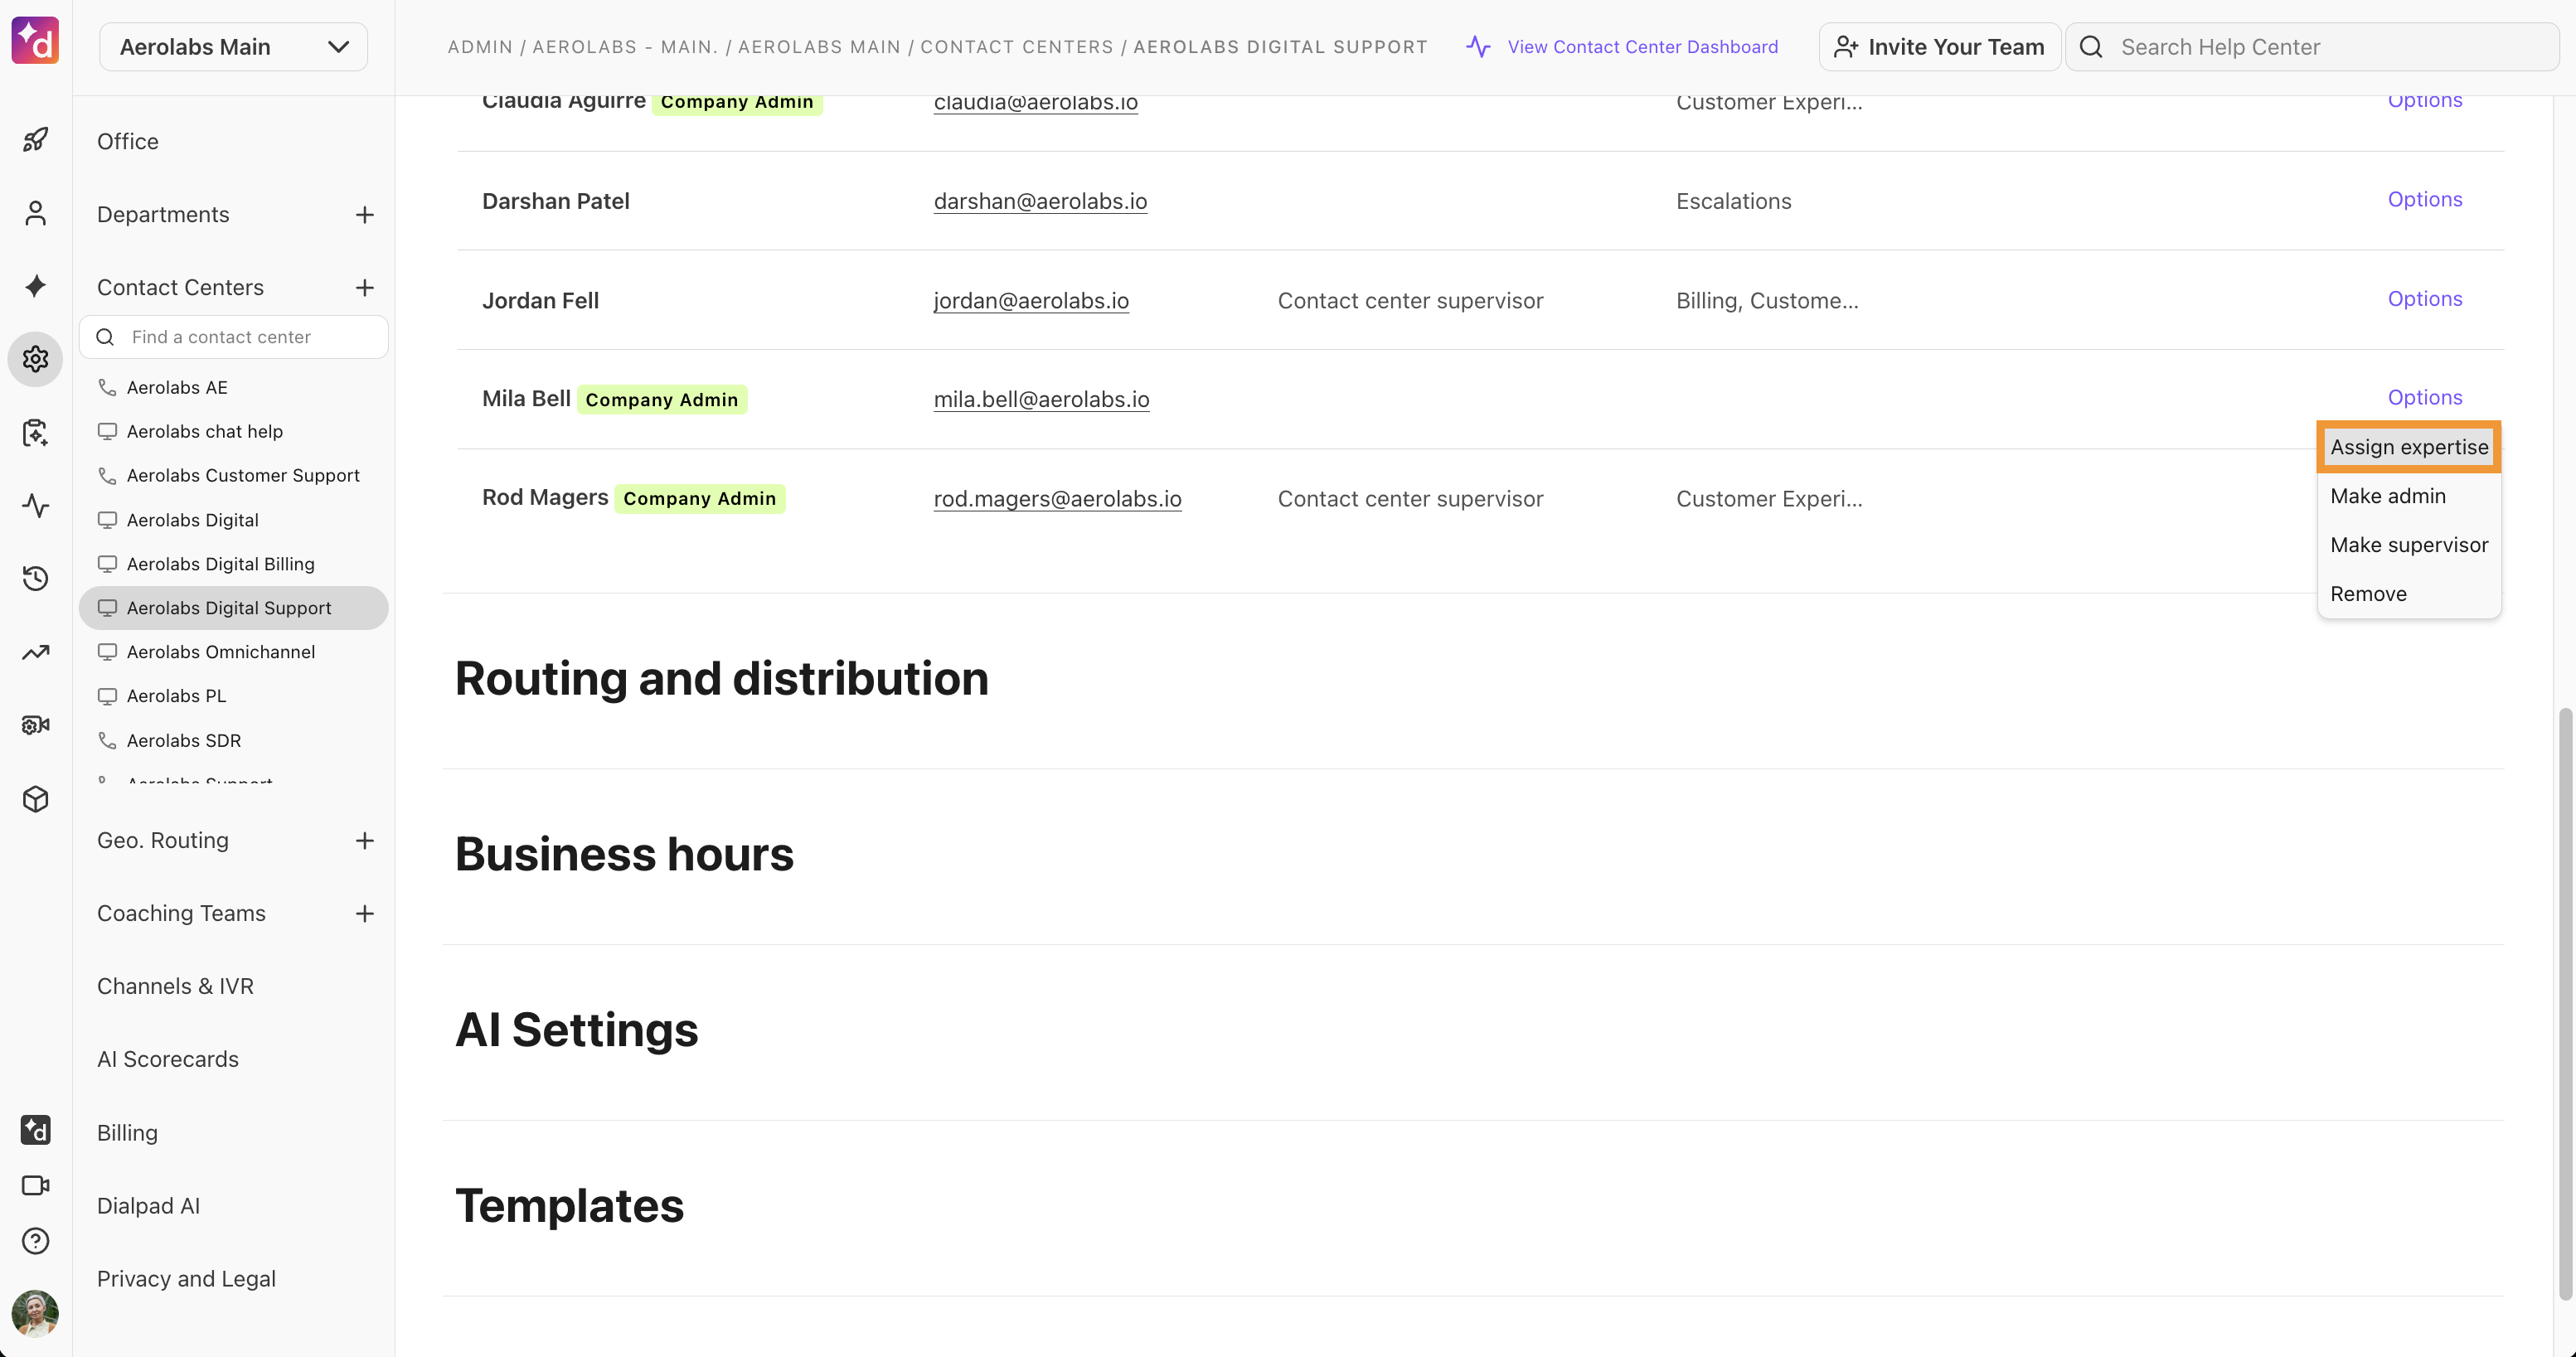
Beside an agent name, select Options > Assign Expertise
Select Add new expertise
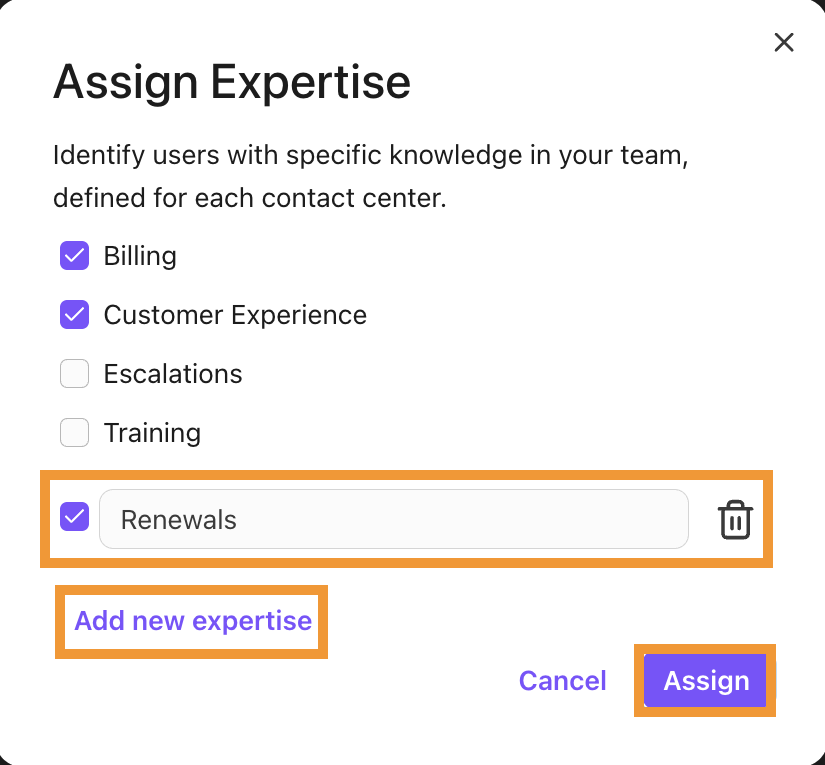
Name the Expertise Group
Select Add new expertise to create additional Expertise Groups
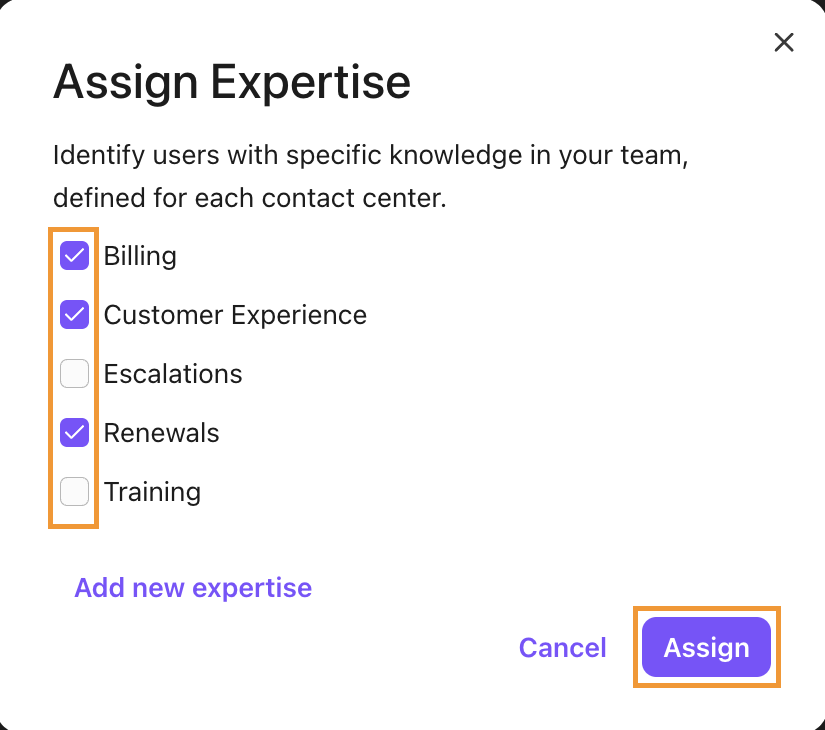
Check the boxes beside the Expertise Groups you want to assign to the agent
Select Assign
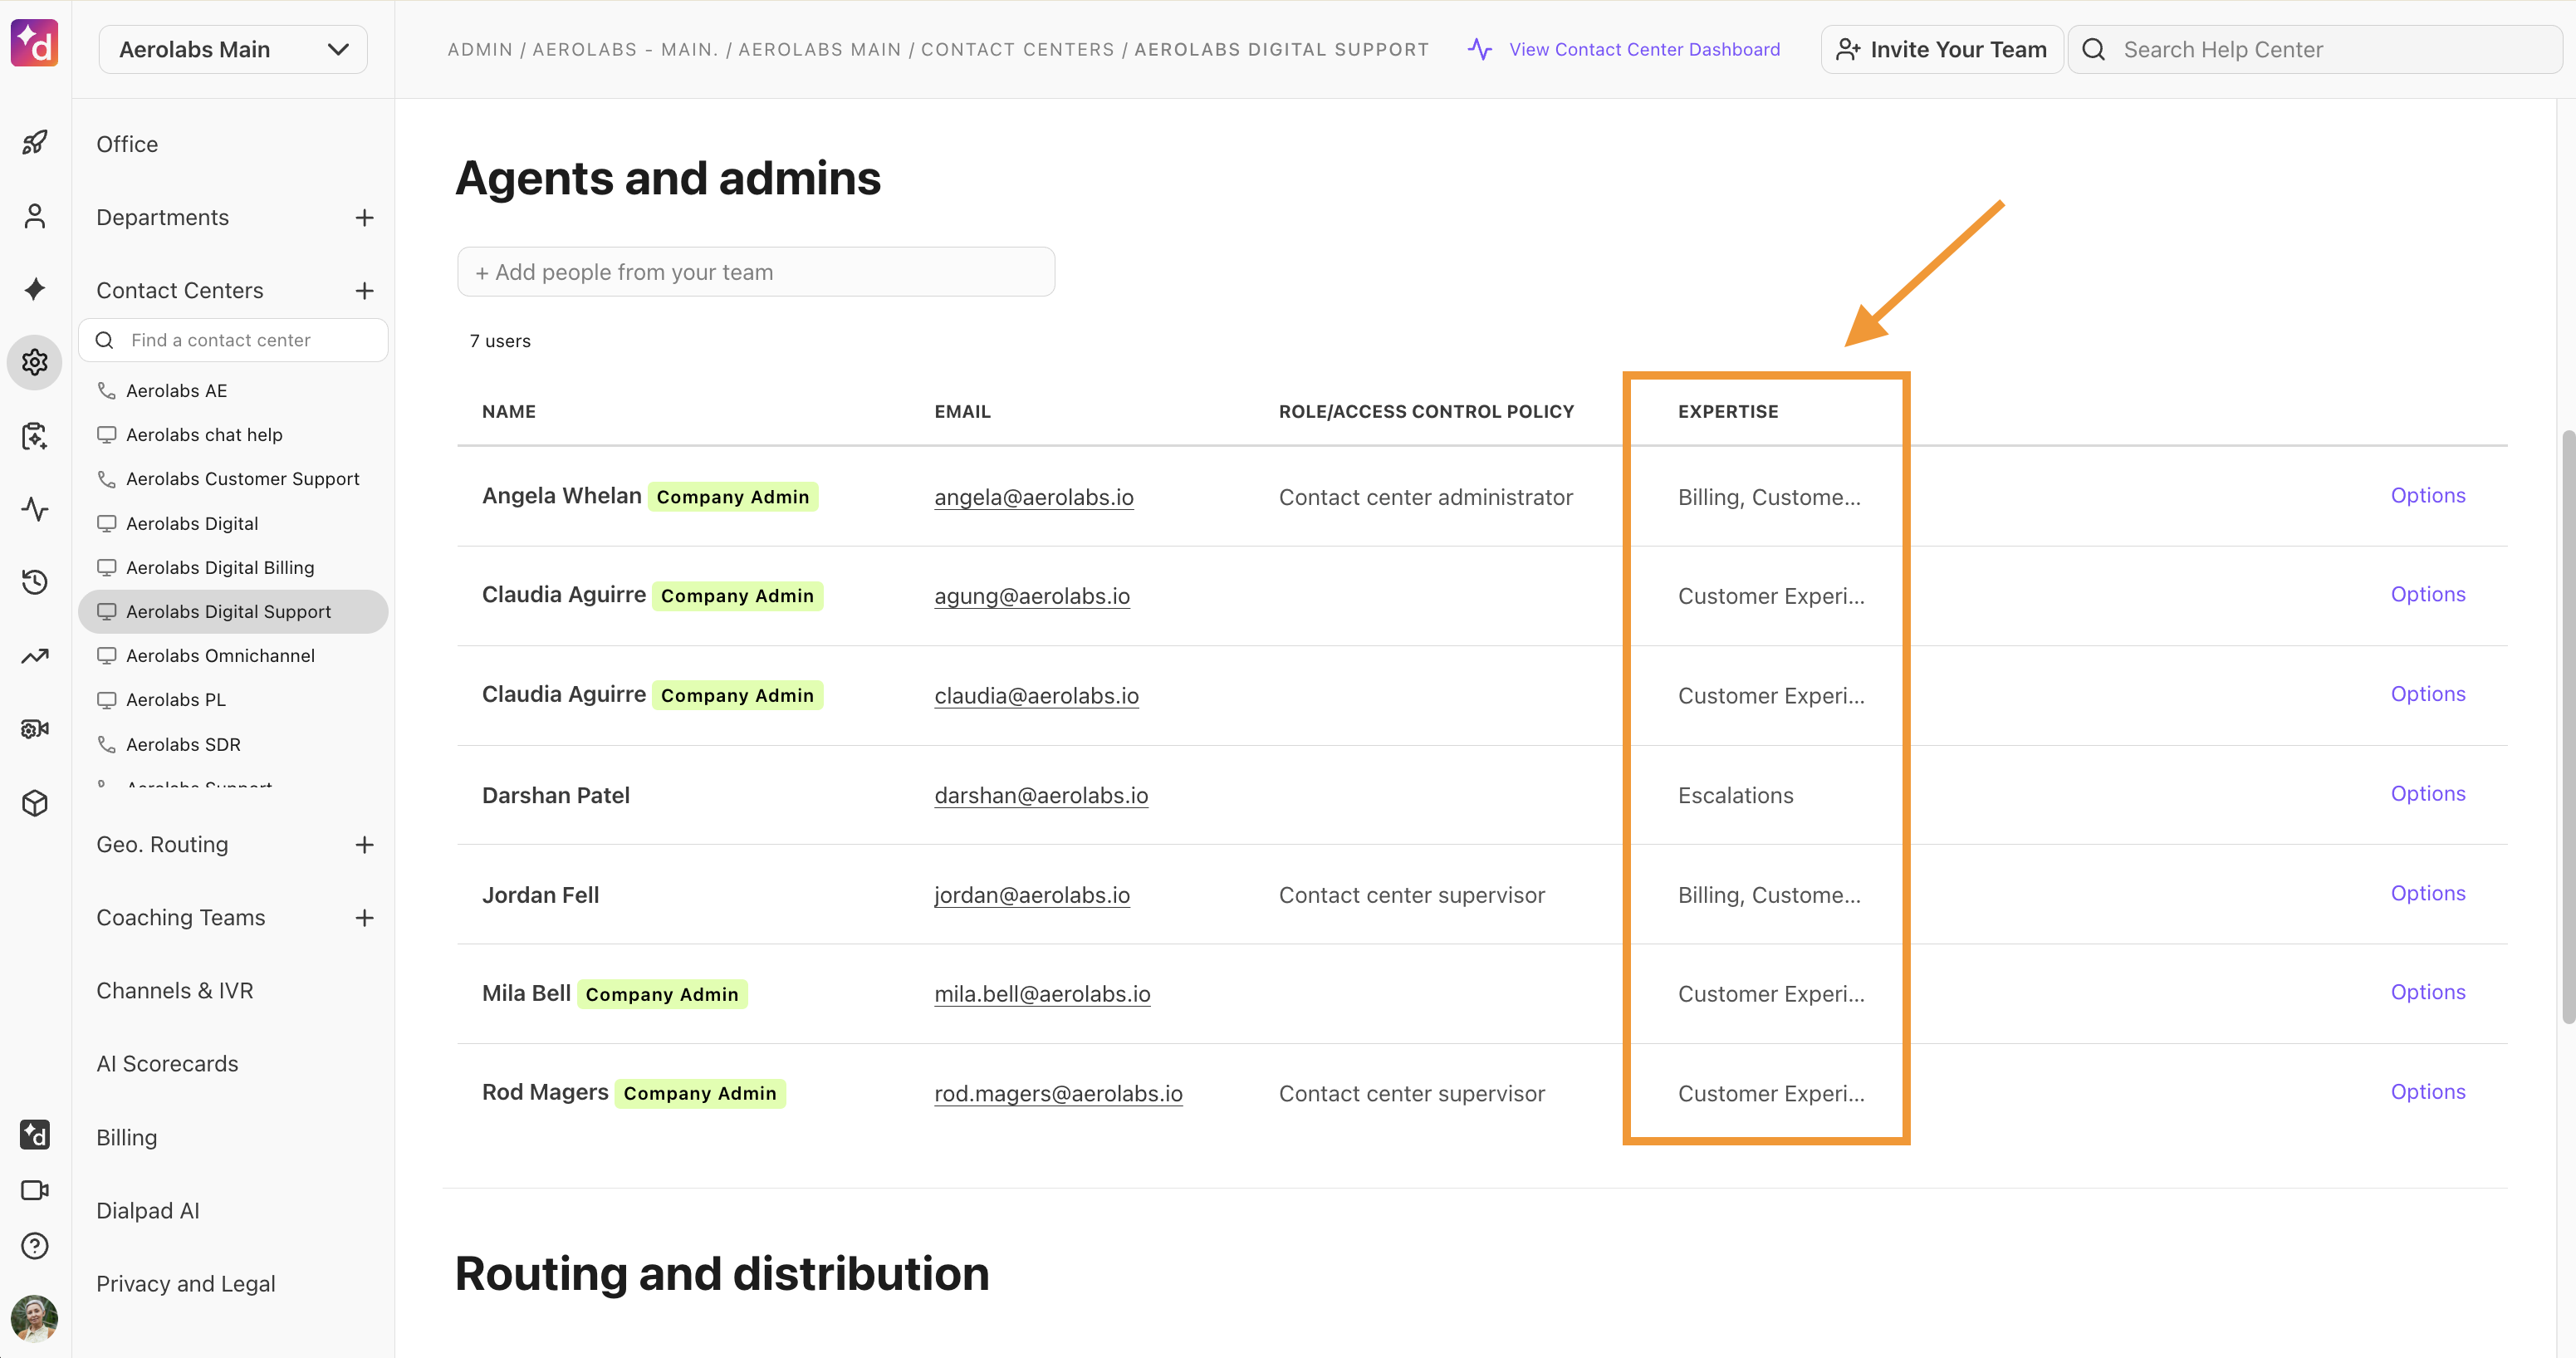
Once assigned to an agent, you’ll see the Expertise Group listed beside the agent’s name in the Agents & admins section.
To unassign an Expertise Group:
Beside the user’s name, select Options > Assign expertise
Uncheck the box beside the desired Expertise Group
Select Assign
Configure Digital Contact Center routing
Routing and distribution rules automatically direct inbound interactions to specific agents based on predefined rules and criteria, such as agent availability or skill-set expertise. By setting contact distribution rules and routing preferences, you not only improve the customer experience but also reduce wait times and enhance the overall delivery of interactions.
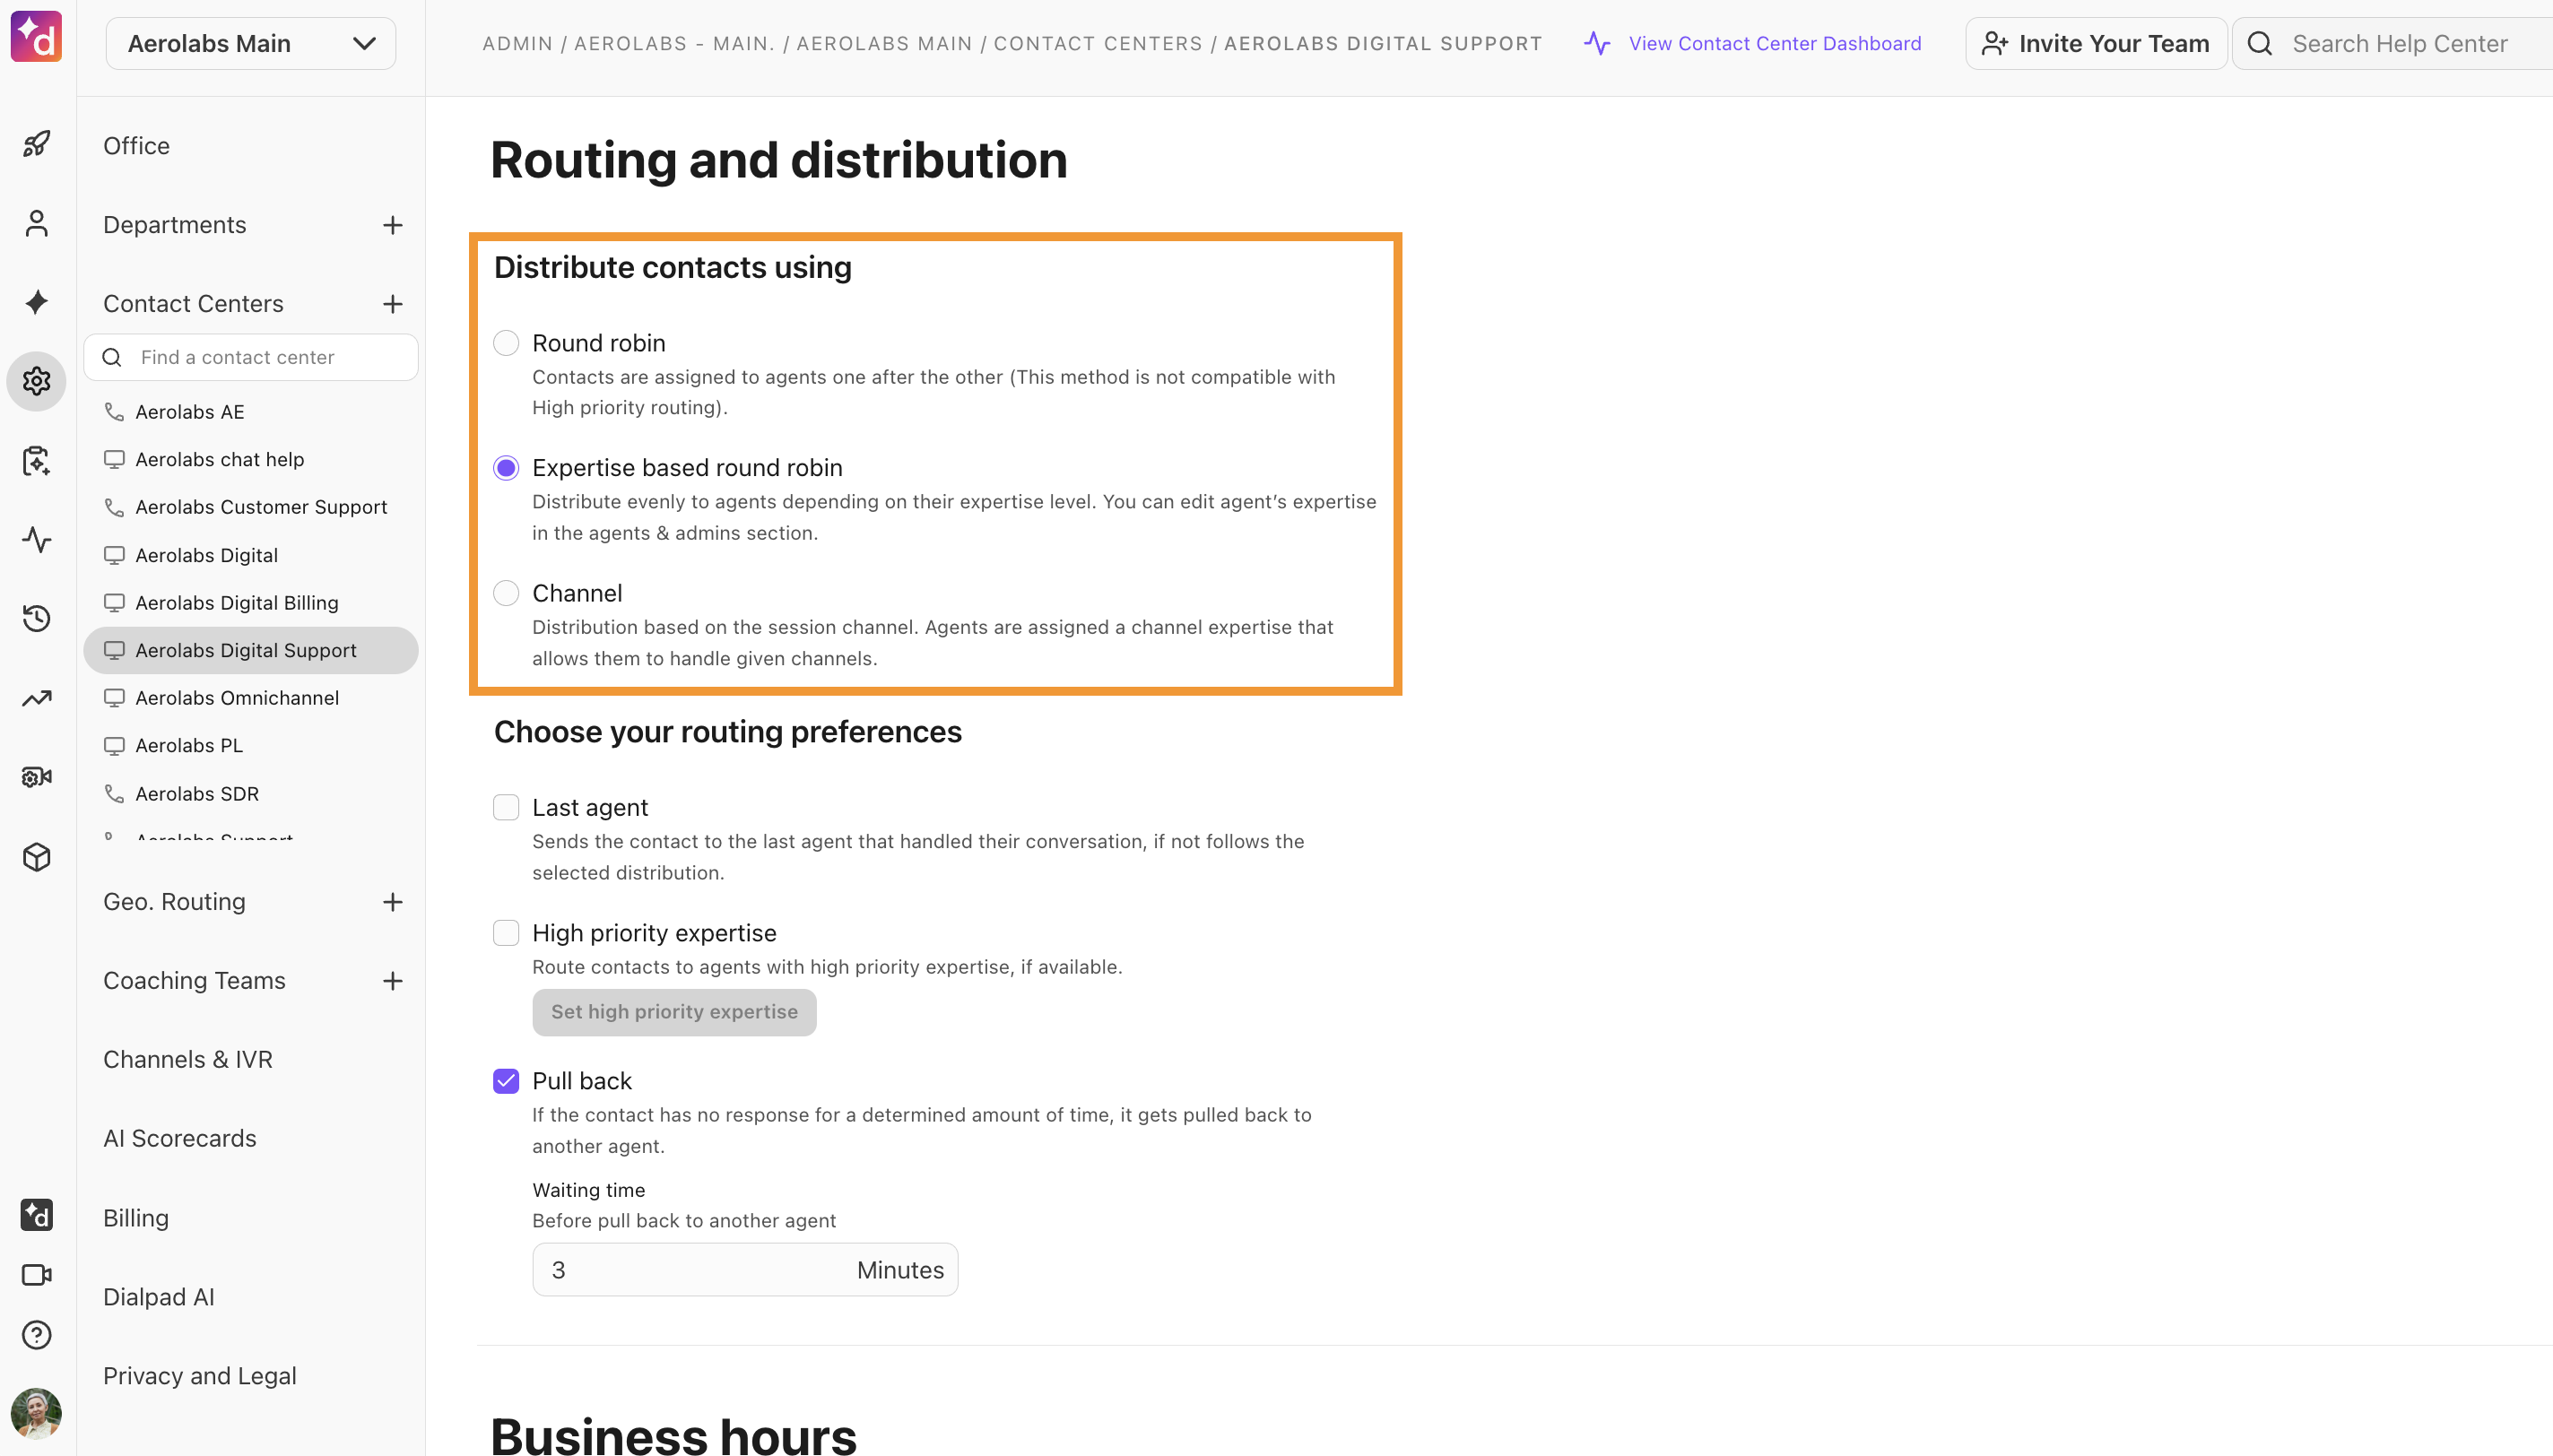
Contact distribution
Dialpad offers 3 types of contact distribution, ensuring your clients reach the right agent every time.
Round robin routing | Assigns contacts to the next available agent.
|
Expertise-based round robin routing | Evenly assigns contacts to agents based on the agents' expertise groups. |
Channel routing | Assigns contacts to agents based on the channel Expertise Group. |
To set contact distribution rules, go to your Dialpad Admin Settings.
Select Contact Centers
Select the Digital Contact Center
Go to Routing and Distribution and select the desired contact distribution setting
Note
This can be changed at any time.
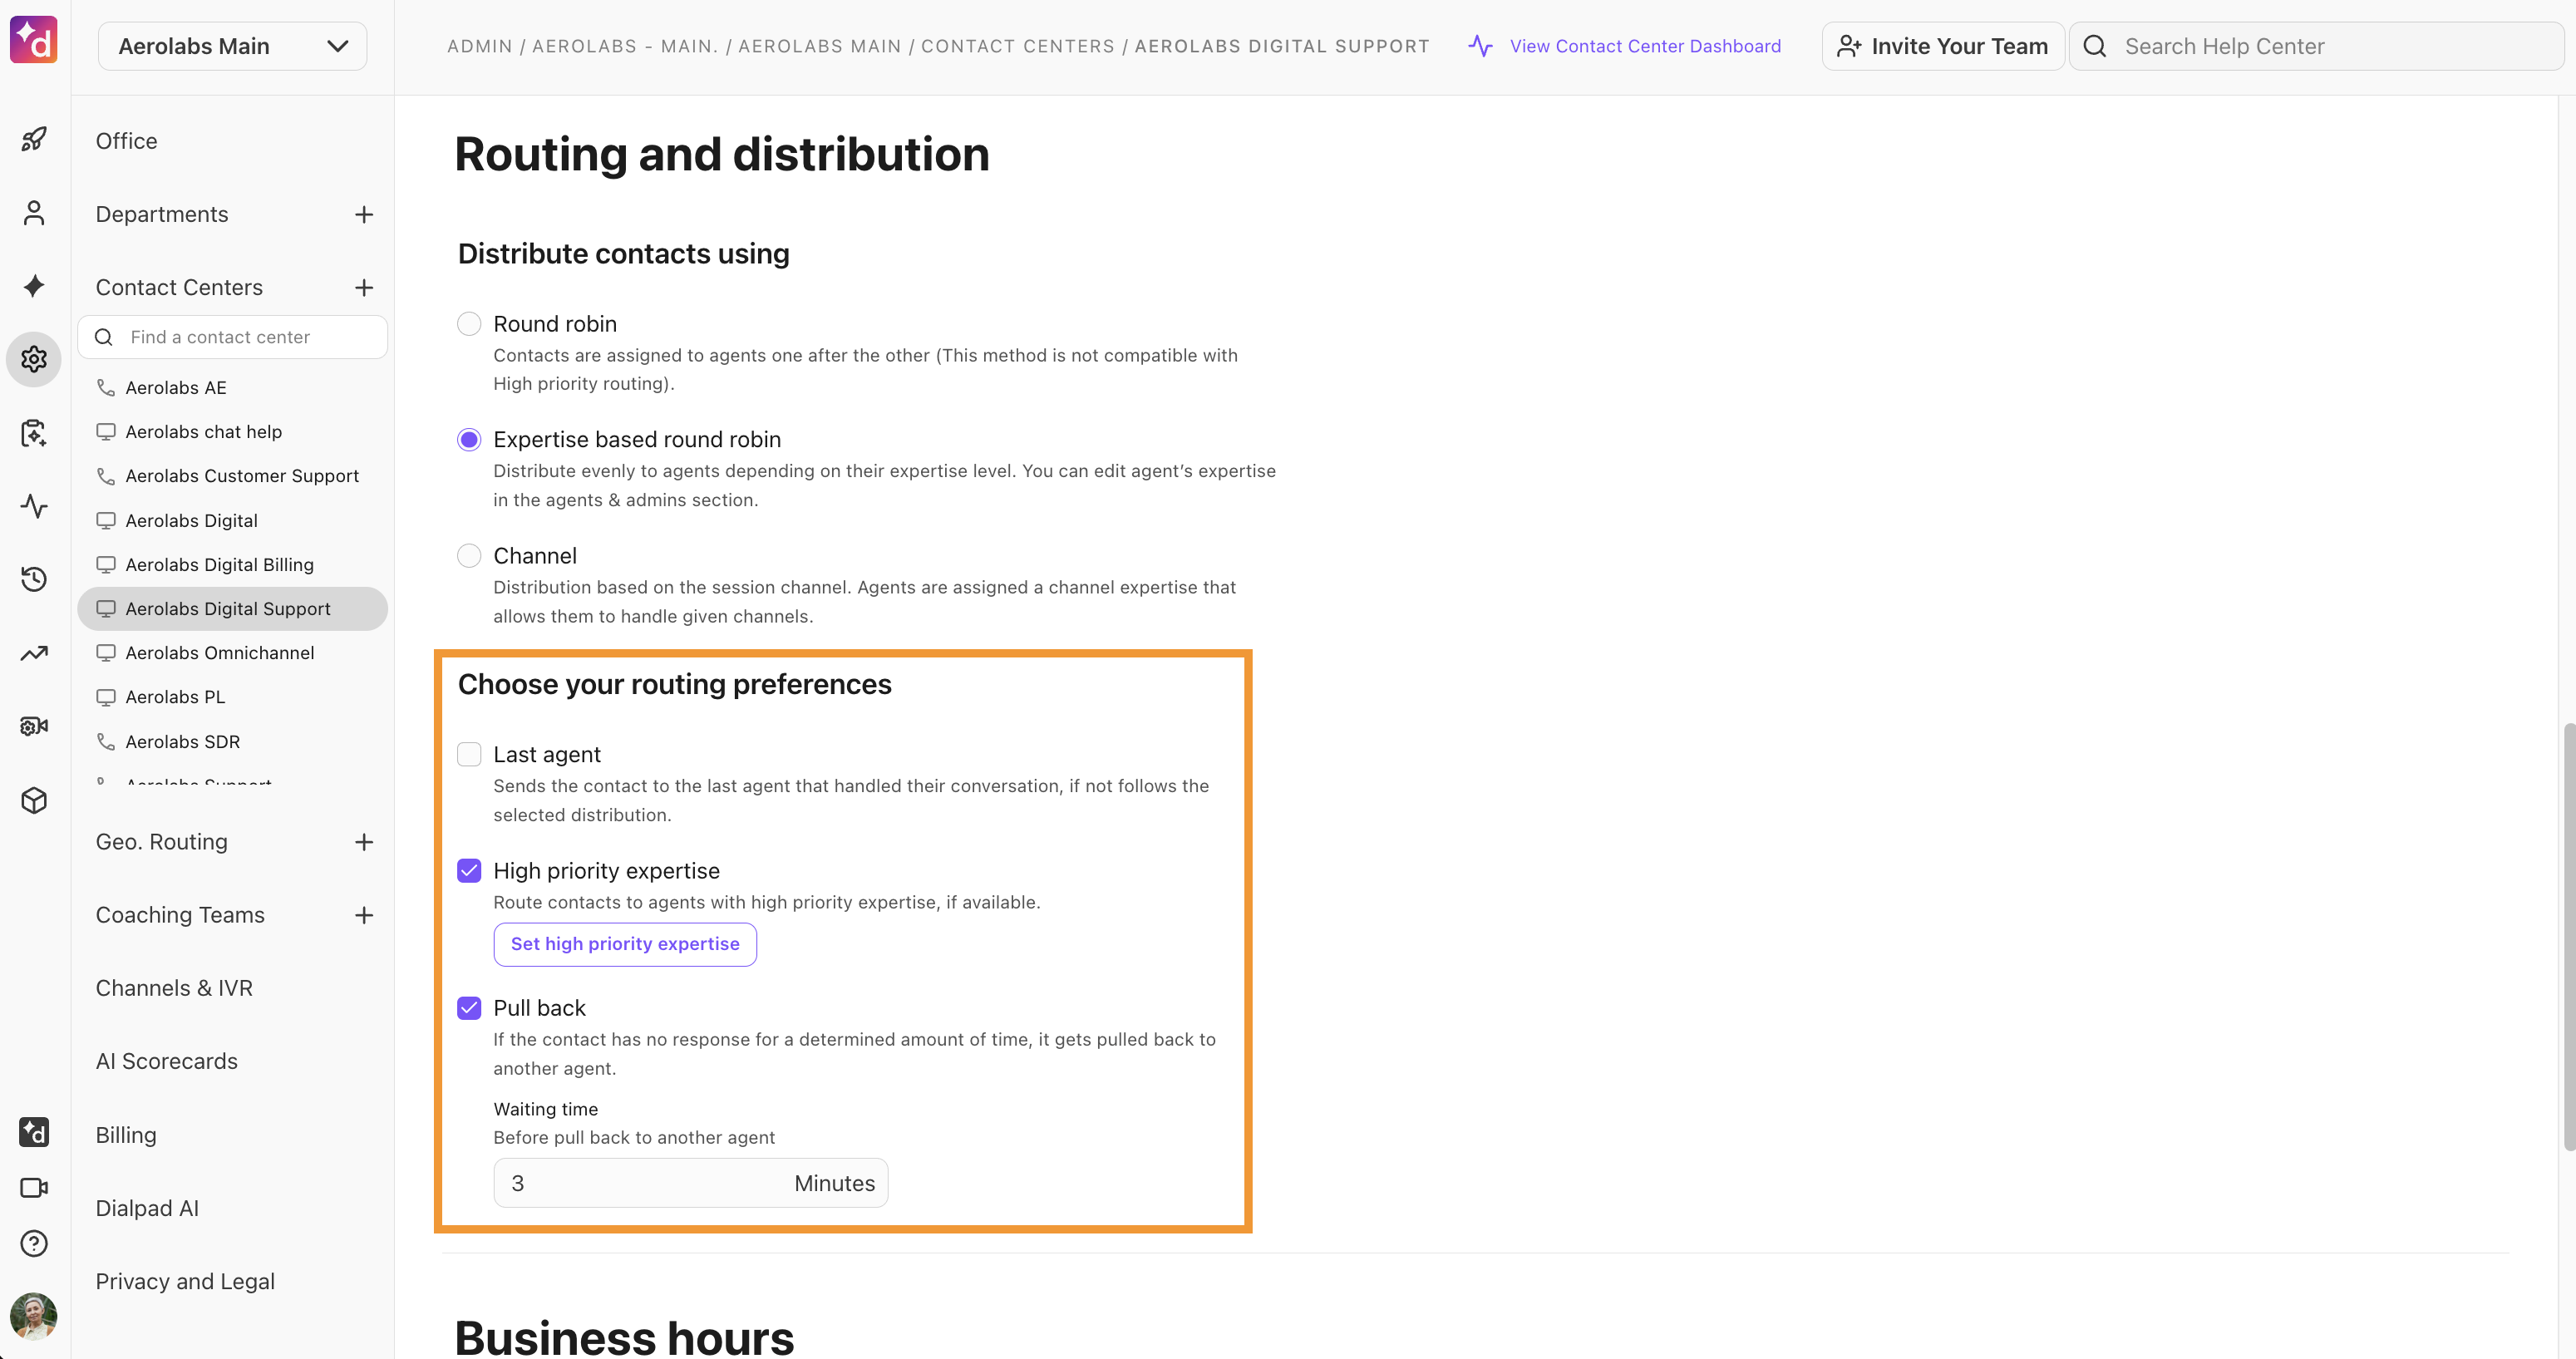
Routing preferences
Routing preferences determine how long clients will wait before being routed to another agent, whether they should be routed to the same agent they last spoke to, and more. Dialpad offers 3 unique routing preferences for Digital Contact Centers.
Last Agent | Sends the contact to the last agent that handled their conversation.
|
High Priority | Routes contacts to agents with the highest priority expertise or channel, based on your contact distribution rules.
|
Pull Back | Prevents clients from waiting on an unresponsive agent by redirecting the contact to another agent if there is no response within a specified time. |
In the Wait Time section, set a time for callers to wait before being routed to another agent. The wait time must be less than 3 days, but we recommend 2-3 minutes.
To set routing preferences rules, go to your Dialpad Admin Settings.
Select Contact Centers and select the Digital Contact Center
Go to Routing and Distribution and check the button(s) beside your desired preferences
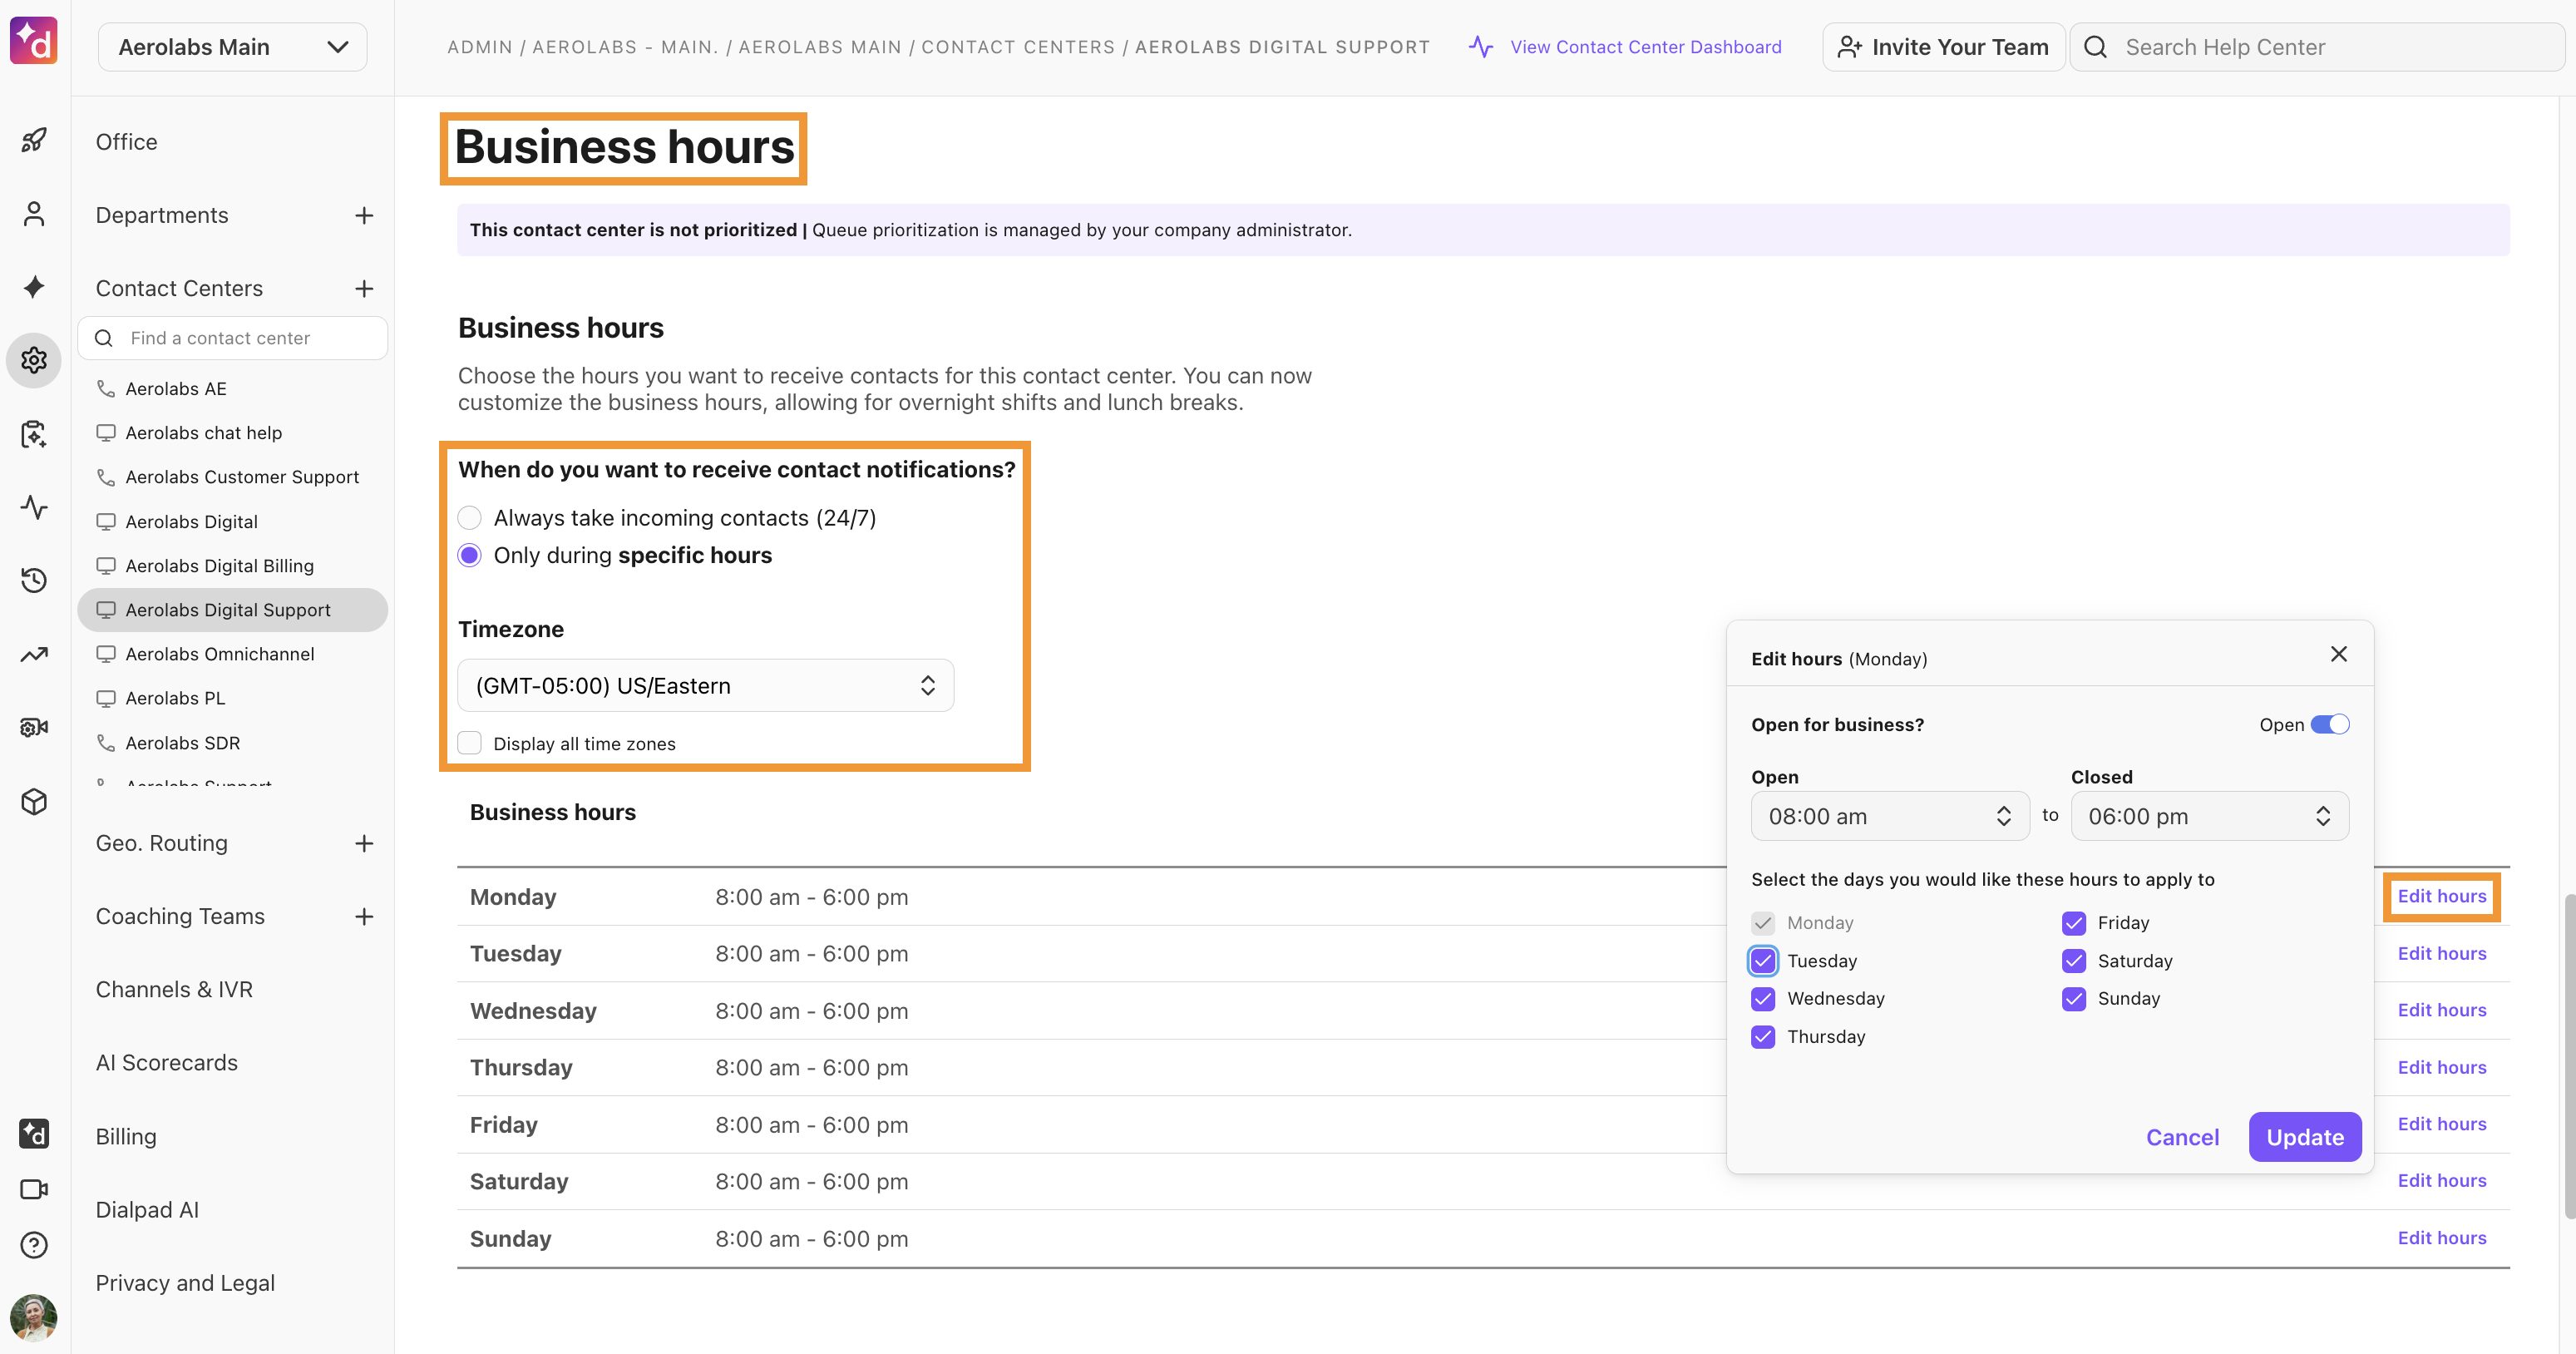
Set Digital Contact Center business hours
Set the business hours of your Digital Contact Center to make sure they're only open when your team is available to take calls. By default, your lines are open 24/7, but you can set different hours for each day.
To set your Digital Contact Center’s business hours, go to your Dialpad Admin Settings.
Select Contact Centers and select the Digital Contact Center
Go to Business Hours
In the Business Hours section, choose when you want to receive calls
Always take incoming calls (24/7)
Only during specific hours
Set the timezone
Select Edit Hours
Choose if the Contact Center is open or closed
Choose the hours during which operators or agents will receive calls
Set an opening time and a closing time
Select the desired days the business hours apply to
Select Update
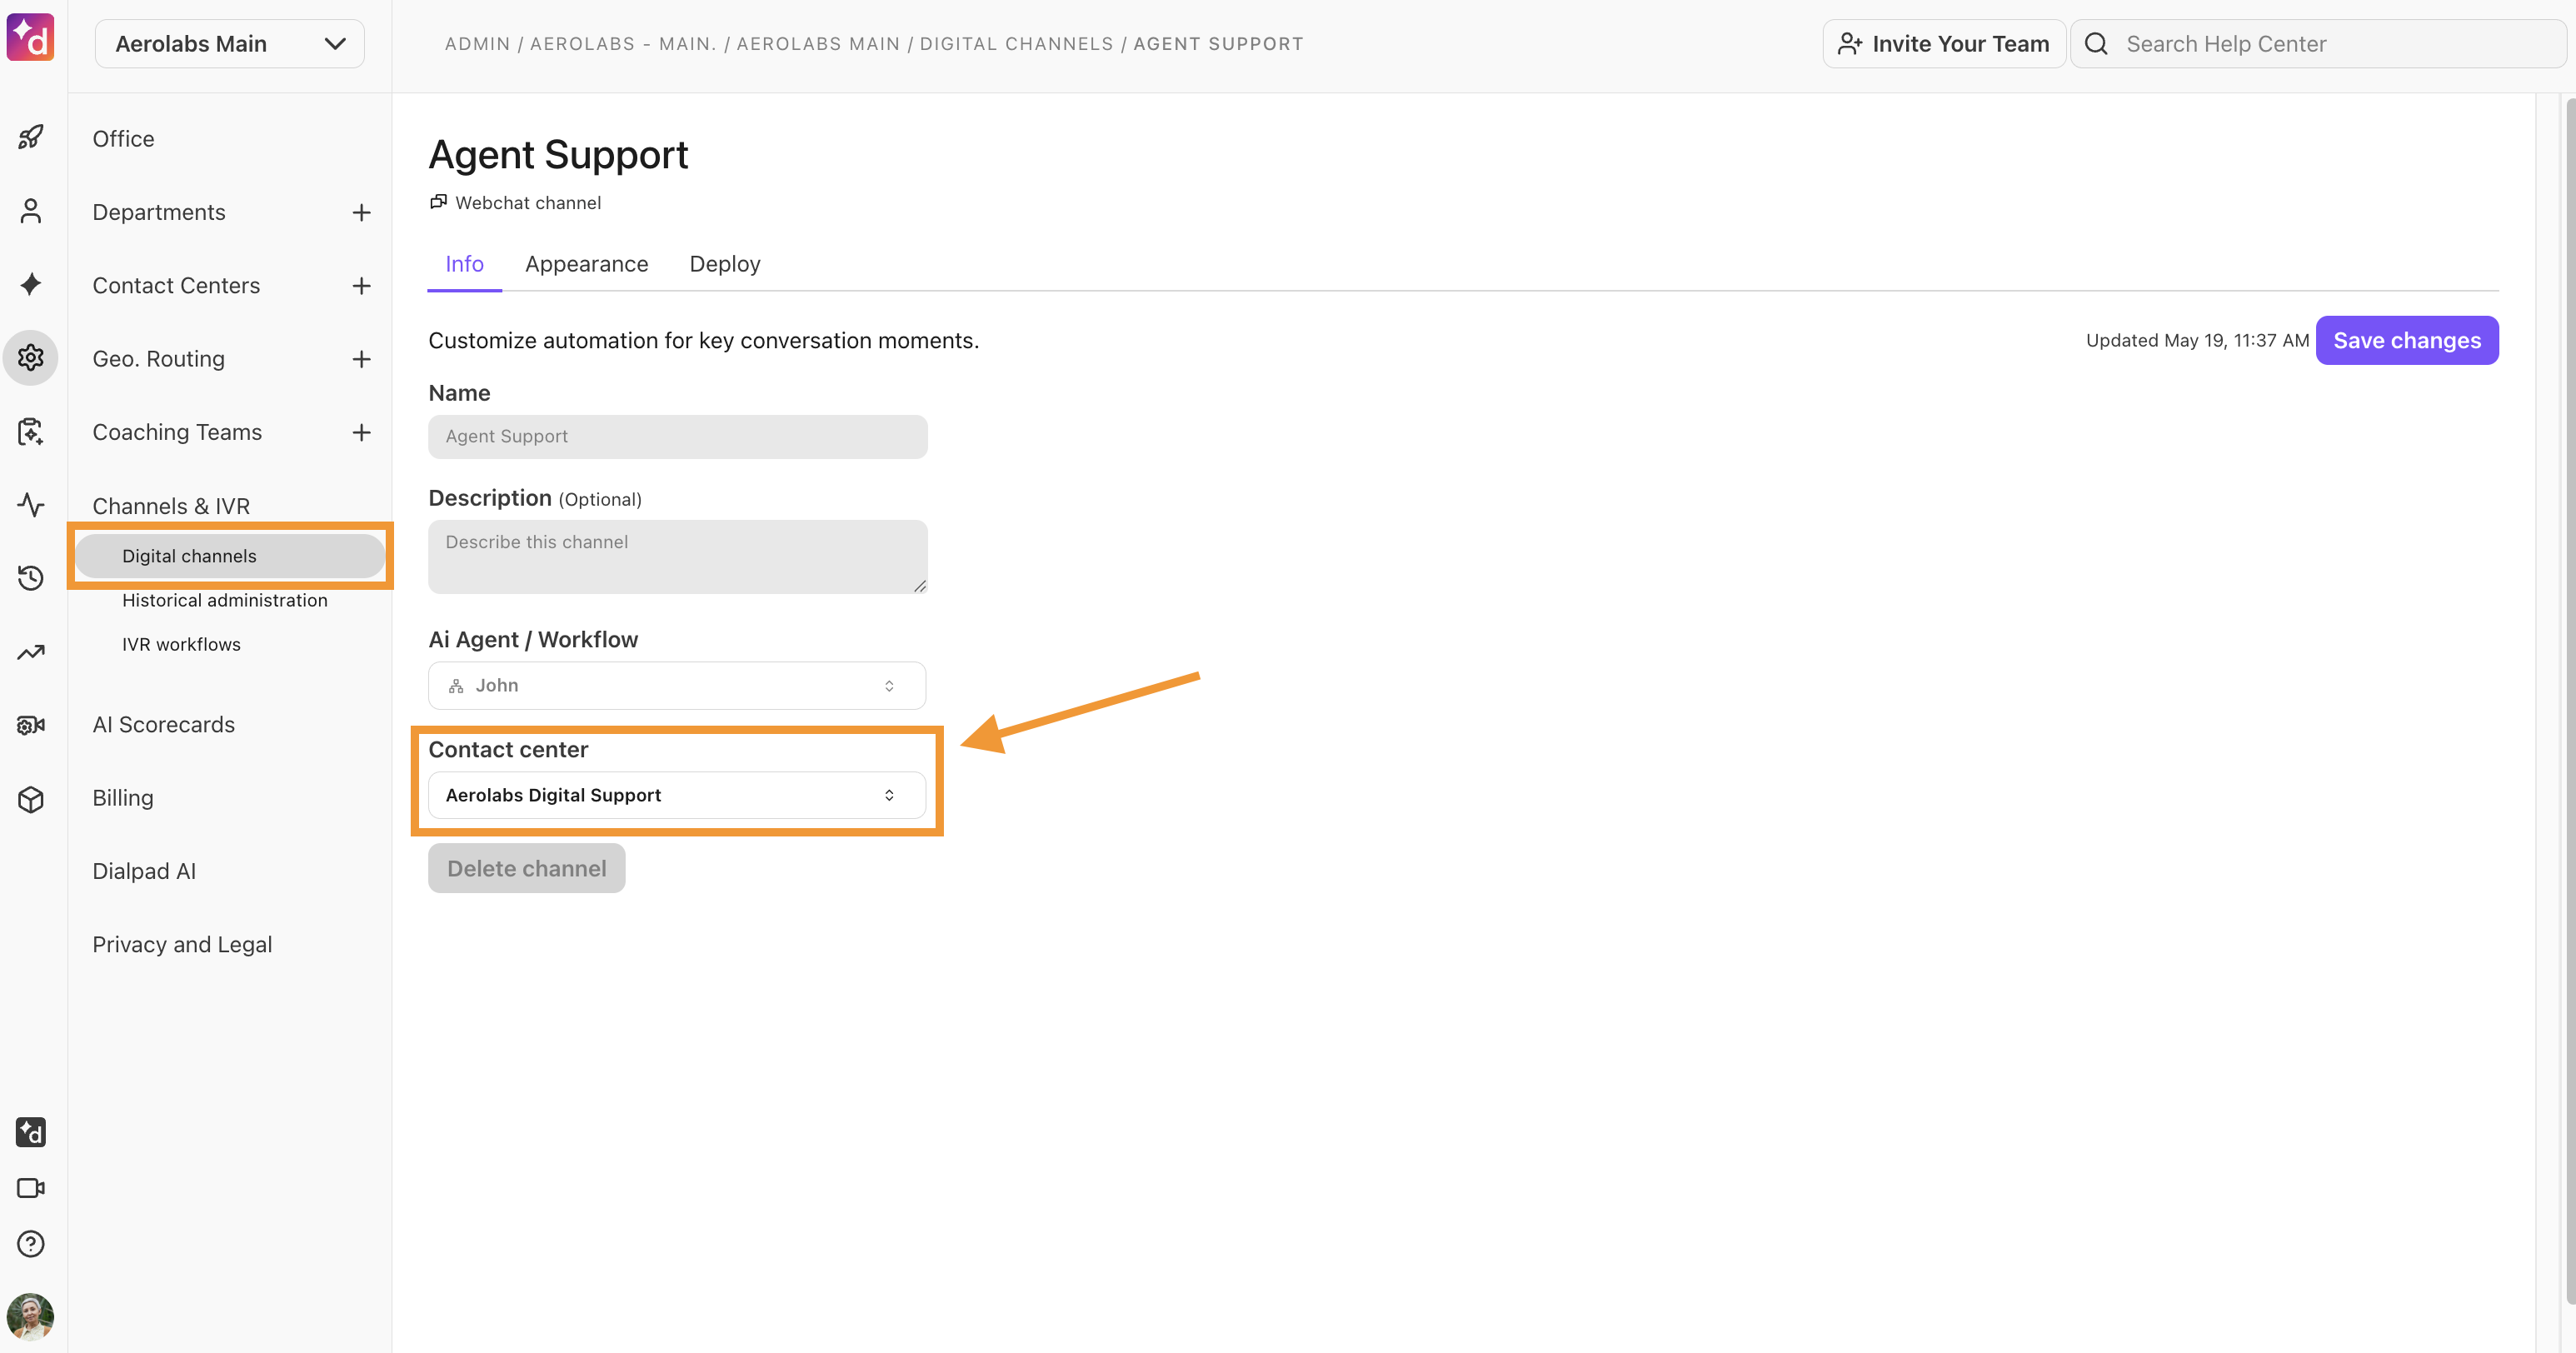
Connect a channel
Now that you’ve created a Digital Contact Center, it’s time to connect a digital channel.
To connect a channel, go to your Dialpad Admin Settings.
Navigate to Channels & Workflows > Digital Channels
Select the desired channel
Under Contact Center, select the desired Digital Contact Center from the drop-down menu
Select Save changes
Advanced Settings for Digital Contact Centers
Customize your Digital Contact Center experience with Dialpad's Advanced Settings.
These settings allow supervisors to assign interactions to specific agents and control the types of interactions that Digital Agents can handle. Advanced Settings are unique to each Digital Contact Center, enabling you to create distinct rules for individual Contact Centers.
To access your Advanced Digital Contact Center Settings, go to your Dialpad Admin Settings.
Select Contact Centers and select the Digital Contact Center
Go to Advanced Settings
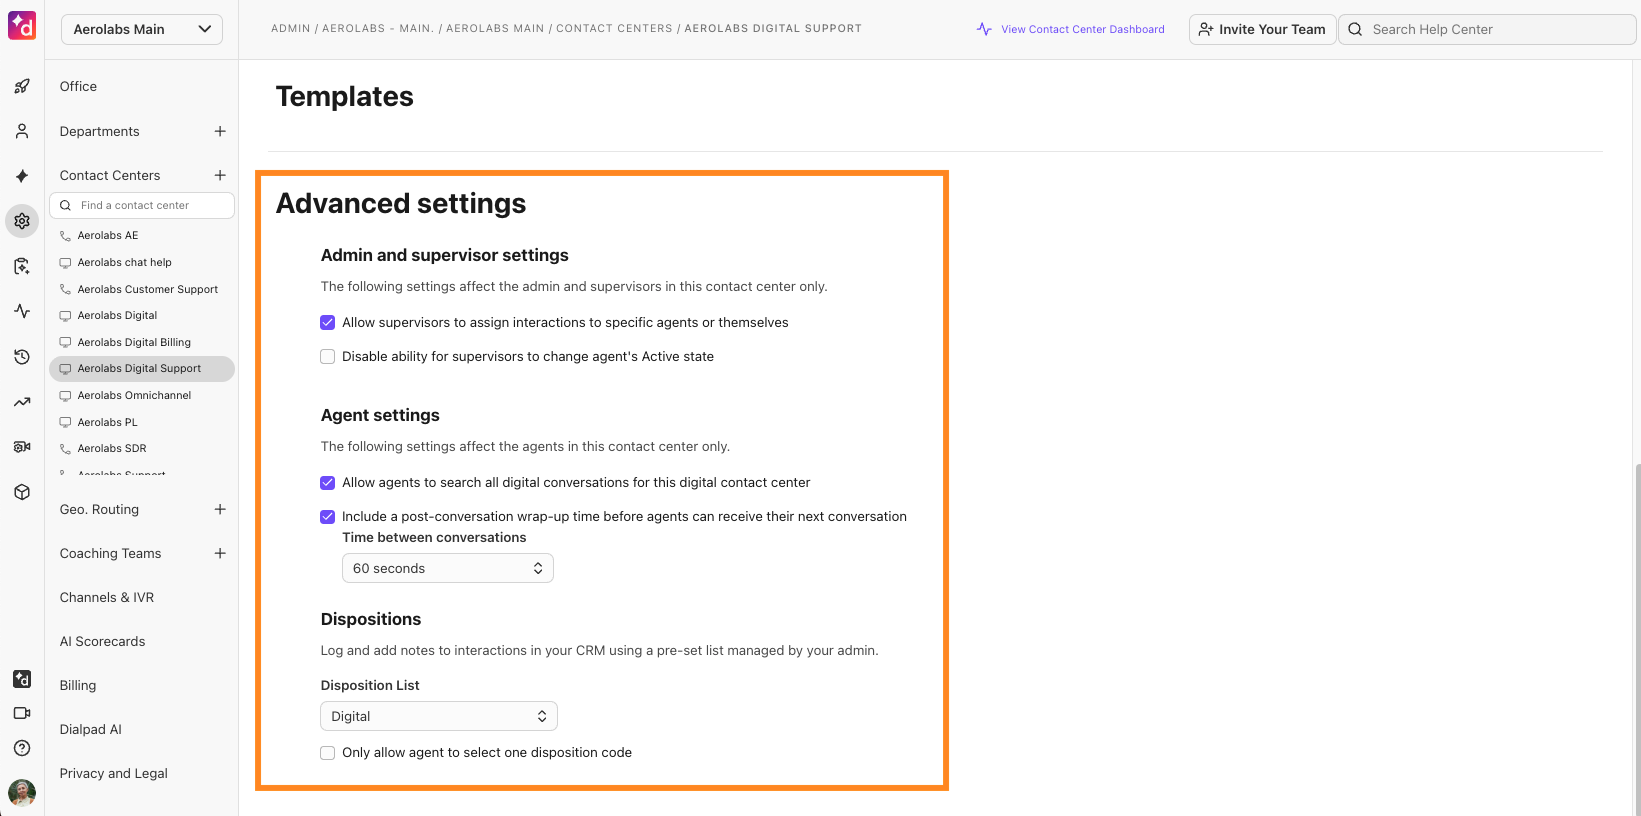
Check the box beside the setting(s) you want to apply
Early Adopter Program Feature
The ability to allow agents to search all digital conversations within a Digital Contact Center is currently in an Early Adopter Program. Please contact Customer Care to enable this feature.
Frequently asked questions
Can I control the number of sessions an agent can handle at once?
Absolutely! To set the maximum number of sessions an agent can have simultaneously, go to your Global Contact Center Settings.
Navigate to Digital Settings > Agent Sessions Limit
In the text box, enter the maximum number of active sessions you’d like your agents to handle at once

This limit is Company-wide, meaning it will apply to all Offices and Digital Contact Centers within your Company.
Tip
To remove the session limit, check the box beside ‘Allow unlimited sessions’.