Give your agents AI-powered answers on demand! With Dialpad's AI Assistant, agents receive instant and highly accurate answers from connected knowledge bases using advanced Generative AI — without needing to switch browsers or apps. With built-in analytics, supervisors can identify which questions customers ask most frequently and pinpoint gaps in documentation and agent knowledge.
With faster resolution times and improved customer interactions, it's a win-win for both agents and customers alike.
Let's dive into the details.
Who can use this
AI Assistant is available on all Dialpad Support licenses and for Dialpad Sell users on a Premium plan. It's also available as a paid add-on.
Create an AI Assistant
To create an AI Assistant, go to your Dialpad Admin Settings.
Note
You must be a Company or Office Admin to create an AI Assistant.
Select Dialpad AI > AI Assistants
Select Create AI Assistant

Name the AI Assistant
Note
Your AI Assistant’s name is for internal purposes only; it’s not the name the bot will refer to itself in conversations with your agents.
Name your AI Assistant and company
Choose the AI Assistant’s knowledge base and default language
Note
You can have more than one knowledge base.
You can only have one default language.
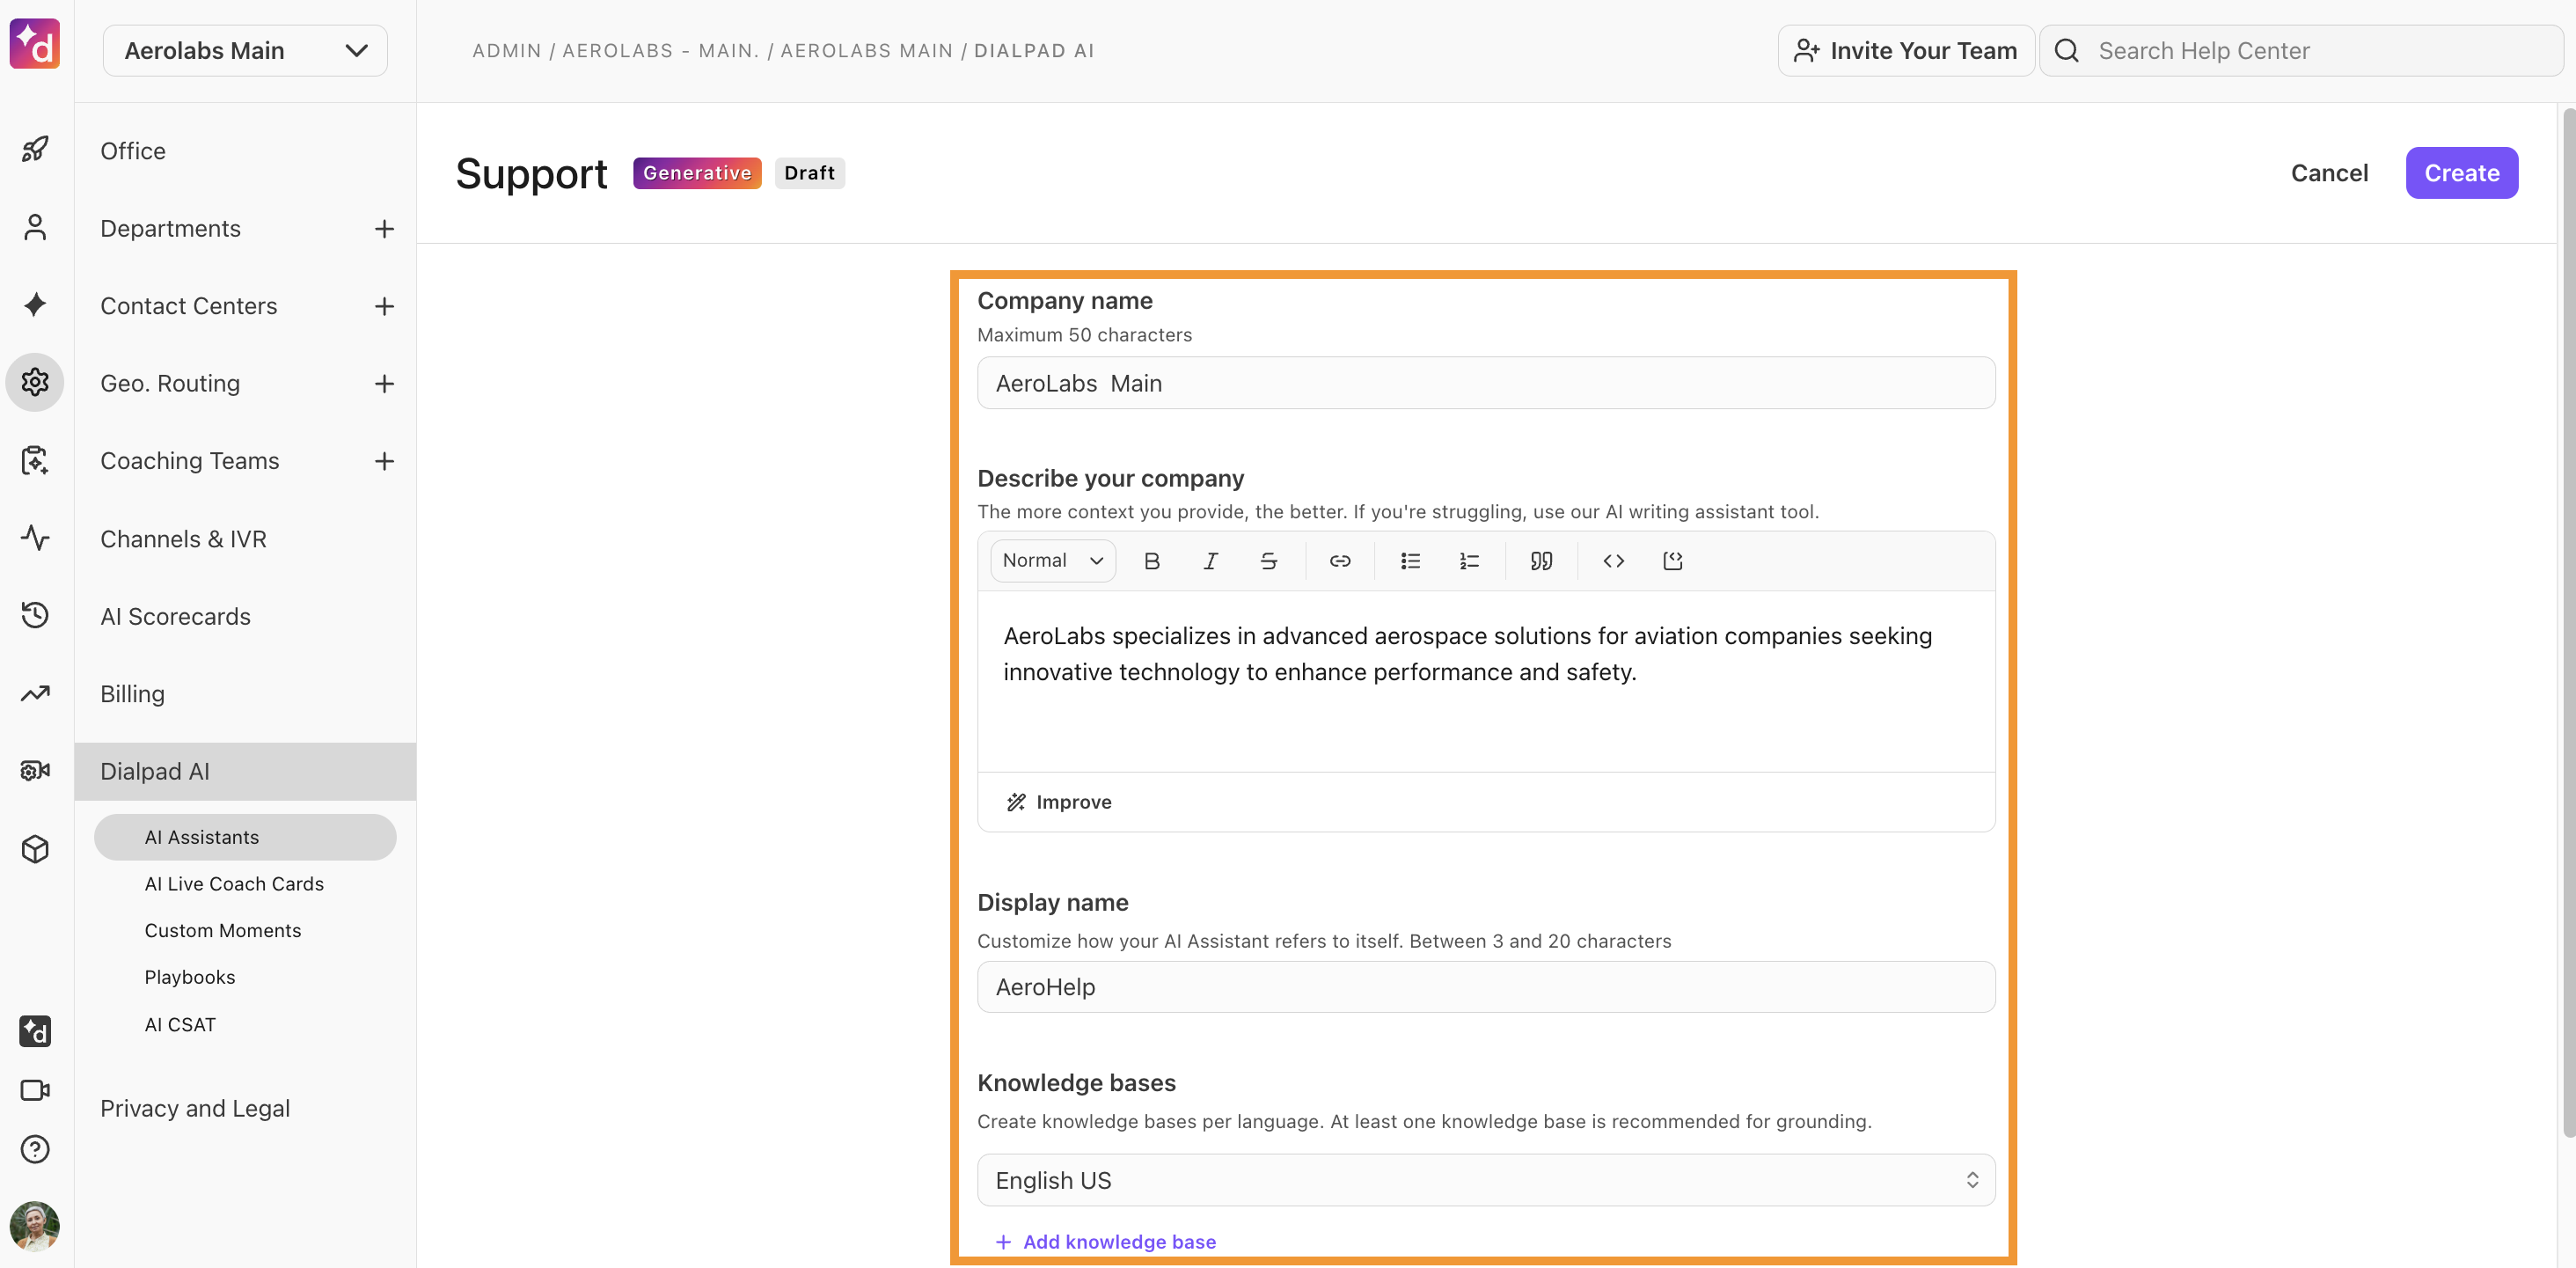
Select the Show sources option if you want to show the sources used by the AI Assistant to generate its answers
Select Create
That’s it! Your new AI Assistant is ready to be connected to your knowledge base and/or website(s).
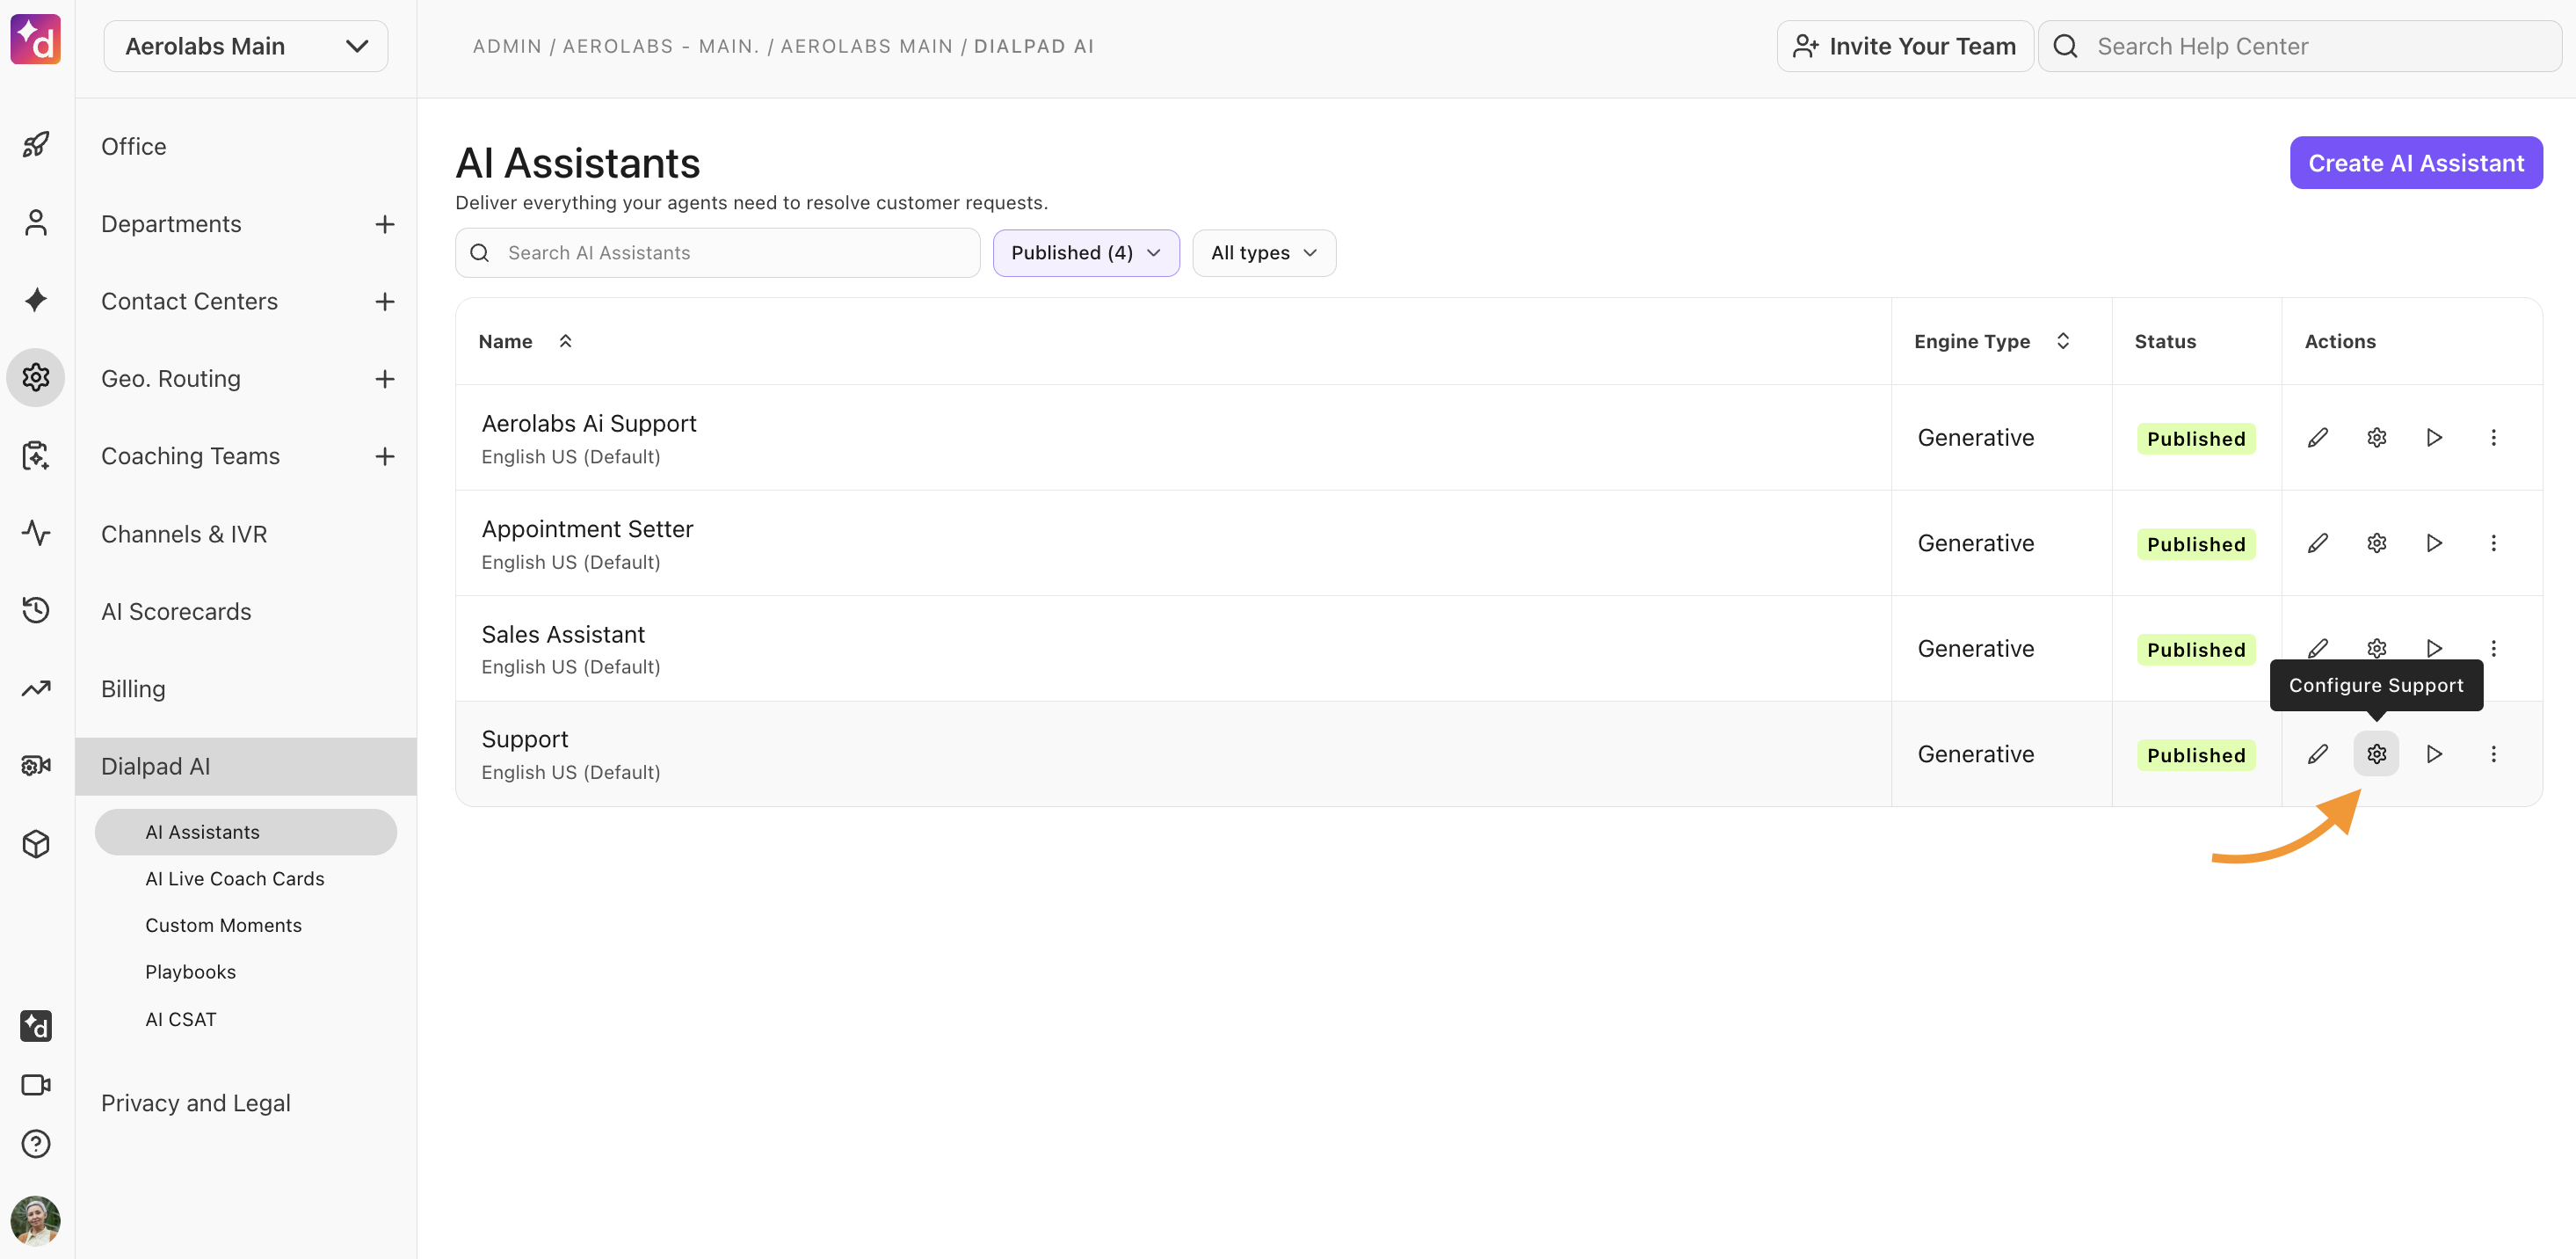
Tip
You can update these settings at any time by selecting the gear icon.
Add knowledge to an AI Assistant
Now that your AI Assistant has been created, it's time to equip it with knowledge by connecting relevant sources. This could be an internal knowledge base, a public-facing Help Center, or any external website.
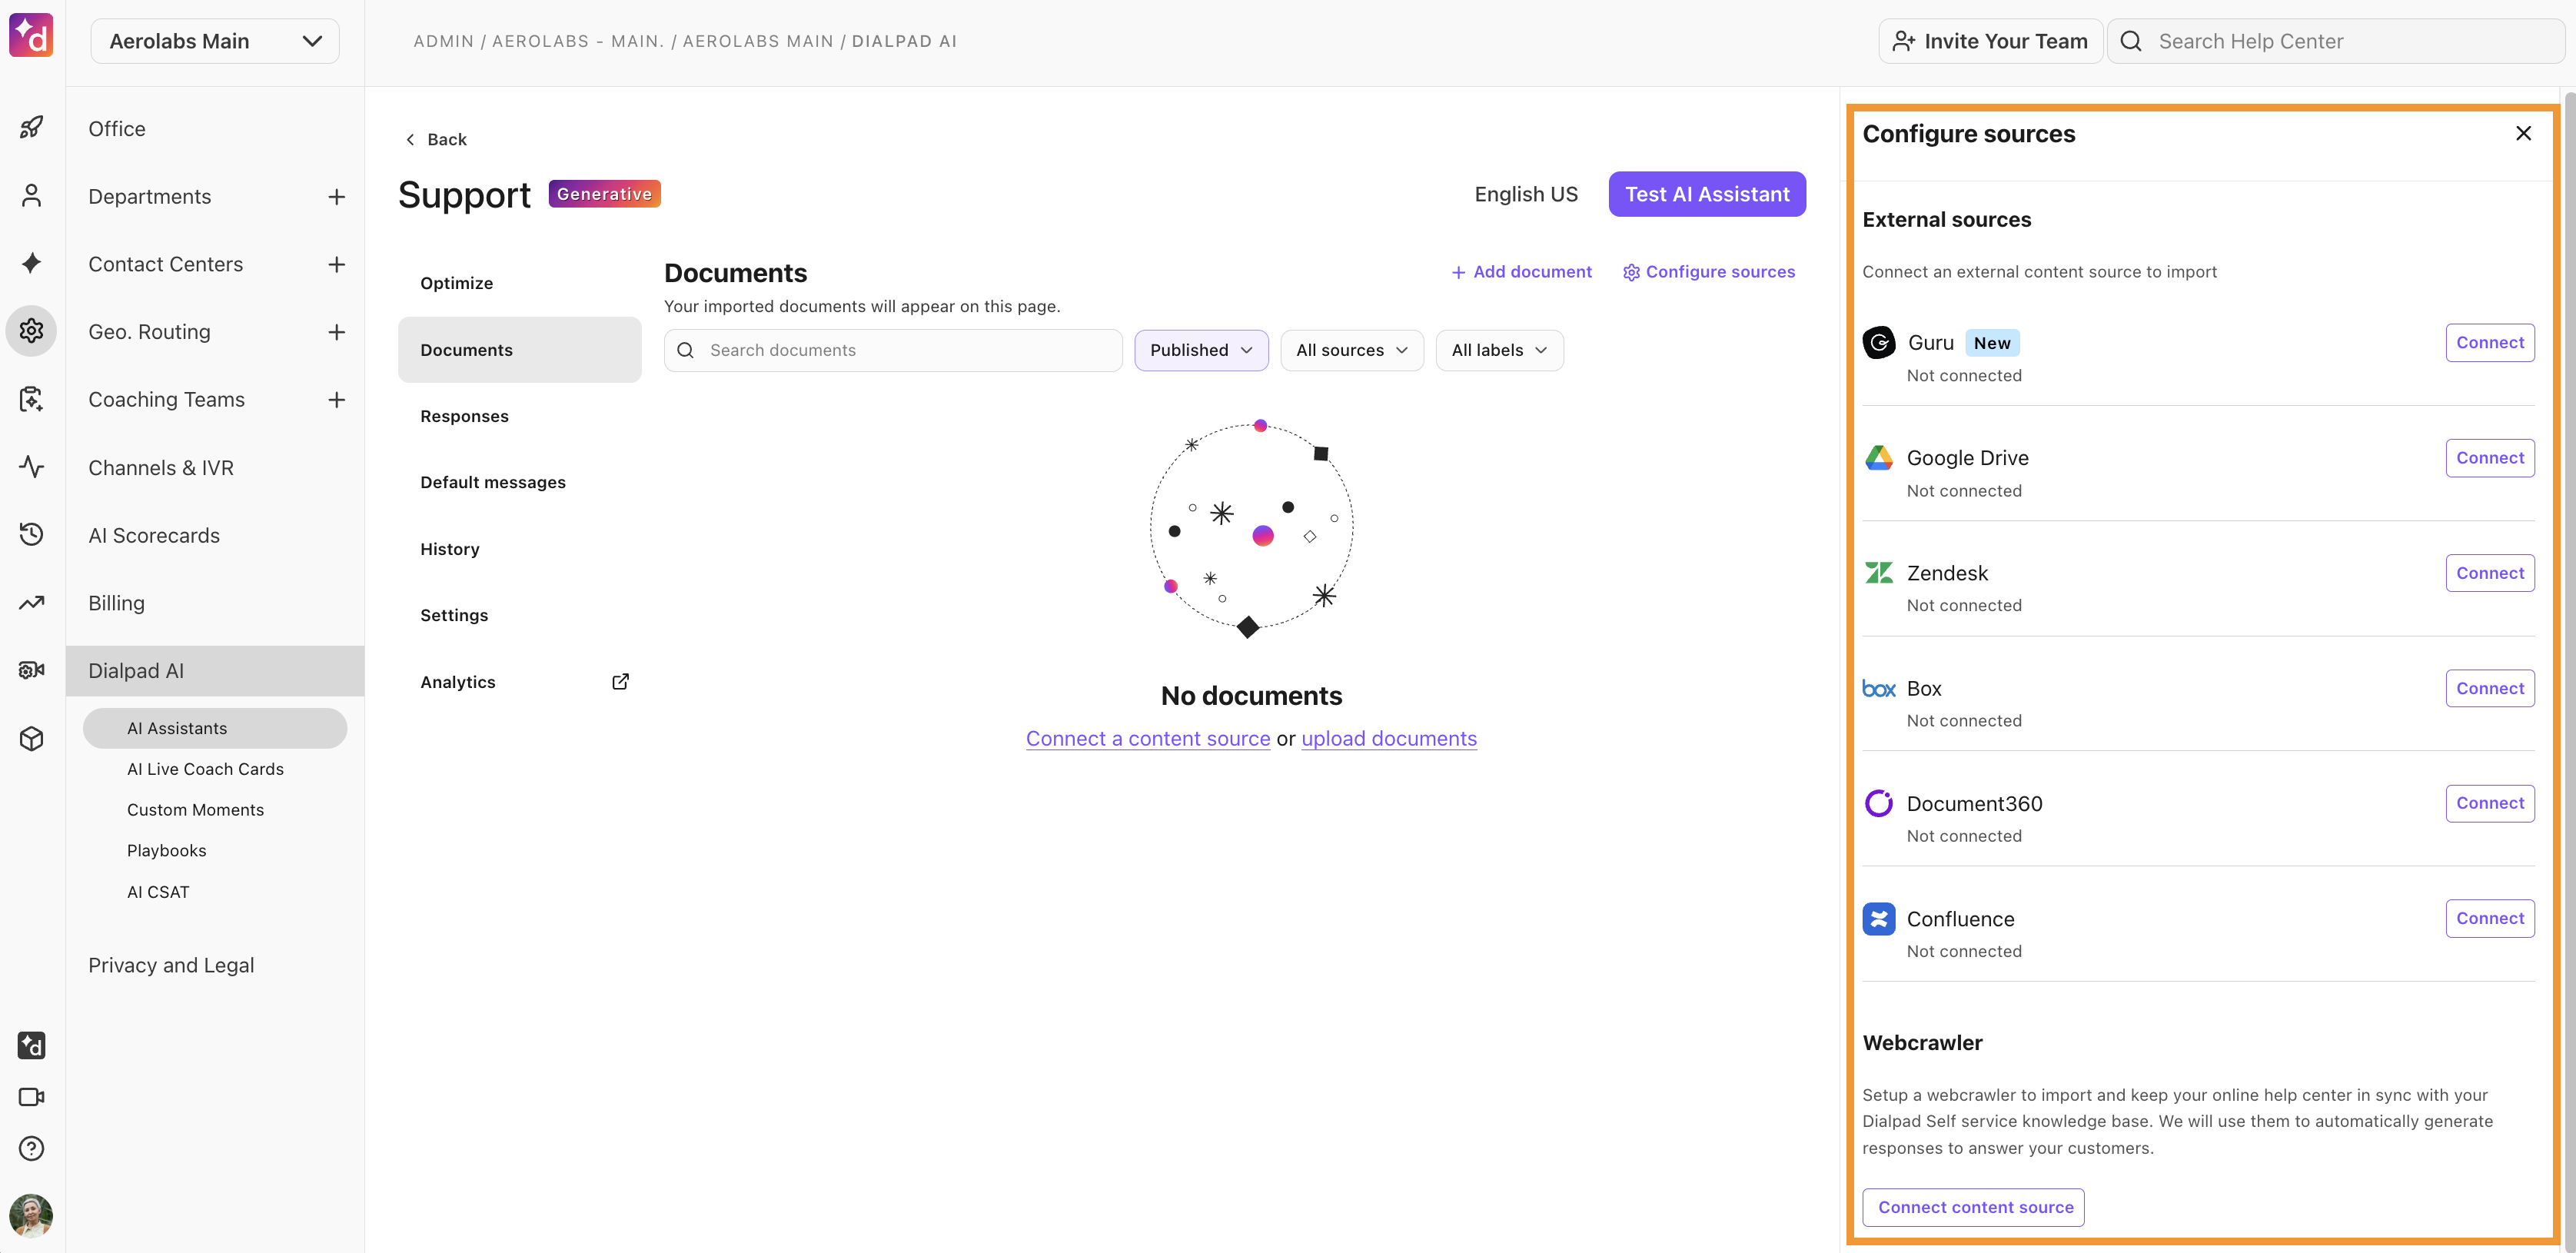
AI Assistants can sync with the following content management platforms:
Zendesk
Guru
Document360
Box
Google Drive
Note
You must select a specific folder, not the entire drive.
Google Docs, PDF, HTML, TXT, and MD files are supported.
These knowledge connectors sync every 12 hours, so if you update an article in your Help Center, the chatbot’s connected knowledge will update automatically.
You can also use our custom web crawler to add content from any website.
Webcrawler configuration
When using a custom webcrawler, you can crawl selected pages or the entire website.
If crawling only specific pages, you’ll need to configure these details:
Base URL | The root of the website that will be crawled (this will act as the reference point for the entire domain). |
Starting Pages | The specific entry points for the crawling process. They are the actual URLs where the crawling starts, but not necessarily the root of the website.
|
Labels | Specify a label to be applied to each imported document. This can be useful for distinguishing documents from other sources (e.g. uploads). |
You can also customize your webcrawler using these advanced settings:
Ignore meta directives | Instruct the crawler to disregard <meta> tag directives such as robots="noindex, nofollow" that are normally used to control how search engines index and link to a page. |
Force crawl | Instead of relying on the sitemap to discover which pages to crawl, force crawl dynamically discovers the pages by fetching and processing every discoverable link, beginning with the starting pages. |
Use custom agent | Specifies a custom user agent string.
|
CSS selector | Use a custom CSS selector to specify what content to scrape from each page.
|
Note
If you’re using the custom webcrawler, you must have legal rights to use the crawled and imported content from all linked websites.
Not limited to websites, you can also upload helpful documents! Documents don’t sync with Dialpad, meaning that if you update your file, you must remove the old version and upload the newest one.
To add knowledge to your AI Assistant, go to your Dialpad Admin Settings.
Select Dialpad AI > AI Assistants
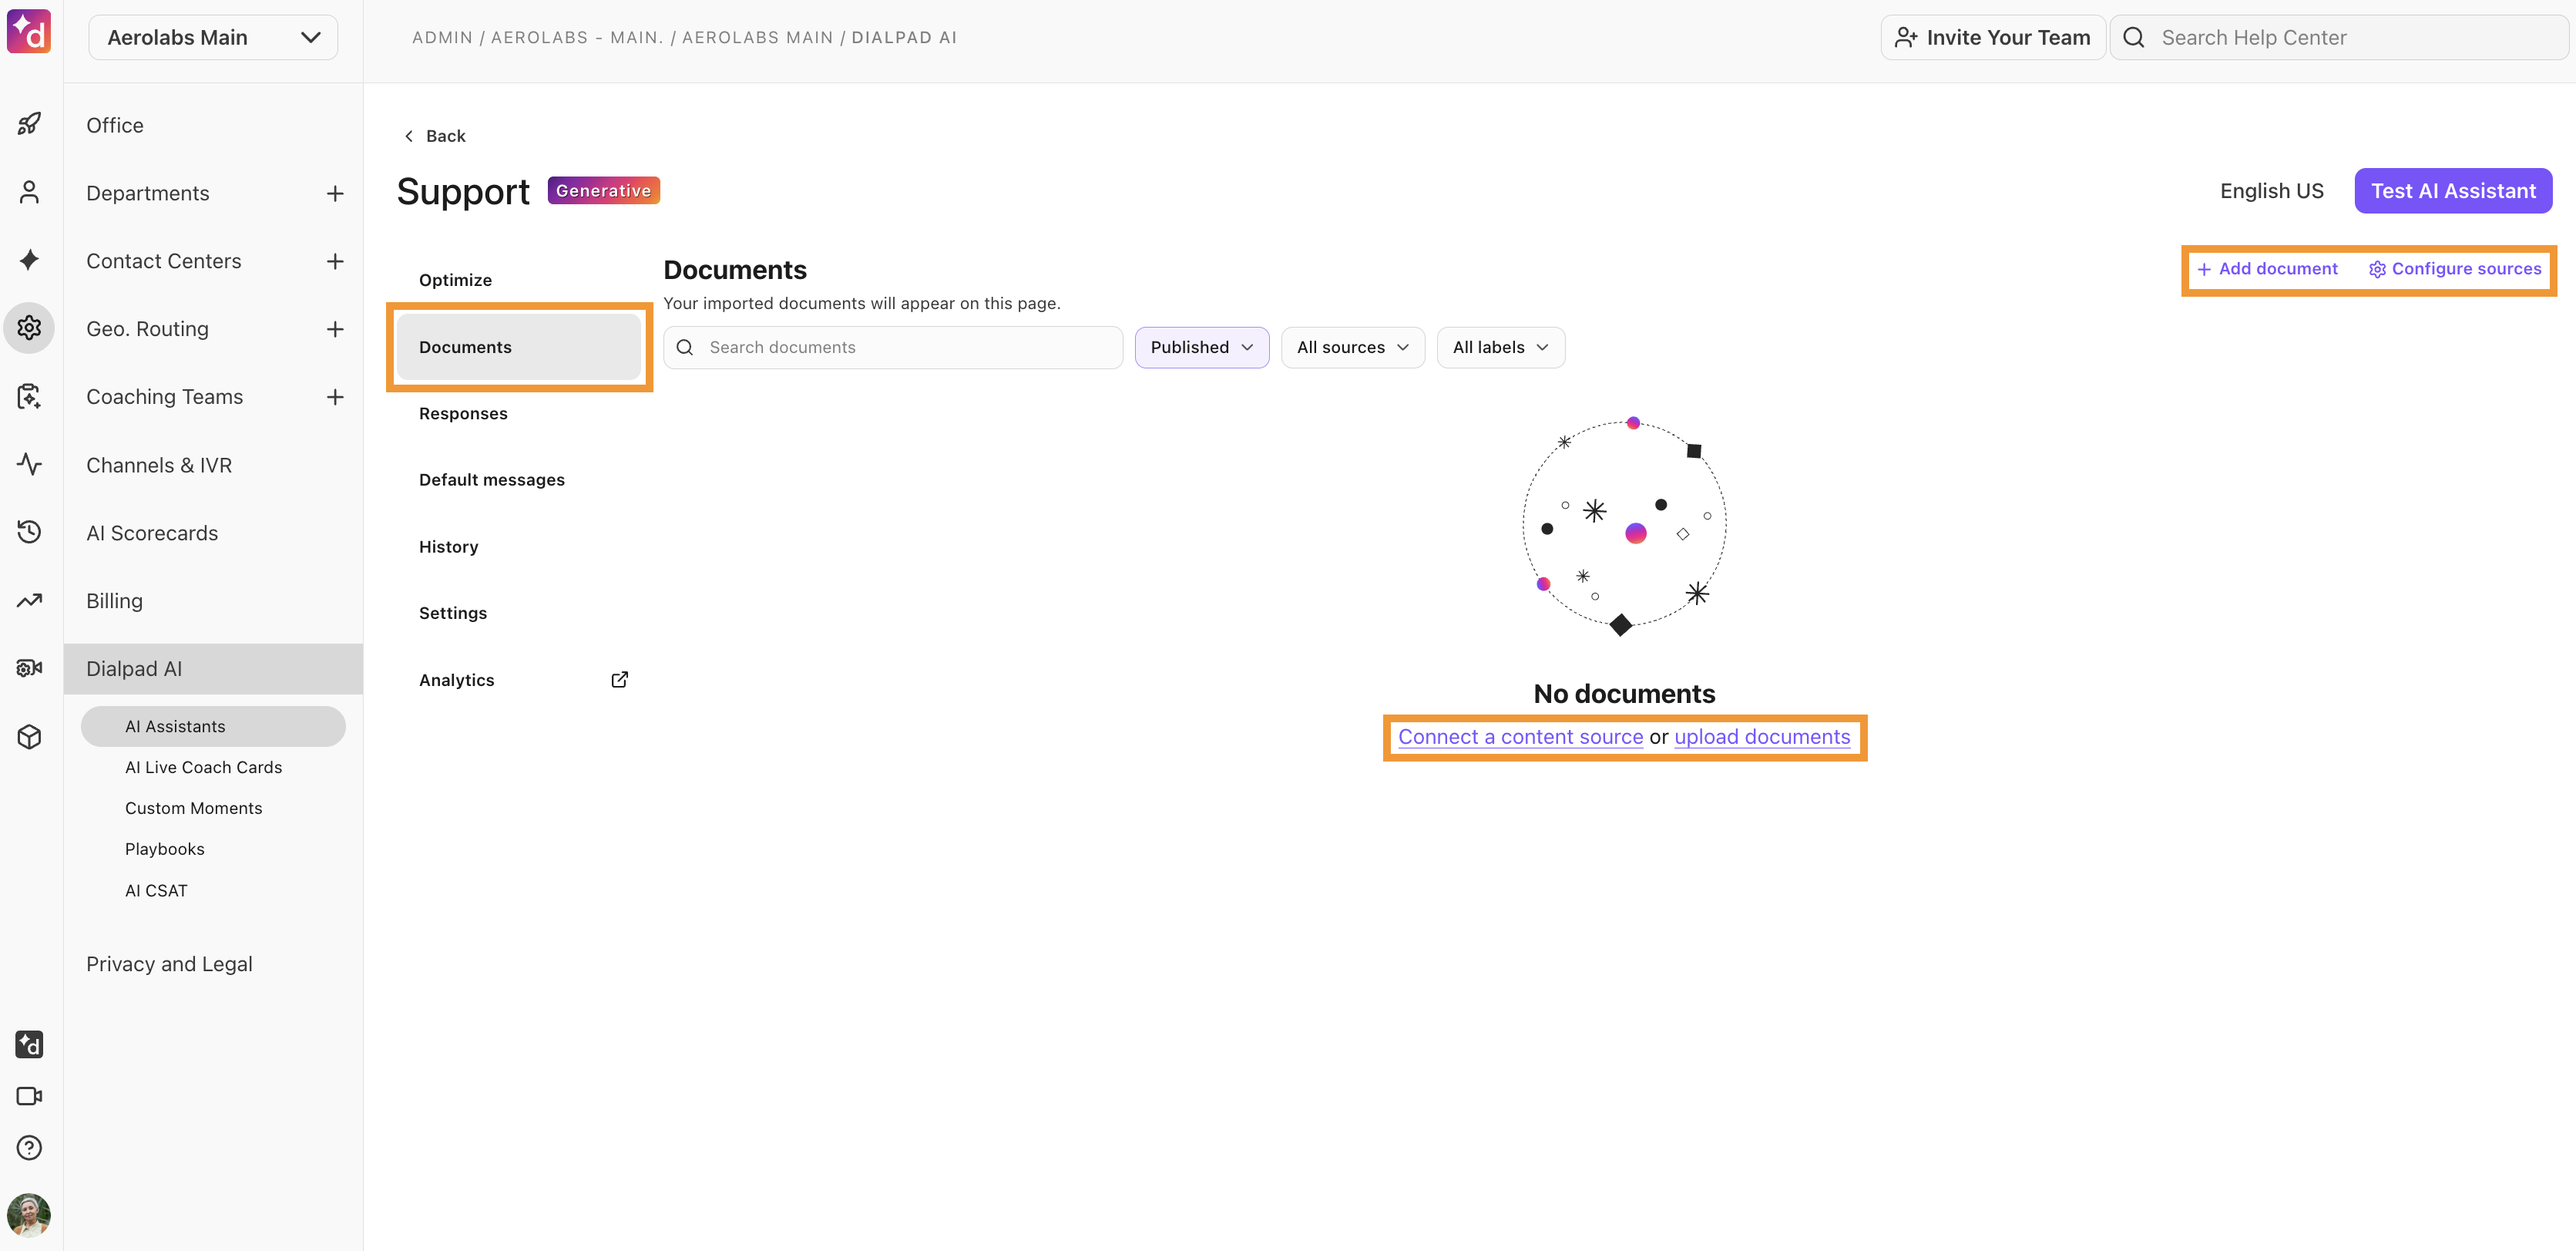
Select the desired AI Assistant
Navigate to the Documents tab and select Configure sources
Navigate to your desired option and select Connect
Note
If you’re connecting to a content management system, you’ll need to provide additional details such as your domain, API key, or locale.
Follow the prompts, then select Save
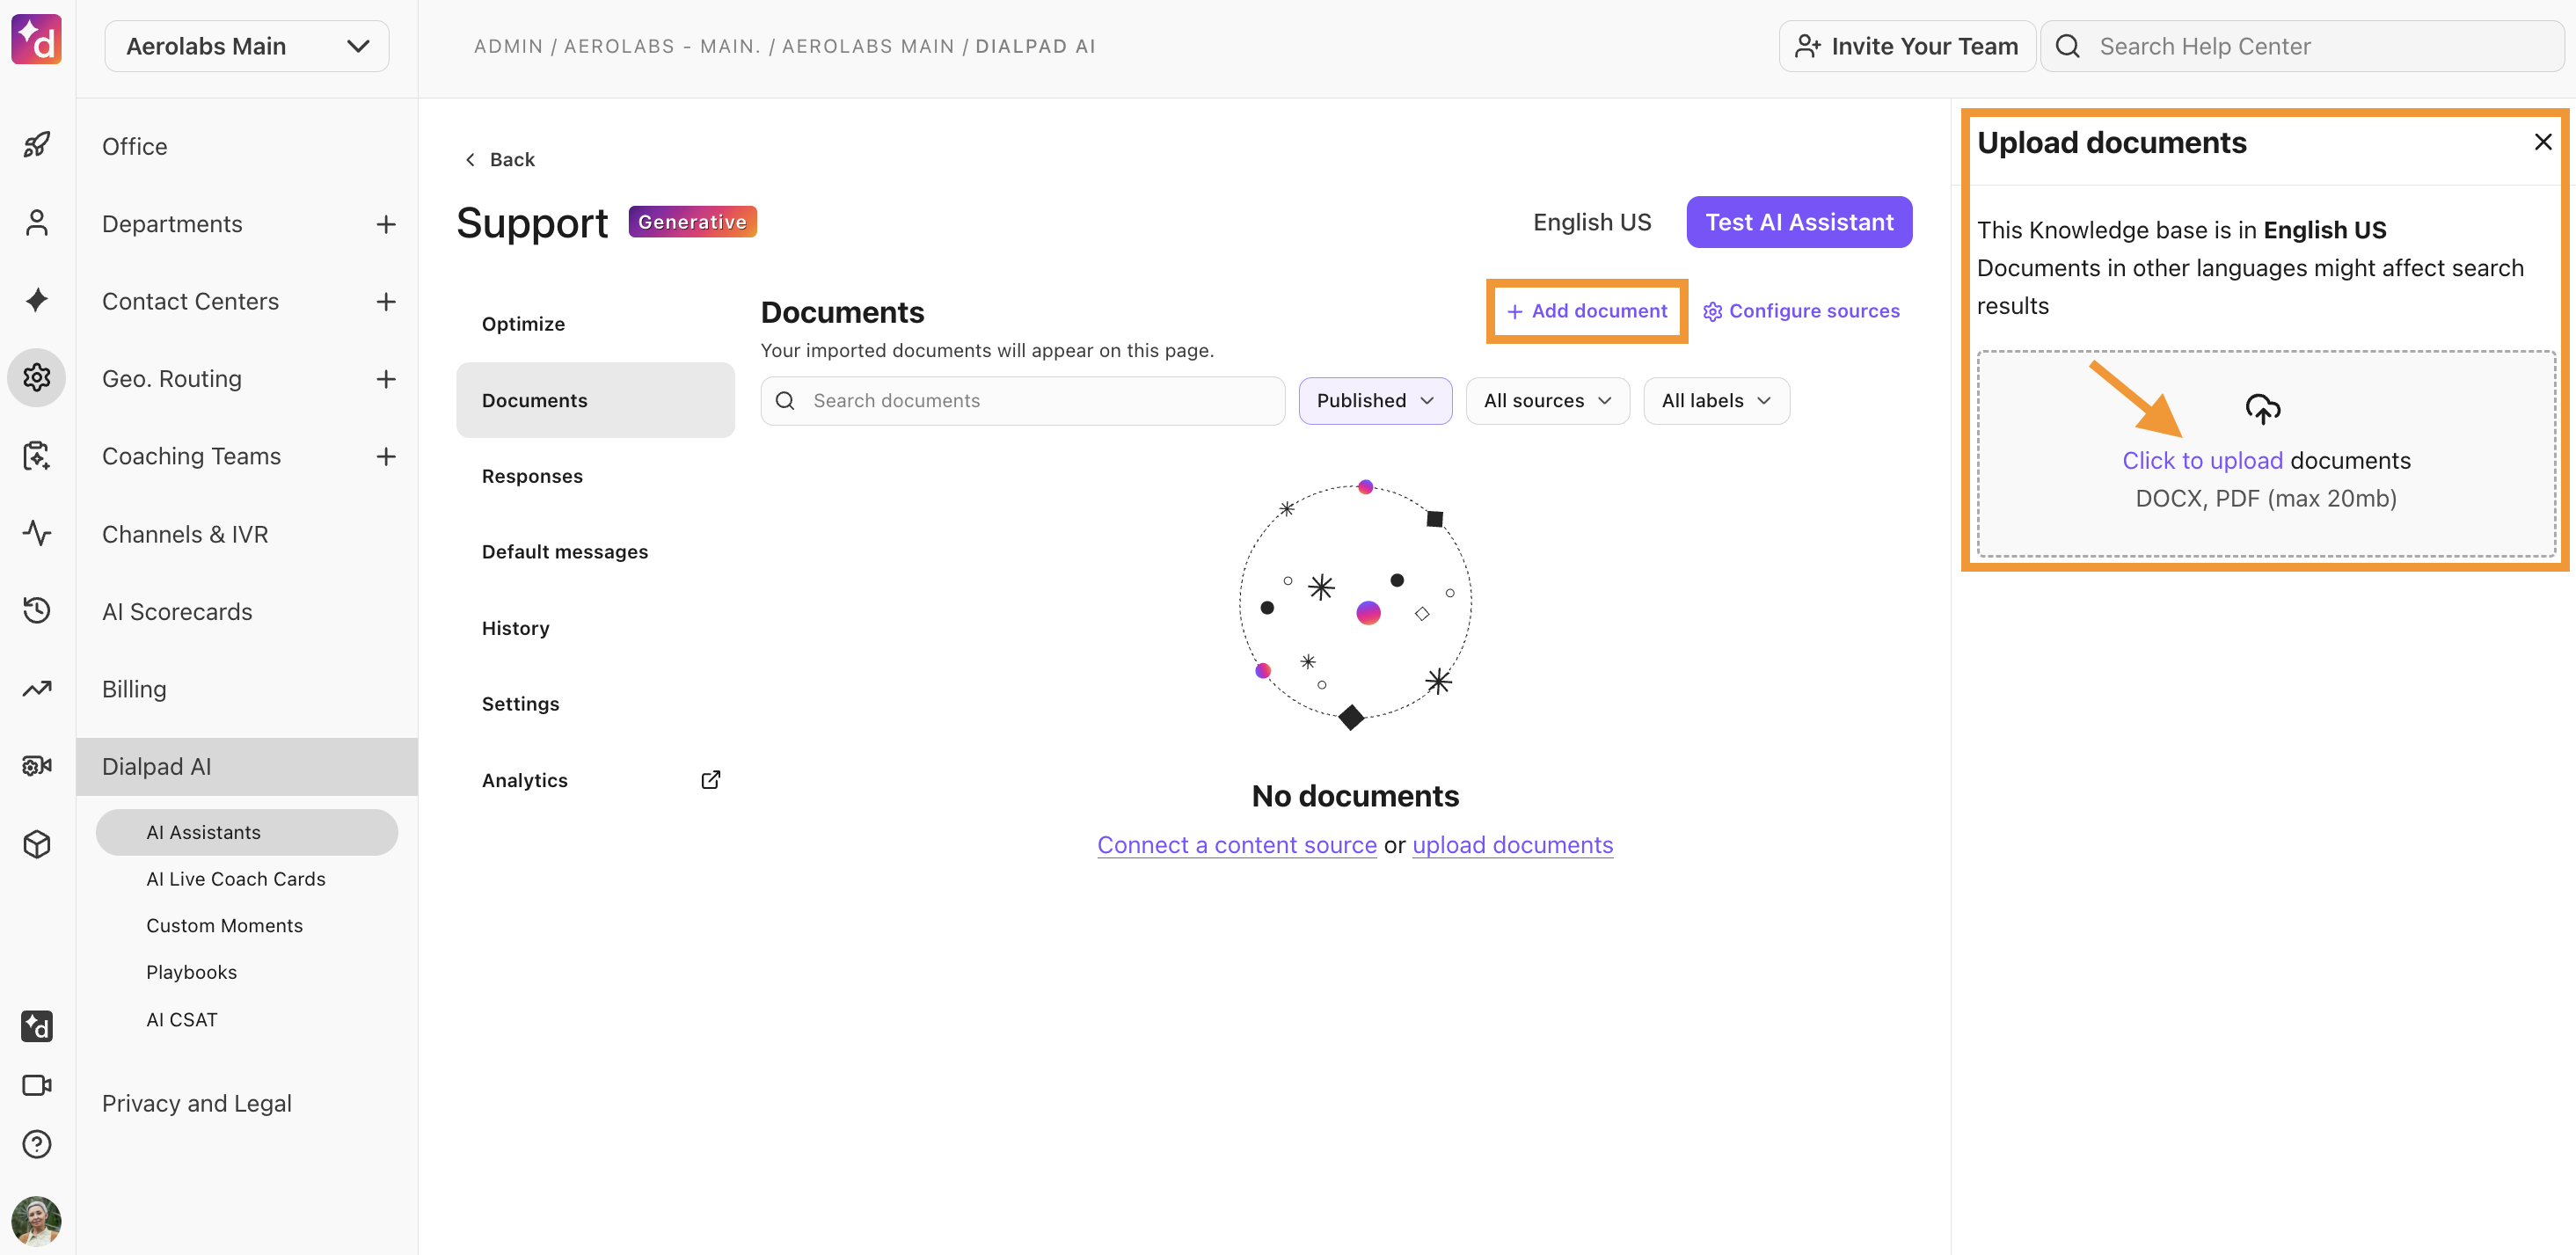
Want to upload individual documents?
Select Upload to add unique files.
*Individual documents cannot be larger than 5 MB.
Response types
Create unique responses to guide your users to specific information. The chatbot uses these responses when a customer's question matches the training questions you provide.
Responses are located in the Responses tab of your AI Assistant Admin Settings.
Dialpad offers 4 different types of responses:
Text-only: Custom phrases written directly in the text editor.
Includes basic formatting and inbound links.

Rich Media: Custom phrases written in the text editor, accompanied by image or video content.
Max upload size: 5 MB
JPEG, PNG, or GIF
Upload or embed functionality (must be publicly available)

Call to Action: A responsive button that directs the user to a specific website.
Be sure to enter the complete URL, including https://

Choice: A menu linking 2 or more responses.
We recommend linking no more than 10 responses in one choice menu.

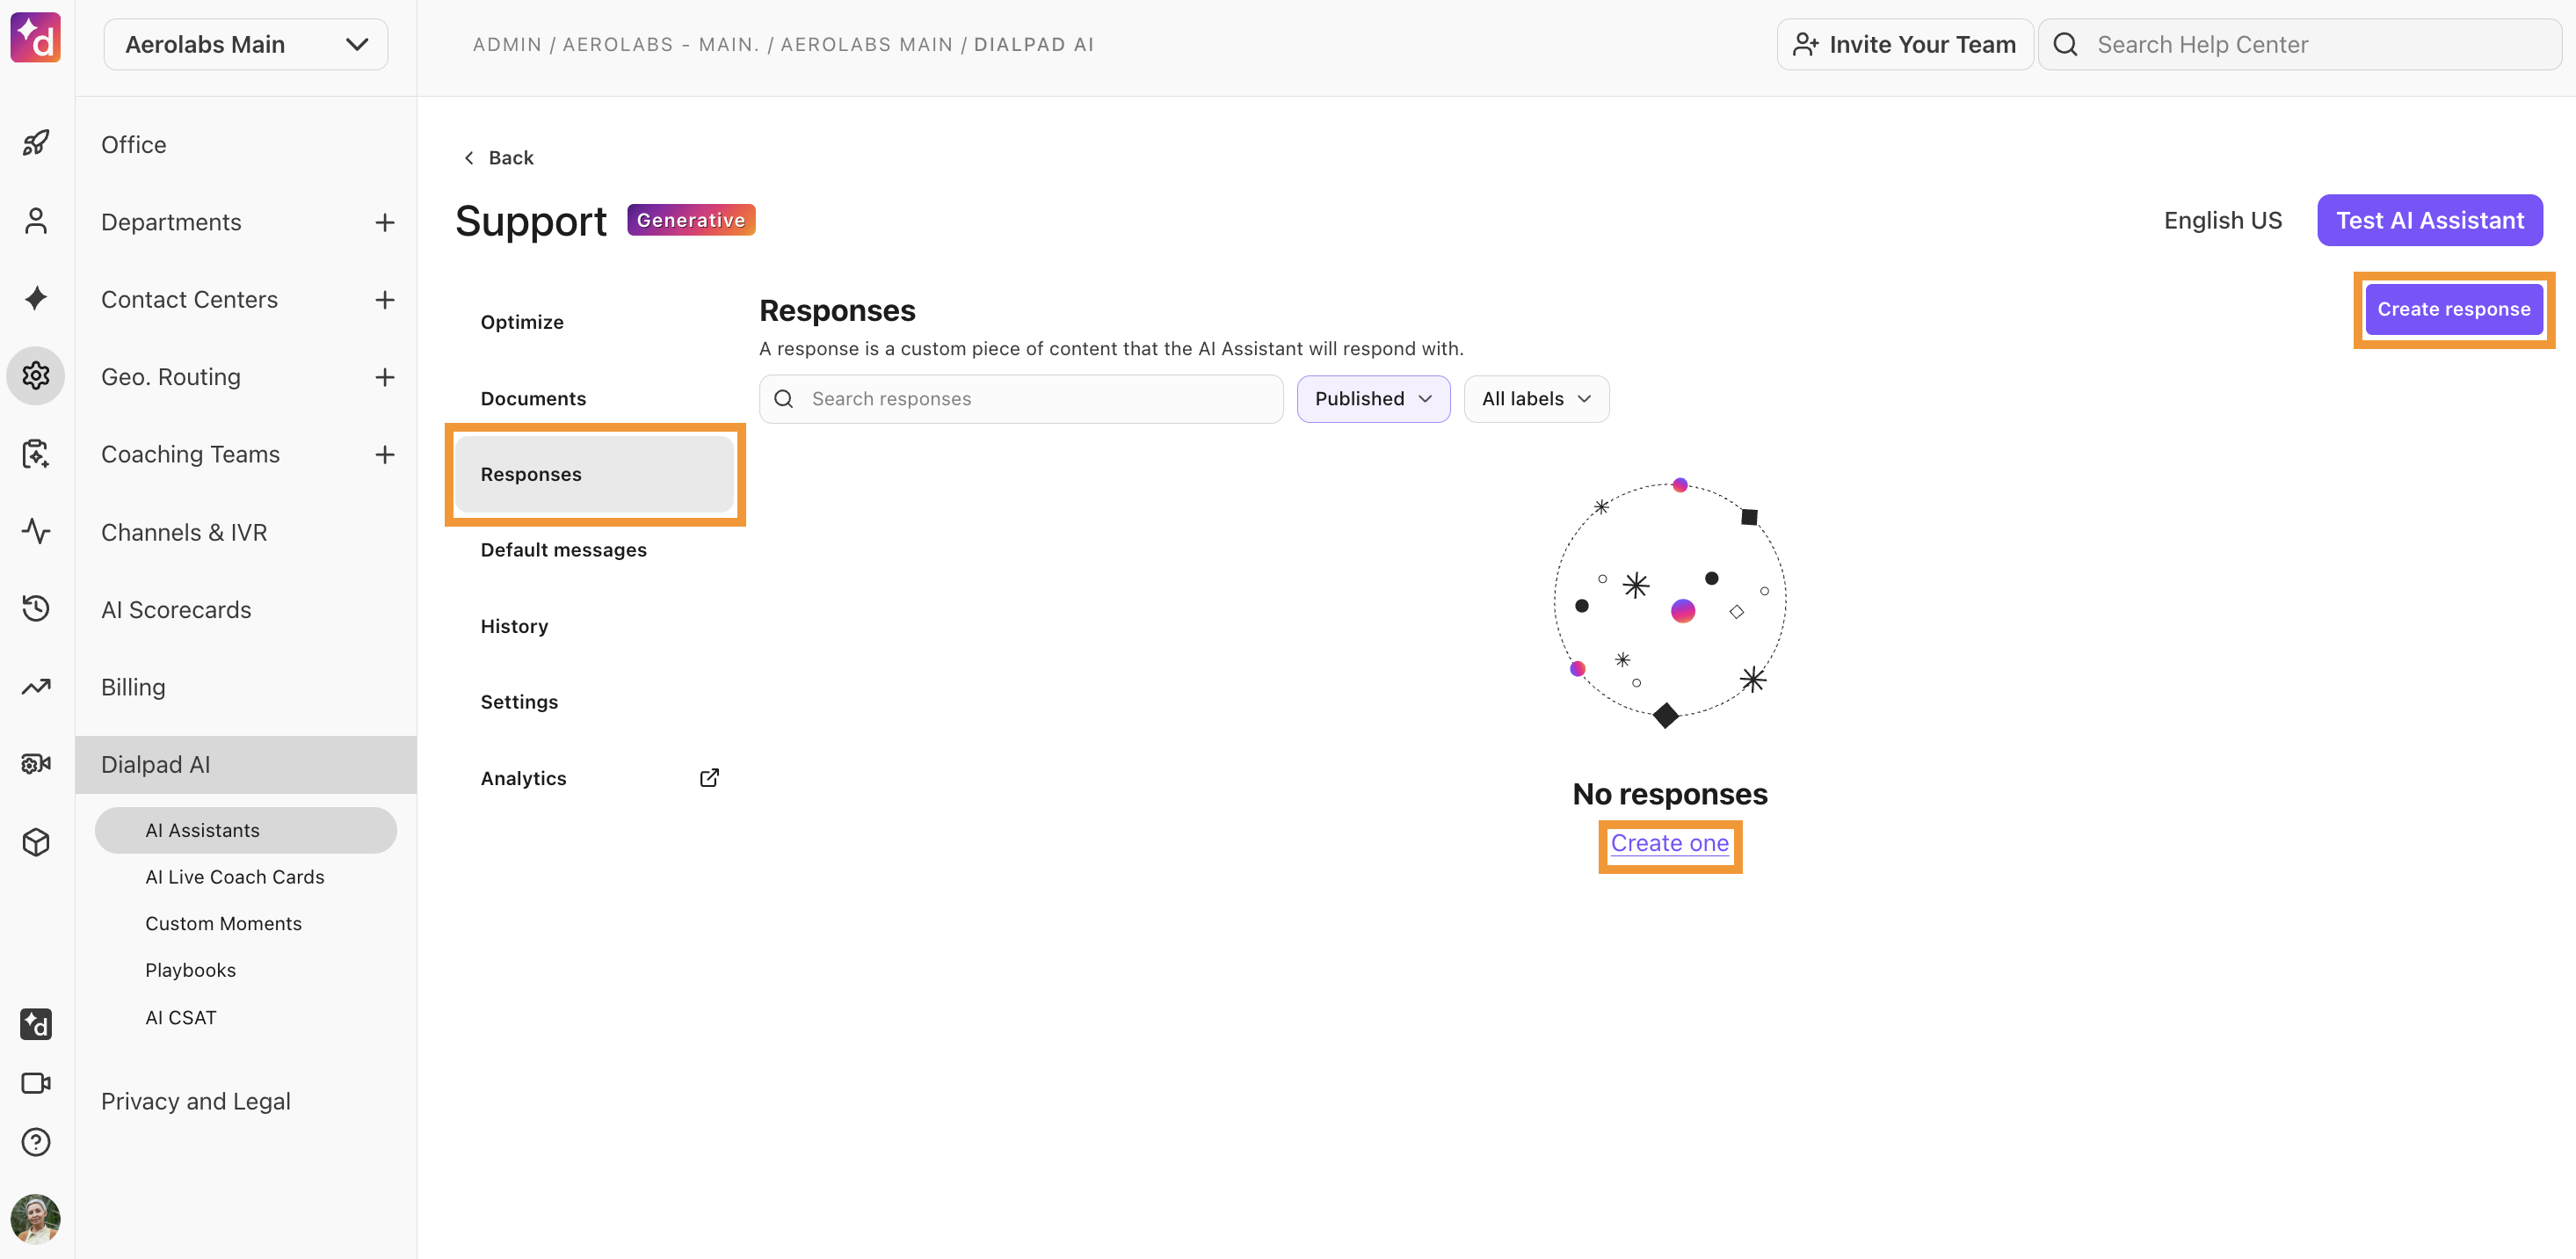
Create a response
To create a response, navigate to the Responses tab.
Select Create response
Name the response
Note
The response name should match the question.
Select Create
Choose the desired response type

Add a minimum of 5 trigger words and phrases
Add labels (optional, but strongly recommended)
Select Save as draft, or Publish
.png)
*Responses are not visible to end-users until published
Best practices
Use at least 3 labels per response.
Match the response title to a trigger phrase and use a variety of trigger phrases for each response.
Less is more — be economical with copy.
Avoid duplicating by searching for existing responses before creating a new one.
Default messages
Default messages are automated responses presented to users based on specific behavior.
Dialpad offers 4 types of default messages:
Welcome message | The first message that appears when the AI Assistant opens. |
No answer | The message that displays when the chatbot cannot find an answer. |
Positive feedback | The message that displays when a user gives a thumbs-up to an answer. |
Negative feedback | The message that displays when a user gives a thumbs down to an answer. |
To access your chatbot’s default messages, go to your AI Assistant Admin Settings.
Select Dialpad AI > AI Assistants
Choose the desired AI Assistant
Select Default messages
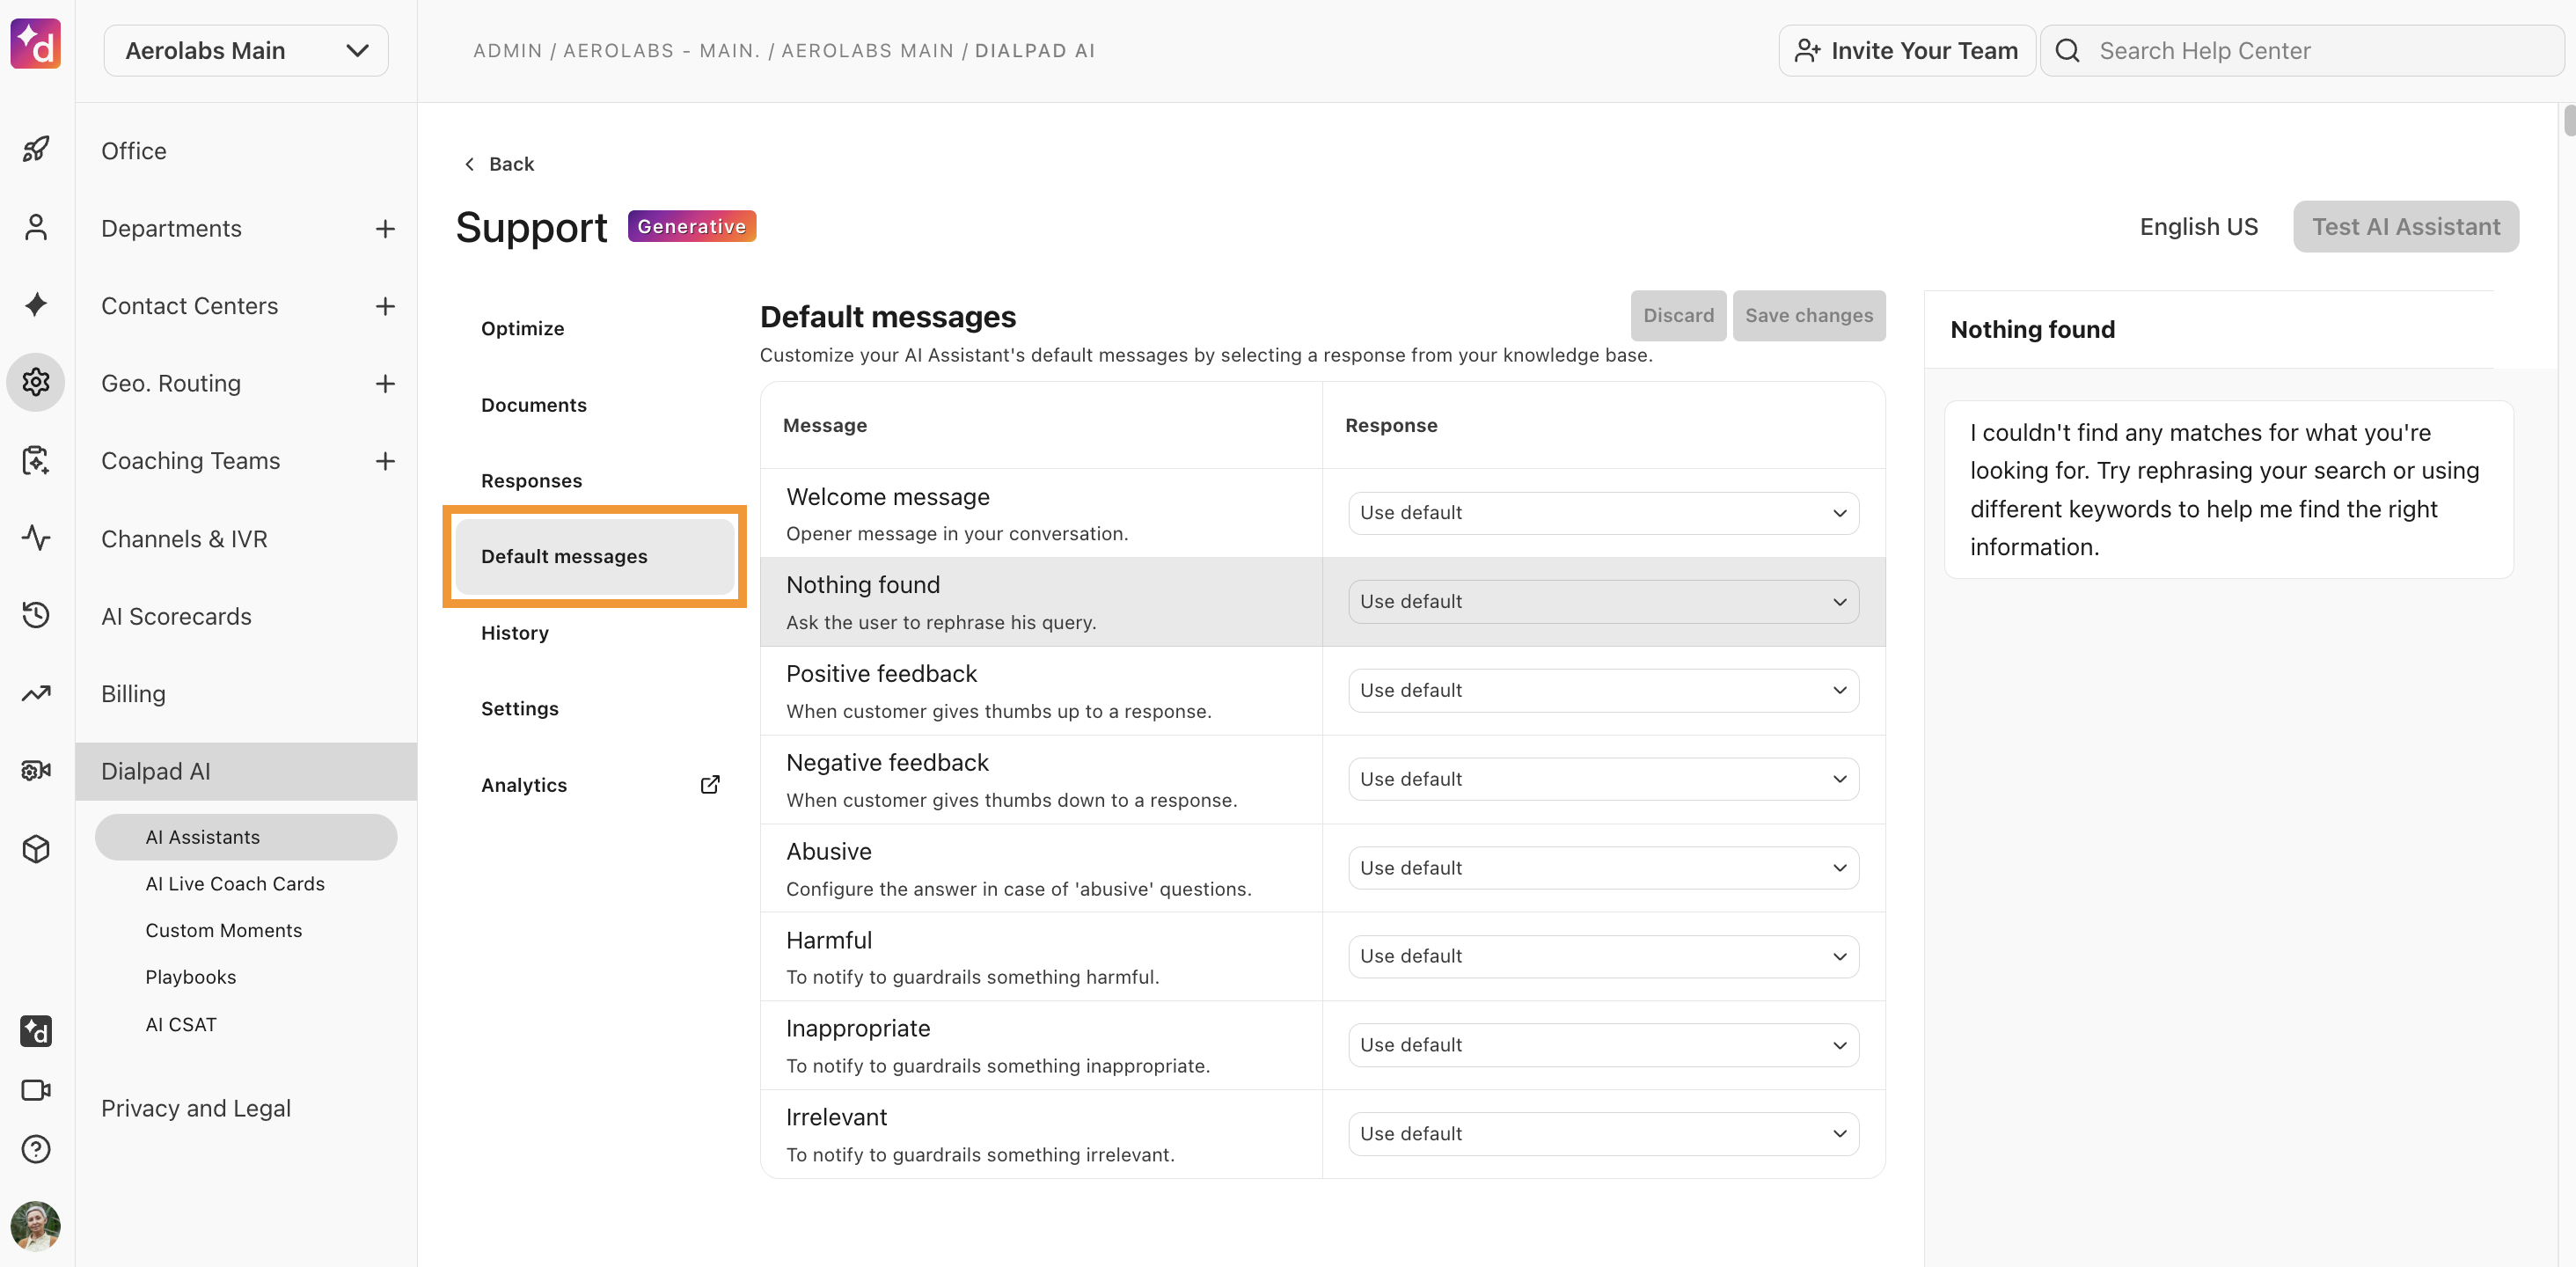
To change a default message:
Select the drop-down menu beside the default message
Choose the desired response
Select the response from the list, or search for the response name
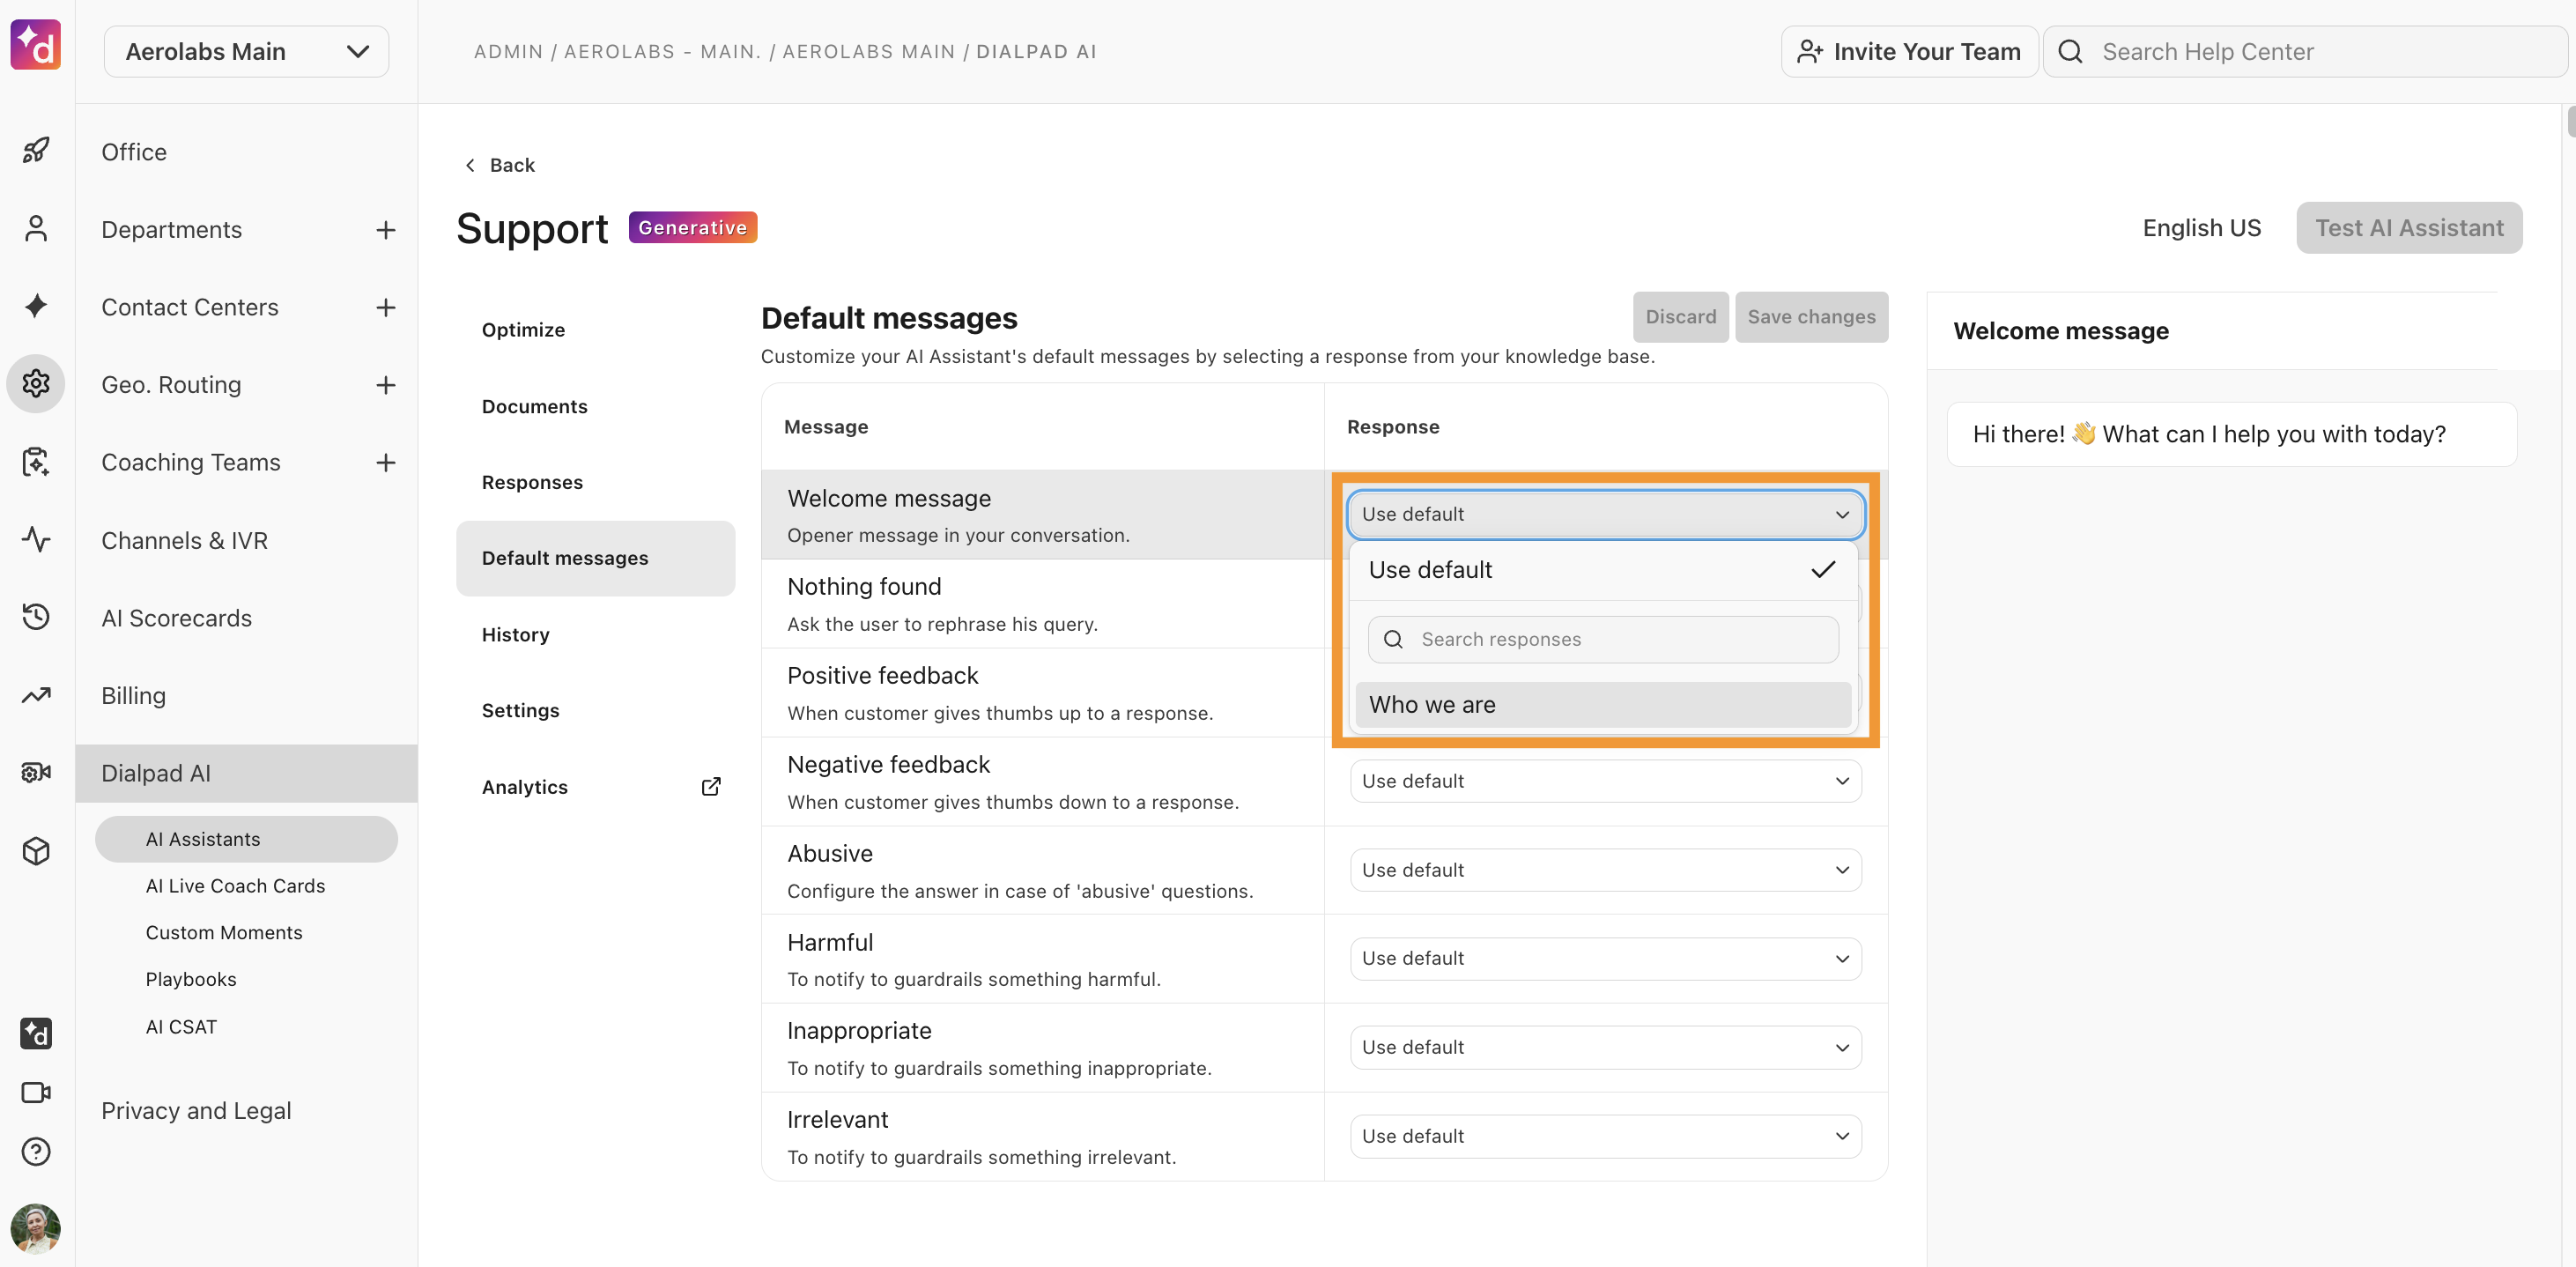
View the new response in the preview panel
Select Save changes
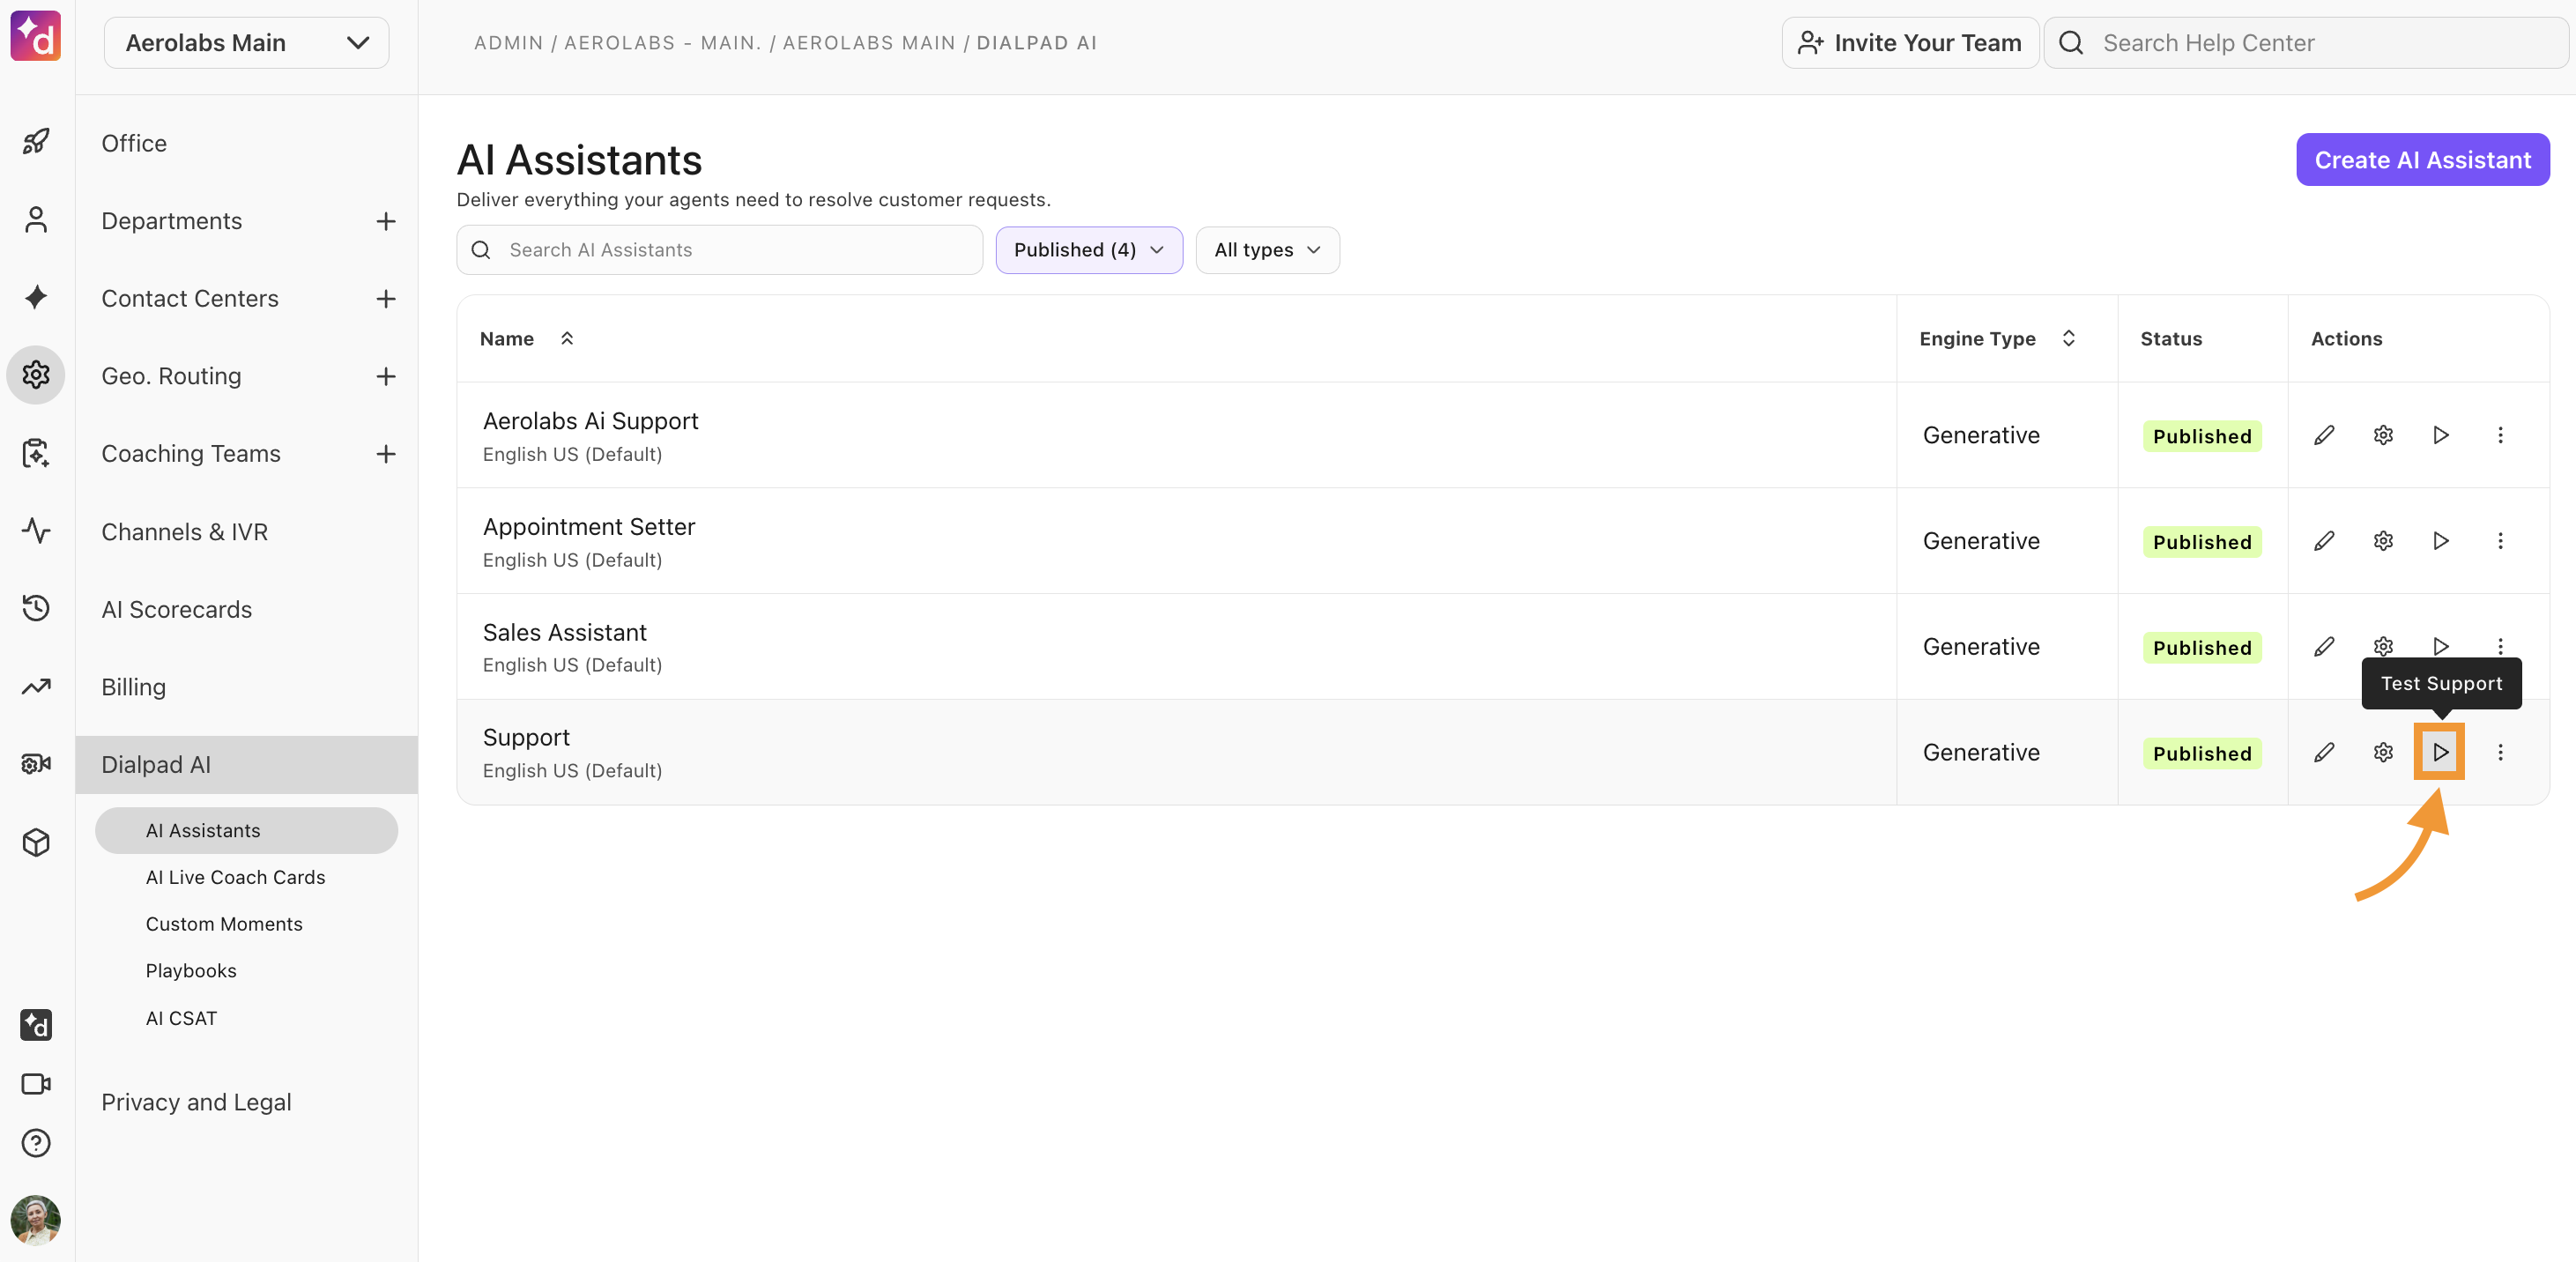
Test your chatbot
Quickly verify your chatbot’s responses using the Test Support feature.
To use the Test Support feature, go to your Dialpad Admin Settings.
Select Dialpad AI > AI Assistants
Navigate to the desired chatbot
Select the play button from the AI Assistant’s Actions column
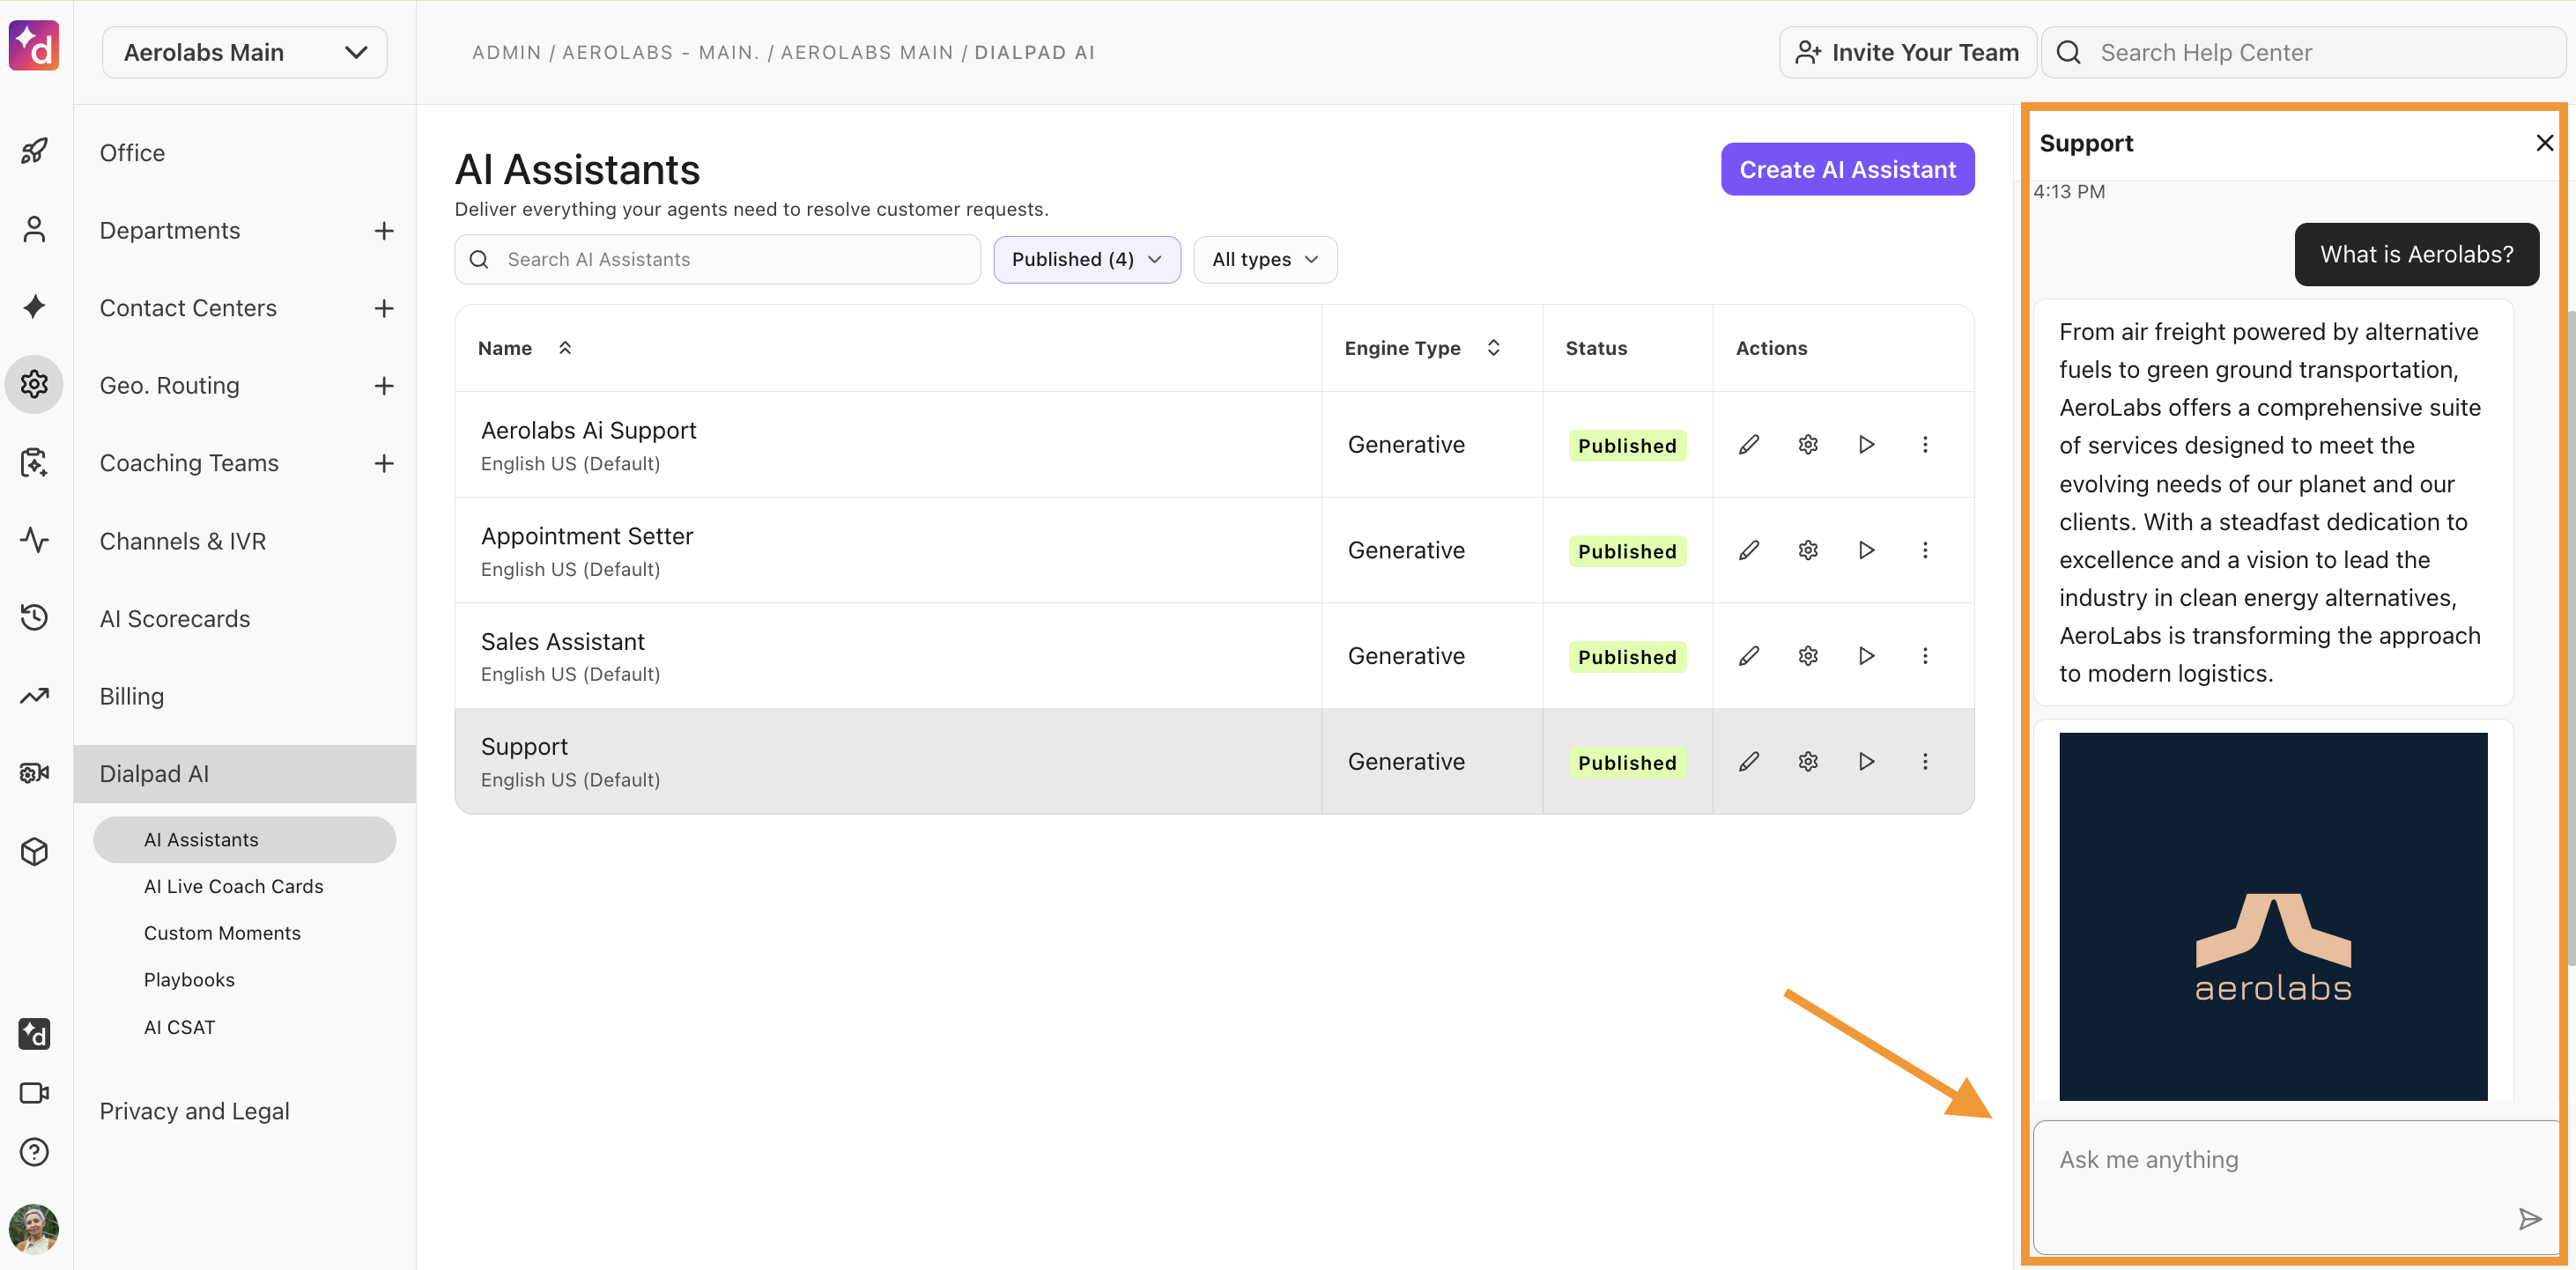
Enter the desired question and check your AI Assistant’s response
Connect the AI Assistant
Once your AI Assistant has been built and tested, it's time to connect it to your Contact Center so that agents can use it.
To connect an AI Assistant to your Contact Center, go to your Dialpad Admin Settings.
Navigate to Contact Centers and select the desired Contact Center
Navigate to AI Settings
Under AI Assistant, select the AI Assistant from the drop-down menu

Train your AI Assistant
Dialpad's Optimize features help you identify areas for improvement by quickly pinpointing unanswered chatbot questions, allowing you to fill knowledge gaps by updating or adding relevant content, and correcting broken or outdated responses.
To access our Optimize features, go to your Dialpad Admin Settings.
Select Dialpad AI > AI Assistants
Select the desired AI Assistant
Select the Optimize tab

In the Optimize section, you’ll find five different sections:
Unanswered questions
Broken content
Low confidence responses
Muted questions
Snoozed
Let’s go over each one.
Unanswered questions
The Unanswered questions section highlights knowledge gaps in your responses or website content by identifying customer questions your chatbot could not answer.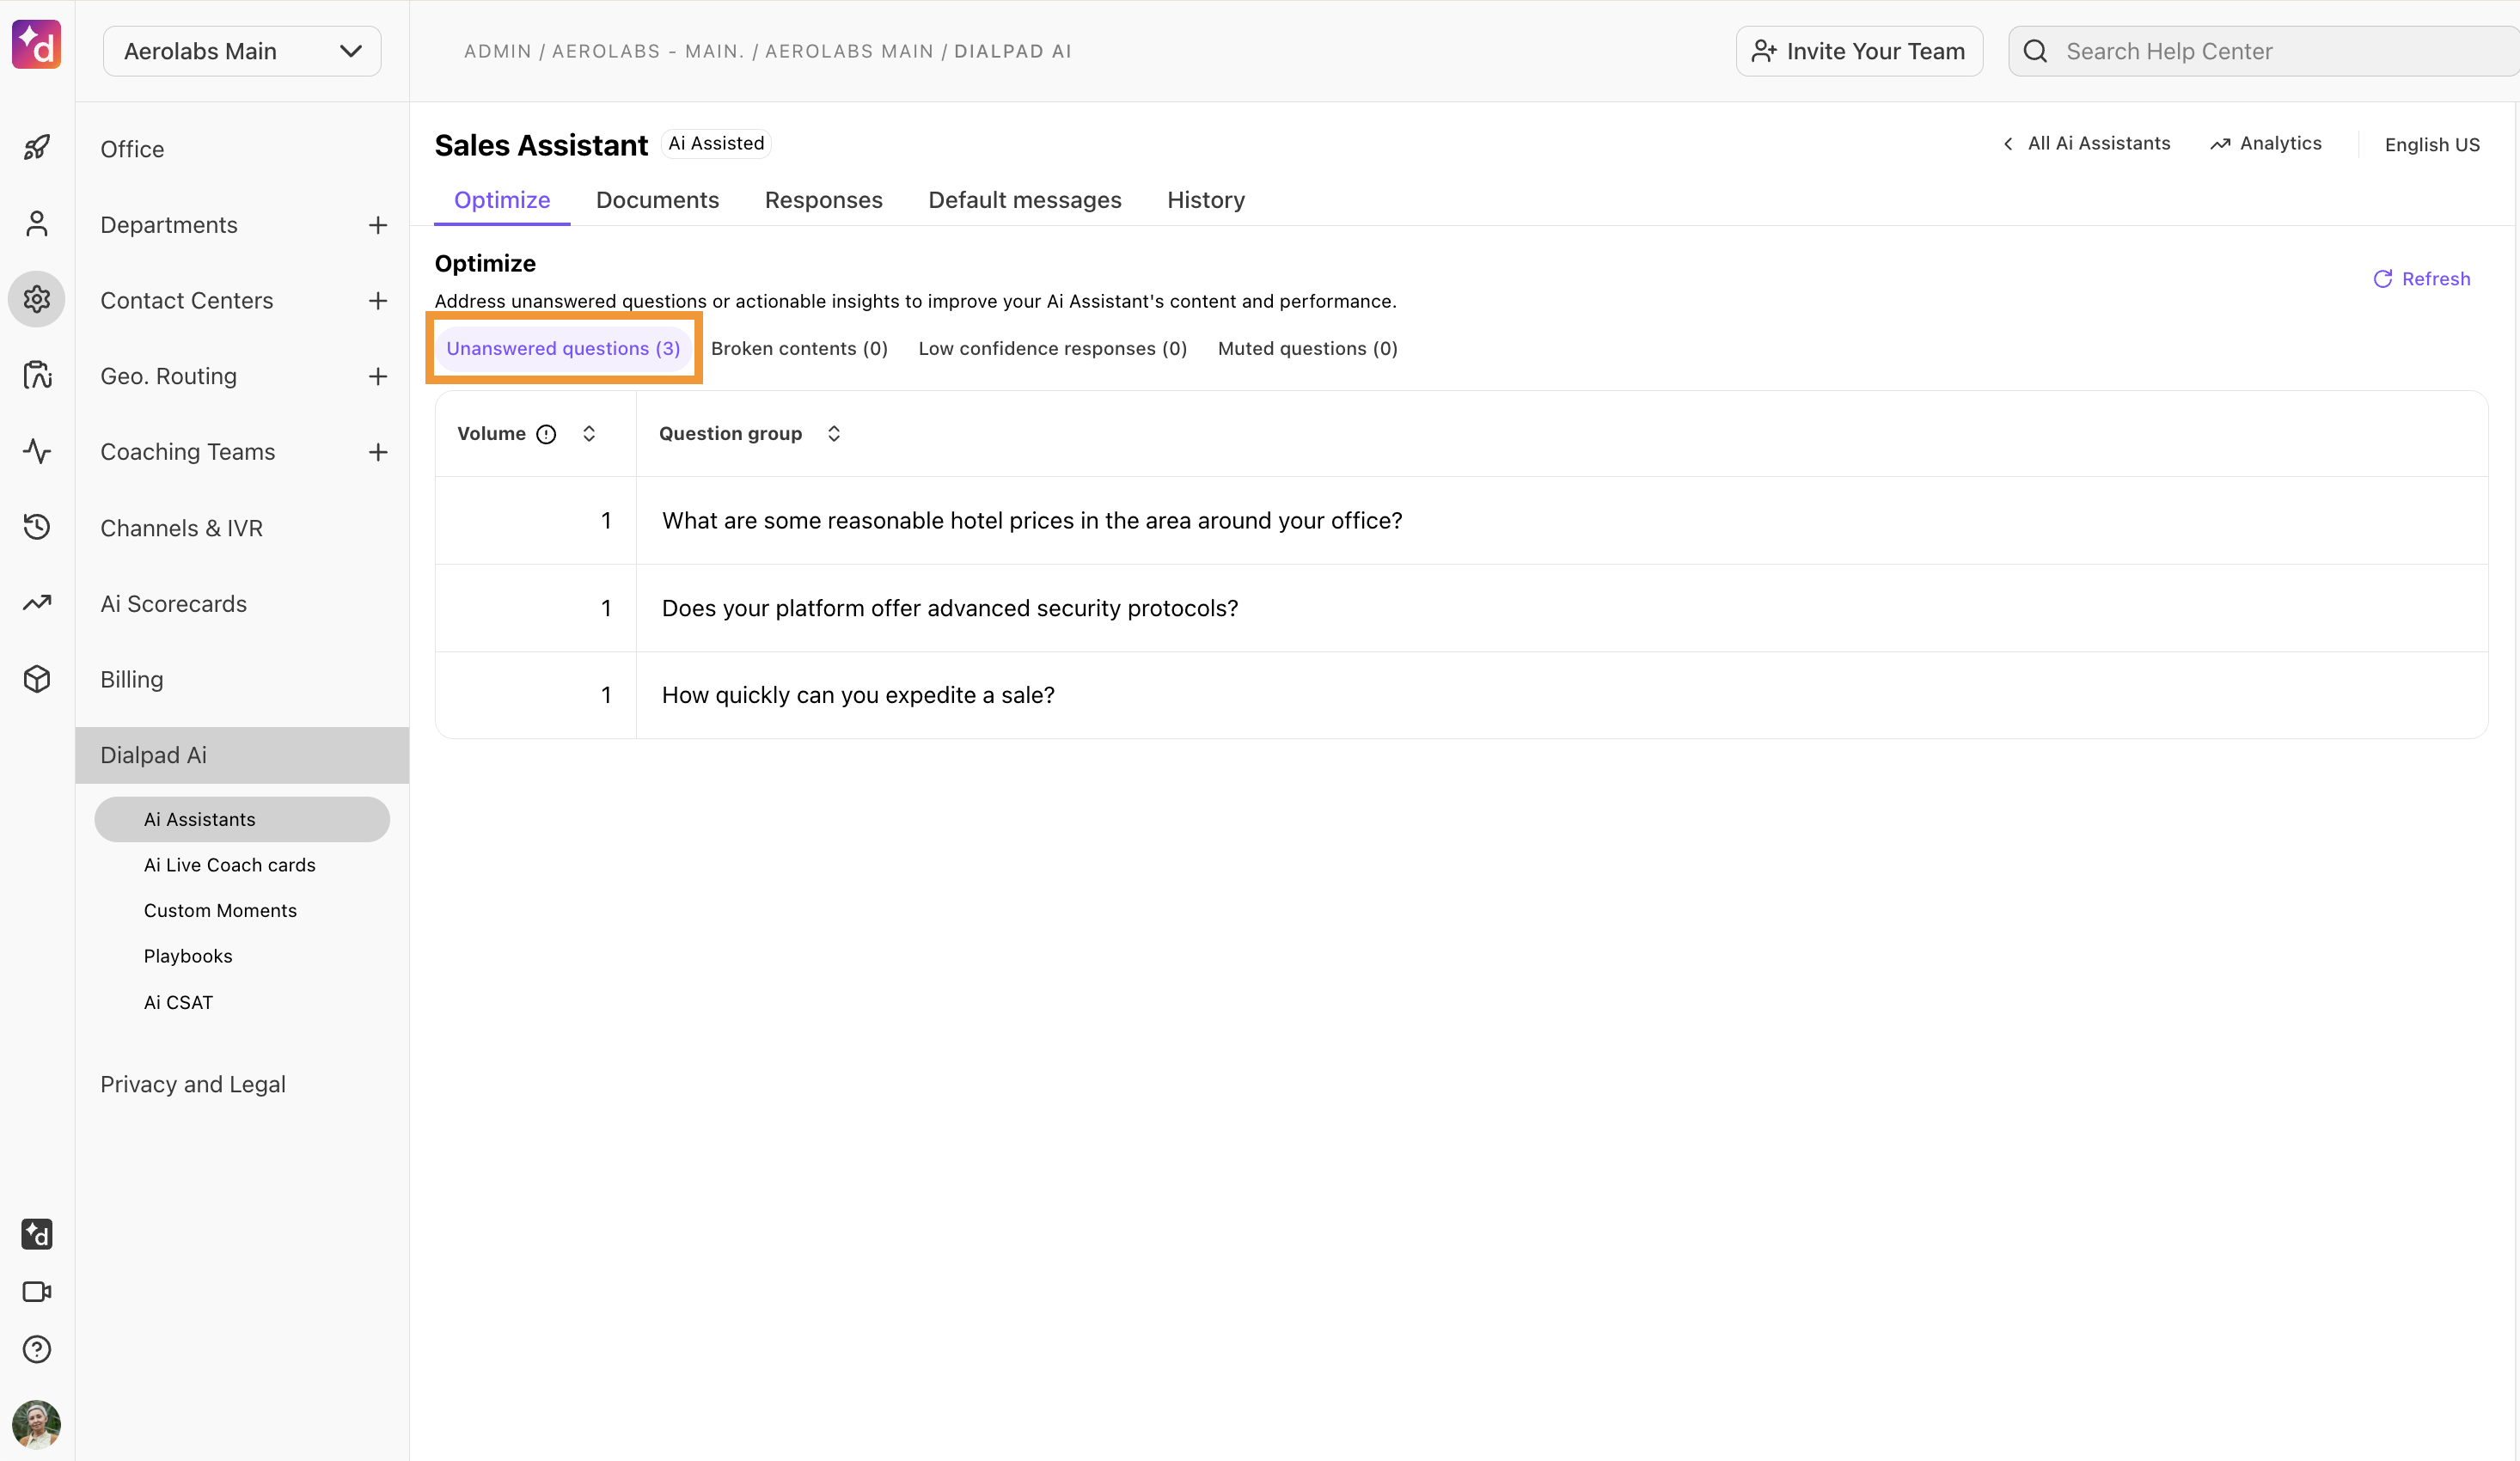
Unanswered questions can be resolved in four different ways.
Add to document | Adds the question(s) to an existing document in your knowledge base. Dialpad AI will suggest related documents, or you can use the search bar to find a specific document. |
Snooze | Snoozes the question(s) for 24 hours, allowing you to update your connected knowledge and add it to the revised document later. Snoozed responses can be un-snoozed at any time. |
Add to response | Adds the question(s) to an existing response. Dialpad AI will suggest related responses, or you can use the search bar to find a specific one. You can also use the Create new response option to create a new response and assign the question to it. |
Mute all | Mutes the question(s) so it does not appear again. Muting is used for questions that cannot be answered, such as when a customer enters their phone number. Muted questions can be reviewed and un-muted at any time. |
To action a question from the Unanswered Tab, select the question, then choose one of the 4 resolution types listed above.
Broken content
The Broken content section displays workflows and responses that are broken. Broken content appears when a response or workflow is archived and it is linked in another response.
To action broken content, navigate to the Optimize tab.
Select Broken content
Select the broken workflow/response
Edit the response
Note
The broken component is highlighted in yellow.

Select Publish
Low confidence responses
The Low confidences responses section displays responses that have less than 5 questions associated with them..png "low-confidence.png")
To action a low confidence response, select the response and add questions.
Tip
Don’t forget that you can use our Optimize questions feature to have Dialpad AI generate questions for you.
Muted questions
The Muted questions section displays responses that were muted by one of your Knowledge Managers.
 To un-mute a question, hover over the question, then select Unmute.
Snoozed
The Snoozed section displays responses that were snoozed (temporarily hidden). This is particularly helpful if you created a Knowledge Base article based on a question that was highlighted in the Unanswered questions tab. As it takes 24 hours for your chatbot to re-sync, snoozing allows for the question to open again the next day so you can assign it to a document.

To un-snooze a question, hover over the question, then select Unsnooze.
Conversation history
View entire Ai Assistant conversations from the History tab.
Here, you can see how many queries were associated with the conversation, the resolution status of the interaction, the user’s feedback, the number of links that were provided, and the time the conversation occurred.
To view a conversation, go to your Dialpad Admin Settings.
Navigate to Dialpad AI > AI Assistants
Choose the desired AI Assistant
Select the History tab
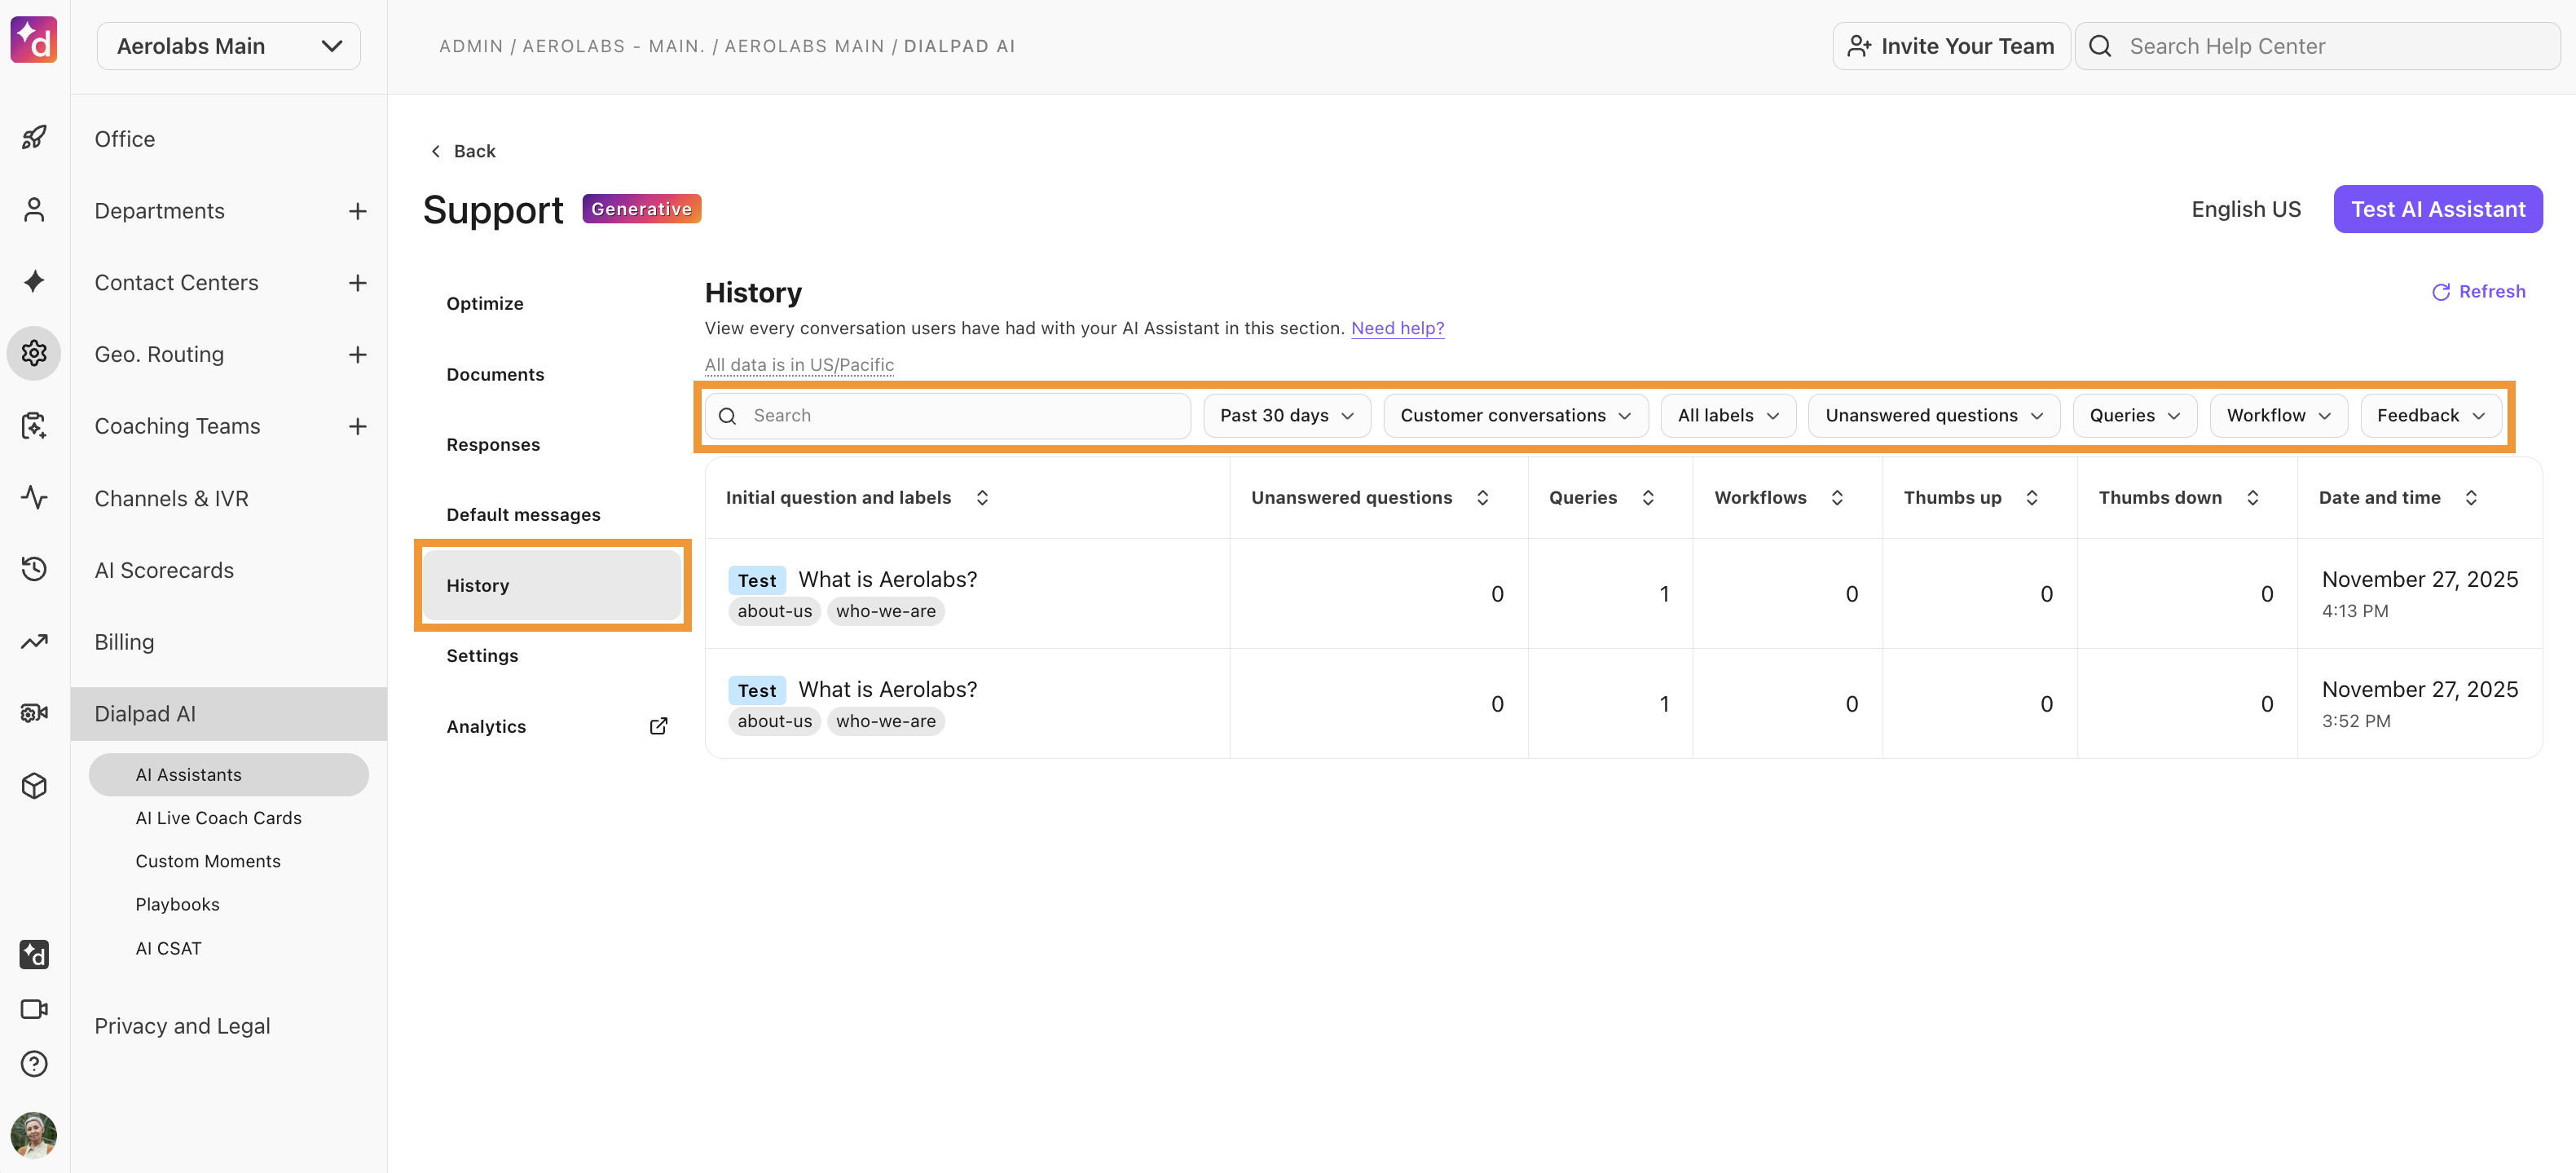
Tips
Use the search bar to find conversations with specific users, or refine your search using these filters:
Customer conversations
Filters by customer or test conversations.
All labels
Filters by specific response and document labels.
Unanswered questions
Filters conversations with or without unanswered questions.
Queries
Filters conversations containing no queries or more than 1 query.
Workflow
Filters conversations that did or did not contain a workflow.
Feedback
Filters conversations by with, without, or containing specific feedback.
The date selector in the right-hand corner lets you select specific timeframes.
View conversation details
To view a conversation, select it. On the pop-up, you’ll see conversation details and a quick link to take you to the full conversation history.
Select Transcript to view the customer’s experience as they spoke with your AI Agent.
On the Metadata tab, you’ll find not only the customer’s details, but also the conversation ID and labels, and more.
How to use AI Assistant
Agents and reps can access the AI Assistant during a live call or chat interaction.
To use AI Assistant:
Select the AI Agent Assist icon from the sidebar
Enter a question in the text box

That’s it, sit back and watch AI Assistant work its magic.
Once you’re done, let us know how helpful the content was by selecting the thumbs-up or thumbs-down icon. This doesn’t impact Dialpad GPT, but it does help your Knowledge Managers know what content can be improved.
Frequently asked questions
What languages does Generative AI Assistance support?
Generative AI Assistance is currently only available in English, but stay tuned as we’re continuously adding new functionality.
Are there any analytics for my AI Assistant?
Absolutely! To learn more about your AI Assistant analytics, read this Help Center article.