Dialpad for Salesforce integrates sales and service calls into Salesforce Lightning. Users can enable Open CTI, assign profiles, activate Dialpad Lightning for individual users, uninstall the package, or switch between connected production and sandbox instances.
Dialpad for Salesforce enables companies to break down silos and seamlessly connect—with sales and service calls that live natively inside Salesforce to deliver more engaging experiences and improve agent productivity using Dialpad's robust features.
Let's take a look at the integration process for Salesforce Users on the Lightning platform.
Who can use this
Dialpad integration with Salesforce Lightning is available to Dialpad Sell, Dialpad Support and Dialpad Connect users.
Requirements
To integrate Salesforce and Dialpad, you must:
Have an Enterprise or Unlimited edition of Salesforce.
Be using the latest Salesforce package
-
Enable API access
Dialpad does not store Salesforce activities. It only does a real-time fetch to display information using Salesforce APIs.
Note
To install the Dialpad for Salesforce package, you must have a Salesforce System Admin profile, with full access to Accounts, Contacts, Leads, Opportunities and Cases.
Install Salesforce lightning
To install Salesforce Lightning for all users:
-
Select Dialpad for Salesforce from the AppExchange
- Make sure you're using the most recent package.
Click on Install for All Users then Install
Permission sets
Dialpad for Salesforce provides two permission sets: one for admins and one for users.
Review the details below to ensure you're using the correct permissions.
Dialpad for Salesforce - Administrator
The ‘Dialpad for Salesforce - Administrator’ permission set is intended for Office Admins and Contact Center Admins, as well as those who need access to the 'Dialpad_Lightning' tab.
With this permission set, you can manage the following features:
Powerdialer list creation and management
List prioritization
Contact Center prioritization
Salesforce settings
Dialpad for Salesforce - Standard user
This permission set is intended for agents or non-admin users and should be assigned to Contact Center agents who place calls from Salesforce.
With this permission set, agents can access the 'My Dialpad' Tab, where they can see their assigned lists and upcoming records from the Powerdialer.
If your organization does not use Powerdialer, this permission set is required to ensure proper access to call logging objects and fields.
Enable Dialpad Lightning
Once the package has been installed, you can enable the Lightning integration for individual users.
From the Set Up menu:
Select Set Up Home
Navigate to Administration
Select Users
Check the individual users you need to enable, then select Edit
Navigate to Call Center, then select the magnifying glass
Select Dialpad Lightning
Select Save to save your changes and finalize enablement
Enable open CTI for your app
Before you can enable the integration, you'll need to select the Lightning app you want to enable with Dialpad.
Here's how:
Navigate to the App Manager
Select each Lighting app you want to enable with Dialpad
-
Select Edit
Select Utility Items (Desktop Only)
-
Select Add Utility Item
-
Search for Open CTI Softphone
Rename the Open CTI Softphone as Dialpad
-
Select Save and Done to complete
Make sure that the app is assigned to the user profiles of the users you want to enable, then select Save.
Switch Salesforce instances
Easily switch between your company's multiple Salesforce instances.
To change the connected instance, go to your Dialpad Admin Settings.
Open the Salesforce integration settings at the company level or office level.
-
Select Change Salesforce instance
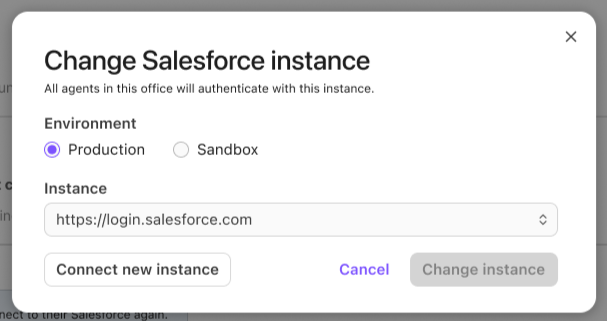
-
Choose the environment
Production
Sandbox
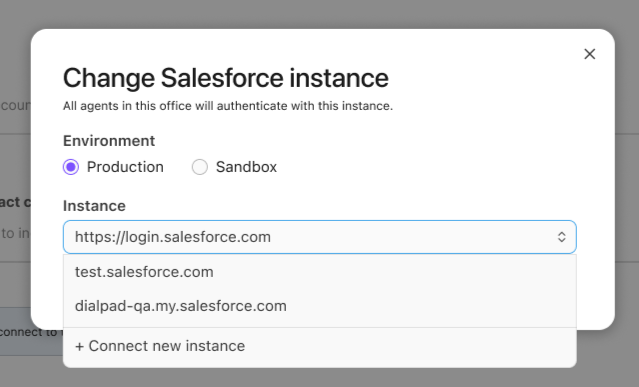
- Select one of the previously connected Salesforce instances, or select Connect new instance
After you sign in, the new instance is automatically added and selected.
Note
If you choose Connect new instance, Dialpad redirects you to the appropriate Salesforce login page based on the environment you selected.
Dialpad does not automatically fetch a complete list of Salesforce instances. If the instance you want isn't listed, select Connect new instance, then sign in to add it.
Uninstall Lightning
To uninstall the Salesforce Lightning integration:
Navigate to Apps
Select Installed Packages
Next to Dialpad for Salesforce, select Uninstall
On the uninstall screen, select Do Not Save a Copy...
Select Uninstall