Your IT team should be doing more than managing lost passwords. With Dialpad's OneLogin’s single sign-on (SSO) integration, IT teams never have to worry about users managing multiple passwords or usernames — everything is synced to their OneLogin account. Users simply log into OneLogin and select Dialpad from their app panel to log in and start placing calls.
Let's go over this integration.
Admins can manage users via the OneLogin Administrative Portal.
*If you're on a Standard or Pro level plan, you'll need to reach out to Customer Care.
Create API key
First things first, you'll need your Company Admin to set up API keys.
Have your Company Admin navigate to their Dialpad Admin Settings.
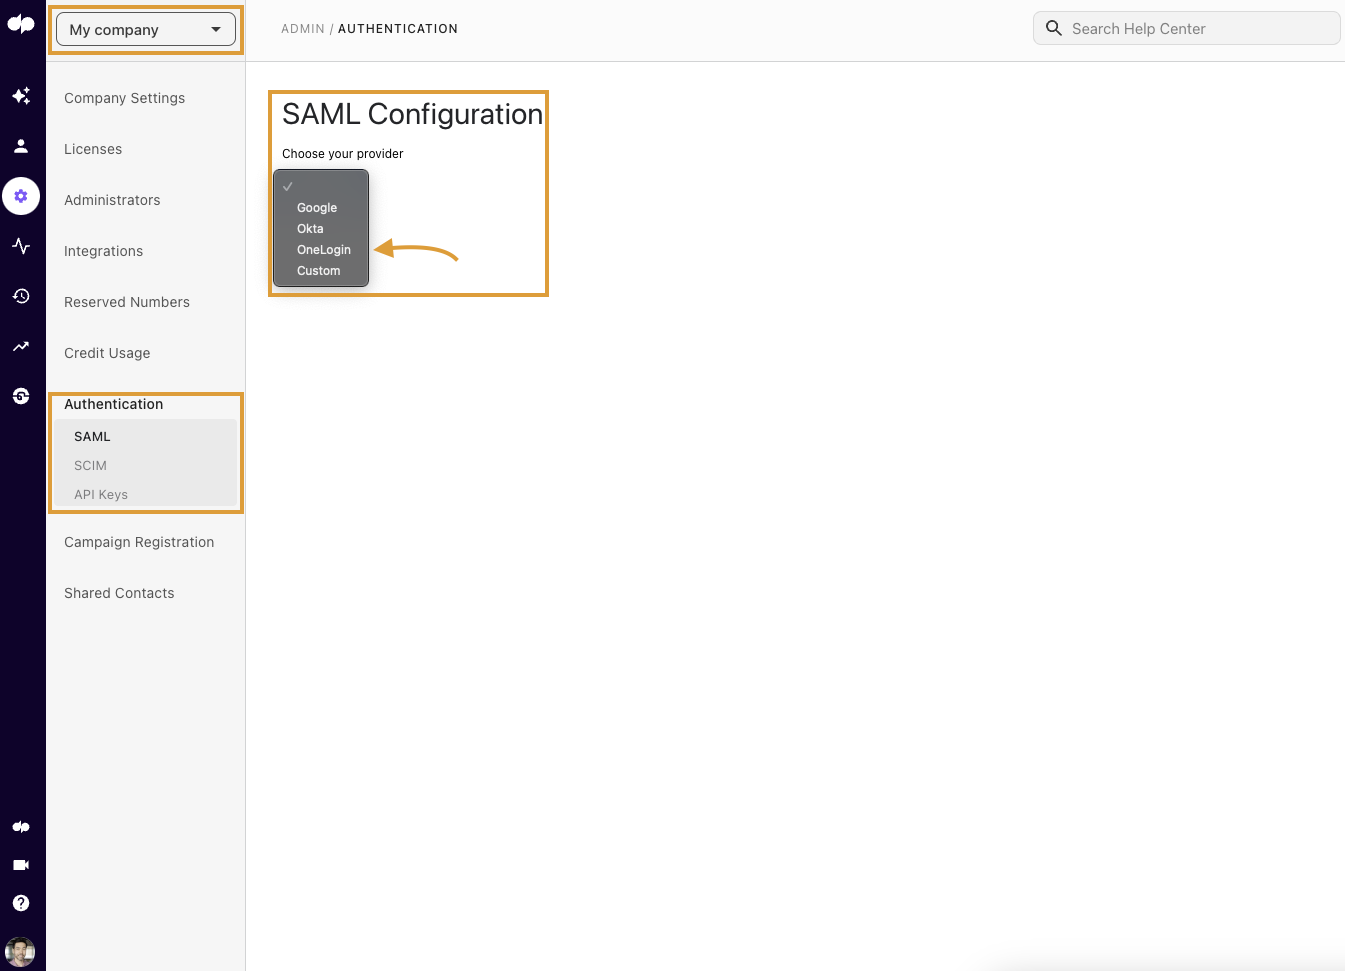
- Navigate to My Company
- Select Authentication
- Select API Keys
- Select Add Key and generate a new API key for OneLogin

- Copy the API key
Configure OneLogin
Before you start configuring OneLogin, make sure you have:
- Dialpad Company Admin (Super Admin) access
- OneLogin Administrative Portal Access
- Dialpad Enterprise Plan
- Available licenses
In the OneLogin administrative portal, head to the Applications tab.
- Select Add App (in the upper-right corner)

- Type Dialpad in the Search bar
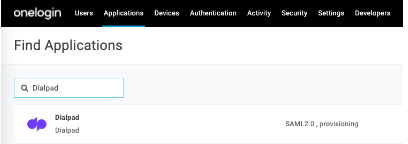
- Select Dialpad (with SAML 2.0 and provisioning tabs
- Enter a Display Name
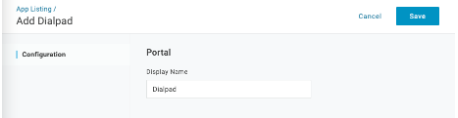 Dialpad Tip:Before moving to the configuration tab in OneLogin, open the SAML settings on the Dialpad Admin page in another browser tab.
 - Select Save
- Select OneLogin as the SAML provider
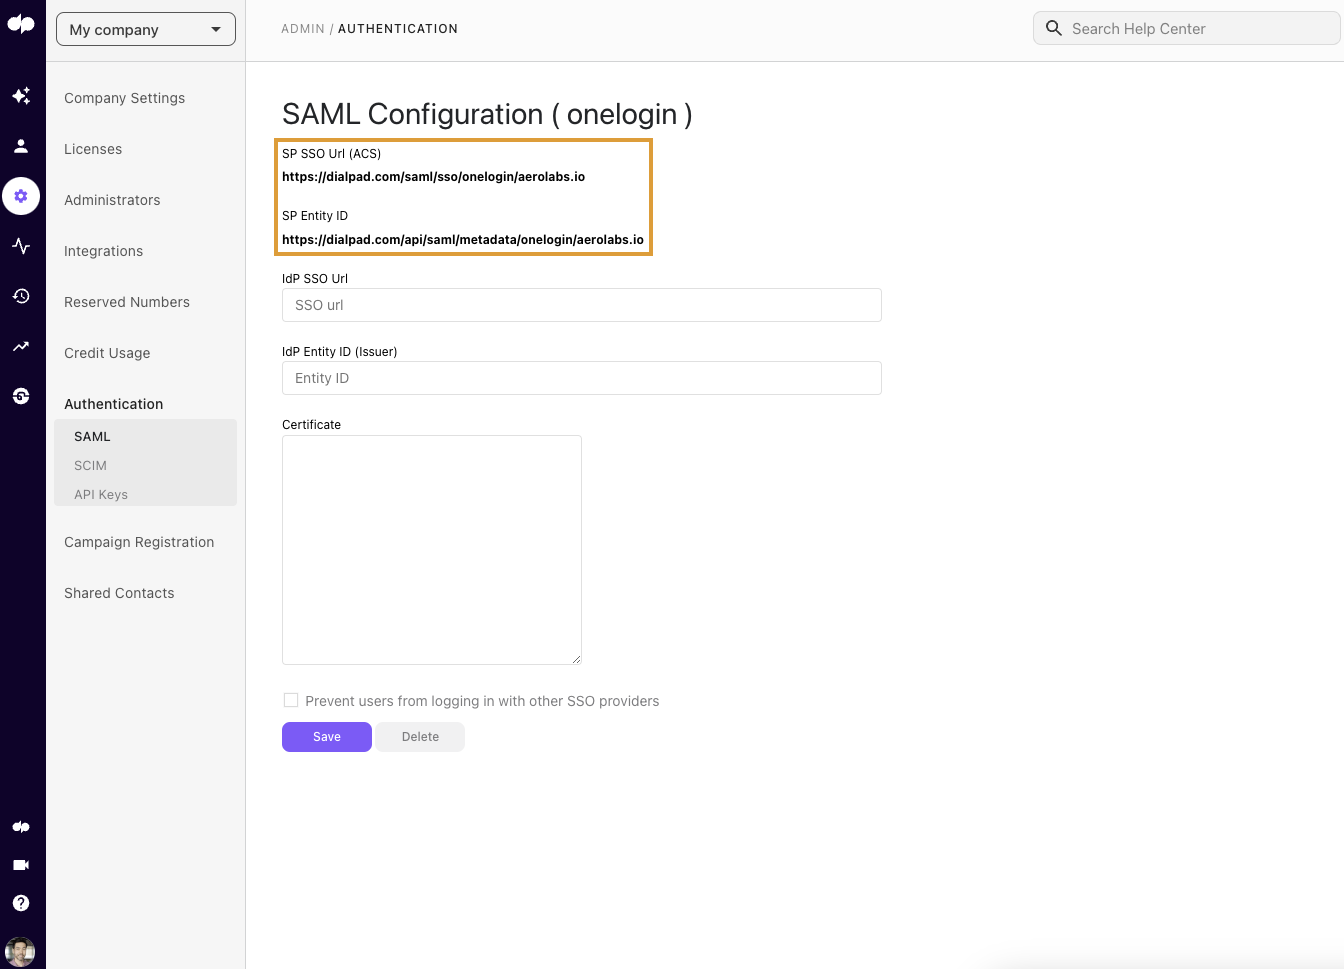
- Take note of the SP SSO Url and SP Entity ID
- Navigate to the Configuration tab of the Dialpad app in OneLogin Admin portal
- Enter your org domain in Application Details
- It must match the SP SSO Url
- It must match the SP SSO Url
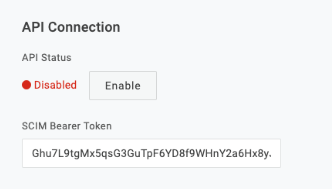
- In API Connection, enter the API key previously generated in the SCIM Bearer Token field.
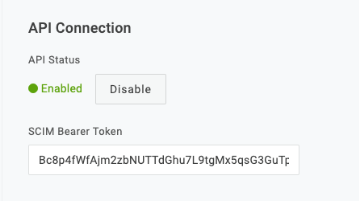
- Select Enable
- Select Save
- Click the SSO OneLogin, while keeping the Dialpad SAML page open in another tab

- Copy and paste the following OneLogin attributes into their corresponding Dialpad fields as specified in the table below
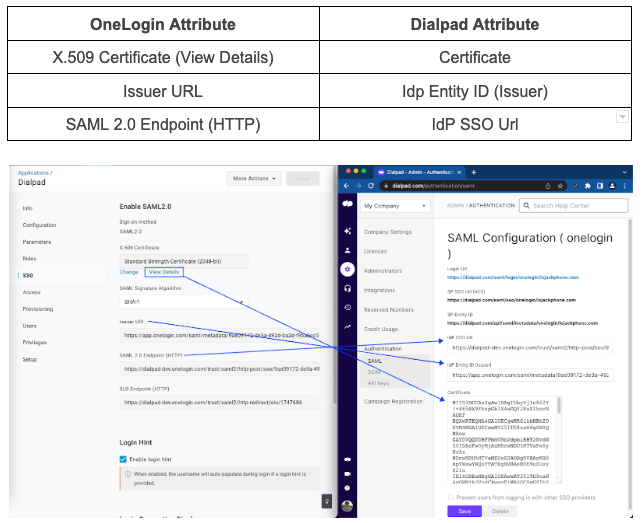
- Select Save on the Dialpad page
Configure user provisioning
Now that SAML has been set up, you'll need to configure your User provisioning.
- Navigate to the Provisioning tab
- Check "Enable Provisioning" to set up SCIM
- Select Save
Creating and deleting Dialpad users
Once OneLogin is configured for SCIM, new Users can be provisioned on Dialpad by creating them in the OneLogin portal.
- Navigate to the Users tab
- Select New User
- Create the new User

- Select Save User
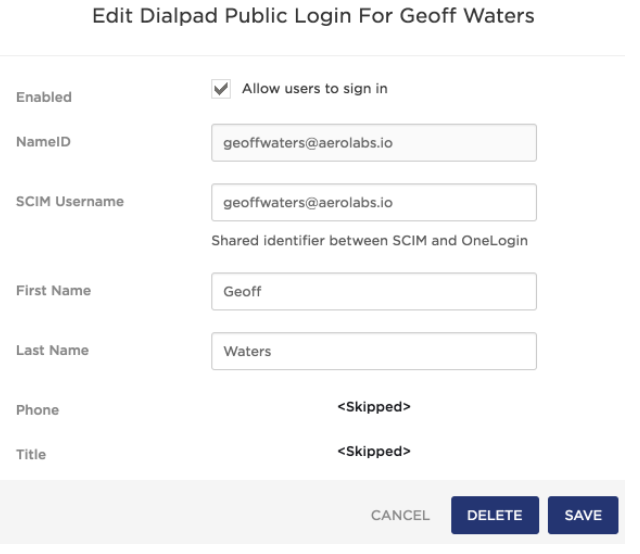
Next, navigate to Applications and select Add the Dialpad Application login
Update any relevant details and hit Save.
Frequently asked questions
What are the default mappings?
- Office in OneLogin → Office in Dialpad
- Number in OneLogin → Number in Dialpad
- Email(s) in OneLogin → Email(s) in Dialpad
- Username in OneLogin → Username in Dialpad
- First name in OneLogin → First name in Dialpad
- Last name in OneLogin → Last name in Dialpad
What happens to existing Users once SCIM is added to the company?
Any users that already exist in both Dialpad and OneLogin get linked together using their email address to determine which corresponds to which, and any fields that were out of sync will be communicated to OneLogin.
How is a number assigned?
Dialpad assigns a number from the Office's reserved pool. If there are no numbers in your Reserve Pool, we use the area code of the Office to which the User is assigned to.