Record a Call
- 29 Feb 2024
- 2 Minutes to read
- Print
- DarkLight
- PDF
Record a Call
- Updated on 29 Feb 2024
- 2 Minutes to read
- Print
- DarkLight
- PDF
- New
Article Summary
Call recording is a feature offered by Dialpad that allows users to track and recall specific details of conversations. Users can easily enable call recording during an active call with a single click. The recordings are automatically saved to the user's account for future playback. Users can also choose to automatically record all calls by turning on the auto recording feature in their settings. Call recordings can be accessed from the user's inbox or call history, and they can be listened to or downloaded for further use. Additionally, users have the option to delete call recordings if needed. Dialpad also offers cloud backup, allowing users to save their recordings on Google Drive by connecting their account and selecting the "Save Recordings to Google Drive" option in their settings.
Share feedback
Thanks for sharing your feedback!
Call recording assists in tracking specific details of a conversation. Recall a talking point, or leverage the recording as a record of what was discussed during a meeting.
With Dialpad, you can record phone calls with a single click!
Let's dive into the details.
Who can use this feature
Call recording is available on all Dialpad plans, and on our web, desktop, and mobile apps.
Enable during an active call
To record a call, you or your admin must have enabled call recording for your office.
When you’re on a call, simply select Record.
.png)
That's it, it's really that easy!
To stop recording, click the “Record” button again
After you hang up, the recording will automatically be saved to your account for future playback. You can also automatically record all calls by turning on auto-recording in your settings.
Listen to a call recording
Call recordings are stored in your inbox, and in your web call history for easy access. Let's take a look at how to access your call recordings from each location.
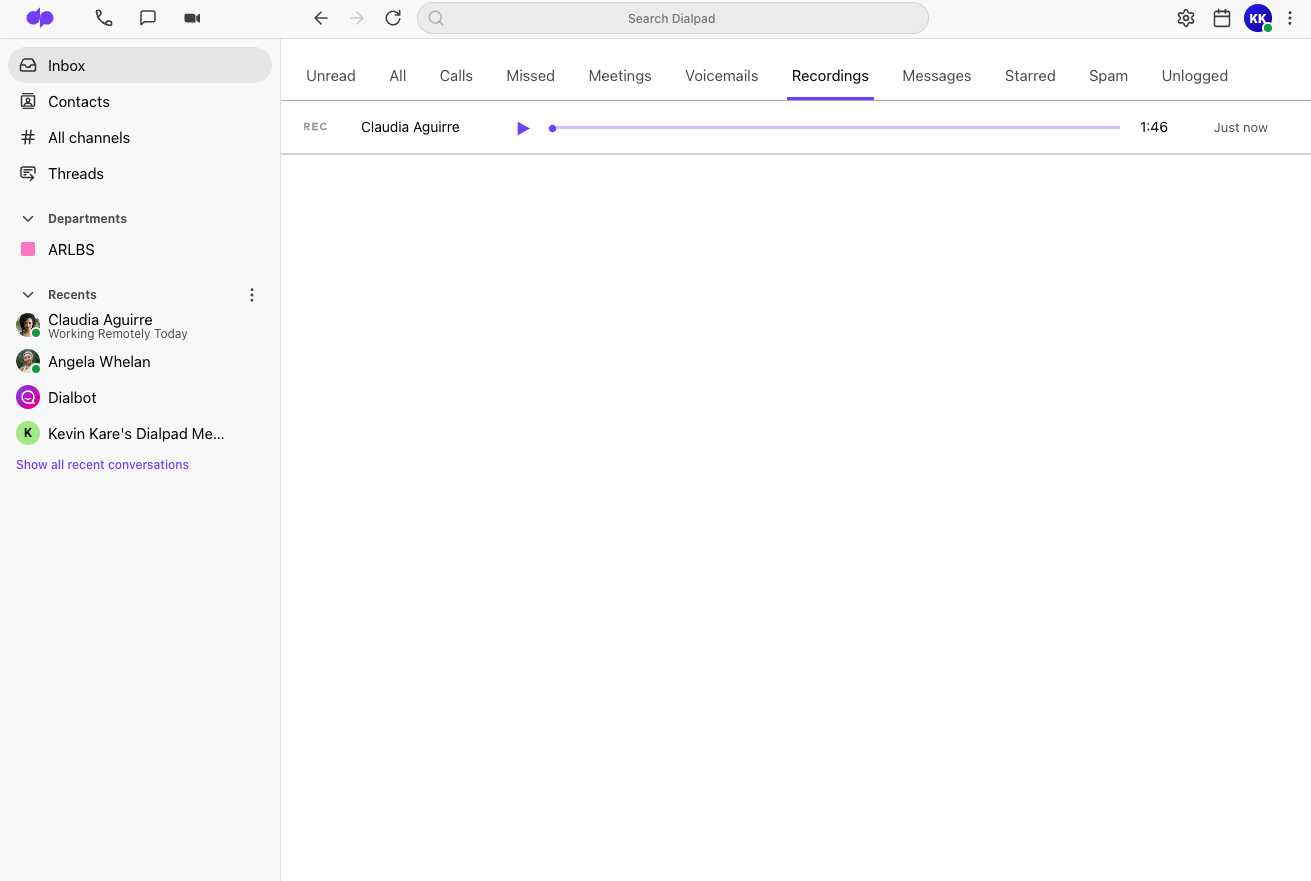
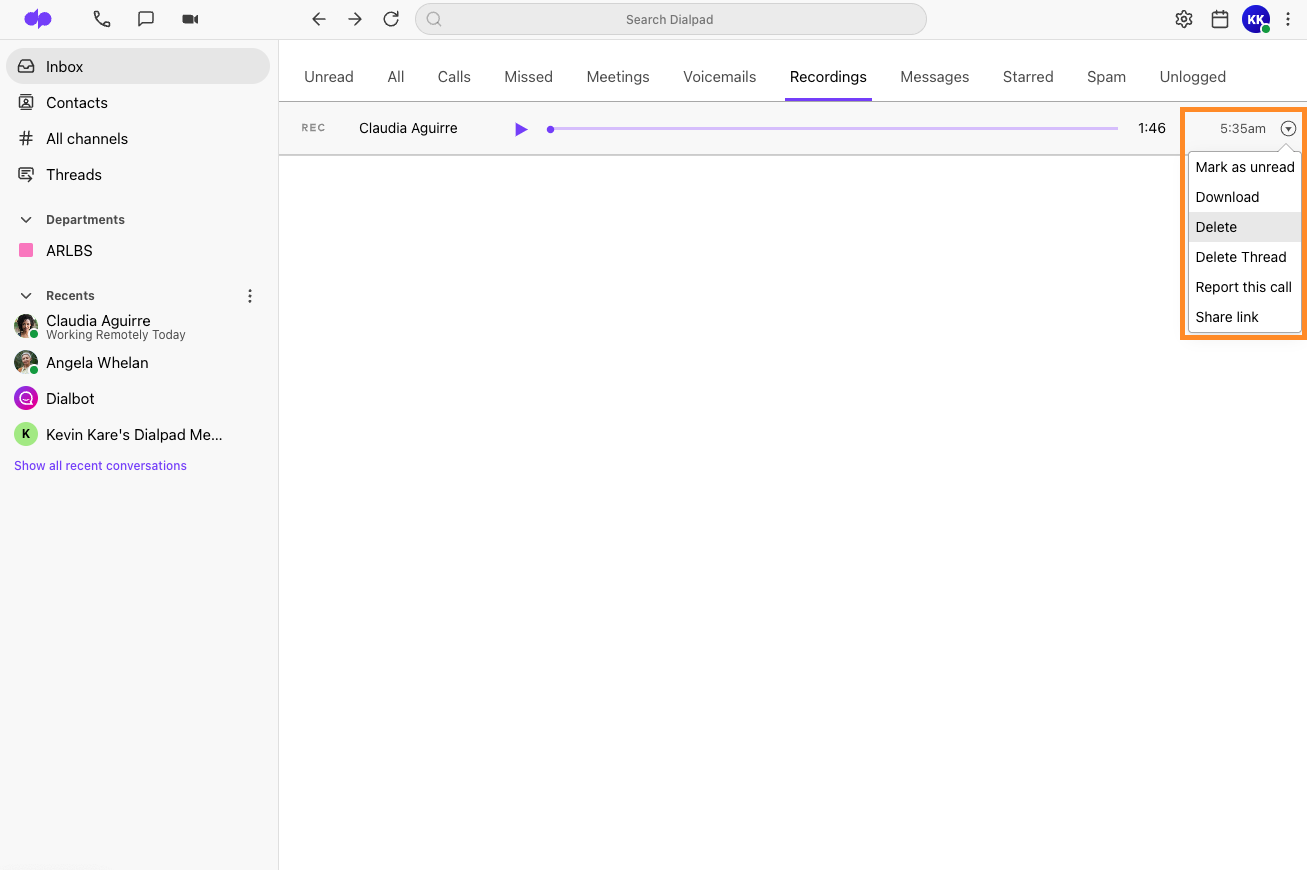
Access call recordings from your inbox
Access your call recordings right from your Dialpad app.
- Select Inbox
- Select the Recordings tab
- Press the Play button
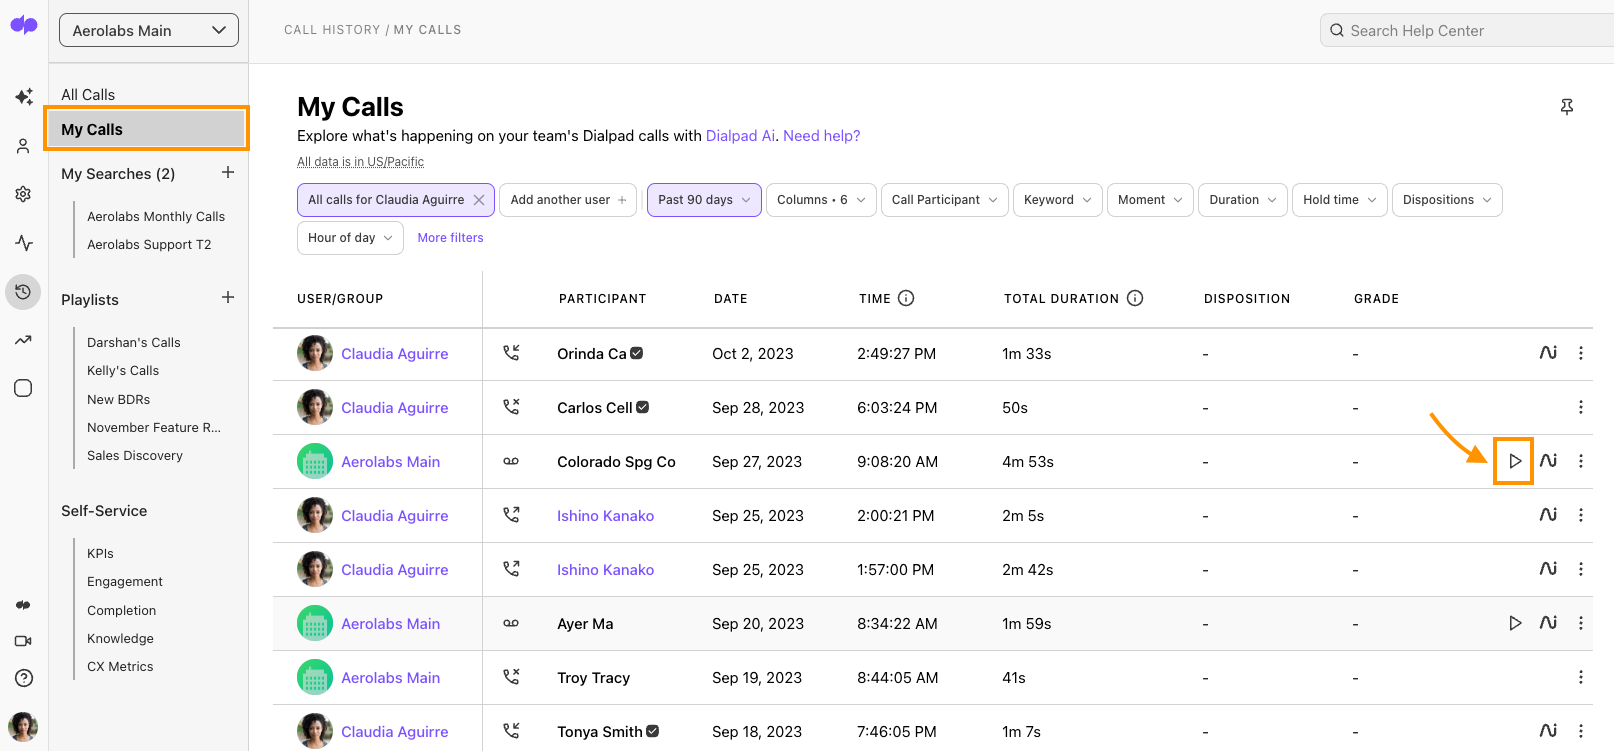
Access call recordings from call history
Access your call recordings from the Call History on Dialpad.com
- Select My Calls
- Press Play beside the desired call

Note:
You can also access the call recording from the conversation view.
Download a call recording
Call recordings can be downloaded from your Dialpad inbox, and from your call history.
Download call recording from Dialpad inbox
- Select the Recordings tab
- Select the Options menu (the down arrow) beside the call you want to download
- Select Download
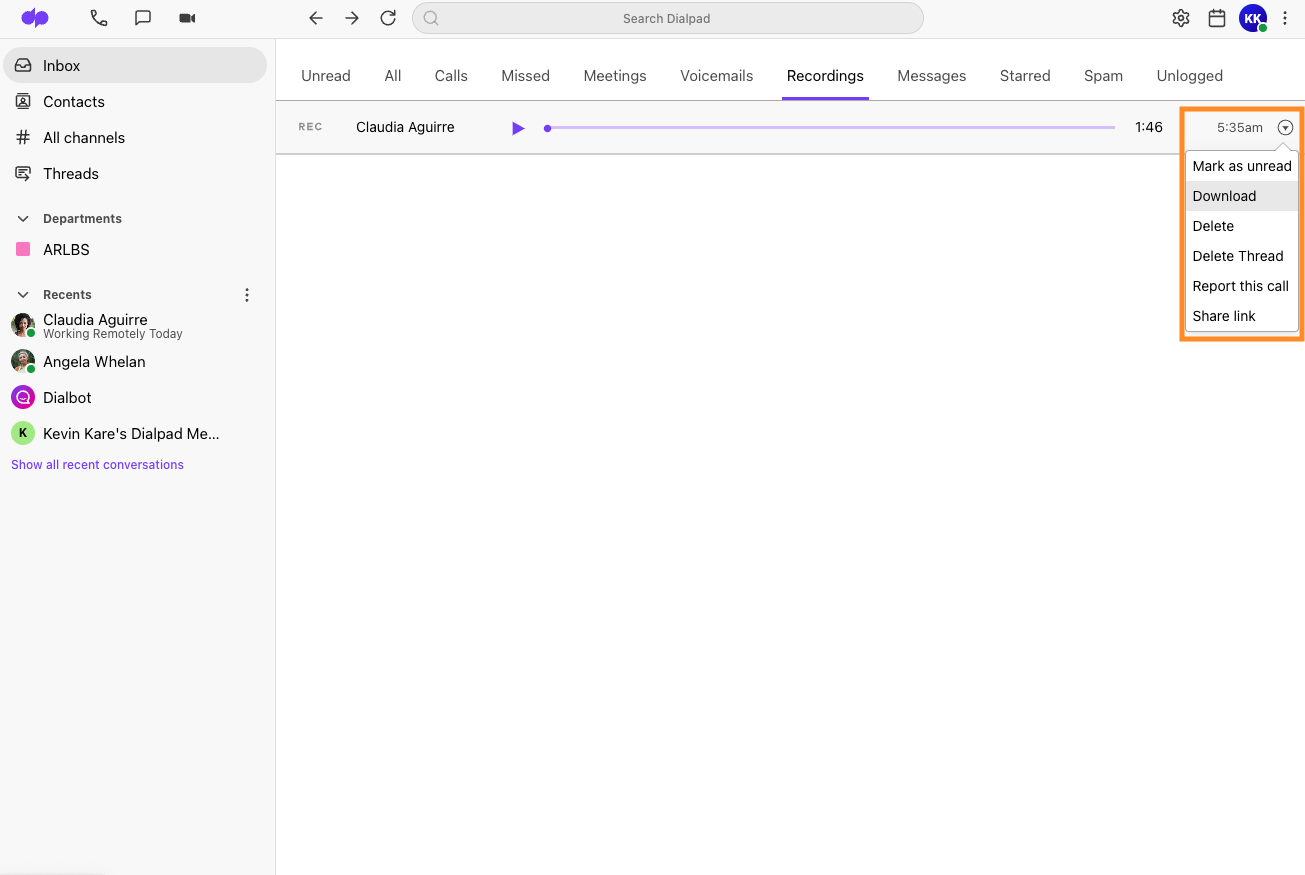
Dialpad will launch your web browser to download the MP3 file.
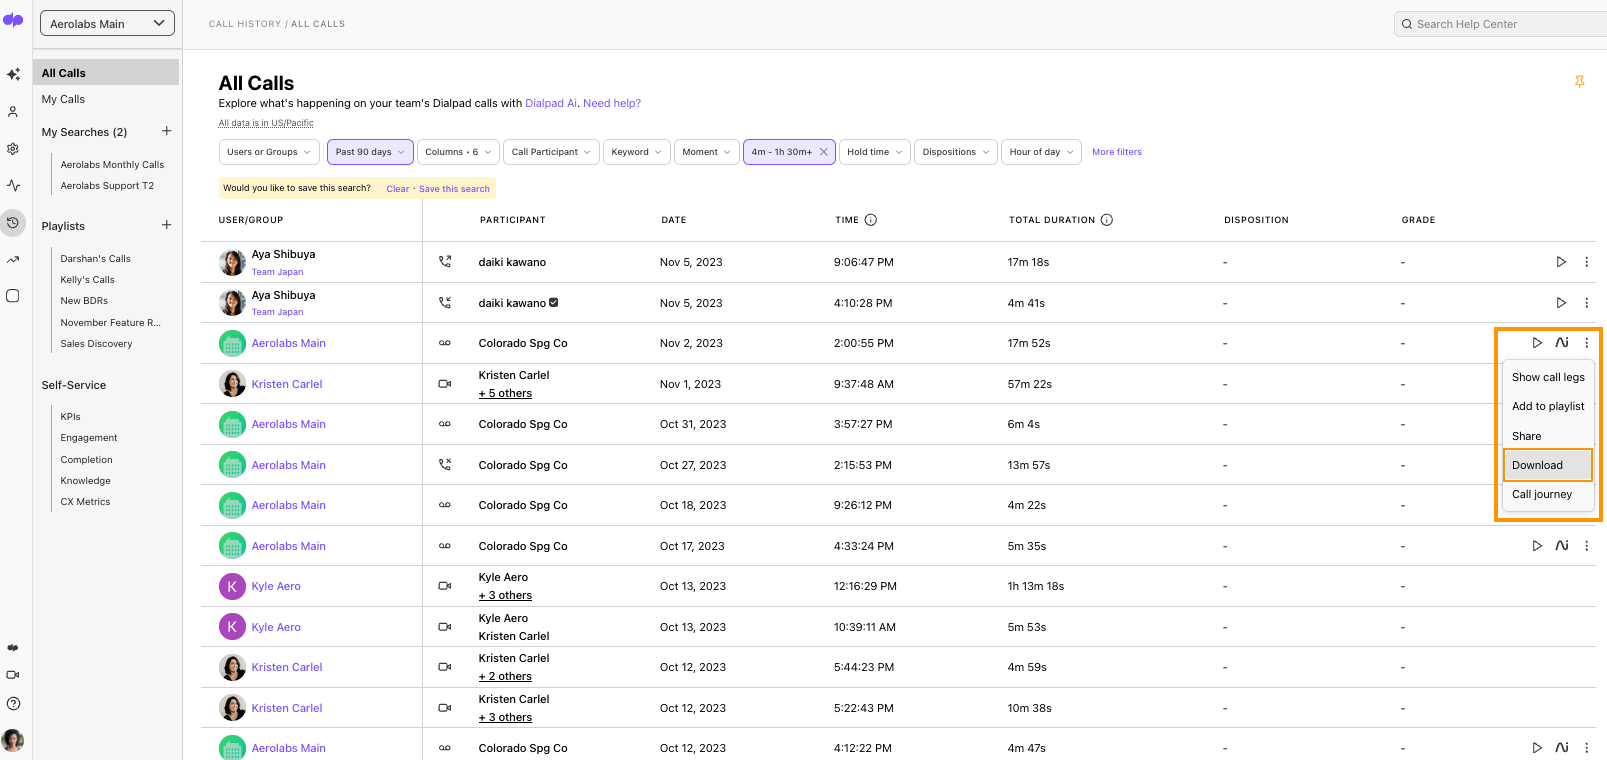
Download recording from call history
To download a call recording, head to Call History from Dialpad.com
- Select All Calls or My Calls
- Find the desired call
- Select Options (the 3 vertical dots)
- Select Download

Delete a call recording
To delete a call recording, navigate to your inbox
- Select the Recordings tab
- Find the call recording you'd like to delete
- Select the Options menu (that's the down arrow)
- Select Delete
- Confirm deletion
Note:
When a user deletes a call recording, they can still listen to the call recording from their call history for up to 24 hours before being completely deleted.
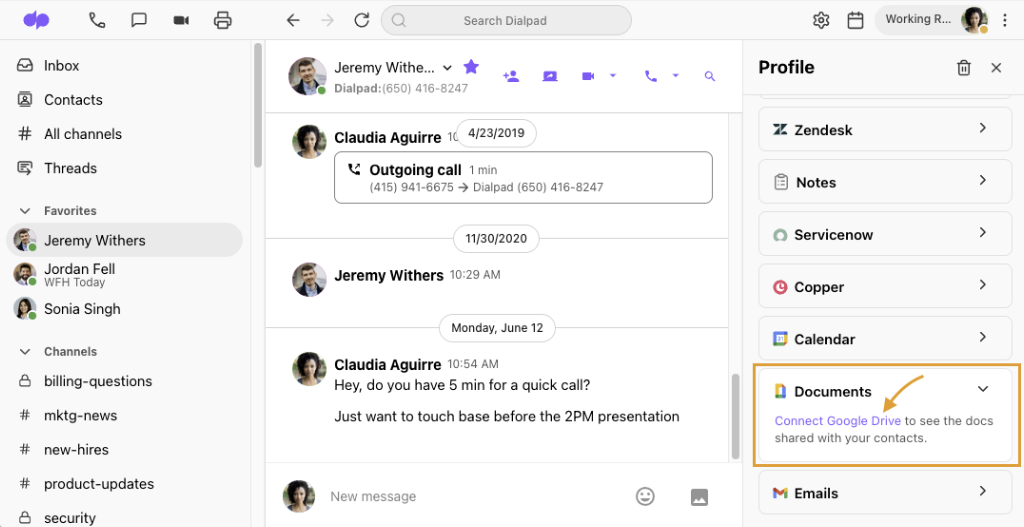
Cloud backup
Save your recordings on the Cloud! Before you can save recordings to the cloud, you'll need to connect your Google Drive.
- Open a conversation in the Dialpad app
- Click the contact name to open the right-hand sidebar
- Select Documents
- Select Connect Google
- Choose your Google Workspace Account
- Select Allow

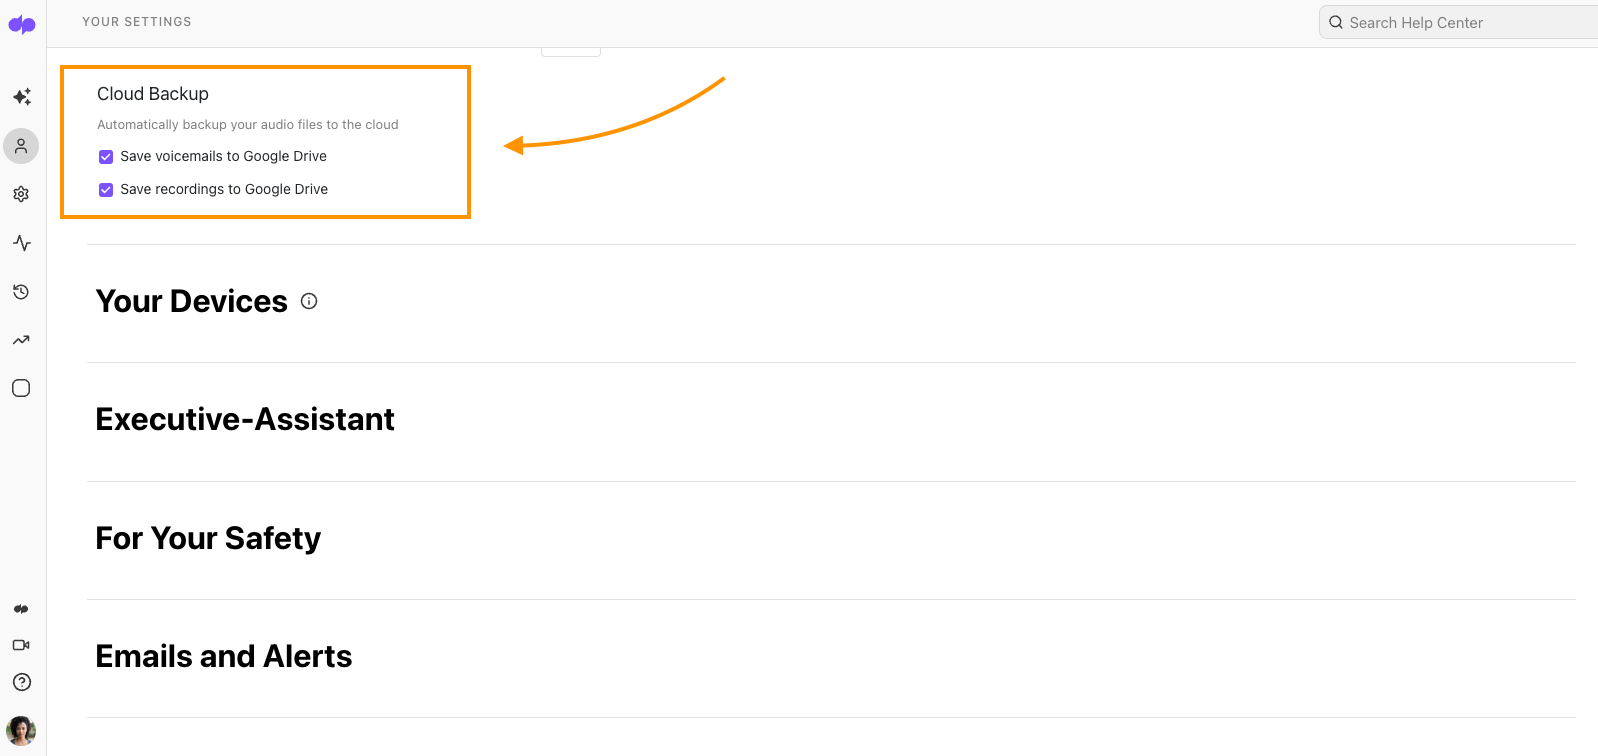
Once your Google Drive is connected, head to Your Settings from Dialpad.com
- Select Show Advanced options
- Navigate to Cloud Backup
- Select Save Recordings to Google Drive
Was this article helpful?
