Dialpad’s native Jumpcloud SCIM integration makes user management simple, easy, and secure.
Let's dive into the details.
Who can use this
The JumpCloud SCIM integration is available to Dialpad Sell and Dialpad Support users, as well as Dialpad Connect users on a Pro or Enterprise plan.
How to enable JumpCloud user provisioning
Dialpad’s JumpCloud integration supports a SCIM 2.0-based automatic user provisioning system. Once configured, creating user accounts, updates, and deactivation will happen automatically.
To enable JumpCloud user management with Dialpad, you’ll need to:
Create a Dialpad API key
Enable Identity management in JumpClou
Allow jumpcloud.com as a secondary domain for the company
For the SCIM integration to succeed, JumpCloud will try to create a test user with a @jumpcloud.com domain. This domain needs to be added as a secondary domain before proceeding further. Contact Dialpad Support to have this enabled.
Want to learn more?
Check out JumpCloud Support for insightful tips and best practices.
Create a Dialpad API Key
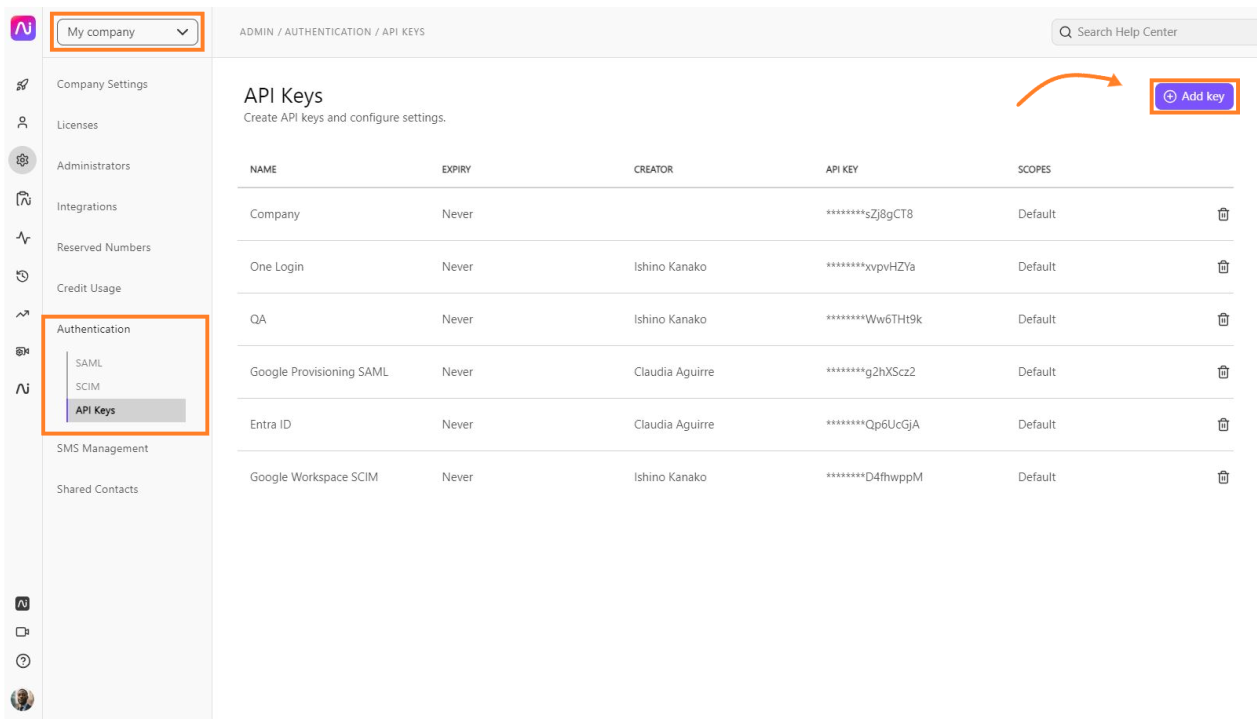
First, you’ll need to create a Dialpad API key. Aa Dialpad administrator, navigate to your Dialpad Admin Settings.
Select My Company
Select Authentication
Select API Keys
Select Add key
Generate a new API key for JumpCloud with the default scopes (already selected)
Save the generated API key, you’ll need it in the next section.
Enable Identity Management in JumpCloud
To enable Identity Management in JumpCloud, login to JumpCloud as an admin.
Select the previously created Dialpad SSO application
Navigate to the Identity Management tab
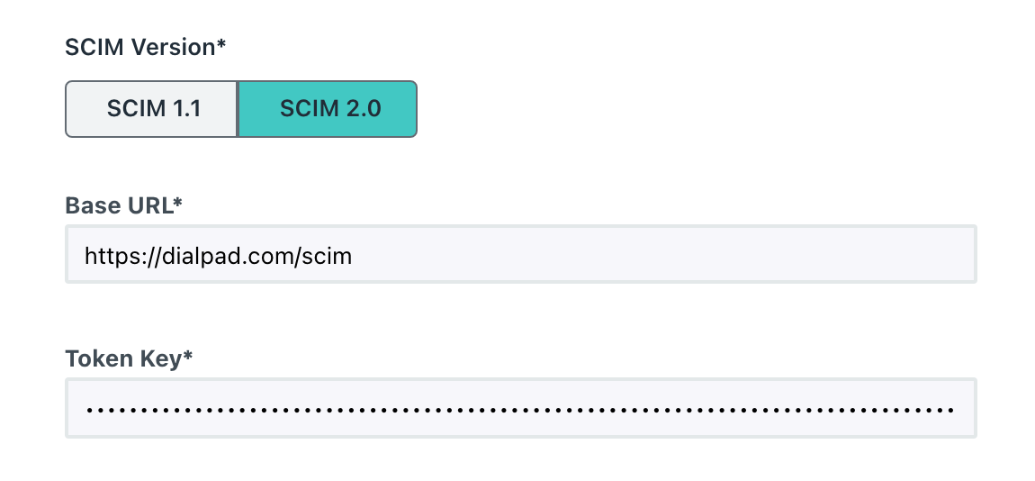
Navigate to Configuration Settings
Verify the SCIM Version is SCIM 2.0
Enter https://dialpad.com/scim on the Base URL
Navigate to Token Key
Enter the API key generated from the previous section
Select Test Connection
Once it succeeds, the Group Management section becomes available
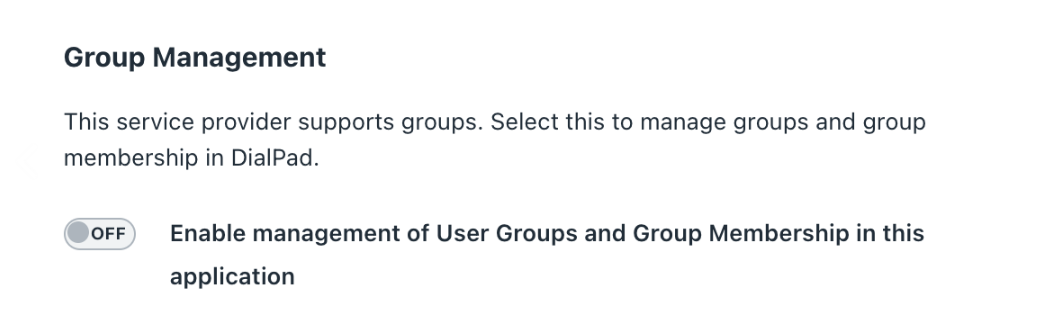
Turn OFF group management
Select Activate
JumpCloud will perform a user creation/deletion test
Once the test succeeds, the integration is complete
Select Save