Contact Centers provide teams with more flexibility and many more advanced features than Departments.
Features include:
Real-time coaching via listen-in, barge, and take over
And much more!
Let's take a look at how to create or duplicate a new Contact Center.
Who can use this
Company and Office Admins on a Dialpad Support or Dialpad Sell plan can create and duplicate Contact Centers.
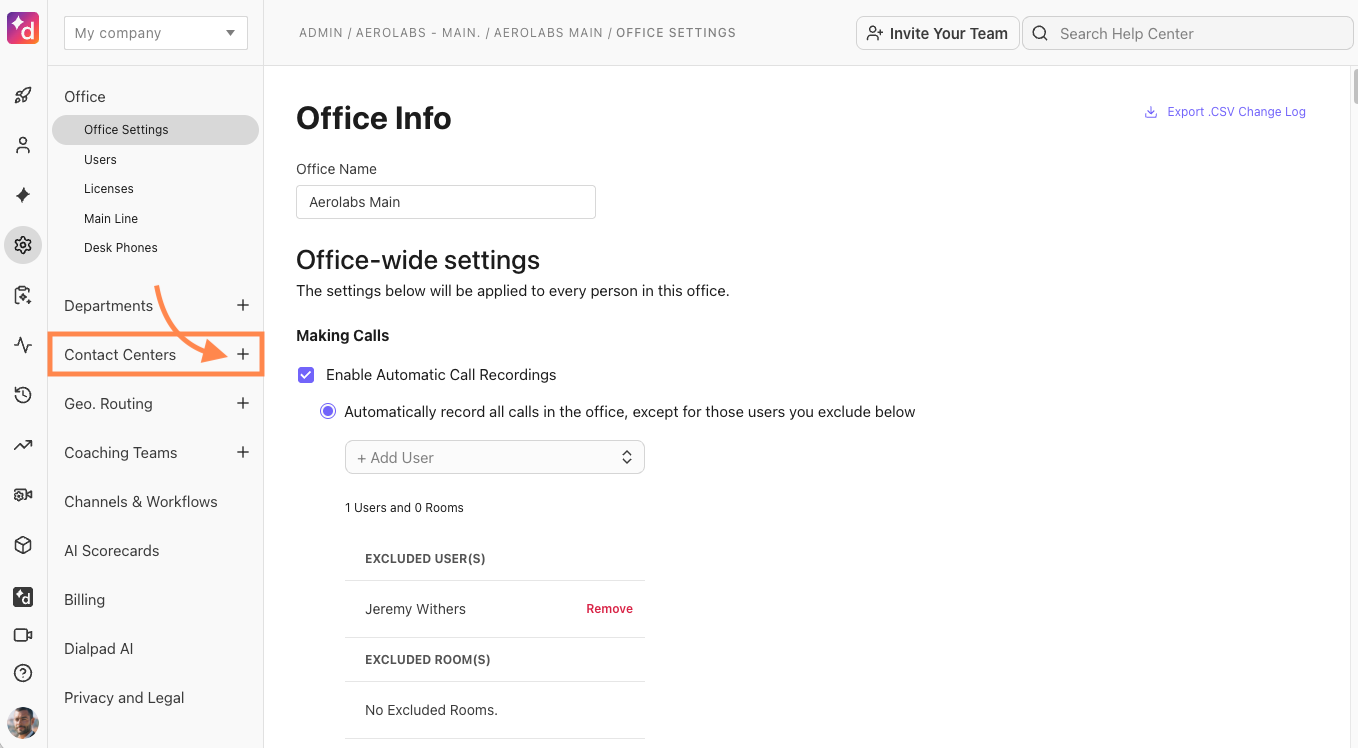
Create a Contact Center
To create a Contact Center, go to Dialpad Admin Settings.
Navigate to Contact Centers
Select the + icon
From the Create contact center window, choose the Routing type of contact center you want to create:
Voice
Provides calls, texts, and call recording only
Digital
Provides messaging, web chat, and social channels
Note
You can’t change the routing type once you create a new contact center
Enter in a name for the Contact Center
Select Create
Dialpad creates your new Contact Center and takes you to settings.
Here, you can edit the Contact Center name, add a description, and assign an abbreviation:
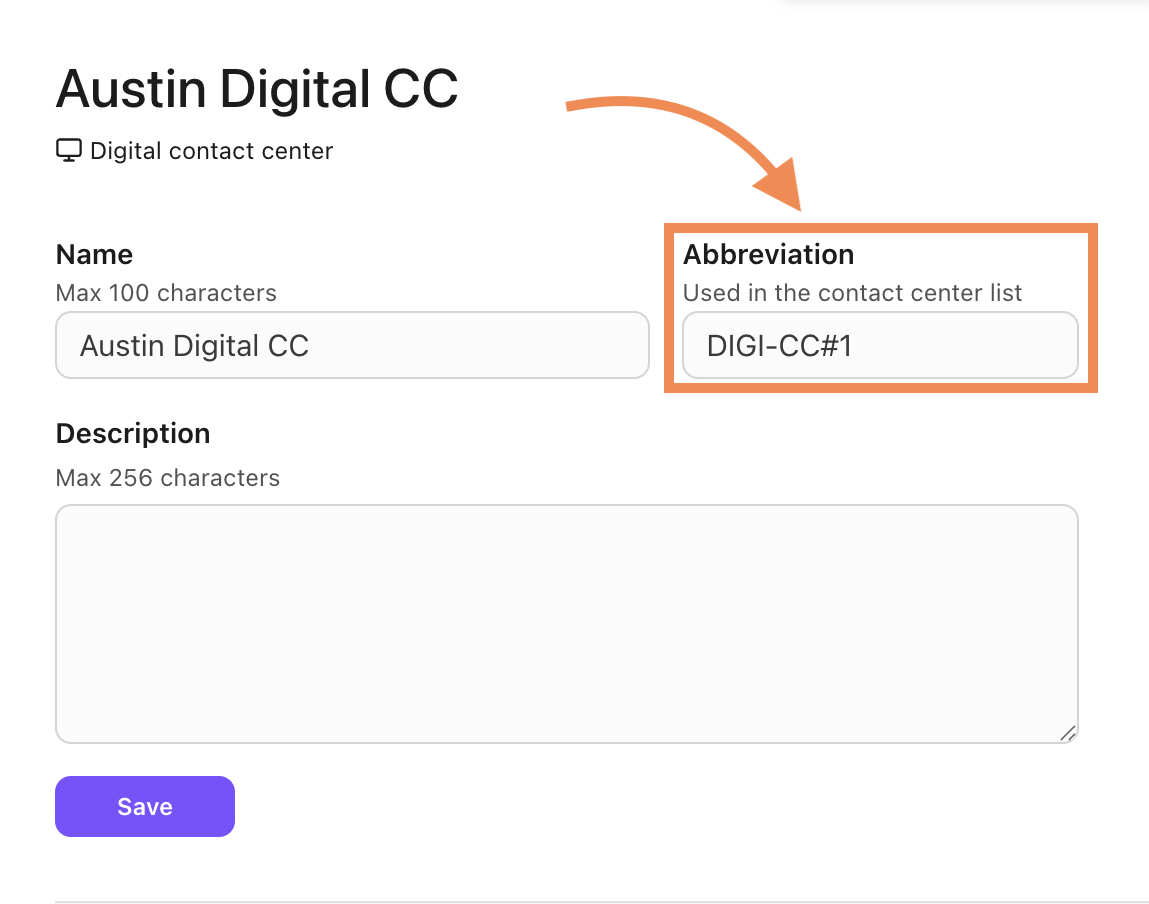
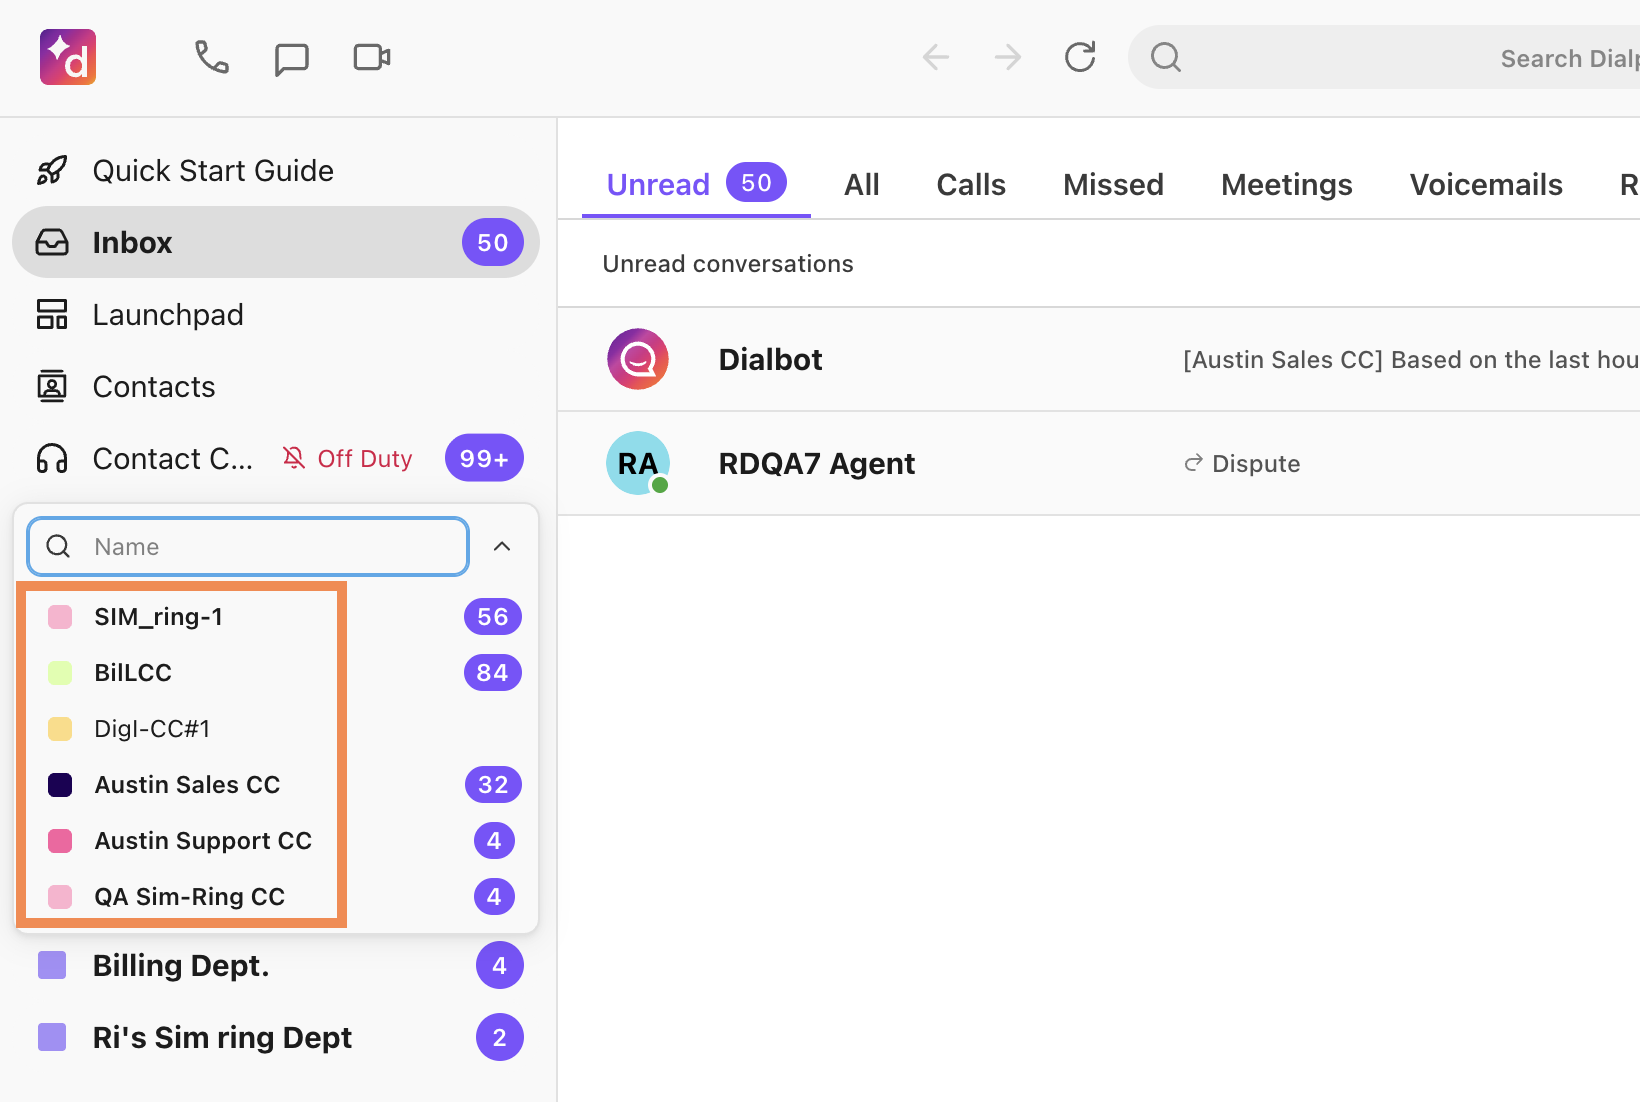
Note
The abbreviation will show in the Contact Center list in the Dialpad app:
You can also add local, toll-free, and fax numbers and configure IVR and Voicemail Language settings.
Note
A Contact Center can have up to 30 numbers (local or toll-free).
Purchase Contact Center licenses
You’ll need to purchase either Dialpad Support or Dialpad Sell licenses for all users before you can assign them as agents to a Contact Center.
To purchase licenses for Dialpad Support or Dialpad Sell:
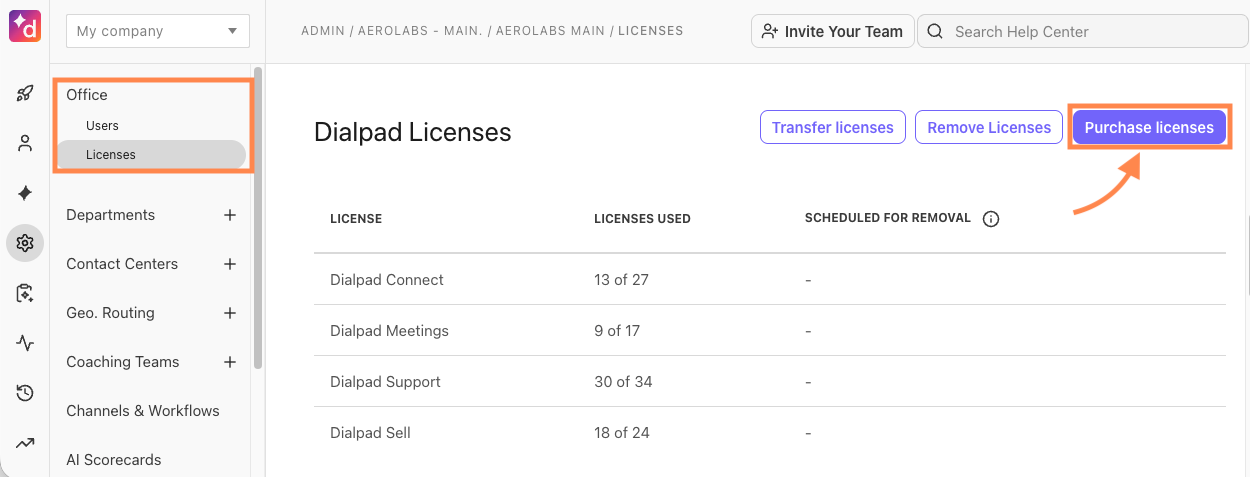
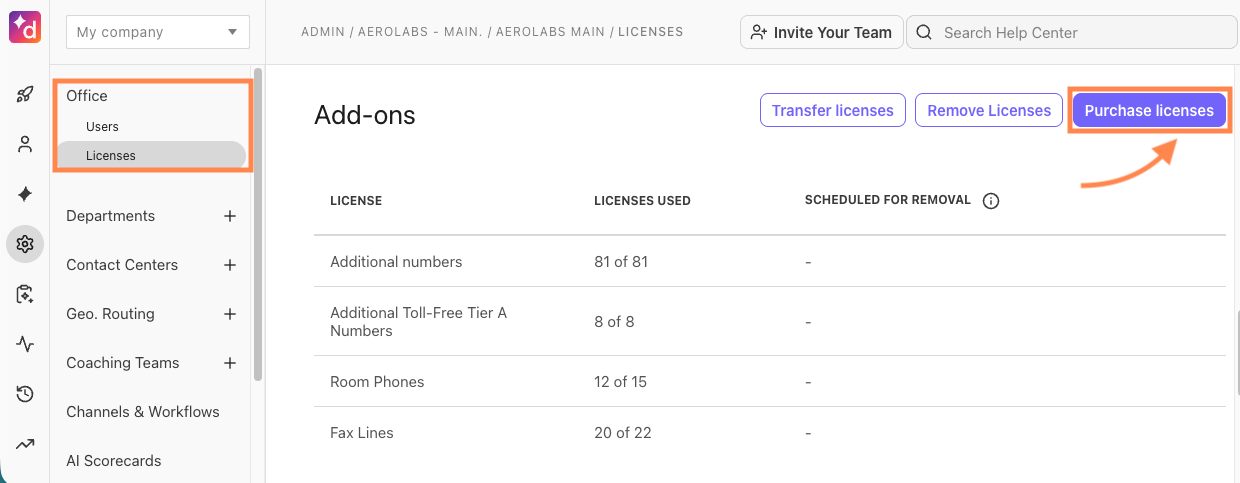
Navigate to Dialpad Admin Settings > Office and select Licenses
From the Dialpad Licenses section, select Purchase licenses
Enter the number of Dialpad Support and/or Dialpad Sell licenses you'd like to purchase
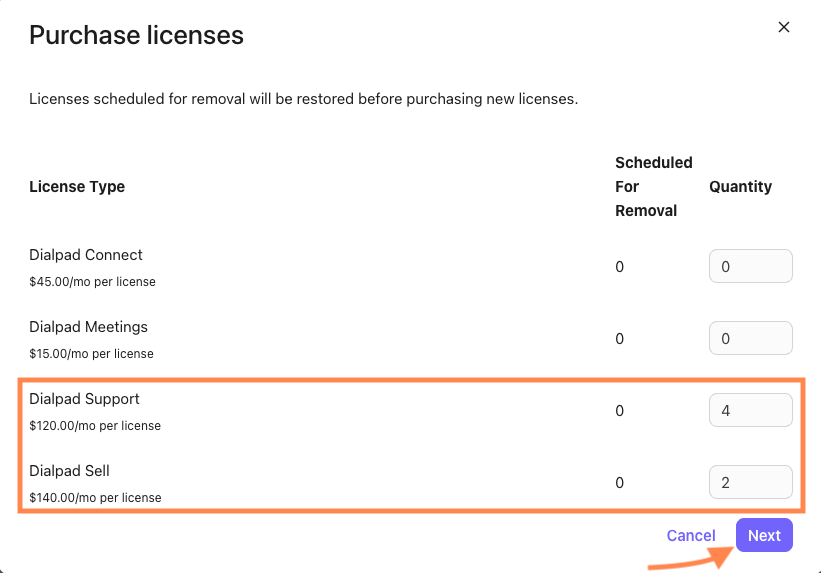
Select Next
Review the updated invoice and select Confirm purchase
You'll also find the option to purchase licenses in the Dialpad Admin Settings > Billing menu. Both will display an overview of licenses on your account.
Purchase the licenses you'll need to cover all agents or reps in the Contact Center.
Note
Dialpad Support users do not get a direct Dialpad number to start, only an extension.
For them to make or receive calls, these agents will need to call from your Main Line or assigned Contact Center unless additional licenses are purchased (see below).
Dialpad Sell users do get a direct Dialpad number and can make and receive calls directly to their number. Dialpad Sell agents also have access to additional features like Voicemail Drop and Coaching Teams.
Add direct number for Support users
Support users can use direct numbers, too.
To add a direct number:
Navigate to Dialpad Admin Settings > Office and select Licenses
Go to the Add-ons section and select Purchase licenses
From the Purchase license window, enter the number of desired additional numbers and select Next
Review your updated overview and select Confirm Purchase
Next, the number needs to be assigned to a user.
To assign a number to a user:
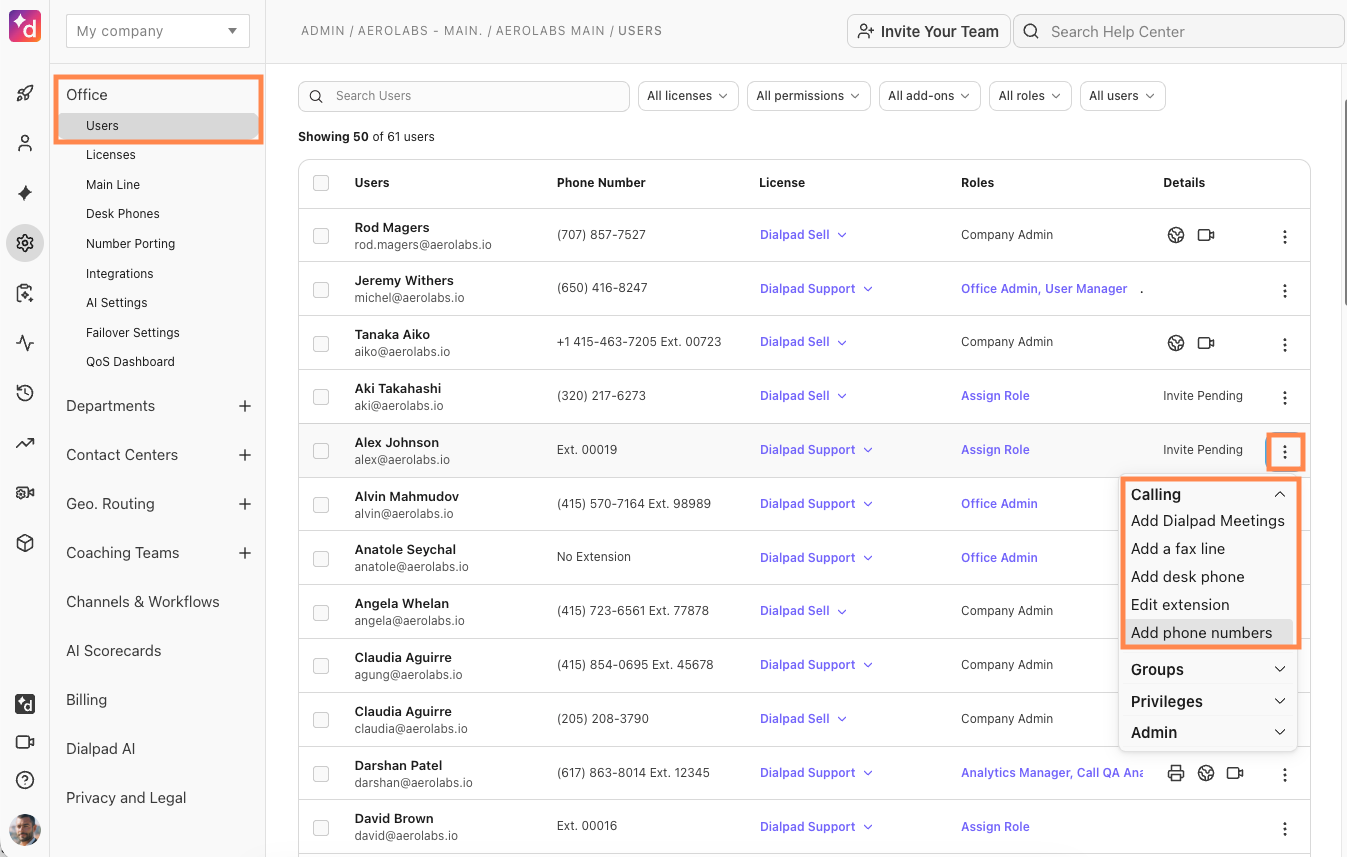
Navigate to Dialpad Admin Settings > Office and select Users
Find the user you want to add the number for and select Options
From the Options drop-down menu, select Calling > Add phone numbers
Name the number (optional)
Select Next and review the invoice
Select Add Number
Duplicate a Contact Center
Need to create a new Contact Center, with the same parameters as your current Contact Center? Worry not, we’ve made it nice and easy to duplicate a Contact Center.
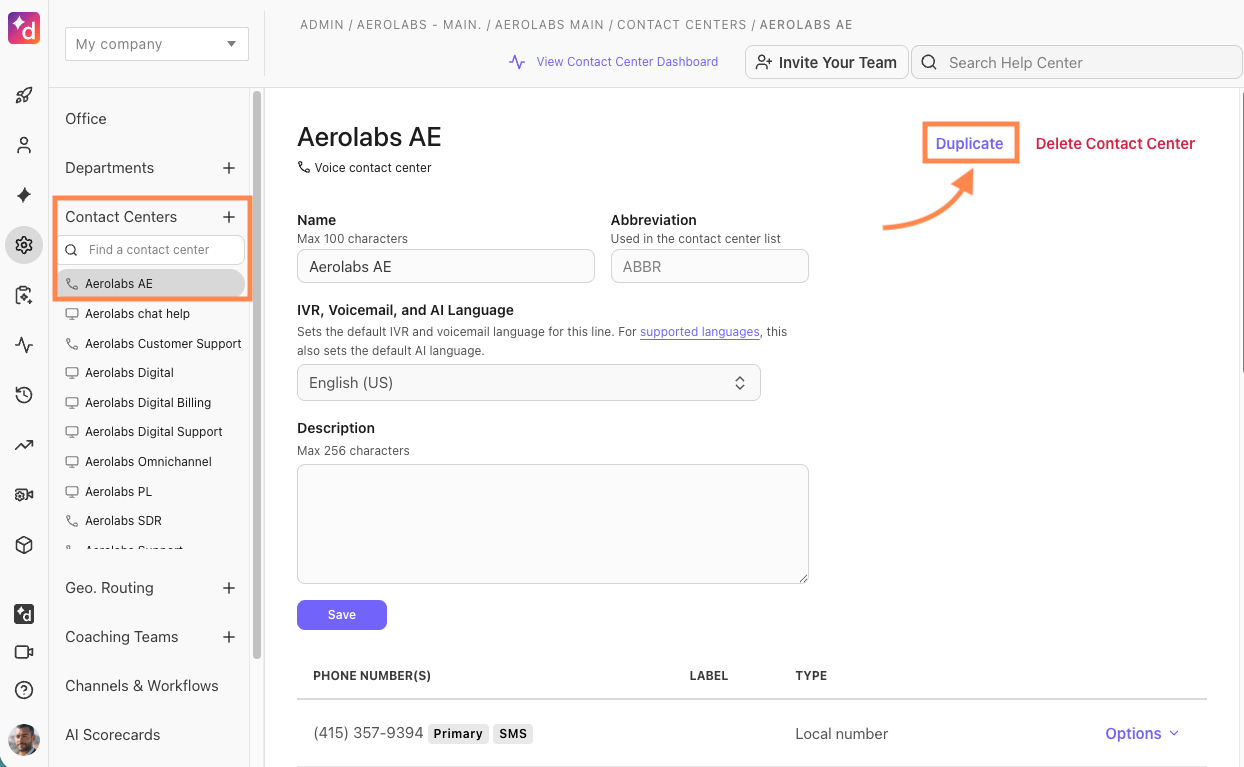
To duplicate a Contact Center:
Navigate to Dialpad Admin Settings > Contact Centers
Choose the Contact Center that you want to duplicate and select Duplicate
From the Duplicate Contact Center window, enter this information for the new Contact Center:
A new name for the Contact Center
A description for the Contact Center
Choose if all current users are included or just select users
Note
See Agent Selection if you only want to add certain users to the new Contact Center.
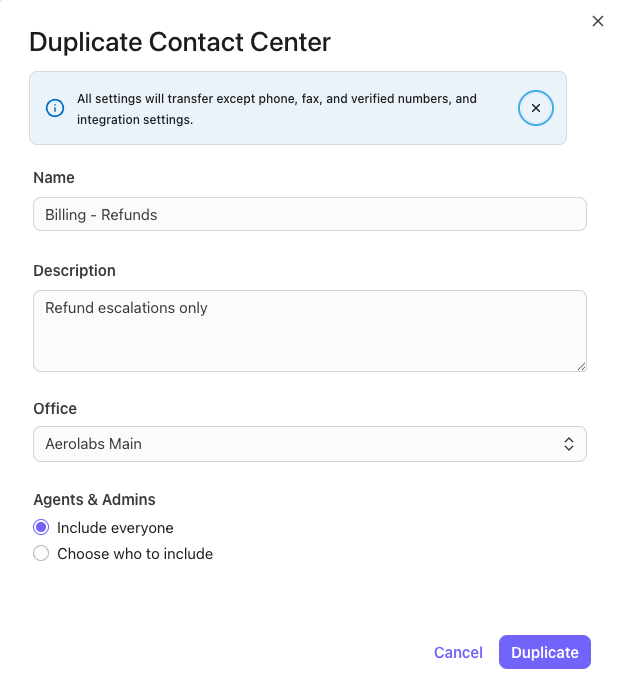
Select Duplicate
If you’re choosing certain agents, choose Select agents & admins
Select Duplicate
Select the agents, then select Duplicate
Note
If you're a Company Admin, you can duplicate the Contact Center across all offices.
If you are an Office Admin, you can only duplicate a Contact Center in the office where you are an admin.
Once duplication is complete, a Duplication successful banner displays with an option to take you to the new duplicated Contact Center.

Depending on the number of agents and admins duplicated from the original Contact Center, it may take a few more seconds to fully bring over the agents and admins after the settings have been duplicated.
Agent selection
When choosing users for a new Contact Center, you have two choices:
Include everyone | This option will copy the agents, supervisors, and Contact Center admins assigned to the original Contact Center being duplicated. |
Choose who to include | This option gives you the choice of which agents, supervisors, and Contact Center admins to duplicate to the new Contact Center. |
When selecting agents, a pop-up window will open with the list of all assigned agents, supervisors, and Contact Center admins to the original Contact Center,
It displays the user’s name, email address, and role within the original Contact Center.
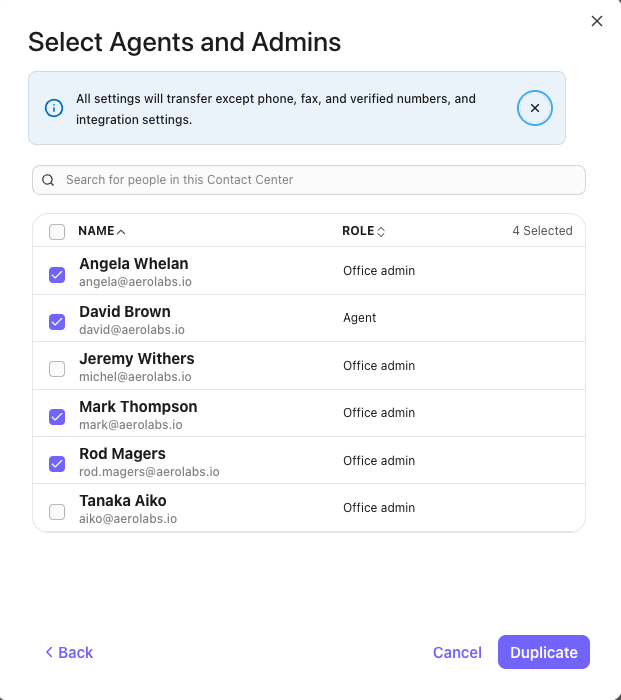
Select the agents, then select Duplicate.
Office parameters
When duplicating a Contact Center within the same office, these setting aren’t duplicated:
Numbers (DIDs)
Fax numbers
Verified numbers
Integration settings
When duplicating a Contact Center to another office, these settings aren’t duplicated:
Numbers (DIDs)
Fax numbers
Verified numbers
Integration settings
Customer IVRs
Applied CSAT Surveys
Call Dispositions
Timezone
Ring type
For information on managing your Contact Center, read this article.
Assign Global Contact Center Settings page access
Use the Global Contact Center Settings page to configure unified settings across all Contact Centers in your Dialpad Office.
Users with a Dialpad Support license (even non-admins) can be granted access to these settings.
To grant Global Contact Center Settings access:
Navigate to Dialpad Admin Settings > Office Settings and select Users
Find your desired user and select Options
From the Options drop-down menu, select Privileges > Give multi contact center settings access
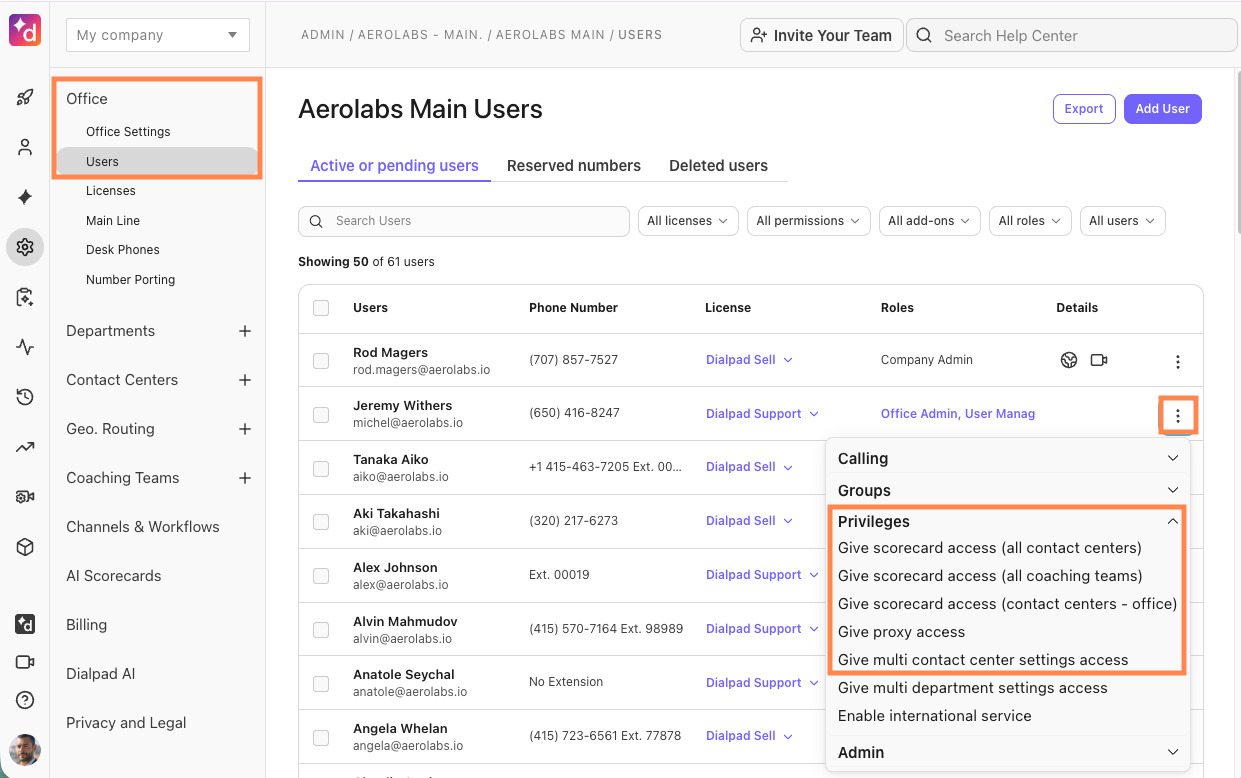
Note
The Give multi contact center settings access permission grants users a view-only experience. You must be an Office Admin to make changes on the Global Contact Center Settings page.