With Google SCIM, Dialpad Administrators can automate their users' entire lifecycle in Dialpad — from creating accounts to profile updates to even account deactivation.
Let's dive into the details.
To enable this integration for our other plans, please contact Customer Care.
Set up user provisioning
First things first, you’ll need to select and add the Dialpad app from the G Suite SAML catalog with the “Provisioning supported” field enabled.
Once that's done, you can start laying the groundwork for user provisioning. Once completed, automatically provisioned users will be assigned the same area code as their Office.
If you’d rather avoid this, you can either manually provision the user or follow the steps outlined in Step 4.
From the Google Admin Console:
- Navigate to Web and mobile apps
- Select the Dialpad app
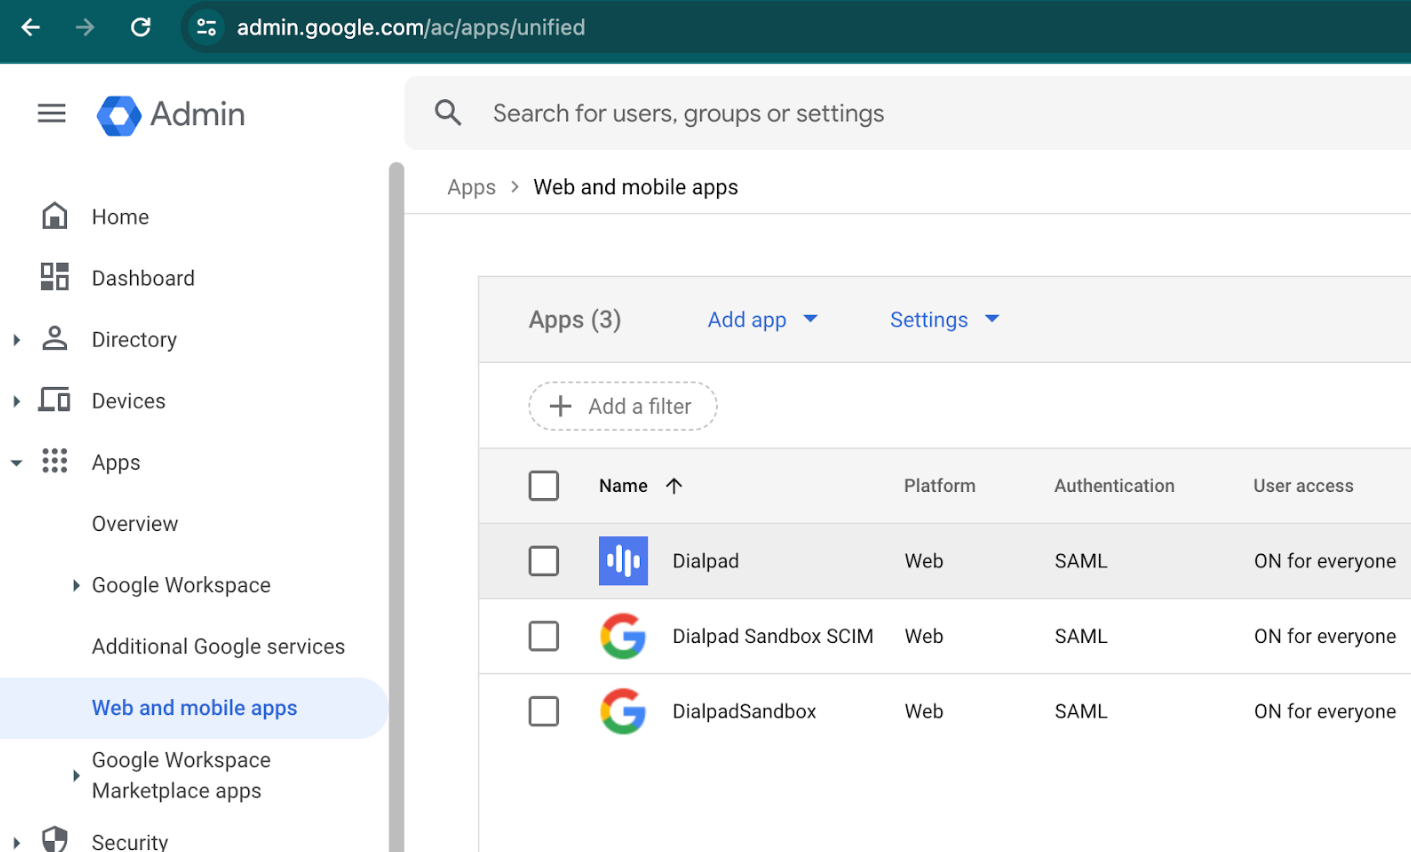
- Navigate to the Autoprovisioning section
- Select Configure Autoprovisioning
Step 1: App Authorization
Before provisioning users, you need to authorize Google to do so.
Head to your Dialpad Admin Settings.
- Select My Company
- Navigate to Authentication
- Select API Keys
- Select Add key
.png)
- Name your key, then select Save
- Copy the API key
- Return to the Google Admin page and paste the key into the field in App authorization section
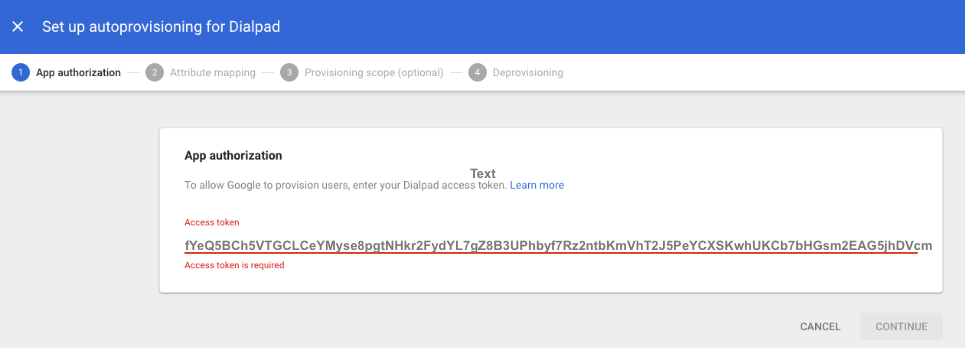
- Select Save
Step 2: Attribute Mapping
Next, it is time to map Google Directory attributes to the corresponding Dialpad app user attributes.
Any attributes with a * must be mapped.
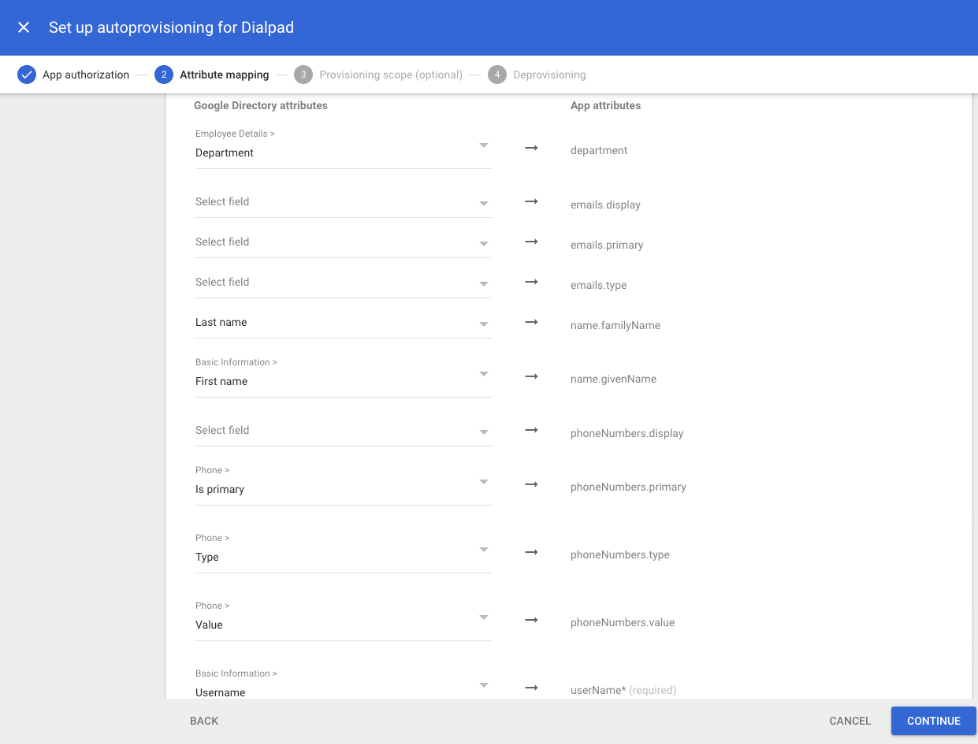
You can also map the user's assigned Dialpad office by mapping the relevant field from Google Directory to the department attribute under the Dialpad app.
Once you've set the attributes, select Continue.
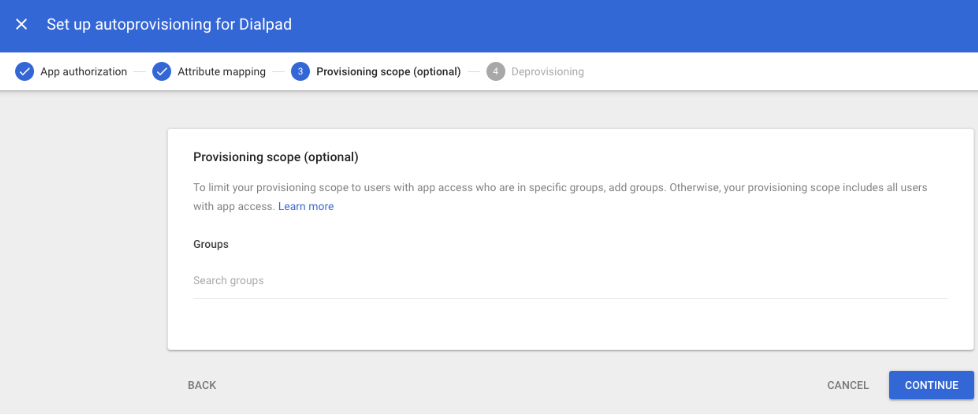
Step 3: Configure Group-Based Provisioning (Optional)
Group-based provisioning is optional and involves restricting provisioning to the specific groups you identify. If you're not restricting provisioning to a specific groups of team members, leave this section empty.
Enter the desired groups in the search bar, then select Continue.
Step 4: Deprovisioning settings
Deprovisioning settings determine how user deletion or removal from the Dialpad app in Google will affect the user’s state (active/suspended).
If you are testing the provisioning steps before activating them for your team, please deconfigure your de-provisioning steps. (uncheck all of the boxes shown below)
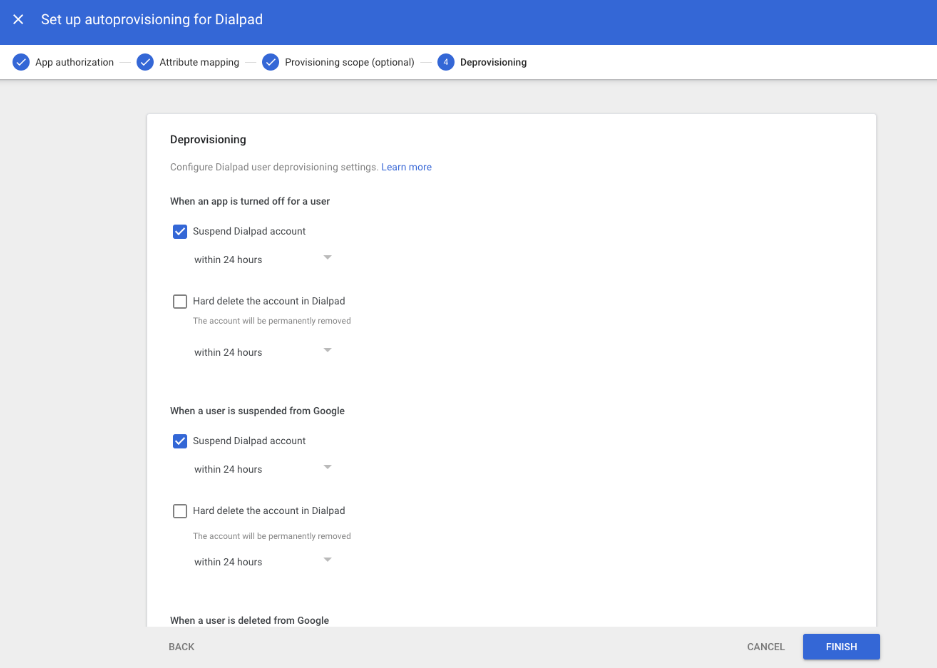
When the above checkboxes are selected, Google will sync with the Dialpad office and see that there are users in Dialpad that are not in the test group you created, then suspend the Dialpad users. You will need to uncheck all of those boxes if you are testing provisioning and not de-provisioning.
Select Finish to complete auto provisioning configuration.
Activate provisioning
Now that you've finished setting up your user provisioning, the last steps are to turn Dialpad on for your users and activate automatic provisioning.
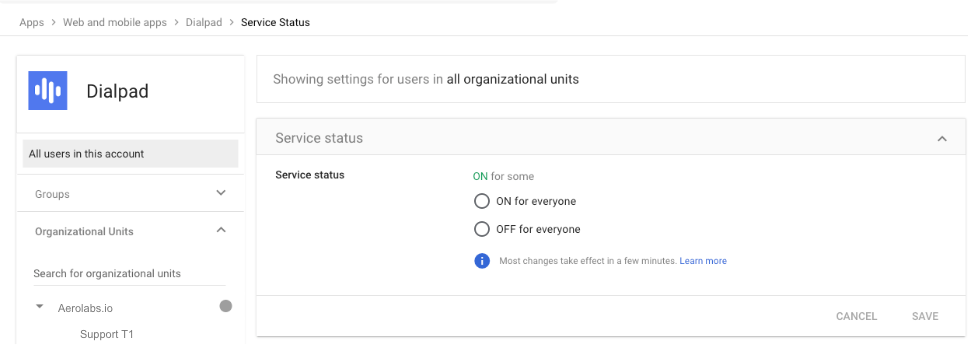
Turn on Dialpad for users (optional)
To turn on Dialpad for all (or some of) your users head to your Google Admin portal:
- Select Web and Mobile apps
- Select Dialpad
- Select User Access and choose one of the three available options:
- ON for everyone: Turns on service for all users
- OFF: Turns off service for all users
- ON for some organizations: Changes settings for only some users
Activate auto provisioning
Last but not least, it's time to activate auto provisioning.
From the User Provisioning tab:
- Navigate to Activate Provisioning
- Slide the toggle on
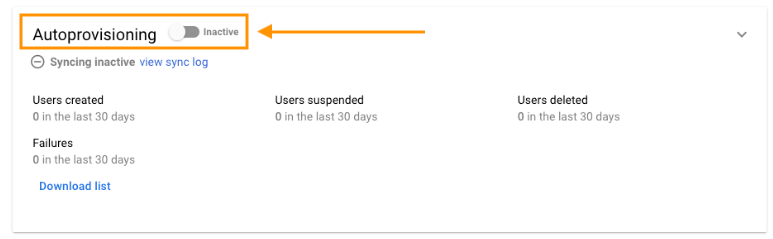
- Confirm the provisioning tasks are complete, then select Turn On
After a few moments, auto-provisioning will begin, and you'll see a green checkmark under Autoprovisioning.
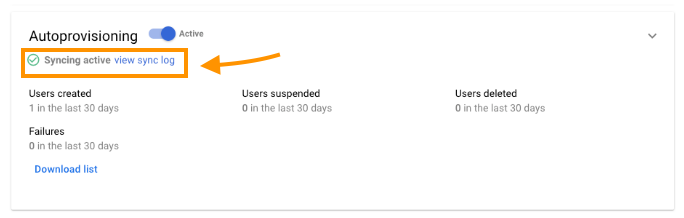
From the Autoprovisioning section, you can see how many users were created, suspended, or deleted, as well as download the sync log.